Knackered old Porsche with loads of natural light - Boxster!
Discussion


trails said:
The Booster is a poper bitsa now, be really interesting to see what the charge cooler does with no other changes...have you printed your blisters yet?
Two done:
And the third is one the printer now:

Depending on how the rest of the week works out I'm aiming to have the engine cover done and P13 chargecooler on by the weekend.
trails said:
They look super neat, 3D printers really are a game changer...fingers crossed for the weekend, the PH collective needs it's Booster hit 
I think one of the biggest enablers in the past decade in low volume automotive has been cost effective access to rapid prototype, 3D scanning and parametric 3D CAD systems. The level of quality and consistency that they enable along with speed of design has been properly game changing!I'll do my best to get everything on there for the weekend, don't want to disapoint!

So some amount of disapointment as it turns out ASH have started using Evri so the order I put in earlier this week on a next day has of course gone missing.... so no charge cooler on pics I'm afraid all.
I have done the engine cover though:
And it fits a treat!

Not sure on the gold, I might biff this off and just use a heat reflective paint on it instead as it's generally a bit better for large panels etc.

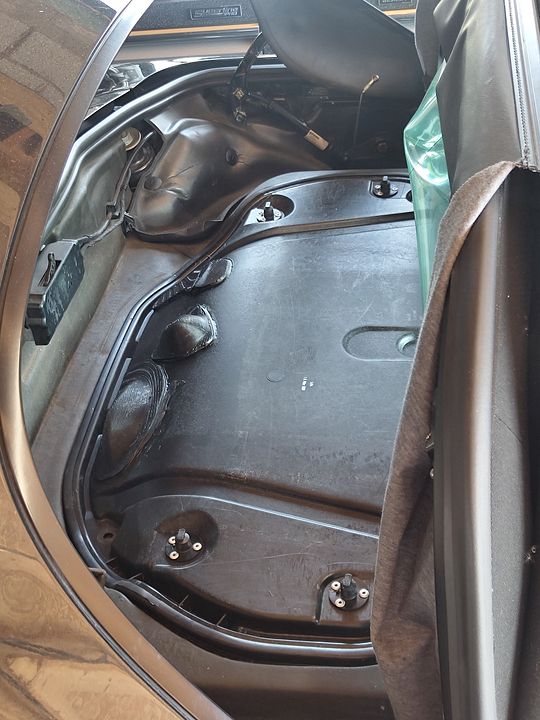
Carpet fits nicely too!
The charge cooler is ready to go on:

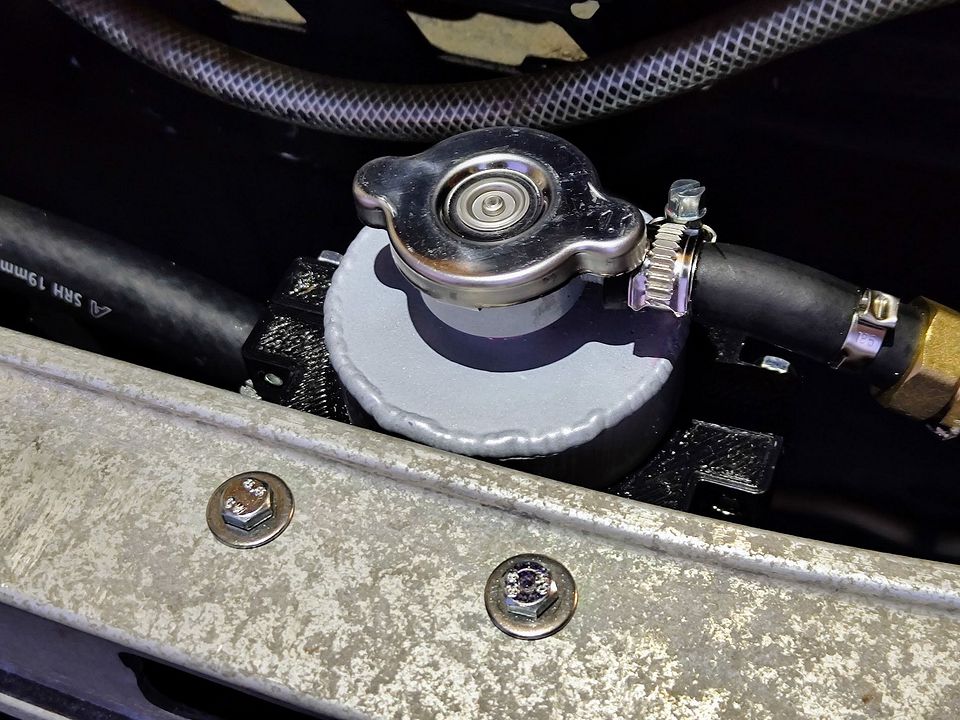
It's had some far more appropriate gold on the sides of the core and I tapped the TMAP boss to M14 and machined a stainless bolt down to form an 1/8th NPT adaptor so it's ready for some water injection if required in the future. I've also pressure tested it just to be on the safe side as it is off a crashed race car afterall
Apologies for the delay, normal service will be resumed shortly Still at this stage it's really just tweaking and refining as the car continues to work reliably and with little fuss, it's also strangely good on fuel pottering about as it's not miles off my diesel daily! On boost is of course a different story
I have done the engine cover though:
And it fits a treat!
Not sure on the gold, I might biff this off and just use a heat reflective paint on it instead as it's generally a bit better for large panels etc.
Carpet fits nicely too!
The charge cooler is ready to go on:
It's had some far more appropriate gold on the sides of the core and I tapped the TMAP boss to M14 and machined a stainless bolt down to form an 1/8th NPT adaptor so it's ready for some water injection if required in the future. I've also pressure tested it just to be on the safe side as it is off a crashed race car afterall
Apologies for the delay, normal service will be resumed shortly
Still at this stage it's really just tweaking and refining as the car continues to work reliably and with little fuss, it's also strangely good on fuel pottering about as it's not miles off my diesel daily! On boost is of course a different story Oh yes! It's so audible it may as well be in the passenger seat
One of the things I wanted from this car was a Group B soundtrack with lots of turbo noise and chatter, absolutely achieved that as with the air filter about 150mm from the drivers back and no dump/diverter valve it is super keen to make itself heard
One of the things I wanted from this car was a Group B soundtrack with lots of turbo noise and chatter, absolutely achieved that as with the air filter about 150mm from the drivers back and no dump/diverter valve it is super keen to make itself heard

The nicked off a broken GT4 car charge cooler is ready to go on:

Not my best / lightest bracket fabrication but there wasn't much of an alternative without folding some ally to replace the original broken Mclaren spec ones as I've retained all the original mounts that were there originally for the PWR charge cooler..... plus as this is being filed under the "testing" heading it'll do the trick just fine . I modded the top bracket to leave room for an M6 rivnut which will carry the PAS tank so that's a nice nod to one thing doing two jobs.
Aiming to get this installed over the bank holiday as the hard work is done now so it's only a case of fit and bleed, it'll be very interesting to see if it makes much difference.
Not my best / lightest bracket fabrication but there wasn't much of an alternative without folding some ally to replace the original broken Mclaren spec ones as I've retained all the original mounts that were there originally for the PWR charge cooler..... plus as this is being filed under the "testing" heading it'll do the trick just fine
. I modded the top bracket to leave room for an M6 rivnut which will carry the PAS tank so that's a nice nod to one thing doing two jobs. Aiming to get this installed over the bank holiday as the hard work is done now so it's only a case of fit and bleed, it'll be very interesting to see if it makes much difference.
And it fits!

Boost transfer pipe and throttle body are obviously fixed points so there was a bit of hose work required to compensate for the inlet position having moved from vertical and inline with the throttle body to pointing at the bulkhead, however there's bags of room around it all so it packaged pretty nicely. There is a little bit of misalignnent which the silicone hose compensates for quite happily so we won't stress about that, especially as a by product of trying this charge cooler is that it has removed the misalignment that was originally present between throttle and the original chargecooler which was arguably worse.
PAS tank now hangs off the chargecooler as planned, that all bolted up a treat in pretty much an identical position. Much happier that it will move with the engine now as it removes constant flex on two lots of pipework.
Whilst in there I've also tidied up a couple of bits of loom that were in there "for dyno use only" and flipped two coils to allow for the coil loom to run under the fuel rail rather than around the back of the head which frees up a bit of room in that area as it was a touch "tightly packaged"

Whilst it's in bits I'm going to make some nicer mounts up for the charge cooler header tank and pump as these are all a little rough at the moment and were very much to get it on the dyno. They'll just be 3D printed bits so nothing too fancy that will hang the header tank off the crash bar and give a little more support to the pump.

Aiming to give it a run round tomorrow evening to see if it's a step forwards or backwards, I would do it earlier in the day but I'm out in the 996 tomorrow
Boost transfer pipe and throttle body are obviously fixed points so there was a bit of hose work required to compensate for the inlet position having moved from vertical and inline with the throttle body to pointing at the bulkhead, however there's bags of room around it all so it packaged pretty nicely. There is a little bit of misalignnent which the silicone hose compensates for quite happily so we won't stress about that, especially as a by product of trying this charge cooler is that it has removed the misalignment that was originally present between throttle and the original chargecooler which was arguably worse.
PAS tank now hangs off the chargecooler as planned, that all bolted up a treat in pretty much an identical position. Much happier that it will move with the engine now as it removes constant flex on two lots of pipework.
Whilst in there I've also tidied up a couple of bits of loom that were in there "for dyno use only" and flipped two coils to allow for the coil loom to run under the fuel rail rather than around the back of the head which frees up a bit of room in that area as it was a touch "tightly packaged"
Whilst it's in bits I'm going to make some nicer mounts up for the charge cooler header tank and pump as these are all a little rough at the moment and were very much to get it on the dyno. They'll just be 3D printed bits so nothing too fancy that will hang the header tank off the crash bar and give a little more support to the pump.
Aiming to give it a run round tomorrow evening to see if it's a step forwards or backwards, I would do it earlier in the day but I'm out in the 996 tomorrow
This is, unsurprisingly, fantastic work and a cracking result.
I'm not sure if you're already planning this or not, but if you could package it up as a 'bolt-in swap' then I'm sure it would sell. Maybe not in enough numbers to make it viable, but it would certainly appeal to me if I had a 986 with a poorly OE engine.
I'm not sure if you're already planning this or not, but if you could package it up as a 'bolt-in swap' then I'm sure it would sell. Maybe not in enough numbers to make it viable, but it would certainly appeal to me if I had a 986 with a poorly OE engine.
RS Grant said:
This is, unsurprisingly, fantastic work and a cracking result.
I'm not sure if you're already planning this or not, but if you could package it up as a 'bolt-in swap' then I'm sure it would sell. Maybe not in enough numbers to make it viable, but it would certainly appeal to me if I had a 986 with a poorly OE engine.
https://www.986booster.com/I'm not sure if you're already planning this or not, but if you could package it up as a 'bolt-in swap' then I'm sure it would sell. Maybe not in enough numbers to make it viable, but it would certainly appeal to me if I had a 986 with a poorly OE engine.
Like this you mean?!

eltax91 said:

Hahaha, yeah that is exactly what I meant!
I won't comment on the kit as I definitely don't want this thread to be in any way commercial, this is just about my build. The reason the kit option exists is because so many people like you asked if I would, so I did The nice thing is when you're building one anyway you don't have to justify commercial viability etc. 
Charge cooler header tank is now properly mounted:
The bracket is a 3D print of the design above, it clamps the tank via two M6's which pull the halves together and then bolts up to the front cross member. 3D printers really are game changing when it comes to building one off projects as the ability to create nice bits like this for mounts etc. in a few hours is fantastic!
I've got a few other little bits to finish as I got no time on the car today really, but once done the plan is to get another 1000 miles or so on it fairly quickly and call this stage 1.5 complete I'll look at a bit of exhaust development a bit later in the year when I git the LSD'd gearbox as I've got to take the exhaust off then anyway!
The nice thing is when you're building one anyway you don't have to justify commercial viability etc. Charge cooler header tank is now properly mounted:
The bracket is a 3D print of the design above, it clamps the tank via two M6's which pull the halves together and then bolts up to the front cross member. 3D printers really are game changing when it comes to building one off projects as the ability to create nice bits like this for mounts etc. in a few hours is fantastic!
I've got a few other little bits to finish as I got no time on the car today really, but once done the plan is to get another 1000 miles or so on it fairly quickly and call this stage 1.5 complete
I'll look at a bit of exhaust development a bit later in the year when I git the LSD'd gearbox as I've got to take the exhaust off then anyway!Bright Halo said:
What material did you use for your 3d prints? Did you put captive nuts in one half or nut and bolt?
These are printed from high temp PETG which is just a brew of PETG that has a glass transition temperature above 100 degrees C. They're printed with a 0.8mm nozzle which generally gives a much stronger part due to the greater bond area between layers and depending on the part either solid or a high % on infill with a high wall thickness. This has proven to be a good setup for usable parts in several applications, the parts aren't lightweight but they are solid and extremely tough. No inserts or nuts on these, I designed them with a lot of depth in the mounting/clamping areas so they could be tapped to a decent depth and then just bolted together. PETG has the rigidity to do this on anything 1mm thread pitch and up. Torque to 5NM with a dab of blue loctite and job jobbed
Gassing Station | Readers' Cars | Top of Page | What's New | My Stuff