Moto Guzzi Cali Cafe Racer Build thread
Discussion


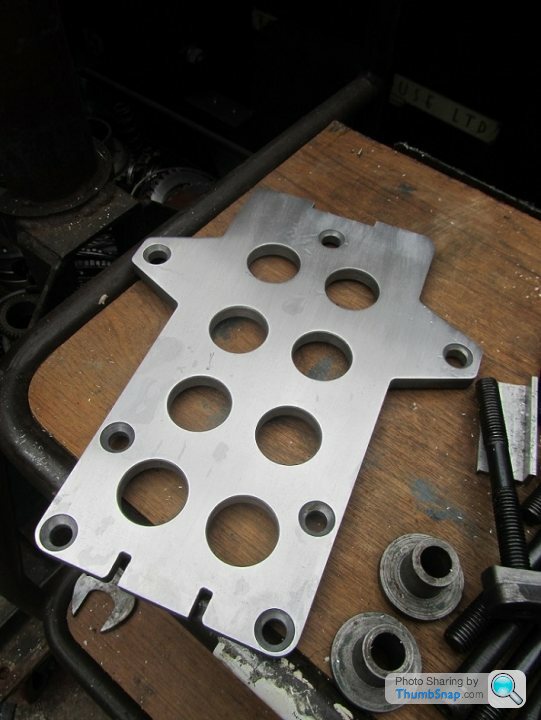
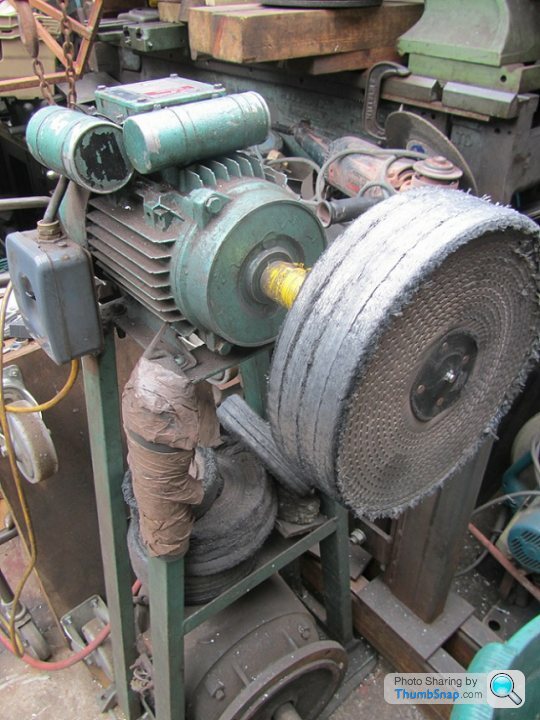
The billet battery tray was looking dull, as I hadn't spend much time polishing it when I drilled and modified it a couple of years ago. I prepped it carefully, working my way to using 400 grade wet and dry, before using my mates homemade buffer. Its about thirty years old and still works really well.
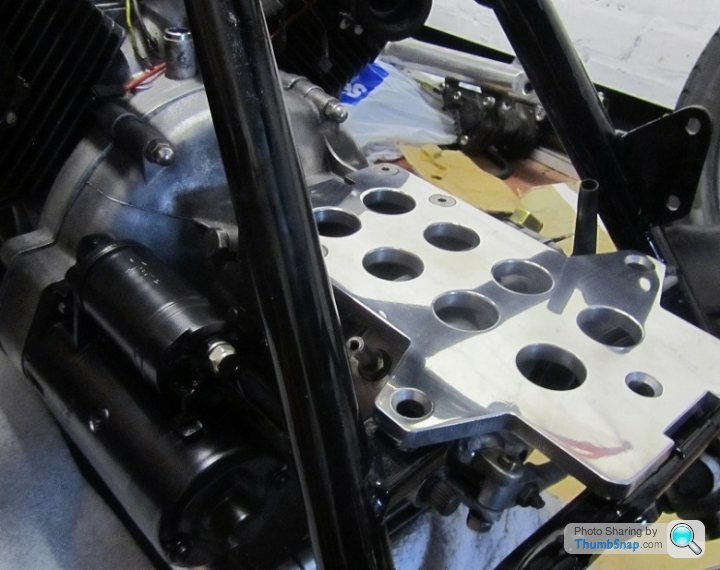
Once fitted to the top of the gearbox, its clear a couple of spacers will be needed to take up the gap to the rear frame mounts. Last time I just used a few washers, this time I'll do things properly.
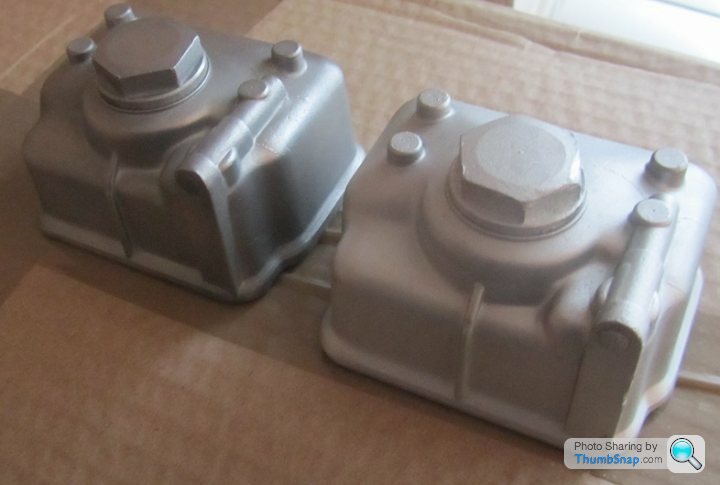
Tomorrow I'm going to collect the two carbs which have been cleaned in an ultrasonic bath, be interesting to see how they look..

Once fitted to the top of the gearbox, its clear a couple of spacers will be needed to take up the gap to the rear frame mounts. Last time I just used a few washers, this time I'll do things properly.
Tomorrow I'm going to collect the two carbs which have been cleaned in an ultrasonic bath, be interesting to see how they look..
Got the carbs back from their ultrasonic bath, cant say I'm too impressed, they don't look much different from before. I'll just clean and polish them by hand.
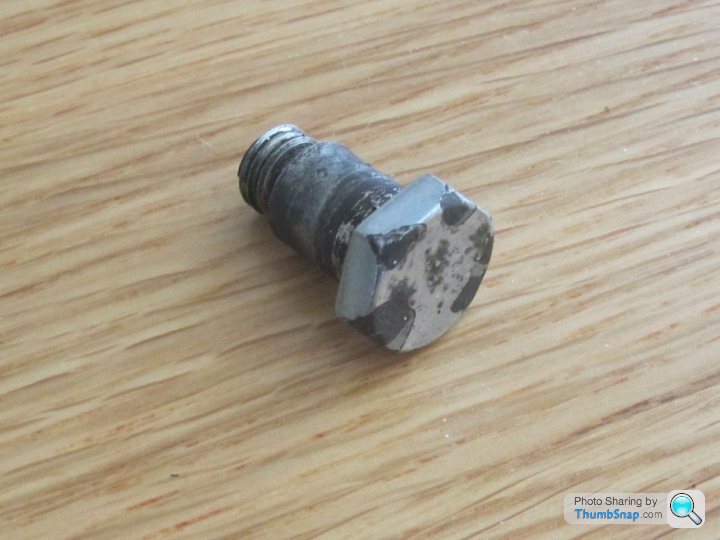
There are a couple of chrome parts that need attention before being refitted. First the side stand pivot bolt, and second the two wheel spindles, both of which are corroded in places. Rather than have them re-chromed, I decided to make replacements, so I've ordered a length of 17mm stainless Hex bar to make a new pivot bolt.
My initial idea of making new spindles from Grade 5 Titanium wasn't such a good one, as Ti has issues with fatigue, I was told Ti spindles are banned from racing for that reason. Instead I've ordered 600mm x 25mm diameter 303 (marine grade)stainless bar, which will be enough to make two spindles. Luckily the thickest part of each spindle is exactly 25mm.
Apart from that, I gave the stainless splash guard a polish and fitted it to the frame, though its covered in my oily fingerprints in the photo, so doesn't look its best.
For the next few weeks there wont be any progress in the big changes I'll be making, just lots of small fiddly jobs..
Edited by Merch131 on Friday 25th March 20:37
Ilovejapcrap said:
Just read all this and loved it
One suggestion start a thread for each bike I can't keep up !
I do have a couple of other threads of other projects, so they aren't all in this one. That reminds me, I could tell you folks are a new project, the 'Spares' bike, being build at the moment from all the spare/unused/unwanted/replaced parts we had going spare... waste not want not ..One suggestion start a thread for each bike I can't keep up !
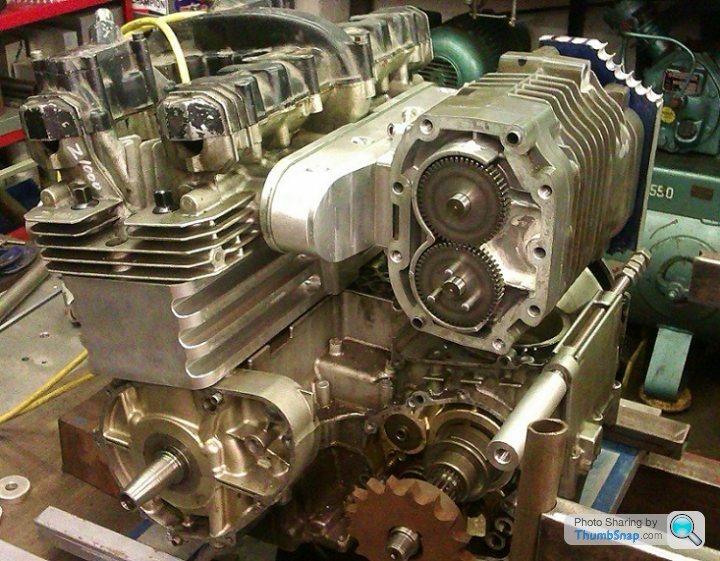
As for the carbs, I could use the bead blaster at the local machine shop, which I'm sure would bring them up nicely, though I would worry about the tiny beads getting inside the carb body. I had the same thought when the gearbox case was being repaired, it would be easy enough to seal it off and blast it which would make it look better than new. The problem would be that it would look odd bolted up to the motor, which is too big/heavy to be treated to the same bead blasting.
That's a concern with getting the carbs too minty, they would look a bit out of place against the motor. I'm undecided how far to go trying to make the cases better than new, I don't want to build an immaculate show bike that I'll never ride for fear of it getting dirty.. already got one of them!
That's a concern with getting the carbs too minty, they would look a bit out of place against the motor. I'm undecided how far to go trying to make the cases better than new, I don't want to build an immaculate show bike that I'll never ride for fear of it getting dirty.. already got one of them!
Re the Dremel accessories.. I've got a box of them, they work well, for about 30 secs before they fall apart..
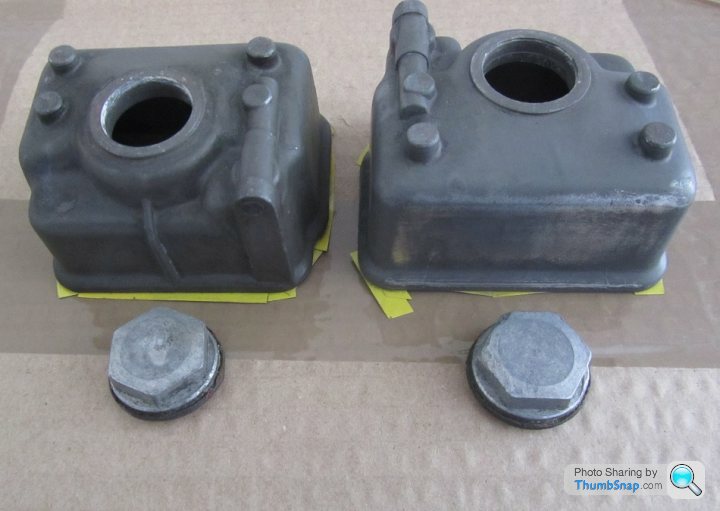
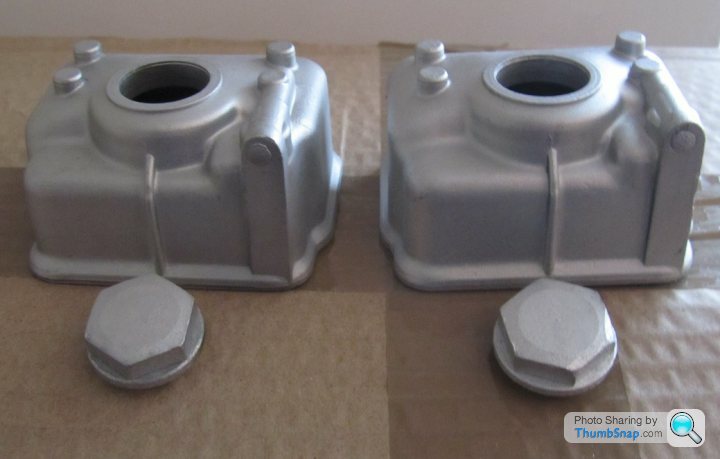
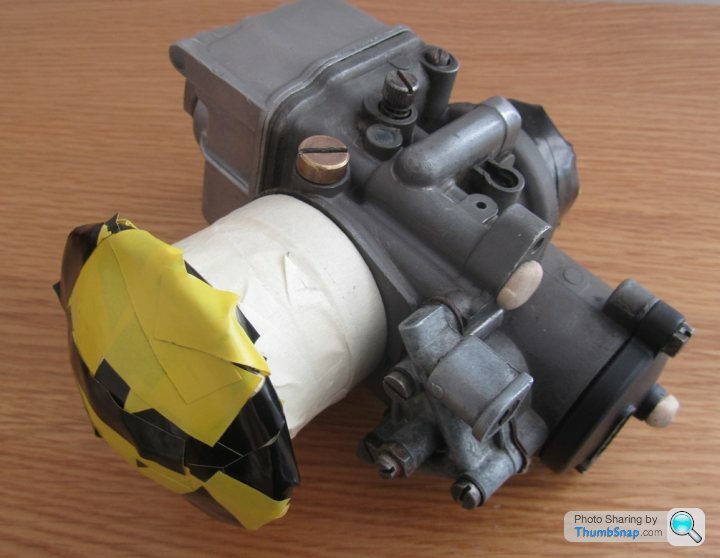
Anyway, I dipped my toe in the cleaning of the carbs, by bead blasting the float bowls today, only took a few seconds to remove all the old staining and corrosion. This left the surface with a matt slightly rough finish, which wouldn't remain clean for long on the bike, so I gave one of the float bowls a quick polish with Autosol. Needs more elbow grease yet, but it should give a good overall finish.. clean and tidy but not overly bright and shiny.
Also made a start on sorting out the engine breather hoses. There are three different sized hoses needed, only had one to hand that was left over from my Harley drag bike project.. cotton over braided Nitrile hose. This was used to make a couple of short hoses which vent the heads into the frame, along with stainless clamps. The Guzzi is unusual in using the frame as part of the breather system, pretty good idea really.
Most of the tricky work is done by mates, such as Jeff who has a small machine shop in his back garden. I was over there today, dropping off the steel bar to make new wheel spindles and do a couple of small jobs.
First, we milled the top yoke bar mounts down as far as we dare, as the speedo bracket that now uses the bar mounts sat a bit high, it looks better now it sits as close to the yoke as possible.
Then we made four alloy 'top hats' for the Tarozzi rear set mounting bolts. The problem here was that the rear sets have 12mm holes (a bit OTT) while the equivalent mounting holes in the frame were a more sensible 10mm. Using 10mm bolts through a 12mm hole worked ok I guess, but I didn't like the idea, so we made top hats to take the rear set holes to 10mm... much better.
After that, I went to the local machine shop to use their blasting cabinet on the whole carbs, having first spend a lot of time carefully sealing the carb bodies to protect the internals from any blasting medium. It worked ok for one carb, but the other somehow got a small amount of medium inside (its very fine, almost like talc powder). Oh well, I'd already ordered new gasket kits for the carbs just in case, so when they arrive, I'll dismantle the carbs completely and use new gaskets throughout, they're nearly thirty years old, so new gaskets aren't a bad idea anyway.
The carb gasket kits arrived, you don't get much for the money, so I had a look online to check the price of a few Dellorto spares, e.g. alloy carb tops would be a nice replacement for the standard black plastic ones, but not at £30 each. If I ever need to completely rebuild one, it may be cheaper to just buy a new carb.
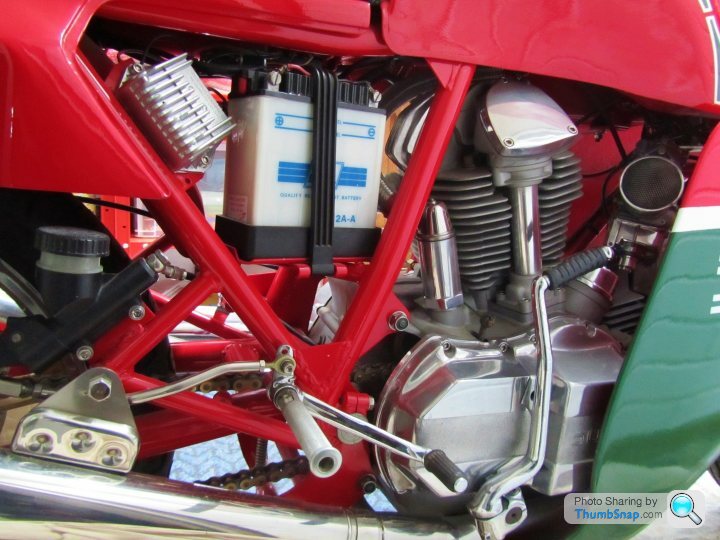
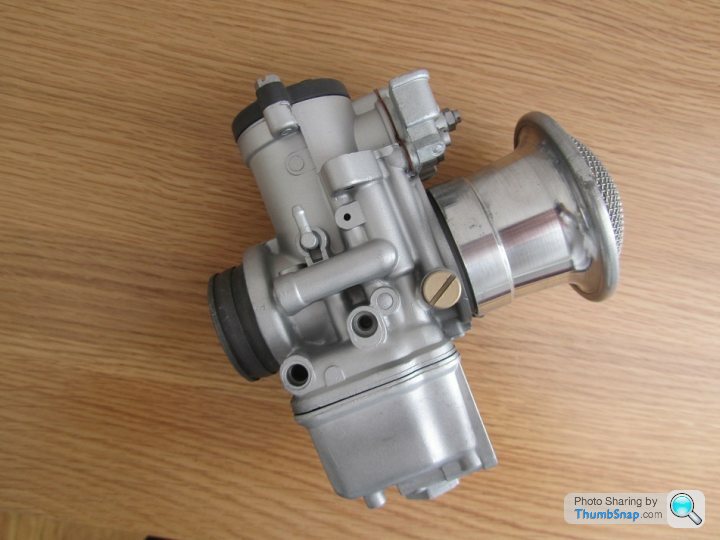
I'm away from home for a while, so wont be any progress next week, I have fitted the carbs to the bike, they do look good.. strange they are both left handed carbs, when Dellorto offer both left and right handed options for the same cost. Mine are stamped 'DS' the 'S' short for Sinistra, or left in Italian.... Being left handed has always been associated with the devil, hence the 'Sin' in Sinistra.. Charming! I am of course left handed
Also had to shim the gearbox mount out 3mm to get the engine / gearbox exactly inline with the frame, which in turn aligned the billet battery tray with its mounts on the frame.
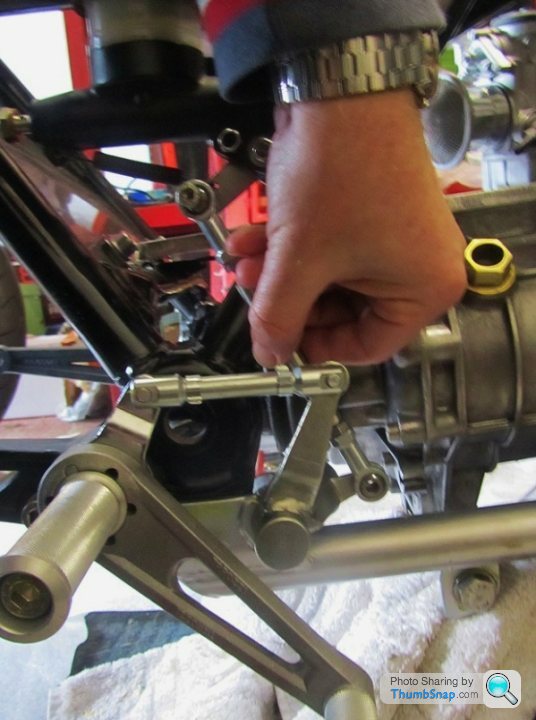
The alloy top hats we made for the rear sets worked well, and bolted back on the frame without any problems. Though the stainless rear brake link rod I made ages ago is about 10mm too long, and a bit on the heavy side, so it'll be replaced by an alloy version when I get back.

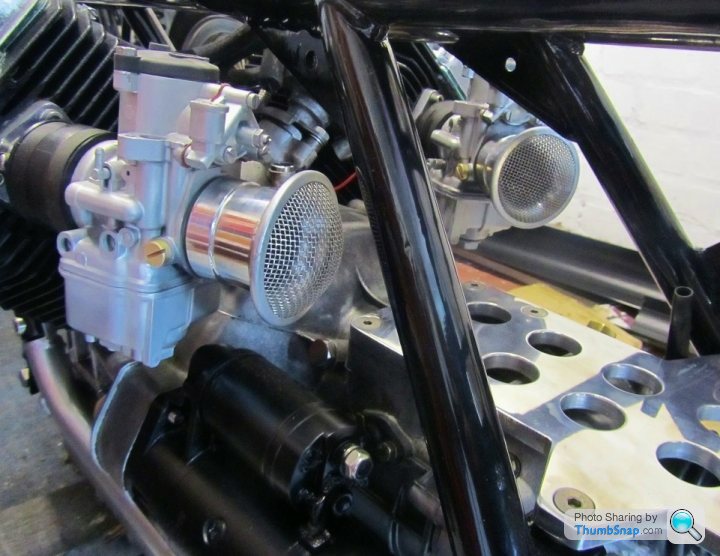
I'm away from home for a while, so wont be any progress next week, I have fitted the carbs to the bike, they do look good.. strange they are both left handed carbs, when Dellorto offer both left and right handed options for the same cost. Mine are stamped 'DS' the 'S' short for Sinistra, or left in Italian.... Being left handed has always been associated with the devil, hence the 'Sin' in Sinistra.. Charming! I am of course left handed
Also had to shim the gearbox mount out 3mm to get the engine / gearbox exactly inline with the frame, which in turn aligned the billet battery tray with its mounts on the frame.
The alloy top hats we made for the rear sets worked well, and bolted back on the frame without any problems. Though the stainless rear brake link rod I made ages ago is about 10mm too long, and a bit on the heavy side, so it'll be replaced by an alloy version when I get back.
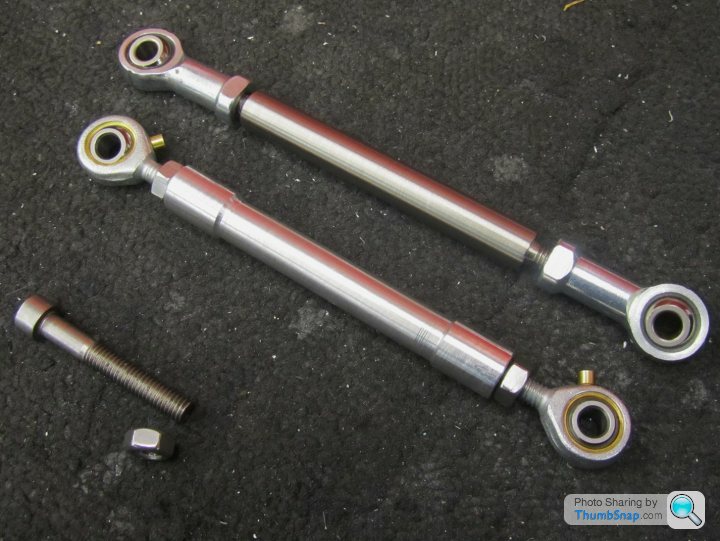
Made the new shorter gear link rod today, in alloy rather than stainless as its lighter. Started off by drilling a suitable hole through the middle of the alloy rod, then tapped an M6 thread into both ends, before machining the centre section to narrow it a bit..
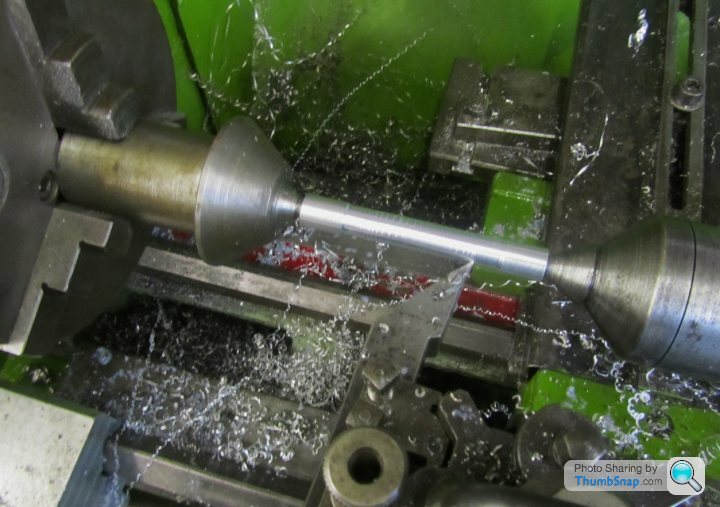
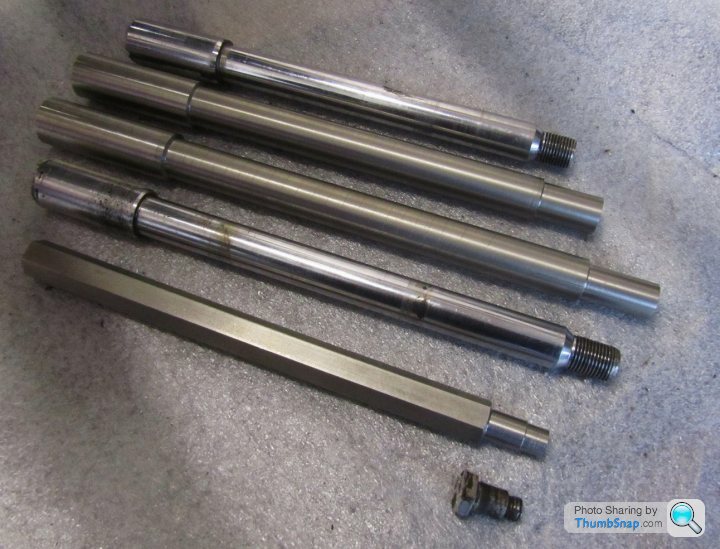
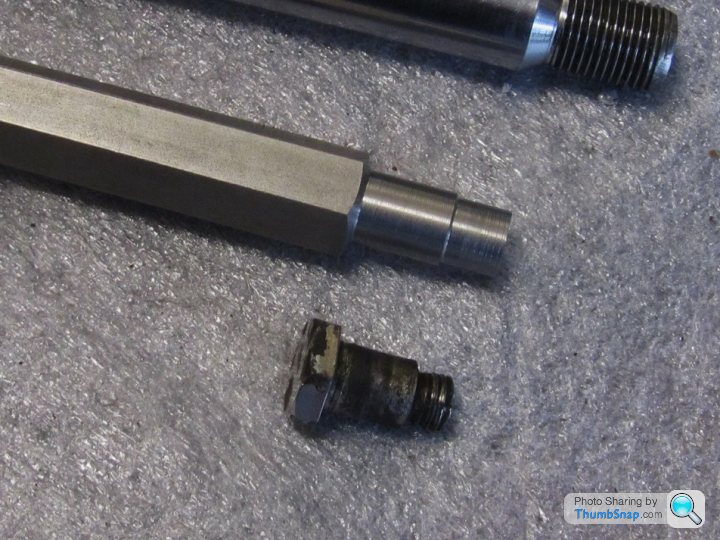
The 25mm stainless bar has been machined to duplicate the original chromed steel wheel spindles, the threads will be cut on a capstan lathe when I take them to a local machine shop, which is why the thread end is longer than needed for the time being. At the fatter end, I've made the spindles 10mm longer because they'll be getting a hex end machined to take a socket in place of the original slot which I didn't like. It'll also provide a useful mount on the LHS for a paddock stand.
The stainless hex bar has been shaped to make a replacement side stand pivot, again it needs its thread cutting, which will be done at the same time as the new spindles are done, hopefully this week.
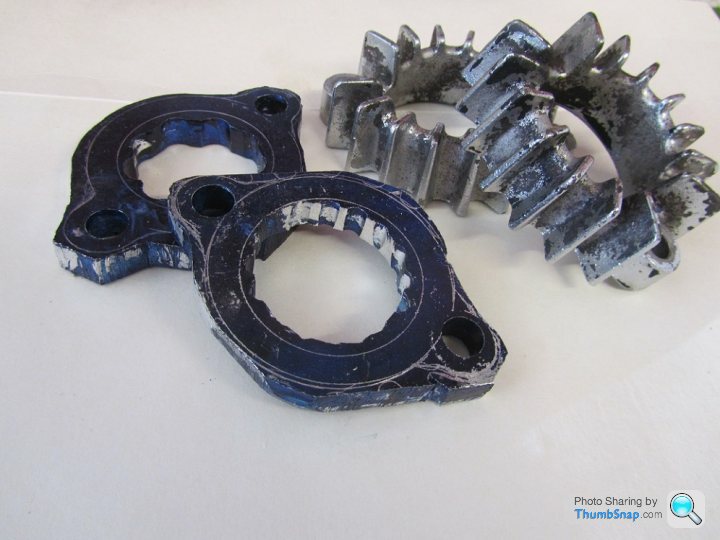
The cast iron floating Brembo discs were looking very tired and rusty, being cast iron they're always going to rust, but nevertheless they could be cleaned up.
The floating rotors are held to the alloy centres by steel bobbins which are in turn held in place by a sprung washer (called Belleville washers) and a circlip. The front discs came apart easily, while the rear was badly corroded and put up more of a fight. A couple of the sprung washers were rusted through and fell apart, so it turned out to be one of my better ideas to rebuild the discs. The tops of the rear discs bobbins were badly scored too, they'll need to be skimmed in the lathe as will the rotors to clean them up. The centres are alloy, so I'll bead blast and paint them.
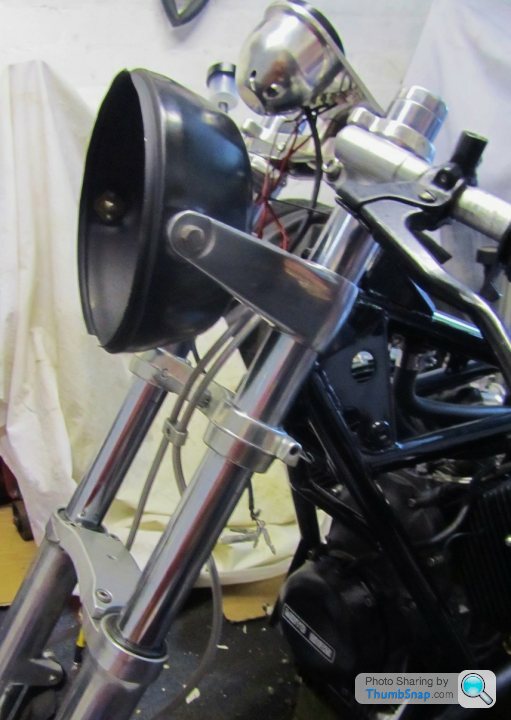
I need to get a couple of small parts chromed soon, which has left me undecided about the headlight, its currently painted, and I'm considering having it chromed, but I keep flip flopping and cant make up my mind..
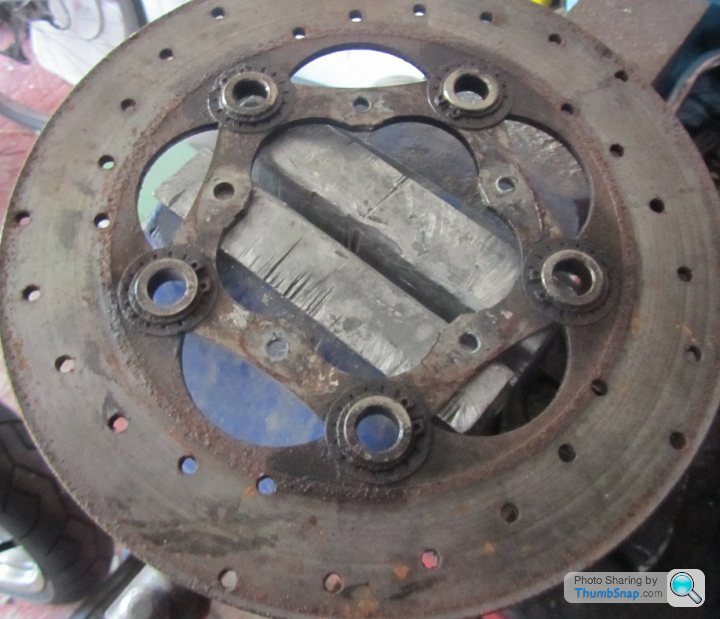

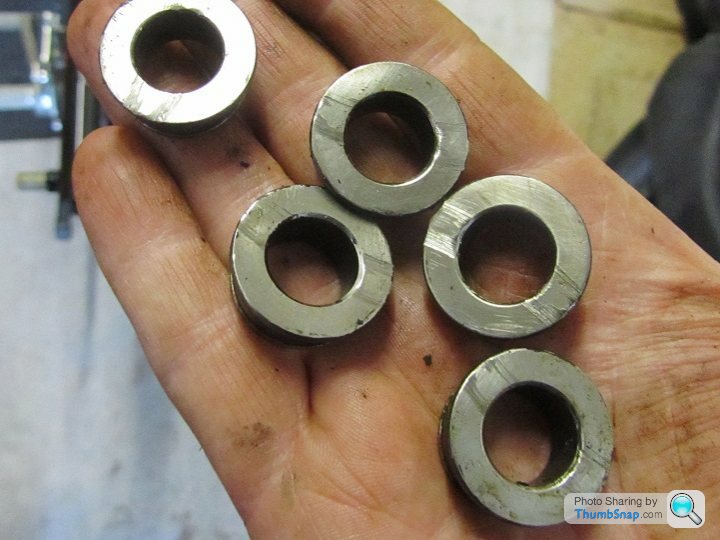
The floating rotors are held to the alloy centres by steel bobbins which are in turn held in place by a sprung washer (called Belleville washers) and a circlip. The front discs came apart easily, while the rear was badly corroded and put up more of a fight. A couple of the sprung washers were rusted through and fell apart, so it turned out to be one of my better ideas to rebuild the discs. The tops of the rear discs bobbins were badly scored too, they'll need to be skimmed in the lathe as will the rotors to clean them up. The centres are alloy, so I'll bead blast and paint them.
I need to get a couple of small parts chromed soon, which has left me undecided about the headlight, its currently painted, and I'm considering having it chromed, but I keep flip flopping and cant make up my mind..
cwis said:
Just a quick (possibly daft) blasting question.
If you blast with baking soda, can't you just wash the parts in water, the media being water soluble?
Just seems a lot of effort to block up everything even on just a carb to use beads etc when a quick dunk would do if you used soda...
Or isn't it aggressive enough?
I must admit I've never blasted a carb - I always used to use Mr Muscle (couldn't leave it on for too long or the alloy went black!) but I think they've changed the formula since I did the last one...
I've never tried soda blasting, though I've seen youtube vids that show good results. I once read in a bike magazine that Mr Muscle Oven cleaner was ideal for cleaning gold anodised Brembo calipers. So I tried it, it certainly worked.. by taking all the anodising off, and that was leaving it on for only a short time. Caustic soda does the same job for removing anodising, cheap too. If you blast with baking soda, can't you just wash the parts in water, the media being water soluble?
Just seems a lot of effort to block up everything even on just a carb to use beads etc when a quick dunk would do if you used soda...
Or isn't it aggressive enough?
I must admit I've never blasted a carb - I always used to use Mr Muscle (couldn't leave it on for too long or the alloy went black!) but I think they've changed the formula since I did the last one...
I use my local machine shop's blasting cabinet which is free to me, which is great, but they are only set up to use silicone beads, so that's what I used. I'm not allowed to blast any steel parts only alloy in their cabinet as blasting steel somehow pollutes the blasting medium.
Not been able to do much this week, though things should speed up at bit soon. I'll be hammering my credit card at the Stafford Classic show this weekend, when I'll order the alloy endurance tank from TAB II, and new rims and spoke sets from Central Wheels.
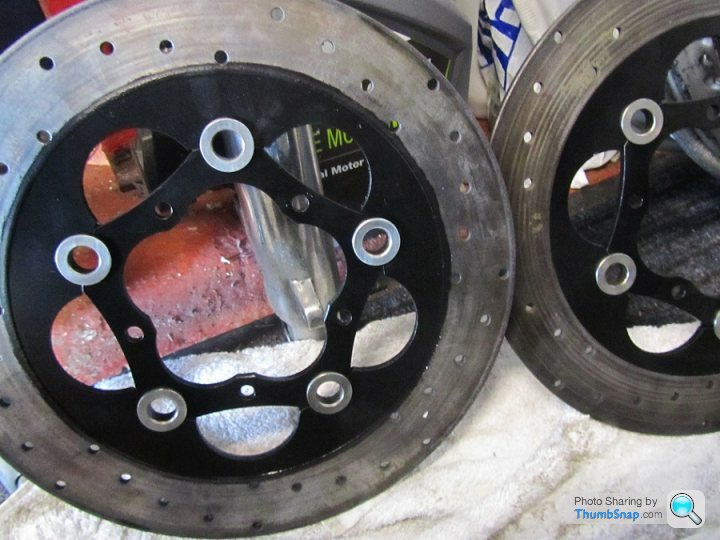
I have painted and reassembled the discs, had to do it twice, as the high temperature paint I used the first time turned out to be too delicate, I had WD40 on my fingertips when I handled the painted parts, it lifted the paint better than paint stripper. Started again, this time using satin black Hammerite, which seems to endure high temps surprisingly well according to the internet.
My masking of the disc edges was rubbish, but that's ok, as they'll be tidied up when the discs are skimmed on the lathe, which needs them to be assembled first.
Also, before a couple of parts go off to be chromed, including the exhaust collets, I used them as a template to mark a couple of scrap pieces of 10mm billet plate, and made a start on hacksawing and filing new collets from the plate. It would be much quicker to ask my mate to shape them on his miller, but sometimes I just want to do it myself and see how it turns out. That said, I may decide not to use them in the final build..


Next the original headlamp brackets didn't look quite right, so they've been replaced with a pair that look more café racer-ish. Fitting the front forks on the frame, confirmed that the headlamp shell definitely needs to be chromed, which I took to Niphos in Crewe this week. I was told they'd be ready for collection in 4 weeks, and a bit more expensive than I expected. While I was there another customer was collecting his newly chromed parts from a KH500, and I have to say they did look good. Also bought a 50mm thick disc of billet alloy, which will be used to make (a hopefully) cool part for the engine...
The discs have been cleaned up on the lathe, the front two discs look good, but the corrosion on the rear disc is pretty bad in places where the pads don't touch, but we did the best we could. I'll probably end up fitting replacement discs all round from EBC at some point, but at £140 each, that can wait.
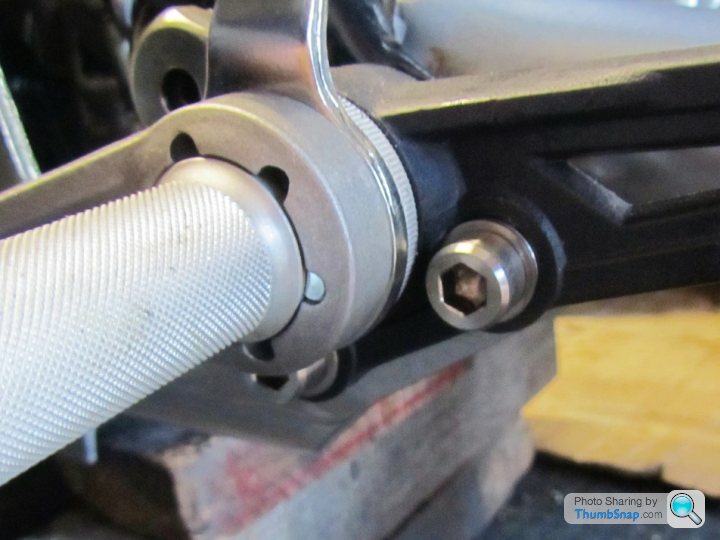
That done, I machined a few more stainless bolt heads before they went back on the bike, and cut a small bevel on the socket heads, just because they look better that way..
I'd been holding off refitting the swing arm, while I waited until the wheels were rebuilt, as the whole back end would be needed when a new billet mount was made to hold the modern Brembo caliper I recently bought. I changed my mind, so for now I'll be using the original mount and caliper, which meant I could go ahead and refit the swing arm at last.

The discs have been cleaned up on the lathe, the front two discs look good, but the corrosion on the rear disc is pretty bad in places where the pads don't touch, but we did the best we could. I'll probably end up fitting replacement discs all round from EBC at some point, but at £140 each, that can wait.
That done, I machined a few more stainless bolt heads before they went back on the bike, and cut a small bevel on the socket heads, just because they look better that way..
I'd been holding off refitting the swing arm, while I waited until the wheels were rebuilt, as the whole back end would be needed when a new billet mount was made to hold the modern Brembo caliper I recently bought. I changed my mind, so for now I'll be using the original mount and caliper, which meant I could go ahead and refit the swing arm at last.
a big day today, a parcel arrived.... like a kid on Christmas morning, it didn't take long to open it and see its contents 
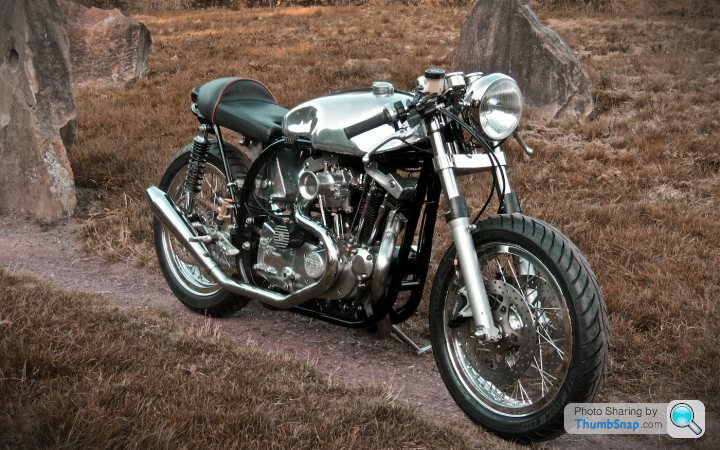
My Endurance racing alloy tank had arrived from TABII in Wales..


Fitted the frame no problem, just need to sort out a rubber strap for the rear mount.. very pleased with it..
Shall I paint it, or leave it polished? decisions, decisions...


My Endurance racing alloy tank had arrived from TABII in Wales..
Fitted the frame no problem, just need to sort out a rubber strap for the rear mount.. very pleased with it..
Shall I paint it, or leave it polished? decisions, decisions...
Also have to decide on what style of seat to go for, its a tricky decision as there are half a dozen options I'm considering. One complication is that the seat rails of the Guzzi Tonti frame are very low, so any seat unit will have to sit an inch or more above the seat rails. It wont be easy to get right, without it looking awkward, or resorting to a thick foam seat, which may be comfy, but not look the part ..
See how these race bikes all have their seat units mount way above the frame..


See how these race bikes all have their seat units mount way above the frame..
SteelerSE said:
That tank is a thing of beauty. It looks amazing as is but it gives you a problem when it comes to seat unit and mudguard colours. What do you match it to? Black?
That's the problem with polished alloy tanks, they only look right on monochrome bikes, ie like the classic 60's Tritons, and like my own Norley. I don't want to end up with two bikes that look almost identical... they also have a 1000cc pushrod V twin motor in common too. The Guzzi is definitely being painted, its going to be red, very red. I may leave the knee cut outs in the tank unpainted. It would be good to have the cut outs clear lacquered, but I've heard conflicting advice on how well the paint would stick to polished alloy.
My Monochrome Norley.. a work in progress..
Gassing Station | Biker Banter | Top of Page | What's New | My Stuff