How-to separate and reseal your rear lights
Discussion


cayman-black said:
I think you will know how to rebuild that Aston of yours soon ds.
Great job!
Haha I've not done anything that difficult on it. I leave the engine and fibre electronics alone and to the experts Great job!
 - truth is I've done a lot of work on old cars / trackcar projects, the Aston is actually easier to work on that most of those Jap motors.
KiwiSG said:
So how do you re-seal? what is the best method to ensure you don't get the same issue again ?
If you use a sealant then you won't be able to open it again, so is there another type of rubber seal to put back into the gap ?
I'll be doing that on Thursday, I'm going to use a bond / sealant all in one to reseal. The issue shouldn't return as I'm going to pack it in there and also see if I can hide a couple of silica bags as well. If the condensation does come back then it can be re-opened up via the oven/heatgun/heatbox approach once more.If you use a sealant then you won't be able to open it again, so is there another type of rubber seal to put back into the gap ?

Old post resurrection - help needed please. I've opened up my driver's side rear light unit as it was showing flickering on the turn signal leds and the diagnostics flagged up an earth fault. It previously had some condensation in the unit.
With a power source I've tested each of the lights and all are ok except the orange indicator leds. The circuit board at the back itself looks ok. On the board where the leds are mounted, these have several rows that are dead and a couple that flicker or glow very dim as per photo. I'm guessing that each row of 3 leds is a series and all the rows are running as parallel. So if one led in a row fails open circuit then the whole row is dead. I'll have to hand the job over to someone with the skills for the soldering - I'm not delicate or skilled enough for that. However, I'd like to know what is needed.
Question is - whether anyone on here has successfully repaired a unit with replacement smds. And if so - what is the specification?
Many thanks,
Eric
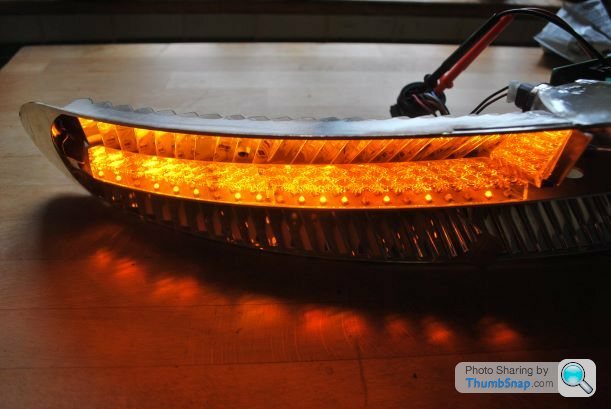
Apologies in advance for a possible thread hijack!
Question for anyone who did the above and split the rear light units. A couple of years ago, I got a brand new set of clear rears. Last year, I noticed condensation in one of them and today decided to take a look into repairing it.
So, popped them out and noticed a few differences to the photos posted above. Firstly, mine are already sealed with black silicon, not tape or foam.
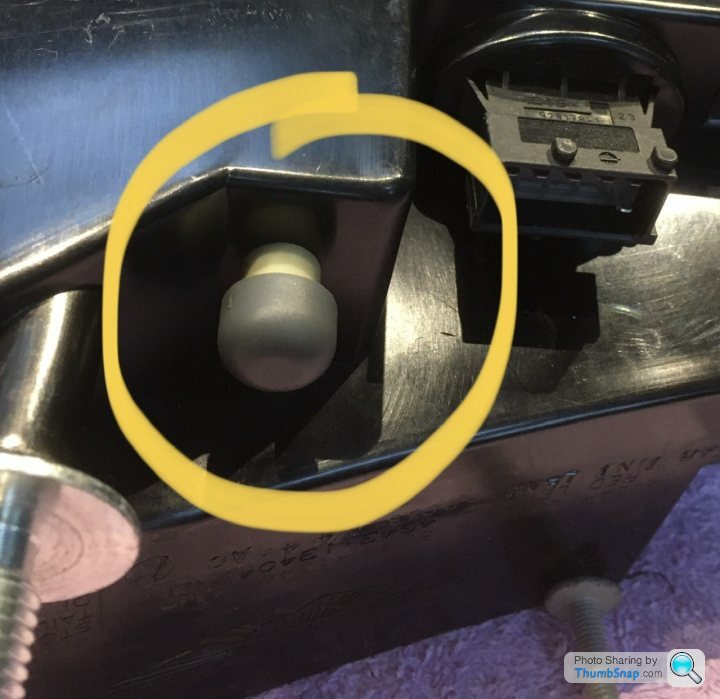
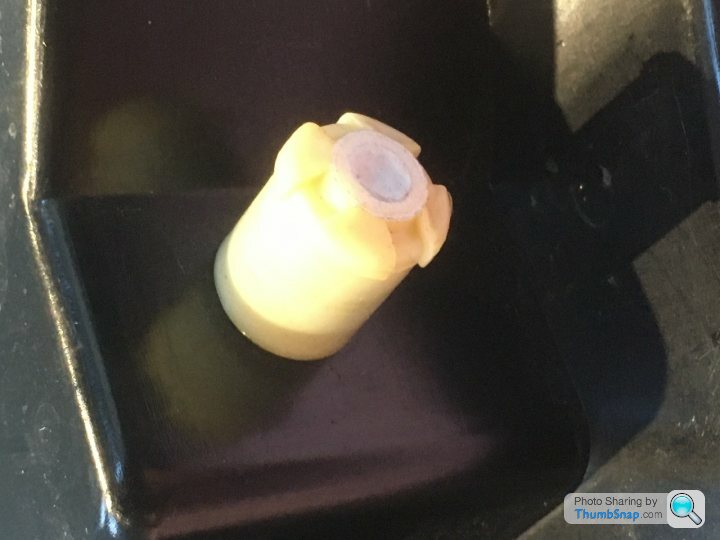
Secondly, I have what appears to be a vent fitted in each one, as per pics.
Thirdly, the damn unit doesn’t fit in my oven but then I’m not going to soften the silicone at 100degC anyway.
So it leads me to think about removing the “vent”, applying a heat gun method to dry out any moisture followed by sealing up the vent hole. I’ll also run a fresh bead of silicone sealant around the perimeter just in case. Thoughts?
Question for anyone who did the above and split the rear light units. A couple of years ago, I got a brand new set of clear rears. Last year, I noticed condensation in one of them and today decided to take a look into repairing it.
So, popped them out and noticed a few differences to the photos posted above. Firstly, mine are already sealed with black silicon, not tape or foam.
Secondly, I have what appears to be a vent fitted in each one, as per pics.
Thirdly, the damn unit doesn’t fit in my oven but then I’m not going to soften the silicone at 100degC anyway.
So it leads me to think about removing the “vent”, applying a heat gun method to dry out any moisture followed by sealing up the vent hole. I’ll also run a fresh bead of silicone sealant around the perimeter just in case. Thoughts?
Gassing Station | Aston Martin | Top of Page | What's New | My Stuff