Pembleton mkII - Tin Tub
Discussion


With most bits from the motorbike now sold I've made a decent amount back. By the time the rest of the bits go, I'll be left with a completely free engine, with carbs, electronic ignition, charging system, wiring loom etc. Some bits seem to be hanging around, which is unusual, but they'll sell eventually.
A few weeks ago my wife and I went to visit our respective families for mothering sunday. My wife's parents live in shropshire, so I made plans on the saturday morning to go and visit Phil just over the border near kiddermister who is the founder and runs and the Pembleton motor company.
The business has changed a little over the last few years. Phil still operates his self build business, selling chassis and components for home builders. There are quite a few chassis to choose from now:
- The classic short wheel base 3wheeler, barrel back (with the spare wheel on the back)
- Short wheel base wide body 3wheeler Barrel back (3inches wider)
- Long wheel base 3wheeler barrel back (3inches wider and nearly 8inches longer)
Then there's bullet tail versions of all of the above, and 4wheeler (brooklands) of all of the above.
Guy (Phil's son) operates a factory build business. These are quite different. They use a brand new crate Guzzi small block injection engine and everything else is factory refurbished for a brand new car. These are called Vsports, but the chassis is also different. The Vsport chassis looks the same until you inspect them side by side or see one build up. The engine and gearbox are mounted further rearward so the engine is almost in line with front of the wheels, the engine mounting in general is quite different to allow for the new engines. When you get to the cabin, the width is the same as the wide body version, but it's the same wheel base, however, a custom fuel tank allows the rear bulkhead to be moved back (and the seat) giving nearly 3inches extra length in the cockpit. Guy's aim was to have one chassis for all the Vsport builds. This makes a lot of sense as then all the body panels are the same. They are fantastic looking machines.
Whilst there I placed the order for my chassis - a LWB 3wheeler Bullet tail. Chassis build times are 8-10wks, so I'm still a few weeks off getting it yet. In the meantime I've got some donor components to refurbish!
Parts restored up to now...
Rear drum, arm end plates and brackets, drive shafts, rear swing arm and steering tube. I've also do the steering tie rods too, but they're not in the picture. I'll be doing a BMW ball joint conversion when the bits arrive...
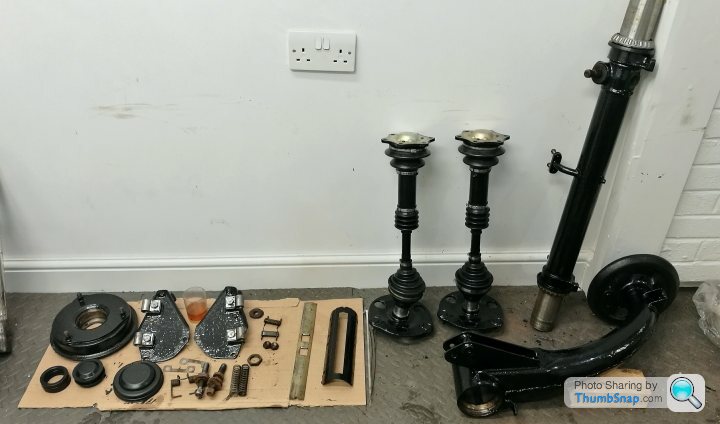
Next jobs will be brake calipers and master cylinder. The front arms are with PMC (pembleton motor company) for modification to the castor angle. All bearings and seals are new.
The drive shaft gaitors were a pain in the arse to fit. Ended up cutting a lemonade bottle for the plastic and creating a cone, a healthy smear of oil and they went on with a bit of force.
Rear drum, arm end plates and brackets, drive shafts, rear swing arm and steering tube. I've also do the steering tie rods too, but they're not in the picture. I'll be doing a BMW ball joint conversion when the bits arrive...
Next jobs will be brake calipers and master cylinder. The front arms are with PMC (pembleton motor company) for modification to the castor angle. All bearings and seals are new.
The drive shaft gaitors were a pain in the arse to fit. Ended up cutting a lemonade bottle for the plastic and creating a cone, a healthy smear of oil and they went on with a bit of force.
Edited by Ambleton on Monday 2nd April 10:39
TooMany2cvs said:
Ambleton said:
I'll be doing a BMW ball joint conversion when the bits arrive...
Replacing TREs or kingpins?The king pin conversion is expensive and looks ugly on an open wheel car. Fundamentally theres nothing wrong with king pins if they're well cared for.
Ambleton said:
TooMany2cvs said:
Ambleton said:
I'll be doing a BMW ball joint conversion when the bits arrive...
Replacing TREs or kingpins?The king pin conversion is expensive and looks ugly on an open wheel car. Fundamentally theres nothing wrong with king pins if they're well cared for.
I've not seen the balljoint conversion - got a link?
TooMany2cvs said:
Indeed - but it's normally the kingpins that people swear at. TREs aren't that bad, especially if you get the castles with grease nips in.
I've not seen the balljoint conversion - got a link?
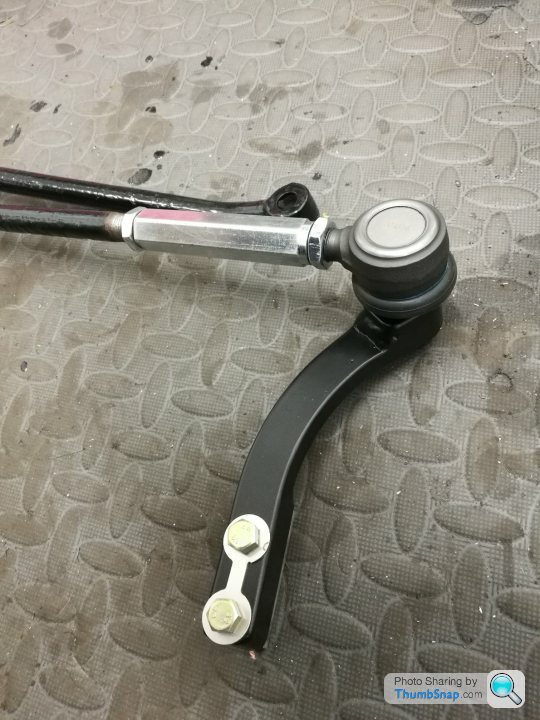
For the TREs a guy in the club makes and sells them with new steering arms...I've not seen the balljoint conversion - got a link?

For the king pin conversion this is the only image I can find at the mo....

Edited by Ambleton on Monday 2nd April 11:05
Ambleton said:
For the TREs a guy in the club makes and sells them with new steering arms...
That's neat. I like that.Ambleton said:
For the king pin conversion this is the only image I can find at the mo....
Yeh, I've seen those - they've come and gone over the years. You're right - far from attractive...Well, my pile of renewed parts is growing:

My front arms are with PMC having the castor angle modified. My chassis should be ready to collect in about a fortnight as it is now at the powder-coaters.
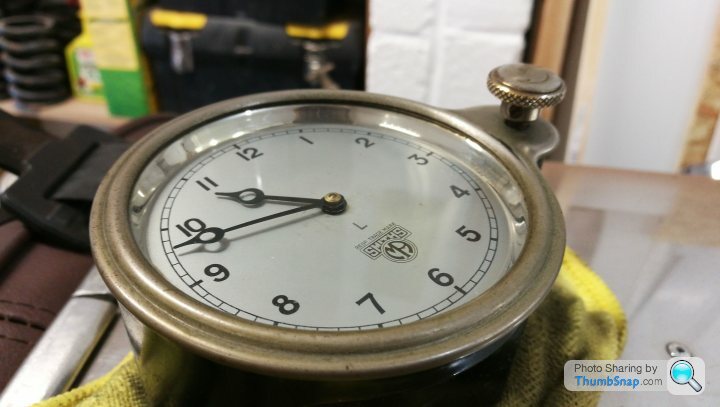
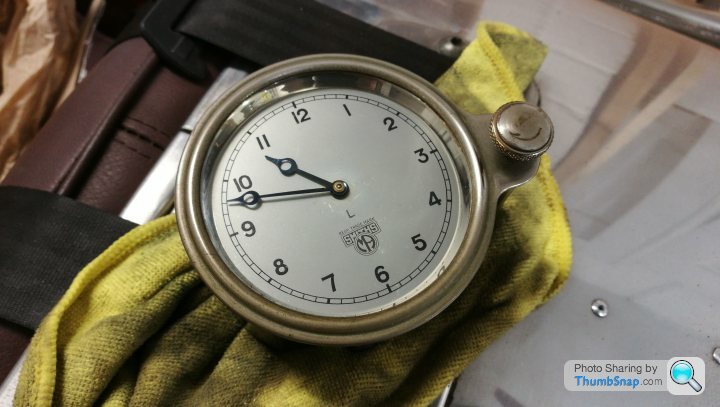
I've also been hunting on ebay and managed to acquire a pre-war smiths mechanical clock.
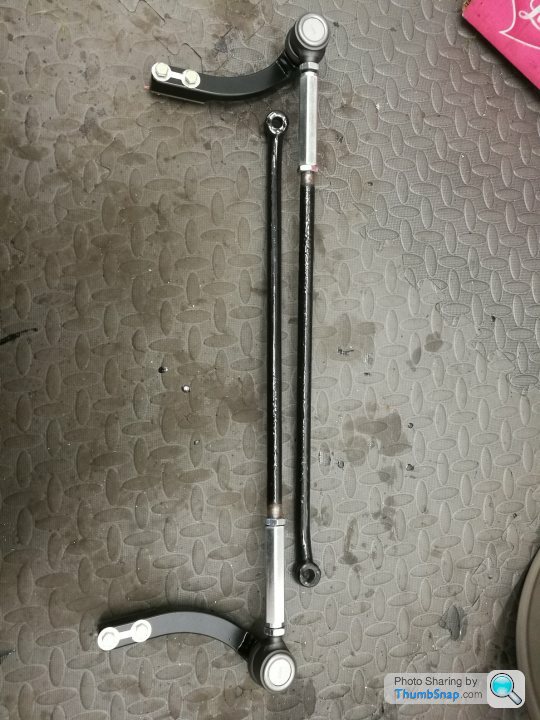
My TRE conversion has also arrived and they look great.
My front arms are with PMC having the castor angle modified. My chassis should be ready to collect in about a fortnight as it is now at the powder-coaters.
I've also been hunting on ebay and managed to acquire a pre-war smiths mechanical clock.
My TRE conversion has also arrived and they look great.
In addition to all the stuff above, I now have from Burton2cv the following:
Master cylinder rebuild kit
Caliper rebuild kit x 2
New wheel bearings all round
Lightened flywheel
New clutch
New dampers
New uprated springs
New brake reservoir (I dropped something on my donor one)
New brake discs and pads
Plus a few other bits I cant remember
Master cylinder rebuild kit
Caliper rebuild kit x 2
New wheel bearings all round
Lightened flywheel
New clutch
New dampers
New uprated springs
New brake reservoir (I dropped something on my donor one)
New brake discs and pads
Plus a few other bits I cant remember
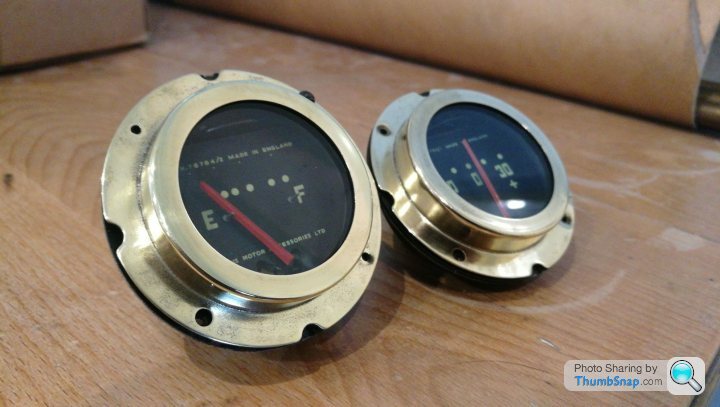
I've been picking up quite a few bits as and when they appear on ebay that are period or just "look right"
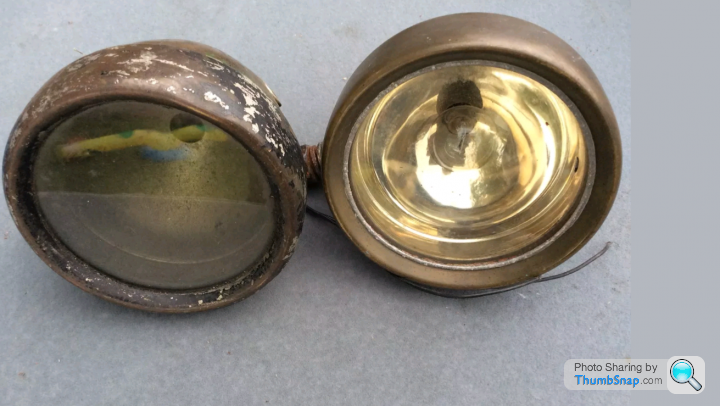
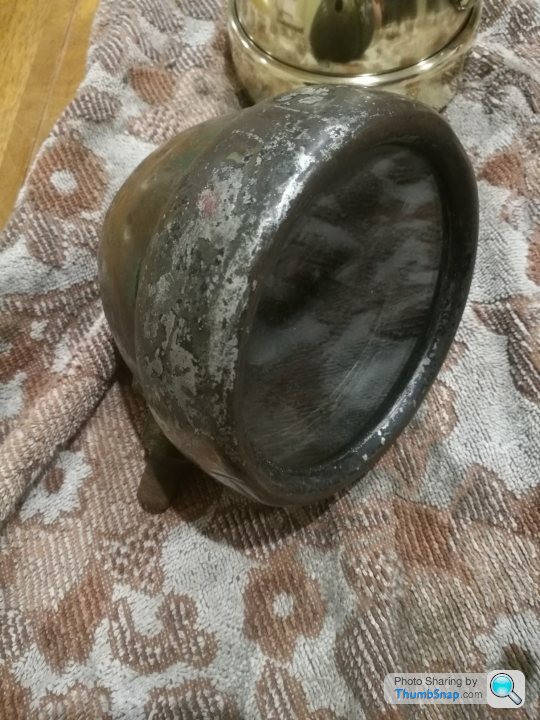
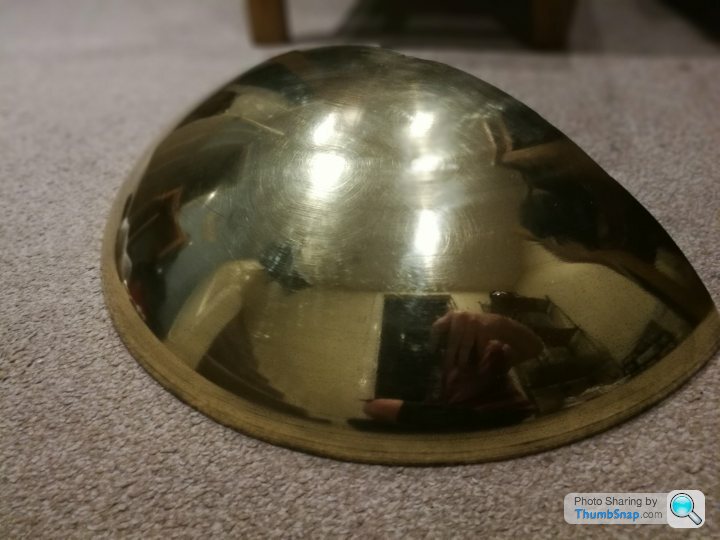
This week ive snapped up some old military brass gauges - ammeter and fuel level, as well as a pair of pre war brass headlamps.
I've decided im going to go all brass and aluminium on this car, because its shiny and looks cool whether is polished or tarnished.
I need to change the reflectors and lamps to MOT compliant modern units, but the bowels and bezels are devine.
The ebay ad had these images...
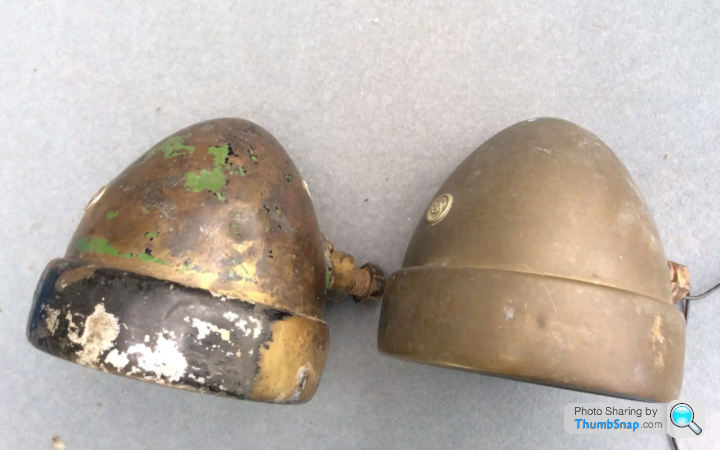

I cleaned up the better one first... the worst one had some pretty bad cracks at the back. I thought about silver solder to repair it, but one of the fabricators at work said the heat may be the last straw as it was thin and weak.

I decided to wet lay a little GRP at the back of the bowl, allowing some resin to seep through.
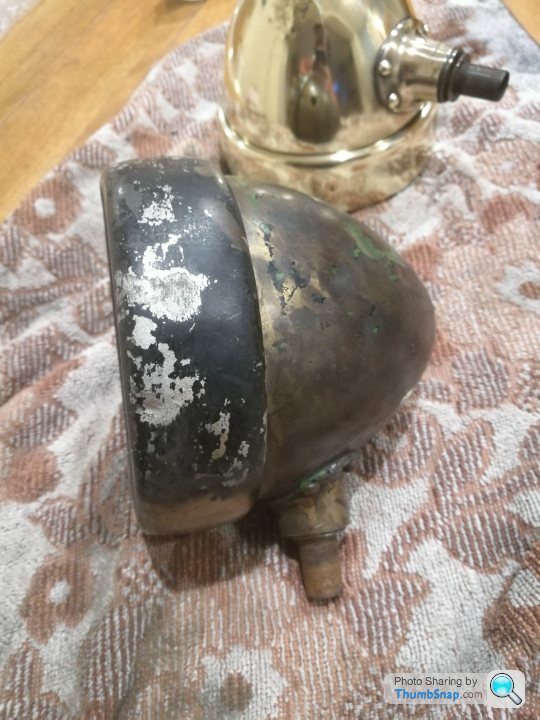
Once stripped of paint, sanded and polished, they now look like this...

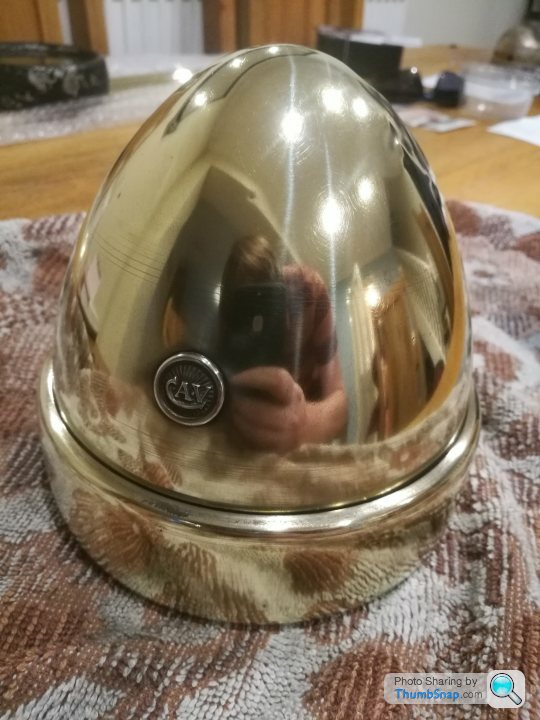

Personally I really like the dents, they give them history and character.
More to come...
This week ive snapped up some old military brass gauges - ammeter and fuel level, as well as a pair of pre war brass headlamps.
I've decided im going to go all brass and aluminium on this car, because its shiny and looks cool whether is polished or tarnished.
I need to change the reflectors and lamps to MOT compliant modern units, but the bowels and bezels are devine.
The ebay ad had these images...
I cleaned up the better one first... the worst one had some pretty bad cracks at the back. I thought about silver solder to repair it, but one of the fabricators at work said the heat may be the last straw as it was thin and weak.
I decided to wet lay a little GRP at the back of the bowl, allowing some resin to seep through.
Once stripped of paint, sanded and polished, they now look like this...
Personally I really like the dents, they give them history and character.
More to come...
Thanks, there's something very satisfying about taking something old and ugly, and polishing the s t out of it, accentuating its imperfections and history, but making it all shiny and fresh at the same time.
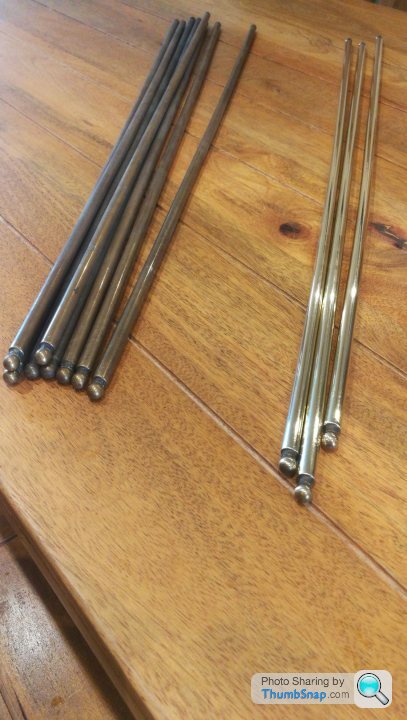
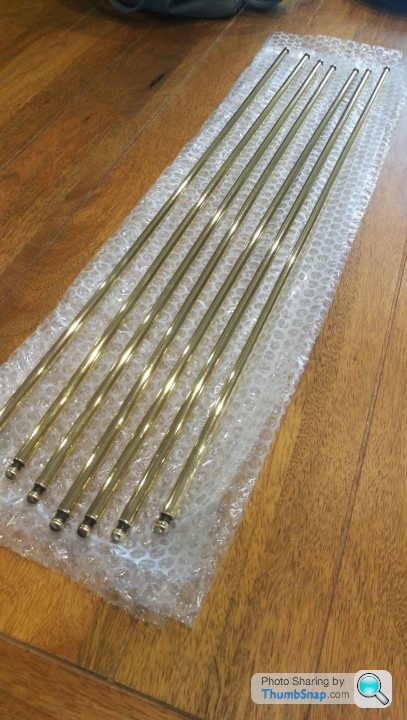
I also managed to pick up some old solid brass stair rods. These will be fabricated into a picnic rack for the back with some blocks of hardwood. I have enough to do two, so ill practice on the current one first...
t out of it, accentuating its imperfections and history, but making it all shiny and fresh at the same time.I also managed to pick up some old solid brass stair rods. These will be fabricated into a picnic rack for the back with some blocks of hardwood. I have enough to do two, so ill practice on the current one first...

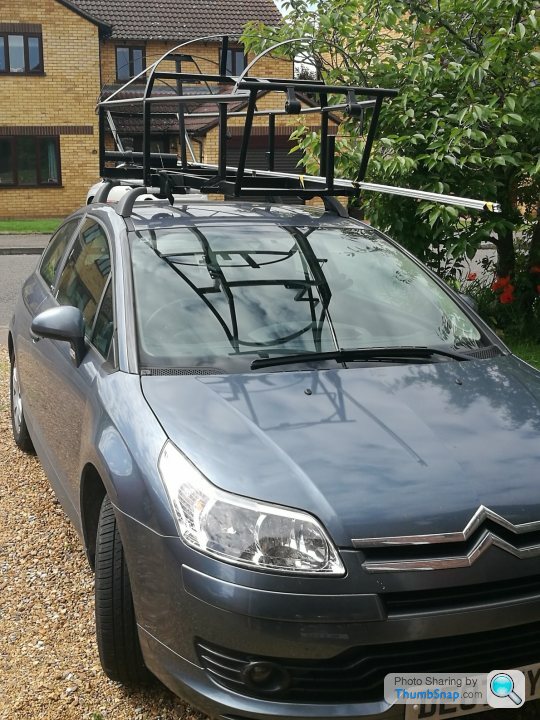
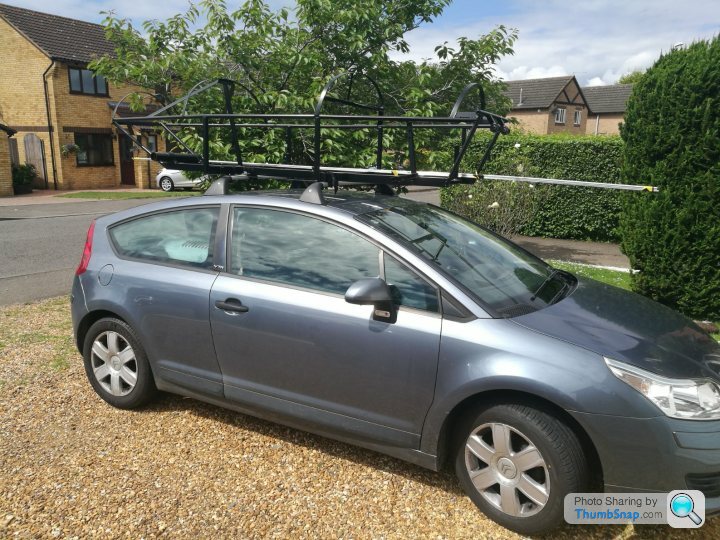
Arriving home with the chassis strapped to the roof!
Placed on stands on the driveway with bonnet, brass cowl and spun tail piece roughly placed in position.


Next to the other one side by side.

I've measured it across the hips, and its 65mm wider. Maybe a little narrower than I was hoping. Its definitely longer, but at this stage its difficult to tell where, the chassis are quite different between them!
Placed on stands on the driveway with bonnet, brass cowl and spun tail piece roughly placed in position.
Next to the other one side by side.
I've measured it across the hips, and its 65mm wider. Maybe a little narrower than I was hoping. Its definitely longer, but at this stage its difficult to tell where, the chassis are quite different between them!
Before I start putting the Pembletons mechanicals together, I need to go and visit a chap called Duncan in Yorkshire. He's a fellow Pembletonista and all round good egg, serial car builder and metalworker by trade.
He's offered to help me make the floor for TinTub. The floor is the most challenging bit of the bodywork as it has to fit absolutely right - this determines the shape of the rest of the body side panels and skirt. It also has 2 curved flanges along the sides, which is difficult to get good results without the correct equipment.
On my trip, I need to collect a newly rebuilt steering rack and a pair of freshly built Austin7 19" wheels.
In the meantime I've been prepping all the other mechanicals to be fitted.
The rear suspension arm is turned around on the 3wheeler. This causes a dilemma because the flange length is different on each side of the arm. The flange must therefore be trimmed in order to get the arn and bearing to sit properly. 13mm must be removed from the outside edge to match the inner distance so it can be turned around without bother.
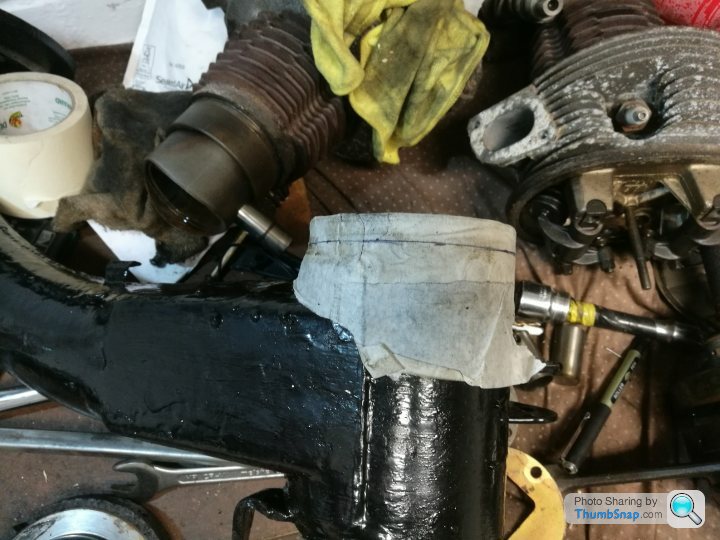
After careful marking I got Mr Angry Grinder out and set about with trepidation.
I cut probably 11mm off, then ground the rest down to flat. I'd rather cut short and grind, than cut too much!
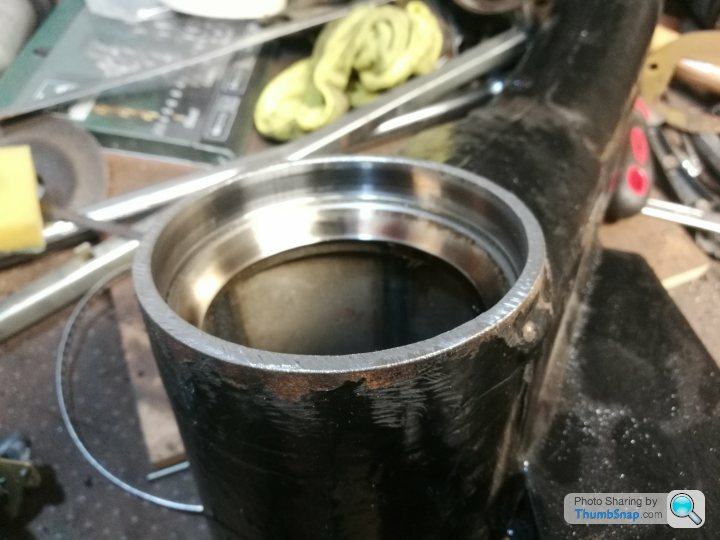
The magic number we're looking for is 16mm from race to lip.

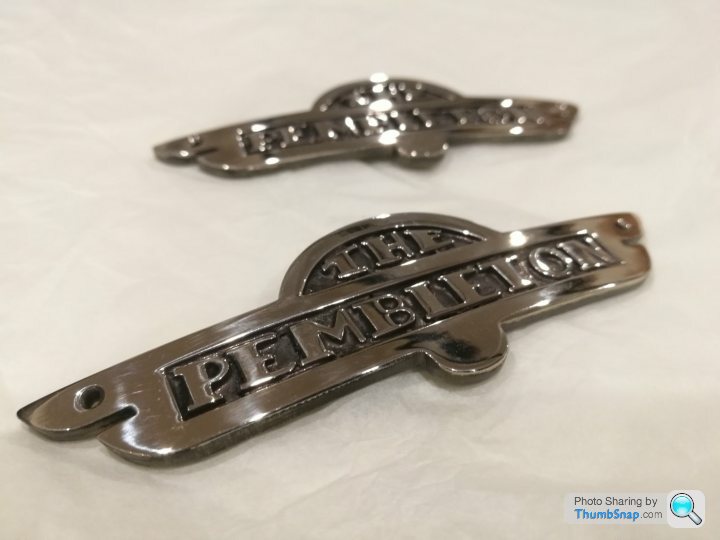
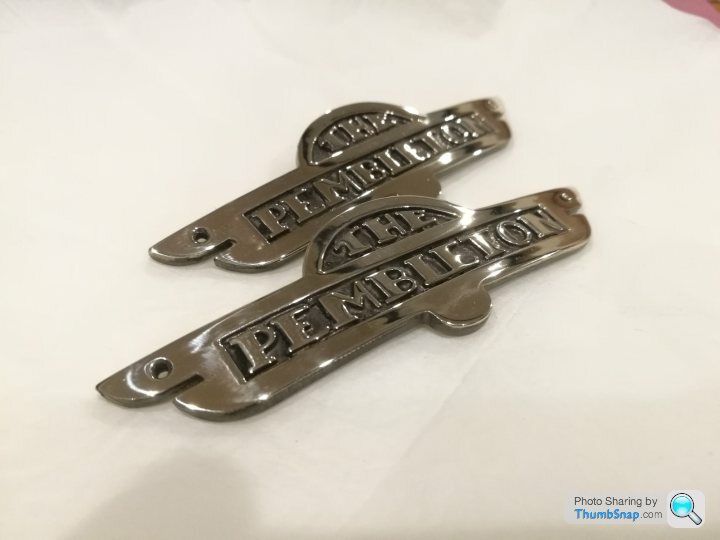
I also spent a little time preparing the shiny bits for fitting later down the line. The brass cowl I got had quite a few manufacturing marks so I gave that a quick rub down and polish and I also prepped the badges for later on. These came rough cast, so needed a little work.
He's offered to help me make the floor for TinTub. The floor is the most challenging bit of the bodywork as it has to fit absolutely right - this determines the shape of the rest of the body side panels and skirt. It also has 2 curved flanges along the sides, which is difficult to get good results without the correct equipment.
On my trip, I need to collect a newly rebuilt steering rack and a pair of freshly built Austin7 19" wheels.
In the meantime I've been prepping all the other mechanicals to be fitted.
The rear suspension arm is turned around on the 3wheeler. This causes a dilemma because the flange length is different on each side of the arm. The flange must therefore be trimmed in order to get the arn and bearing to sit properly. 13mm must be removed from the outside edge to match the inner distance so it can be turned around without bother.
After careful marking I got Mr Angry Grinder out and set about with trepidation.
I cut probably 11mm off, then ground the rest down to flat. I'd rather cut short and grind, than cut too much!
The magic number we're looking for is 16mm from race to lip.
I also spent a little time preparing the shiny bits for fitting later down the line. The brass cowl I got had quite a few manufacturing marks so I gave that a quick rub down and polish and I also prepped the badges for later on. These came rough cast, so needed a little work.

Gassing Station | Readers' Cars | Top of Page | What's New | My Stuff