Nut and Bolt rebuild - sensible mods
Discussion


swisstoni said:
Pete, thanks for the offer of info. Sounds like you had more to do with the design and build than architect / builders so I won't trouble you for their details. It's a credit to you and has given me much food for thought.
Hi swisstoni, would definitely recommend the builders, I am sure they could do you a price if that is what you want. I am happy to share my planning permission drawings if that helps. The architect wasn't bad but I reckon any architect could have done this. The structural engineer was very important and I am happy to share his drawings and calculations and I am sure he could do you another. I was concerned about the 2 post lift sitting on the steels but he reassured me by saying it was just a matter of transferring the weight of the car from 4 points (the wheels) to 2 points (the 2 posts).I may not have said but the garage has also allowed me space for a very nice sized room in the loft as well, with 3 big veluxes. Good for another bedroom & bathroom.
Happy to discuss any time. Pete
Jasper Gilder said:
Couple of thoughts from a man who owned 4 Griffs and did 150,000 miles in them
1 - Galvanising is a great idea, but the heat used may distort the chassis. When I had my 3000M chassis done I had it zinc sprayed. Then I ran out of money for a while and left it in a shed which regularly floods for about 5 years, lying on its side with the water running over it. 5 years later...good as new. It's cheaper and just as good as galvanising without the heat issues
2 - Griffs have the air intake and filter just behind the number plate and on 500s the top of the front is open so - in pouring rain, the filter gets waterlogged and the engine goes into limp mode. There is (apparently) some kind of bush mechanics fix, but I'd be inclined to reposition the air filter
3 - Moving the battery to the boot is OK so long as you have a two part roof, you probably should go for that anyway so you don't wind up with a start crack in the body at axle level behind the passenger rear wheel (most Griffs have/had this and it's caused by putting the roof in the boot)
4 - I had one Griff 500 with a low fuel warning light - good idea! and the optional cold air fan which keeps the footwells cool - also a good idea if your car hasn't got it
Jasper, thanks for the points:1 - Galvanising is a great idea, but the heat used may distort the chassis. When I had my 3000M chassis done I had it zinc sprayed. Then I ran out of money for a while and left it in a shed which regularly floods for about 5 years, lying on its side with the water running over it. 5 years later...good as new. It's cheaper and just as good as galvanising without the heat issues
2 - Griffs have the air intake and filter just behind the number plate and on 500s the top of the front is open so - in pouring rain, the filter gets waterlogged and the engine goes into limp mode. There is (apparently) some kind of bush mechanics fix, but I'd be inclined to reposition the air filter
3 - Moving the battery to the boot is OK so long as you have a two part roof, you probably should go for that anyway so you don't wind up with a start crack in the body at axle level behind the passenger rear wheel (most Griffs have/had this and it's caused by putting the roof in the boot)
4 - I had one Griff 500 with a low fuel warning light - good idea! and the optional cold air fan which keeps the footwells cool - also a good idea if your car hasn't got it
1 - There has been much made of distortion but no evidence of it ever happening. I have spoken to a number of experts including Aston Martin (the man not the car) and we discussed distortion and we both agreed that there wasn't any way the chassis could distort due to its stressed members and providing it was plunged into the zinc bath quickly. The few threads on this matter I have read all mention distortion but none of the chassis that have been galvanised have actually distorted. Aston does do hot zinc spraying but he recommended me to go ahead with the galvanizing as it was overall better than hot zinc spray. The biggest issue is the drilling of the holes to prevent the tubes exploding with the expanding air in them, however you will see on the thread that I have put above that I have done quite a lot of research on this. As for the Europa chassis, I used to have an Elan Sprint and believe the chassis is made up of large areas of folded sheet steel, which is likely to distort when heated.
2 - Good point, was even considering changing the air filter, perhaps to a cylinder type, providing it gives better air flow
3 - On balance, I think I am going to leave the battery but spend a lot of time positioning the fuse box, the relays and the ECU so they are fixed, easily accessible and generally look more tidy.
4 - I hadn't considered the low fuel light, good one. As for the cool air fan, it's got it already.
Appreciate your ideas, Pete
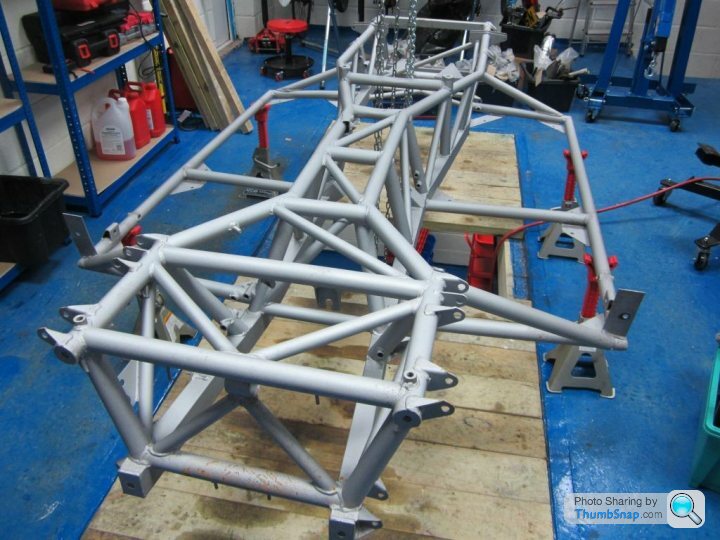
Here we are Sunday evening, chassis from both ends:
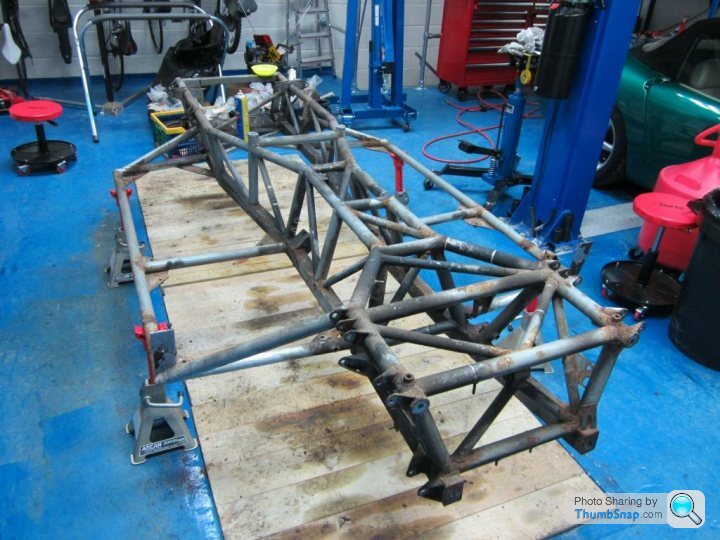
Chassis all stripped down. Tomorrow I need to get that bush out and those three sheared bolts from the chassis as well as push all the bushes out of the wishbones, ready for blasting.
I take back my comments about using penetrating oil spray because it has worked a treat on all those nuts and bolts.
Hedgehopper said:
There was a post the other day, I think on the Cerb forum, regarding removing suspension bushes from wishbones. Rather than burn the rubber out he cut it out with a hole-saw...said it took about 20 seconds per bush, and no horrible smell. Hope it helps.
Damn, wish I had read this earlier. Burnt it out, cut the bush outer and chiselled the damn thing out. Horrible smell .......!Now struggling with drilling out sheared off stud. Unfortunately got to go to a meeting in London tomorrow to earn some money to pay for the Griff!
Wouldn't want you lot to think I was skiving.....
Pressed out all those bushes. Some made an impressive bang when they first freed up:
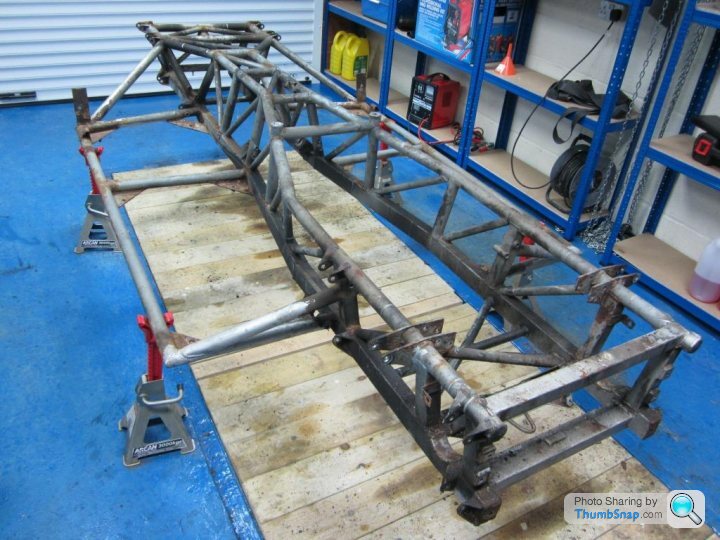
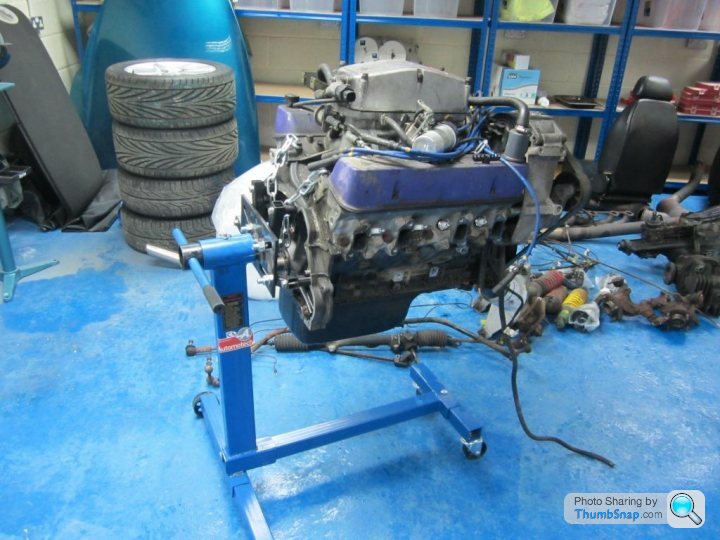
And sent the chassis, wishbones, cross piece and the 3 brackets holding the diff to have some severe grit blasting to see if there were any holes. Meanwhile split the gearbox and engine and put the engine on a stand, ready for the strip down:
Chassis and bits returned:
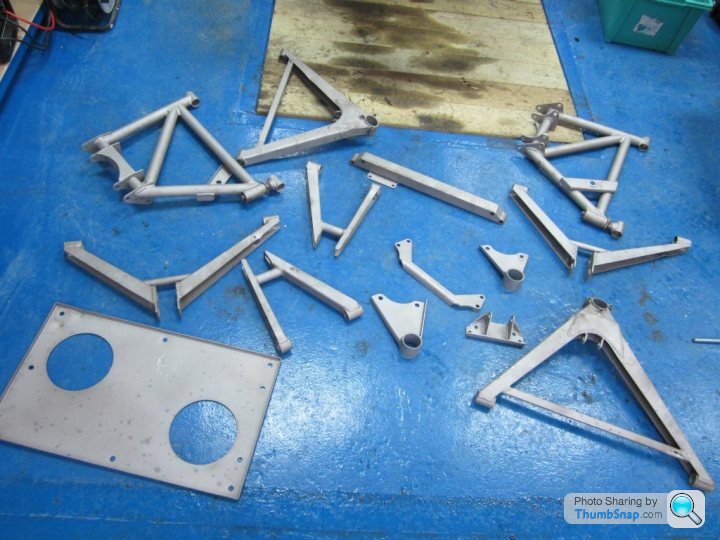
It confirmed that in general the chassis etc. was in surprisingly good nick, so there is one for the record, not every chassis is totally f d
d
The only rust hole was on one of the wishbones:
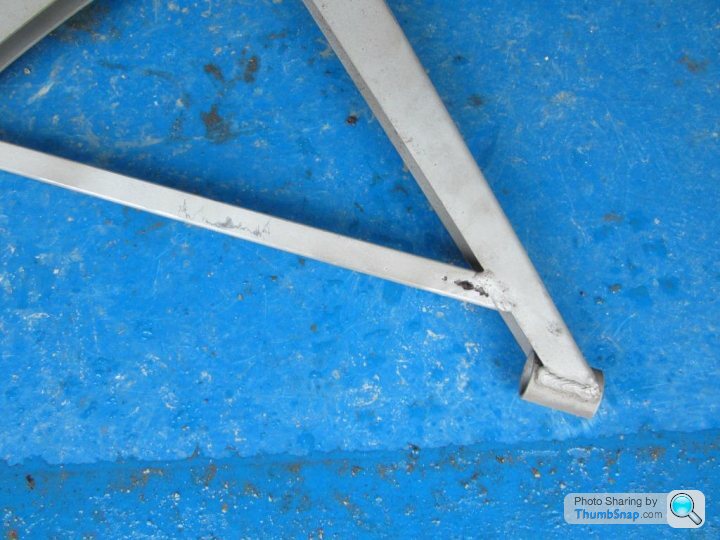
Easily repairable. The front wishbones have some rust pitting so I will have a think whether to replace or not.
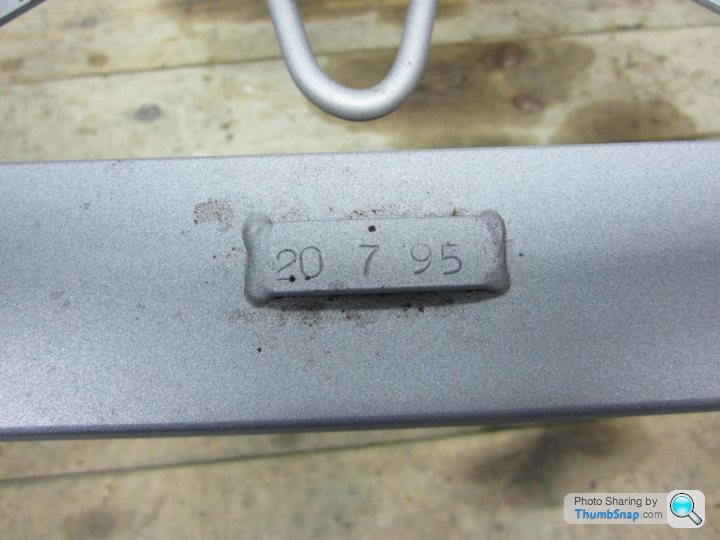
Nice to be able to read the chassis number:
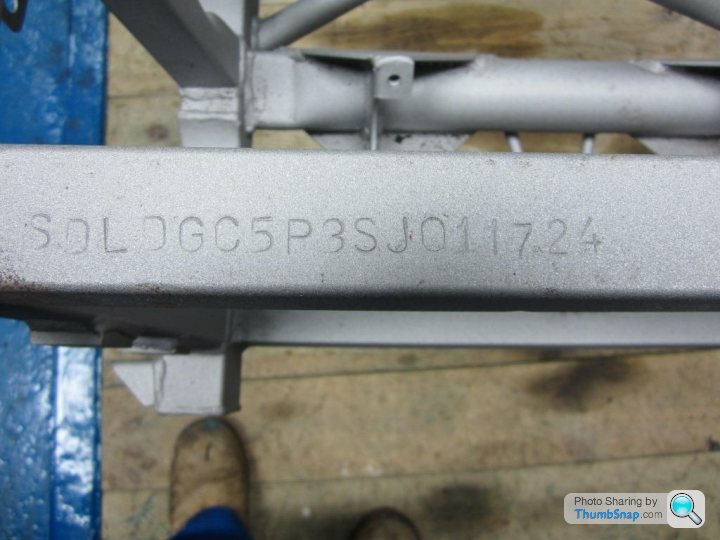
As well as the date manufactured:
Next jobs are to get those repairs done. Add the brackets for the seats and the battery box, drill the holes in the tube and get the bits off to be galvanized. Meanwhile plenty of other jobs to be getting on with and that's before I even contemplate doing the body......
Pressed out all those bushes. Some made an impressive bang when they first freed up:
And sent the chassis, wishbones, cross piece and the 3 brackets holding the diff to have some severe grit blasting to see if there were any holes. Meanwhile split the gearbox and engine and put the engine on a stand, ready for the strip down:
Chassis and bits returned:
It confirmed that in general the chassis etc. was in surprisingly good nick, so there is one for the record, not every chassis is totally f
dThe only rust hole was on one of the wishbones:
Easily repairable. The front wishbones have some rust pitting so I will have a think whether to replace or not.
Nice to be able to read the chassis number:
As well as the date manufactured:
Next jobs are to get those repairs done. Add the brackets for the seats and the battery box, drill the holes in the tube and get the bits off to be galvanized. Meanwhile plenty of other jobs to be getting on with and that's before I even contemplate doing the body......
John, I wasn't sure how interested people actually where in the rebuild, clearly you are. I am back in Kazakhstan earning the dosh to pay for the rebuild (and two daughters at University) but will update you with photos tomorrow.
I have a bit of a dilemma right now. I think the 'Green Meanie', which was the Griff that I was keeping as the driver has blown one (or two) head gasket(s). No oil in the water but it keeps using water and there are bubbles in the water. Not sure whether to take engine out and rebuild myself or to take egine out and hand over to TVR Power for a Taraka (plus many thousands of pounds). When I return I will do some compression tests to decide way forward. Any suggestions welcome, options look like:
I will update on the rebuild tomorrow.
I have a bit of a dilemma right now. I think the 'Green Meanie', which was the Griff that I was keeping as the driver has blown one (or two) head gasket(s). No oil in the water but it keeps using water and there are bubbles in the water. Not sure whether to take engine out and rebuild myself or to take egine out and hand over to TVR Power for a Taraka (plus many thousands of pounds). When I return I will do some compression tests to decide way forward. Any suggestions welcome, options look like:
- Take out engine and replace head gasket (optimistic but minimum cost)
- Take out engine and do minimum rebuild (still optimistic and medium cost)
- Take out engine and do major rebuild (could be major cost depending on what I find)
- Take out engine and hand over to TVR Power (major cost)
- Give car to TVR Power and leave the whole lot to them (mega cost)
I will update on the rebuild tomorrow.
carsy said:
If you are sure it is head gaskets, the heads can be taken off with engine still in the car.
Could it be the block gone porous (hope not).
I was constantly using water and I noticed a pinhole leak in the radiator. I am afraid I did a quick fix on that with k-seal but it still lost water. I made up a funnel which screwed into the swirl pot so I could properly get the air out of the system but I coud not get rid of the bubbles. The car does not appear to overheat though.Could it be the block gone porous (hope not).
I spoke to Dom at TVR Power and he reckoned that head gaskets don't blow but rather the liners slip causing exhaust gases to get into the water or water in the oil etc. If the exhaust gases get into the water then the pressure may then cause the radiator leak.....
I could do the head gasket insitu, however by the time I have taken those b
d exhaust manifold bolts out, I may as well take the engine and box out and then be able to get to everything (and probably quicker at the end of the day).I suspect what I will end up doing is strip the engine myself, get some stepped liners put in and generally upgrade the engine with whatever needs doing and it will also give me the opportunity of putting in a new clutch while I am at it.
Having had the chassis and other bits blasted I then ordered some 2mm mild steel folded into channel 35mm wide by 15mm sides. Four pieces to be welded longitudinally on the chassis to secure the seats and one laterally to secure the battery box.
I then spent quite a time chasing those threads (9/16 UNF I believe) for all the chassis and seat belt bolts. I sprayed in a load of penetrating oil and then blasted it through with an air gun to get rid of all the accumulated crap from the last 18 years - I do realise that I will have to chase them again once the chassis has been galvanized and powder coated but it was a good opportunity to clear them of all the dirt and rust.
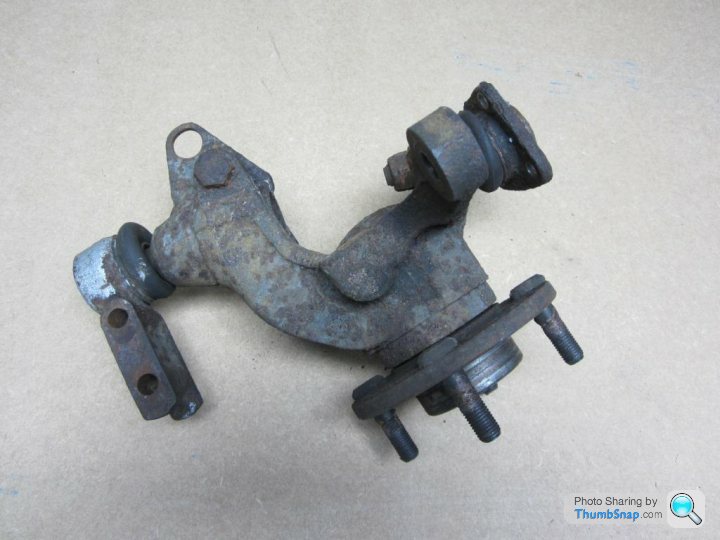
I then proceeded to strip down the front hubs:
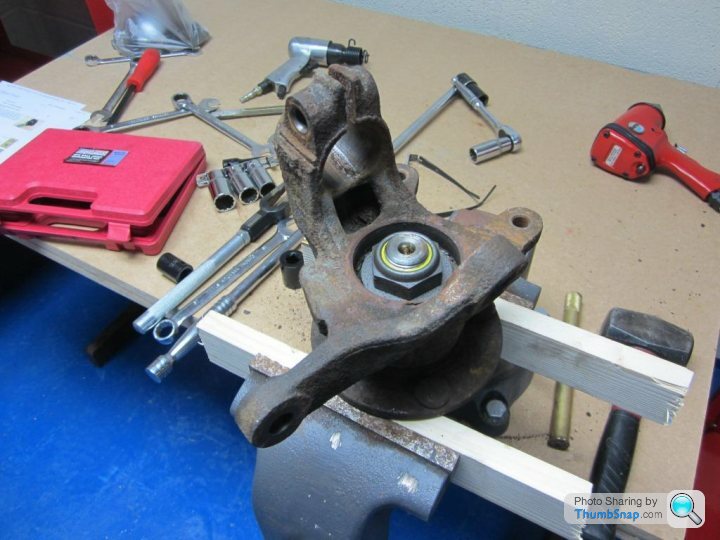
Those hub nuts are a real bd to get off. I started with a one metre breaker bar, I then tried a lump hammer and chisel but in the end an air wrench did the job but it need a lot of chuntering before they moved (photo is a rear hub):
One hub was good but the other had clearly been contaminated. Not only that but there was a rusty ball bearing beneath the dust cover:
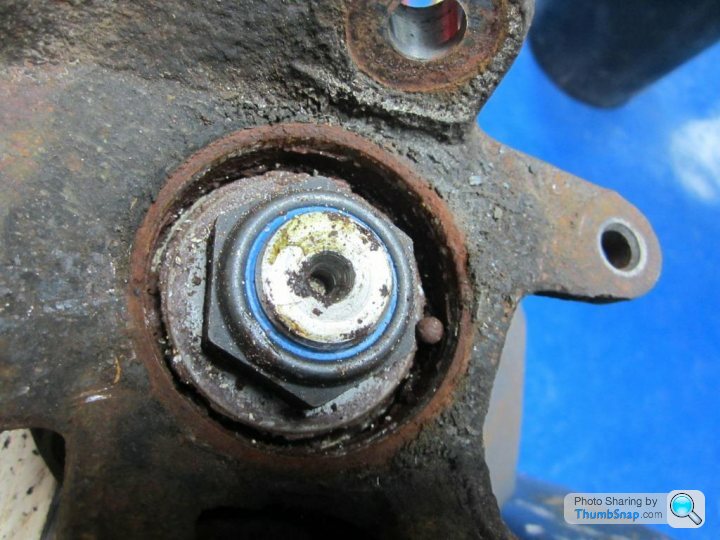
Fk knows where that came from as the bearings are tapered roller bearings.....!
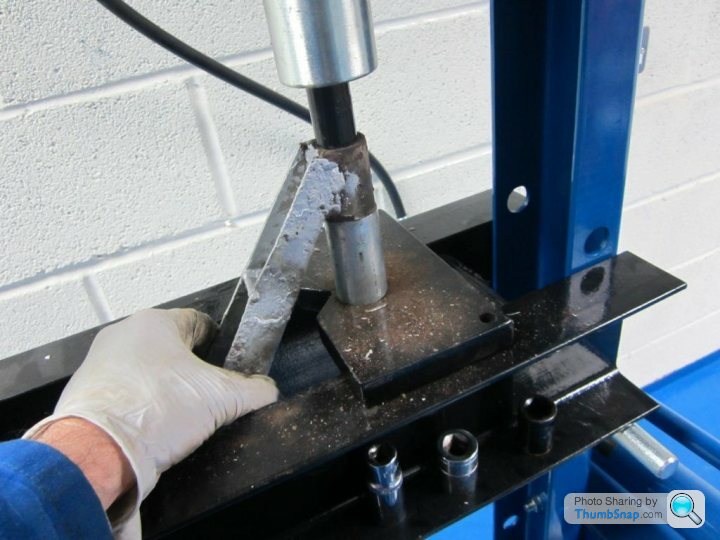
I pushed out the bushes from the rear hubs:
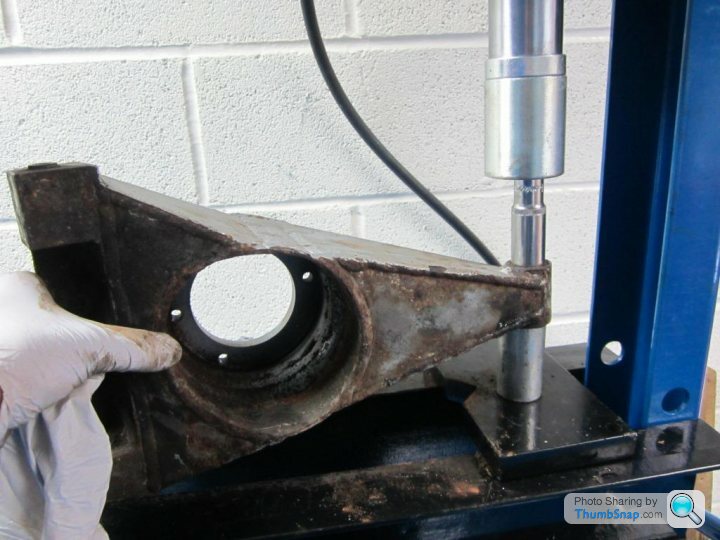
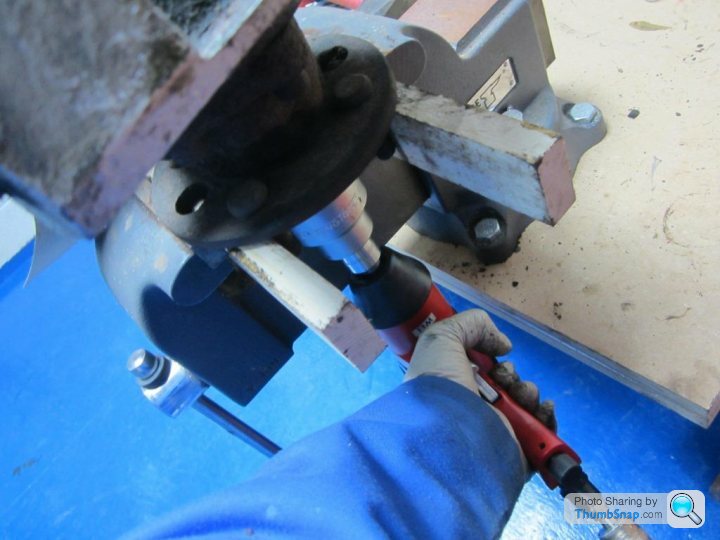
I even pushed out the wheel studs (a real strip down):
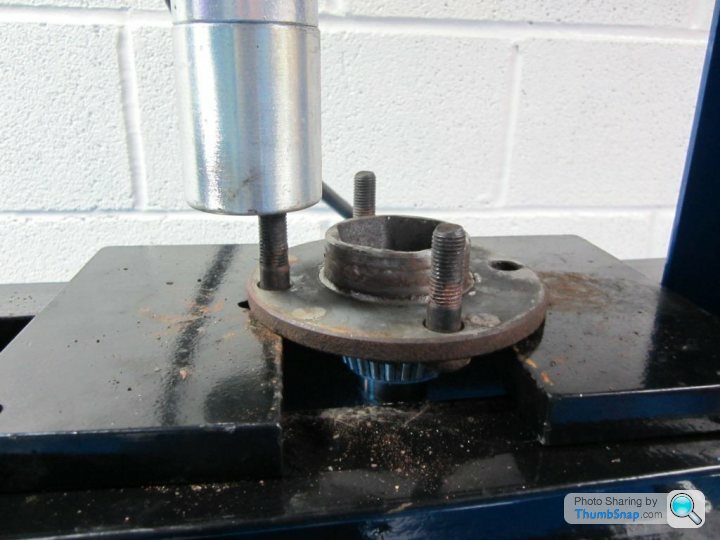
That 20 tonne press has paid for itself already. I recommend one for those people who do a lot of the work themselves and they are not expensive (I paid £180).
The folded channel came the day I was leaving so no chance to do anything with it. I return to UK 6th March so until then no progress but jobs will be to drop the body on the chassis, offer up the channel and tack it to the chassis then weld it, drill seat and battery box holes. Drill holes in chassis then get it off to the galvanizers. After that I need to do something about the engine for the 'Green Meanie'..... Suggestions on a postcard please.
My little present to me, whilst out here will be a blast cabinet so I can clean up all those bits and pieces. I bought a 900mm oven from fleaBay for £7.98 and I plan to do a lot of the powder coating of all the bits and pieces myself.
I am a friendly sort of bloke so if it is convenient and you think it is local enough then feel free to come and use the press etc. when I am back. I have already met up with Rob the Sparky and we had a nice blast along the road despite the local constabulary pulling out behind us....
I then spent quite a time chasing those threads (9/16 UNF I believe) for all the chassis and seat belt bolts. I sprayed in a load of penetrating oil and then blasted it through with an air gun to get rid of all the accumulated crap from the last 18 years - I do realise that I will have to chase them again once the chassis has been galvanized and powder coated but it was a good opportunity to clear them of all the dirt and rust.
I then proceeded to strip down the front hubs:
Those hub nuts are a real b
d to get off. I started with a one metre breaker bar, I then tried a lump hammer and chisel but in the end an air wrench did the job but it need a lot of chuntering before they moved (photo is a rear hub):One hub was good but the other had clearly been contaminated. Not only that but there was a rusty ball bearing beneath the dust cover:
F
k knows where that came from as the bearings are tapered roller bearings.....!I pushed out the bushes from the rear hubs:
I even pushed out the wheel studs (a real strip down):
That 20 tonne press has paid for itself already. I recommend one for those people who do a lot of the work themselves and they are not expensive (I paid £180).
The folded channel came the day I was leaving so no chance to do anything with it. I return to UK 6th March so until then no progress but jobs will be to drop the body on the chassis, offer up the channel and tack it to the chassis then weld it, drill seat and battery box holes. Drill holes in chassis then get it off to the galvanizers. After that I need to do something about the engine for the 'Green Meanie'..... Suggestions on a postcard please.
My little present to me, whilst out here will be a blast cabinet so I can clean up all those bits and pieces. I bought a 900mm oven from fleaBay for £7.98 and I plan to do a lot of the powder coating of all the bits and pieces myself.
I am a friendly sort of bloke so if it is convenient and you think it is local enough then feel free to come and use the press etc. when I am back. I have already met up with Rob the Sparky and we had a nice blast along the road despite the local constabulary pulling out behind us....
Edited by Pete Mac on Saturday 8th February 17:42
Mark_S_24 said:
Hi,
Great thread, keep it coming.
Here is a thread on the Chimaera side about covering the Front end of the outriggers.
http://www.pistonheads.com/gassing/topic.asp?h=0&t=1107773&d=11735.75850&nmt
Some more professionally than others :-)
If you were thinking of getting mapping done on the old Lucas system, I think Mark Adams is away doing a Uni Course so isn't doing mapping at the moment. So might be worth looking at the Lloyds kits http://www.lloydspecialistdevelopments.co.uk/engine-management-kits
And that would clean up your wiring loom too.
Don't know what was different on the 500, but perhaps widening of trumpets & porting and polishing?
HTH
Mark
Hi MarkGreat thread, keep it coming.
Here is a thread on the Chimaera side about covering the Front end of the outriggers.
http://www.pistonheads.com/gassing/topic.asp?h=0&t=1107773&d=11735.75850&nmt
Some more professionally than others :-)
If you were thinking of getting mapping done on the old Lucas system, I think Mark Adams is away doing a Uni Course so isn't doing mapping at the moment. So might be worth looking at the Lloyds kits http://www.lloydspecialistdevelopments.co.uk/engine-management-kits
And that would clean up your wiring loom too.
Don't know what was different on the 500, but perhaps widening of trumpets & porting and polishing?
HTH
Mark
I've tried both these threads and neither of them work. Any chance of having another go.
Pete
EGB said:
Is your Green Meanie a Starmist Ocean Haze, like mine? Just curious.

Edited by EGB on Saturday 18th January 18:44
I didn't want you to think that I had become bored of this project, it's just I have been really busy on my garden re-modelling project (groan) as well as preparing the Green Meanie for summer, such that I can start a long(ish) journey without thinking it will break down after 5 miles - I think I am there.
I have started drilling the chassis, preparing it for galvanizing:

I'm using a 5mm cobalt drill (much tougher than your cheap and nasty drills you can buy in bulk but not that expensive either)
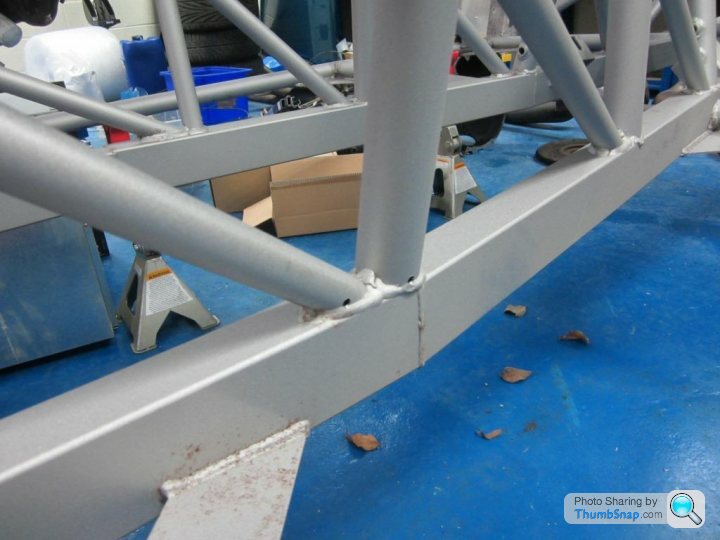
I am drilling as close to the welds as possible, as advised by a structural engineer to minimise any effect on structural integrity.

I have been advised by the galvanizers that the chassis will be dipped, tipped over to one side by approximately 30 degrees, therefore the drain holes should all be one side, with the air hole on the opposite side of the tube at the other end, the idea being that when dipped the chassis will be coated as quickly as possible inside and out, minimising the chances of unequal heating and possible distortion and the maximum amount of molten zinc will drain out as the chassi is lifted from the zinc bath.
I have assumed the chassis will be dipped nearside down. The galvanizers have advised that the drain hole should be 8mm minimum and the air hole 5mm minimum, however I am keeping to 5mm for now and will argue the toss later.
I have started drilling the chassis, preparing it for galvanizing:
I'm using a 5mm cobalt drill (much tougher than your cheap and nasty drills you can buy in bulk but not that expensive either)
I am drilling as close to the welds as possible, as advised by a structural engineer to minimise any effect on structural integrity.
I have been advised by the galvanizers that the chassis will be dipped, tipped over to one side by approximately 30 degrees, therefore the drain holes should all be one side, with the air hole on the opposite side of the tube at the other end, the idea being that when dipped the chassis will be coated as quickly as possible inside and out, minimising the chances of unequal heating and possible distortion and the maximum amount of molten zinc will drain out as the chassi is lifted from the zinc bath.
I have assumed the chassis will be dipped nearside down. The galvanizers have advised that the drain hole should be 8mm minimum and the air hole 5mm minimum, however I am keeping to 5mm for now and will argue the toss later.
cavebloke said:
Hi Pete,
It's a really interesting approach and, like many others, I can't wait to see the results. I hope it works perfectly as it really seems the best solution. I wonder if you have a way to weigh the chassis before and after? When I've seen this done before (only on telly so might have been editing) the zinc seemed to start setting quite fast after removing the item from the tank. If this is the case, the larger 8mm holes might be pretty important for draining rate and ensuring you get back close to the original weight. The risk being, creating a chassis that's heavier on the nearside if the drain isn't quite fast enough and the zinc sets inside. Naive thoughts I'm sure, but worth considering in advance.
Good luck with it all,
Simon
PS Will you still see the chassis number and build date through the galv? They're quite difficult to see through my new powdercoat.
Exactly as advised, the zinc sets quickly and may block the 5mm holes before it all runs out, as advised by the galvanizers. I think I will open the 5mm holes to 8mm but can't bring myself to do it right now and I will only do it in a final consultation with the galvanizers.It's a really interesting approach and, like many others, I can't wait to see the results. I hope it works perfectly as it really seems the best solution. I wonder if you have a way to weigh the chassis before and after? When I've seen this done before (only on telly so might have been editing) the zinc seemed to start setting quite fast after removing the item from the tank. If this is the case, the larger 8mm holes might be pretty important for draining rate and ensuring you get back close to the original weight. The risk being, creating a chassis that's heavier on the nearside if the drain isn't quite fast enough and the zinc sets inside. Naive thoughts I'm sure, but worth considering in advance.
Good luck with it all,
Simon
PS Will you still see the chassis number and build date through the galv? They're quite difficult to see through my new powdercoat.
Not sure about the chassis number and build date. I will also be covering the galv but this is purely decorative so not sure whether to powder coat or spray (pluses and minuses to both). Pete
John, thanks for your interest. Unfortunately the garden project has overwhelmed me and 'nut and bolt rebuild' is on hold until the autumn as I only have so much time (25 hrs in the day, 8 days in the week) and if I don't get the garden finished then Mrs Mac may well decide to go and find a better man.
I know you will hate me for this but the following are a few snaps of the current 'project':
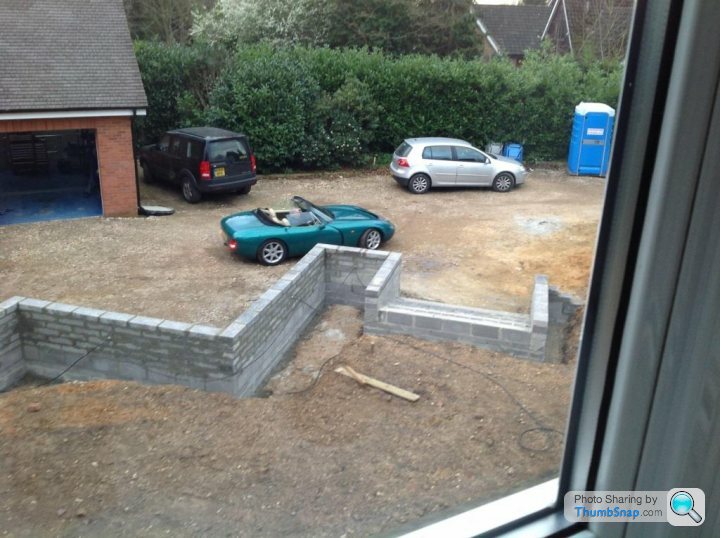
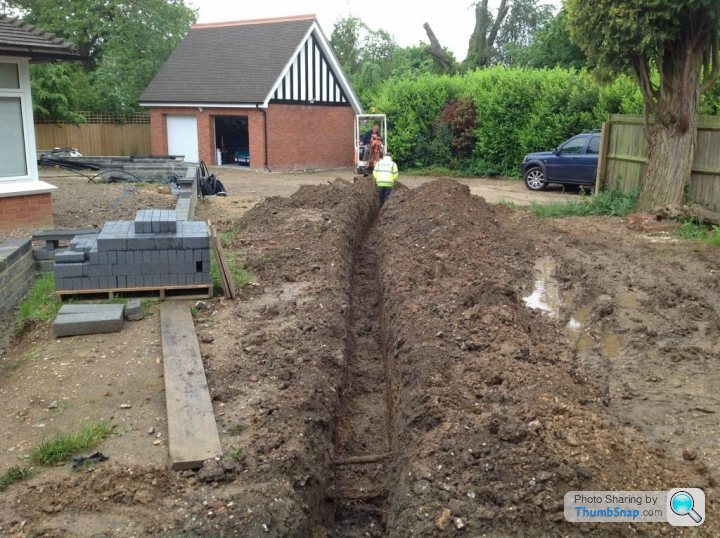
Believe you me I have not lost interest in the rebuild and running new services around the garden will enable me to run a v. large power feed to the garage (16 mm2), which will enable me to power a 'meaty' compressor for sandblasting as well as my MIG welder. The current feed is just not man enough.
Anyway watch this space and I will be back up and running on the rebuild.
Pete
I know you will hate me for this but the following are a few snaps of the current 'project':
Believe you me I have not lost interest in the rebuild and running new services around the garden will enable me to run a v. large power feed to the garage (16 mm2), which will enable me to power a 'meaty' compressor for sandblasting as well as my MIG welder. The current feed is just not man enough.
Anyway watch this space and I will be back up and running on the rebuild.
Pete
cindydog3 said:
Yep. Know that situation all too well! We all have our cross to bear! At least you managed to squeeze the green meanie into the shot.
P.s. Tidy looking portaloo you have there!
Couldn't do a shot without a TVR in there...!P.s. Tidy looking portaloo you have there!
Portaloo is surprisingly useful!
Back in Kazakhstan now to earn the money for the next round of the projects so no progress for the next 5 weeks but probably considerably more comments from me.
Pete
You probably thought I had given up, well after a bit of a break I've very willingly eased myself back into it. Put a thumping great 16mm2 feed to garage to enable me to run a big compressor for blasting as well as welding.
Thought I would ease myself in gently. I have a thing about the silicone smears under the bonnet so thought I would start on hatches for clutch master cylinder, fuse box and lights:

I plan to take moulds off these once I have got the required finish and then produce new ones (for others as well once I have proved I can do it). I plan to fix using stainless rivnuts and stainless button screws:
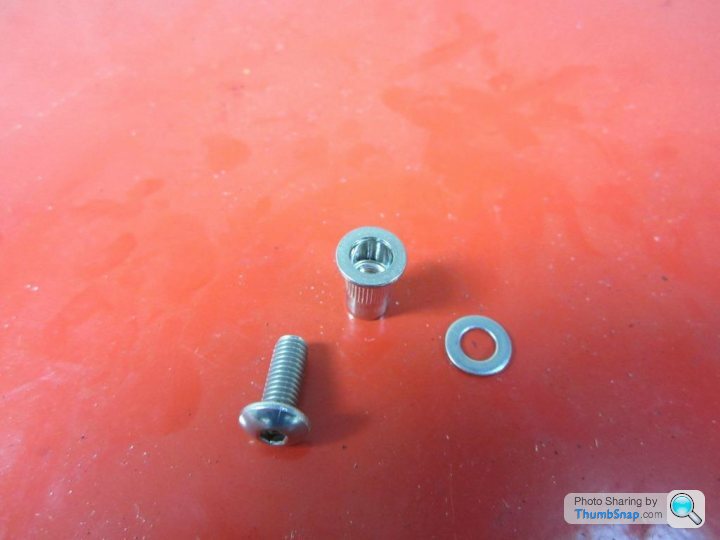
In order to not crush the GRP covers I plan to cut off a flush rivnut and use the top part as a sleeve, benefit is it is splined so it should fix into the GRP cover. I've been discussing with PeteGriff how to produce these in quantity if others want to take advantage of the future moulds.
I also want to make up a cover for the brake master cylinder:

Has anybody else done it already? If so I would much appreciate a moulding from that cover. If not, anybody have any good ideas how to make up a buck to take a mould from - 3D Printer perhaps.
Thought I would try my hand at powder coating using my £6.98 oven acquired from Fleabay:

Where better to start then the prop-shaft:

My first ever powder coated component... It wasn't hard.
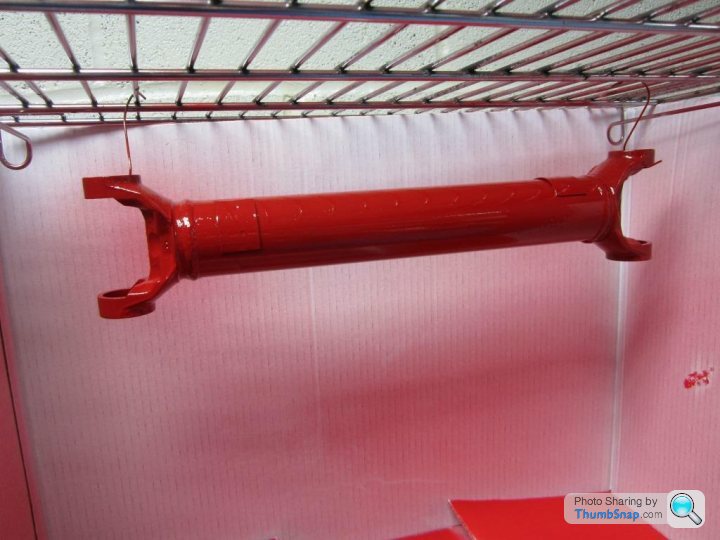
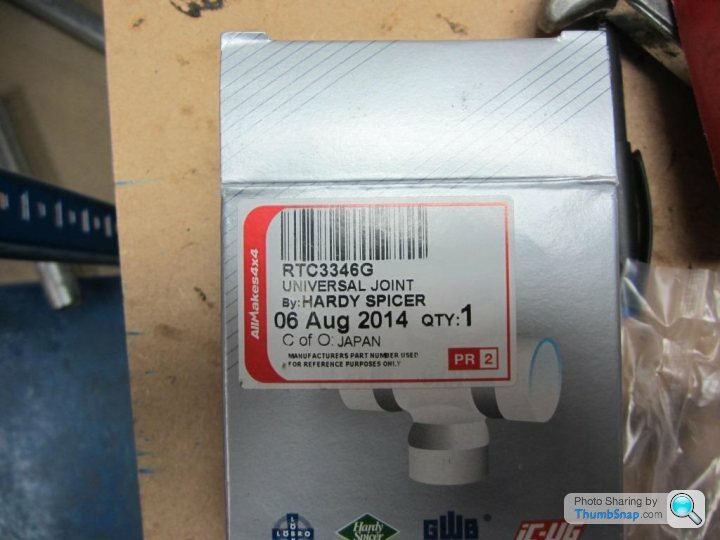
New UJs:

I used these from LR Direct. £10.21 each. Why, because they are the same as I took off.
Here is the final bearing cap going on:

And the final product:
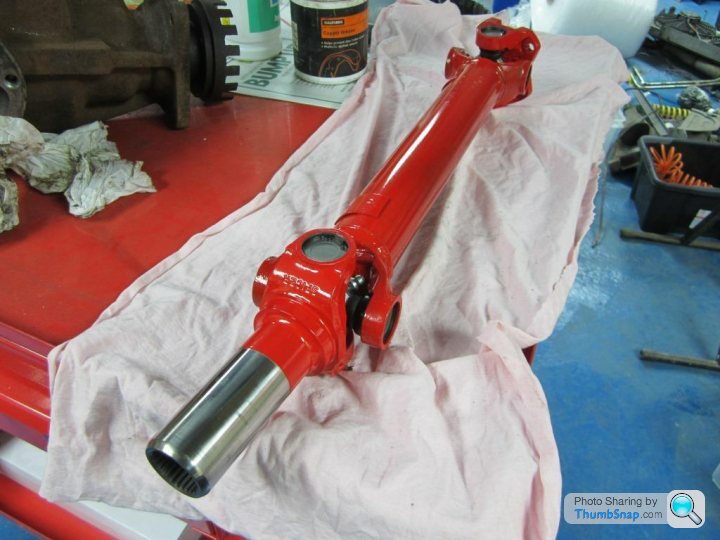
Purists won't like the colour, however I have decided to have a bit of fun. Things that rotate, prop-shaft and drive shafts in red, suspension in blue. Chassis, not sure yet....!
Now I can use the welder I need to get back to the chassis and weld up those brackets for the seats and the battery and get it off to the galvanizer. Pete
Thought I would ease myself in gently. I have a thing about the silicone smears under the bonnet so thought I would start on hatches for clutch master cylinder, fuse box and lights:
I plan to take moulds off these once I have got the required finish and then produce new ones (for others as well once I have proved I can do it). I plan to fix using stainless rivnuts and stainless button screws:
In order to not crush the GRP covers I plan to cut off a flush rivnut and use the top part as a sleeve, benefit is it is splined so it should fix into the GRP cover. I've been discussing with PeteGriff how to produce these in quantity if others want to take advantage of the future moulds.
I also want to make up a cover for the brake master cylinder:
Has anybody else done it already? If so I would much appreciate a moulding from that cover. If not, anybody have any good ideas how to make up a buck to take a mould from - 3D Printer perhaps.
Thought I would try my hand at powder coating using my £6.98 oven acquired from Fleabay:
Where better to start then the prop-shaft:
My first ever powder coated component... It wasn't hard.
New UJs:
I used these from LR Direct. £10.21 each. Why, because they are the same as I took off.
Here is the final bearing cap going on:
And the final product:
Purists won't like the colour, however I have decided to have a bit of fun. Things that rotate, prop-shaft and drive shafts in red, suspension in blue. Chassis, not sure yet....!
Now I can use the welder I need to get back to the chassis and weld up those brackets for the seats and the battery and get it off to the galvanizer. Pete
PeteGriff said:
Pete you are having fun!! Looks like your feminine side is coming out with all these bright colours!
I like you powder coating exploits using that 2nd hand oven. Just to help, you need to achieve at least 192C for the powder (which are polyester based) to melt and flow. It also pays to apply a pre coat to assist the bonding, usually a phosphate dip is used.
The sealant application in your Griff does seem to have been previously done by a monkey, I can see why you want to make some nice covers.
By the way, how far away are you with the massive TVR workshop and garage project?
Best regards, Pete
Hi Pete, yes, must be my feminine side.....I like you powder coating exploits using that 2nd hand oven. Just to help, you need to achieve at least 192C for the powder (which are polyester based) to melt and flow. It also pays to apply a pre coat to assist the bonding, usually a phosphate dip is used.
The sealant application in your Griff does seem to have been previously done by a monkey, I can see why you want to make some nice covers.
By the way, how far away are you with the massive TVR workshop and garage project?
Best regards, Pete
I hadn't considered pre-dipping or spraying, is that zinc phosphate paint or what? I've just blasted and then cleaned/de-greased using acetone.
Oven works fine. Crank it up high until the powder melts then down to 180C for ten minutes to harden the coating as per suppliers instructions. Powder is cheap as chips, £15 per kilo and a kilo goes a long way. Anybody in Berkshire area wants to have a go my doors are open.
I'm not sure what to do about that cover but I know it looks a mess right now as it does on a lot of Griffs. Perhaps if I use some sort of resin mould around the shape and then get the resin block machined so I know it fits over the master cylinder. The bonnet sits fairly close to the top of the master cylinder though.
TVR workshop and garage are fine, it's the garden that needs finishing. Be in touch. Pete
Quinny said:
Snot mine
Mine's like this

Quinny, I've been searching for hours for that photo of your car - I couldn't find the thread but I remembered it from a couple of years back. I was planning to plagiarise your clutch master cylinder cover. You don't happen to have a mould or a spare I could take a mould from do you? Mine's like this
Other thread is this one:
http://www.pistonheads.com/gassing/topic.asp?h=0&a...
It's Marty V8's car
Pete
Edited by Pete Mac on Friday 24th October 05:27
andy43 said:
Pete Mac said:
Quinny said:
Yes.... You can have mine to copy.....,I'll probably be putting it on SORN at the end of Nov.... So just tell me where to send it.
Guys, I have all the gear, the gel coat for moulds the GRP mat, the resin, wax, release agent etc. but what I didn't have is a cover for the clutch master cylinder nor a way around making one. I had some ideas but the best option would be to take a mould off Quinny's if he is willing. My intention would be to produce moulds for all the hatches/covers and make them available to the Griff/Chimp fraternity. Haven't worked out how that would work yet as I hadn't planned to go into major scale production but I would like to share everything that I get out of this - anything to keep these cars on the road - I also need to finalise how I'm going to fix the hatches.Quinny, I could PM you my address with a promise not to break it. I am back to Kazakhstan next week for 5 weeks but then could take a mould off your cover as soon as I get back, say 2nd week in December and then get it straight back to you - if I f
k it up (which I don't intend to), then I promise to replace it.PeteGriff seems to be a bit of a mentor on the production side. Pete, got any better ideas?
Pete
Quinny said:
Yes pete.... Just pm me your address...and I'll send it over.....might as well send you the brake master cylinder one too
Quinny, I've PMed you with my contact details. Don't worry about the brake master cylinder cover as I have one already and I don't want to risk yours. I will undertake to make mould/covers available to all although it won't be until the new year some time. I will need to experiment with fixings unless everybody wants to play with their own....!By the way the LS3 motor has not gone unnoticed. No wonder you SORN the car - a bit hairy in the snow and ice....? Pete
Gassing Station | Griffith | Top of Page | What's New | My Stuff