Nut and Bolt rebuild - sensible mods
Discussion


For those who remember or care, it's been a long time coming but I'm back on it. A bit of early retirement and having finished many of the pressing projects around the house I can finally put my mind back on the rebuild.
I thought I would ease myself in gently and rebuild the callipers.
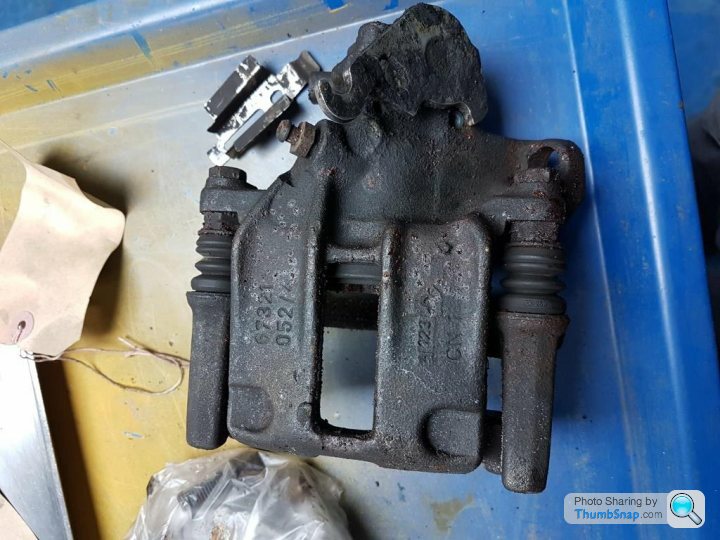
Stripped them down

and got degreasing

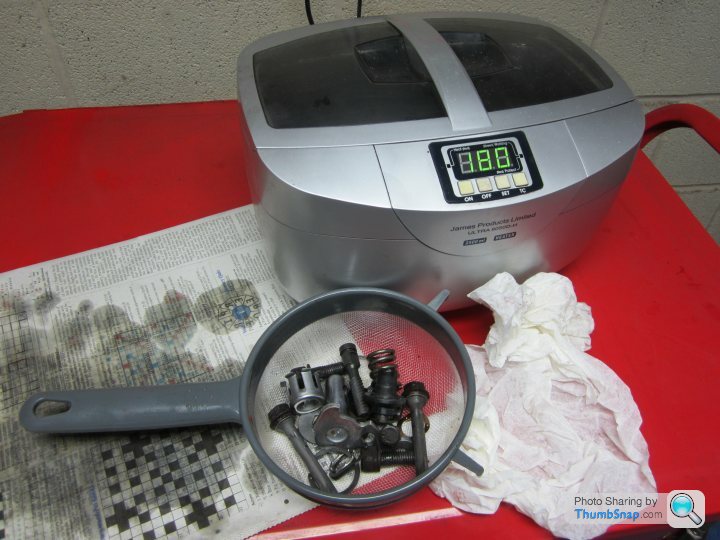
I'm not sure about the ultra-sonic cleaner. I think it does a good job and the good thing is it heats the solvent which adds to the effectiveness of the cleaning, however I reckon I could do the same job in the parts washer with a good scrub.
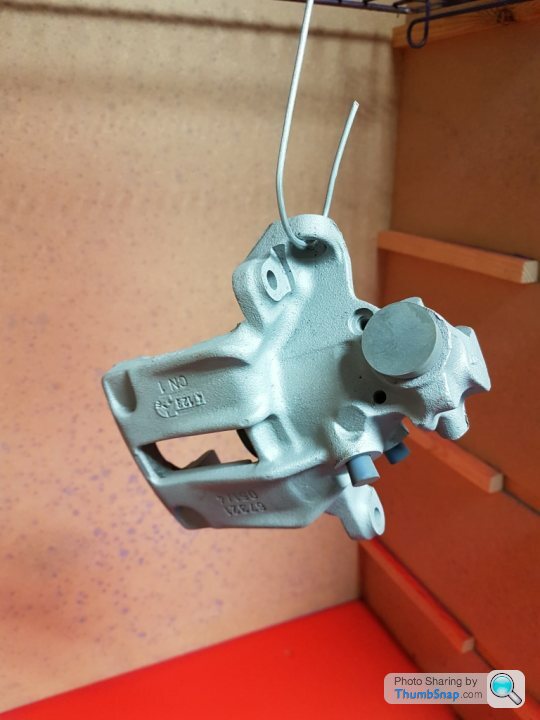
I gave the callipers a good blast
and then powder coated them
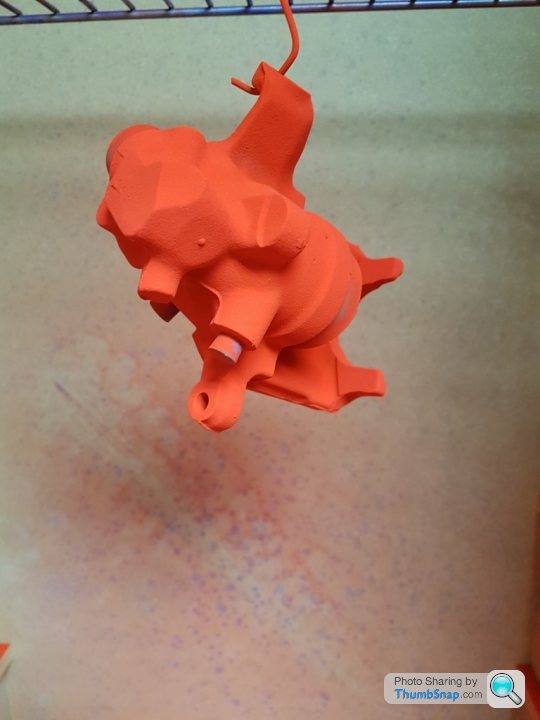
and into the oven. I reckon my powder coating skills have improved and I realise that you can really load the powder onto the callipers and on the rough finish of the callipers it really helps to smooth out the casting. You will note that I used a combination of silicone plugs as well as old bolts and pistons to keep the blast media and powder coat out of the internals. I like the silicone plugs but they do get blasted out by the airline as well as the heat from the oven expanding the air inside
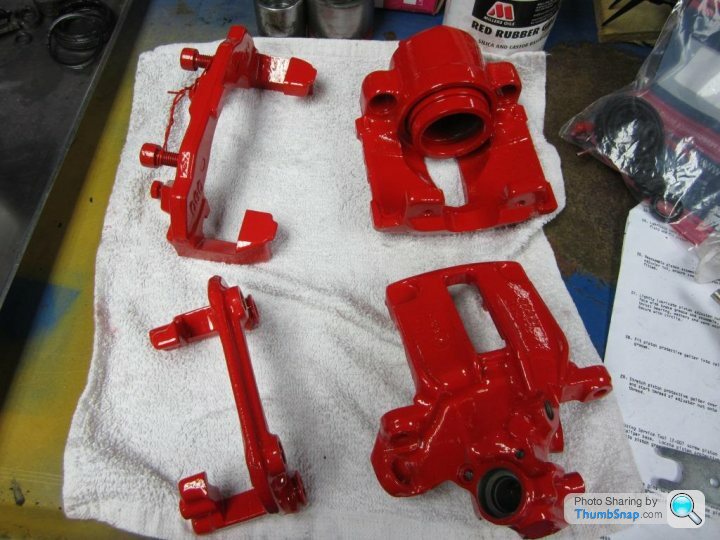
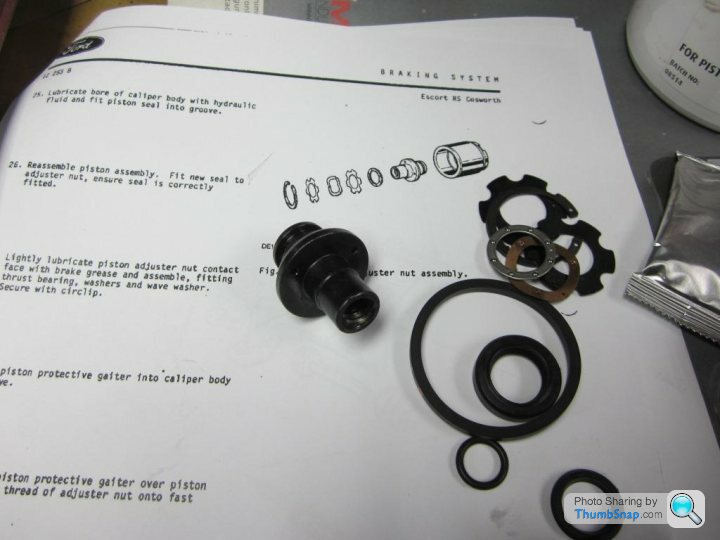
and on to the rebuild. I did a bit of shopping around for the rebuild kits including new pistons and ended up with Bigg Red. Spoke to a bloke called James Priest who couldn't have been more helpful and the prices were very competitive. He also threw in clips and springs for the rear callipers as well as titanium bleed nipples because they didn't have any stainless steel - couldn't be fairer than that....
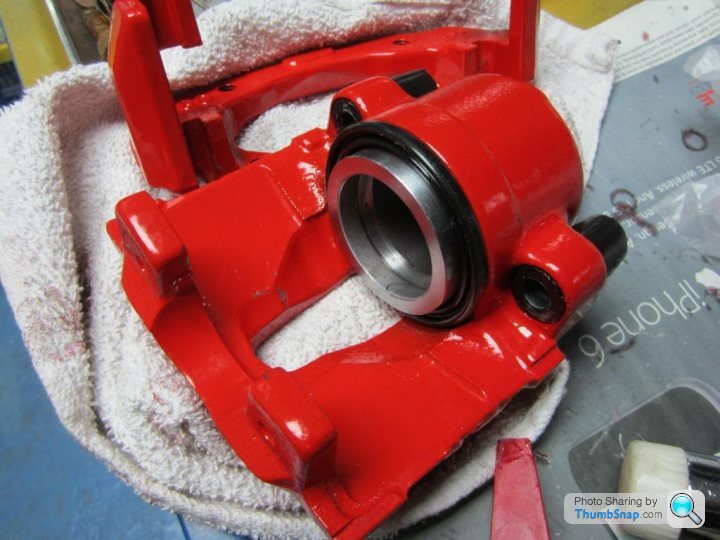
Front callipers are pretty straight forward
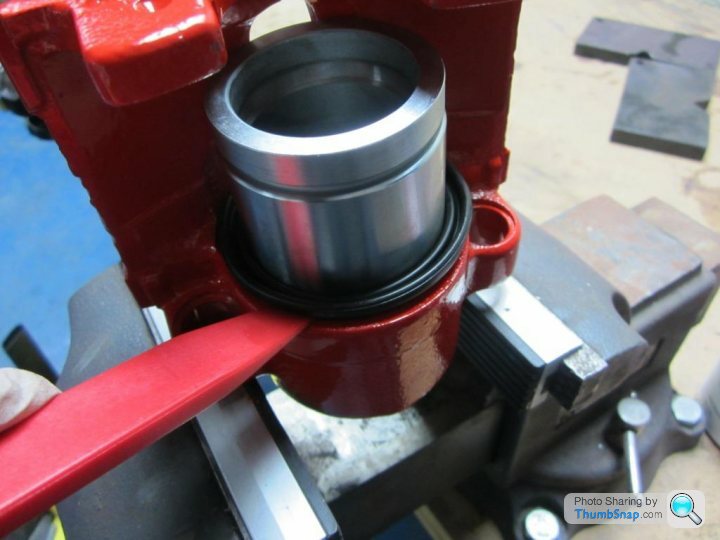
There are a number of ways of getting those dust seals on. I put them at the bottom of the piston and used a plastic trim tool to ease them into the seating, it worked for me
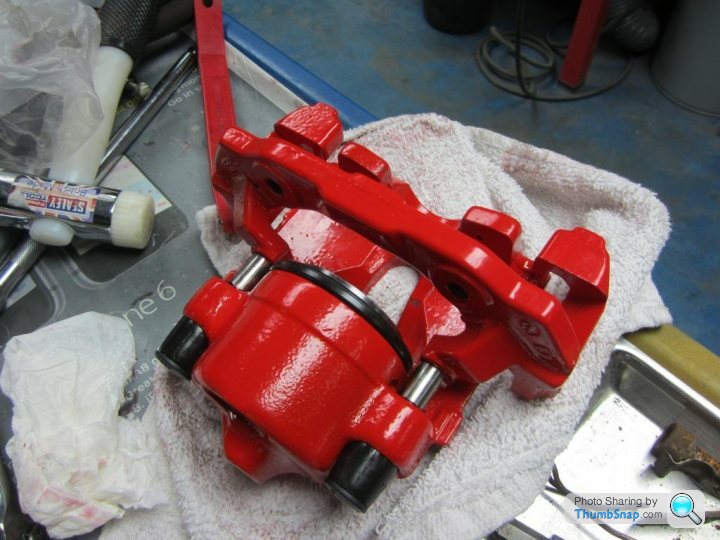
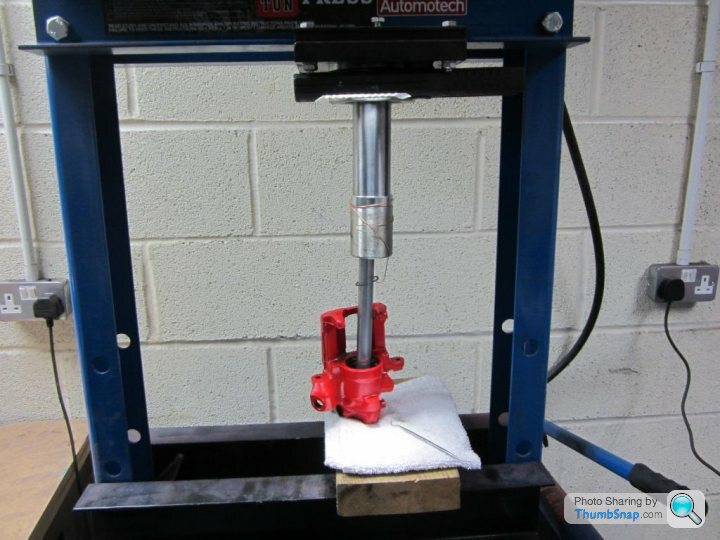
The rear callipers are a more difficult and the first one I used the press to compress the spring to get the circlip in
However the next one I used a G clamp and socket, more controllable. Don't have a photo but this is the little tinker when stripping down
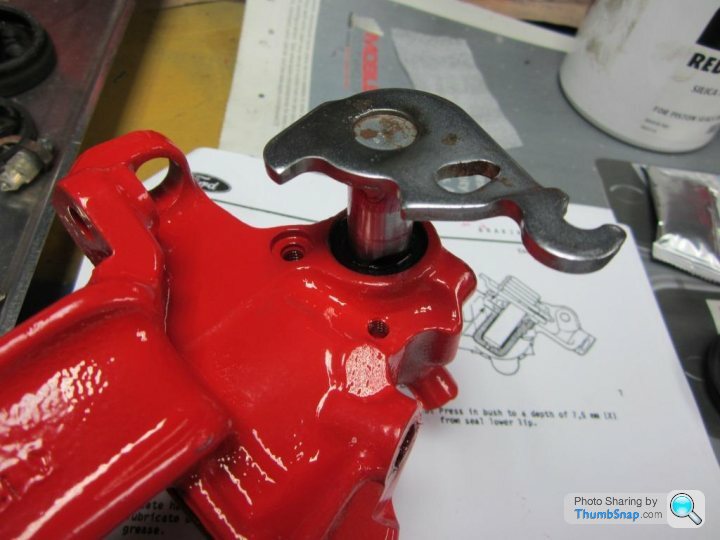
Handbrake mechanism

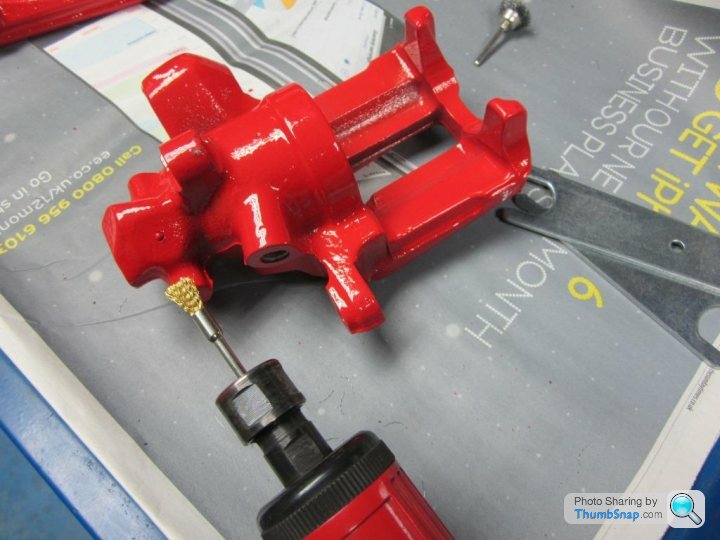
A couple of tips here. I do have a bore hone, however the bores where in good nick so I generally used a die grinder with a range of little wire brushes
essential tool for the rear callipers was this long nosed, right angle snap ring pliers.

These are Laser from Amazon but I'll bet there are plenty of options there and the other essential ingredient is rubber grease
Note I am using old bolts for now but will replace them all when I start putting the car together. I will also have a go at re-plating some of the components. I've got the kit, I just need to start using it.
For those that are interested I'll follow this up with the next episode of the rebuild. I need to put my mind to sorting that chassis out in the new year......
As you can see I want to do as much of this work as I possible can so next jobs will include the diff, the gearbox and of course the engine itself. I am also interested in putting in Impreza power steering but that is also for next year.
If anybody wants to give it a go themselves then happy to help where I can.
Have a good Christmas and New Year chaps.
Pete
I thought I would ease myself in gently and rebuild the callipers.
Stripped them down
and got degreasing
I'm not sure about the ultra-sonic cleaner. I think it does a good job and the good thing is it heats the solvent which adds to the effectiveness of the cleaning, however I reckon I could do the same job in the parts washer with a good scrub.
I gave the callipers a good blast
and then powder coated them
and into the oven. I reckon my powder coating skills have improved and I realise that you can really load the powder onto the callipers and on the rough finish of the callipers it really helps to smooth out the casting. You will note that I used a combination of silicone plugs as well as old bolts and pistons to keep the blast media and powder coat out of the internals. I like the silicone plugs but they do get blasted out by the airline as well as the heat from the oven expanding the air inside
and on to the rebuild. I did a bit of shopping around for the rebuild kits including new pistons and ended up with Bigg Red. Spoke to a bloke called James Priest who couldn't have been more helpful and the prices were very competitive. He also threw in clips and springs for the rear callipers as well as titanium bleed nipples because they didn't have any stainless steel - couldn't be fairer than that....
Front callipers are pretty straight forward
There are a number of ways of getting those dust seals on. I put them at the bottom of the piston and used a plastic trim tool to ease them into the seating, it worked for me
The rear callipers are a more difficult and the first one I used the press to compress the spring to get the circlip in
However the next one I used a G clamp and socket, more controllable. Don't have a photo but this is the little tinker when stripping down
Handbrake mechanism
A couple of tips here. I do have a bore hone, however the bores where in good nick so I generally used a die grinder with a range of little wire brushes
essential tool for the rear callipers was this long nosed, right angle snap ring pliers.
These are Laser from Amazon but I'll bet there are plenty of options there and the other essential ingredient is rubber grease
Note I am using old bolts for now but will replace them all when I start putting the car together. I will also have a go at re-plating some of the components. I've got the kit, I just need to start using it.
For those that are interested I'll follow this up with the next episode of the rebuild. I need to put my mind to sorting that chassis out in the new year......
As you can see I want to do as much of this work as I possible can so next jobs will include the diff, the gearbox and of course the engine itself. I am also interested in putting in Impreza power steering but that is also for next year.
If anybody wants to give it a go themselves then happy to help where I can.
Have a good Christmas and New Year chaps.
Pete
Gassing Station | Griffith | Top of Page | What's New | My Stuff