Project track hound - Budget Mx5 build
Discussion


Salgar said:
OP, I've just bought an MX-5 and am looking to do something similar (albeit slower), which of those books have been those most useful? Which do you think would be the most useful for a complete amateur?
The "Do it up" Mx5 book has probably been the most useful but to be fair they are two very different books.The "Do it up" book is more of an ownership manual than a workshop manual. It covers all of the major jobs you’re likely to do from changing the roof, to servicing and replacing brakes etc but also contains a lot of useful model specific information you wouldn't expect such as common age related problems, how to clear out the drain holes, how and where to apply rust proofing, a buyers guide etc. Unlike a normal workshop manual it also has really nice colour pictures which are much more helpful than the grainy black and yellow pictures you normally get. The book is however full of 'filler' in places such as model history which seems to be there just to pad the book out.
The other book is much more traditional even down to the toilet paper it’s printed on. It covers a much wider range of topics but it's based on a strip down on a fairly new US spec model in a very ordered fashion so doesn't come with that ownership perspective. The US spec models are also different so it can sometimes take some translation (e.g I think I've read that the wiring diagrams are completely different). While I haven't used it much it will come in handy when I need to change/fix something which isn't covered in the other book.

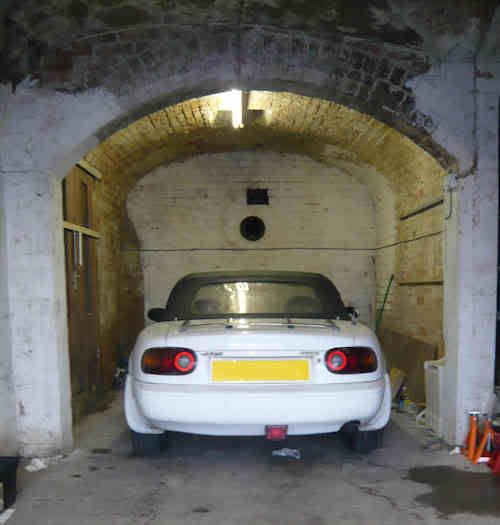
A bit of an update on the Mx5 track car, with the front end of the car done, it was time to move onto the rear of the car. The garage is on a slight slope so I only jack with the slope rather than against it, so to work on the back of the car, I reassembled the front, dropped it back on its wheels and spun the car around.
The extended period with the wheels in the air and lack of general movement had led to the rear offside handbrake to become well and truly stuck which led to some excitement trying to turn the car around, but given I plan to change all the brakes not too much of a concern.
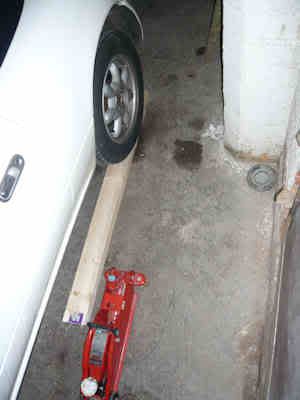
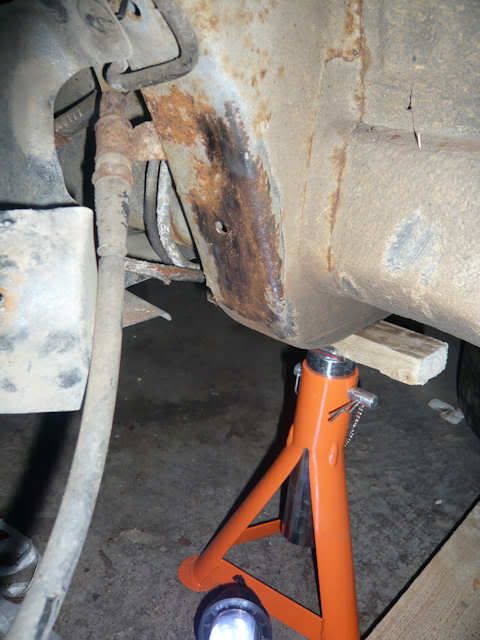
Jacking the car up on to axel stands was a pain. Everyone tells you to jack off the differential, which is all well and good, but it’s too low to get a bottle jack under and too far under the car to put a trolley jack underneath and have room for the handle. The solution was to get some wood from Wickes, cut in it half and bump the car up these and then jack from the differential.
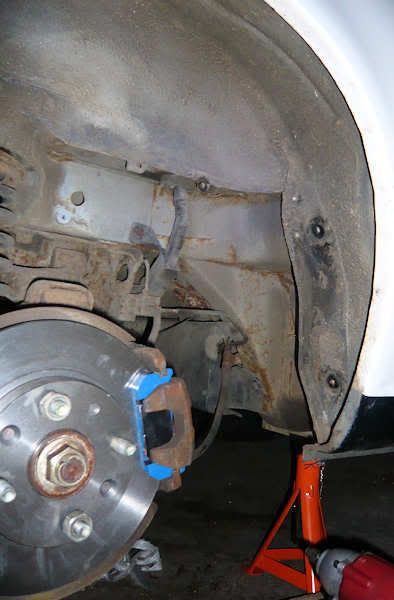
With the car on stands, I went to look at my seized handbrake. I was half expecting to be greeted by a worn out calliper when I took the wheel off but was surprised to find a shiny new one instead…
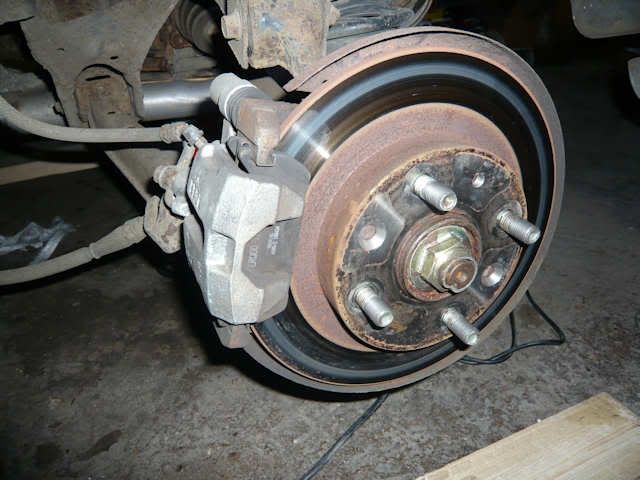
I can only assume that someone had replaced the calliper and not adjusted it properly. I replaced the pads with Mazda OEM’s, generic discs and with plenty of grease. There was hardly any grease there originally and no return springs which probably didn’t help the handbrake operation.
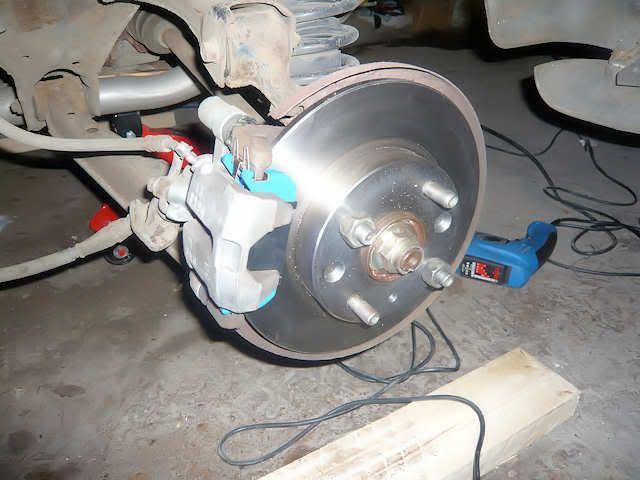
Helpfully the bleed screw on this calliper was on a 7mm fitting (who carries 7mm spanners) so I also got to treat myself to a new set of spanners.
The arches themselves were pretty spotless but removing the plastic liners revealed some rust patches which looked a little scary in places
Lucky sanding down revealed this was all just surface rust…
…so this was solved with a layer of Kurust followed up with some underseal.
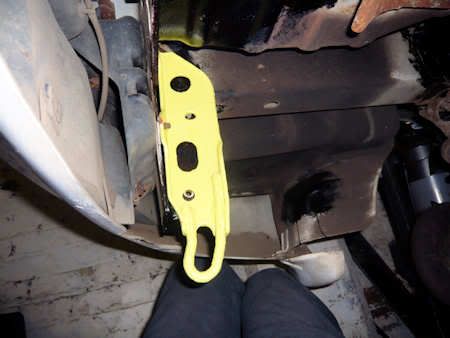
Looking under the boot floor, there was a lot of surface rust, with a lot of it centred around the towing mounts.
I took these off, sanded down the back of the car and recoated with underseal and took the opportunity to repaint the towing eyes in a rather fetching yellow.
In my on going quest to tidy the car up a bit (someone on this site very wisely described these projects as ‘raceorations’) I removed the sill kick places to check for rust…
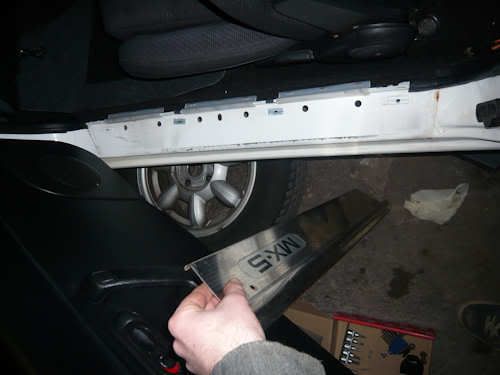
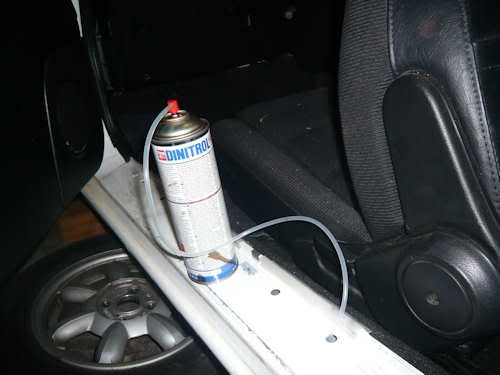
…and apart from one patch on the drivers side found the underside to be in pretty good nick. I also found a set of access holes underneath into the sills so used the opportunity to fill the sills full of Dinitrol to slow any potential corrosion down as the sills are a known weak spot.
With the rear of the car in the air I then moved onto the roll bar fitting, but that requires a post all of its very own…….
The extended period with the wheels in the air and lack of general movement had led to the rear offside handbrake to become well and truly stuck which led to some excitement trying to turn the car around, but given I plan to change all the brakes not too much of a concern.
Jacking the car up on to axel stands was a pain. Everyone tells you to jack off the differential, which is all well and good, but it’s too low to get a bottle jack under and too far under the car to put a trolley jack underneath and have room for the handle. The solution was to get some wood from Wickes, cut in it half and bump the car up these and then jack from the differential.
With the car on stands, I went to look at my seized handbrake. I was half expecting to be greeted by a worn out calliper when I took the wheel off but was surprised to find a shiny new one instead…
I can only assume that someone had replaced the calliper and not adjusted it properly. I replaced the pads with Mazda OEM’s, generic discs and with plenty of grease. There was hardly any grease there originally and no return springs which probably didn’t help the handbrake operation.
Helpfully the bleed screw on this calliper was on a 7mm fitting (who carries 7mm spanners) so I also got to treat myself to a new set of spanners.
The arches themselves were pretty spotless but removing the plastic liners revealed some rust patches which looked a little scary in places
Lucky sanding down revealed this was all just surface rust…
…so this was solved with a layer of Kurust followed up with some underseal.
Looking under the boot floor, there was a lot of surface rust, with a lot of it centred around the towing mounts.
I took these off, sanded down the back of the car and recoated with underseal and took the opportunity to repaint the towing eyes in a rather fetching yellow.
In my on going quest to tidy the car up a bit (someone on this site very wisely described these projects as ‘raceorations’) I removed the sill kick places to check for rust…
…and apart from one patch on the drivers side found the underside to be in pretty good nick. I also found a set of access holes underneath into the sills so used the opportunity to fill the sills full of Dinitrol to slow any potential corrosion down as the sills are a known weak spot.
With the rear of the car in the air I then moved onto the roll bar fitting, but that requires a post all of its very own…….

Greg_D said:
i have done almost the same thing a couple of years ago
http://sites.google.com/site/phoenixraceworx/home
you don't need to go any further in order to get a particularly good track car.
you will be amazed what you can keep honest with a well set up 5 (having gone to 'Lotus on track' days, it was only the racing elises and exiges that were any faster)
Have a read!
Greg
I can't believe you did that to such a nice Mx5!http://sites.google.com/site/phoenixraceworx/home
you don't need to go any further in order to get a particularly good track car.
you will be amazed what you can keep honest with a well set up 5 (having gone to 'Lotus on track' days, it was only the racing elises and exiges that were any faster)
Have a read!
Greg
Thanks for the support guys.
Thought I would do an update on probably the most serious modification I plan to make to the car, fitting the roll bar. As mentioned before I went for a TR lane GP bar because it allowed me to keep the roof of the car up and didn’t require the assistance an expert welder.
Fitting instructions are provided on their website ( TR lane ) but they don’t really do the task justice so I thought I would provide a fairly detailed post as the only other ones I can find on the internet seem to be for older designs (I’ve also just noticed that they’ve brought the price down so they’re even cheaper now). There is one here on the Mx5 owners club but its for an older design – mx5oc
To do a decent job you will need
· A grinder with a decent set of grinding and cutting discs
· A table fork
· Right angled drill + electric drill
· 10MM drill bit which is either very short or has been combined with the grinder
· Some metal plates
· Some Kurust + underseal
· Pair of sheet metal nibblers
· Normal sockets, screw drivers etc
To start with you need to take the trim off the back of the car around the parcel shelf. The main difficulty is removing the carpet tacks. I used a method I stole from somebody on one of the Mx5 forums by using a fork and a screwdriver allowing you to remove the tacks and keep them reusable.

Then remove the side trim and the seat belts
and roll back the carpet on the parcel shelf.
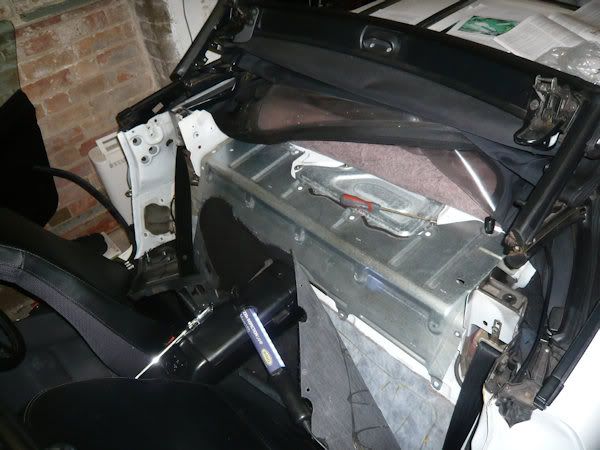
Then undo the 10 or so nuts to reveal the fuel tank and the base of the car. It will also help to empty the trim from the boot so you can come in from underneath when fitting the bar.
Now you come to the stage in the instructions which innocently says “THE TWO ANGLE BRACKETS WHICH THE REAR PARCEL SHELF MOUNTS TO, YOU WILL NEED TO REMOVE 4" OF THIS EACH SIDE”.
This actually translates to 'whip out the grinder and grind off the bits of metal hanging off the central structural mounting of the car'.
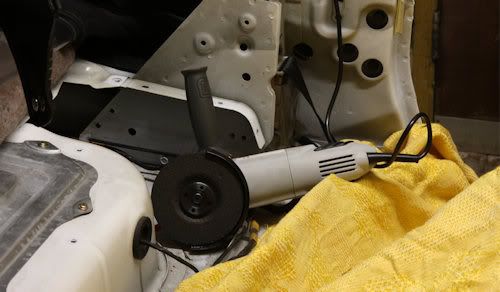
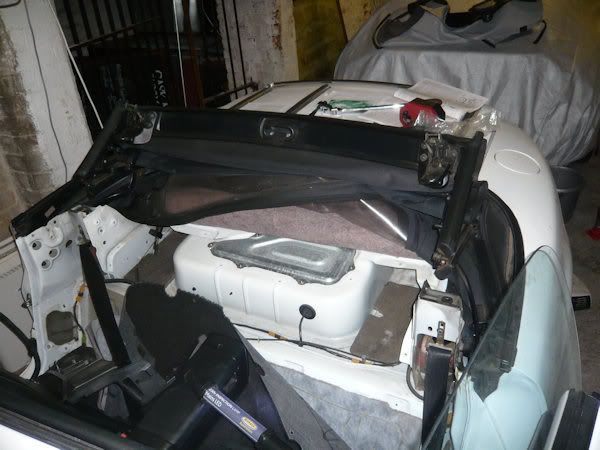
Its been a while since I have used the grinder but after some on the job practice, I removed said pieces of metal with a cutting disc and the ground the sharp edges off
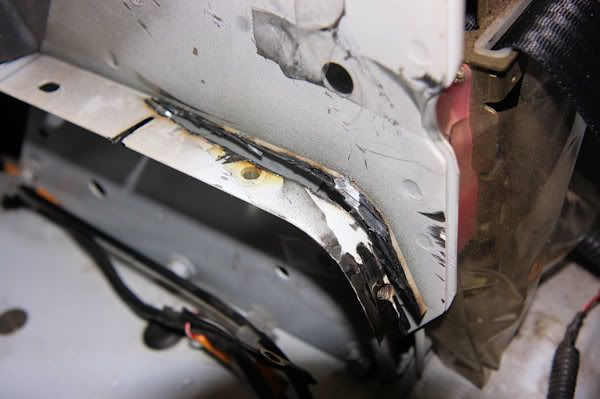
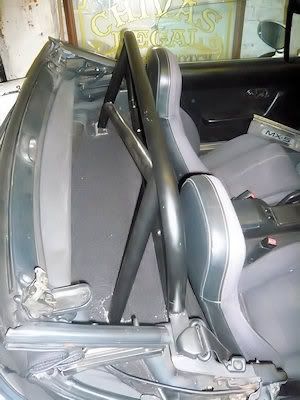
It best to try and cover the car as best you can here or you will be picking metal shavings out the car for years (and if you don’t they will start creating rust strains in the carpet). Once done the bar is able to sit properly in the car
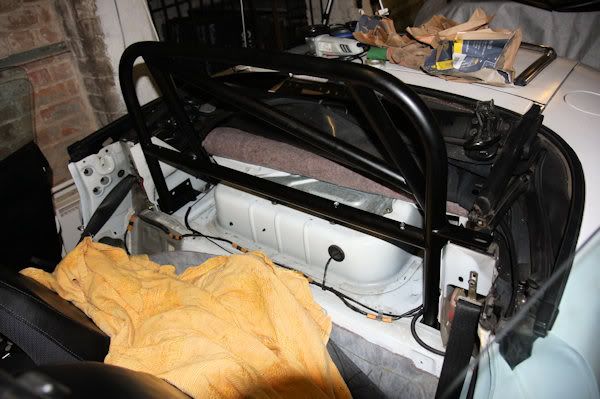
I had the optional harness bar fitted which tends to warp the size of the bar a bit, thus I decided to fit the horizontal mounting first to stretch the bar back into shape, so that it sat precisely between the two seat belt towers.. This brings up the first problem, which there really isn’t enough room to get a drill to the hole you need to drill.
Therefore this required the purchase of a right angle drill. Machine mart have a good one for £20 but were out of stock so I ended up getting mine from B&Q (and it was rubbish to the point I stripped the gears on the second to last hole but that’s another story)
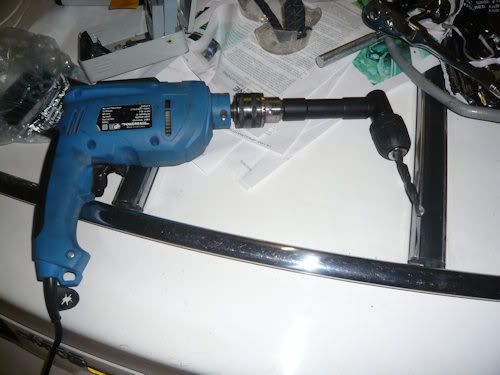
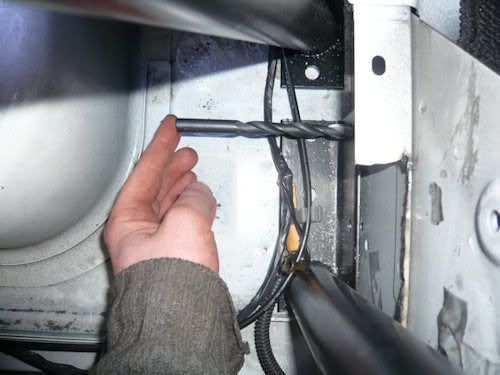
For the front mounting points you can drill the mounting points with a 10mm drill bit as long as you cut an inch off the bit with a grinder so it will fit in the gap.
For the rear mounting points, you have even less room, with one mounting point being easier to get to from the boot.
You either need to cut the drill bit down to a stub, or do what I did, which is use a 3mm drill bit to drill down, then drill back up with a 10mm bit and then use the spreader plate as a template to drill the other holes.
With the holes drilled, I ran round with some kurust just to seal the fresh metal and started to fix the bar in place.
As mentioned the bar is supplied with some spreader plates….
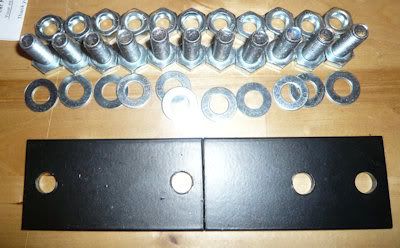
…but only for the rear mounting points. I’m guessing the lack of room and the thickness of the metal at the other mounting points meant that they decided not to provide them. Given this is a safety item, I brought a couple of small metal plates for pounds from B&Q to fit in addition to these mounting plates and cut them to shape with the grinder. The seat belt towers are pretty thick and I guess this is where the majority of the strength comes from but I took the Tesco approach of every little helps.
I took a similar approach to the vertical mounting points. There isn’t a lot of room and they are very close to some metal seams but I added some anyway.
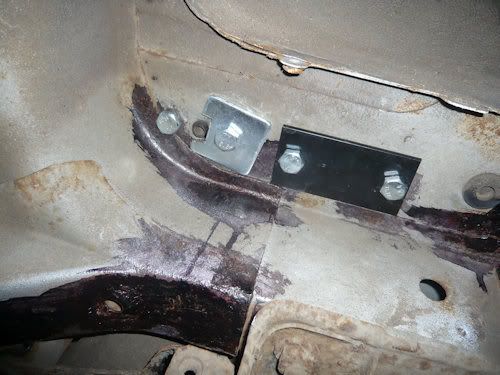
With it fitted I coated the mounting points in underseal to make them more water resilient and then used a set of steel nibblers to cut holes in the parcel shelf so I could screw that back in.

I then put the interior trim back on using a hack saw to cut a few pieces out of the plastic trim so they would fit back round the roll bar.
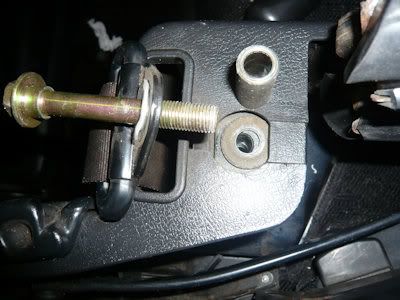
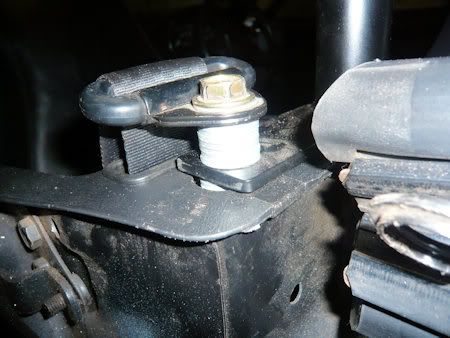
The roll bar also bolts into the top seat belt mounting in addition to the towers themselves. For the bar to bolt in, you need to take out a spacer around the seat belt mounting bolt, but the spacer is bigger than the piece of metal supplied with roll bar, so you will need to either cut the spacer down to size, or in my case, get a load of M12 washers to fill the gap.
I then trimmed the parcel shelf carpet with a bread knife and job done…….
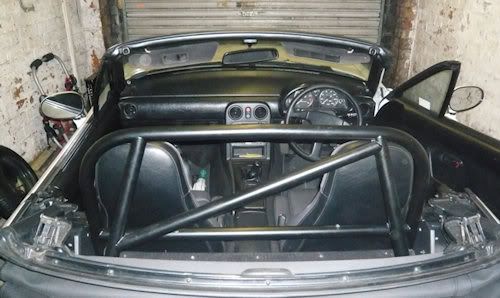
The roll bar looks like a well made piece of kit especially for the money but the mounting points IMO aren’t up to roll cage standards, but then it’s not designed to take the forces that a roll cage is designed to take, its designed to stop you getting beheaded if you dig into a gravel trap, not maintain cabin shape in a full frontal collision, thereofre despite being surprised at the fitting process, I guess I'm comfortable. The direction of the forces should be generally towards the metal, not away from it.
Now that the bar is in place it's time for a test run before the next stage.....
Thought I would do an update on probably the most serious modification I plan to make to the car, fitting the roll bar. As mentioned before I went for a TR lane GP bar because it allowed me to keep the roof of the car up and didn’t require the assistance an expert welder.
Fitting instructions are provided on their website ( TR lane ) but they don’t really do the task justice so I thought I would provide a fairly detailed post as the only other ones I can find on the internet seem to be for older designs (I’ve also just noticed that they’ve brought the price down so they’re even cheaper now). There is one here on the Mx5 owners club but its for an older design – mx5oc
To do a decent job you will need
· A grinder with a decent set of grinding and cutting discs
· A table fork
· Right angled drill + electric drill
· 10MM drill bit which is either very short or has been combined with the grinder
· Some metal plates
· Some Kurust + underseal
· Pair of sheet metal nibblers
· Normal sockets, screw drivers etc
To start with you need to take the trim off the back of the car around the parcel shelf. The main difficulty is removing the carpet tacks. I used a method I stole from somebody on one of the Mx5 forums by using a fork and a screwdriver allowing you to remove the tacks and keep them reusable.
Then remove the side trim and the seat belts
and roll back the carpet on the parcel shelf.
Then undo the 10 or so nuts to reveal the fuel tank and the base of the car. It will also help to empty the trim from the boot so you can come in from underneath when fitting the bar.
Now you come to the stage in the instructions which innocently says “THE TWO ANGLE BRACKETS WHICH THE REAR PARCEL SHELF MOUNTS TO, YOU WILL NEED TO REMOVE 4" OF THIS EACH SIDE”.
This actually translates to 'whip out the grinder and grind off the bits of metal hanging off the central structural mounting of the car'.
Its been a while since I have used the grinder but after some on the job practice, I removed said pieces of metal with a cutting disc and the ground the sharp edges off
It best to try and cover the car as best you can here or you will be picking metal shavings out the car for years (and if you don’t they will start creating rust strains in the carpet). Once done the bar is able to sit properly in the car
I had the optional harness bar fitted which tends to warp the size of the bar a bit, thus I decided to fit the horizontal mounting first to stretch the bar back into shape, so that it sat precisely between the two seat belt towers.. This brings up the first problem, which there really isn’t enough room to get a drill to the hole you need to drill.
Therefore this required the purchase of a right angle drill. Machine mart have a good one for £20 but were out of stock so I ended up getting mine from B&Q (and it was rubbish to the point I stripped the gears on the second to last hole but that’s another story)
For the front mounting points you can drill the mounting points with a 10mm drill bit as long as you cut an inch off the bit with a grinder so it will fit in the gap.
For the rear mounting points, you have even less room, with one mounting point being easier to get to from the boot.
You either need to cut the drill bit down to a stub, or do what I did, which is use a 3mm drill bit to drill down, then drill back up with a 10mm bit and then use the spreader plate as a template to drill the other holes.
With the holes drilled, I ran round with some kurust just to seal the fresh metal and started to fix the bar in place.
As mentioned the bar is supplied with some spreader plates….
…but only for the rear mounting points. I’m guessing the lack of room and the thickness of the metal at the other mounting points meant that they decided not to provide them. Given this is a safety item, I brought a couple of small metal plates for pounds from B&Q to fit in addition to these mounting plates and cut them to shape with the grinder. The seat belt towers are pretty thick and I guess this is where the majority of the strength comes from but I took the Tesco approach of every little helps.
I took a similar approach to the vertical mounting points. There isn’t a lot of room and they are very close to some metal seams but I added some anyway.
With it fitted I coated the mounting points in underseal to make them more water resilient and then used a set of steel nibblers to cut holes in the parcel shelf so I could screw that back in.
I then put the interior trim back on using a hack saw to cut a few pieces out of the plastic trim so they would fit back round the roll bar.
The roll bar also bolts into the top seat belt mounting in addition to the towers themselves. For the bar to bolt in, you need to take out a spacer around the seat belt mounting bolt, but the spacer is bigger than the piece of metal supplied with roll bar, so you will need to either cut the spacer down to size, or in my case, get a load of M12 washers to fill the gap.
I then trimmed the parcel shelf carpet with a bread knife and job done…….
The roll bar looks like a well made piece of kit especially for the money but the mounting points IMO aren’t up to roll cage standards, but then it’s not designed to take the forces that a roll cage is designed to take, its designed to stop you getting beheaded if you dig into a gravel trap, not maintain cabin shape in a full frontal collision, thereofre despite being surprised at the fitting process, I guess I'm comfortable. The direction of the forces should be generally towards the metal, not away from it.
Now that the bar is in place it's time for a test run before the next stage.....

Time for a bit of an update. After fitting the roll bar, I took the car out for a test run to check it all worked and to pick up some spares from a guy who was breaking his car over towards rutland water.
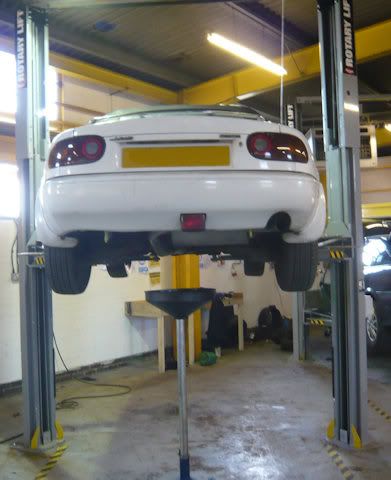
Ended up putting 150 miles on it that day and as I was out and about I decided to make a trip up to a self-service garage which has opened up just north of Nottingham and used one of their 2 post lifts to change the gearbox, engine and diff oil.
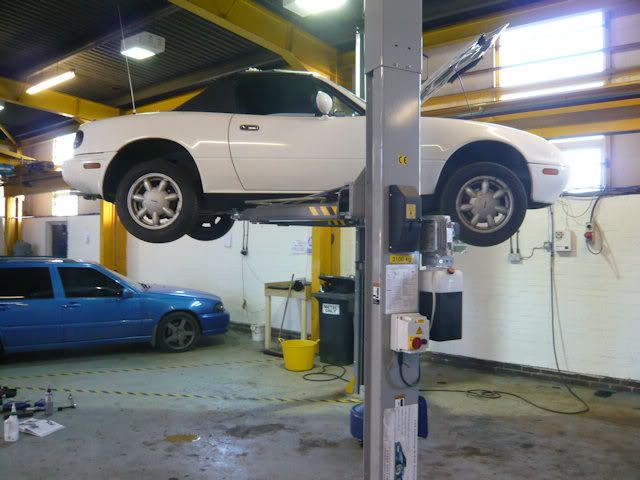
It's a really good setup they've got going on down there and it saved me a lot of messing around jacking the car up and trying to get the car level in order to drain the and refill the gear box.
With this done, it was time to deal with the clutch. The test drive had confirmed to me what I already believed from my first drive of the car, that the clutch biting point was at the top of it's travel and on its way out. While normal road driving would have probably have got another 10 or 20K miles out of it, the car handling day I had in mind wasn't.
Given that this is a fairly major job I decided to hand over to the specialist's and dropped the car off at 5 Speed in Nottingham. They recommended swapping the flywheel for one from a 1.8 Mazda, allowing me to use the 1.8 clutch and gain the benefit of it's large diameter and did this for no extra labour charge.
The guys really know there stuff and worked really hard to get the job done in a short time period, so I thought I should mention them.
Next the seats. After taking the standard seats out and sitting straight on the floor there was only ~2 inches of clearance for my head below the roll bar so I decided being strapped in fully was too much of a risk so I went out and got these...
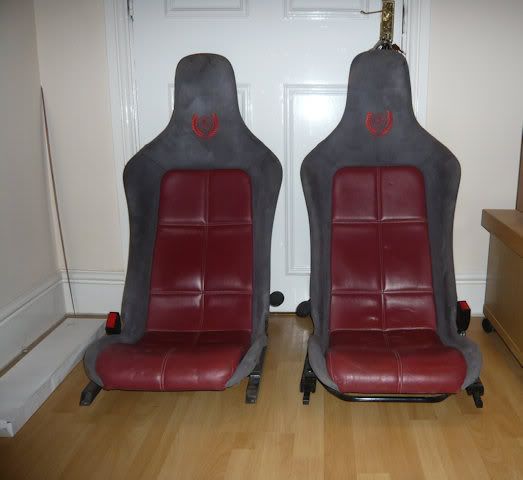
Two Lotus Elise S2 seats from a breakers. Not particularly cheap but should stop me banging my head on the roll bar and get me sitting a little lower, and hopefully look a little like this.
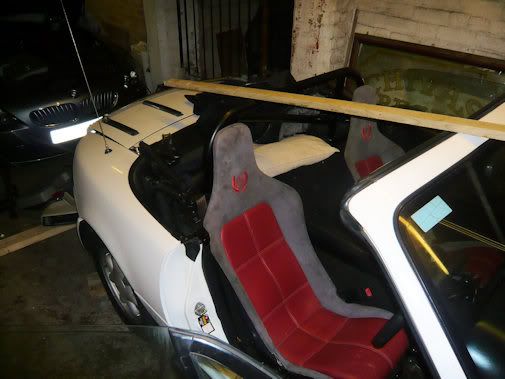
Having spoken to a local machine shop, they told me they could weld on some metal to allow the original lotus frames to attach to the mx5 sliders....
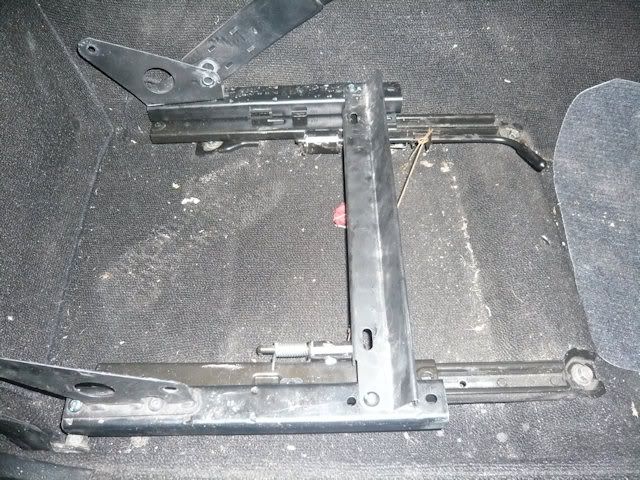
So after just over a week at the fabricators, two sets of welded lotus frames cam back, which just required me to put some holes in the right places, allowing me to fit the seats just in time for my first track day....
However as I tried to bolt everything together, it turned out that the measurements had been lost in translation. With the track day in a matter of hours, I bolted the original seats back in and hoped everything would be fine. Sorry for the lack of pictures on this, but I didn't really have time to take photos trying to get the car ready in time.
We went down to Barkstone heath in Grantham, which rather than a track day, was a mixture of sprint courses, some being more traditional hill climb and others being more of a drift course. Myself and a couple of mates headed down and had a great day...
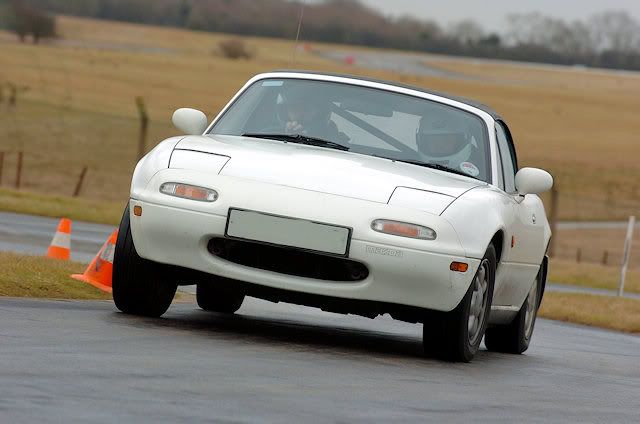
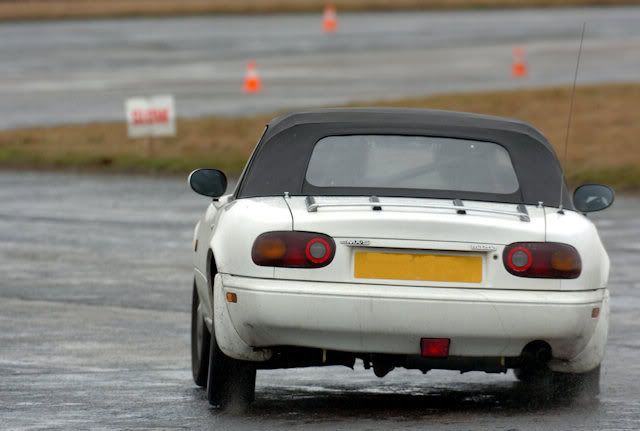
The day was very wet which had me worried as I wasn't sure I would be able to get the helmet under the roof but luckily if I sank down in the seat it just about worked which meant I had a much dryer day than I could have done.
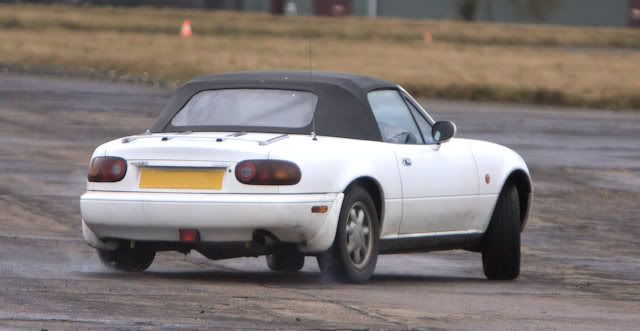
We used the opportunity to swap cars and here is a photo of my mate showing me how to drift properly.
So what next. Well I'm changing job and moving down south so this project is going to be on ice for the next couple of months. Hopefully I'll find some time to drop the lotus seats in. Given the height issues I think they (or at least the drivers seat) will be bolted in my driving postion as rails add too much height.
Ideally I would also want to stiffen up the handling as the car has a worrying tendency to lean on track but that looks like a big money operation and I need to draw the line somewhere so we shall see. I think the plan for now is to get out on another track day.
That and find a decent set of stickers for an Mx5. Do they exist?
Ended up putting 150 miles on it that day and as I was out and about I decided to make a trip up to a self-service garage which has opened up just north of Nottingham and used one of their 2 post lifts to change the gearbox, engine and diff oil.
It's a really good setup they've got going on down there and it saved me a lot of messing around jacking the car up and trying to get the car level in order to drain the and refill the gear box.
With this done, it was time to deal with the clutch. The test drive had confirmed to me what I already believed from my first drive of the car, that the clutch biting point was at the top of it's travel and on its way out. While normal road driving would have probably have got another 10 or 20K miles out of it, the car handling day I had in mind wasn't.
Given that this is a fairly major job I decided to hand over to the specialist's and dropped the car off at 5 Speed in Nottingham. They recommended swapping the flywheel for one from a 1.8 Mazda, allowing me to use the 1.8 clutch and gain the benefit of it's large diameter and did this for no extra labour charge.
The guys really know there stuff and worked really hard to get the job done in a short time period, so I thought I should mention them.
Next the seats. After taking the standard seats out and sitting straight on the floor there was only ~2 inches of clearance for my head below the roll bar so I decided being strapped in fully was too much of a risk so I went out and got these...
Two Lotus Elise S2 seats from a breakers. Not particularly cheap but should stop me banging my head on the roll bar and get me sitting a little lower, and hopefully look a little like this.
Having spoken to a local machine shop, they told me they could weld on some metal to allow the original lotus frames to attach to the mx5 sliders....
So after just over a week at the fabricators, two sets of welded lotus frames cam back, which just required me to put some holes in the right places, allowing me to fit the seats just in time for my first track day....
However as I tried to bolt everything together, it turned out that the measurements had been lost in translation. With the track day in a matter of hours, I bolted the original seats back in and hoped everything would be fine. Sorry for the lack of pictures on this, but I didn't really have time to take photos trying to get the car ready in time.
We went down to Barkstone heath in Grantham, which rather than a track day, was a mixture of sprint courses, some being more traditional hill climb and others being more of a drift course. Myself and a couple of mates headed down and had a great day...
The day was very wet which had me worried as I wasn't sure I would be able to get the helmet under the roof but luckily if I sank down in the seat it just about worked which meant I had a much dryer day than I could have done.
We used the opportunity to swap cars and here is a photo of my mate showing me how to drift properly.
So what next. Well I'm changing job and moving down south so this project is going to be on ice for the next couple of months. Hopefully I'll find some time to drop the lotus seats in. Given the height issues I think they (or at least the drivers seat) will be bolted in my driving postion as rails add too much height.
Ideally I would also want to stiffen up the handling as the car has a worrying tendency to lean on track but that looks like a big money operation and I need to draw the line somewhere so we shall see. I think the plan for now is to get out on another track day.
That and find a decent set of stickers for an Mx5. Do they exist?
Excellent thread mate, ive got a similar project on the go at the moment and have been following with great interest.
Re sorting out the handling, have you seen these: http://www.mx5nutz.com/forum/index.php?showtopic=4...
I too am on a tight budget and am seriously considering some.
Also, you happy with your TRlane roll bar? Im considering one however cant decide wether to go with the gp bar or splash out and get the TD bar?
Keep the updates coming
Mine started out the exact same way, an inexpensive Track Toy, I Auto-Xed and ran on Roadracing courses at Club Track days for years. I kept adding parts like an addict and when the Engine & Trans finally gave up at 165,000 Miles Mostly abusive, on track, I decided to go this way, instead of building a Kit fiberglass Cobra.
http://www.youtube.com/user/LS2V8Miata?feature=mob...
Miata madness is an incurable disease for some of us!
http://www.youtube.com/user/LS2V8Miata?feature=mob...
Miata madness is an incurable disease for some of us!
Gassing Station | Readers' Cars | Top of Page | What's New | My Stuff