72 Mustang Mach1 restoration
Discussion


Matt Harper said:
Is this a 'back to scratch' resto? The 302 makes total sense, if that's the case. That said, earlier comments suggest a non FoMoCo transplant in this cars future. If so, why start with a donkey-motor vs a 351 Cleveland, which would be totally appropriate for this car? Just curious, as to the thinking.
Stage one is a 'back to scratch' resto and stage two, at a later date, will be using a spare LT5 and 6 speed that I have.I stuck with the 302 for cost, plus I want to keep the original engine and gearbox and will crate it up to one side when I do stage two.
I want to use the LT5, not mainly for power, but more so for efficiency. When my ZR-1 was running a standard motor It would return up to 35mpg, motorway mileage. Being approx the same weight as my Mach1 - (ZR-1 loaded with electric gizmos versus Mach1 with no power everthing) I want the challenge of fitting the ZR-1 running gear with appropriate rear gears to try and achieve the same mpg I was getting from my standard ZR-1.
Although it was bloody freezing I had chance to get outside over this weekend and suss out where all the pulleys and brackets go. Not being a mechanic/fitter and only DIY, with no experience of putting a 302 back together, it was a bit time consuming. I purposely kept the old fan belts and brackets, etc unrestored so I could match up the old marks to make things easier to fit.
Not really sure where the dipstick bolts to, or even if it is the right one?
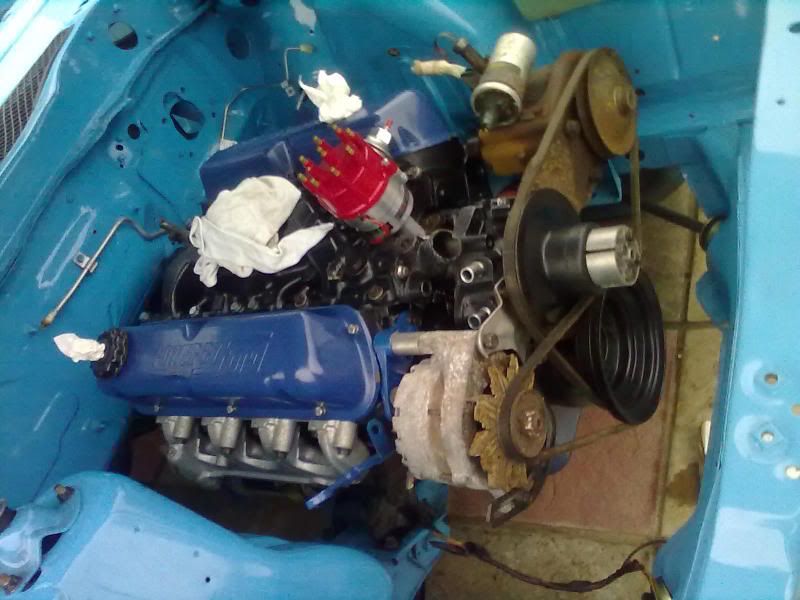
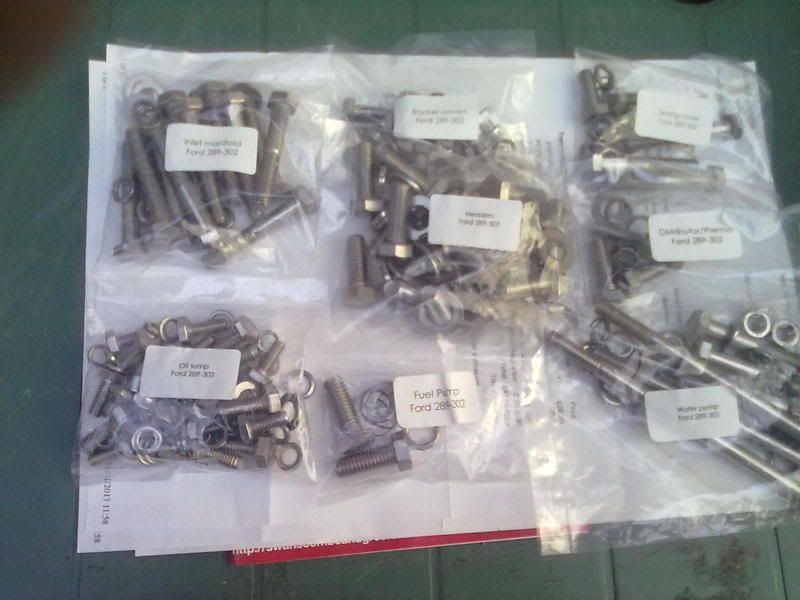
I also bought some bolts from Basil bolts on ebay, fast service, to replace all the old bolts that the engine builders used to tag things together when they rebuilt the engine
http://www.ebay.co.uk/itm/370734243926?ssPageName=...
Not really sure where the dipstick bolts to, or even if it is the right one?
I also bought some bolts from Basil bolts on ebay, fast service, to replace all the old bolts that the engine builders used to tag things together when they rebuilt the engine
http://www.ebay.co.uk/itm/370734243926?ssPageName=...
Edited by ZR1cliff on Sunday 3rd February 20:06
Heads up on a deal in Aldi stores, of all places - for those of you who, like me, paint your own parts, head lamp buckets, brackets, etc. Last year I found some ART DECO metal rust protection spray paints in several colours, including silver and black.
These cans are around £3.70 a can and are in their stores at the moment, compared to other brands of £10 a can found at Halfords. Last year I only bought a few cans and they sold out in a few days, they get them in for spring time and are advertised for rust proofing gates etc. This paint covers directly onto metal, one or two coats. Ideal for painting and leaving in the sun to bake hard.
These cans are around £3.70 a can and are in their stores at the moment, compared to other brands of £10 a can found at Halfords. Last year I only bought a few cans and they sold out in a few days, they get them in for spring time and are advertised for rust proofing gates etc. This paint covers directly onto metal, one or two coats. Ideal for painting and leaving in the sun to bake hard.
Over the weekend I was able to take the fuel tank back off and fit the sender and breather and flexible pipes. Then cover the top in GT85 to protect. I had an old inner tube and cut some rubber to sandwich between tank and body, finally cutting two neater strips the width of the straps and bolting the tank in.


Today I had a spare day and couldn't get out on the car, because of the weather, so tackled the prop shaft. I had rubbed this down last year and spray painted, so today I fitted the new Universal joints and gave the prop shaft another spray coat of paint and silver sprayed the ends.


Today I had a spare day and couldn't get out on the car, because of the weather, so tackled the prop shaft. I had rubbed this down last year and spray painted, so today I fitted the new Universal joints and gave the prop shaft another spray coat of paint and silver sprayed the ends.
Got some more done this weekend and also made use of the lighter evenings. The prop is now on, as is the exhaust, although I need more hangers for final fixing. Very pleased with how easy the H pipe went on.
I had a delivery from CJ pony parts, mainly small things like hoses and fixing hardware. Put the boot rubber on too and have found it is a little difficult to shut the boot. hopefully that will wear in.
Some parts ordered aren't as you would expect - such as the accelerator cable, no an exact fit with its thicker fixing area, which needed new longer screws.
One major step was fitting the rear spoiler, makes it look like the picture I have in my head.
Also cleaned up the power steering pump and brackets, plus lining up the front bumper and panels.
Edited by ZR1cliff on Tuesday 19th February 19:19
Dr G said:
Fitting new/refurb/shiny parts is massively satisfying.
Realising the bolts that hold it on look crappy in comparison then dipping/painting/replacing them is a pain in the arse
Keep us updated, following with interest
Will do Dr G. I have several 'states of play' going on in the car - new parts, restored parts I'm happy with and others I can improve on.Realising the bolts that hold it on look crappy in comparison then dipping/painting/replacing them is a pain in the arse
Keep us updated, following with interest
I'm replacing old bolts as I go - did the fender bolts recently.
Biggest test recently are the front and rear valances. Both are not originals and are not great fits, so will need persuading slowly and gently into place.
I have a golden rule - if I struggle on anything I leave it and come back to it with a fresh mind. Often works out.
Spent some hours today going back to the front valance and trying to iron out the ill fitting to the bottom of the wings. Got busy with a round hand file in the holes to both the wing and the front valance. After market valances are poor fitting compared with the originals and knowing what I know now I would have been better off restoring the original. ah well you live and learn.
Afterwards I unwrapped the front spoiler and measure, measure, measure, stand back and look. stand back and look (you get the idea - measure ten times, drill once) It went on well.
Those plastic clamps I got from B&Q came in handy for holding on the spoiler while I measured.

This pic shows how much the holes had to be filed out.

Afterwards I unwrapped the front spoiler and measure, measure, measure, stand back and look. stand back and look (you get the idea - measure ten times, drill once) It went on well.
Those plastic clamps I got from B&Q came in handy for holding on the spoiler while I measured.
This pic shows how much the holes had to be filed out.
Worked on the rear valance and rear bumper today. The new bumper brackets only had so much play in them, so it was out with the file again to elongate the holes in the brackets, to help line the new bumper up.
The one on the right has been done, compared with the stock hole on the left.

Once done the rear bumper lined up easier. Also fitted the original flip open petrol cap.

Then it was back to the front to set about setting the bumper up. These can be very time consuming as they never go as you want and with several bolts at different angles, it's trial and error till you jugle from one end to the next.


The paint shop thankfully put a beaker of the paint they used to paint the car, in the boot. Handy for touch ups for the odd couple of scratches

The one on the right has been done, compared with the stock hole on the left.
Once done the rear bumper lined up easier. Also fitted the original flip open petrol cap.
Then it was back to the front to set about setting the bumper up. These can be very time consuming as they never go as you want and with several bolts at different angles, it's trial and error till you jugle from one end to the next.
The paint shop thankfully put a beaker of the paint they used to paint the car, in the boot. Handy for touch ups for the odd couple of scratches
Edited by ZR1cliff on Sunday 24th February 19:30
For the past week I've been out after work and the weekend (lucky the missus is busy with cake making  ) working mainly on the front end. My apologies for the quality of some of the photos, all done with my mobile.
Again some time consuming hours lining up the front grille and setting up the headlamp buckets. At first it's a mishmash of using new parts, restored parts and some old parts that need replacing. However once i've got it all working and in place I can make another small list (mainly new fixings) and get on to America for them to be delivered.

) working mainly on the front end. My apologies for the quality of some of the photos, all done with my mobile.Again some time consuming hours lining up the front grille and setting up the headlamp buckets. At first it's a mishmash of using new parts, restored parts and some old parts that need replacing. However once i've got it all working and in place I can make another small list (mainly new fixings) and get on to America for them to be delivered.
Have also been working on the brake lines. When I dismantled the old rusty brake lines, I took them apart in sections, and kept all the clips and grommets in place on the corrosponding parts and then stored them in the roof space out of the way in my work shop. I kept all the clip screws by screwing them back in the holes they came from. This way, with the new brake lines and offering them up to the old parts, it saved time working out where everything went.
I bought a complete set of 72 Mach1 brake pipes as a kit. I am fixing them loosely in place to see how it all goes together and once satisfied I will then 'final fix' all the pipes. The kit is stainless steel and is meant to be a right sod to make air tight? Or so I've heard.
Part of the kit. Some parts are already on the car from before the engine and trans were fitted.
Edited by ZR1cliff on Monday 4th March 20:34
Also got stuck into the front brakes, with new rotors, Bearings, calipers and fixings.
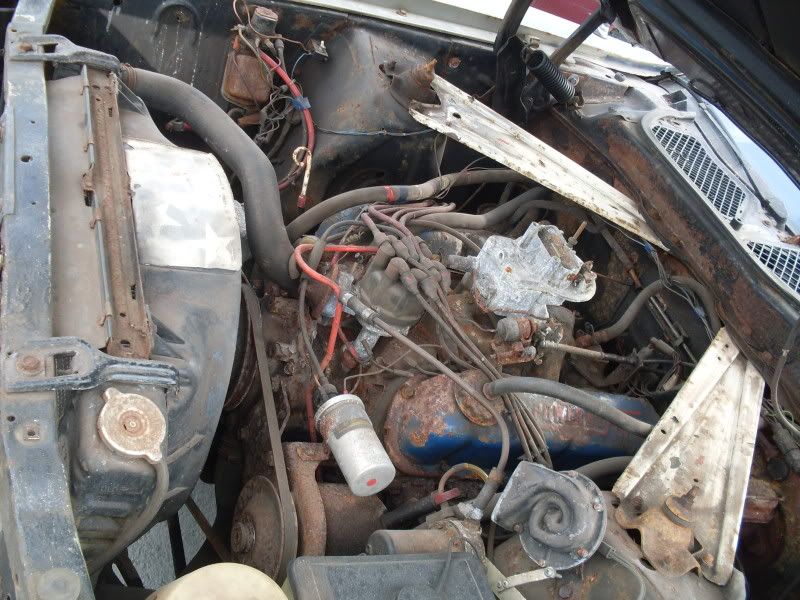
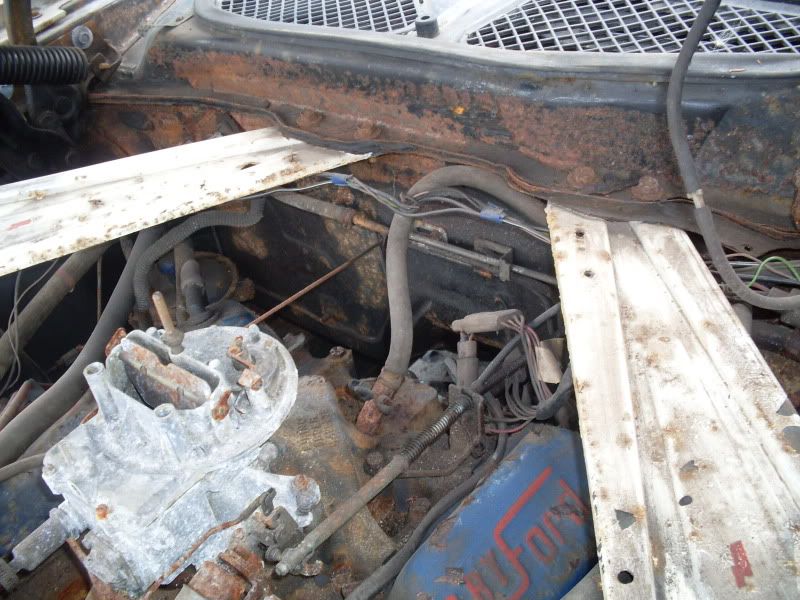
Before I replaced the front brakes.

Everything ready to go on. Copper grease and bearing grease at the ready.

And after. Poor quality pic. I left the brake pads out until just before she's ready to move under her own power.

Before I replaced the front brakes.
Everything ready to go on. Copper grease and bearing grease at the ready.
And after. Poor quality pic. I left the brake pads out until just before she's ready to move under her own power.
Cleveland351 said:
They seem to be growing in popularity in the USA, the UK will surely follow!, fantastic old beasts really!
Dedicated forum over at www.7173mustangs.com
Great site, I am a member and have got some good advice from owners on there.Dedicated forum over at www.7173mustangs.com
Have you got any links or photos to your car?
Cheers
Gassing Station | Mustangs | Top of Page | What's New | My Stuff