72 Mustang Mach1 restoration
Discussion


Cleveland351 said:
Thanks Cliff, it's had a very thorough & skilled restoration.
The colour is 'Blue Glow' ('73 only special order) with 'Argent' call outs
Everything works (inc. the A/C) and yes, as you mentioned working 'Ram-Air'
Not sure which tag you mean? the Red one on the Rad is an A/C advisory label and the card/paper one attached to the rad filler neck is an original Ford Anti-Freeze advisory label.
We'll have to have a meet up when yours is done, keep up the good work!
You can see from the photo's that It's a thorough restoration. The anti freeze sticker was the one I was looking at. Most definitely have to meet up and get them along to a show or two. There seems to be a limited amount of 71-73's about these days.The colour is 'Blue Glow' ('73 only special order) with 'Argent' call outs
Everything works (inc. the A/C) and yes, as you mentioned working 'Ram-Air'
Not sure which tag you mean? the Red one on the Rad is an A/C advisory label and the card/paper one attached to the rad filler neck is an original Ford Anti-Freeze advisory label.
We'll have to have a meet up when yours is done, keep up the good work!
I was able to get outside today, in the end, but instead of working on the mustang I got stuck into some spring maintenance on my ZR-1 instead. There will be a link between both cars when phase two of the rebuild starts around a couple of years time, when i transplant a Lotus 4 cam LT5 and 6 speed into the Mach1.
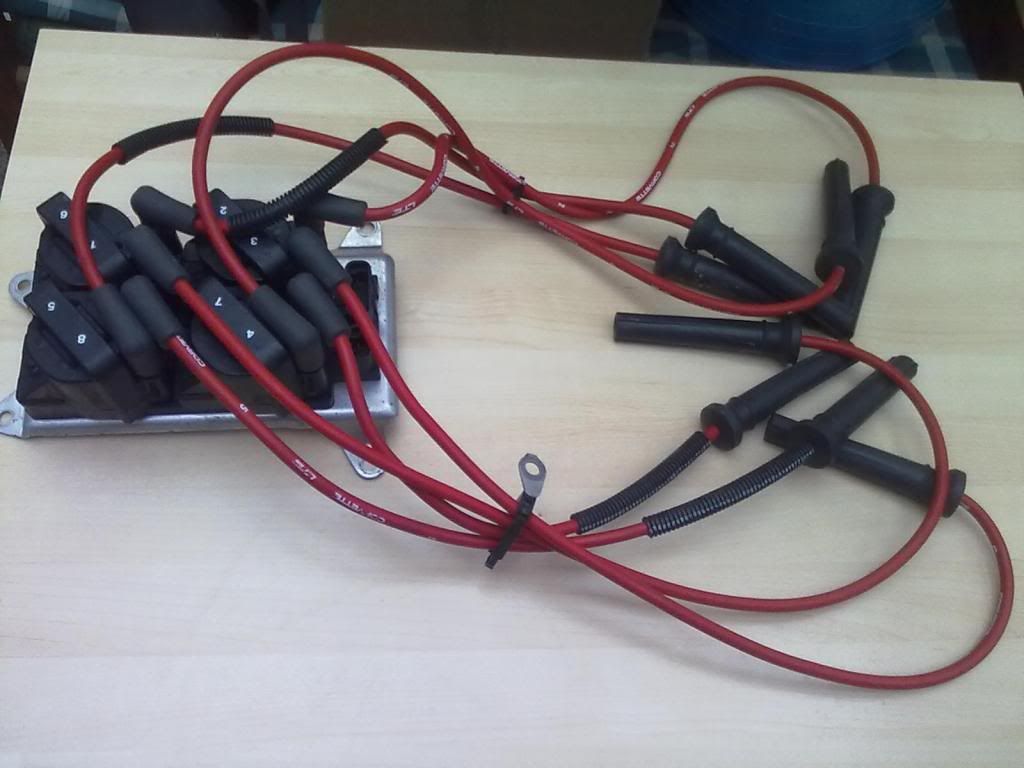
I have most of the parts already for the transplant, but am still wanting other parts. One I found recently on the web was delivered this week - the coil pack assembly with original LT5 plug leads.
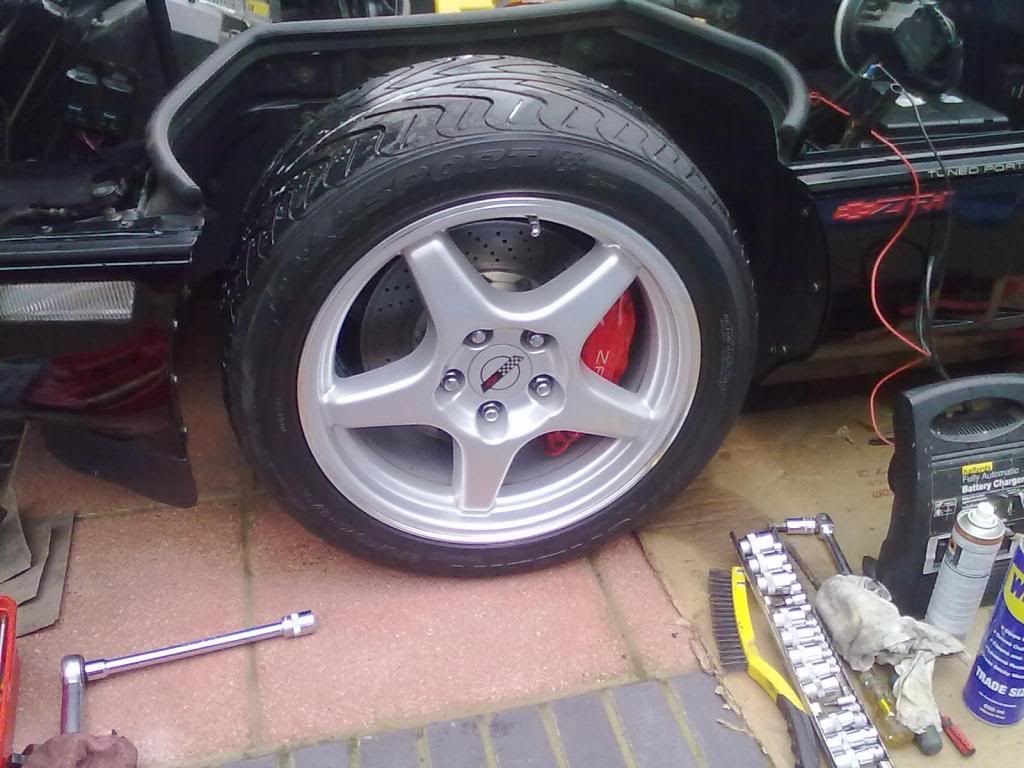
Every time I passed the Z when working on the Mach1 I noticed the brake rotors accumalating surface rust, so today I took the cover off and hung it on the line to air and gave the Z a wash, put on the battery charger, then Pulled the front brakes apart and cleaned them up. The monotonous part was cleaning every hole in the drilled rotors, using a small screw driver.
Also pulled the spark plugs and cleaned them up, then started the car after a 9 week sleep. Next will be installing new oxygen sensors and uprated, ethanol proof S/S injectors.

Tomorrow, if the weather holds, it's back onto working on the Mach1. Looks like a short cold spell arriving before the weather warms up and I can concentrate on getting the Mach1 fired up.
I have most of the parts already for the transplant, but am still wanting other parts. One I found recently on the web was delivered this week - the coil pack assembly with original LT5 plug leads.
Every time I passed the Z when working on the Mach1 I noticed the brake rotors accumalating surface rust, so today I took the cover off and hung it on the line to air and gave the Z a wash, put on the battery charger, then Pulled the front brakes apart and cleaned them up. The monotonous part was cleaning every hole in the drilled rotors, using a small screw driver.
Also pulled the spark plugs and cleaned them up, then started the car after a 9 week sleep. Next will be installing new oxygen sensors and uprated, ethanol proof S/S injectors.
Tomorrow, if the weather holds, it's back onto working on the Mach1. Looks like a short cold spell arriving before the weather warms up and I can concentrate on getting the Mach1 fired up.
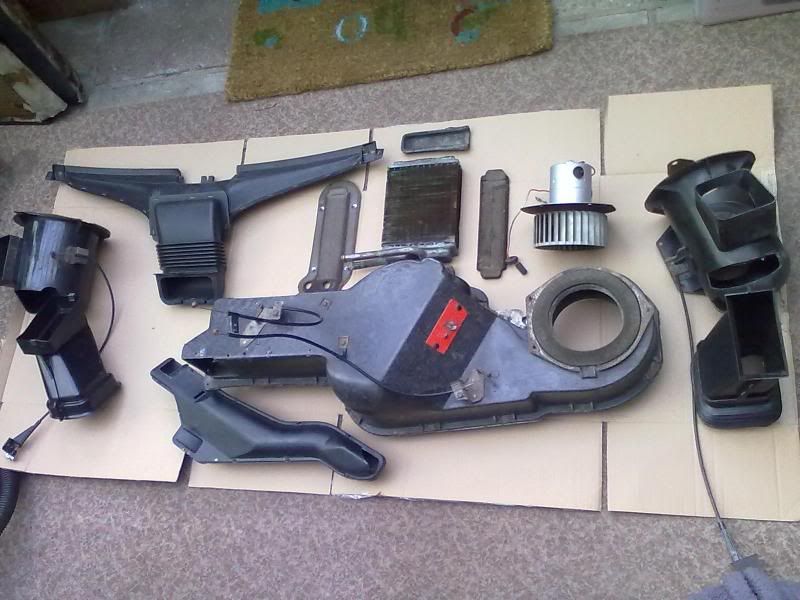
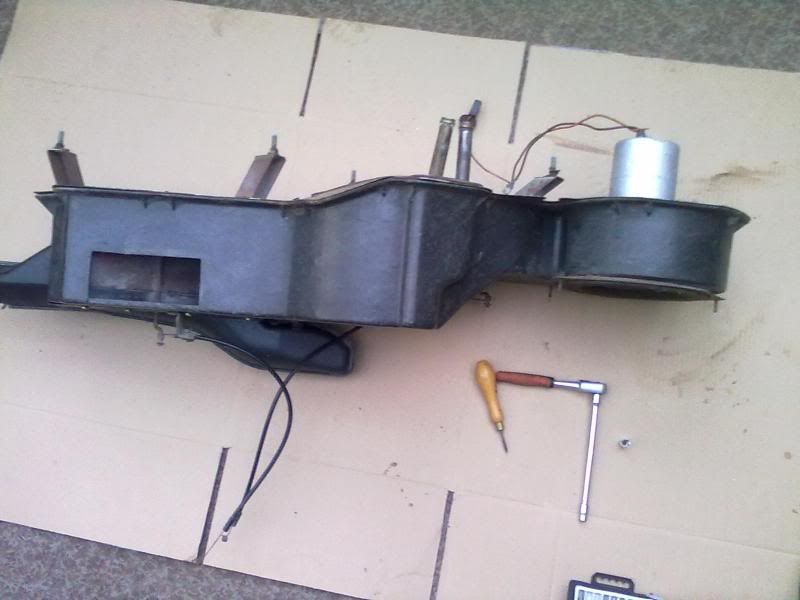
Was a bit wet today so got stuck into the heater box. The original heater box had sat for years and when checked the heater motor was siezed and the heater matrix leaking. Fortunately I saw a damaged 71-73 heated unit at a mustang show and on checking both the Matrix and fan motor were OK and working. I checked the motor using jump leads to a battery.
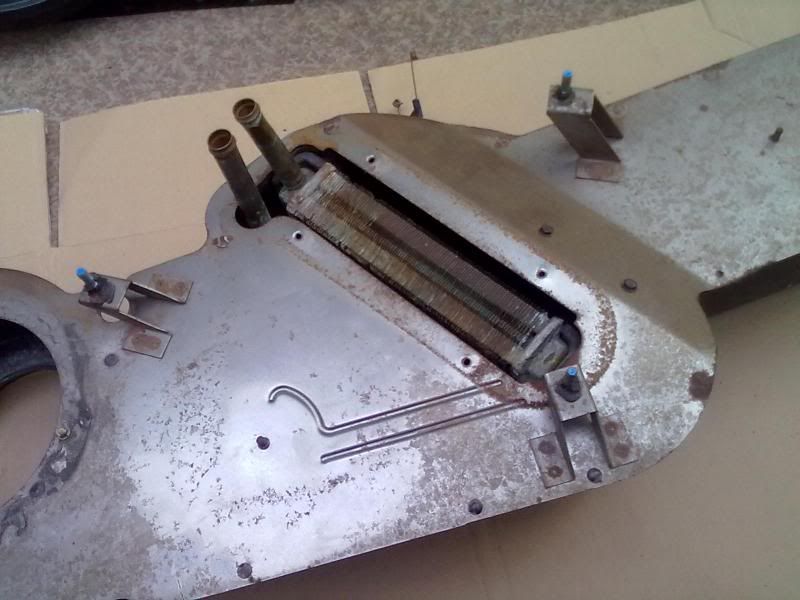
The matrix slots into the housing and has two rubber cushions at each end. There are also two felt cushions that cosset the matrix either side.
The matrix was tested when the radiator was overhauled, however I've declined to paint the matrix incase it gives off an odour.
Also fitted is the lower floor heater spreader housing. They're not a great fit with small gaps around where both parts mate, so I put some sealer on before screwing them together. This is now ready to bolt to the bulkhead, then have the other parts added to it.
Edited by ZR1cliff on Sunday 17th March 17:15
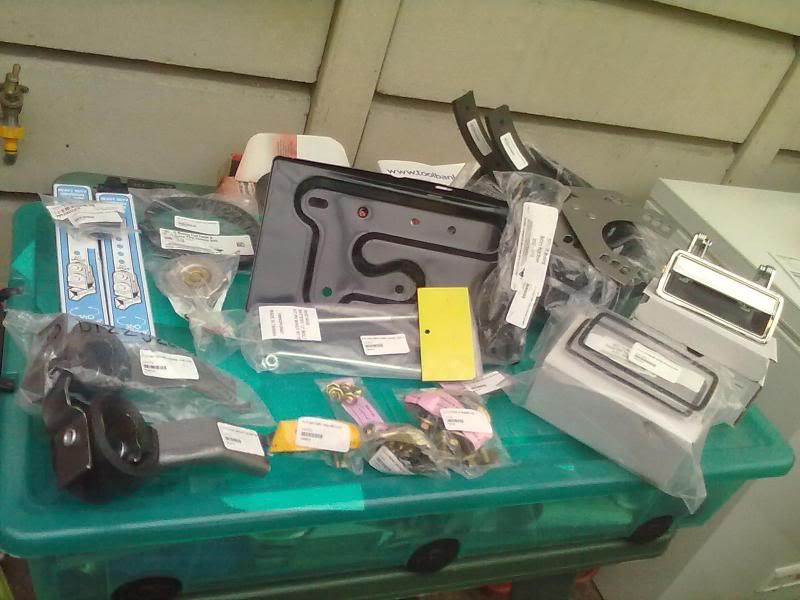
The latest parts order was delivered yesterday. The order included new chrome door handles, battery tray and battery fastenings, rear window rubber, various exhaust hangers, a selection nuts bolts and fastenings and a trusty radiator cap.
Love it when these parts turn up, it feels like Christmas.
Love it when these parts turn up, it feels like Christmas.
Had big plans for the weekend, tieing up loads of jobs on the Mach1. However due to the poor weather it was a huge tidy up in the workshop and re stock the shelves with parts due to go on the car. These were split into three main areas - interior, exterior and engine bay.
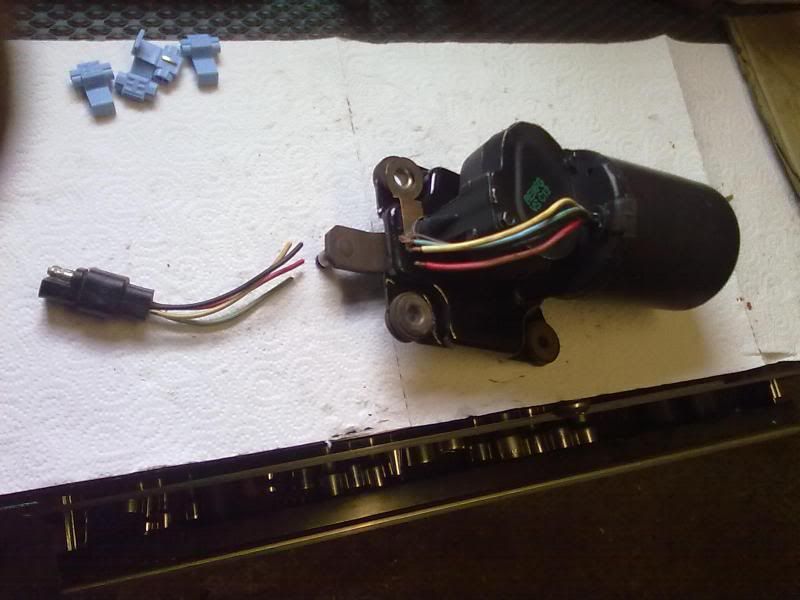
Then it was onto dismantling the windscreen wiper linkage, bracket and associated parts from the old motor. Tidying them up and refitting the new motor.
New motor is on the left and the old parts are on the right, along with the original plug that was cut from the old motor. The new motor doesn't come with a plug
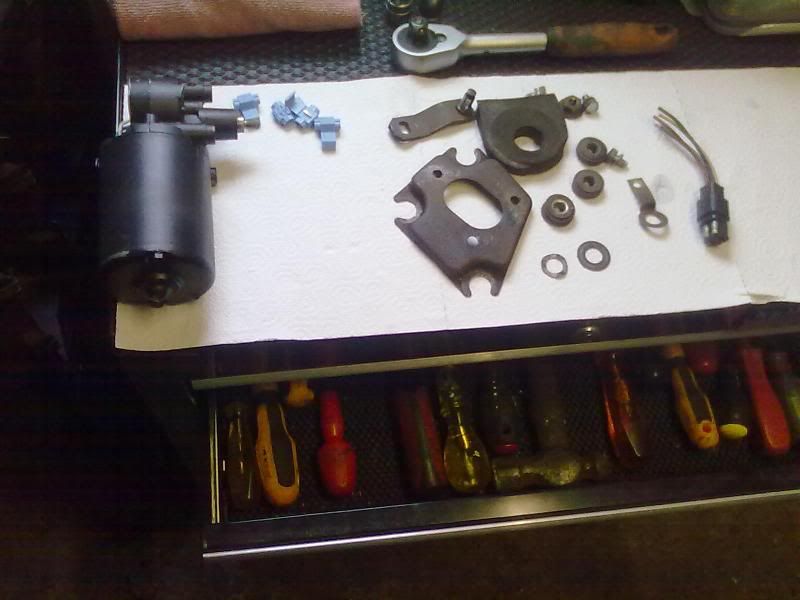
The bracket was cleaned and painted, along with all the other parts, then assembled. The only thing left to do now is to connect the plug and solder it to the new wiring on the motor and shrink wrap the wires. Then bin those horrible blue connectors.
Then it was onto dismantling the windscreen wiper linkage, bracket and associated parts from the old motor. Tidying them up and refitting the new motor.
New motor is on the left and the old parts are on the right, along with the original plug that was cut from the old motor. The new motor doesn't come with a plug
The bracket was cleaned and painted, along with all the other parts, then assembled. The only thing left to do now is to connect the plug and solder it to the new wiring on the motor and shrink wrap the wires. Then bin those horrible blue connectors.
stormy22 said:
Is it wrong that I'm turned on by that?
Not at all stormy, the newly (for that era) fashioned flush door handles, hidden wipers and sleak shape, was a very sexy shape back then and still is.Time for a dirty video

Diamonds are forever.
http://www.youtube.com/watch?v=hnLAI-MV5ik
Cleveland351 said:
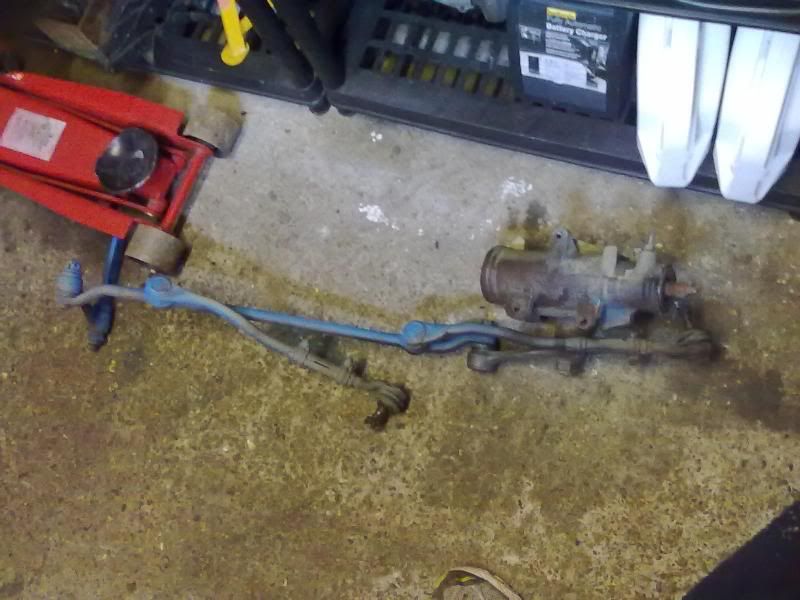
Cheers for the link. Steering box feels ok and it's only done around 50k, so should be ok. Will have another assesment once the car is on the road.The steering box was seperated from the rest of the linkage and given a good wire brushing and degreasing. When I tried to unbolt the pipes they were siezed and the 23 years of sitting about had taken it's toll on the pipes. so they were cut off and then easily unbolted by tapping a tight fit socket on to the hex couplings. I kept these on and plugged them so no fluid could leak out and no debri could get in the box.
The box has only covered around 50k and on inspection and turning the shaft looked and worked smoothly. Obviously the next check will be on the car under load.
The box has only covered around 50k and on inspection and turning the shaft looked and worked smoothly. Obviously the next check will be on the car under load.
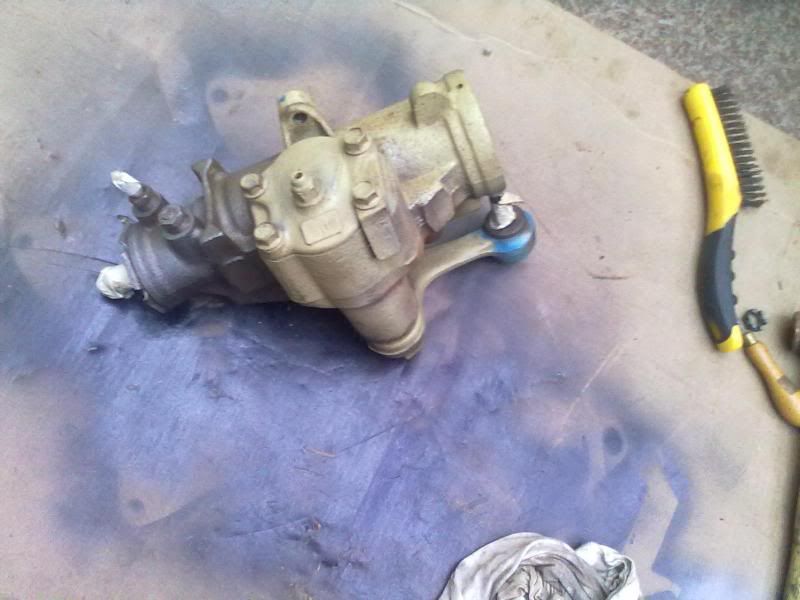
The steering box was then sprayed, using Hammerite smooth silver, that can be sprayed directly on to bare metal. A couple of coats gives a decent covering. I painted it a light colour to show up any possible leaks, down in that dark corner of the engine bay.
Also time to start seperating the linkage, far easier off the car and replace with the new parts. The main linkage bar is being kept.
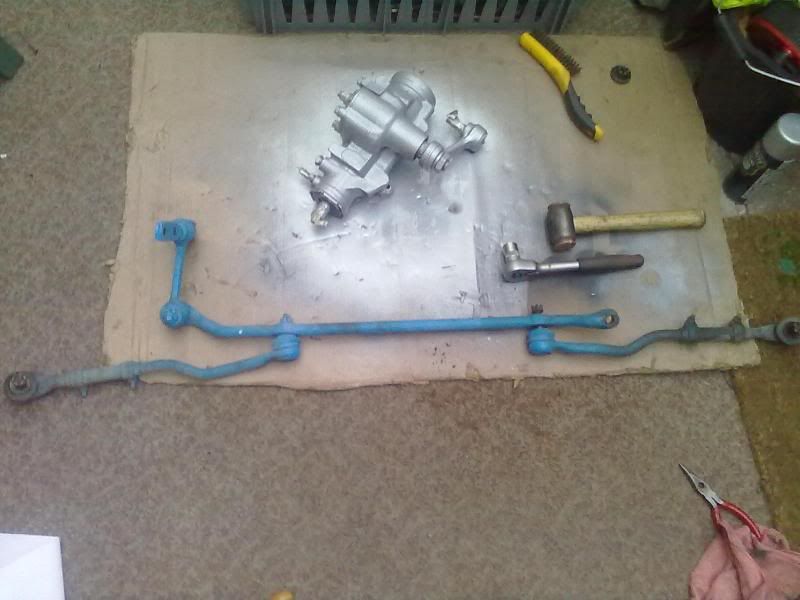
Also time to start seperating the linkage, far easier off the car and replace with the new parts. The main linkage bar is being kept.
The main bar was cleaned then sprayed with a couple of coats of paint to match the new parts in the picture. I set the parts up as the same measurements as the old to get it all somewhere near what was taken off, for primary set up.
I also have new hydraulic pipes and steering box coupling ready for the install in the next week. Will put this all together off the car.
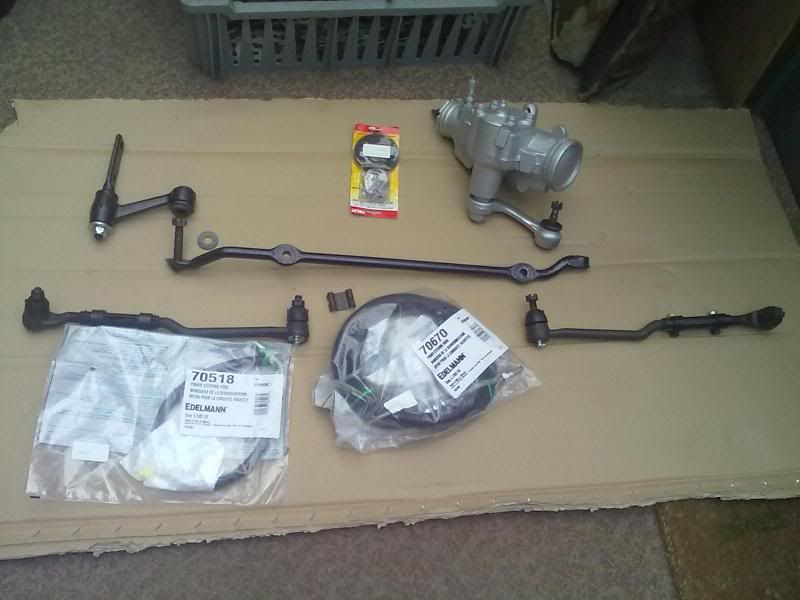
I also have new hydraulic pipes and steering box coupling ready for the install in the next week. Will put this all together off the car.
uk66fastback said:
Looking great mate - keep going in this weather!
Cheers! Lucky enough I'm able to take parts into the old outhouse where it's a few degrees warmer than the outside. Good news is, it looks like the weather should start warming up, even though it's only by a couple degrees.
Some of the dilemas and things on my mind;
71-73 drip rails are no longer available - where to go for chroming?
Need to put a few days aside for putting the loom in the car.
New head liner to be fitted before glass goes in - warm day so it stretches OK.
Winscreen and rear glass need to go in.
What anti freeze/coolant to use?
Initial fire up of the engine - mobile mechanic familier with these cars is needed to assist with setting up.
Stainless steel brake pipes fitting need to be finished and the system bled - will they seal OK?
spent some time today connecting up the brake lines to the equaliser block, best done while all the steering box and parts are out of the car. I also took out the booster and brake master cylinder to make more room. Would have probably been better of doing this without the engine and box in aswell - lesson learnt.
I'm very conciuos of the SS fittings alegedly leaking so the plan was to take the block to the pipes and not the other way round. Then carefully ease the block back into its place. Things had to be undone a few times to carefully line the pipes up in the correct order, along with the fuel breather pipe. Constantly doing things up and undoing them and so forth. Probably spent 4 hours mucking around so far and wil carry on till all the clips are back on and I'm happy. I've lined up the two short curly pipes and will take the master cylinder to them, then ease the MC on to the booster. Fingers crossed this yeilds a non leaking system.
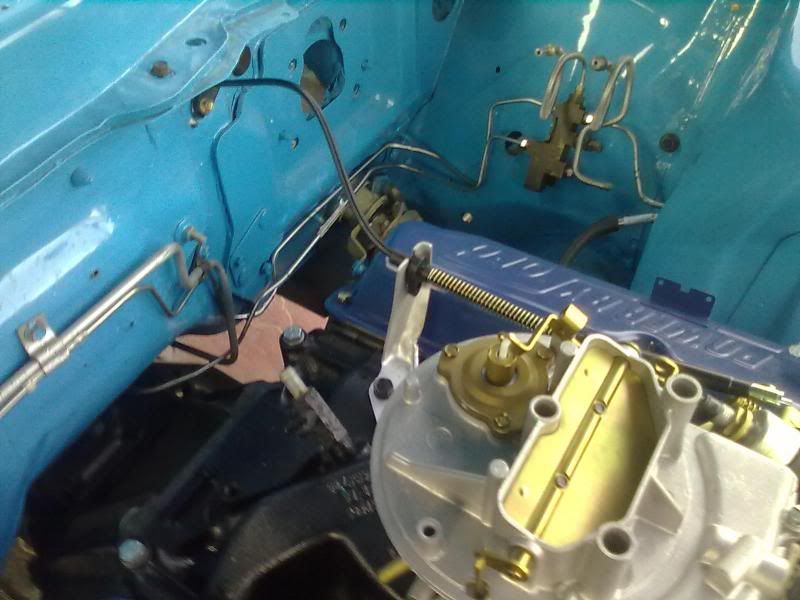
I'm very conciuos of the SS fittings alegedly leaking so the plan was to take the block to the pipes and not the other way round. Then carefully ease the block back into its place. Things had to be undone a few times to carefully line the pipes up in the correct order, along with the fuel breather pipe. Constantly doing things up and undoing them and so forth. Probably spent 4 hours mucking around so far and wil carry on till all the clips are back on and I'm happy. I've lined up the two short curly pipes and will take the master cylinder to them, then ease the MC on to the booster. Fingers crossed this yeilds a non leaking system.
Before fitting the brake booster and master cylinder, other parts underneath needed finishing and putting back on the car - the steering box and engine loom.
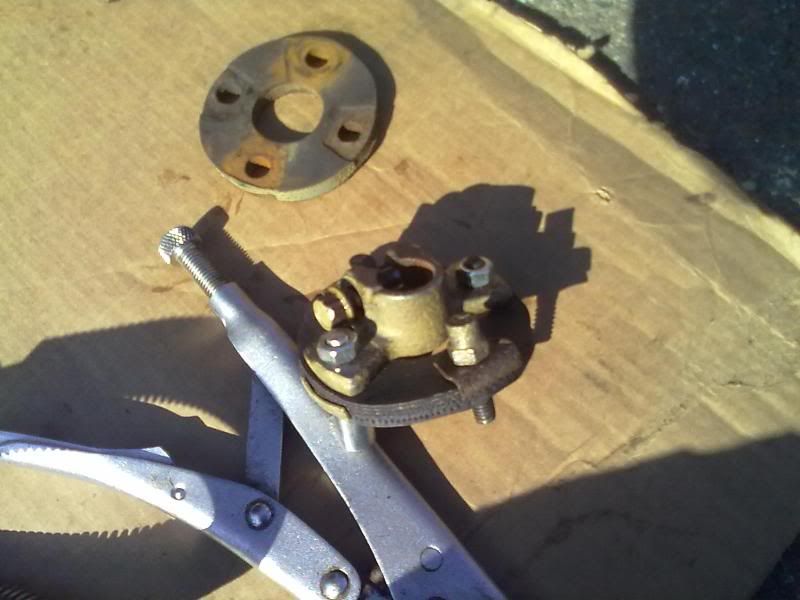
To fit the steering box the flexible coupling needed to be replaced.
The connecting bolts simply unbolt, there are new bolts supplied with the kit although they don't have the shoulders on them to stop compressing the rubber, so I cleaned up the old bolts and reused them. The car had only done 50K plus and everything looked in reasonable condition. However I'd read that these can fail so took the option of replacing the rubber while the coupling was out of the car.
The two counter balances don't unbolt, instead the heads have to be ground off and the new threaded counter balances bolted in. The old ones can be a bit of a s*d to press out once ground off.

The new flexible coupling ready to go back in, with the old rubber ring next to it.
To fit the steering box the flexible coupling needed to be replaced.
The connecting bolts simply unbolt, there are new bolts supplied with the kit although they don't have the shoulders on them to stop compressing the rubber, so I cleaned up the old bolts and reused them. The car had only done 50K plus and everything looked in reasonable condition. However I'd read that these can fail so took the option of replacing the rubber while the coupling was out of the car.
The two counter balances don't unbolt, instead the heads have to be ground off and the new threaded counter balances bolted in. The old ones can be a bit of a s*d to press out once ground off.
The new flexible coupling ready to go back in, with the old rubber ring next to it.
Edited by ZR1cliff on Monday 8th April 19:53
Cheers Malc, been mucking about with the loom since, good to see you and the others, shame it turned bloody cold 
Engine Loom was next. Best fed through from the engine side, this had one half of the fuse box and a short part of loom, that couples together with the main dash loom. Once fed through, a firm careful tug and the rubber pulls into place on the firewall.
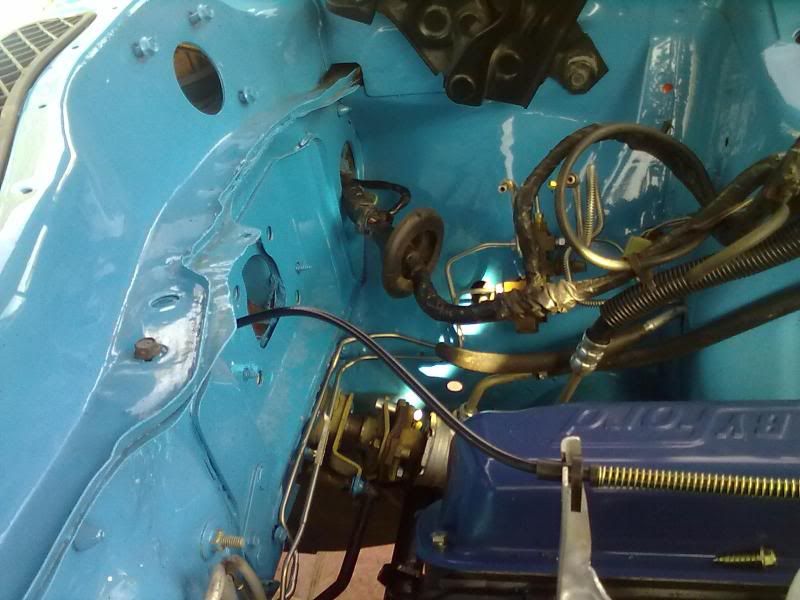
The rest of the loom then routes over the drivers' side shock tower, with another short part of the loom going on to serve the windscreen wipers and top half of the engine.
Then down under the screen water bottle and diverts over the lower cross member, with part of the loom supplying the lights, before the crossmember, carrying on through the radiator support for the drivers' side lights. At the other end of the loom, once across the crossmember, serving the passenger side lights and another part of the loom going on to the voltage regulator and solonoid.

Engine Loom was next. Best fed through from the engine side, this had one half of the fuse box and a short part of loom, that couples together with the main dash loom. Once fed through, a firm careful tug and the rubber pulls into place on the firewall.
The rest of the loom then routes over the drivers' side shock tower, with another short part of the loom going on to serve the windscreen wipers and top half of the engine.
Then down under the screen water bottle and diverts over the lower cross member, with part of the loom supplying the lights, before the crossmember, carrying on through the radiator support for the drivers' side lights. At the other end of the loom, once across the crossmember, serving the passenger side lights and another part of the loom going on to the voltage regulator and solonoid.
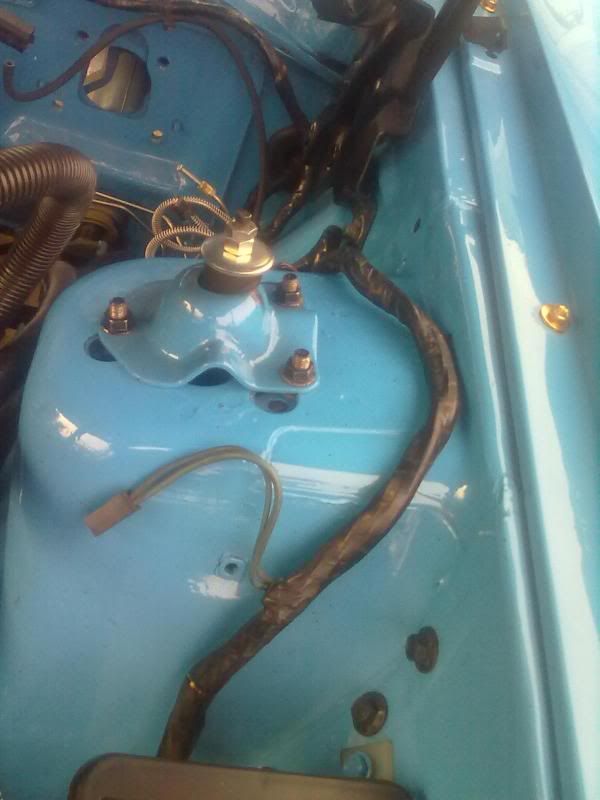
Spent last weekend finishing off all the brake lines, rebuilding the rear drums, fitting the hand brake cables and securing the exhaust. also wrapped up the fuel lines, so the only thing to do now is the electrics for the initial fire up.
With the nice sunny weather it was an oppurtunity to drop the other jobs in mind and get stuck into the interior. I will order new seat covers and carpets, also door cards. I already have the roof lining and will wait for a warm day to help stretch into position.
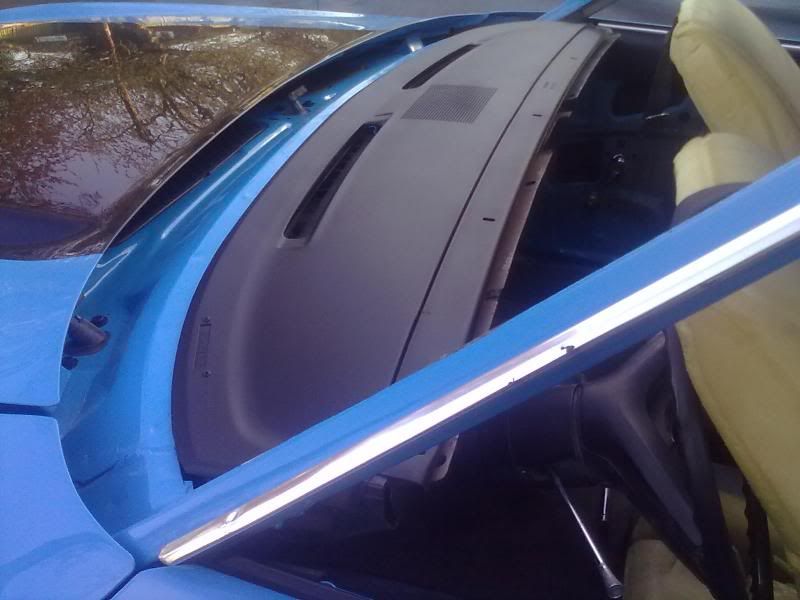
The interior parts, like trims, which are very hard to get hold of in top condition, I have elected to repaint. The interior was originaly red and I am changing the colour to black. I used plastic primer spray, followed by several coats of satin black spray and dried the parts in the sun, making use of the decent weather.
The top dash was seperated from the leading edge and rubbed down

Then under coated and sprayed satin black.
This is the rear trim in original red, a bit discoloured and showing the 41 years of age.
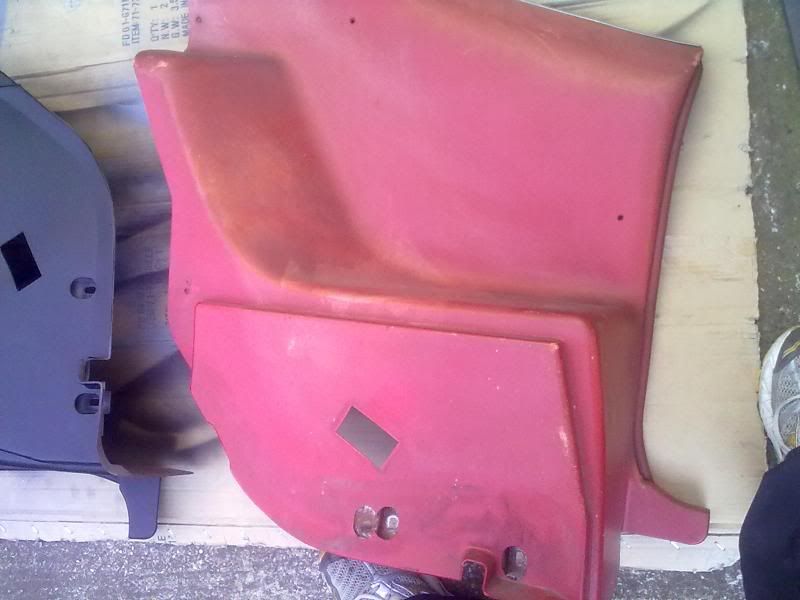
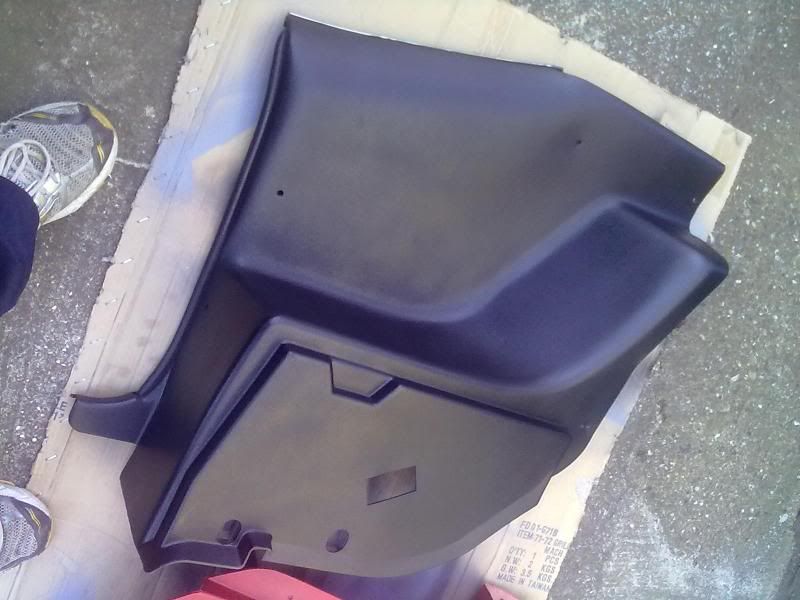
After a coating of grey plastic primer, followed by several coats of satin black, then a good dry in the sun between coats.
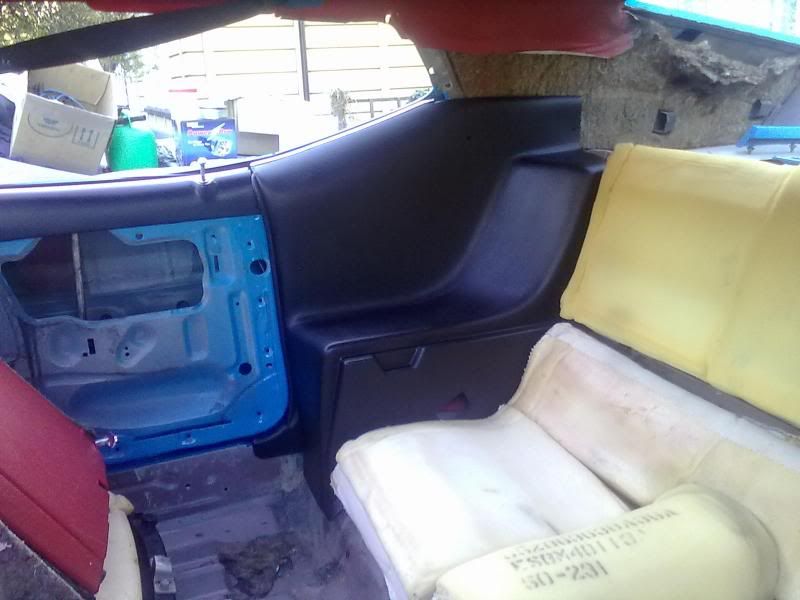
In position in the car along with the top door trim. Seats awaiting recovering and doors, the door cards.
With the nice sunny weather it was an oppurtunity to drop the other jobs in mind and get stuck into the interior. I will order new seat covers and carpets, also door cards. I already have the roof lining and will wait for a warm day to help stretch into position.
The interior parts, like trims, which are very hard to get hold of in top condition, I have elected to repaint. The interior was originaly red and I am changing the colour to black. I used plastic primer spray, followed by several coats of satin black spray and dried the parts in the sun, making use of the decent weather.
The top dash was seperated from the leading edge and rubbed down
Then under coated and sprayed satin black.
This is the rear trim in original red, a bit discoloured and showing the 41 years of age.
After a coating of grey plastic primer, followed by several coats of satin black, then a good dry in the sun between coats.
In position in the car along with the top door trim. Seats awaiting recovering and doors, the door cards.
Edited by ZR1cliff on Thursday 25th April 21:17


Gassing Station | Mustangs | Top of Page | What's New | My Stuff