V8S Rebuild begins!
Discussion
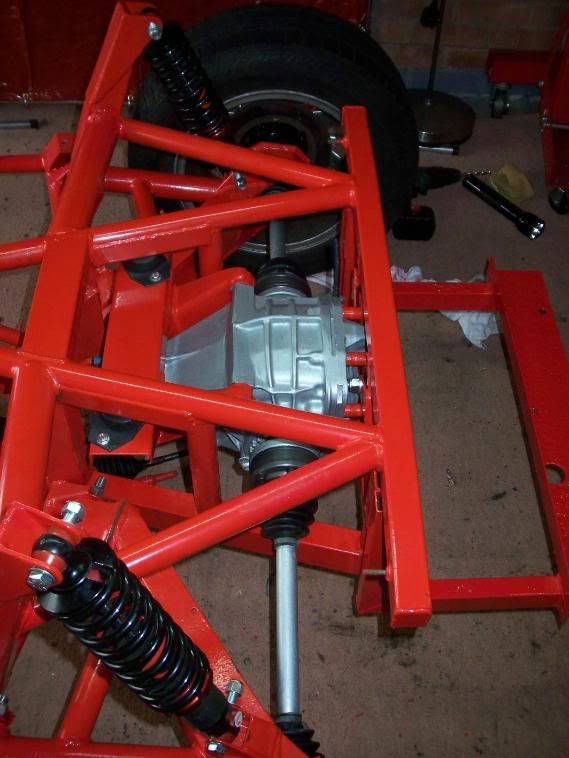
Diff & Driveshafts in.
Fuel tank cradle fitted by my 16 year old son - a rare appearance from his bedroom!
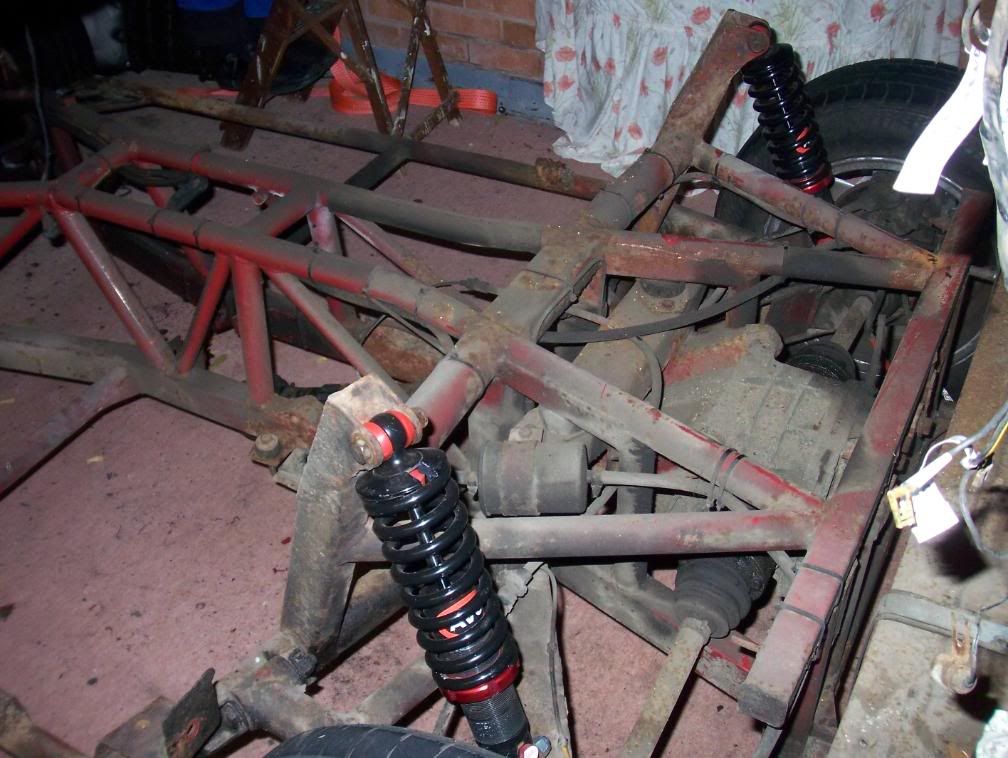
And for fun here's a before shot.
I then turned my attention to fitting the chim power steering rack - I ground the drivers side rack mounting point to get it to fit - then discovered I need to grind a bit of the main rack mounting tube on the chassis away too
Looks like the welder will see the light of day again - I nearly put it on ebay last week so its lucky I didn't.
Ah well I've come this far in for a penny......
Bit of a pain now its all been powder coated but never mind, it's a good job I bought a big tin of red smoothrite
Fuel tank cradle fitted by my 16 year old son - a rare appearance from his bedroom!

And for fun here's a before shot.

I then turned my attention to fitting the chim power steering rack - I ground the drivers side rack mounting point to get it to fit - then discovered I need to grind a bit of the main rack mounting tube on the chassis away too

Looks like the welder will see the light of day again - I nearly put it on ebay last week so its lucky I didn't.
Ah well I've come this far in for a penny......
Bit of a pain now its all been powder coated but never mind, it's a good job I bought a big tin of red smoothrite

Edited by Barkychoc on Saturday 9th August 19:25
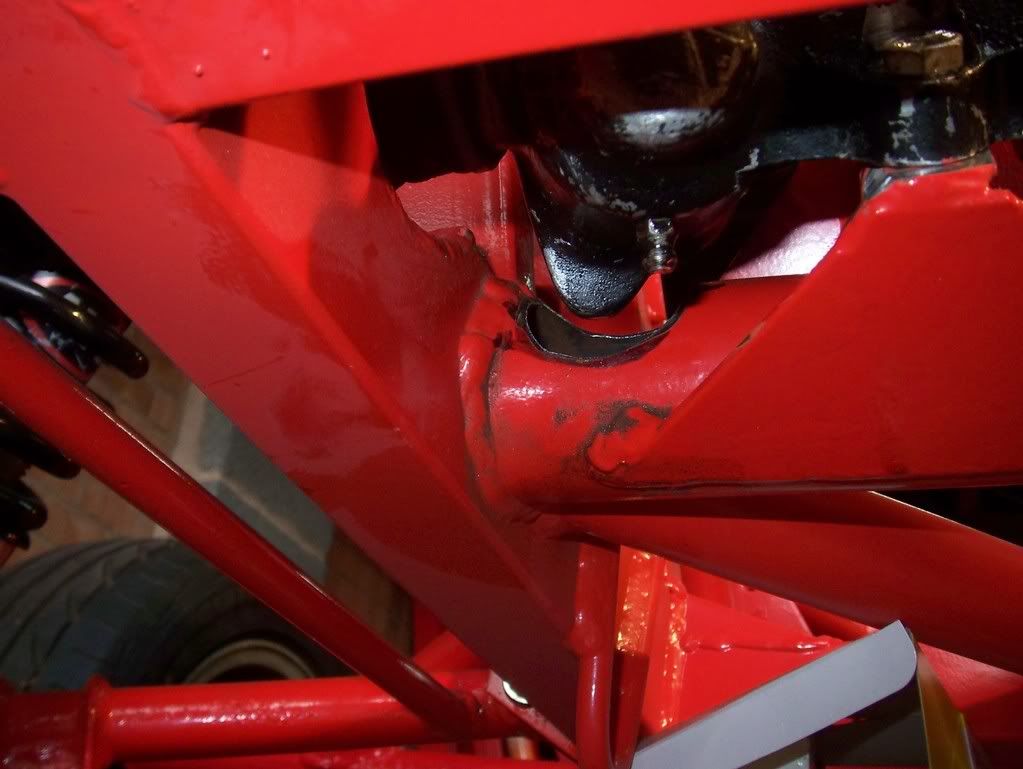
A pic here of the issue fitting the power steering rack - I'm going to have to cut that tube and weld in a piece of metal to give the clearance. 
However it is all reversible if it doesn't work - modifying that tube has no bearing on the manual steering rack at all.
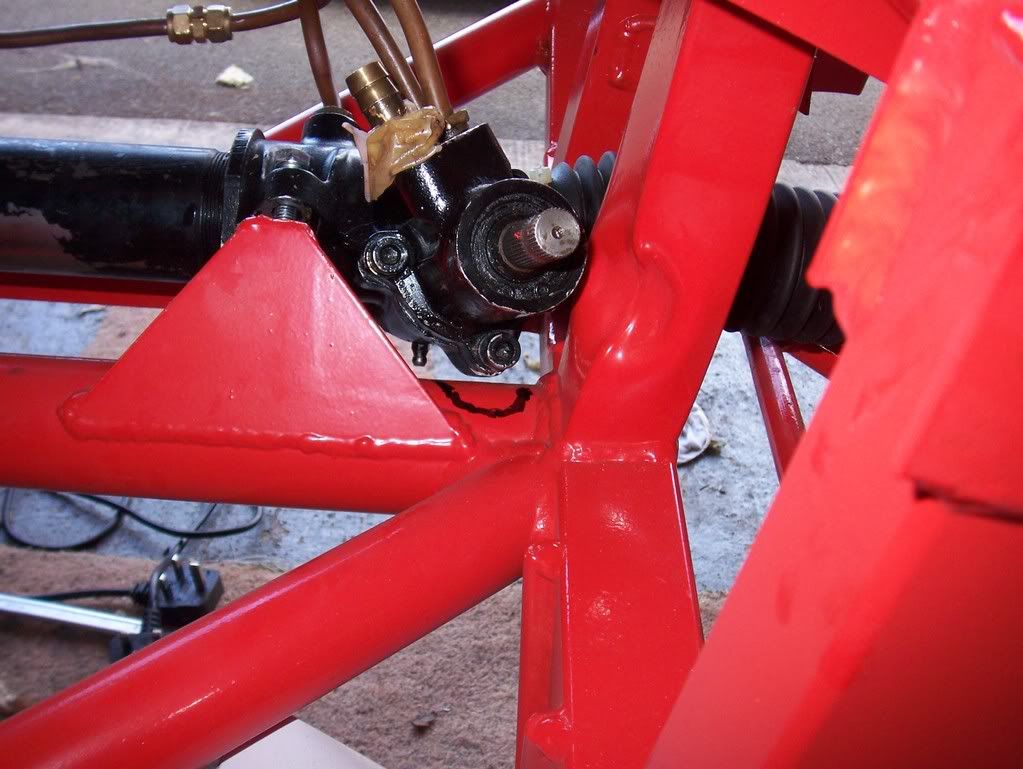

However it is all reversible if it doesn't work - modifying that tube has no bearing on the manual steering rack at all.

Edited by Barkychoc on Sunday 10th August 16:20
Following on from above I have taken the angle grinder to my chassis to fit the power steering rack 
From above look under the rack I have ground the tube away.
I've also had to grind the rack mounts - sorry no photos yet the camera battery went flat.
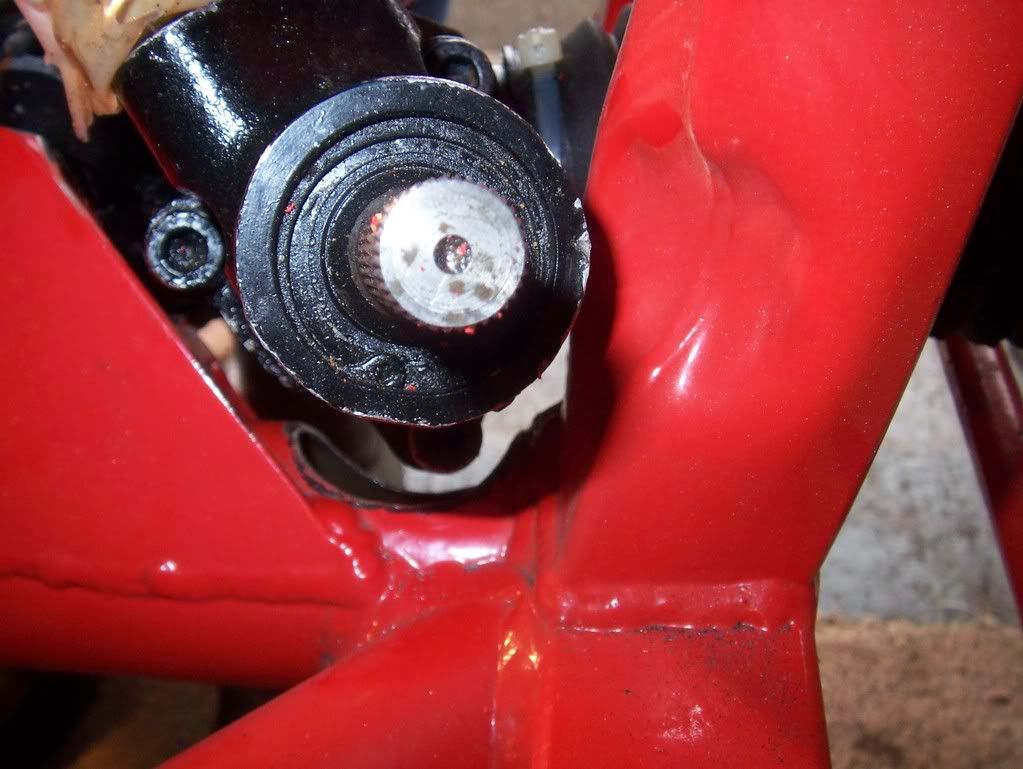
From below
Rack fitted
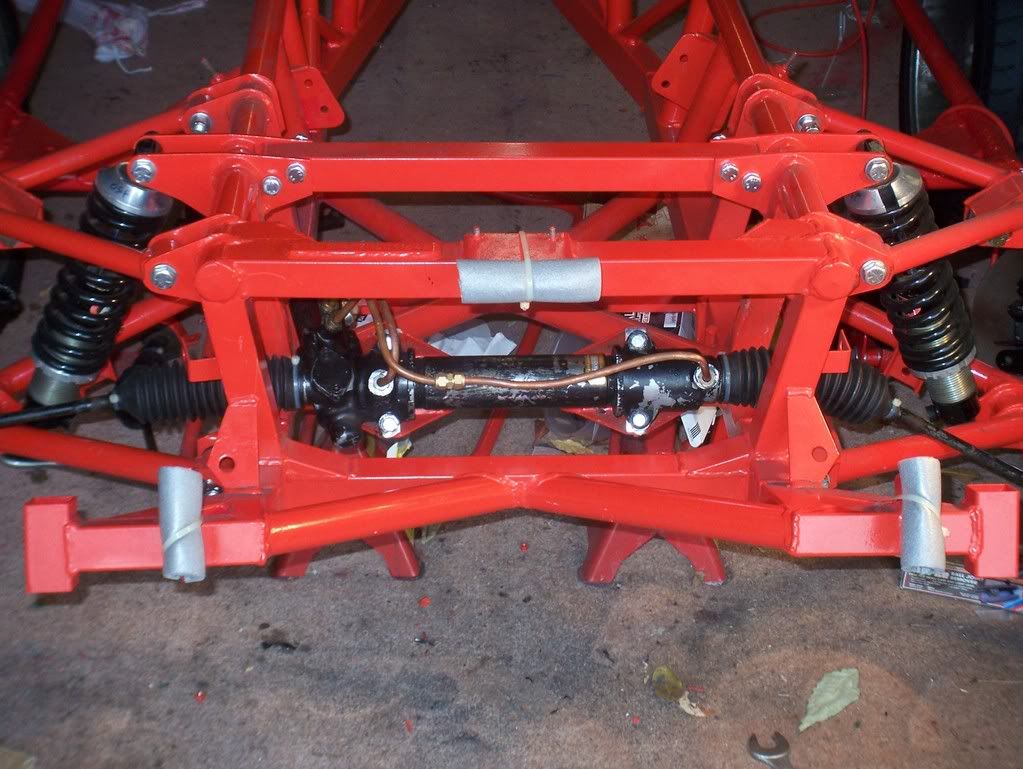
I've now removed the rack again, welded a plate into the hole and given it the first coat of hammerite.

From above look under the rack I have ground the tube away.
I've also had to grind the rack mounts - sorry no photos yet the camera battery went flat.

From below

Rack fitted


I've now removed the rack again, welded a plate into the hole and given it the first coat of hammerite.
Edited by Barkychoc on Friday 22 August 18:14
pies said:
Chris you are welding over those holes 
Yes the hole is welded up now with a piece of steel - the camera went flat so no pic.
Ray S said:
 Looking good Chris will all be worth it in finish.Will it be ready for next SCH
 Ray
RayI'm actually not a million miles off now - once fuel & brake pipes are sorted there's not a lot else before the body is ready to go back on.
Edited by Barkychoc on Friday 22 August 20:12
OK time for a picture update.
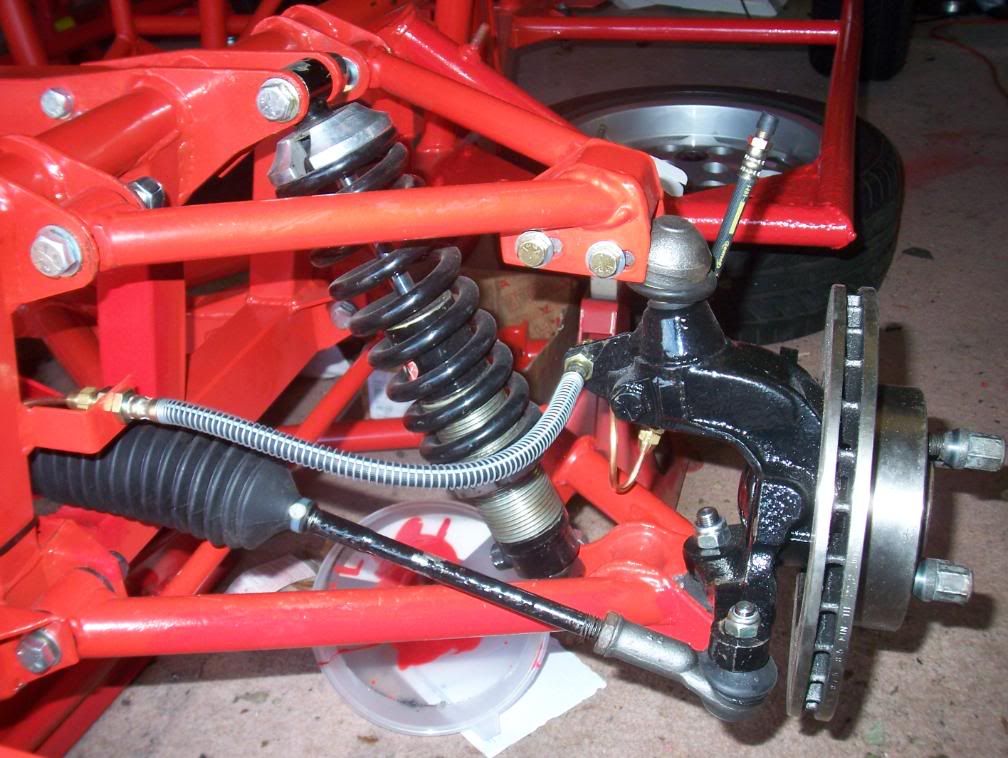
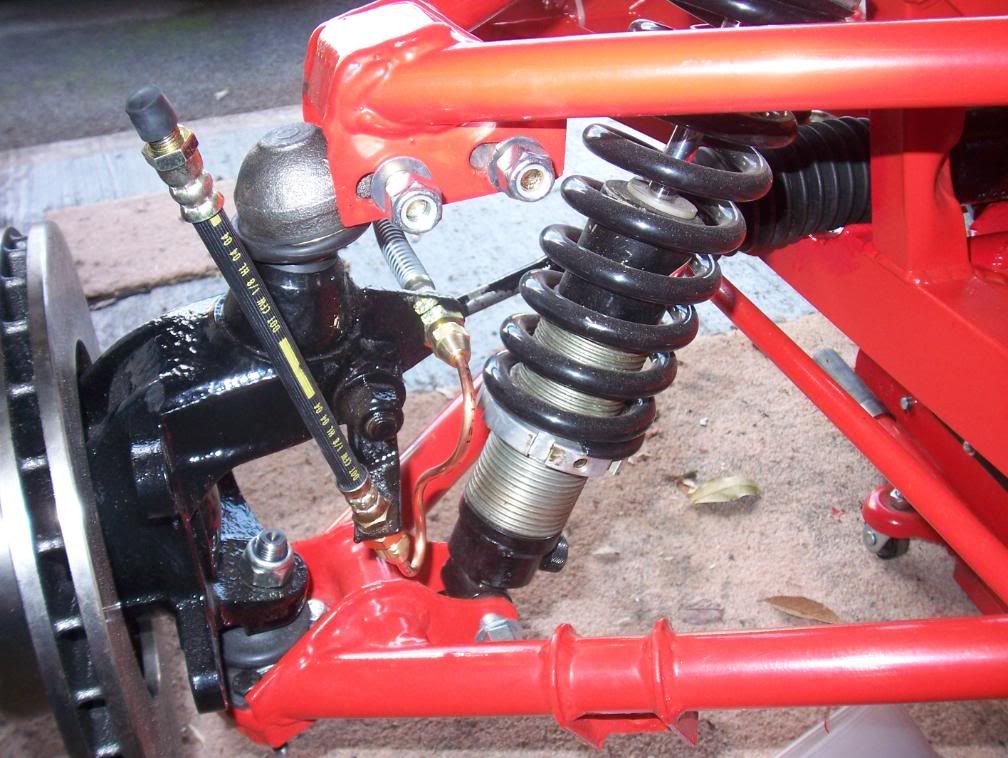
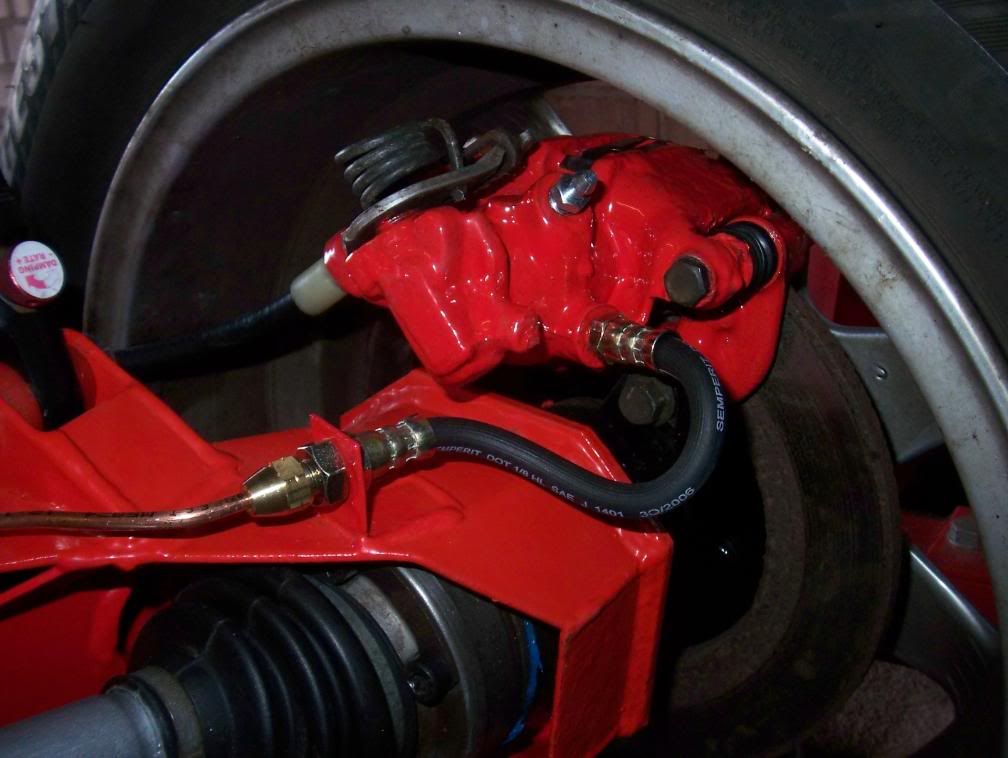
Nearside front showing brake pipes.
No calipers fitted yet I'm waiting for a replacement caliper piston due to arrive on monday.
I'm fitting xr4x4 calipers which allow use of 260mm discs (its another story but don't use xr4x4 discs - you need 2wd 260mm discs later ABS models or xr4i).
I'll touch up the track rod paint when I know the tracking is right.
Offside rear
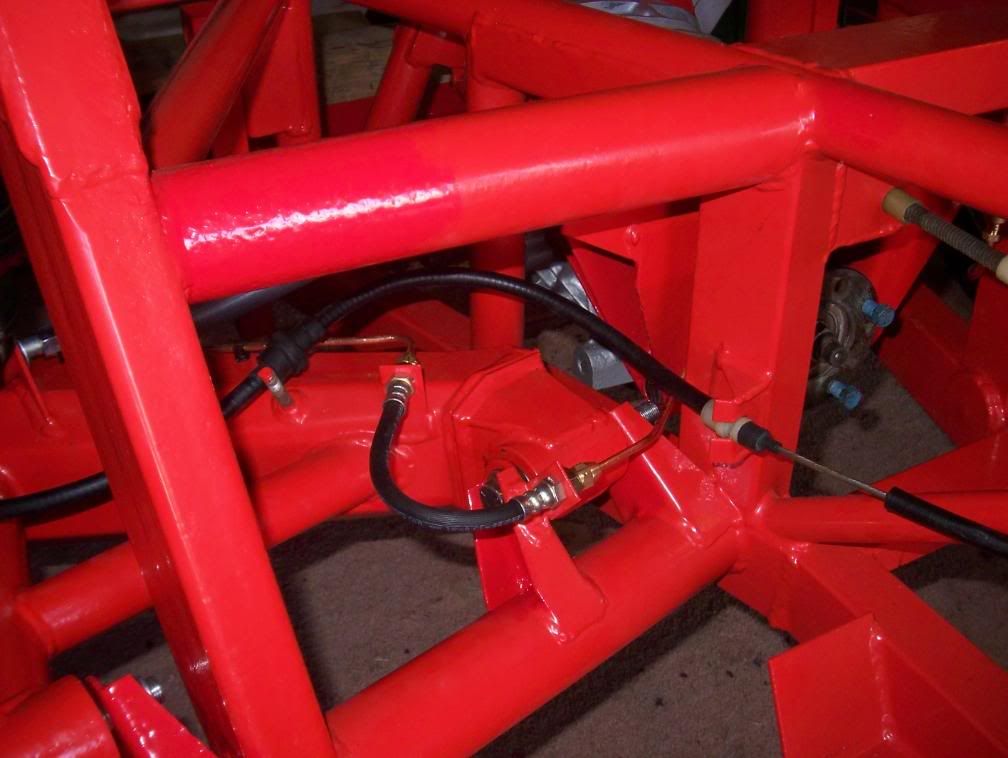
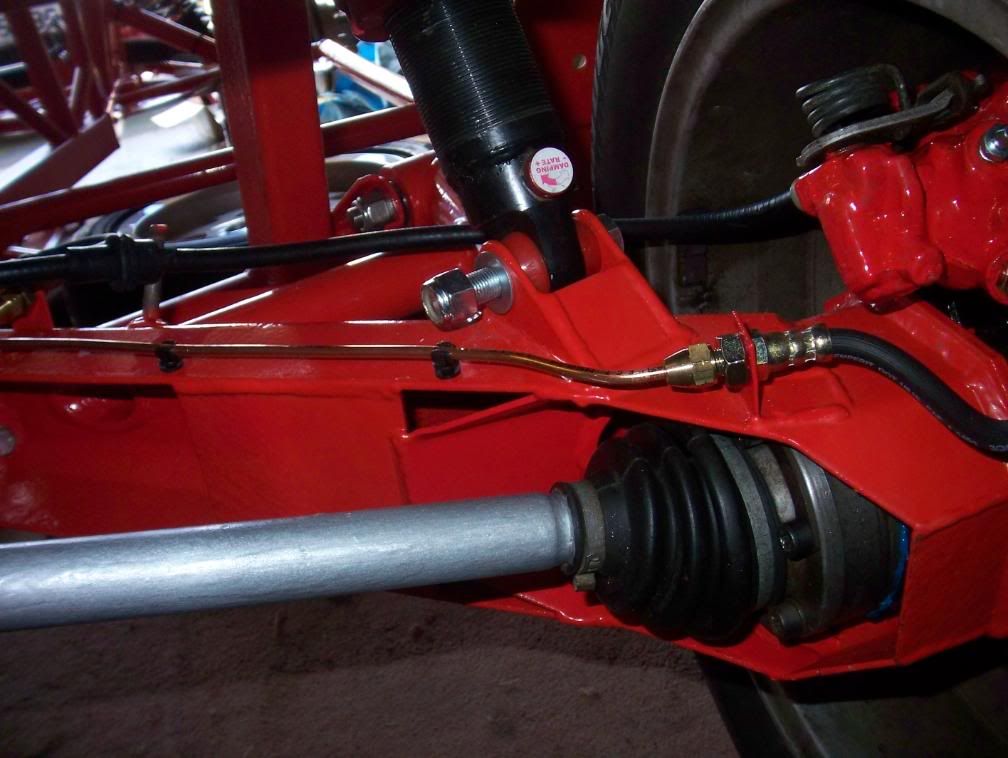
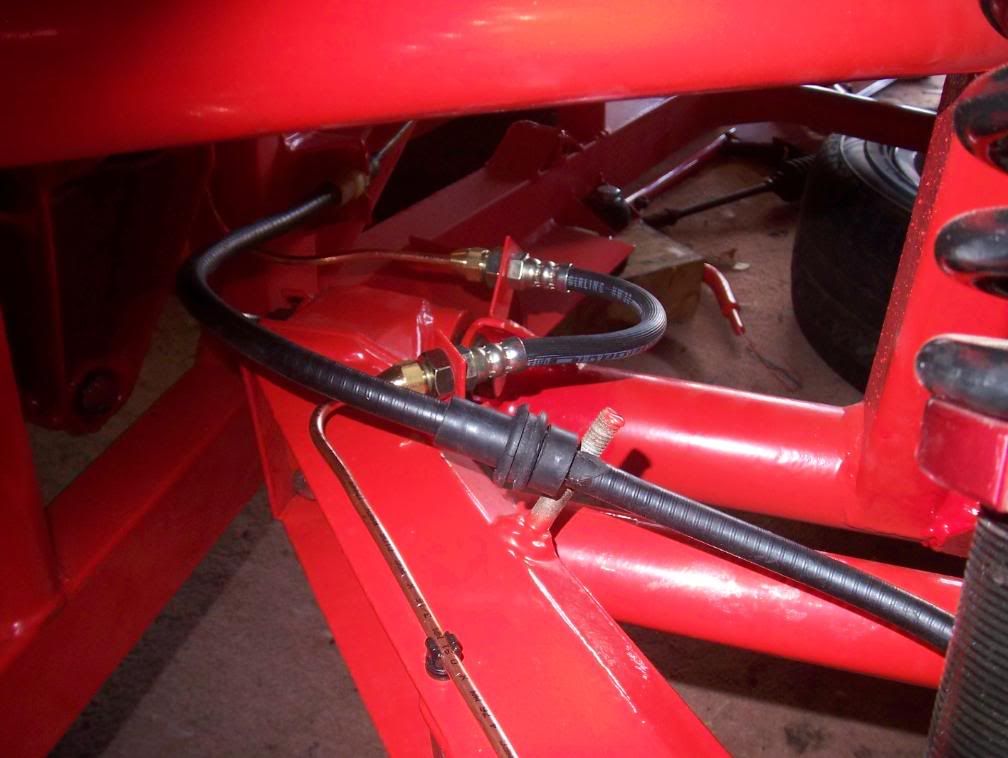
Nearside rear trailing arm pipe
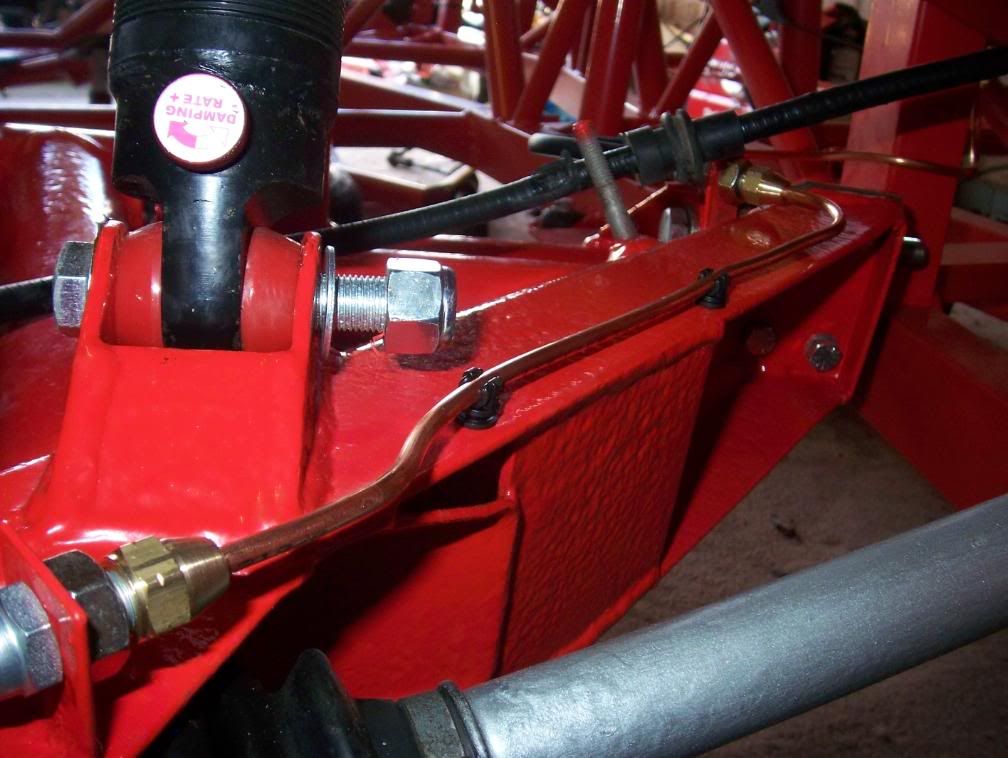
Rear brake pipe above diff to offside (cable ties needed here)
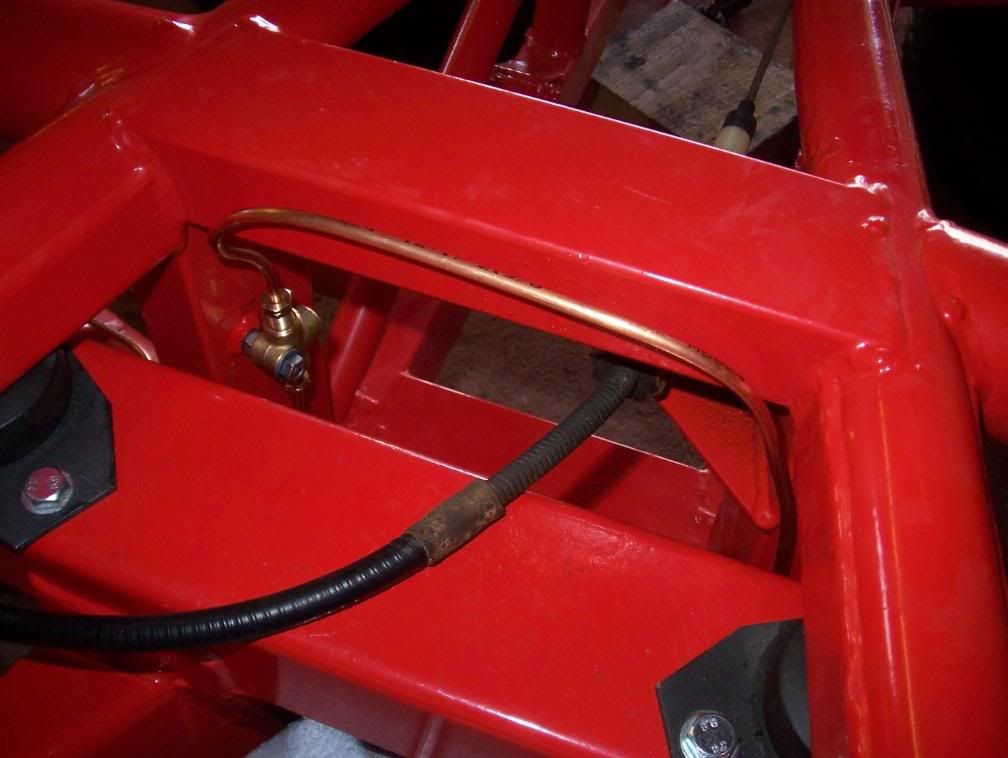
Rear Brake 'T', my original was imperial, I've replaced everything with metric.
Additional nut fitted under the 'T' as otherwise it is too near the chassis and you can't swing the spanner very well.
I know there's a pipe missing - I ran out of copper pipe
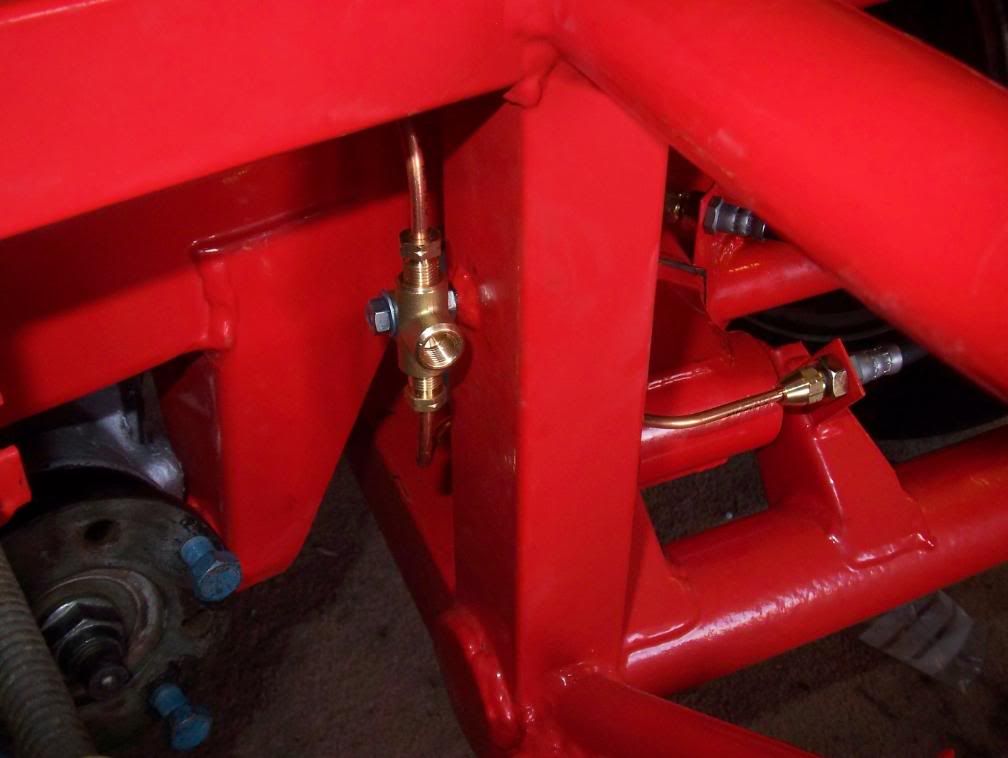
Routing of front brake pipes - faithful to original route
The pipes at the bottom left of the picture need to be covered by a piece of rubber hose for protection.
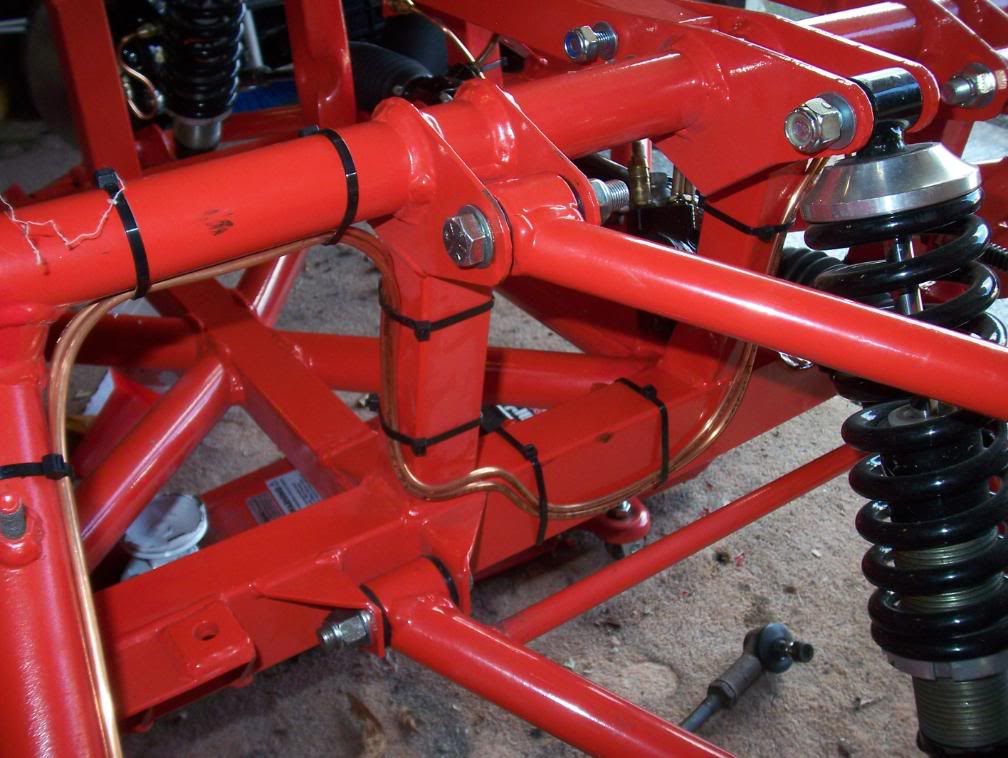
Front Brake pipe - again same as original route
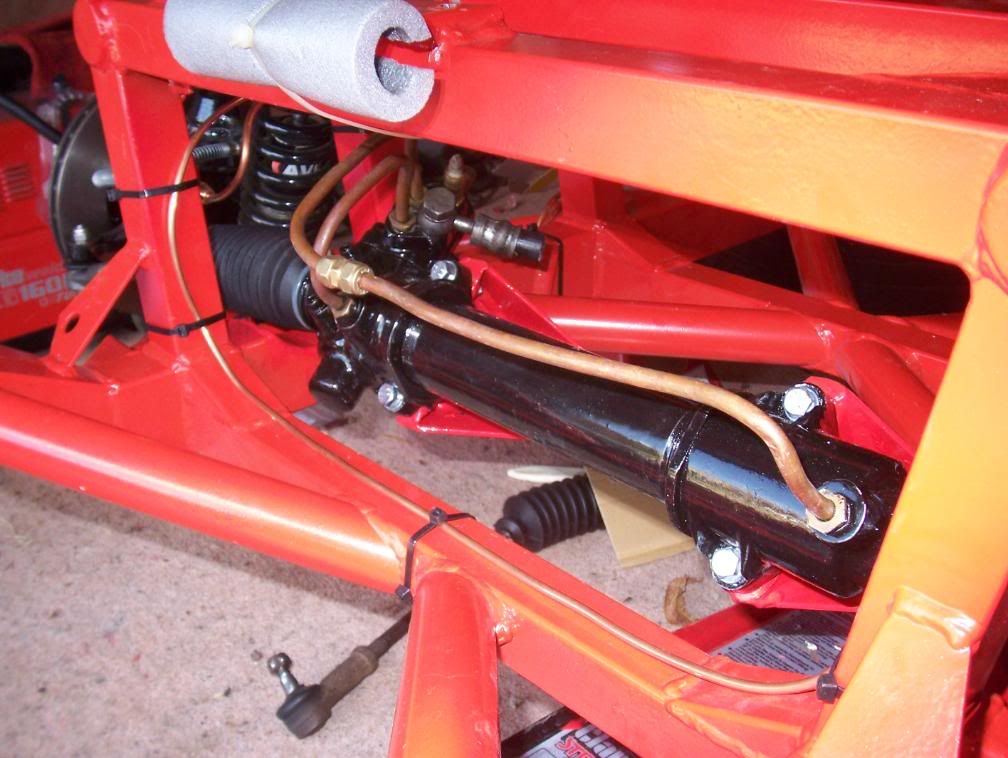
A few more cable ties need to be fitted - I'm out of longer ones you may notice I've joined short ones together - they will be replaced.
None of the brake unions are done up tight at the moment as I need to undo all the flange joints and fit shakeproof washers, and the front flexi pipes to the calipers wil have to come off again anyway as you need to tighten it at the caliper end first (otherwise you'd twist the hose).
Left to do
Rebuild front calipers & fit.
Clean, paint & fit fuel tank.
Fit fuel pipes.
Fit rear brake pipe.
Fit starter supply cable.
Then I am going to put the body on - as I can't drive till next April I'm going to leave the engine expenditure till nearer the time.
Once the body is on there's still plenty to be done - connect & bleed brakes, replace heat shielding in engine area, fit the jag seats, sort out power steering pump & steering linkage, sit in drivers seat and make brrrrr noises
Nearside front showing brake pipes.
No calipers fitted yet I'm waiting for a replacement caliper piston due to arrive on monday.
I'm fitting xr4x4 calipers which allow use of 260mm discs (its another story but don't use xr4x4 discs - you need 2wd 260mm discs later ABS models or xr4i).
I'll touch up the track rod paint when I know the tracking is right.


Offside rear


Nearside rear trailing arm pipe

Rear brake pipe above diff to offside (cable ties needed here)

Rear Brake 'T', my original was imperial, I've replaced everything with metric.
Additional nut fitted under the 'T' as otherwise it is too near the chassis and you can't swing the spanner very well.
I know there's a pipe missing - I ran out of copper pipe


Routing of front brake pipes - faithful to original route
The pipes at the bottom left of the picture need to be covered by a piece of rubber hose for protection.

Front Brake pipe - again same as original route

A few more cable ties need to be fitted - I'm out of longer ones you may notice I've joined short ones together - they will be replaced.
None of the brake unions are done up tight at the moment as I need to undo all the flange joints and fit shakeproof washers, and the front flexi pipes to the calipers wil have to come off again anyway as you need to tighten it at the caliper end first (otherwise you'd twist the hose).
Left to do
Rebuild front calipers & fit.
Clean, paint & fit fuel tank.
Fit fuel pipes.
Fit rear brake pipe.
Fit starter supply cable.
Then I am going to put the body on - as I can't drive till next April I'm going to leave the engine expenditure till nearer the time.
Once the body is on there's still plenty to be done - connect & bleed brakes, replace heat shielding in engine area, fit the jag seats, sort out power steering pump & steering linkage, sit in drivers seat and make brrrrr noises

Edited by Barkychoc on Saturday 13th September 20:06
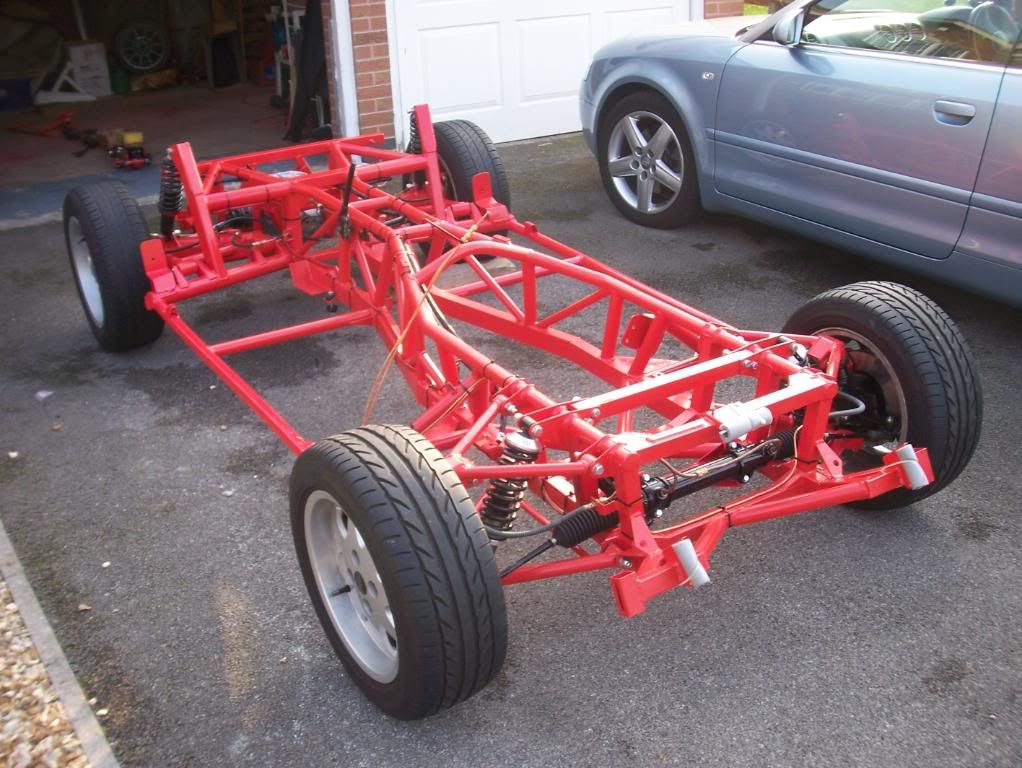
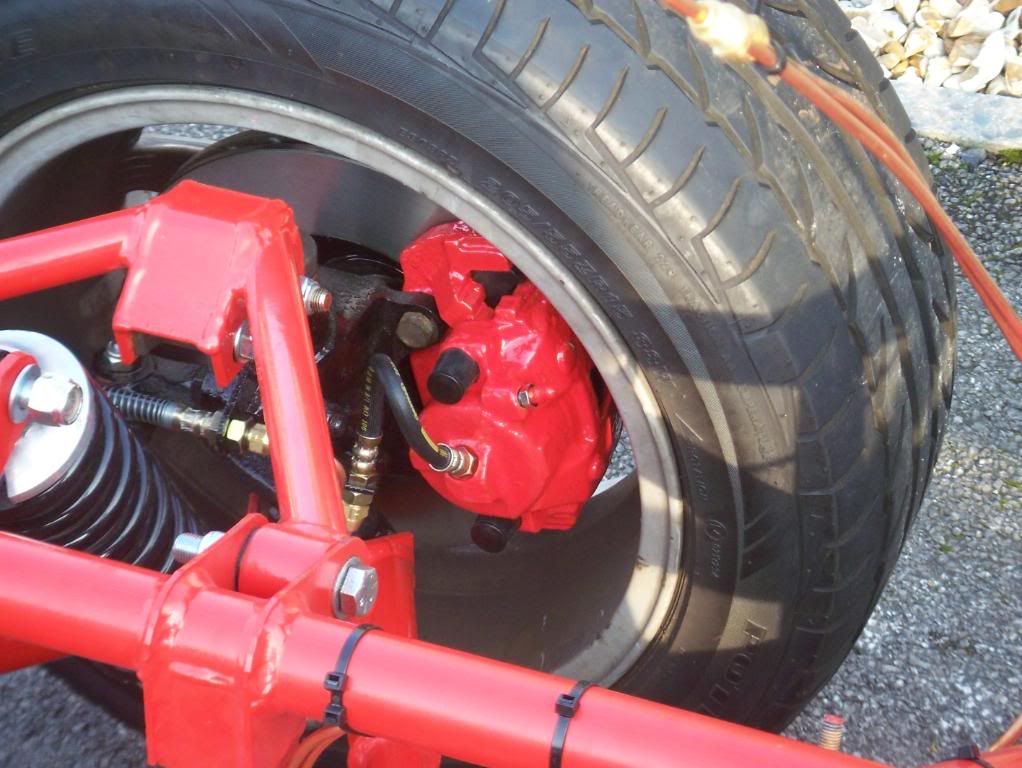
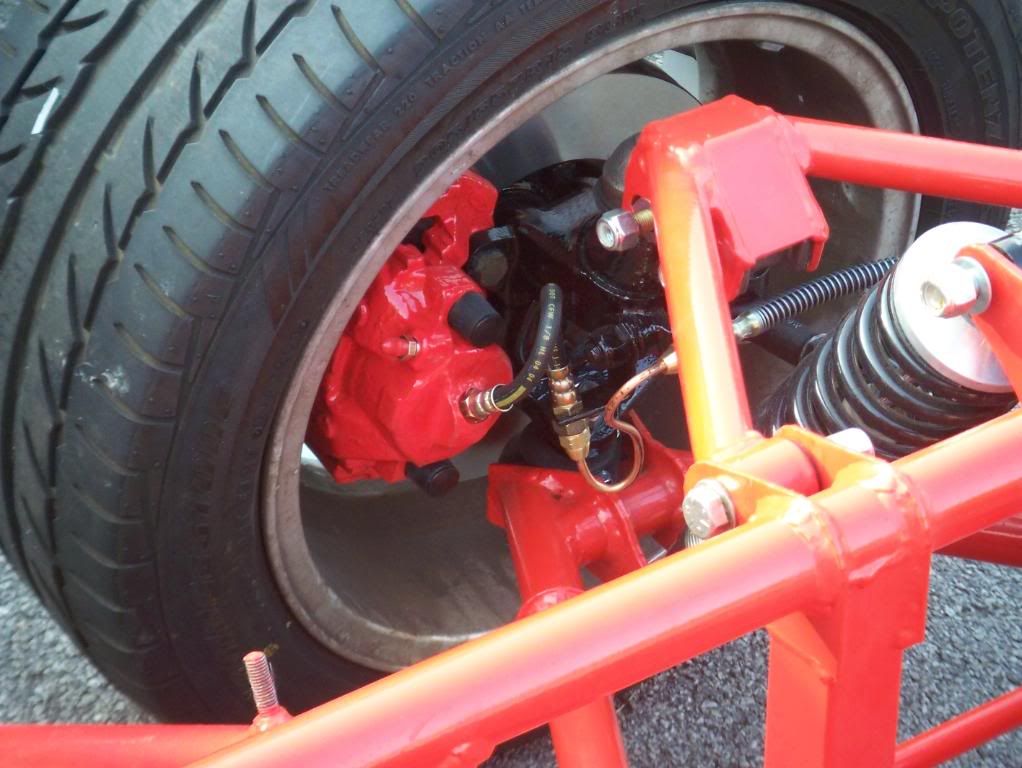
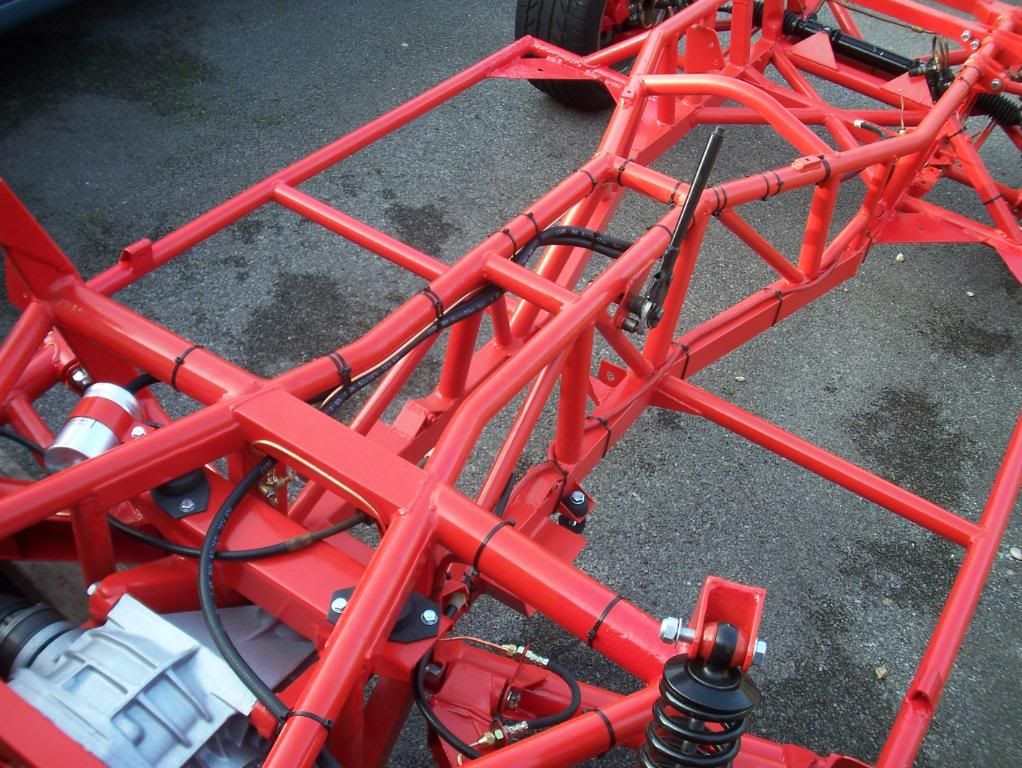
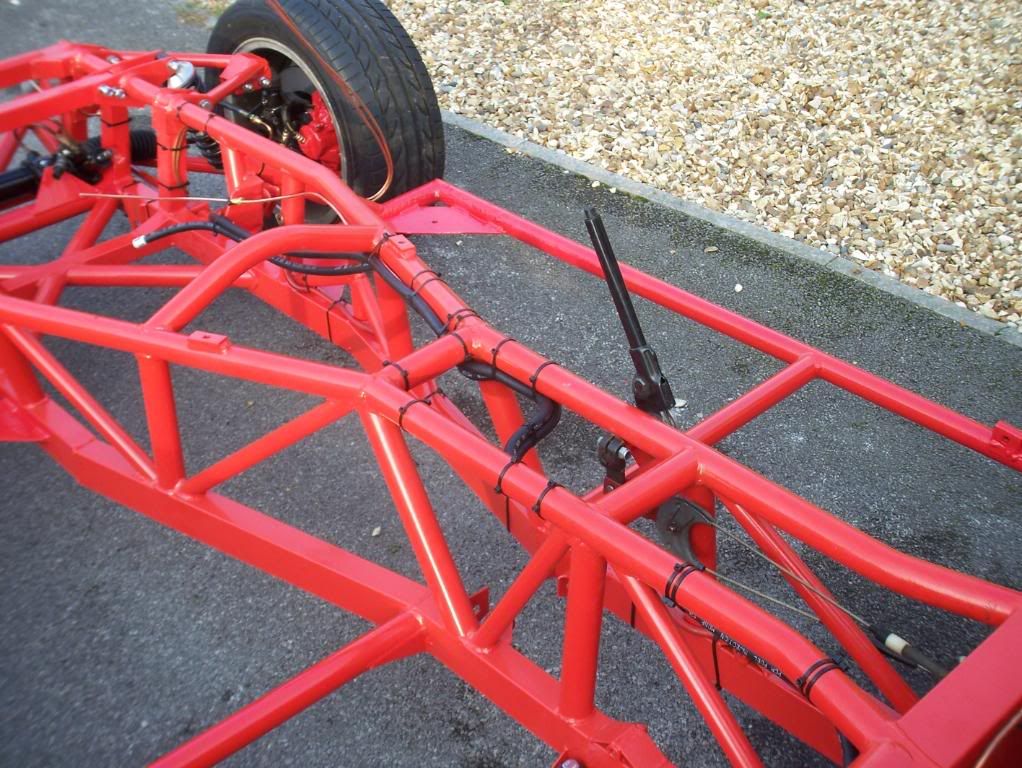
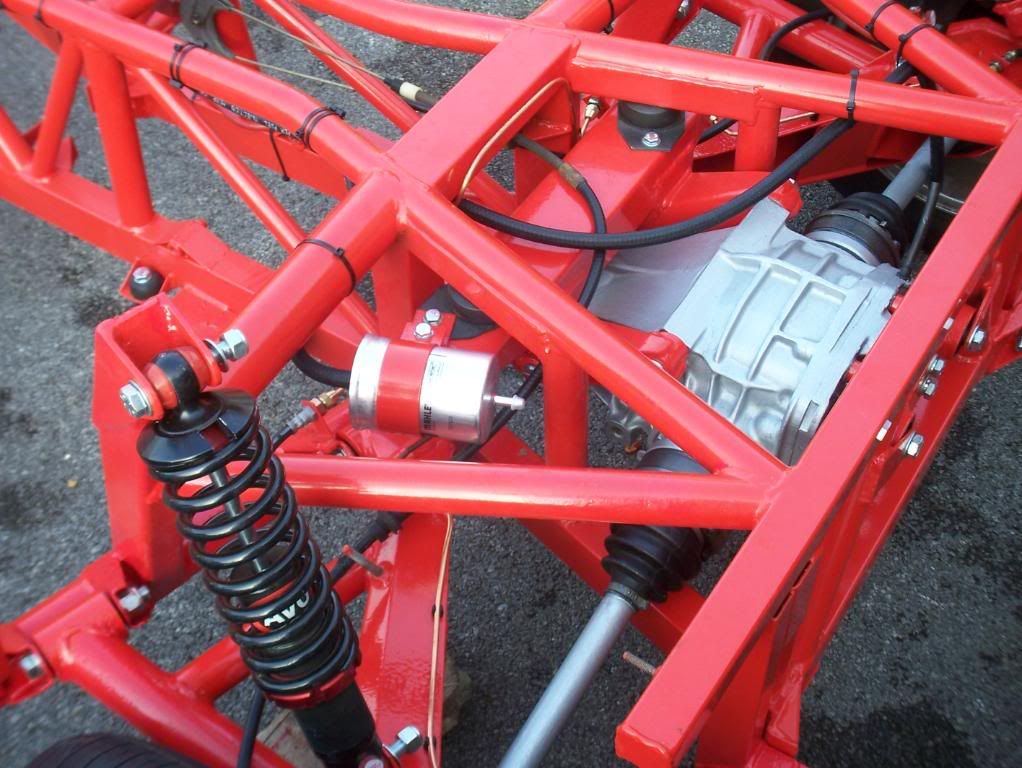
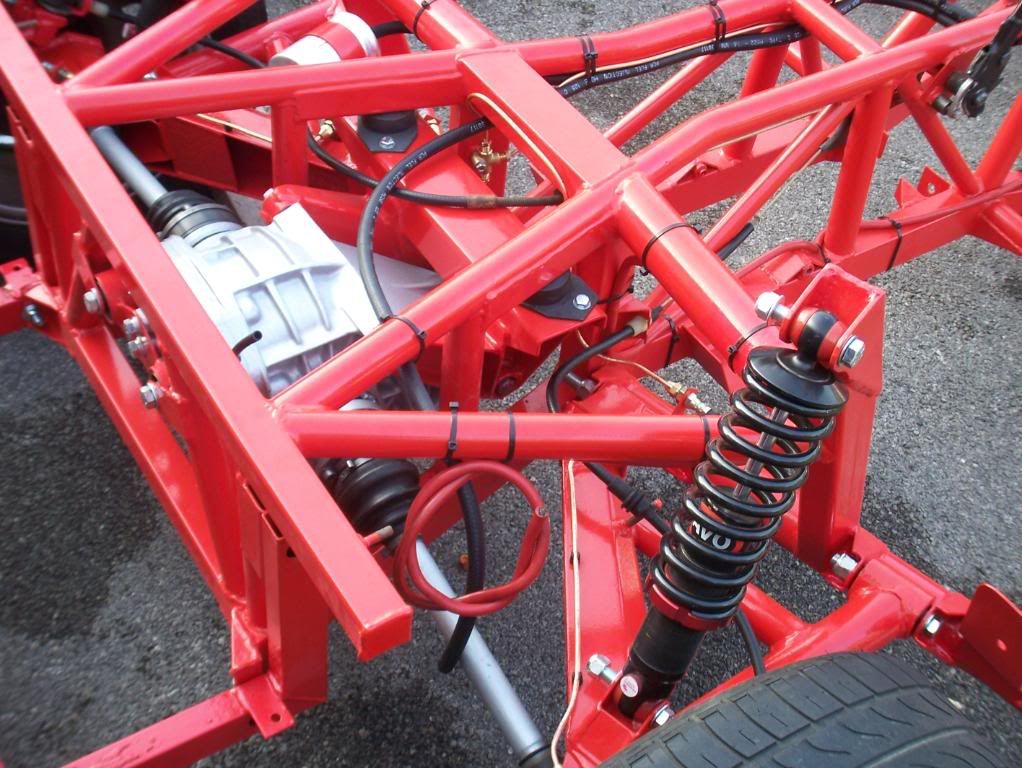
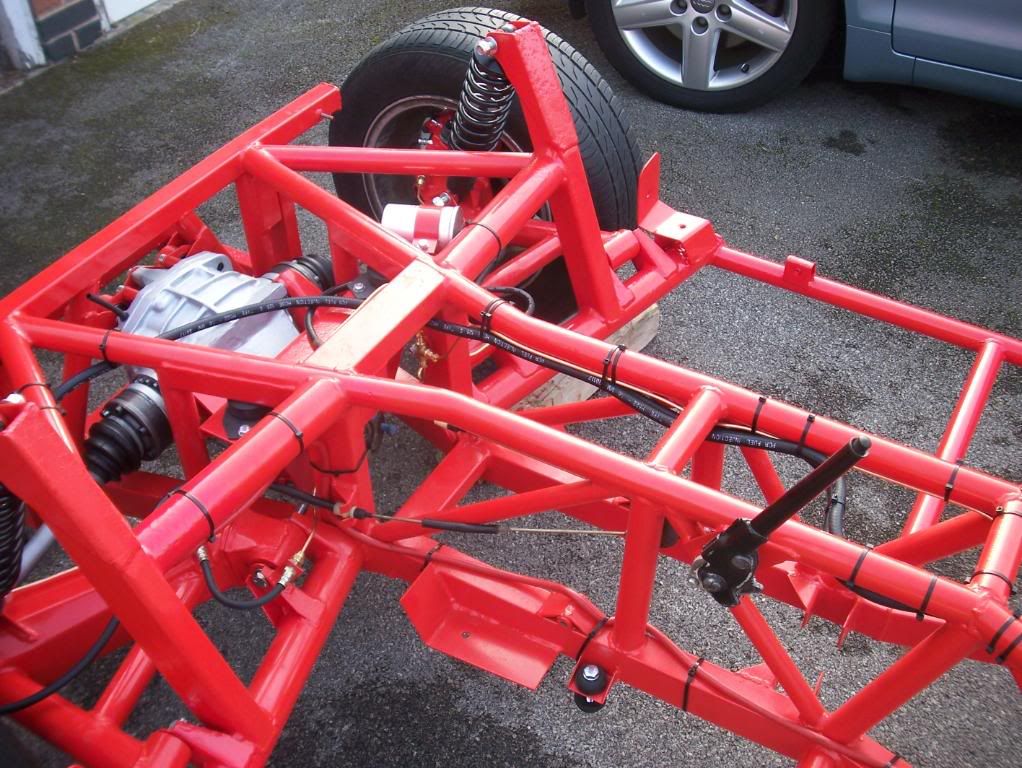
OK got quite a bit done today.
Rebuilt & fitted front calipers (60mm piston / 260mm disc sierra calipers).
Made & fitted last remaining copper brake pipe for rear brakes.
Fitted fuel hoses.
Fitted new fuel filter & bracket.
Fitted starter motor / main vehicle supply cable.
Left to do
Clean & fit fuel tank.
Clean underside of body & I may paint it black.
Replace heat shielding in engine bay.
Probably waxoyl the outriggers (the jury is still out).
Then thats it - body on time.......
Pictures below in no particular order.
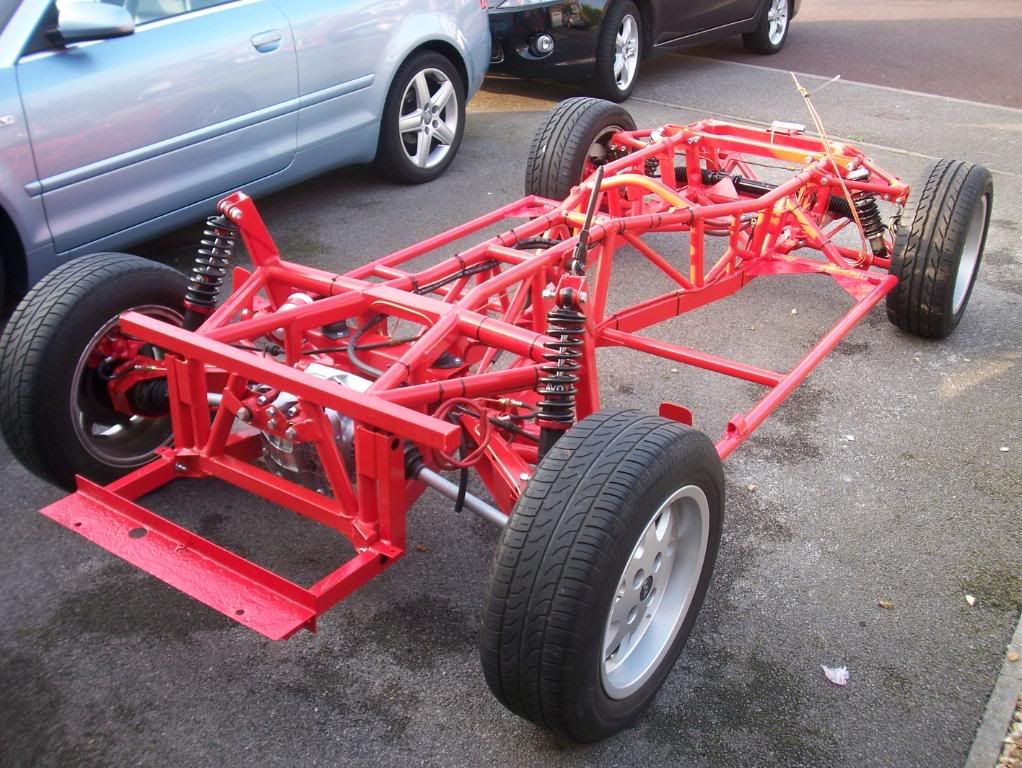
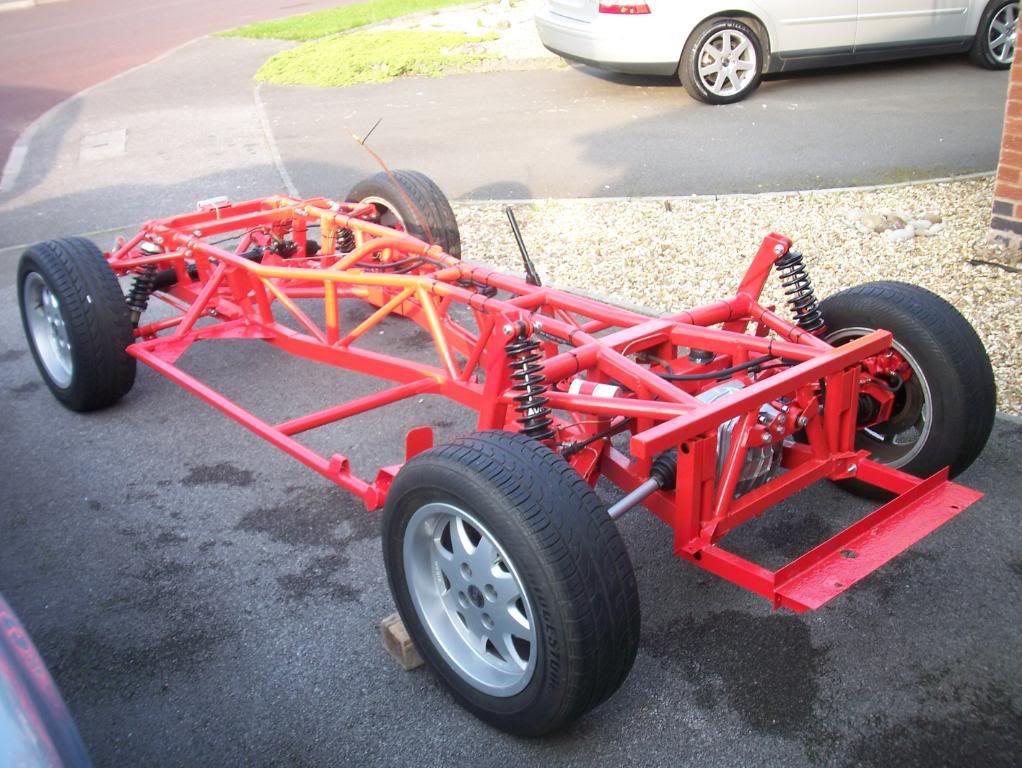
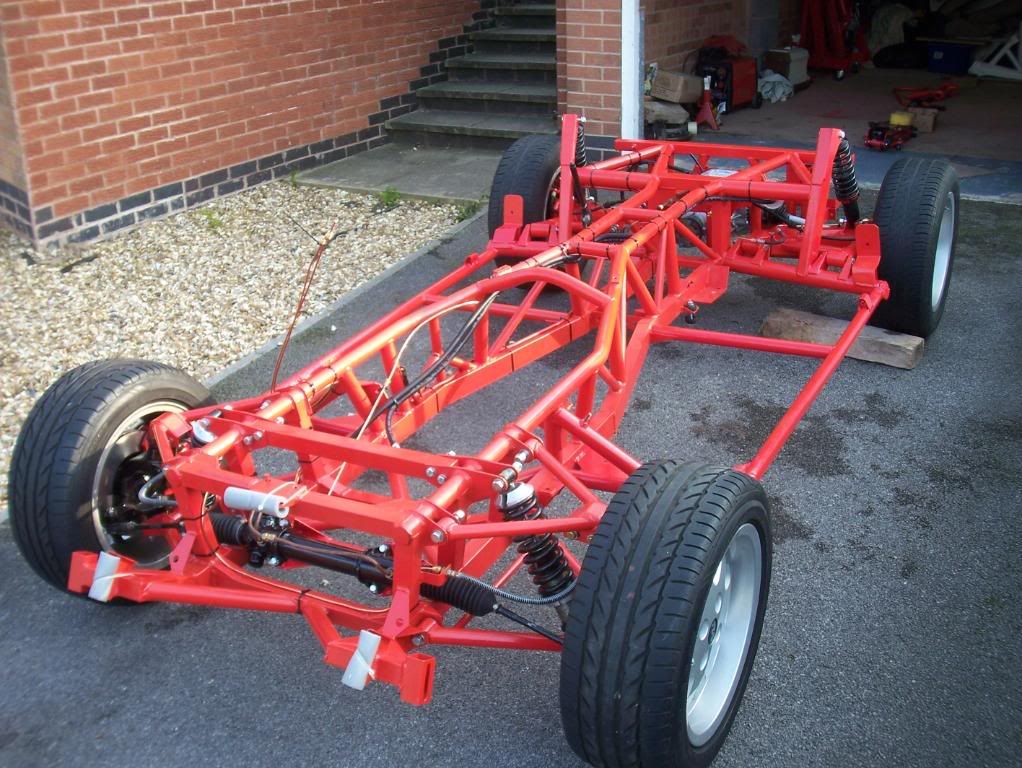
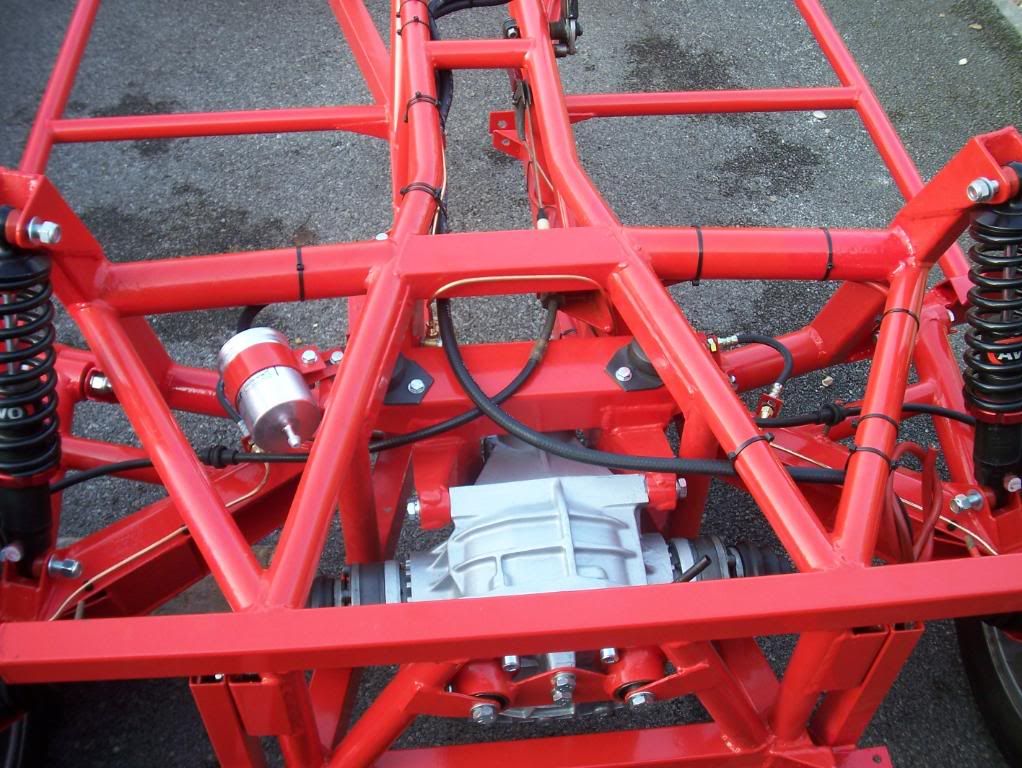
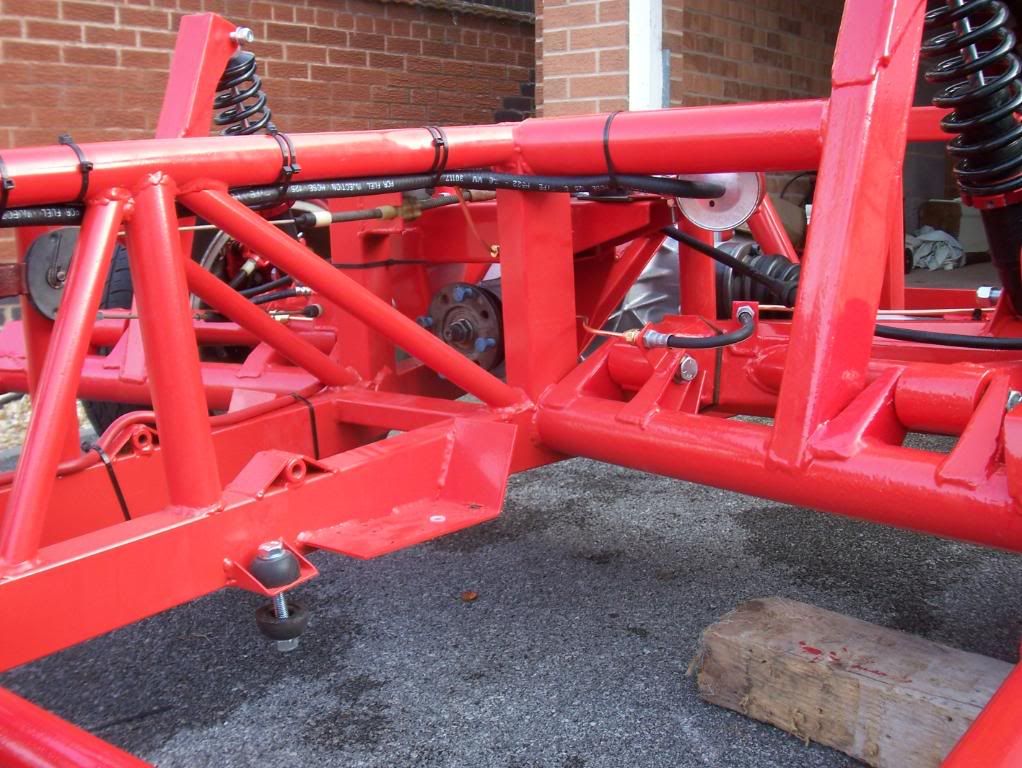
Rebuilt & fitted front calipers (60mm piston / 260mm disc sierra calipers).
Made & fitted last remaining copper brake pipe for rear brakes.
Fitted fuel hoses.
Fitted new fuel filter & bracket.
Fitted starter motor / main vehicle supply cable.
Left to do
Clean & fit fuel tank.
Clean underside of body & I may paint it black.
Replace heat shielding in engine bay.
Probably waxoyl the outriggers (the jury is still out).
Then thats it - body on time.......

Pictures below in no particular order.


Edited by Barkychoc on Saturday 20th September 21:28
Gassing Station | S Series | Top of Page | What's New | My Stuff


