V8S Rebuild begins!
Discussion


No exciting pics but over the last few days I have:
Fitted the fuel filler hoses in the boot, what a pig having already fitted the tank in the end I removed the filler cap assembly then it wssn't too difficult apart from the contortions required to get at the filler cap fixing nuts in the boot.
Fitted the fuel pump (under the boot in V8S, another of a job).
Fitted the fuel hoses from tank to pump, from pump to filter and the return to the tank connected.
Changed the rear hub nuts for new ones after I had the hubs off for the refurb last year.
Fitted the battery power cable into the boot and fitted the earth cable between battery location and chassis.
I also bit the bullet and took the engine for some professional attention, I'll report more info on that as I have it.
Next job is to fit the heat shielding in the engine bay and generally sort out the engine bay ready to fit the engine when it returns.
Fitted the fuel filler hoses in the boot, what a pig having already fitted the tank in the end I removed the filler cap assembly then it wssn't too difficult apart from the contortions required to get at the filler cap fixing nuts in the boot.
Fitted the fuel pump (under the boot in V8S, another
of a job).Fitted the fuel hoses from tank to pump, from pump to filter and the return to the tank connected.
Changed the rear hub nuts for new ones after I had the hubs off for the refurb last year.
Fitted the battery power cable into the boot and fitted the earth cable between battery location and chassis.
I also bit the bullet and took the engine for some professional attention, I'll report more info on that as I have it.
Next job is to fit the heat shielding in the engine bay and generally sort out the engine bay ready to fit the engine when it returns.
seb400 said:
Hi Chris
Excuse my ignorance, but if it passed the pressure test why a rebore?
Is each cylinder measured separately by way of spark plug cavity?
Steve
Number 8 cylinder had some odd wear to the bore requiring a rebore, it is possible I had a bent con rod but this will be confirmed later when the pistons are removed from the rods to fit new ones (+20 thou).Excuse my ignorance, but if it passed the pressure test why a rebore?
Is each cylinder measured separately by way of spark plug cavity?
Steve
Some of the other bores were showing some signs of wear.
There was no point having a rebore if the liners were not sound in the block - hence the pressure test. If the pressure test had failed the options would have been new liners (£££) or an alternative block.
The pressure test is to test the coolant passages & liners in the block, not a compression test if thats what you were thinking of.
The block is heated to 100 degrees and pressurised to 150psi and tested to see if it holds pressure.
OK engine has returned, 20 thou rebore complete with new pistons, new cam, new timing chain & gears & fully assembled.
My Civic has had a V8 in the back today, but it didn't seem to go any faster
I've fitted new heat shielding to the engine bay too, it looks loads better.
Pics to follow tomorrow.
My Civic has had a V8 in the back today, but it didn't seem to go any faster
I've fitted new heat shielding to the engine bay too, it looks loads better.
Pics to follow tomorrow.


A bit more progress today - boring stuff though.
Anti roll bar refitted with poly mounts, blimey those drop links are a bugger to get back on the roll bar aren't they?
Clutch connected and bled, took a couple of goes but pedal action feels good now. I won't really know properly until its running.
Checked the timing (TDC) with a dial gauge on No1 cylinder - Rover V8 ignition timing marks on the pulley are notoriously unreliable and mine is no exception - it's 2 degrees out.
I've got some work tomorrow and its looking like a busy 2 or 3 weeks coming up so progress may slow a little - but its been 2.5 years already , a few more days won't make any difference!
Anti roll bar refitted with poly mounts, blimey those drop links are a bugger to get back on the roll bar aren't they?
Clutch connected and bled, took a couple of goes but pedal action feels good now. I won't really know properly until its running.
Checked the timing (TDC) with a dial gauge on No1 cylinder - Rover V8 ignition timing marks on the pulley are notoriously unreliable and mine is no exception - it's 2 degrees out.
I've got some work tomorrow and its looking like a busy 2 or 3 weeks coming up so progress may slow a little - but its been 2.5 years already
, a few more days won't make any difference!I've stuck the original drop links back on for now Kevin, there's no wear or splitting on the rubbers so they will do for now.
A bit more progress
Obviously I was a precision engineer in a previous life
The dial gauge is setup to determine top dead centre on cylinder 1


The Rover V8 crankshaft pulley is notorious for having inaccurate markers, mine was 2 degrees out so top dead centre was indicated at 2 degrees after TDC.
The fix was easy - a quick file on the end of the pointer and voila!

Engine is now coming together


I now need to check the tappet pre load Bedtime reading here
A bit more progress
Obviously I was a precision engineer in a previous life
The dial gauge is setup to determine top dead centre on cylinder 1
The Rover V8 crankshaft pulley is notorious for having inaccurate markers, mine was 2 degrees out so top dead centre was indicated at 2 degrees after TDC.
The fix was easy - a quick file on the end of the pointer and voila!
Engine is now coming together
I now need to check the tappet pre load Bedtime reading here
clarenceboddiger said:
Are those new bolts in the Water Pump/ timing cover, if so did you buy a kit or buy seperates?
Yes I bought them as a kit off ebayhttp://cgi.ebay.co.uk/ROVER-V8-WATER-PUMP-BOLTS-ST...
I didn't realise but if you read the ad properly you only get the top end water pump bolts, not every single bolt for the front cover.
I had to cut one or two of the bolts in the kit shorter, but otherwise they seem reasonable. I snapped one of the long water pump bolts when I stripped the engine to had to buy something.
Also Ken - cleaning up that engine - Mr Muscle oven cleaner is your friend.
Chris
I checked the hydraulic tappet pre load as per the link above if you read it and I need some additional shims to bring the tappet pre load down a bit, I haven't been through them all but the ones I checked were all very high, over 60 thou, I'll be a bit more scientific when I have the shim kit.
A quick update to answer all the questions today!
I've been held up a bit as I sent a few bits to be powder coated, including the plenum.
The rocker covers I had done previously, the same colour as the chassis.
I got the various bits back on Saturday, and though I say so myself WOW!
The plenum is just placed on top, it isn't bolted down yet as I still need to finish rebuilding the throttle mechanism.
I've had the pulleys done in gloss black too, you can just see the water pump pulley.
Quick pic

I've now bought some oil and have a small issue with the oil pressure switch fitting but that won't hold things up for long.
I have also been a bit dim as I've bolted down the rocker covers but I need to open them again as I need to make sure oil is getting up to the rockers when I prime the oil pump.
I've been held up a bit as I sent a few bits to be powder coated, including the plenum.
The rocker covers I had done previously, the same colour as the chassis.
I got the various bits back on Saturday, and though I say so myself WOW!
The plenum is just placed on top, it isn't bolted down yet as I still need to finish rebuilding the throttle mechanism.
I've had the pulleys done in gloss black too, you can just see the water pump pulley.
Quick pic
I've now bought some oil and have a small issue with the oil pressure switch fitting but that won't hold things up for long.
I have also been a bit dim as I've bolted down the rocker covers but I need to open them again as I need to make sure oil is getting up to the rockers when I prime the oil pump.
Done a bit over the last few days.
The engine is filled with oil and I've successfully primed the oil pump.
Today I fitted a replacement speedo sender unit as I broke the original when I removed the engine. What a pig pig pig of a job. I called into question its parentage many times! Its so bloody tight down where it is located and a chassis leg is in the way. Pig.
I've spray painted black coil, mounting brackets, prop shaft plus a few minor bits. Basically bits that wouldn't survive the powder coating oven.
The prop shaft is fitted now.
I've also spent quite a bit of time sorting out the under bonnet wiring looms as a lot of the loom tape had fell off or was pretty close to falling off, I've redone most of the looms in self amalgamating tape, they look a lot better.
I also had an issue previously with the oil light switch being a really sloppy fit in the oil pump, it previously had loads of PTFE tape wrapped round it. I dicovered that the oil pressure switch that was fitted isn't the one for a Rover V8 - God knows what it is off.
The solution is to get a Rover V8 oil light switch and fit that into one of the blanked off ways in the side of the oil pump.
Rimmer Brothers came up trumps with a blanking plug where the bodged oil pressure switch was located, so now I'm happy thats all sorted.
I'm at the point now where there's a list of little bits to do - but they all seem to take bleedin ages!
Chris
Tinks, here's your hose in action!
VIDEO

The smoke is just from the manifold and exhaust paint.
We had to cut the engine at the end of the video due to a coolant leak.
However we later sorted that, fired her up again till suddenly there was a yellow pool of liquid gently rolling past the drivers door.
Hmmm whats that?
PETROL! Sh!t Sh!t Sh!t
I have no idea where this came from - maybe during the petrol hose manufacturing but it must have been inside the hose and blocked the return to the tank - so the petrol return hose to the tank blew off at the tank. A close one.

The higher revs are to run the cam in - fully appreciated I think by the guy next door that works nights
VIDEO
The smoke is just from the manifold and exhaust paint.
We had to cut the engine at the end of the video due to a coolant leak.
However we later sorted that, fired her up again till suddenly there was a yellow pool of liquid gently rolling past the drivers door.
Hmmm whats that?
PETROL! Sh!t Sh!t Sh!t
I have no idea where this came from - maybe during the petrol hose manufacturing but it must have been inside the hose and blocked the return to the tank - so the petrol return hose to the tank blew off at the tank. A close one.
The higher revs are to run the cam in - fully appreciated I think by the guy next door that works nights
Edited by Barkychoc on Sunday 16th May 19:16
Edited by Barkychoc on Monday 24th October 21:47
Yes Tom a fantastic moment for sure today.
It started second turn of the key, I've run out of time today so I may still need to look at the coolant hoses - one or two minor leaks here and there but nothing major.
I did actually drive the car today - only off the drive, turn round and back on, but at least the transmission is all working, brakes, clutch etc. I don't want to drive it much as it means I'm using the power steering rack with no fluid in it - which can't be good for it can it.
I've given mounting the Power Steering Pump a bit of attention today.
I think I said previously that it is a Citroen Saxo / Peugeot 106 electrically powered hydraulic pump - as fitted to Sagaris / Tamora and a few other late cars I think.
I am getting the hang of this TVR Lark - I made all the mounting brackets from stuff I had kicking around in the garage just like TVR - 10mm threaded rod, nuts & washers, a couple of bits of flat steel, a bit of rubber hose and a quick squirt of gloss black aerosol.
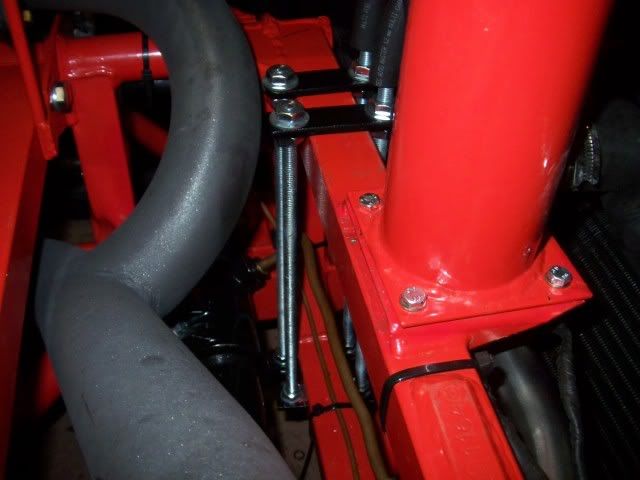
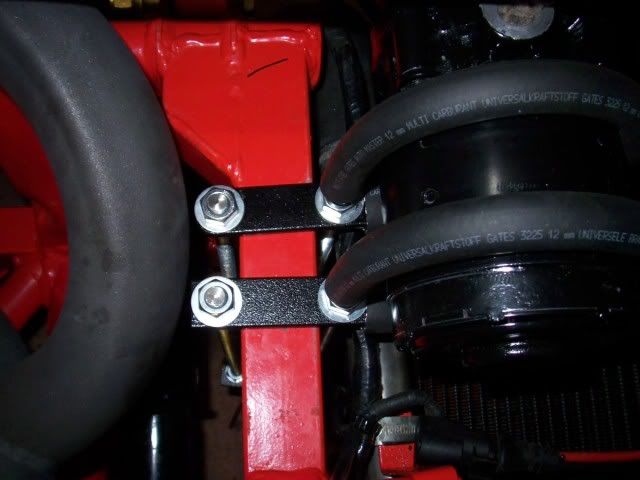
I hope the pics speak for themselves, what I've done is pretty straightforward - 2 lengths of 10mm threaded rod bent to a hockey stick shape with a bit of rubber hose over the end - and a couple more bits of straight 10mm rod.
There's also a bit of opened & flattened rubber hose underneath the pump cabletied to the bracket with TVR precision.
The bracket is a bit closer to the exhaust than I'd like but I'll see how it goes.
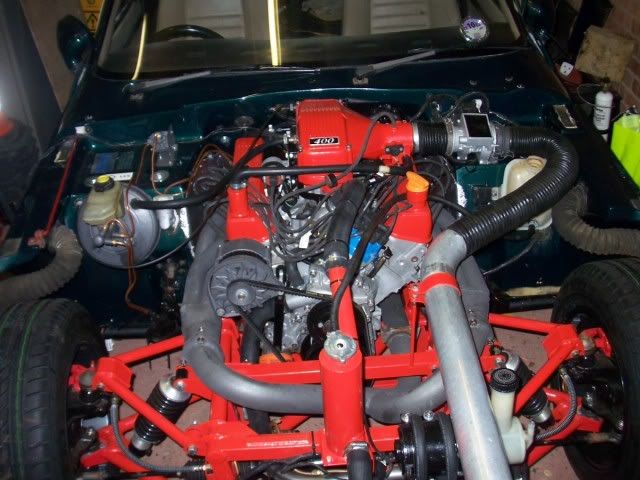
If you are not aware the big aluminium pipe is the air intake on the V8.

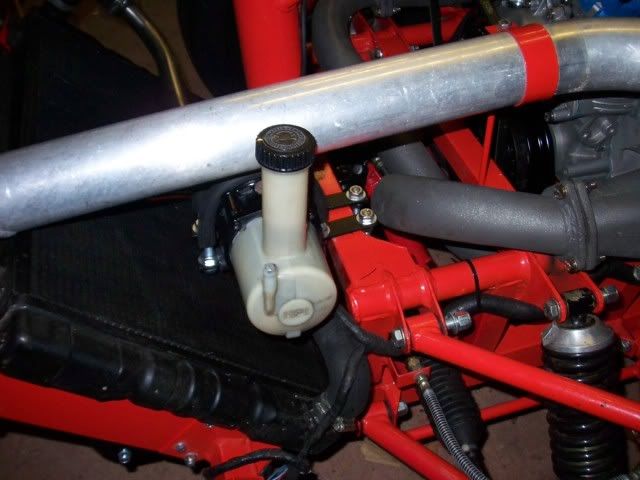
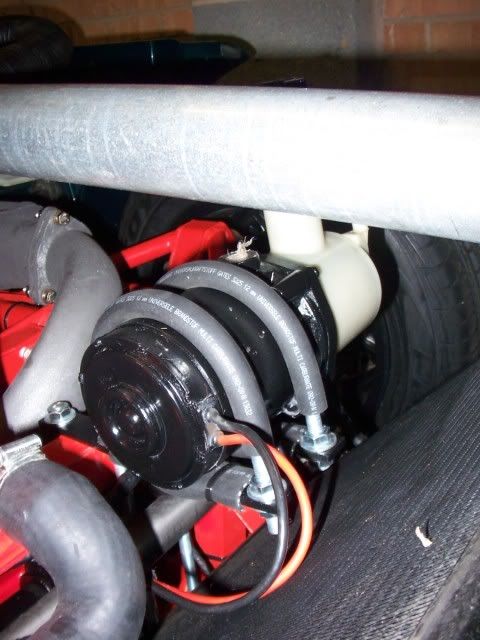
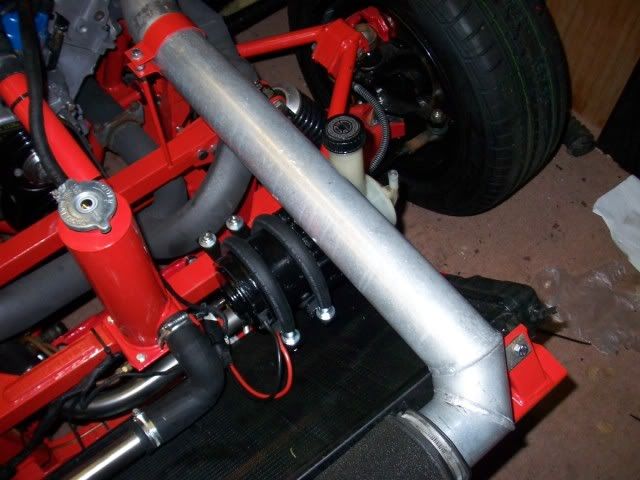
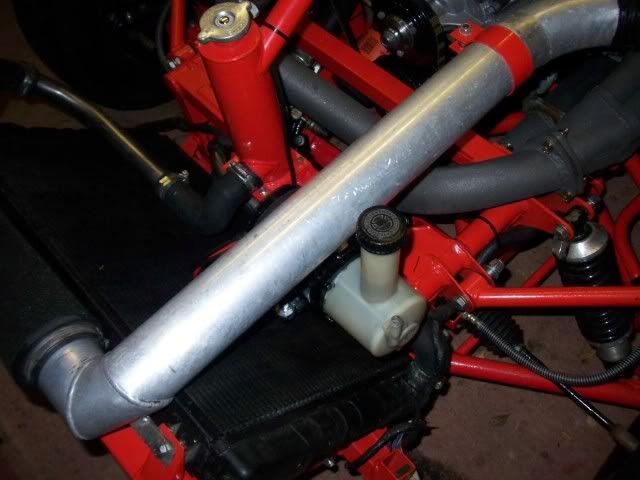
and its about time we had a new engine shot!
I think I said previously that it is a Citroen Saxo / Peugeot 106 electrically powered hydraulic pump - as fitted to Sagaris / Tamora and a few other late cars I think.
I am getting the hang of this TVR Lark - I made all the mounting brackets from stuff I had kicking around in the garage just like TVR
- 10mm threaded rod, nuts & washers, a couple of bits of flat steel, a bit of rubber hose and a quick squirt of gloss black aerosol.I hope the pics speak for themselves, what I've done is pretty straightforward - 2 lengths of 10mm threaded rod bent to a hockey stick shape with a bit of rubber hose over the end - and a couple more bits of straight 10mm rod.
There's also a bit of opened & flattened rubber hose underneath the pump cabletied to the bracket with TVR precision.
The bracket is a bit closer to the exhaust than I'd like but I'll see how it goes.
If you are not aware the big aluminium pipe is the air intake on the V8.
and its about time we had a new engine shot!
Edited by Barkychoc on Sunday 6th June 19:25
Edited by Barkychoc on Sunday 6th June 19:31
Got seats & seat belts fixid in the car properly today - thats the good news.
The bad news is the master cylinder is leaking


I am getting fluid leaking at the servo end - I have some wet staining on the servo where the fluid is running down behind the flange.
I have a spare master cylinder, I can't decide whether to try that or just go for a new one.
Oh and the bloody reversing lights aren't working either.
The bad news is the master cylinder is leaking
I am getting fluid leaking at the servo end - I have some wet staining on the servo where the fluid is running down behind the flange.
I have a spare master cylinder, I can't decide whether to try that or just go for a new one.
Oh and the bloody reversing lights aren't working either.
Edited by Barkychoc on Sunday 13th June 19:10
Gassing Station | S Series | Top of Page | What's New | My Stuff