They Said it Couldn't be Done...
Discussion


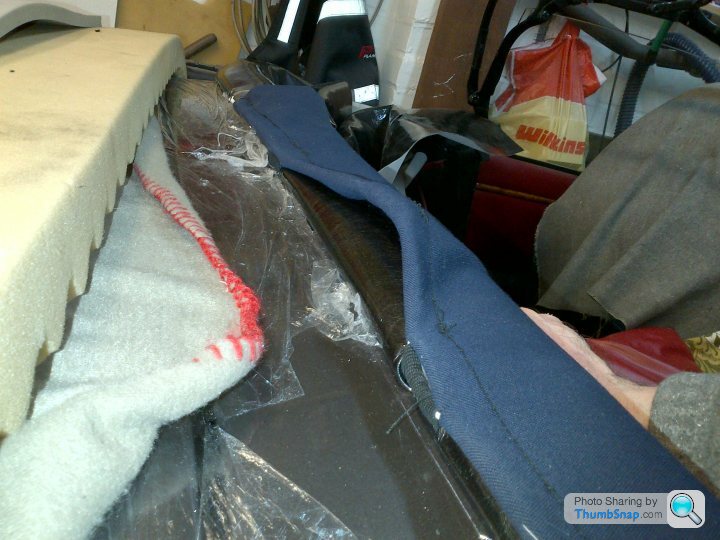
I'm working on an idea to attach the hood bag/tonneau without resorting to studs/poppers through the hood fabric....
Loops of elastic webbing attached to the studs in the hood rail...
Corresponding "gaps" in the rear seam of the hood bag.....
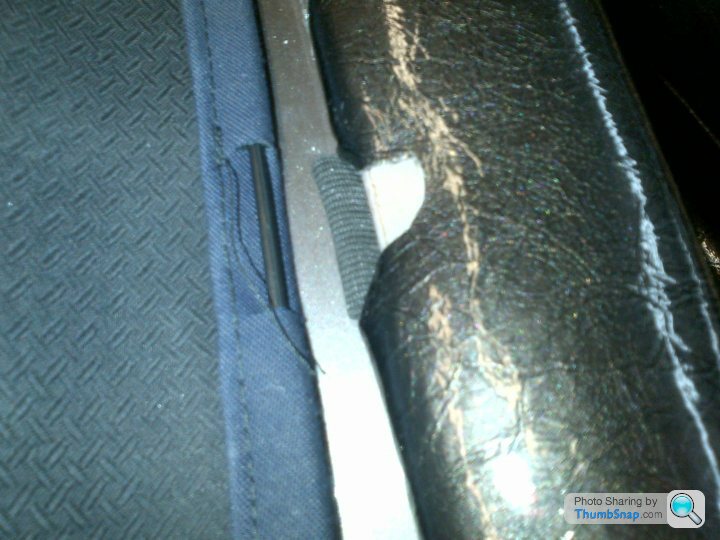
Slide a thin fibreglass rod up the hood bag seam and through the webbing loops....
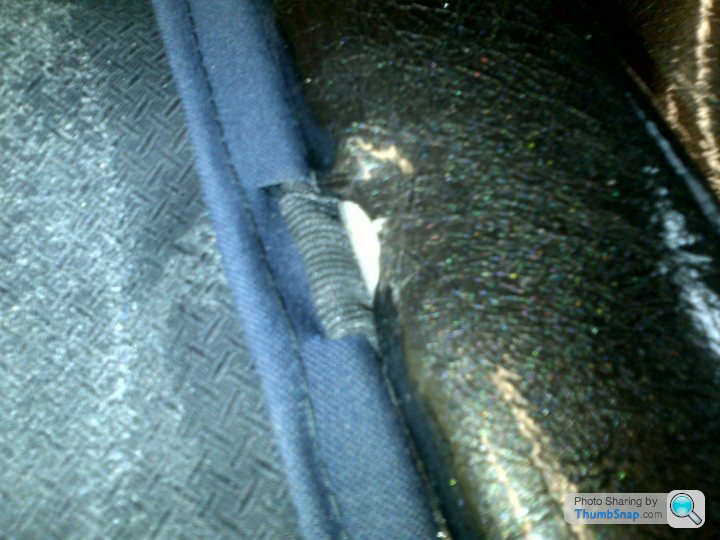
And the result is an almost invisible fixing....
Comments? Alternatives?
Don't bother asking how it goes around the corners, because I haven't worked that out yet
Loops of elastic webbing attached to the studs in the hood rail...
Corresponding "gaps" in the rear seam of the hood bag.....
Slide a thin fibreglass rod up the hood bag seam and through the webbing loops....
And the result is an almost invisible fixing....
Comments? Alternatives?
Don't bother asking how it goes around the corners, because I haven't worked that out yet
White S3 said:
.........an old fashioned net curtain wire....
That's a good suggestion; thanks for that  I've got a feeling the curtain wire may be too flexible to push along the long edge of the back seam but could well be the answer for the corners if we can come up with a way of hooking it to the ends of the rod.
glenrobbo said:
..... I'm thinking nylon rod, or maybe something used in kite-making or perhaps fishing equipment or camping ????? .. Or dyno-rod wire?
All good suggestions. I've also looked at the rods electricians use for running cables under floor boards. I think the solution is in thee world of tents though.glenrobbo said:
..... Will the hood bag/ tonneau cover be a semi-permanent fixture, ...
The hood bag is intended to be removable and yes, getting it on will probably be a bit of a faff but no more so than fitting the OE roof. Getting the bag off will be very quick though which is the way you'll need it to be if the rain starts.Edited by v8s4me on Saturday 7th February 17:50
I tried the curtain wire idea today. It slid along the seam more easily than I expected but it flexes too much under tension........
.....so it looks like the rod is the solution for the straight seam. The wire might still be an answer for the corners though so I'll keep thinking about this one.
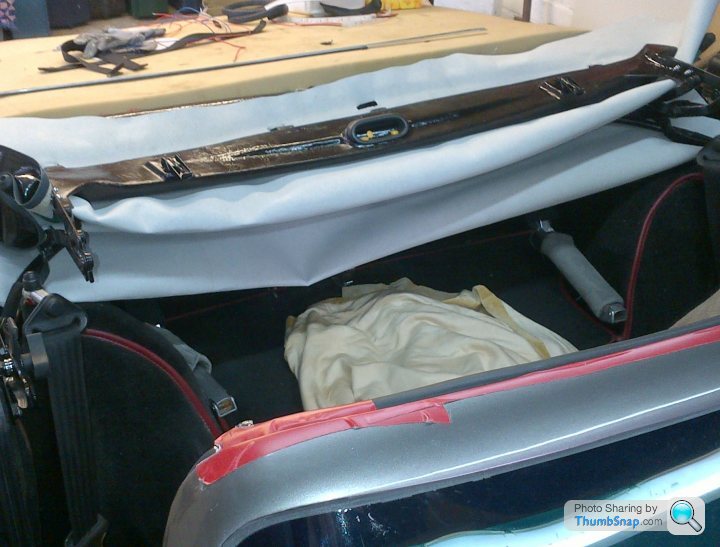
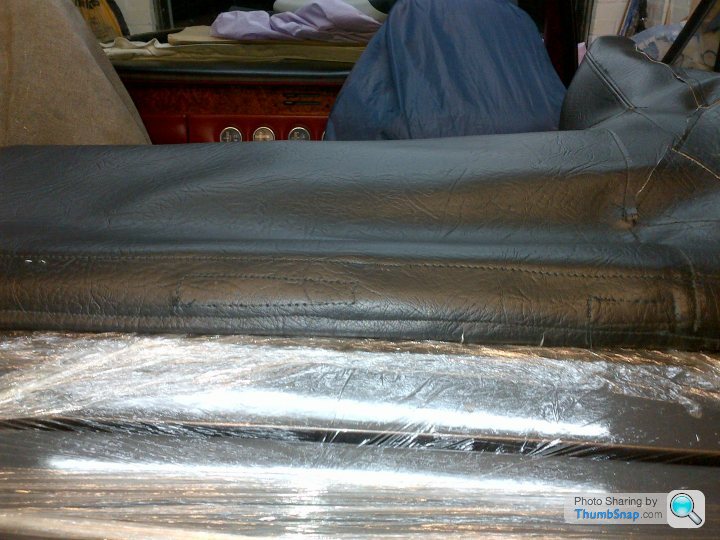
This is a photo of the hood with the vinyl folded down showing how much space it takes up; much less than I expected ................
.....so it looks like the rod is the solution for the straight seam. The wire might still be an answer for the corners though so I'll keep thinking about this one.
This is a photo of the hood with the vinyl folded down showing how much space it takes up; much less than I expected ................
Barry S1 said:
So when are you going into full production Joe ? Looking good 
Thanks Barry! I won't be doing another one but I'm sure someone else might have a go once we (a) find out if it keeps the weather out and (b) doesn't blow off the first time the window is opened . Making the header rail was the most difficult bit so if you can find a better way of making one of these then the conversion becomes a whole lot easier.
I’ve been doing a bit more messing about with the design of the hood around the driver’s door window area. This looks like the best option so far…
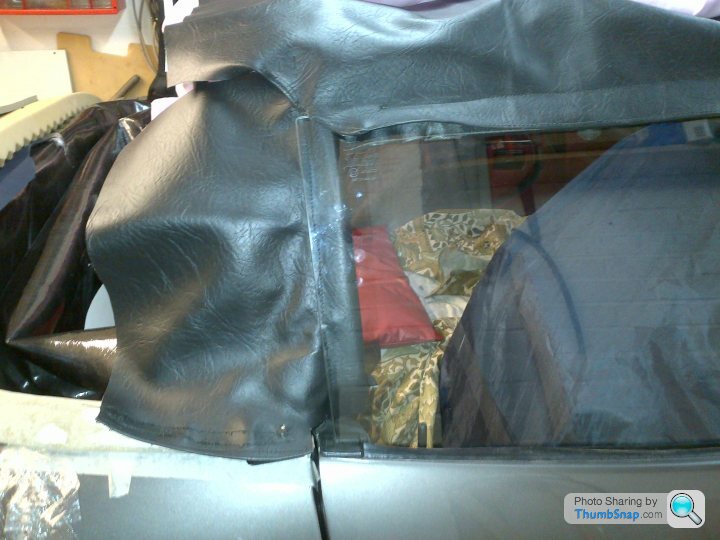
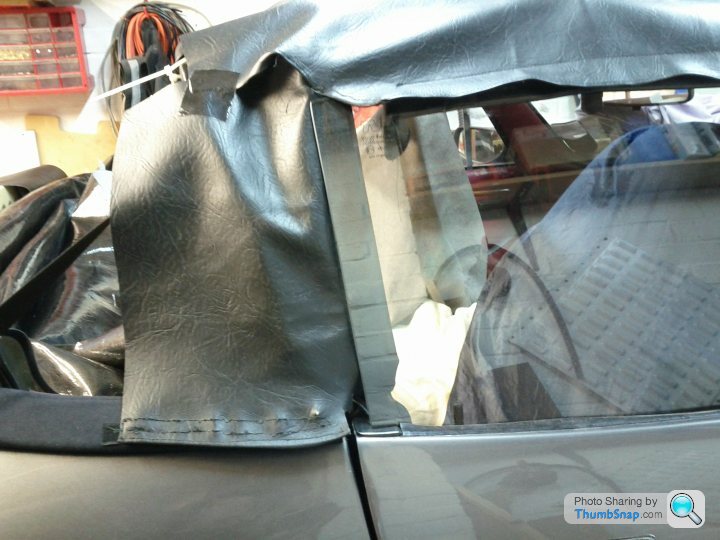
Now have a look at the oh so snug fit of the soft hood fabric to the inwardly curving window..
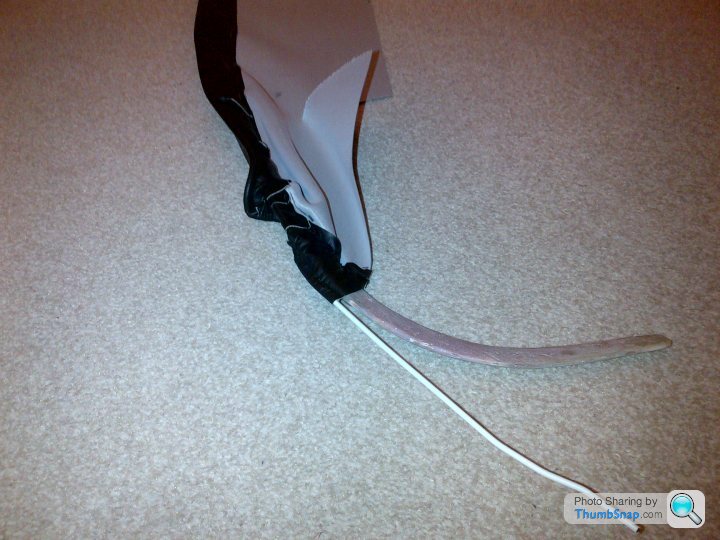
So how’s that done then? Magic? The Power of The Force? Glue? No! It’s Vorsprung durch Tent Technik or “Tent Technology” alluded to in an earlir post...
Well it’s actually an old car aerial but it’s still just a fibreglass rod. It is poked through the neoprene window seal which is sewn into the seam on the vertical edge of the hood fabric. A small loop holds this to the folding frame so that when the door is closed....
.... then hey presto, the rod pushes the fabric out to take up the shape of the window.
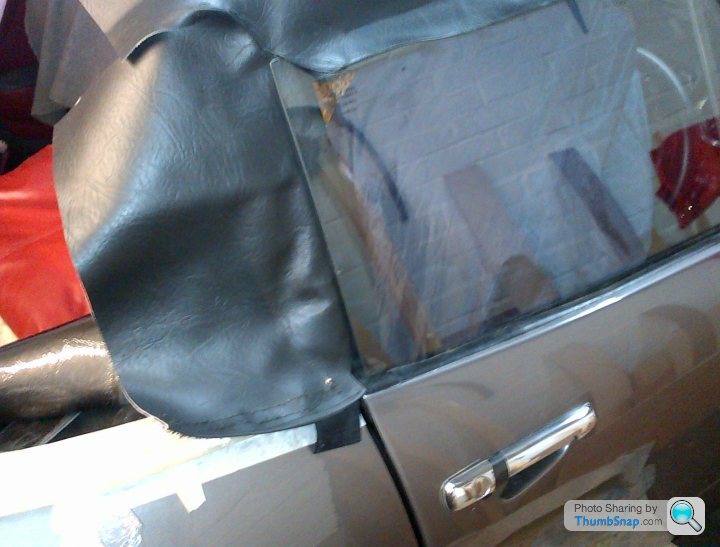
Giving a much neater fit than the flappy TR6 one above. The 'B' post flap on the TR6 is a good idea though and looks like it will help keep drafts/rain out. Clever eh?
Now have a look at the oh so snug fit of the soft hood fabric to the inwardly curving window..
So how’s that done then? Magic? The Power of The Force? Glue? No! It’s Vorsprung durch Tent Technik or “Tent Technology” alluded to in an earlir post...
Well it’s actually an old car aerial but it’s still just a fibreglass rod. It is poked through the neoprene window seal which is sewn into the seam on the vertical edge of the hood fabric. A small loop holds this to the folding frame so that when the door is closed....
.... then hey presto, the rod pushes the fabric out to take up the shape of the window.
Giving a much neater fit than the flappy TR6 one above. The 'B' post flap on the TR6 is a good idea though and looks like it will help keep drafts/rain out. Clever eh?
Can anyone work out what these might be for?
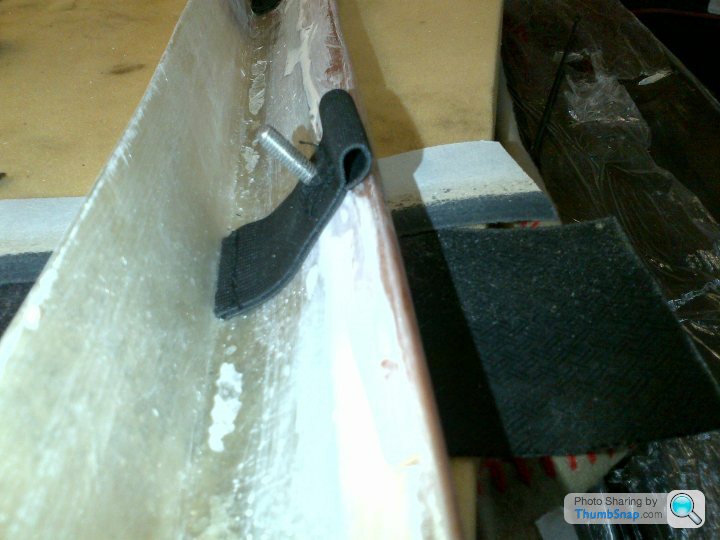
There's a clue in WhiteS3's post from last Saturday. I'm not sure that they will actually work yet but without making them I can't find out. More later. In the meantime, Here's the simple bump-stop solution for the hood frame where it pivots in the bracket.
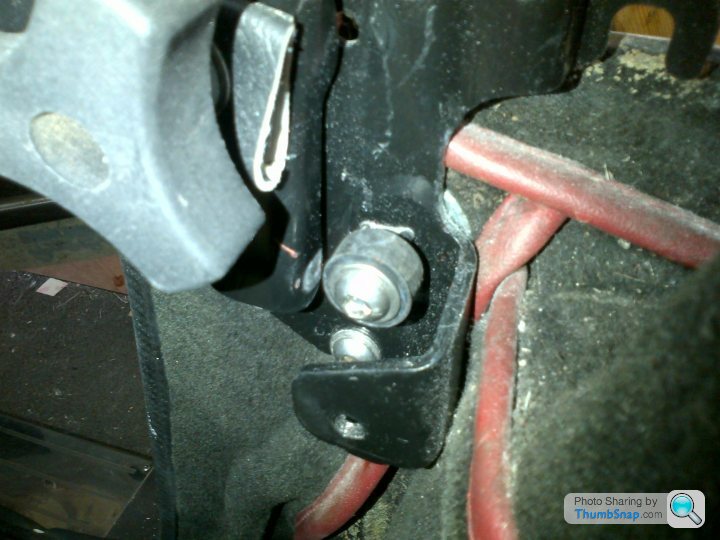
Just a bolt through a rubber bung and some stainless washers. Simple but effective
There's a clue in WhiteS3's post from last Saturday. I'm not sure that they will actually work yet but without making them I can't find out. More later. In the meantime, Here's the simple bump-stop solution for the hood frame where it pivots in the bracket.
Just a bolt through a rubber bung and some stainless washers. Simple but effective
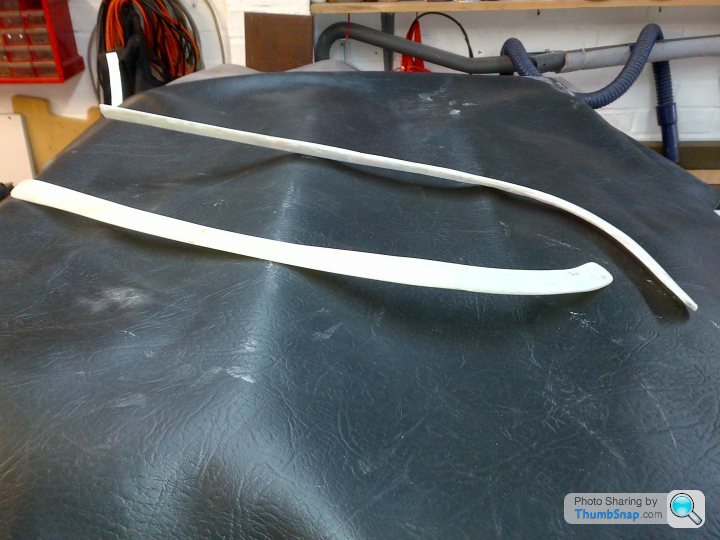
So as nobody has worked it out (or more likely can's be ar ed) here's the answer...
They are battens or stays (like in a corset ). I wanted to see if these, plus the curtain wire, would hold the corners of the hood cover in place and avoid using studs....

Not entirely successful so far but worth a bit more work and thought.
ed) here's the answer...They are battens or stays (like in a corset
). I wanted to see if these, plus the curtain wire, would hold the corners of the hood cover in place and avoid using studs....Not entirely successful so far but worth a bit more work and thought.

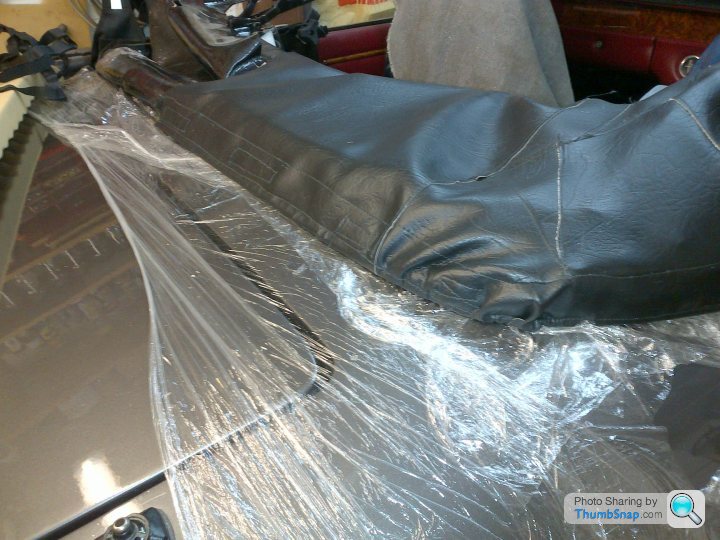
This morning was spent messing around with the MX rear screen to try and get an idea of what size and shape rear window to go for. The bits of string are there to try and give an idea of where the hood fabric will curve from the body to the top rails (and to hod the window in place).
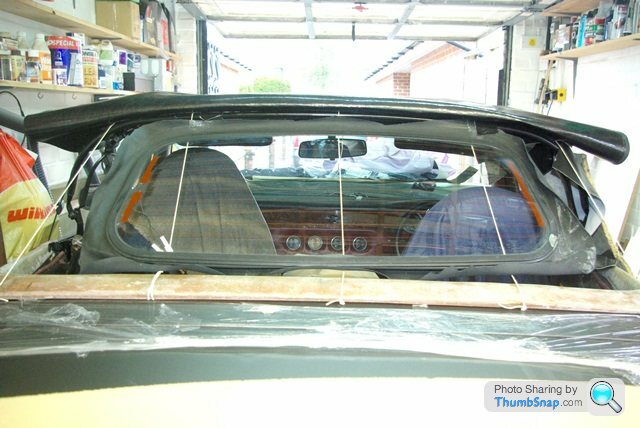
I had though about something wider but I think it is about right as it is. The MX window is plenty wide enough for the field of view of the rear view mirror and there is a good view of the n/s rear quarter. Also any wider and the plastic window might get too close to the hinged part of the frame when it's folded down.
So thats the plan then; use the MX screen as a template (thats tem-plate not temp-let ). Another detail sorted and another job ticked off
I had though about something wider but I think it is about right as it is. The MX window is plenty wide enough for the field of view of the rear view mirror and there is a good view of the n/s rear quarter. Also any wider and the plastic window might get too close to the hinged part of the frame when it's folded down.
So thats the plan then; use the MX screen as a template (thats tem-plate not temp-let
). Another detail sorted and another job ticked off It's amazing where the money goes isn't it?
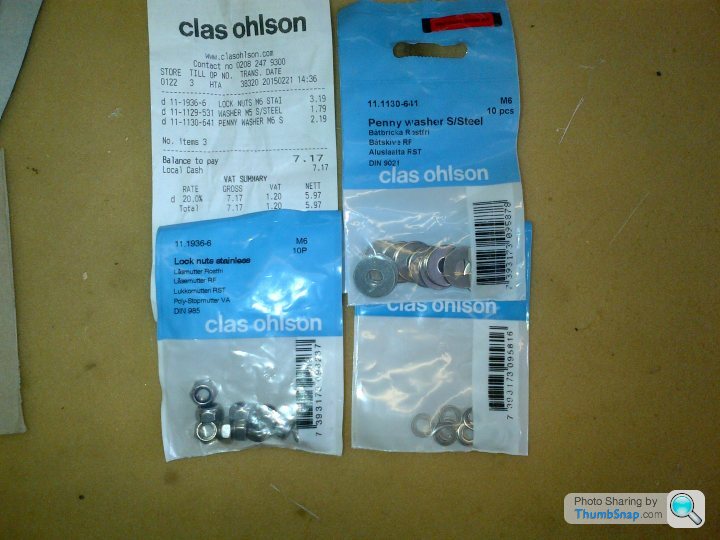
Three packets of little stainless fixings = £7.17. I guesstimate I've spent over £50 so far just on various fixings as I've tried out different experiments. If I could just find all the little buers which have fallen into the various gaps and crevices I'd save a fortune
Three packets of little stainless fixings = £7.17. I guesstimate I've spent over £50 so far just on various fixings as I've tried out different experiments. If I could just find all the little bu
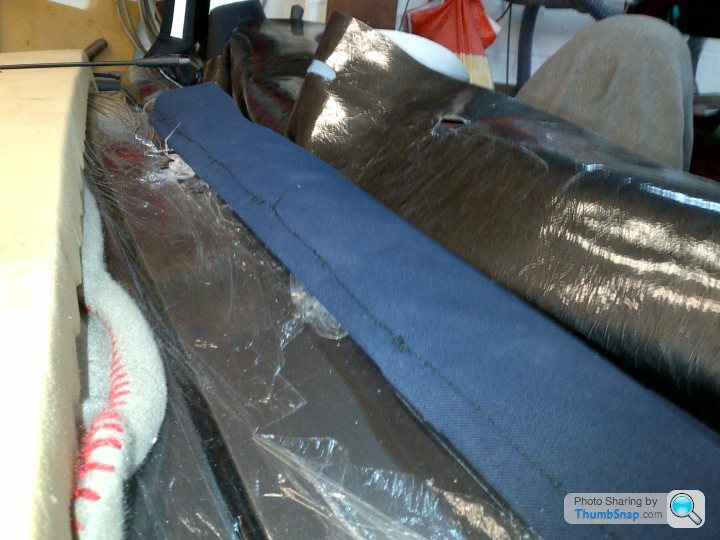
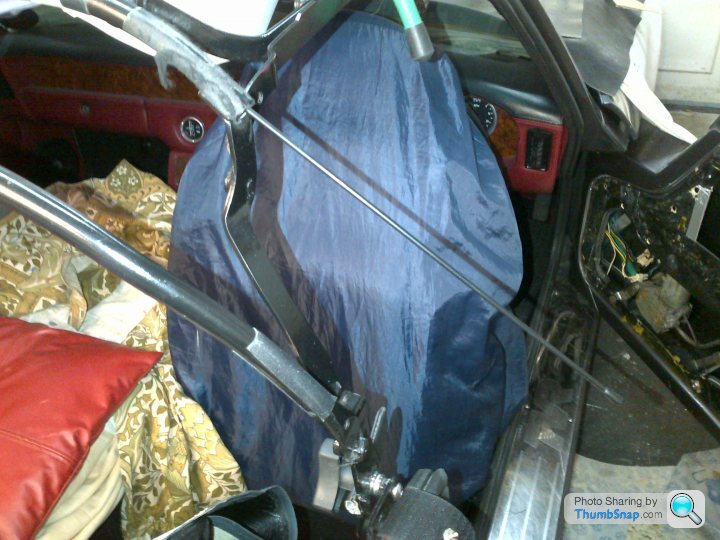
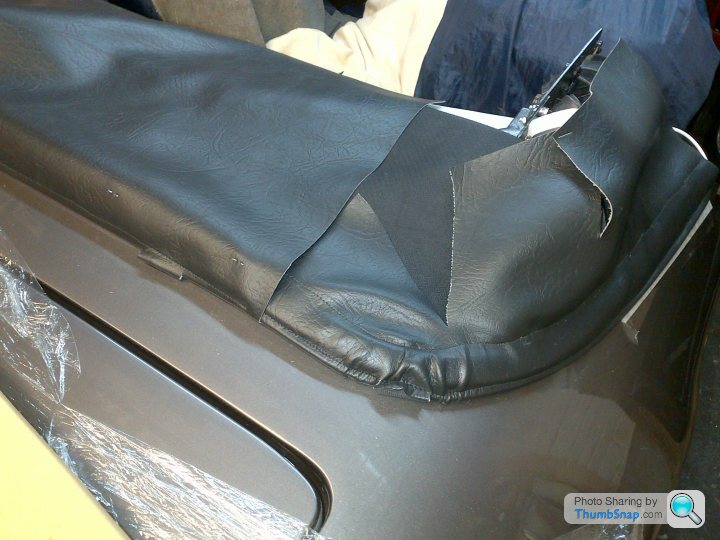
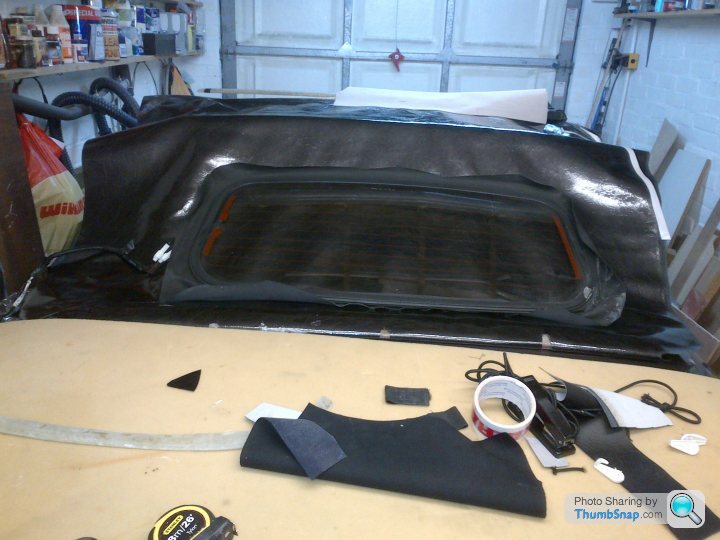
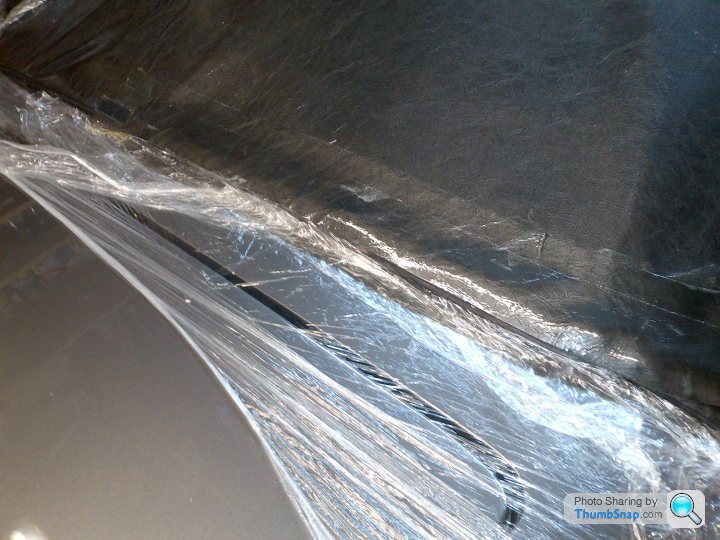
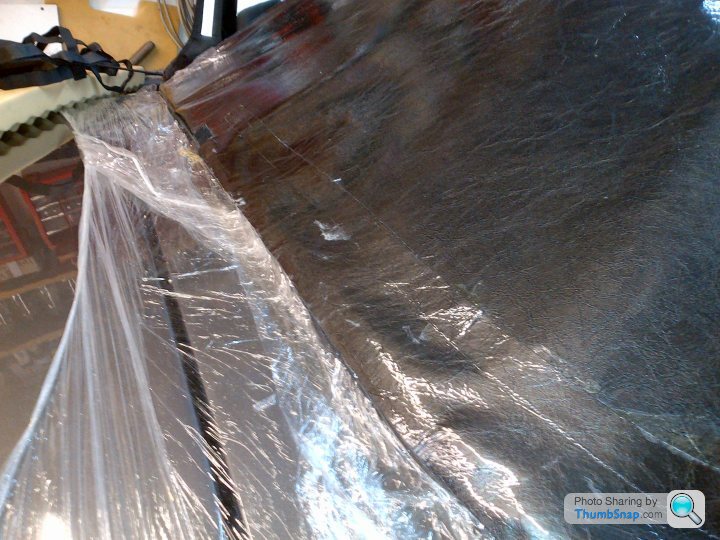
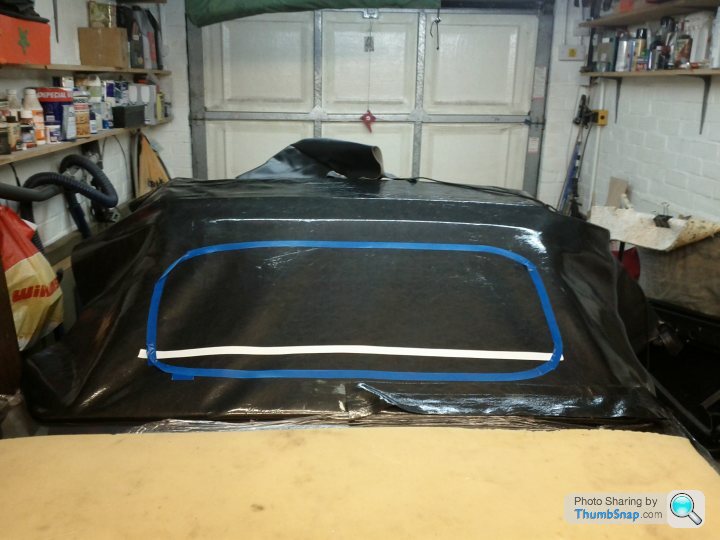
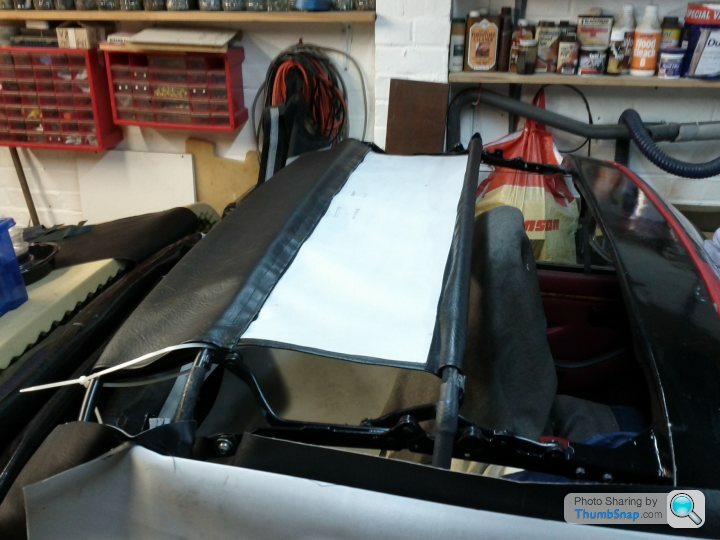
ers which have fallen into the various gaps and crevices I'd save a fortune Today was spent messing about with ideas for the hood cover. Ignore the patchwork quilt effect, this is just a pattern making exercise and a way of trying to find the best way of covering the folded hood..
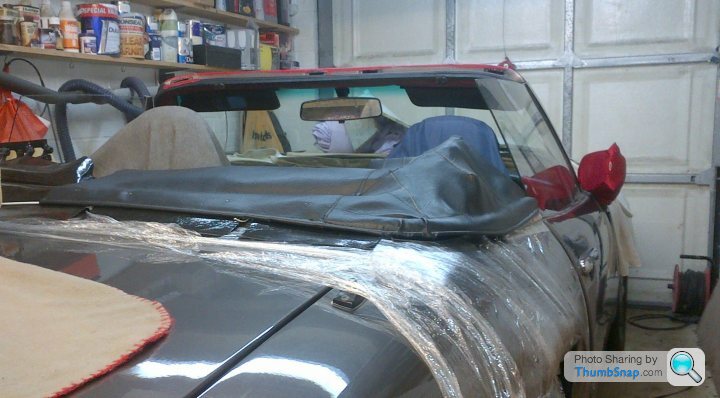
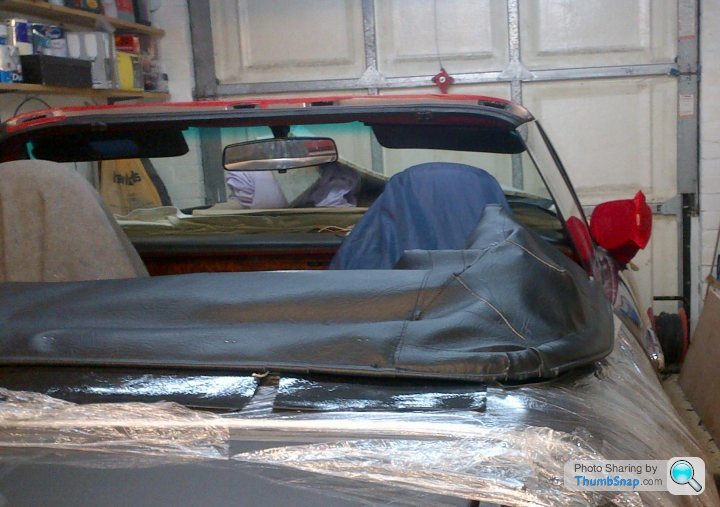
As you can see, apart from part of the folding frame at each end the whole lot sits very low. This is lower than the OE hood and and will hopefully show off the lovely lines of the 'S'.
As you can see, apart from part of the folding frame at each end the whole lot sits very low. This is lower than the OE hood and and will hopefully show off the lovely lines of the 'S'.
After many hours of experimenting I'm close to giving up on the idea of invisible fastenings for the hood cover. Does anyone have a photo of what the male part of the Tenax fastener looks like on a black hood? The only other option left I can think of is Velcro around the back seam of the hood. At least it would be black and only visible close up with the hood up, which hopefully won't be very often. Has anyone seen that done?
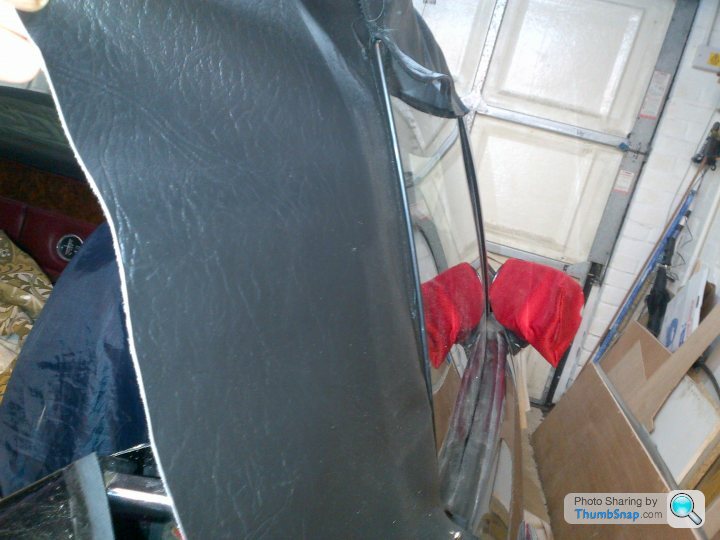
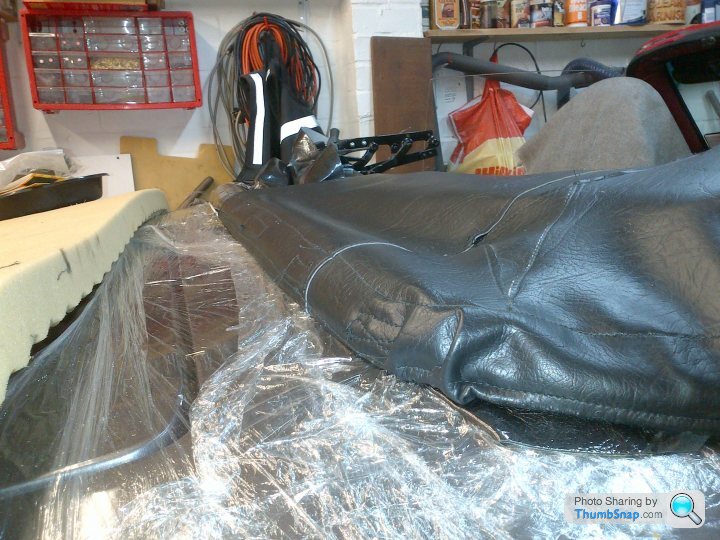
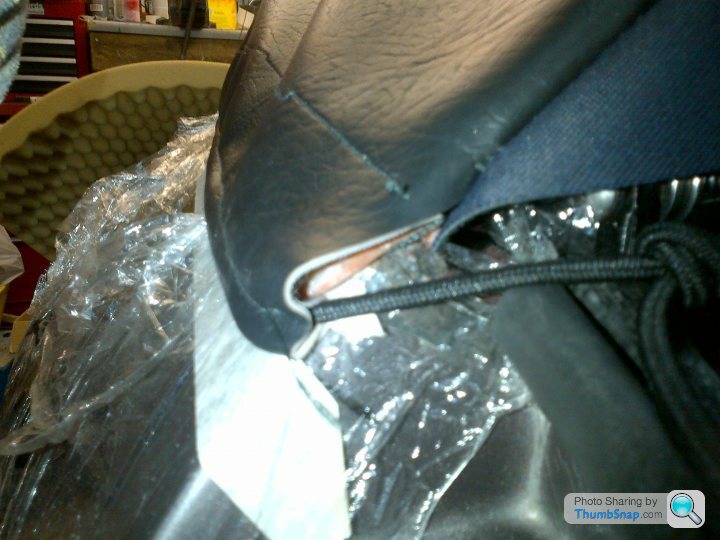
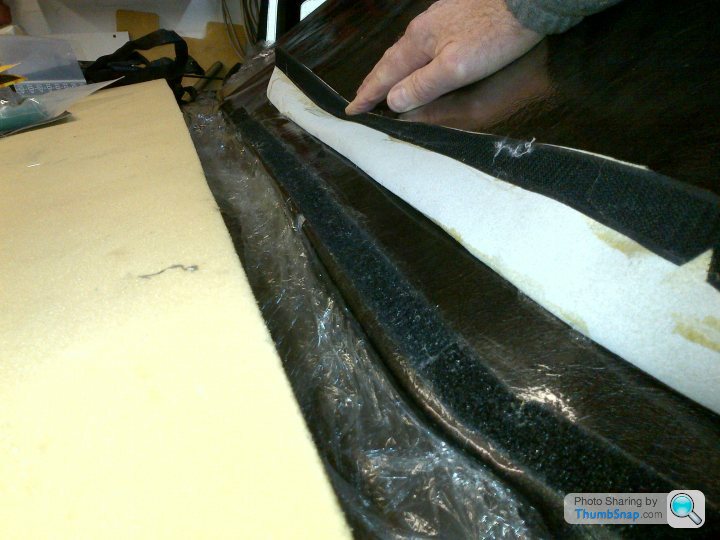
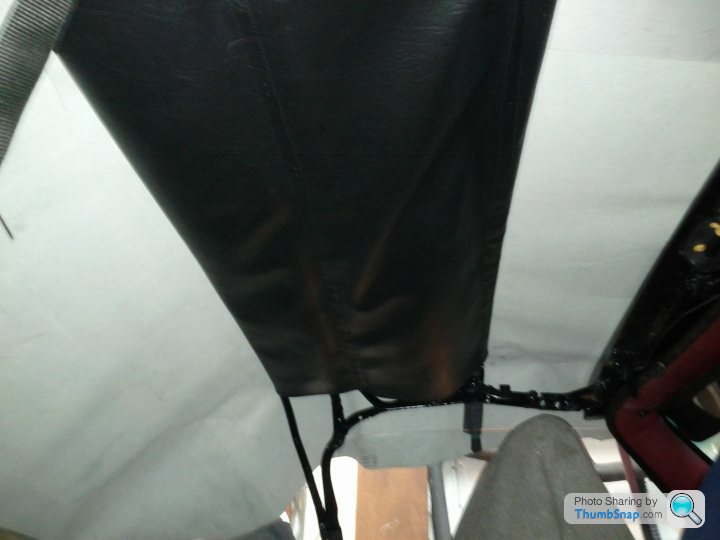
Well, after much experimenting with “clever” solutions it looks the simple answer might be the best one. A narrow band of Velcro around the rear seam of the hood shown here glued to the shiny vinyl temporary hood.

It shows up more on this material than I think it will on black mohair, and obviously it would be neatly stitched in place rather than the manky glue I’ve used. The other half of the Velcro goes round the underside of the corresponding seam of the hood cover and is completely hidden when the hood cover is in place.
Now for the clever bit (I couldn’t resist!). Net curtain wire (White S3’s idea) is threaded through the back seam of the hood cover and the tension holds it to the lip on the hood rail so there is a nice tight join between the fabric and the body with no unsightly gap (hopefully!).
I haven’t quite worked out how to secure the little hook at each end of the curtain wire yet but I’m sure the solution will come from somewhere. If not from my twisted imagination, then from one of you chaps.
Thanks for the ideas. I've just come in from the garage where I've been experimenting with something very similar. I wondered if I really needed all the tension the wire was giving so I've just tried elastic instead and it seems to work.
Because there is less tension I'm thinking the end of the elastic could just be sewn into the seam of the hood cover where the Tenax fastener will hold it to the hood rail by the 'B' post.
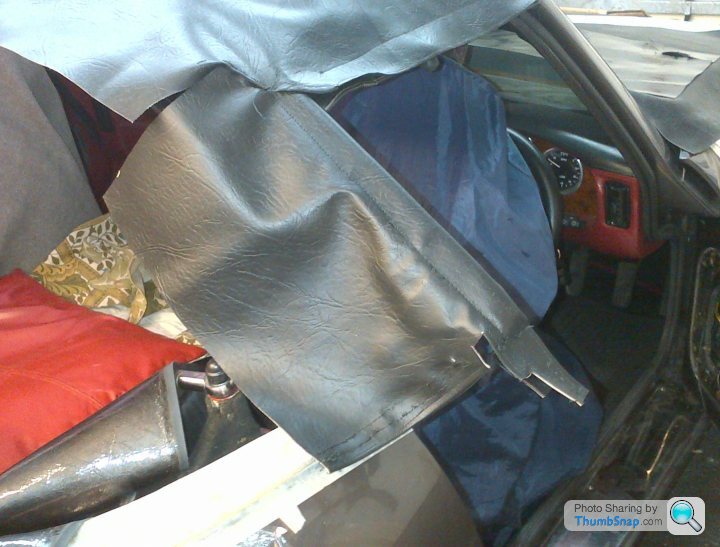
I've taken the flap idea (thanks Russ & White S3) but dropped the studs/poppers and just used Velcro. There's no significant tension on the flap or the hood cover at this point so I don't think I'll need studs/poppers.
It will look a lot neater done in mohair and sewn in place. On the "production" version the seam of the flap will touch the body.
Then to fit the hood cover, peel back the flap....
Then attach the edge of the hood bag to the Velcro to cover everything up with the elasticated seam making a nice neat join to the body (you need to use your imagination a bit here because my sewing is crap)....
Keep the ideas coming please
I think I've also cracked how to make sure the back roof hoop comes up and stays in the correct position relative to the rear window. This will be done with webbing straps which will be attached to the rear hood rail (the fibre glass bit) and then to a fixed point on the rear roof hoop and then continued on the the main roof hoop so that when the frame is pulled up, the rear hoop is pulled up to the correct position to hold the window where it should be and no further. Then when the tension is released the whole lot just folds back down again.
Because there is less tension I'm thinking the end of the elastic could just be sewn into the seam of the hood cover where the Tenax fastener will hold it to the hood rail by the 'B' post.
I've taken the flap idea (thanks Russ & White S3) but dropped the studs/poppers and just used Velcro. There's no significant tension on the flap or the hood cover at this point so I don't think I'll need studs/poppers.
It will look a lot neater done in mohair and sewn in place. On the "production" version the seam of the flap will touch the body.
Then to fit the hood cover, peel back the flap....
Then attach the edge of the hood bag to the Velcro to cover everything up with the elasticated seam making a nice neat join to the body (you need to use your imagination a bit here because my sewing is crap)....
Keep the ideas coming please
I think I've also cracked how to make sure the back roof hoop comes up and stays in the correct position relative to the rear window. This will be done with webbing straps which will be attached to the rear hood rail (the fibre glass bit) and then to a fixed point on the rear roof hoop and then continued on the the main roof hoop so that when the frame is pulled up, the rear hoop is pulled up to the correct position to hold the window where it should be and no further. Then when the tension is released the whole lot just folds back down again.
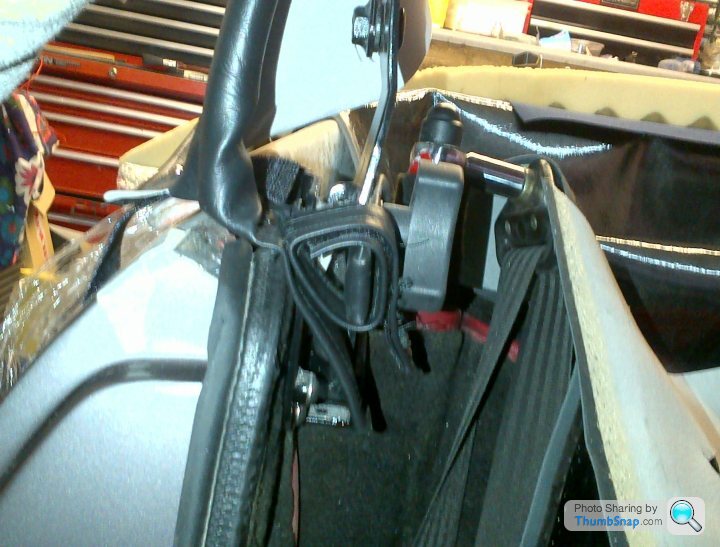
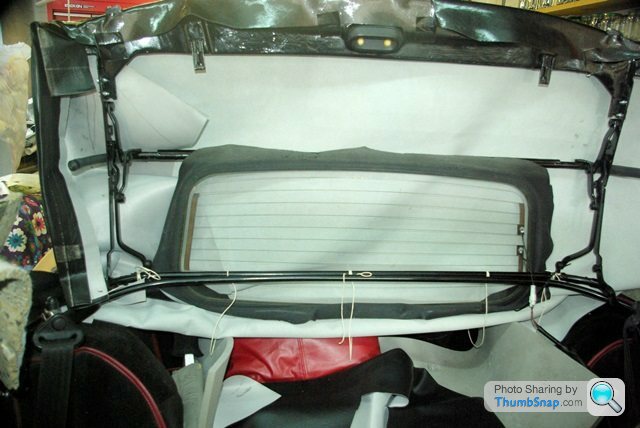
I think I've worked out how to locate the rear roof hoop using webbing straps...
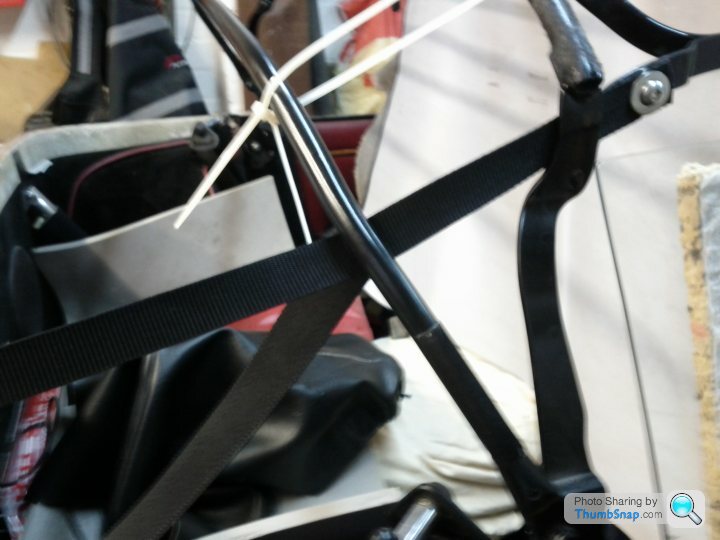
This is important because it determines the positioning of the rear window and also the curve of the rear part of the hood so it has to look right as well.
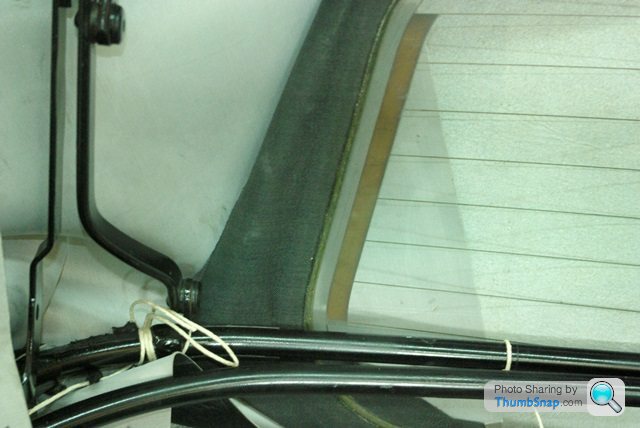
This is how the lower corner of the hood to the rear of the door will be fixed to the rear hood rail (ie the fibreglass bit which holds the back seam of the hood to the tub). Velcro sewn to hood fabric, stuck to the hood rail and a stud, either Tenax or popper TBD....

..and trimmed on the inside with red vinyl to match the existing trim...
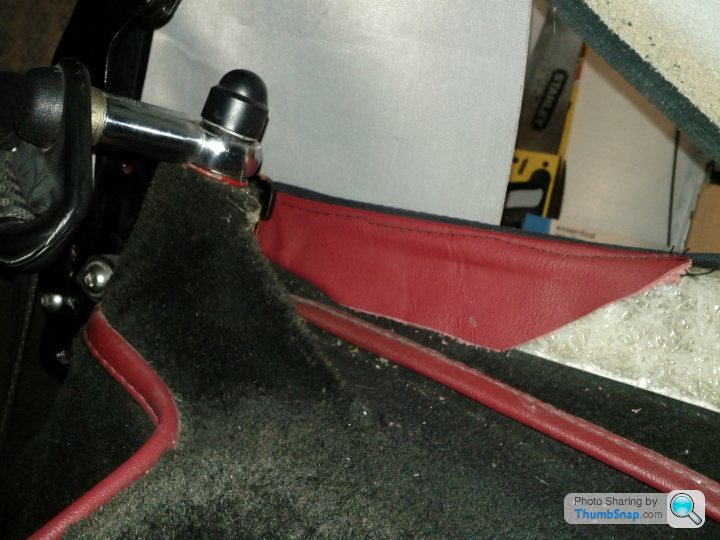
Then an experiment with, for want of a better description, a head-lining. This is mainly to provide a smooth surface for the underside of the hood fabric to slide over...
Now, can anyone tell me where I put the door speaker please?
This is important because it determines the positioning of the rear window and also the curve of the rear part of the hood so it has to look right as well.
This is how the lower corner of the hood to the rear of the door will be fixed to the rear hood rail (ie the fibreglass bit which holds the back seam of the hood to the tub). Velcro sewn to hood fabric, stuck to the hood rail and a stud, either Tenax or popper TBD....
..and trimmed on the inside with red vinyl to match the existing trim...
Then an experiment with, for want of a better description, a head-lining. This is mainly to provide a smooth surface for the underside of the hood fabric to slide over...
Now, can anyone tell me where I put the door speaker please?
Getting down to minor details now. This is how the interior light will look mounted on the vertical face of the rear hood rail....

..and it looks like an ordinary popper will give enough tension at the 'B' post fastening point so that means it can be hidden under the flap which will cover the Velcro strip described above.
The trimmer came over to have another look at progress and we've made some provisional decisions about the shape and positioning of the rear window. Pretty much as above subject to whether or not the hood will need to be secured to the rear folding hoop, but we won't know that until he starts laying the fabric on the frame next month. He's still thinking about my idea for an elasticated seam to hold the hood bag to the corners so that detail is still to be sorted out. "Over-engineered" was the word(s) he used; he's getting used to me now Some light at the end of the tunnel at last
..and it looks like an ordinary popper will give enough tension at the 'B' post fastening point so that means it can be hidden under the flap which will cover the Velcro strip described above.
The trimmer came over to have another look at progress and we've made some provisional decisions about the shape and positioning of the rear window. Pretty much as above subject to whether or not the hood will need to be secured to the rear folding hoop, but we won't know that until he starts laying the fabric on the frame next month. He's still thinking about my idea for an elasticated seam to hold the hood bag to the corners so that detail is still to be sorted out. "Over-engineered" was the word(s) he used; he's getting used to me now
Some light at the end of the tunnel at last Gassing Station | S Series | Top of Page | What's New | My Stuff