Alternator adjuster - anyone tried these?
Discussion


Well they are virtually ready, I just need to add the spacers for the lower bolts:
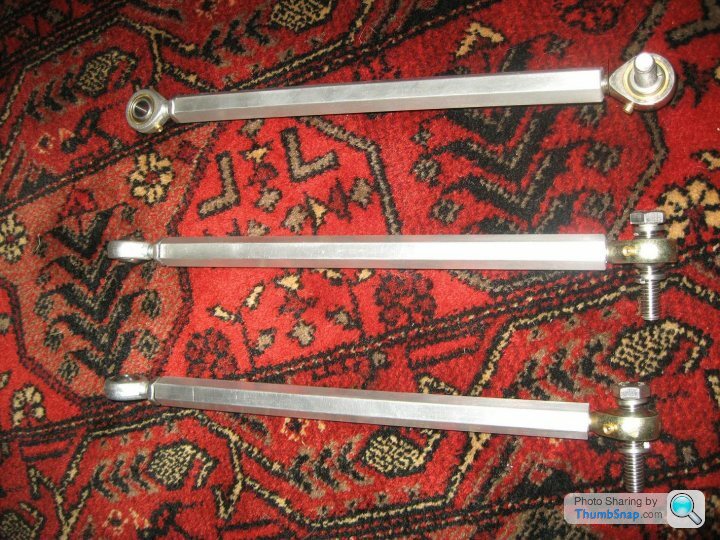
The spring washers on the bottom bolt give e little space for the rose joint to swivel about.
If anyone else is interested I have more parts in stock and can turn a few more around pretty quickly.
I'll post up some fitting instructions in due course.
The spring washers on the bottom bolt give e little space for the rose joint to swivel about.
If anyone else is interested I have more parts in stock and can turn a few more around pretty quickly.
I'll post up some fitting instructions in due course.
Fitting Instructions
1. Undo top alternator tensioner nut and slacken off alternator a bit.
2. Unto the top alternator bolt about half way.
3. Remove the tensioner bar bottom bolt and remove the old tensioner bar.
4. Bag the bar and the bolt and washer(s) and put it in your boot (just in case).
5. Insert and hand-tighten the new bottom bolt supplied with the kit in the hole vacated by the old bolt - just to check it's the same thread (should be 5/8" UNC as supplied but you never know what some people might have fitted). It should go in easily by hand - no spanners.
6. Screw in both rose joints and then align them to point the same direction. Note one is left hand thread! That is the bottom one, the one with the lock nut is the top one (or else you will find it very hard to get to the lock nut!)
7. Fit the bottom bolt complete with two spring washers and spacer (all supplied). Torque [I'll look this up maybe 10lbf to start with] 13mm or 1/2" socket.
8. Slip the top rose joint over the top alternator bolt.
9. Do up the top alternator bolt.
10. Replace the top alternator nut and tighten.
11. "Undo" the hex bar (1/2" or 13mm spanner) which will tension the fan belt.
12. When you have the desired tension, nip up the lock nut.
To change the fan belt you need to take off the top joint, the bottom one can be left well alone. Screw in both rose joints for minimum length.
Drive and enjoy the lack of squealing. Remember if there are any problems you still have the old bar in the boot! Just in case.
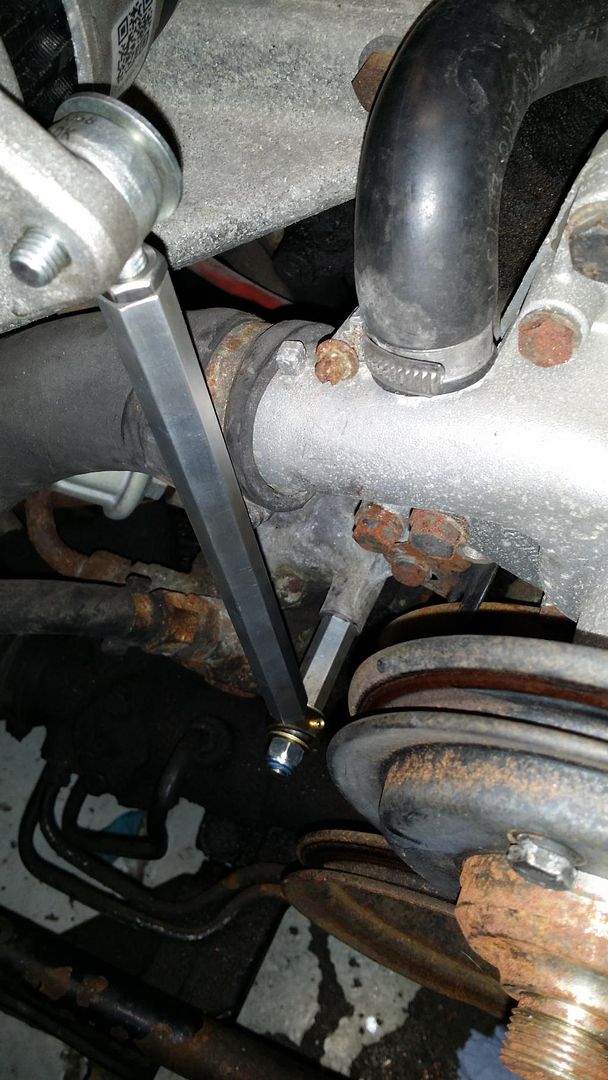
Picture below shows the bottom fitting, the arrangement of the two spring washers and the spacer, and the direction it bolts into the engine (or bracket). I normally put the bolt and washers into the packet separately to get the package under the 25mm limit.

1. Undo top alternator tensioner nut and slacken off alternator a bit.
2. Unto the top alternator bolt about half way.
3. Remove the tensioner bar bottom bolt and remove the old tensioner bar.
4. Bag the bar and the bolt and washer(s) and put it in your boot (just in case).
5. Insert and hand-tighten the new bottom bolt supplied with the kit in the hole vacated by the old bolt - just to check it's the same thread (should be 5/8" UNC as supplied but you never know what some people might have fitted). It should go in easily by hand - no spanners.
6. Screw in both rose joints and then align them to point the same direction. Note one is left hand thread! That is the bottom one, the one with the lock nut is the top one (or else you will find it very hard to get to the lock nut!)
7. Fit the bottom bolt complete with two spring washers and spacer (all supplied). Torque [I'll look this up maybe 10lbf to start with] 13mm or 1/2" socket.
8. Slip the top rose joint over the top alternator bolt.
9. Do up the top alternator bolt.
10. Replace the top alternator nut and tighten.
11. "Undo" the hex bar (1/2" or 13mm spanner) which will tension the fan belt.
12. When you have the desired tension, nip up the lock nut.
To change the fan belt you need to take off the top joint, the bottom one can be left well alone. Screw in both rose joints for minimum length.
Drive and enjoy the lack of squealing. Remember if there are any problems you still have the old bar in the boot! Just in case.
Picture below shows the bottom fitting, the arrangement of the two spring washers and the spacer, and the direction it bolts into the engine (or bracket). I normally put the bolt and washers into the packet separately to get the package under the 25mm limit.
Edited by adam quantrill on Monday 6th October 23:41
Edited by adam quantrill on Thursday 22 August 20:16

Morning all.
Little update for you this nearly sunny Thursday morning.
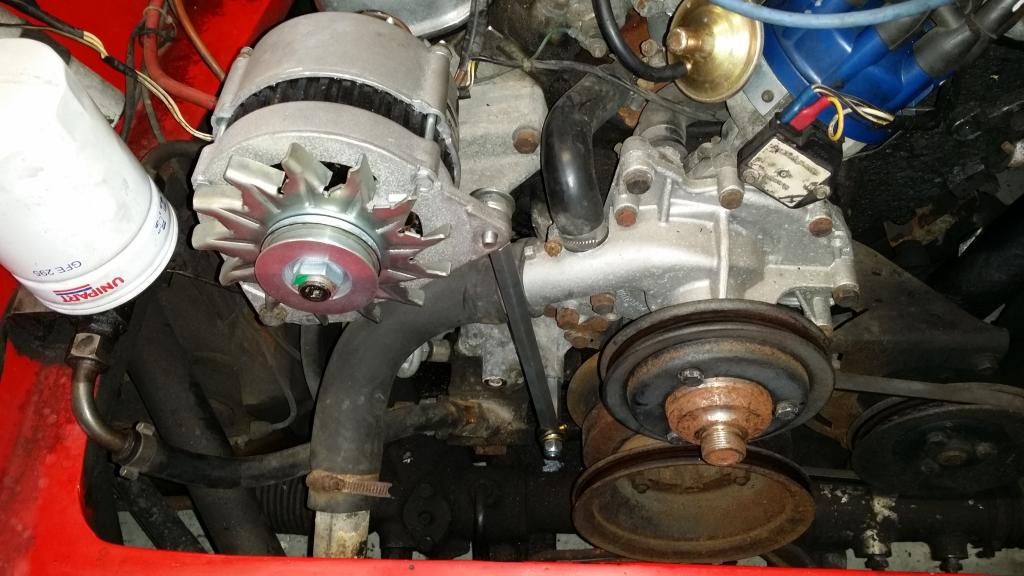
The Alternator adjuster bar has been fitted to the 350i.. After a few little issues regarding the clearance past the pipe, a 35mm spacer was required to 1- get past the pipe 2-aid the angle of the rose joints at both the engine end and alternator end..
See below pics..
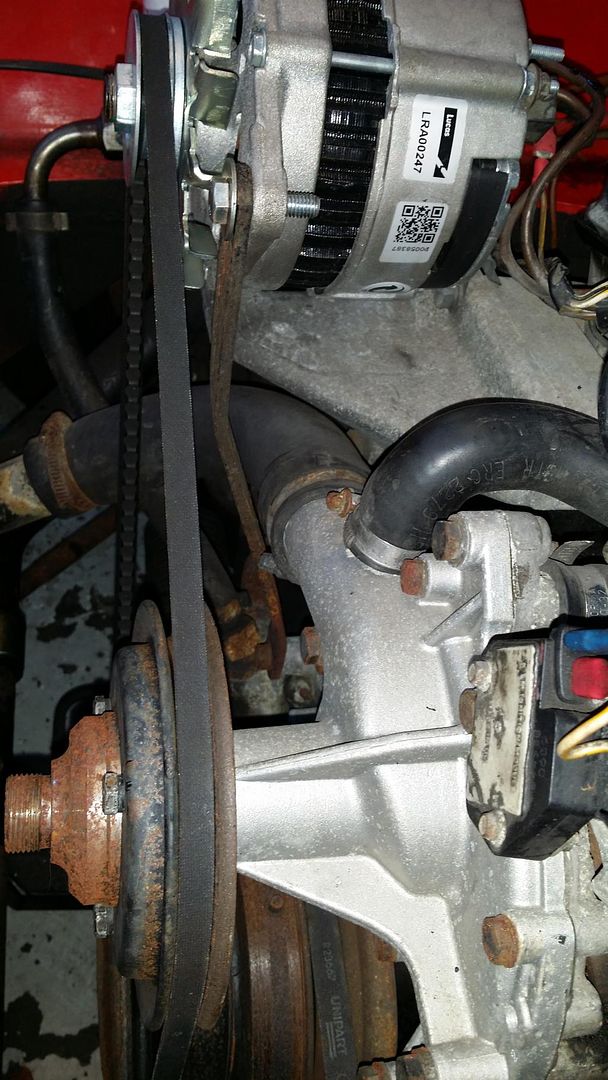
Existing steel bar
The 35mm spacer in place - has a threaded stud either end to make assembly easier. The hole within the engine had to be threaded to suit - original steel bar hole to the left (not touched in case of needing to reuse the bar)
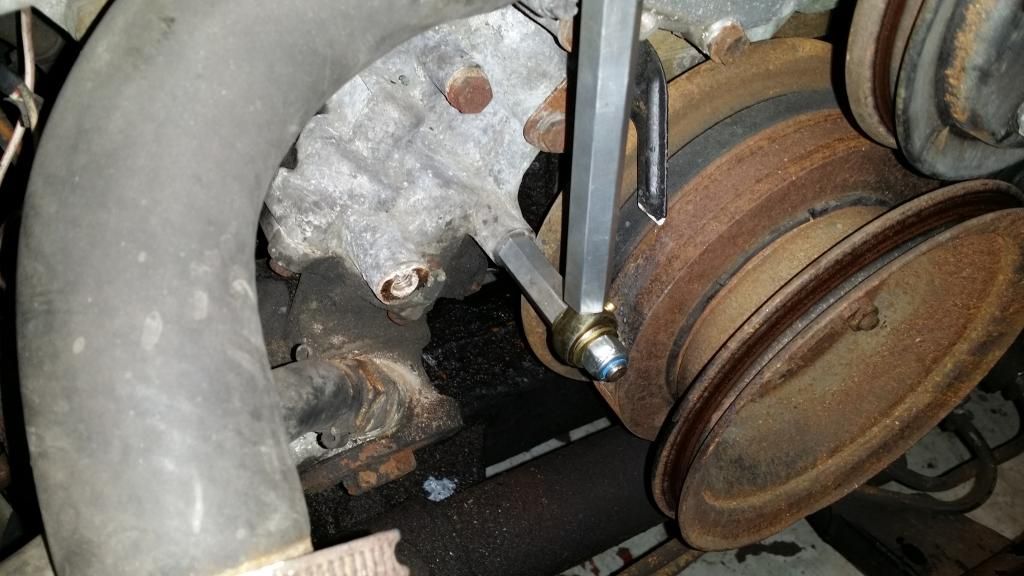
Bar in place keeping the alternator snug
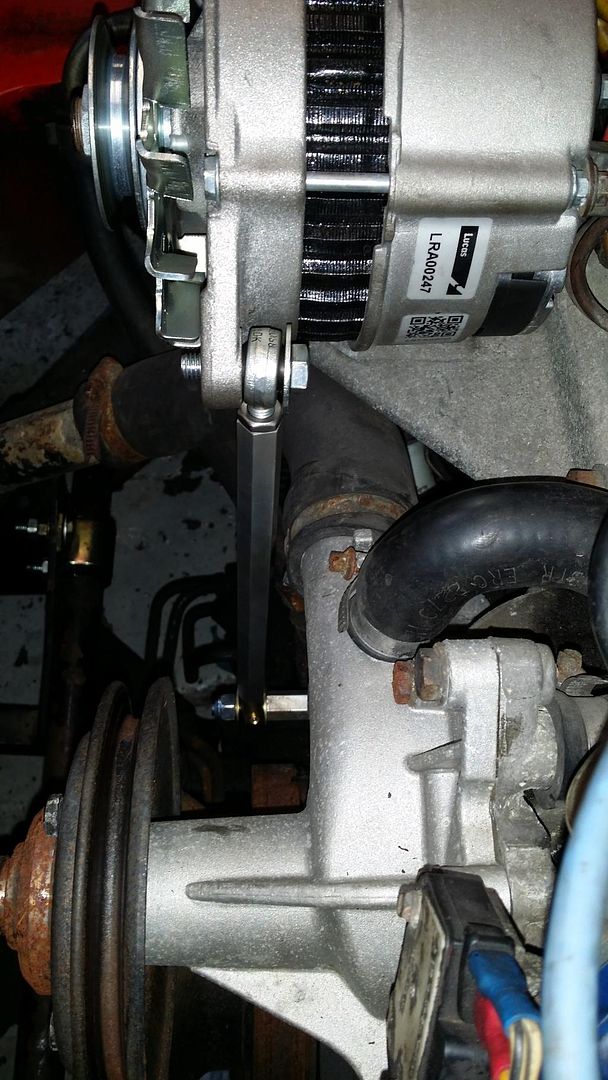
once the belt was on, tension was easily achievable and the locknut has kept that setting tight.
only covered 5 miles so far with it fitted but I cant see any problems arising. There is also approx 6mm clearance now between the bar and the pipe..
Thanks Adam for supplying the extra spacer and top marks again for making the adjuster up..
Little update for you this nearly sunny Thursday morning.
The Alternator adjuster bar has been fitted to the 350i.. After a few little issues regarding the clearance past the pipe, a 35mm spacer was required to 1- get past the pipe 2-aid the angle of the rose joints at both the engine end and alternator end..
See below pics..
Existing steel bar
The 35mm spacer in place - has a threaded stud either end to make assembly easier. The hole within the engine had to be threaded to suit - original steel bar hole to the left (not touched in case of needing to reuse the bar)
Bar in place keeping the alternator snug
once the belt was on, tension was easily achievable and the locknut has kept that setting tight.
only covered 5 miles so far with it fitted but I cant see any problems arising. There is also approx 6mm clearance now between the bar and the pipe..
Thanks Adam for supplying the extra spacer and top marks again for making the adjuster up..
Don't know is the honest answer....
I spent about half hour with the guys in the garage playing with the original supplied spacer trying to get it to fit and for me, there just wasn't enough clearance past the pipe for it to mount properly. Both the rose joints were also right on the maximum angle which i wanted to stay away from. The supplied spring washers helped this but it still wasn't enough..
As its a TVR, it may be the case the alternator is located slightly differently between cars,
with the 35mm spacer - the adjuster bar is now pretty vertical inline with the belt.
Not sure what Adam would say as he is running his adjuster with the original size spacer.. but the longer spacer defo helped in my case..
I think possibly spend a little time measuring up the angles of existing setup against the angles allowed by the rose joints etc... a slightly shorter spacer may be fine.. but it was a definite 'lets have a play and see whats works' scenario
I do know with the 35mm spacer, a longer bolt would be needed which is why the garage actually made a threaded stud to go through the spacer - into the engine and enabling a nylock to be used to secure the bar.
Adam - are you able to advise ??
Don't let it put you off - Its a definite improvement over the existing steel bar and makes the belt tension adjustment / belt replacement a very easy job..
Gassing Station | Wedges | Top of Page | What's New | My Stuff