Clutch progress
Discussion


Well I've got the old clutch off so I'm half way there. It's not half as bad a job as I was expecting.
So far this is what I've had to move:
1. Engine forward 2-3 inches just enough to get the rear g/b mounts off the chassis (this means uncoupling the top hose, probably not the bottom one (saves refilling the watter), maybe moving the oil filter remote, the oil thermostat if you have one, disconnect the exhaust centre box from the manifolds.)
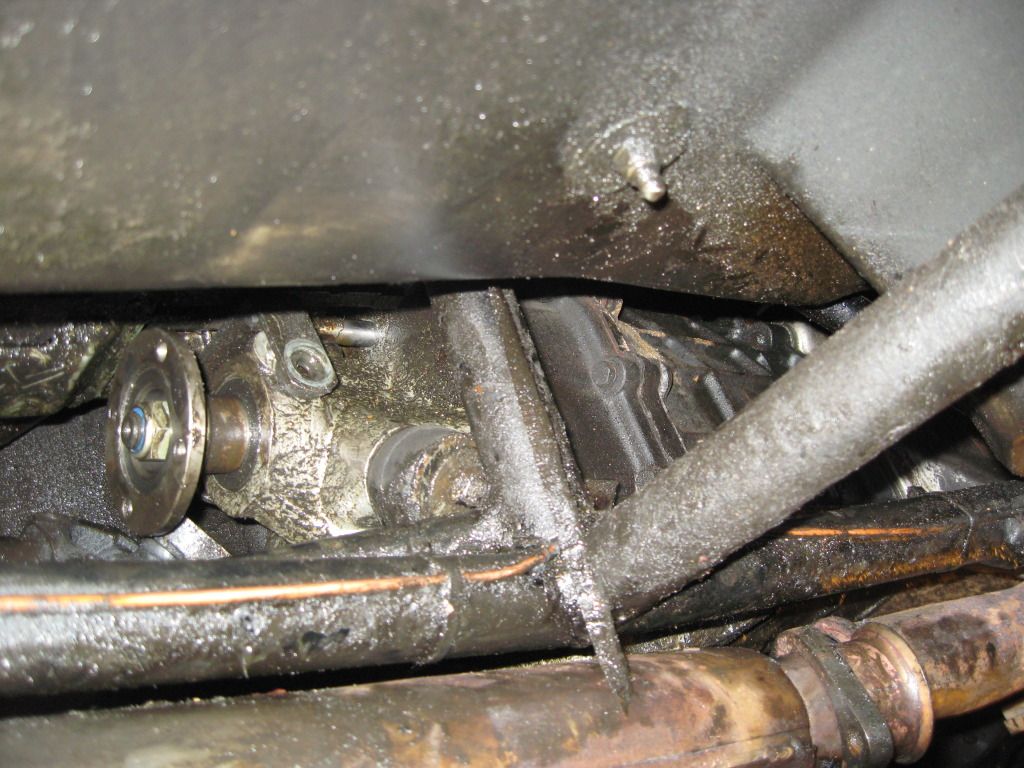
2. Uncouple propshaft & disconnect g/b from engine. (This means undoing all the bellhousing bolts, the flywheel cover plate, the clutch slave cylinder)
3. Move the gearbox back as far as possible, jiggle it off the clutch spline. I found that by undoing and dropping down the g/b remote thingy it gave far more clearance at the top. Take out the side bolts on the remote, but only loosen the forward-pointing bolts. Using a big lever on the old clutch and bellhousing is a good way to get it off. There is a big gap where the clutch remote bulge is to get it started.
4. Once you have the g/b back about 4" that's enough room to get the clutch cover plate out.
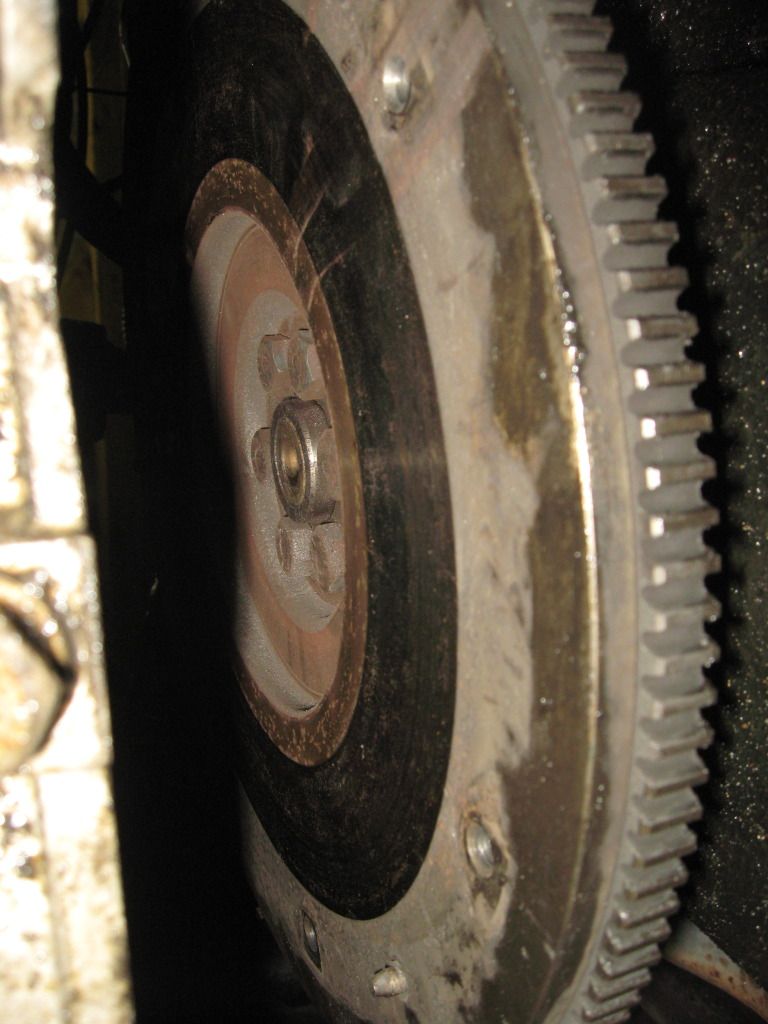
Incidentally my old clutch friction plate doesn't look too bad - there's still plenty of meat left on it. There is no oil on it at all - my fears seem to be misplaced, the little oil at the bottom of the bellhousing probably seeped past the flywheel cover sides. The cover plate springs do seem a little weak - pressing the big metal lump down with my thumbs seemed to make it move slightly, I reckon it should be much stiffer. Does anyone know what the spring rates should be on these?
Anyway, on with the new clutch plate and cover plate next.
So far this is what I've had to move:
1. Engine forward 2-3 inches just enough to get the rear g/b mounts off the chassis (this means uncoupling the top hose, probably not the bottom one (saves refilling the watter), maybe moving the oil filter remote, the oil thermostat if you have one, disconnect the exhaust centre box from the manifolds.)
2. Uncouple propshaft & disconnect g/b from engine. (This means undoing all the bellhousing bolts, the flywheel cover plate, the clutch slave cylinder)
3. Move the gearbox back as far as possible, jiggle it off the clutch spline. I found that by undoing and dropping down the g/b remote thingy it gave far more clearance at the top. Take out the side bolts on the remote, but only loosen the forward-pointing bolts. Using a big lever on the old clutch and bellhousing is a good way to get it off. There is a big gap where the clutch remote bulge is to get it started.
4. Once you have the g/b back about 4" that's enough room to get the clutch cover plate out.
Incidentally my old clutch friction plate doesn't look too bad - there's still plenty of meat left on it. There is no oil on it at all - my fears seem to be misplaced, the little oil at the bottom of the bellhousing probably seeped past the flywheel cover sides. The cover plate springs do seem a little weak - pressing the big metal lump down with my thumbs seemed to make it move slightly, I reckon it should be much stiffer. Does anyone know what the spring rates should be on these?
Anyway, on with the new clutch plate and cover plate next.
Edited by adam quantrill on Monday 7th May 20:54
Got my 400SE back from RTracing last week, after having a pukka Borg and Beck 3 piece fitted. Not cheap, and had to wait, but the correct clutch.
The last 'pattern'...really for a 350... clutch threw in the towel after around 4,000 miles of very mild use. It had been put in just before I bought the car a couple of years ago.
If in any doubt ...spend a bit more now.
The last 'pattern'...really for a 350... clutch threw in the towel after around 4,000 miles of very mild use. It had been put in just before I bought the car a couple of years ago.
If in any doubt ...spend a bit more now.

From what I remember, the previous owner had replaced the complete assembly, but Richard Thorpe said that a lot of the after-market ones are specced for the 350 (ie not OE) are just not up to the job. The 400SE does produce quite a lot of torque.
I know Richard needs his profit margin, but the Borg and Beck clutch kit costs around 300 quid, and I was tempted to go for the Griff 500 one, which costs about another 50.
Isn't your car supercharged ?
I think a belt and braces approach would be a good idea.
.
Molybdenum based grease I believe, for the splines...sometimes called chassis grease.
Edited by grahamw48 on Tuesday 24th June 09:02
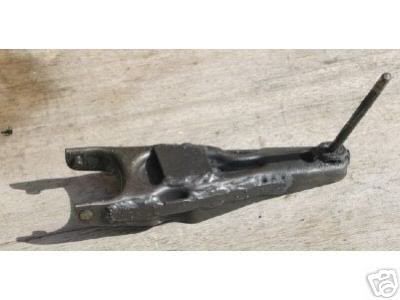
Adam - on the subject of the bearing are you replacing with a steel bearing or the plastic one.
Be careful if it's the plastic ones - as I believe there are 2 positions it can go on - check it carefully.
Don't forget that the arm / release bearing can be a real 8itch to fit .. especially if you have only a few inches to get your arm in..
Also check the release arm very carefully for signs of cracking around the fulcrum ball .. if in any boubt - either replace of add strengthening. You dont want to do this job twice
Edited by rev-erend on Tuesday 24th June 09:34
No I'm just going to inspect the release arm and bearing but not change either.
The car has only done 24k miles, and I'm used to seeing more like 100k out of my clutches before they go. The release bearing has been perfect, no noise, and it's an original good metal one as opposed to this plastic rubbish ;^)
As for doing this again, it's more likely that the gearbox will fail before the clutch anyways, given my history with these things.
rev-erend said:
Adam- that sounds reasonable.
Just try and inspect the lever arm where the fulcrum ball in on the pressing (without removal.. if necessary ) and check for cracks..
Agree with you Alan. Had this issue on a std 350i, and think a more powerfull clutch needs a strong and healthly lever. Should not be too difficult to check now, just to invest a bit more time.Just try and inspect the lever arm where the fulcrum ball in on the pressing (without removal.. if necessary ) and check for cracks..
Rob
Will certainly inspect the arm. I have a spare one I'm sure, in case it looks iffy. Or I can weld on some reinforcements.
It's likely to go in tonight. Any recommendations as to how to remove the protective coating from the cover plate face? Solvent or abrasive? What about the flywheel, that looks nice and shinney, what about sanding it lightly to key the surface, or leave it as is?
I'll see if I can get hold of a dial gauge to measure the cover plate spring rates versus the bathroom scales, it'd be nice to check this out.
adam quantrill said:
Will certainly inspect the arm. I have a spare one I'm sure, in case it looks iffy. Or I can weld on some reinforcements.
It's likely to go in tonight. Any recommendations as to how to remove the protective coating from the cover plate face? Solvent or abrasive? What about the flywheel, that looks nice and shinney, what about sanding it lightly to key the surface, or leave it as is?
I'll see if I can get hold of a dial gauge to measure the cover plate spring rates versus the bathroom scales, it'd be nice to check this out.
Adam - heres a picture of Steve Heaths strenghtened release arm It's likely to go in tonight. Any recommendations as to how to remove the protective coating from the cover plate face? Solvent or abrasive? What about the flywheel, that looks nice and shinney, what about sanding it lightly to key the surface, or leave it as is?
I'll see if I can get hold of a dial gauge to measure the cover plate spring rates versus the bathroom scales, it'd be nice to check this out.
Re - glazing of flywheel .. as the heat hardening or groves would be more than surface - it would take a lathe to remove - I'd just clean it with a solvent (acetone / petrol).
Never heard of a friction plate having a protective covering..
Nope - it was just something that looked like laquer on the cover plate little flywheel thingy. Got that all cleaned off with petrol and wire wool.
The clutch is in, and cover plate torqued up, and the bellhousing is all on, just need to torque up the bolts there, slip on the clutch slave and check the action. Then re-connect all the other bits and pieces.
It was pretty obvious what the original fault was - laying the old clutch plate on the old cover, the flywheel face of the clutch was almost flush with the faces of the mounting pads. With the new cover and plate the plate sticks up 2 - 3mm. So the fault was a combination of some minor wear plus the springs seem to be shot.
The release arm looked fine, by the way.
Edited by adam quantrill on Thursday 26th June 16:17
Well it's in and it's vicious! A late night push through to 1 a.m. had the ancillaries all bolted back on.
First launch this morning almost chucked me off the ramps into the wall on the other side of the road!!!
I'm still getting used to it but first impressions are very favourable. The bite point is much higher, plus when I change down I get some harsh engine braking - I'll have to watch this.
So - book yer rides out at BBWF (Combine you're first).
P.S. What's the best way to 'bed in' a new clutch? Take it easy, or give it a good caning?
Another top tip - if you need a clutch alignment tool, you can make your own. For the central spindle use an old bit of the pin that you take put of a rear suspension rebuild - that's the pin that the rear shock absorber goes onto - it's exactly the right diameter. Then slip that into an old socket - I had a 15mm one that was very slightly too small, and I wrapped about 10 turns of tape round it to pack it out to fit the spline. The hole right through the socket was just the right size too, in my case.
I had a few more drives today, and it's really excellent, it holds the full torque of the engine in all gears right through the rev range. Just gotta get used to the biting point!
Just to add, I counted the time up and it took roughtly 12-16 hours, but I did do a few other jobs while under there.
Edited by adam quantrill on Monday 30th June 21:44
Now here it is again as a picture story ;^)
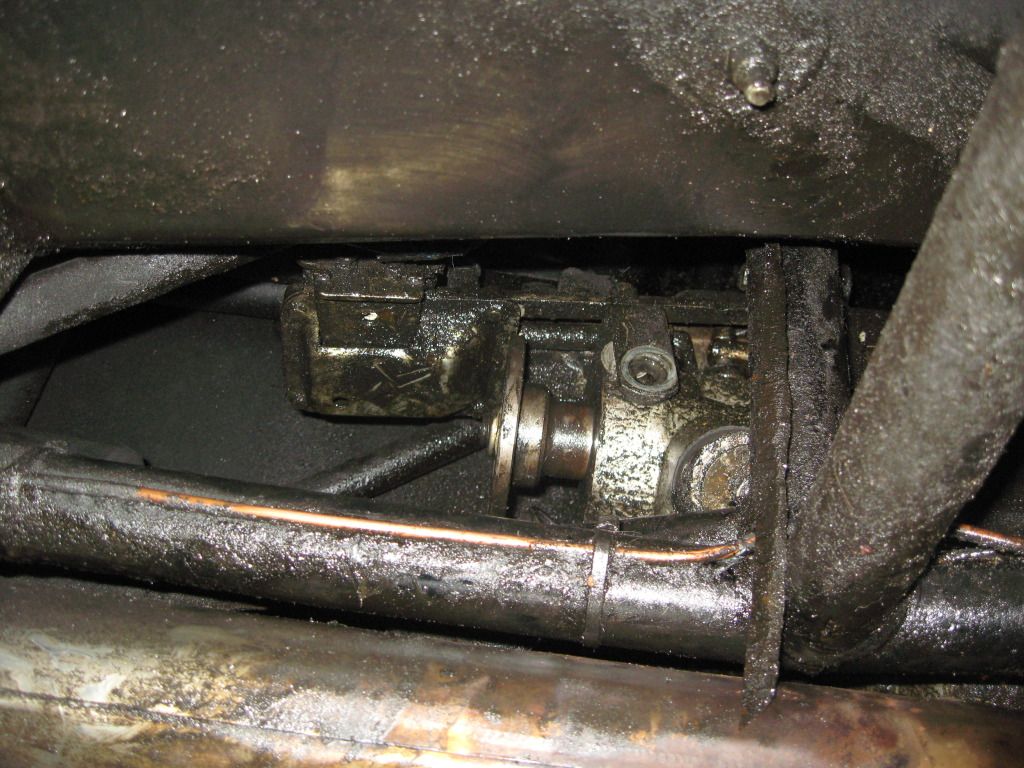
1. Engine forward 2-3 inches just enough to get the rear g/b mounts off the chassis
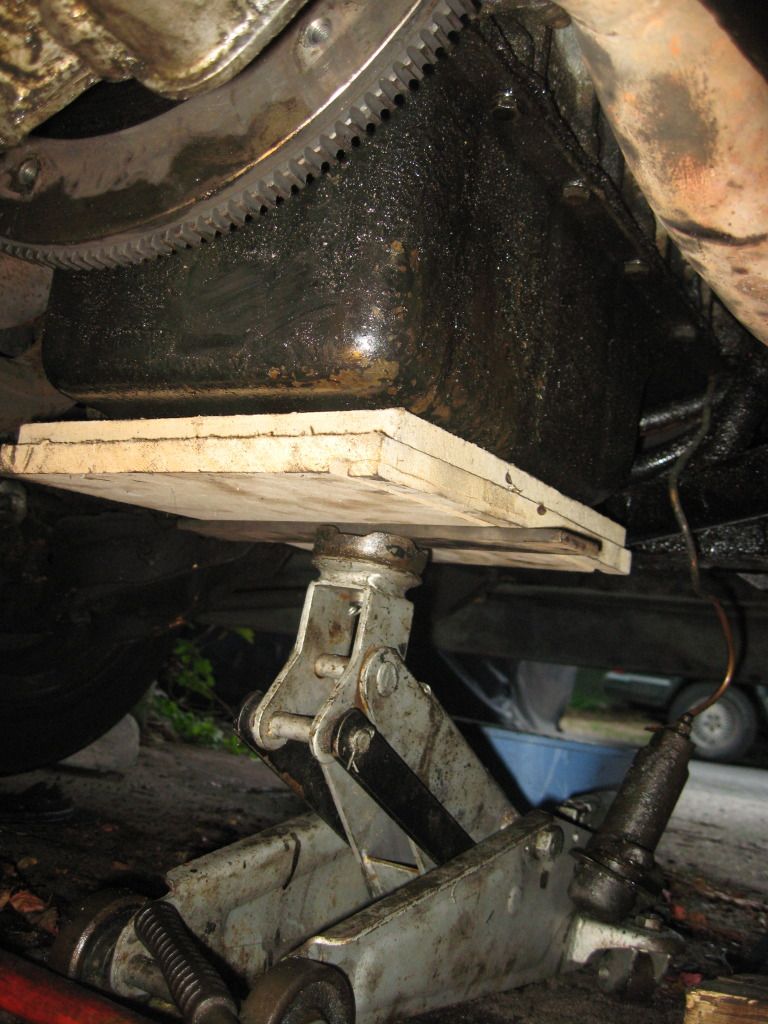
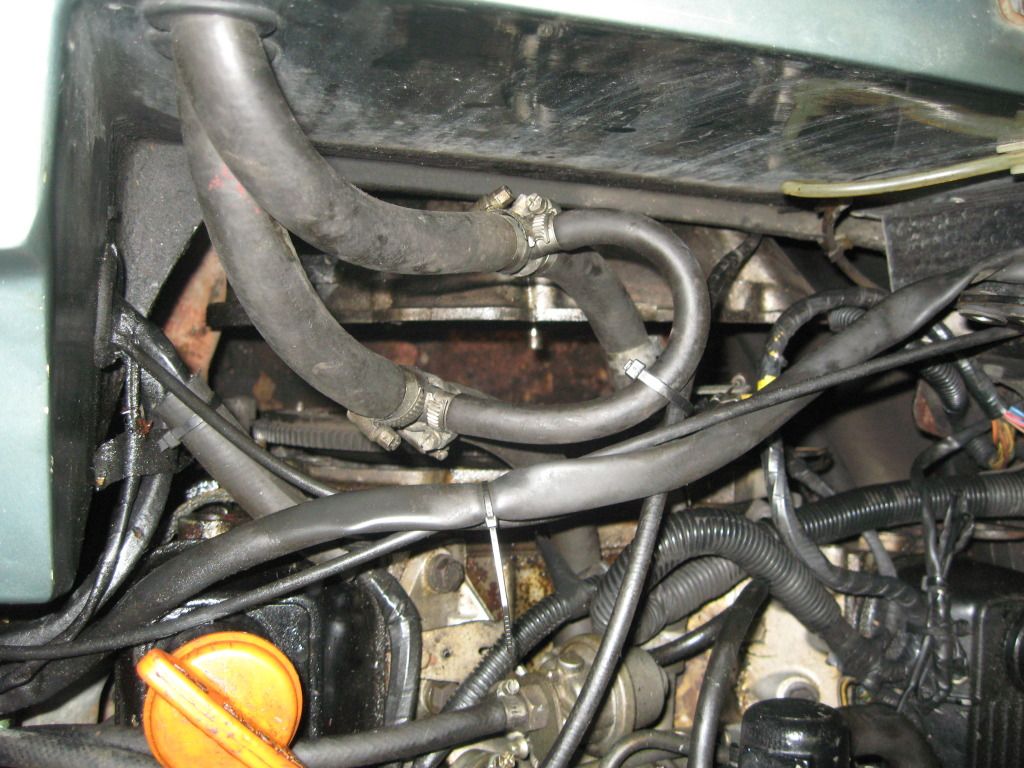
(this means uncoupling the top hose,
probably not the bottom one (saves refilling the watter),
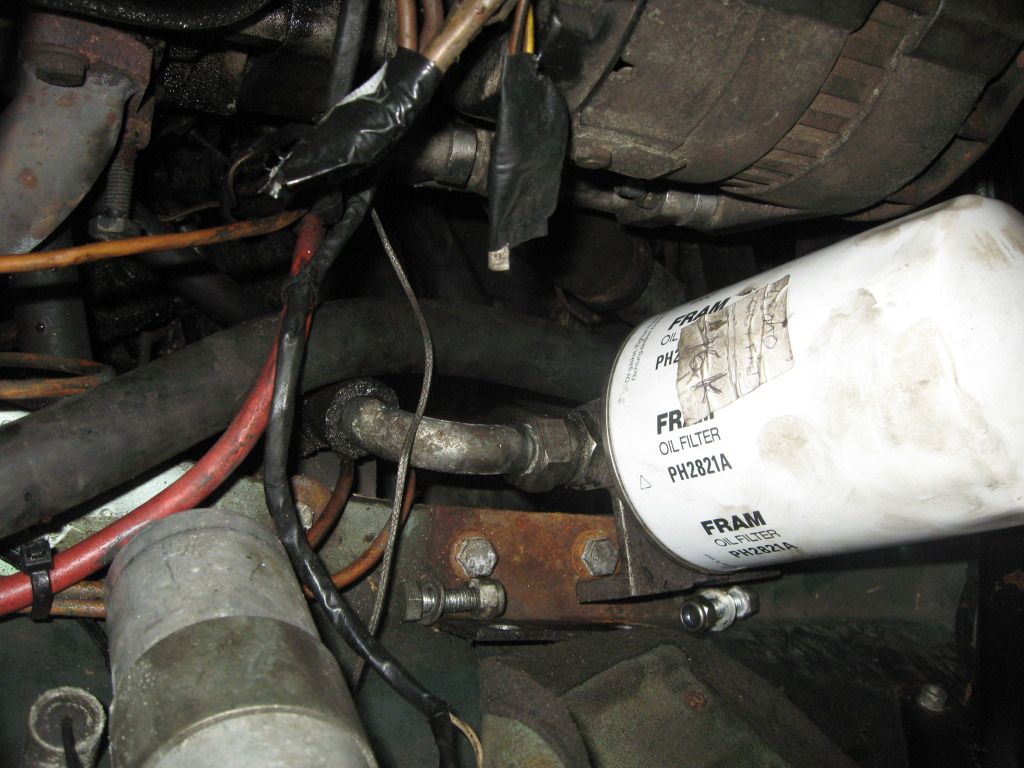
maybe moving the oil filter remote, the oil thermostat if you have one,
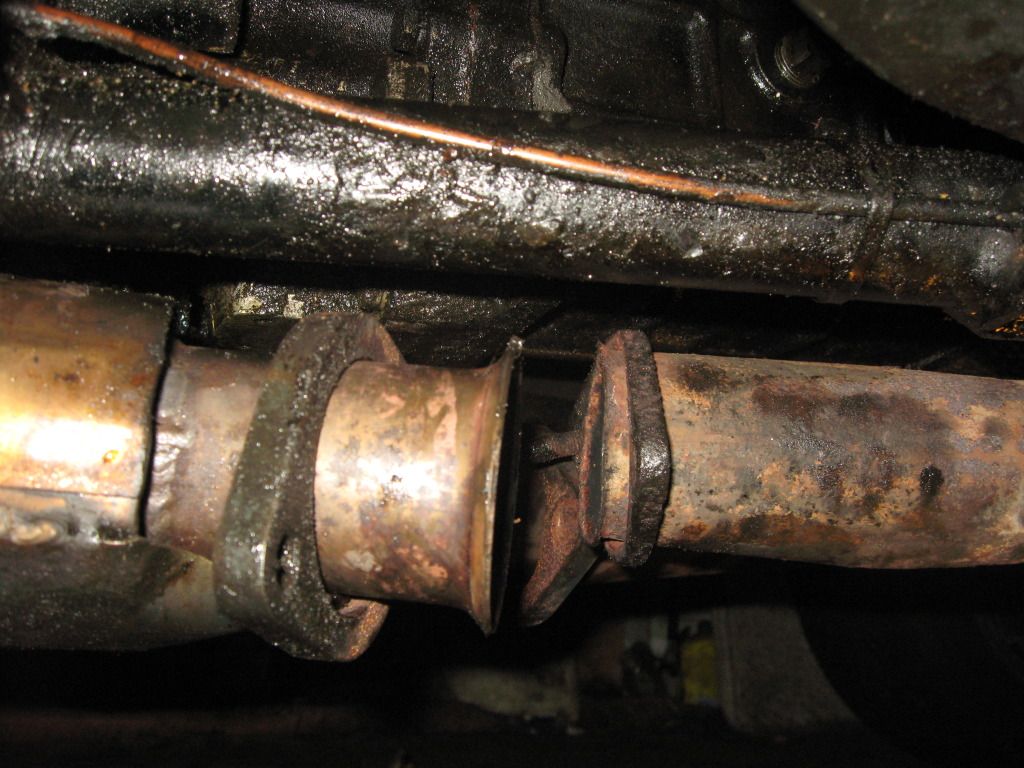
disconnect the exhaust centre box from the manifolds.)
2. Uncouple propshaft & disconnect g/b from engine. (This means undoing all the bellhousing bolts, the flywheel cover plate, the clutch slave cylinder)
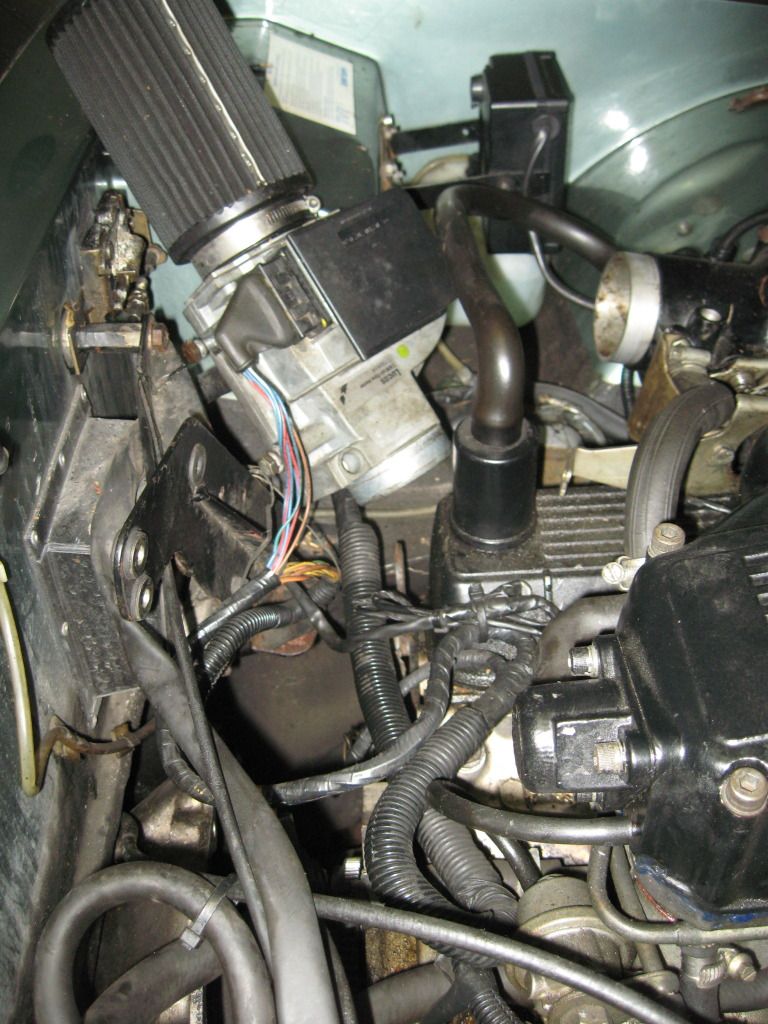
if you have an SX, it's easier if you move the air meter too
3. Move the gearbox back as far as possible, jiggle it off the clutch spline. I found that by undoing and dropping down the g/b remote thingy it gave far more clearance at the top. Take out the side bolts on the remote, but only loosen the forward-pointing bolts.
Using a big lever on the old clutch and bellhousing is a good way to get it off. There is a big gap where the clutch remote bulge is to get it started.
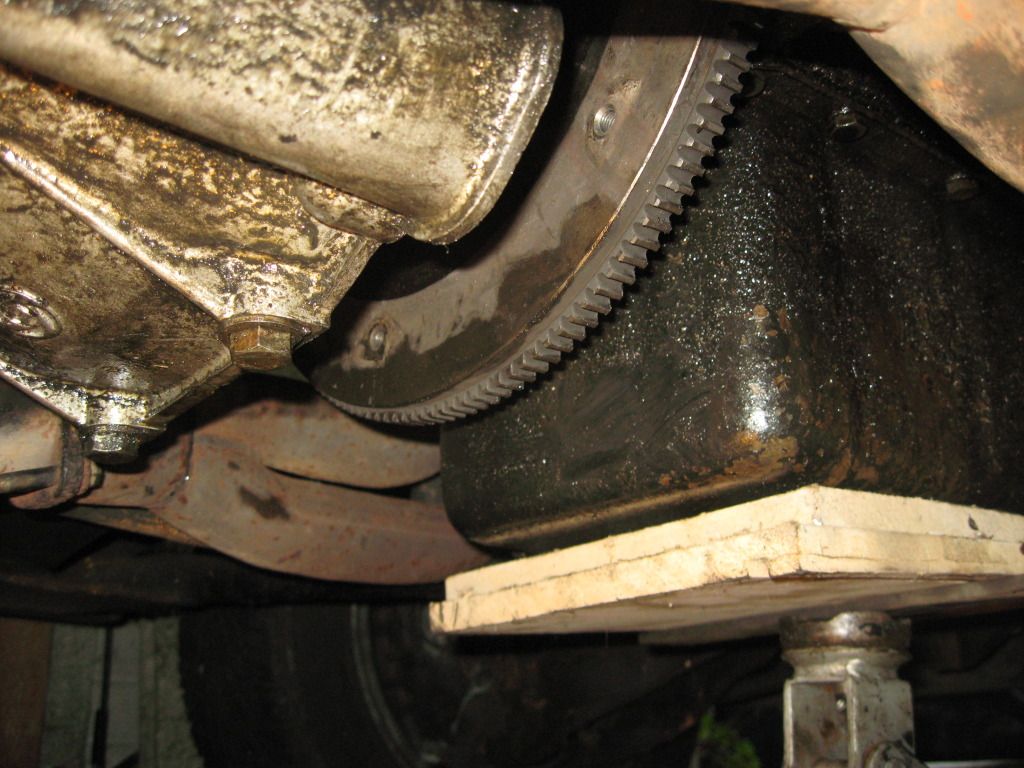
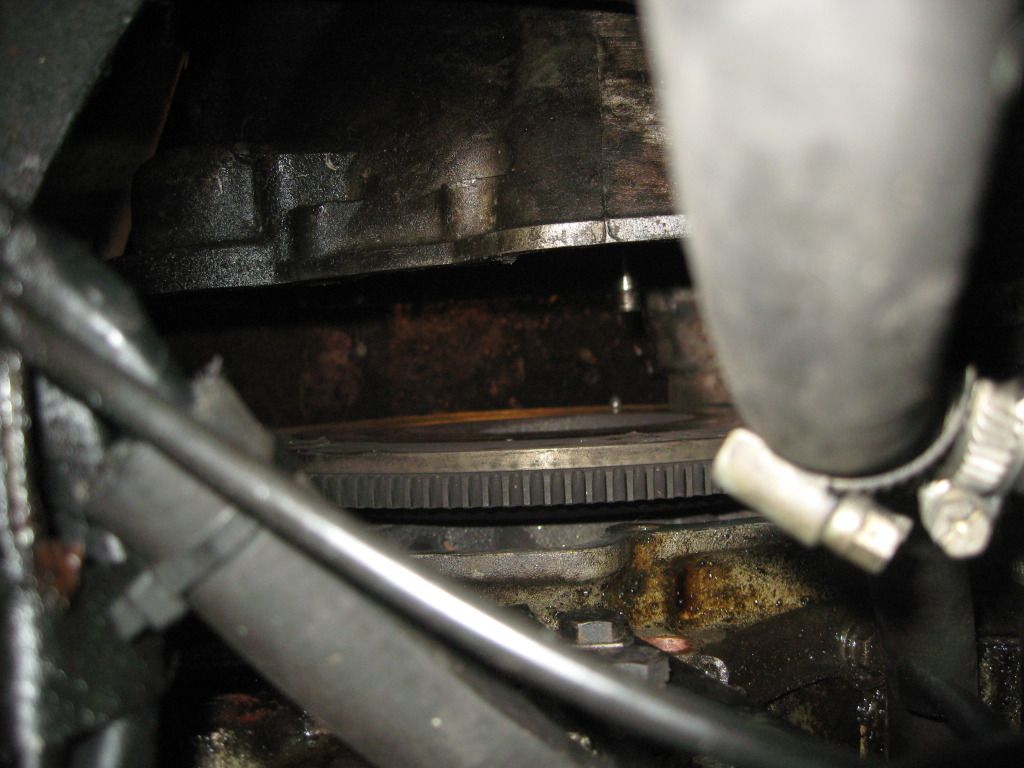
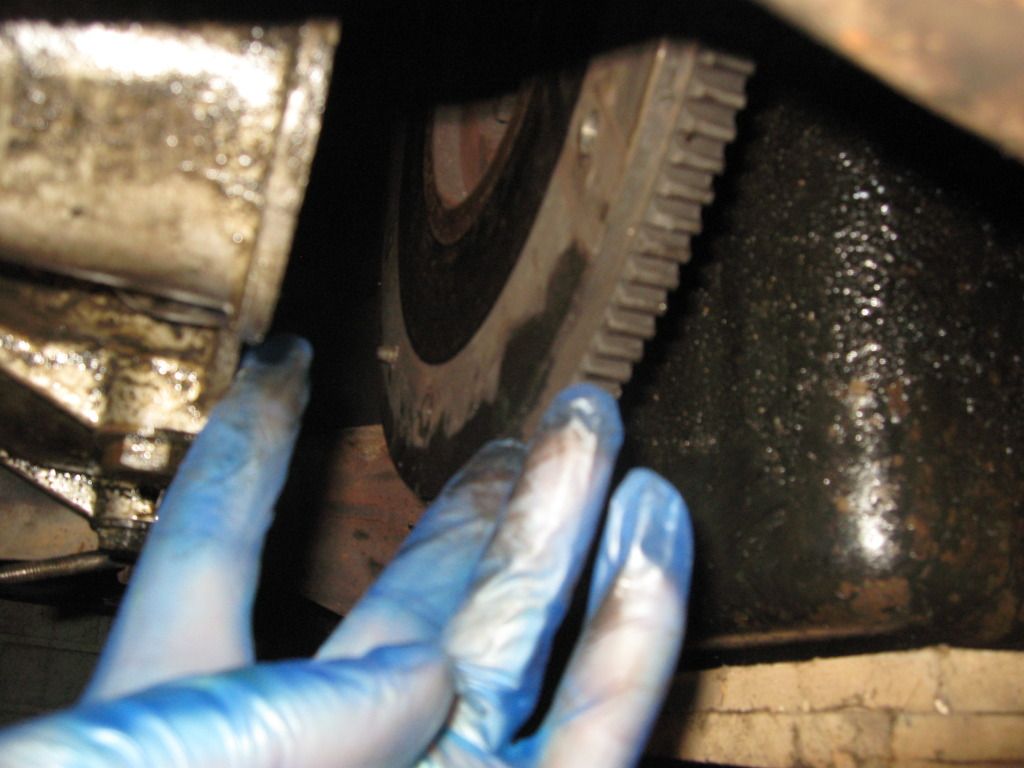
4. Once you have the g/b back about 4" that's enough room to get the clutch cover plate out.

1. Engine forward 2-3 inches just enough to get the rear g/b mounts off the chassis
(this means uncoupling the top hose,
probably not the bottom one (saves refilling the watter),
maybe moving the oil filter remote, the oil thermostat if you have one,
disconnect the exhaust centre box from the manifolds.)
2. Uncouple propshaft & disconnect g/b from engine. (This means undoing all the bellhousing bolts, the flywheel cover plate, the clutch slave cylinder)
if you have an SX, it's easier if you move the air meter too
3. Move the gearbox back as far as possible, jiggle it off the clutch spline. I found that by undoing and dropping down the g/b remote thingy it gave far more clearance at the top. Take out the side bolts on the remote, but only loosen the forward-pointing bolts.
Using a big lever on the old clutch and bellhousing is a good way to get it off. There is a big gap where the clutch remote bulge is to get it started.
4. Once you have the g/b back about 4" that's enough room to get the clutch cover plate out.
Gassing Station | Wedges | Top of Page | What's New | My Stuff