Refurbishment of my Maserati Mexico
Discussion


hidetheelephants said:
The discs look surprisingly small, although it's probably a trick of the eye; what diameter are they?
From memory, the fronts are about 300mm diameter so not too shabby. I'm keeping everything standard so they are the original size both front and back. Reading period road tests they described the brakes as adequate rather than exceptional so maybe they are undersized!
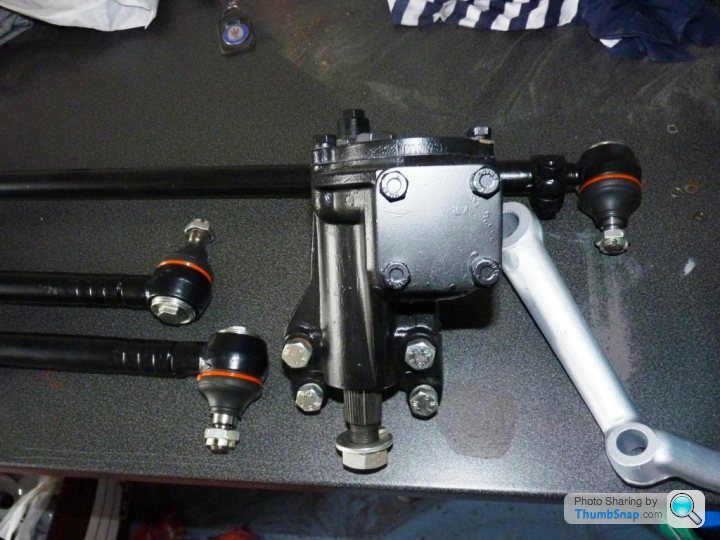
Just a little update after a few hours in the garage today. Just to respond to the above, the steering is done by a separate box William. Nice and easy to lift solo and it's all ready for installation with new seals and the track rods all refurbished:-
Today I took a break from making up new brake pipes and re-fitted the front springs using my home-made compressors to wind the spring pan up against the lower wishbone, worked a treat
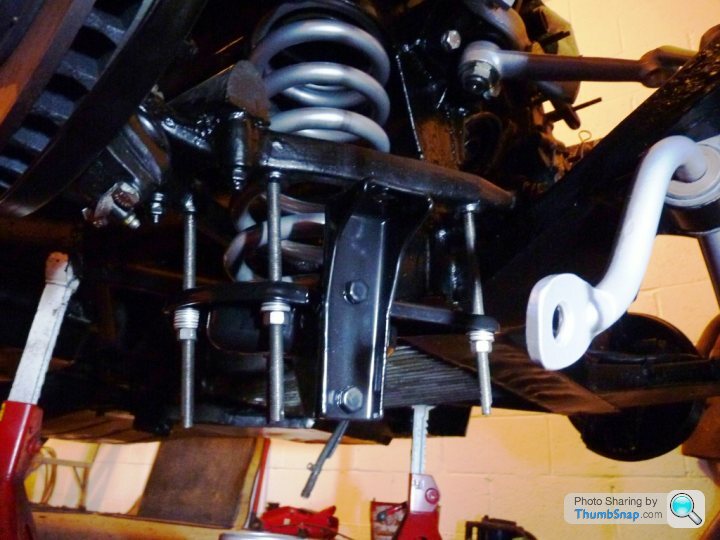
Once the spring was fully seated, the damper is fed in from below and secured which is nice and logical. One side done and time to do the other before securing the anti-roll bar drop links.
Quite pleased with how it's gone together.
Paul
Today I took a break from making up new brake pipes and re-fitted the front springs using my home-made compressors to wind the spring pan up against the lower wishbone, worked a treat
Once the spring was fully seated, the damper is fed in from below and secured which is nice and logical. One side done and time to do the other before securing the anti-roll bar drop links.
Quite pleased with how it's gone together.
Paul
retropower said:
The front suspension is incredibly similar to mk2 jaguar, even the lumps on the lower arm forgings look the same!! The way the spring pans work is identical too! Who copied who?
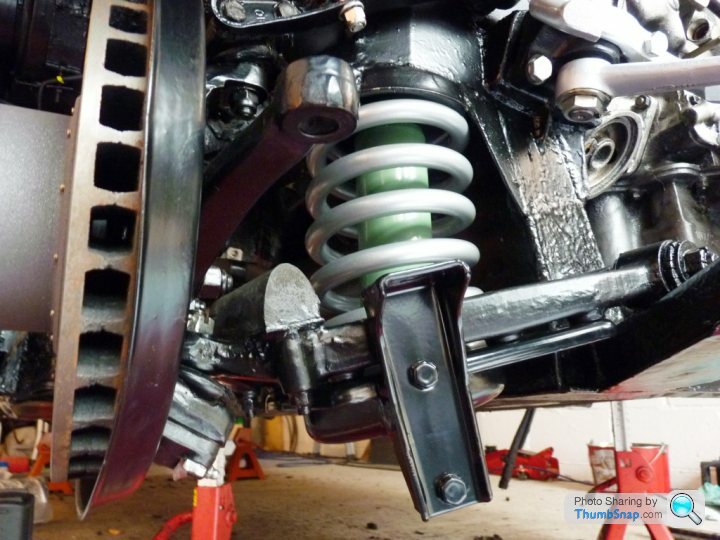
The Mexico front end is an evolution of the 3500 GT suspension which dates from 1957. Same pan and wishbone design so it may have been nicked by the Browns Lane boys. Works well.Master cylinders mounted and a few more brake pipes fitted tonight. Small steps.
Paul
RichB said:
I've only just happened across this thread and I'll look forward to reading about what has happened in the ensuing 2 1/2 years since this enthusiastic initial comment.
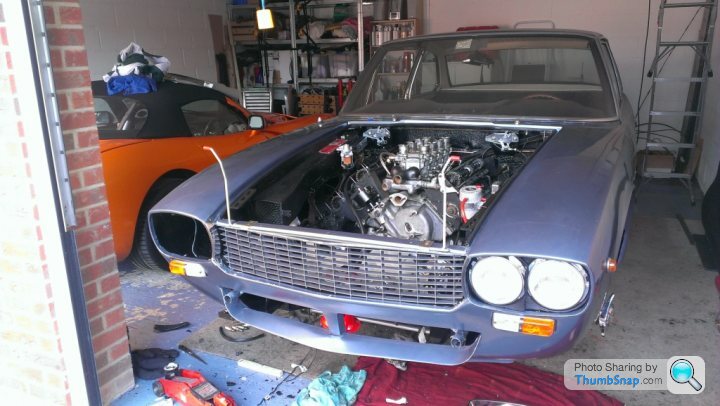
Anyway, a great combo, a TVR and a classic Nice one.
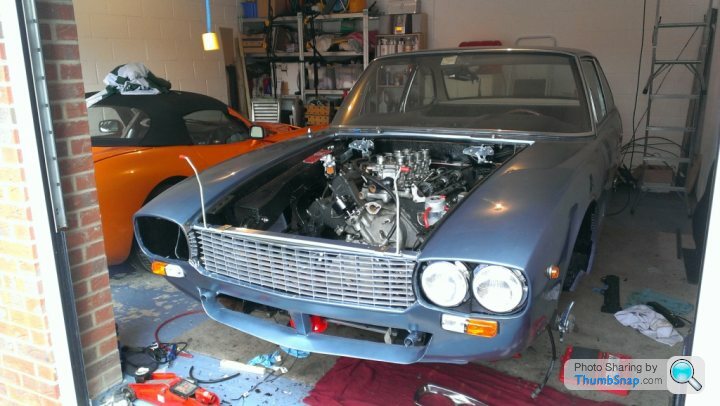
Lol.... Well at least I've started on the brakes The Surveyor said:
...recently purchased Maserati Mexico, 4.2 V8. In need of some light refurbishment and a fresh coat of paint, needs the interior cleaning and a few repairs, and the brakes making good...
Anyway, a great combo, a TVR and a classic
Nice one. I've just noticed that my thread has dropped down to page 6 which shows a disgraceful lack of updates in line with the general glacial progress.
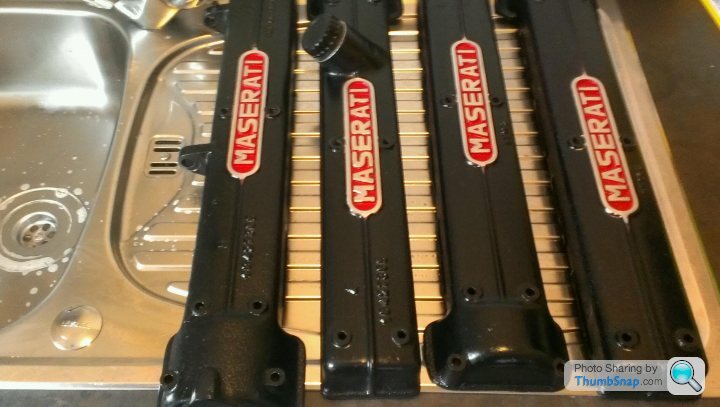
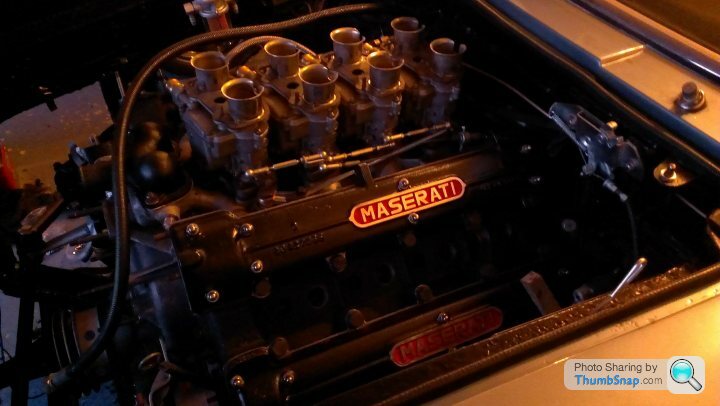
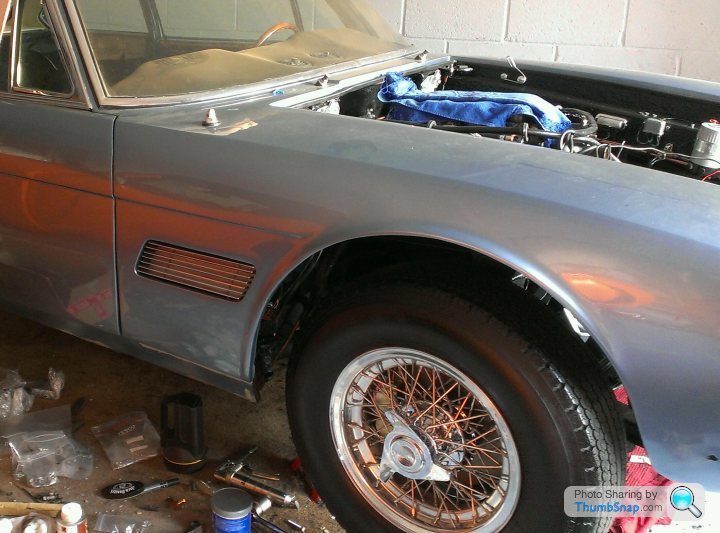
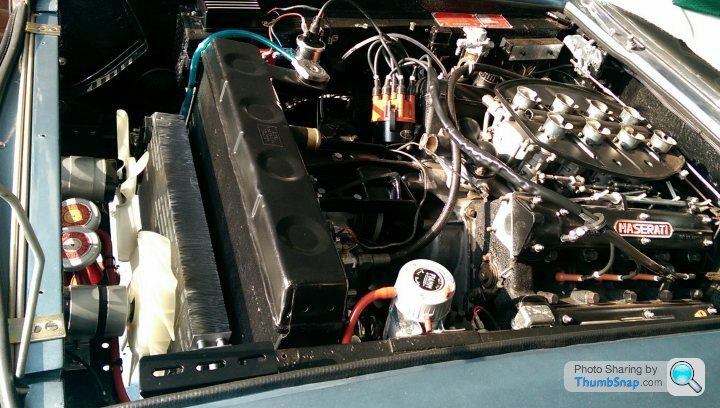
Work has been progressing in between planning for my upcoming wedding, with engine-bay auxiliaries (fans, horns, bonnet catches) and steering components being fitted, and other bits and pieces being cleaned and re-painted including the distributor and rocker covers.
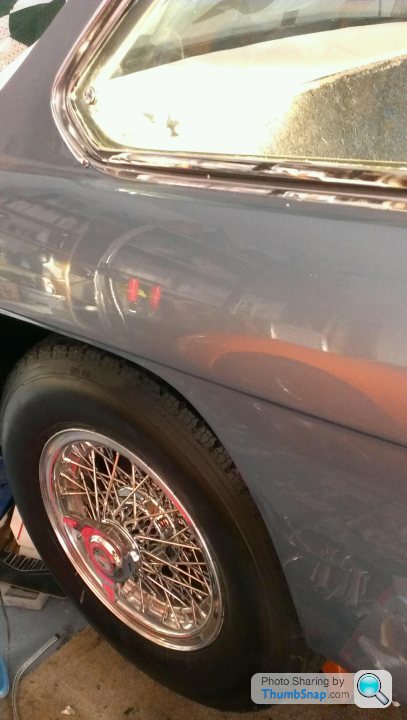
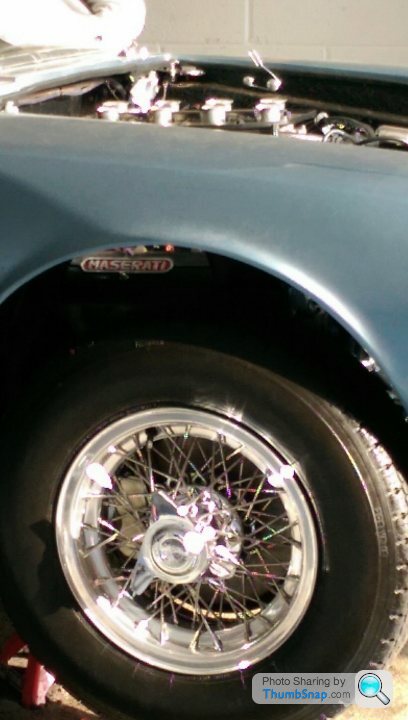
The front brakes are now fitted along with the new clutch master and slave cylinders including all new copper pipe and flexi hose. Both servos are installed along with new original spec cotton braided vacuum hoses linking the inlet manifold, the single vacuum tank, and the paired servo's.
Recently I trial-fitted the front grill after it was soda-blasted and I'd painted it silver. Whilst it fitted well enough, I hated the bright aluminium silver paint finish as it just looked too much:-
So, I repainted it in a darker metallic grey which looks much more 'period':-
Still loads to do.....
Paul
Work has been progressing in between planning for my upcoming wedding, with engine-bay auxiliaries (fans, horns, bonnet catches) and steering components being fitted, and other bits and pieces being cleaned and re-painted including the distributor and rocker covers.
The front brakes are now fitted along with the new clutch master and slave cylinders including all new copper pipe and flexi hose. Both servos are installed along with new original spec cotton braided vacuum hoses linking the inlet manifold, the single vacuum tank, and the paired servo's.
Recently I trial-fitted the front grill after it was soda-blasted and I'd painted it silver. Whilst it fitted well enough, I hated the bright aluminium silver paint finish as it just looked too much:-
So, I repainted it in a darker metallic grey which looks much more 'period':-
Still loads to do.....
Paul
uk66fastback said:
In that second pic it looks like the grille is the body colour! Trick of the light maybe ... It's not the colour that would rile me if it was silver, just how glossy it was - a matt finish would look just fine I think (in silvery/grey)
Cheers, it's not body coloured but does look like it in the picture. Both the silver and the metallic grey have been over-painted with a gloss lacquer so it's both easier to clean as well as catching the light better. A matt finish would go dull overtime as you can't easily clean between the slats. I'll fit the lower grille surround along with the chrome badge and take another picture so hopefully the contrast comes out better.
Paul
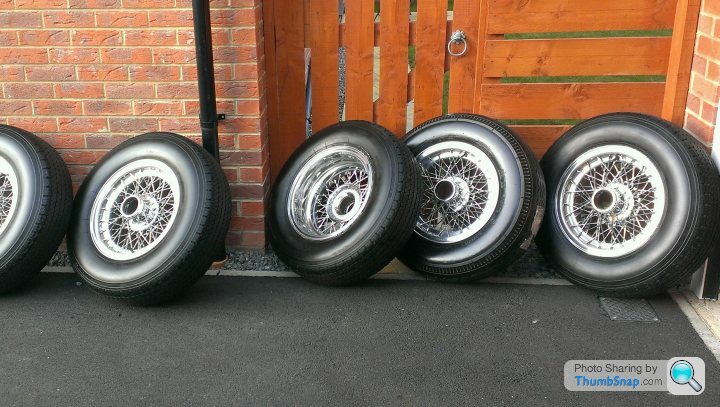
As has become the norm for this project, other things have got in the way of any solid progress, things like my wedding coming up on Friday..... However in between table plans, suit fittings, wedding favours and other such stuff, I stole a few hours and got the tyres fitted to the wheels, then popped them on the car. Another little step forward.
More spare time needed.......
More spare time needed.......
urquattro said:
In married life we all need a shed with a restoration project in it, it becomes a man cave and bolt hole, I had one of each forever, when one project is finished another is gathered up.................
Good look with the wedding, good day etc and don't mention the car in your wedding speech. !
Agree 100%, the 3000m TVR rebuild is already lined up to follow this one and thankfully Jacqui knows what she's in for regarding the cars. And yes, maybe better not reminding anybody at the wedding how much money has been scimmed off the wedding budget to fund this project lol.... Good look with the wedding, good day etc and don't mention the car in your wedding speech. !
Cheers
Paul S4 said:
Here is an idea for those exhaust manifolds...I had a similar choice a few years ago with my 1970 Lotus Elan; a friend who is an historic race mechanic suggested nickel plating, which I had done at Almit in Newton Aycliffe. ( I am assuming that you are in the North East...as am I. )
They came back gleaming, but obviously not as bright as chrome. Over time, ( about 10 years and 40,000 miles of hard driving ) they were still fine, having turned a lovely shade of silver/blue. I was told at the time that nickel plating is actually slightly porous, and if left outside the steel beneath will start to rust, but having driven my car in all sorts of wet weather on motorways etc, they never showed any corrosion at all.
Of course this advice may well be too late if you have already painted them !
Thanks Paul, but yes, they're already painted. I've used Almit before and they are great, but have been using Cleveland Chrome for my plating on this project, they wouldn't touch the manifolds saying the carbon build-up would ruin their acid dips. Maybe I should have stuck with Almit !They came back gleaming, but obviously not as bright as chrome. Over time, ( about 10 years and 40,000 miles of hard driving ) they were still fine, having turned a lovely shade of silver/blue. I was told at the time that nickel plating is actually slightly porous, and if left outside the steel beneath will start to rust, but having driven my car in all sorts of wet weather on motorways etc, they never showed any corrosion at all.
Of course this advice may well be too late if you have already painted them !
SprintSpeciale said:
How do things stand Paul? Any recent pics for us?
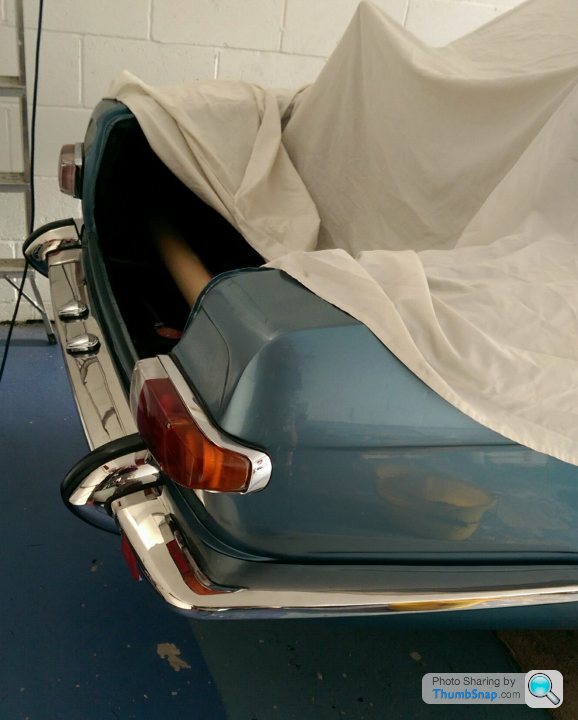
Progress has been steady but not very photo friendly. I've been working underneath again at the back getting the underside fully painted and putting new seals in the diff. Once that is finished, I can put the last of the brake pipes on, the handbrake cable , the prop shaft then the exhaust. I've still got the twin tanks to fit then the back is done.... Radiators are installed but I'm looking for some final sections of new hose to finish the plumbing. Then it'll be time to see is it starts......Here are a few pics from earlier today just for the records:-
Still having fun with it
Paul

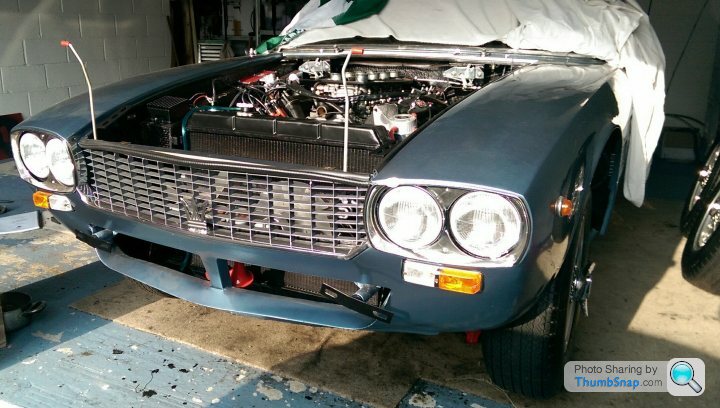
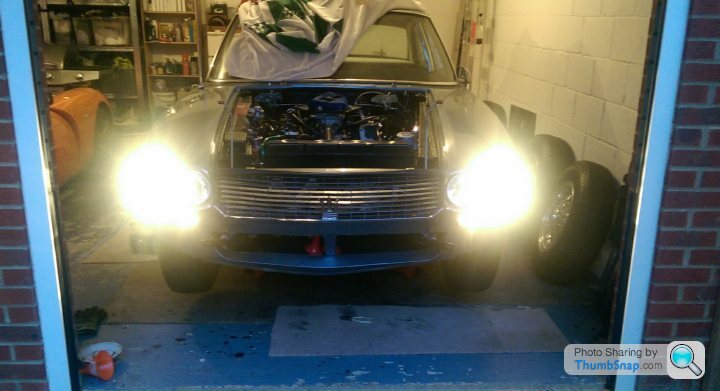
I made a small but significant step forward last night on the Mexico, I connected the battery up for the first time and no flames, fires, or melting wiring that I could see.
The electric aerial rising up was a little startling as it wasn't working when I bought the car (although I'm not sure it should go up without the radio being connected!) and switching on the ignition had the fuel pumps operating correctly, first one, then the other when switched over. Some of the lights worked including the door warning lights, the side lights and dipped headlights but there was no main-beam and only one number plate light.
Electric windows wouldn't work and neither would the indicators or horns. Great joy was the under-bonnet light which did work which again never did before!
Much checking on the wiring needed, one fuel tank still to install, and then I may see what happens with one more turn on the ignition key......
Paul
Gassing Station | Classic Cars and Yesterday's Heroes | Top of Page | What's New | My Stuff