Project Scimitar MV6
Discussion


Had a day ont he car yesterday 
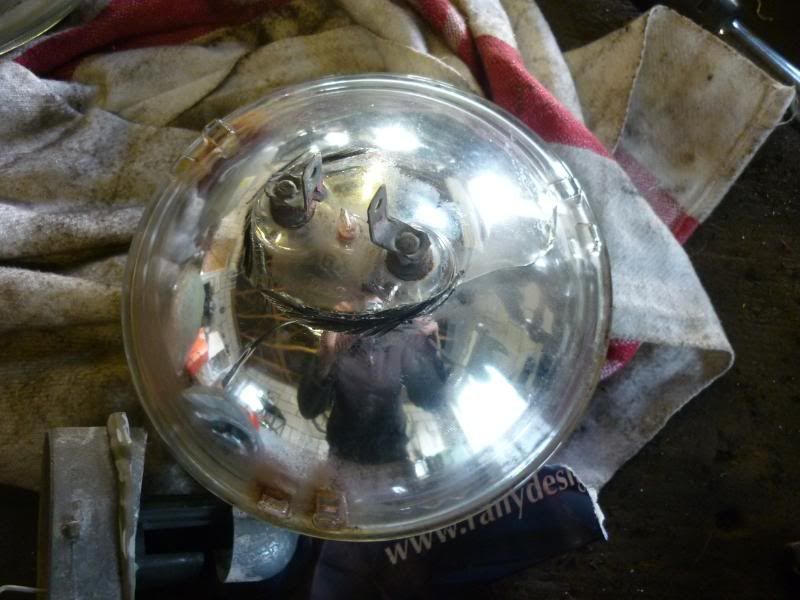
I've started making what I feel is the best solution to the problem of the front indicators. I can't seem to find a solution which doesn't look daft. So I'm hollowing out the main beam lamps and putting hte indicators in them.
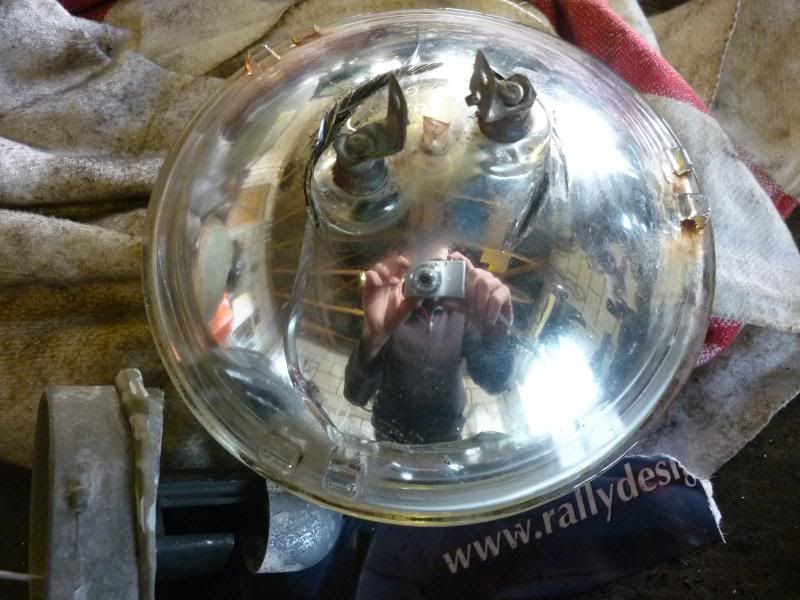
I started grinding the original sealed beam jobbies, I was very surprised this worked at all, but then the heat got the better of them and the glass cracked.
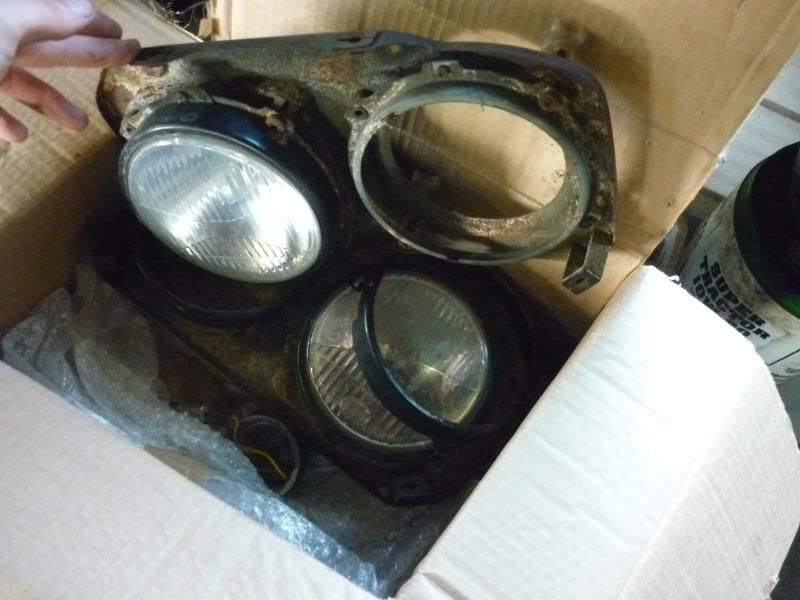
So I moved onto the capri lights from ebay, these have metal backs so were much easier to work on.
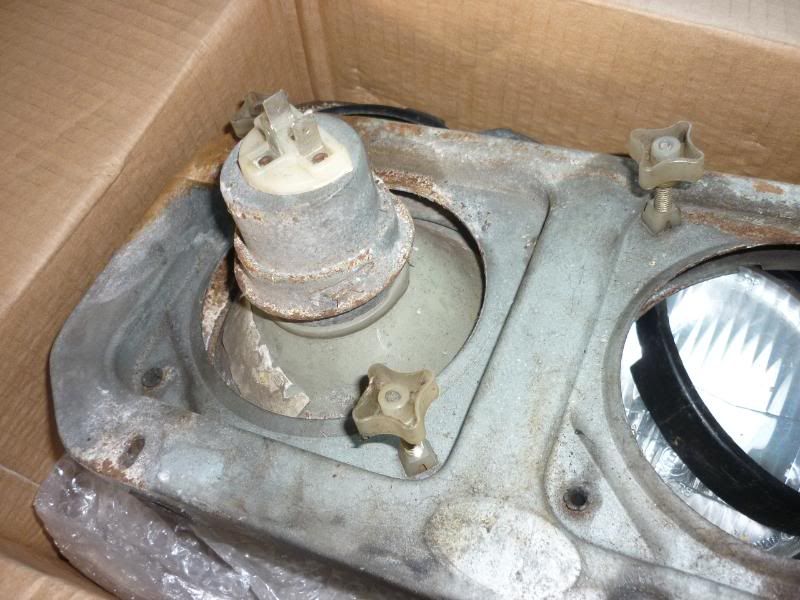
Cut the back out.
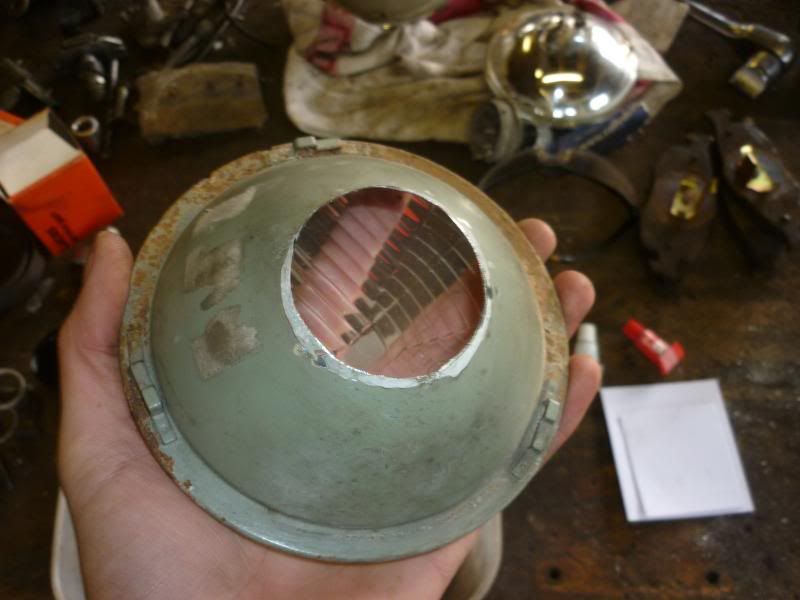
And glued the mini style indicator lenses in. Its hard to photograph, it doesn't look wuite that orange when using your own eyes, but I'm already thinking I should have gone with clear lenses and orange bulbs, we'll see how they look on the car.

I spent a long time trying to trace an intermittent fault with the crank position sensor and got nowhere yet. I think I'm going to reroute the wire away from any other electrics incase its just picking up too much noise.
More to come.
I've started making what I feel is the best solution to the problem of the front indicators. I can't seem to find a solution which doesn't look daft. So I'm hollowing out the main beam lamps and putting hte indicators in them.
I started grinding the original sealed beam jobbies, I was very surprised this worked at all, but then the heat got the better of them and the glass cracked.
So I moved onto the capri lights from ebay, these have metal backs so were much easier to work on.
Cut the back out.
And glued the mini style indicator lenses in. Its hard to photograph, it doesn't look wuite that orange when using your own eyes, but I'm already thinking I should have gone with clear lenses and orange bulbs, we'll see how they look on the car.
I spent a long time trying to trace an intermittent fault with the crank position sensor and got nowhere yet. I think I'm going to reroute the wire away from any other electrics incase its just picking up too much noise.
More to come.
Got some quality time in this morning, Didn't move mountains but I'm please with progress.
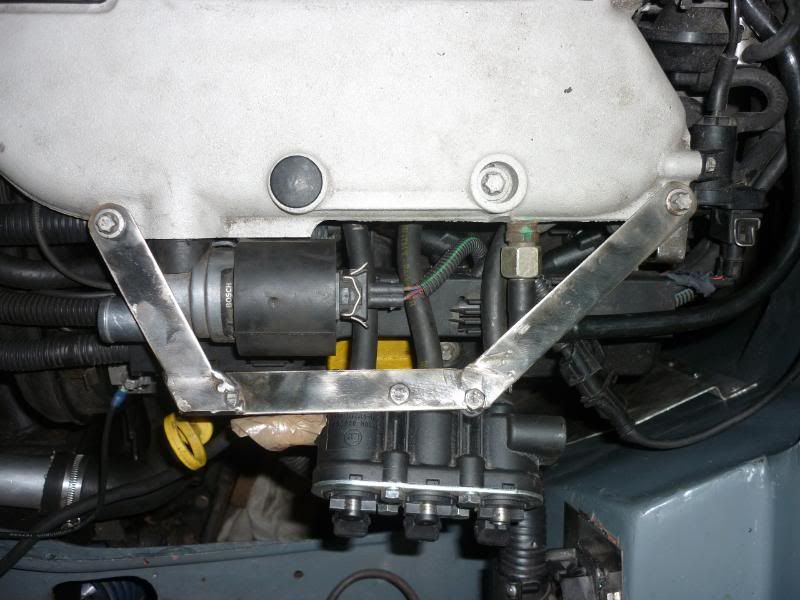
I used some strips of SS that I picked up from the scrap yard some time ago (they were for SS tank straps, but I got loads just in case).
Bit of drilling, bending, cutting and welding and voila!
Left side
And the right side

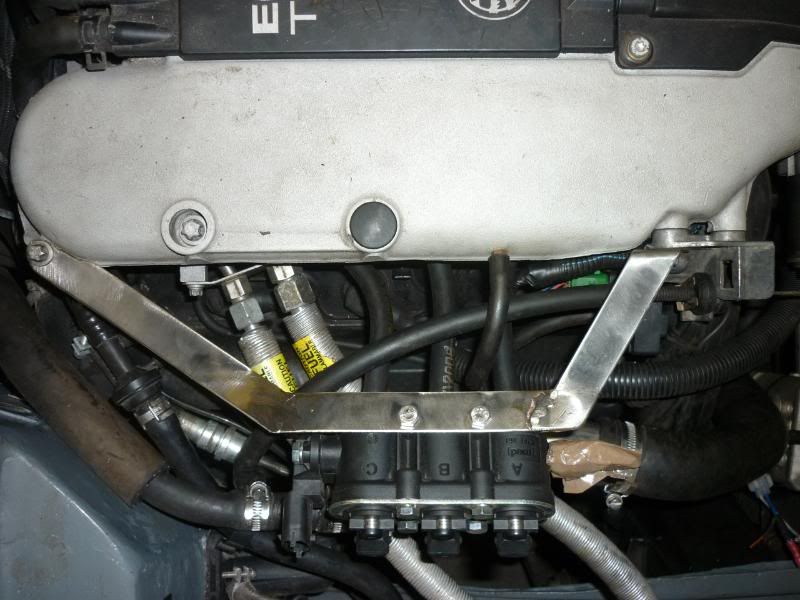
They were mounted on top of the manifold in the omega, but this was too high for the scim. I was going to mount them further outboard on the inner wing area, but they really need to be on the engine so there is little relative movement between them and the engine, so as not to chaf the hoses.
Put the new SS exhaust studs in too. Couldn't be happier with these, they're got an allen key on one end so they're really easy to put in
More to come
I used some strips of SS that I picked up from the scrap yard some time ago (they were for SS tank straps, but I got loads just in case).
Bit of drilling, bending, cutting and welding and voila!
Left side
And the right side
They were mounted on top of the manifold in the omega, but this was too high for the scim. I was going to mount them further outboard on the inner wing area, but they really need to be on the engine so there is little relative movement between them and the engine, so as not to chaf the hoses.
Put the new SS exhaust studs in too. Couldn't be happier with these, they're got an allen key on one end so they're really easy to put in
More to come
I had pretty much a whole day on the car yesterday, and I'm definately getting slower 
Maybe its cos all the major miles stones have been reached, the body now sits on the redone chassis, the engine is it, and it now runs. Now I need to buckle down and get the hell on with the mass of little jobs left to get it finished.
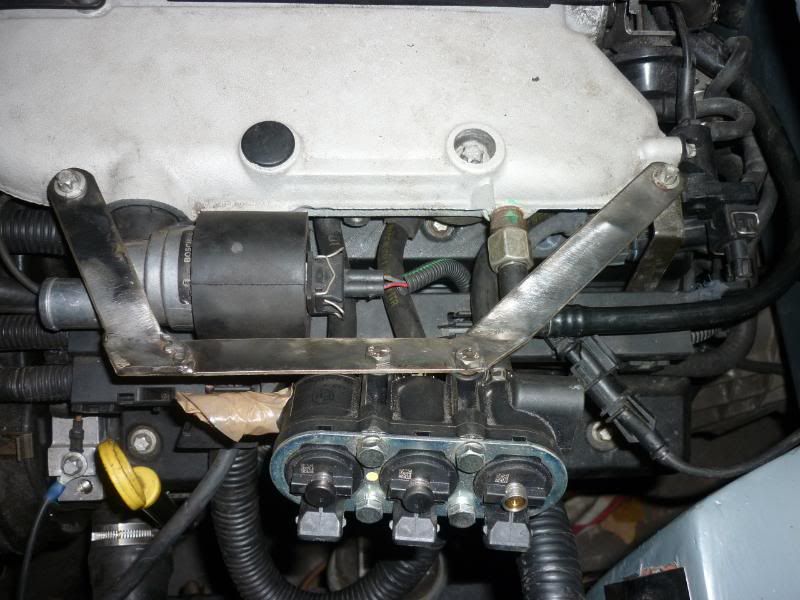
I did lots yesterday but have little to show for it. Firstly, having been chatting on the omega forum, it seems the vauxhall thermostat open at a very high temperature, to the point where the engine is running around boiling point (save for the fact that its pressurised) for emission legislation, so the oil too runs hotter. So I got hold a "cool-stat" that starts opening at a much more resonable 82C.
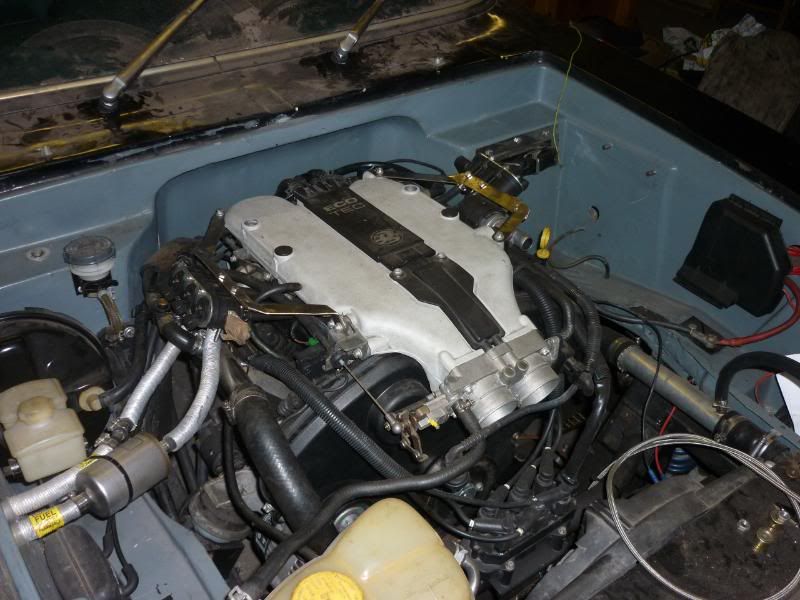
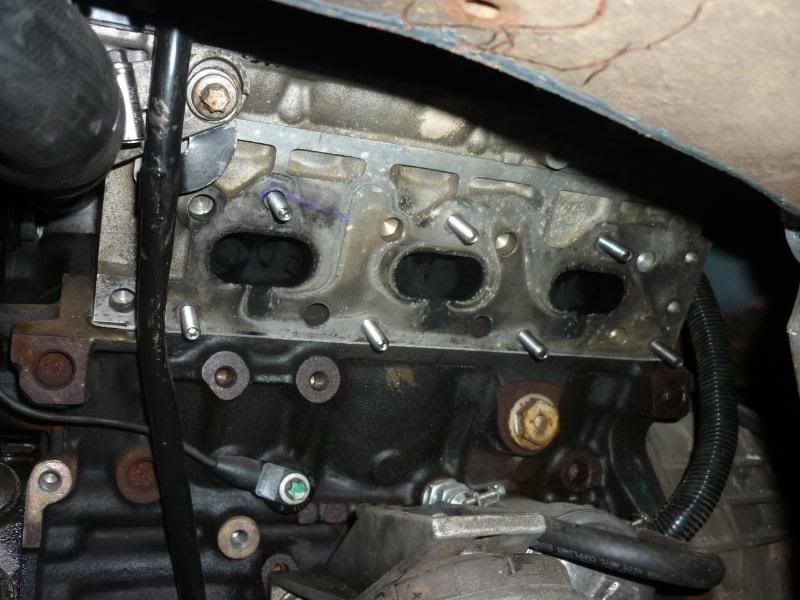
So I pulled the inlet off and inlet runners needed moving to get this new thermostat in. Its right in the bottom of the V there behind the timing cover.
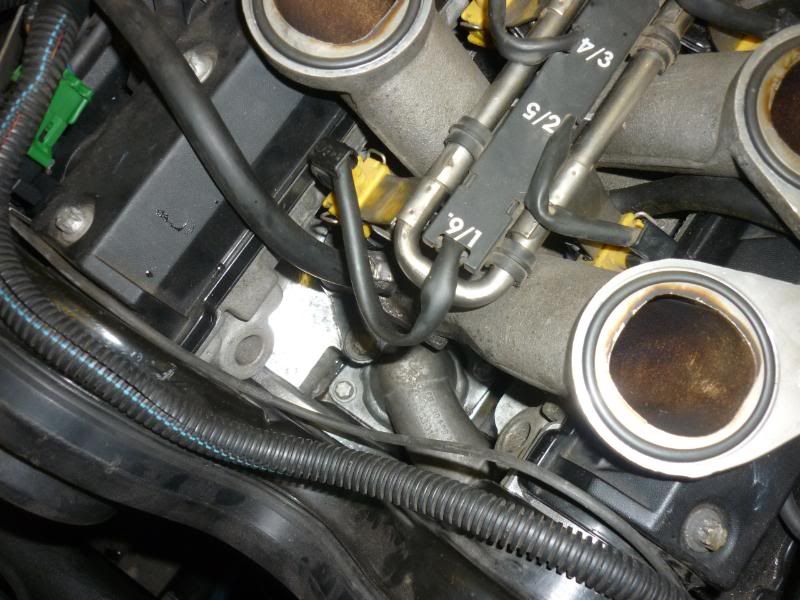
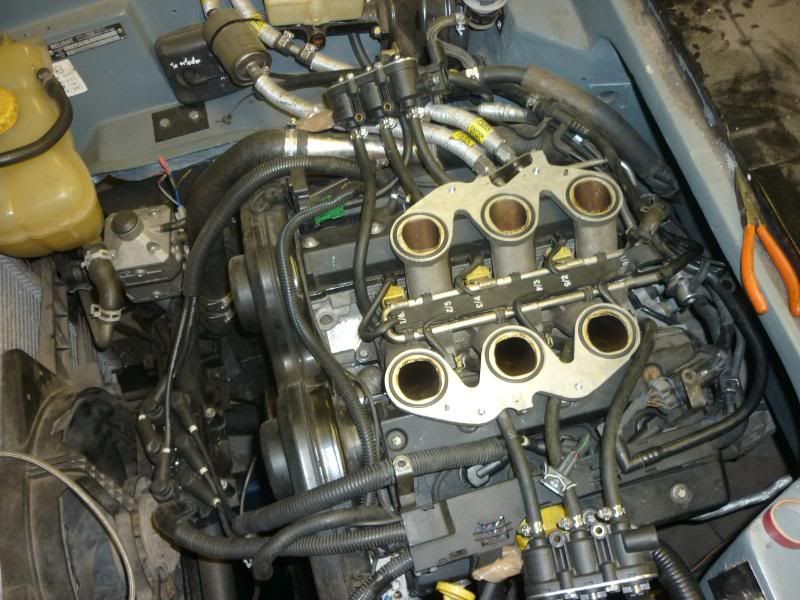
You can see the handsome shape of the V6 so much better without that horrible inlet manifold on it.
The other thing I finally got round to doing yesterday was the crank sensor. Its the bain of every after market ECU installer, its the thing that most often causes trouble with an aftermarket installation and I too have been bitten. There is an intermittent fault that shows up as a major but infrequent misfire. There is an LED on the ECU that changes fro green to red if it looses the Crank signal, and thats exactly what happens when it misfires. The ECU looses the signal so can't fire the sparks.
After reading up on it it seems the signal in the wire is very weak so can be lost in the "noise" of the surrounding wire even though its a shielded wire.
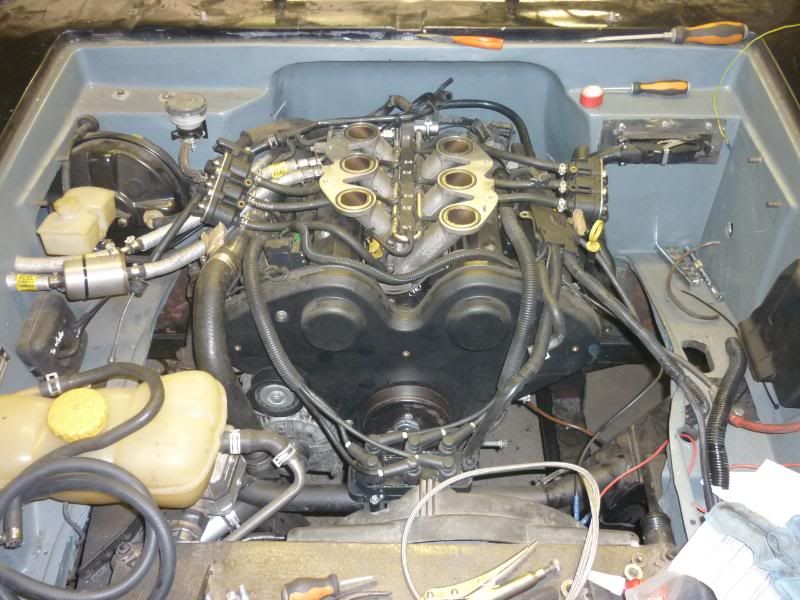
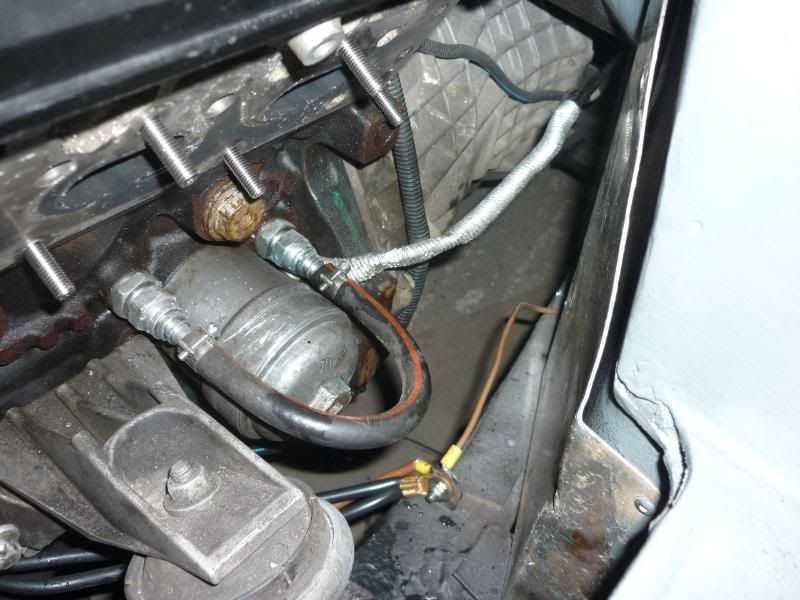
So I spent a long time taking this particular wire out of the engine loom, (the one that had taken ages to make neat by having all the sire go through one connector) and routing it away from all other wires and through a different area in the bulkhead. I resoldered the wires really close to the ECU so the sheild was in tact as far as possible. Here's the sensor wire going back from the engine to a point low in the bulkhead.
The result of my work...... It misfires more now AAAAGGGHHHHH
I did have the sensor out of the block to see if it was covered in metal deposite. So now I'm not sure if it is my meddling with the wires of the sensor itself thats messed it up.
Next port of call is to buy a brand new sensor, if that doesn't cure it the ECU will need to go back so they can adjust the "sensitivity something or other". I really hope the new sensor cures it.
I had to fix the lathe yesterday too, the inverter had started messing up the garage circiut breaker. With that now working my brother is sailing through his Capri brake upgrade, and my project has slowed accordingly to help.
My christmas holiday is evaporating with little to show for it
I might get one more day on it hopefully.
More to come
Maybe its cos all the major miles stones have been reached, the body now sits on the redone chassis, the engine is it, and it now runs. Now I need to buckle down and get the hell on with the mass of little jobs left to get it finished.
I did lots yesterday but have little to show for it. Firstly, having been chatting on the omega forum, it seems the vauxhall thermostat open at a very high temperature, to the point where the engine is running around boiling point (save for the fact that its pressurised) for emission legislation, so the oil too runs hotter. So I got hold a "cool-stat" that starts opening at a much more resonable 82C.
So I pulled the inlet off and inlet runners needed moving to get this new thermostat in. Its right in the bottom of the V there behind the timing cover.
You can see the handsome shape of the V6 so much better without that horrible inlet manifold on it.
The other thing I finally got round to doing yesterday was the crank sensor. Its the bain of every after market ECU installer, its the thing that most often causes trouble with an aftermarket installation and I too have been bitten. There is an intermittent fault that shows up as a major but infrequent misfire. There is an LED on the ECU that changes fro green to red if it looses the Crank signal, and thats exactly what happens when it misfires. The ECU looses the signal so can't fire the sparks.
After reading up on it it seems the signal in the wire is very weak so can be lost in the "noise" of the surrounding wire even though its a shielded wire.
So I spent a long time taking this particular wire out of the engine loom, (the one that had taken ages to make neat by having all the sire go through one connector) and routing it away from all other wires and through a different area in the bulkhead. I resoldered the wires really close to the ECU so the sheild was in tact as far as possible. Here's the sensor wire going back from the engine to a point low in the bulkhead.
The result of my work...... It misfires more now
AAAAGGGHHHHHI did have the sensor out of the block to see if it was covered in metal deposite. So now I'm not sure if it is my meddling with the wires of the sensor itself thats messed it up.
Next port of call is to buy a brand new sensor, if that doesn't cure it the ECU will need to go back so they can adjust the "sensitivity something or other". I really hope the new sensor cures it.
I had to fix the lathe yesterday too, the inverter had started messing up the garage circiut breaker. With that now working my brother is sailing through his Capri brake upgrade, and my project has slowed accordingly to help.
My christmas holiday is evaporating with little to show for it
I might get one more day on it hopefully.
More to come
Check this thread out mate, he may be able to help with your crank sensor issue.
Tame Vauxhall Mechanic
Keep up the good work!
Tame Vauxhall Mechanic
Keep up the good work!

A little on my brothers Capri brake upgrade for those that are interested
It was meant to be a simple bolt on job. We found a kit for the rear but it turns out the weld on bracket (which is very well made) falls in totally the wrong place so some massive strong extensions have had to be made to get the bracket to a suitable place for welding to the axle tube.
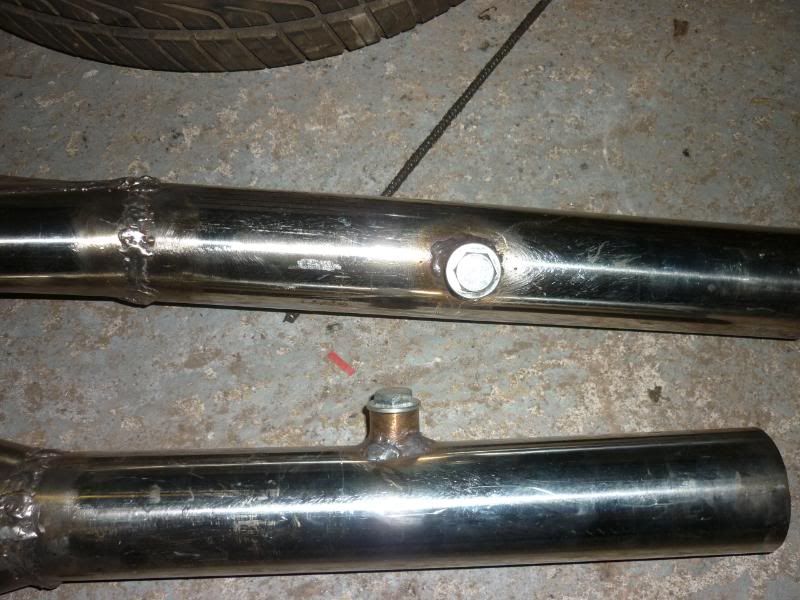
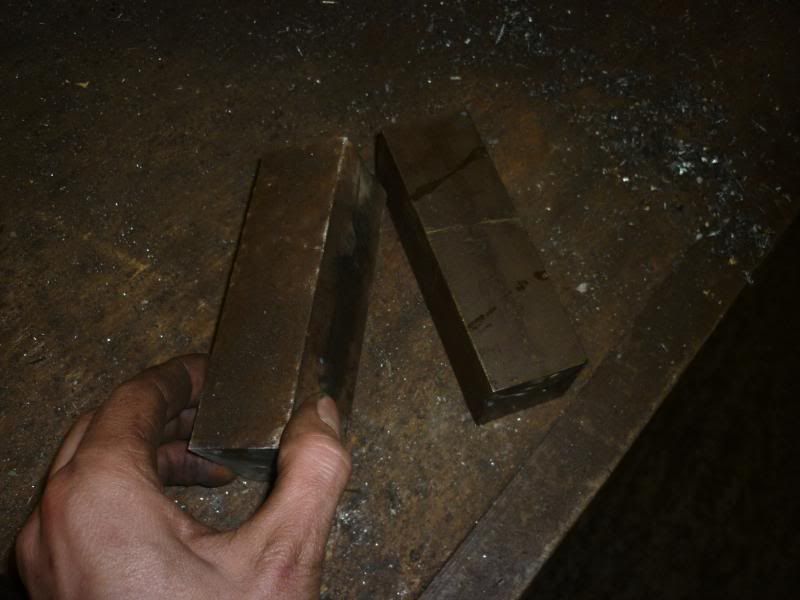
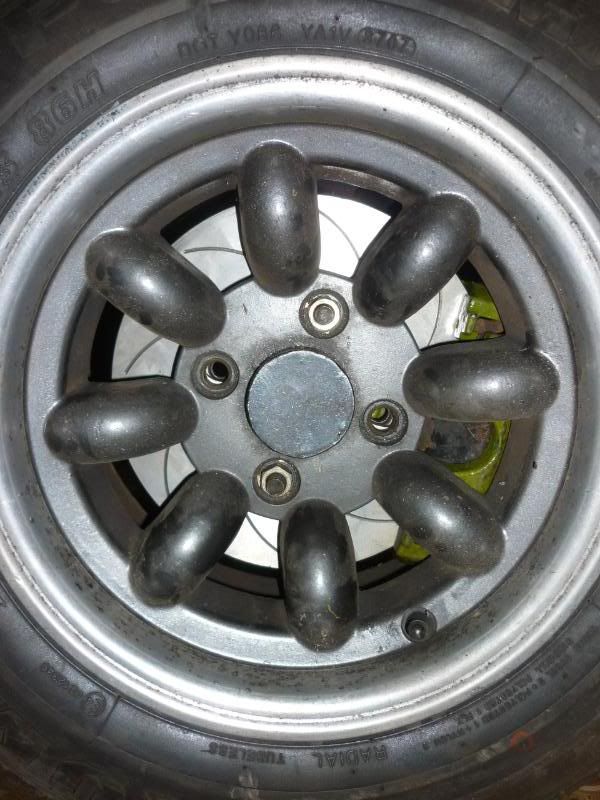
And the front was based on the capri sport kits you can get but we did it ourselves. Thing is I found the wrong discs totally, we've got focus discs that will fit behind his 13" wheels, but they're not "tall" enough so we've had to make a large bracket to go between the Mondeo caliper and the mounts on the strut. So we talked it through and bought a whole load of different drill bits, a tap, some bolts, and some chunky 40x40mm steel bar. I had to go visiting down south so left my brother to it. He's done a cracking job, I'm full of brotherly pride
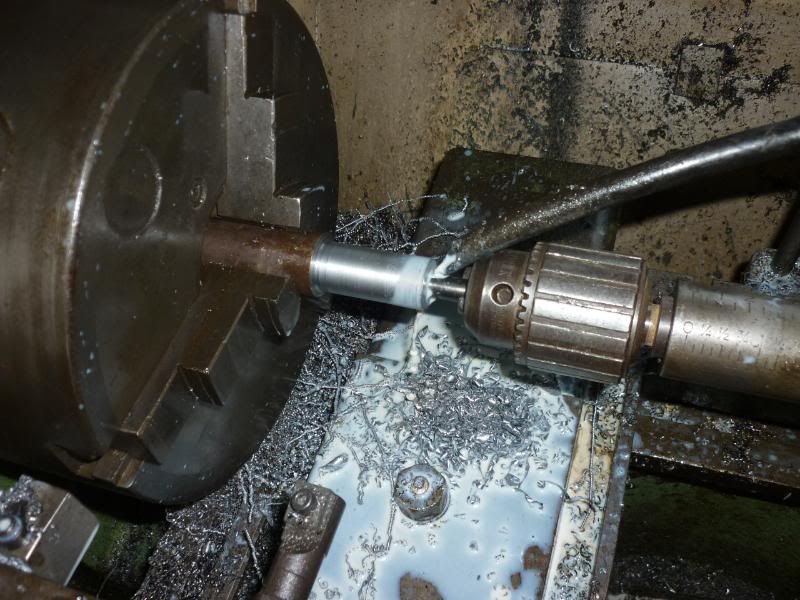
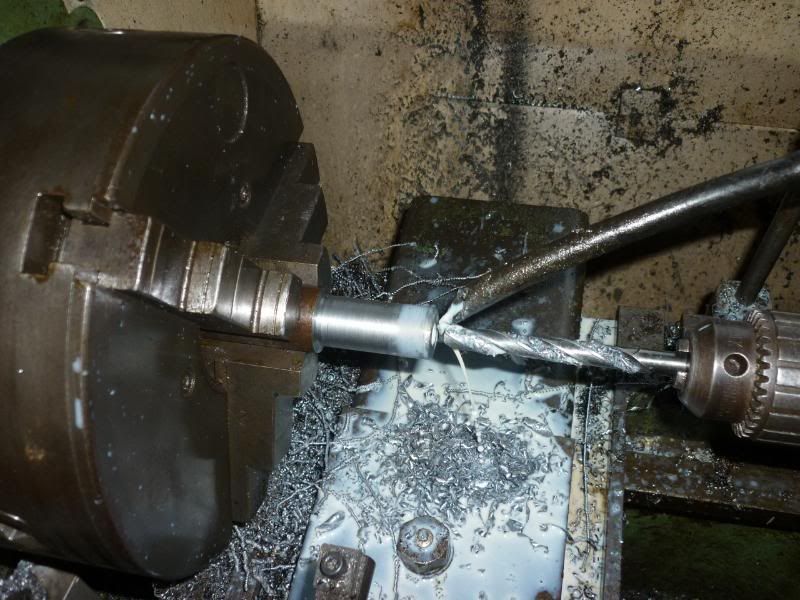
Here's the bar cut into two lengths
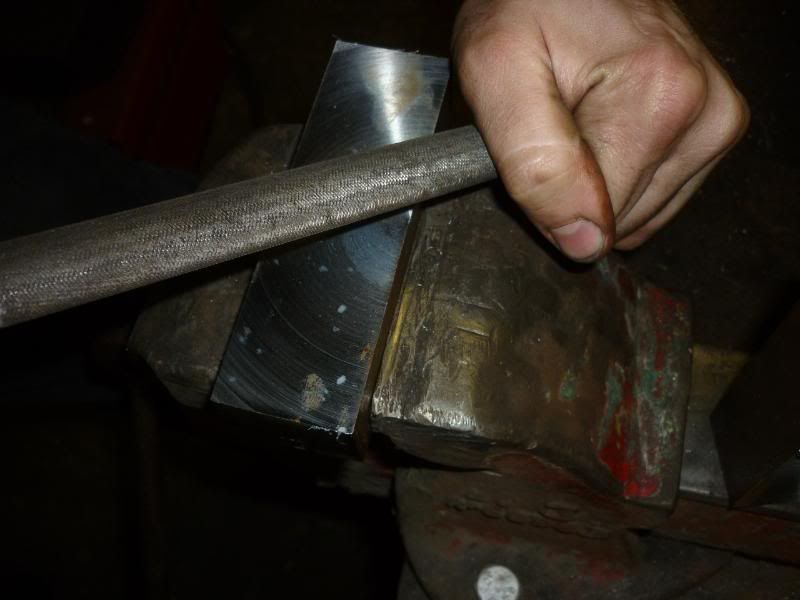
He then skimmed 6mm off on the lathe, taking them down to 40x36mm, the right size for the gap between the caliper and the mounts.
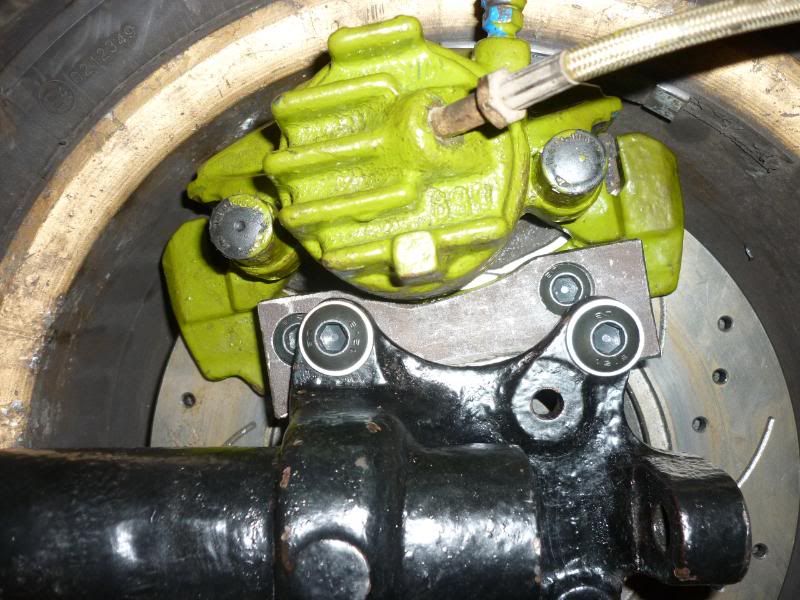
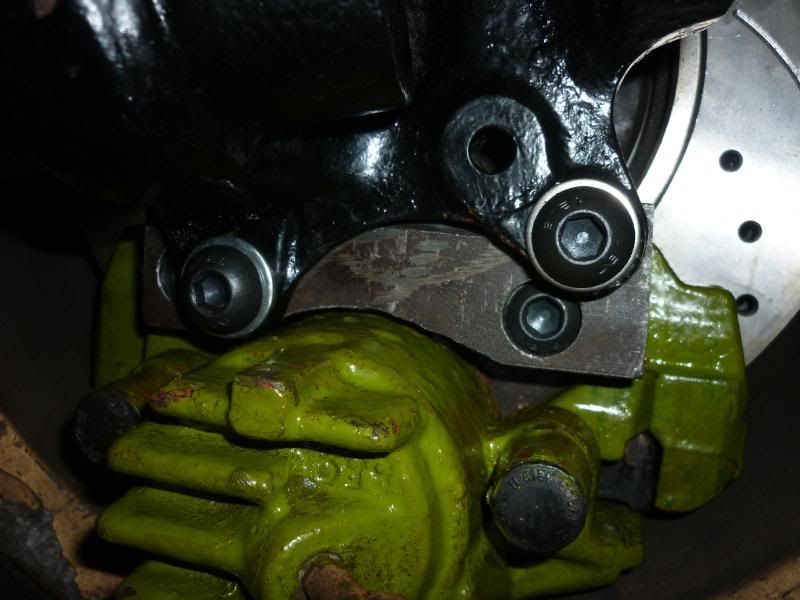
Then just as I do, he got all carried away as things started moving and didn't take any more photos till it was done. But hopefully you get the idea from the finished item. The steel block is bolted to the caliper, there are section ground out of the block to clear the hub and to clear the piston of the caliper.
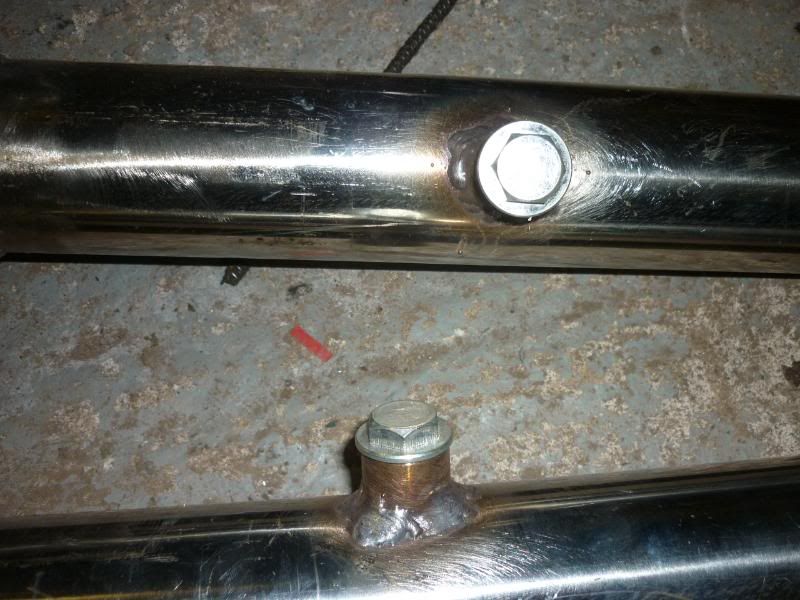
The main problem that made it difficult is that the caliper can't be rotated up the disc as the mounting points on the strut foul on the caliper (see photos), so it can only be moved up or down from the intended position by a few degrees. For this reason the caliper bolts and the strut bolts, end up nearly on top of each other. To get round this he turned a little off the caliper bolts to fit them into a counter bore, if you know what I mean (picture speaks a thousand words).
More to come on the scim soon.
It was meant to be a simple bolt on job. We found a kit for the rear but it turns out the weld on bracket (which is very well made) falls in totally the wrong place so some massive strong extensions have had to be made to get the bracket to a suitable place for welding to the axle tube.
And the front was based on the capri sport kits you can get but we did it ourselves. Thing is I found the wrong discs totally, we've got focus discs that will fit behind his 13" wheels, but they're not "tall" enough so we've had to make a large bracket to go between the Mondeo caliper and the mounts on the strut. So we talked it through and bought a whole load of different drill bits, a tap, some bolts, and some chunky 40x40mm steel bar. I had to go visiting down south so left my brother to it. He's done a cracking job, I'm full of brotherly pride
Here's the bar cut into two lengths
He then skimmed 6mm off on the lathe, taking them down to 40x36mm, the right size for the gap between the caliper and the mounts.
Then just as I do, he got all carried away as things started moving and didn't take any more photos till it was done. But hopefully you get the idea from the finished item. The steel block is bolted to the caliper, there are section ground out of the block to clear the hub and to clear the piston of the caliper.
The main problem that made it difficult is that the caliper can't be rotated up the disc as the mounting points on the strut foul on the caliper (see photos), so it can only be moved up or down from the intended position by a few degrees. For this reason the caliper bolts and the strut bolts, end up nearly on top of each other. To get round this he turned a little off the caliper bolts to fit them into a counter bore, if you know what I mean (picture speaks a thousand words).
More to come on the scim soon.
Yeah a productive morning on the lathe.
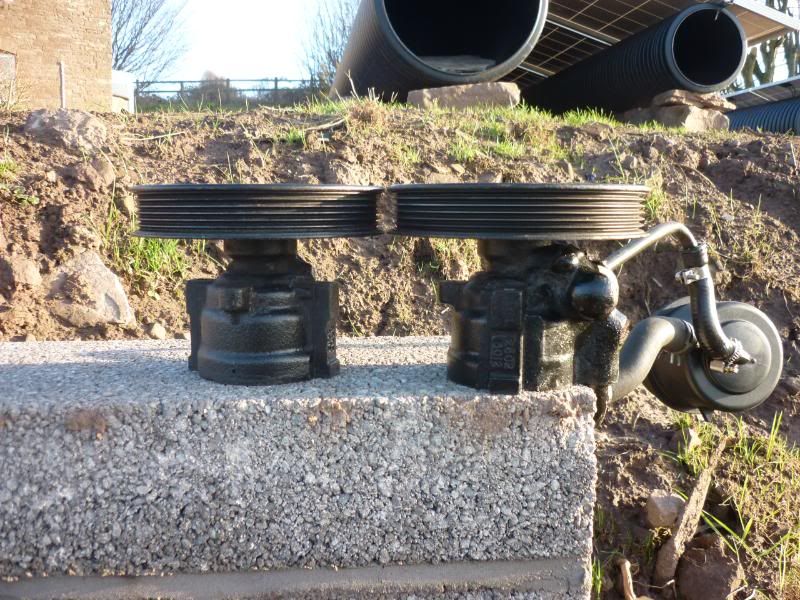
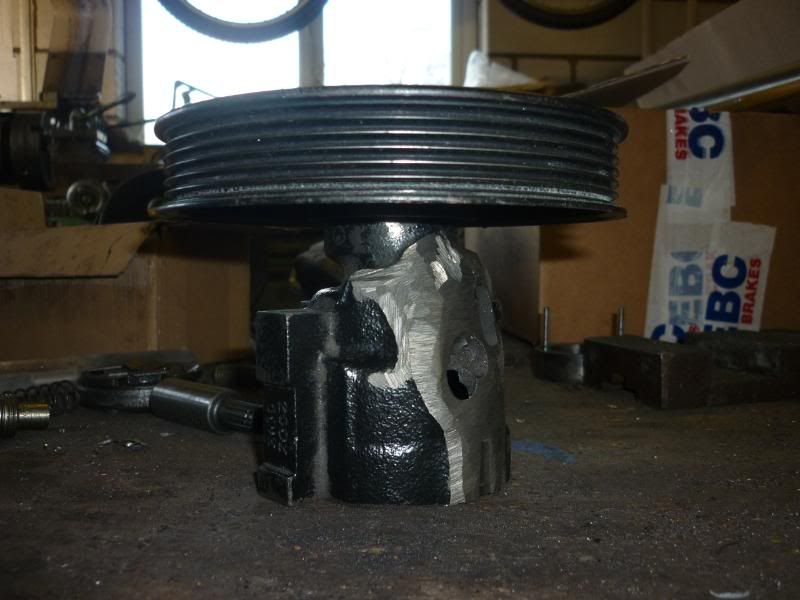
To recap, I've fitted a PAS rack to the car for its quick ratio but don't want the Assistance so I've got loads of feel. Thing is I might change my mind so I'm retaining the original pump, and butchering another one to make a free wheel pulley so that the belt still takes the correct path over all the pulleys.
The cir-clip thingy wasn't coming out at all, so I got the dye grinder out and hacked away till I could pull the pump apart.
Interesting internals, I think its called a vein (sp?) type pump but its got little paddles thats ride round an odd shaped bore. Anyway thats all on the bin
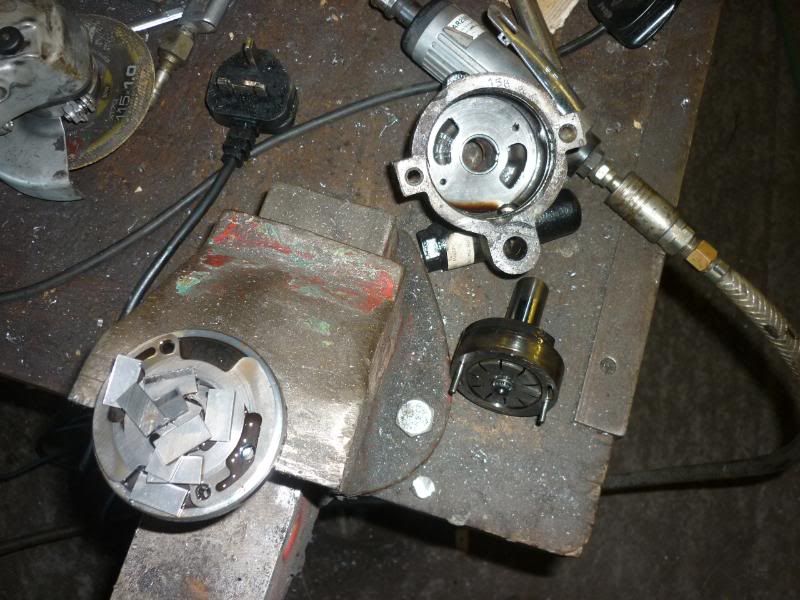
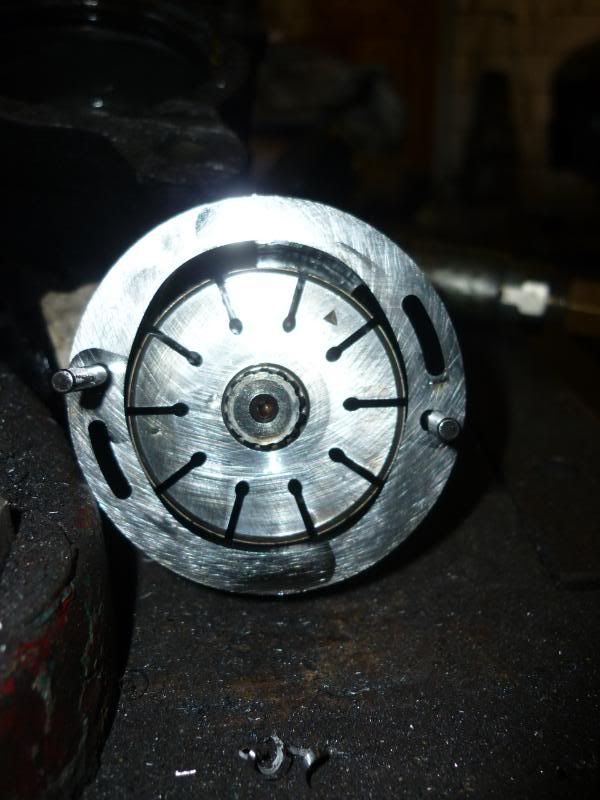
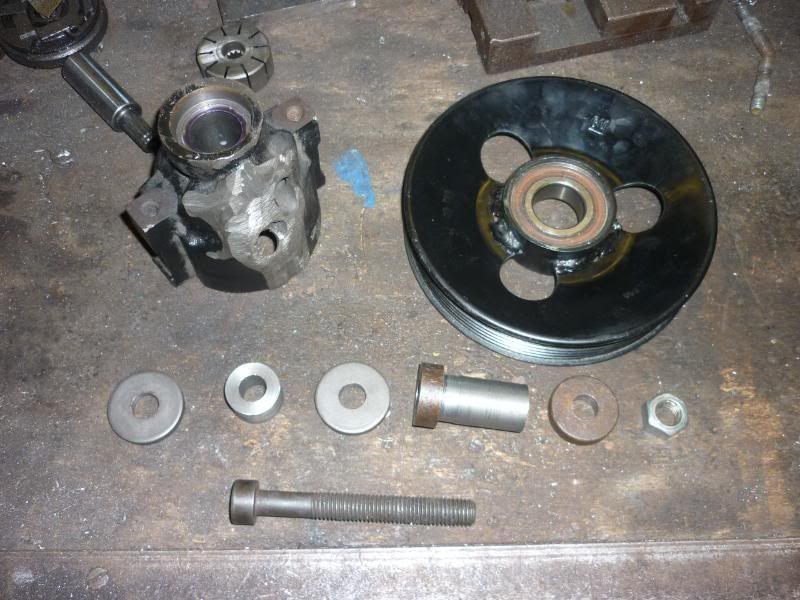
I pressed the solid bearing out and started making an arrangement to get the new pulley mounted.
Checked all the dimensions out to make sure it'll be in the same possition as the original
Ground the hell out of the casing to lose a bit of weight, but hopefully not too much strength
Made a few more bits on the lathe and its all done Starting from the left, there are the big washers that clamp the bearing in the pulley centre. There is the spacer that goes between them (still in the bearing), obviously this is a little too small to allow the washers to clamp down on the bearing. Then there's the T shaped thingy that goes into the PAS Pump casing, and again is slighty too short to allow the washer and nut to clamp down on the casing.
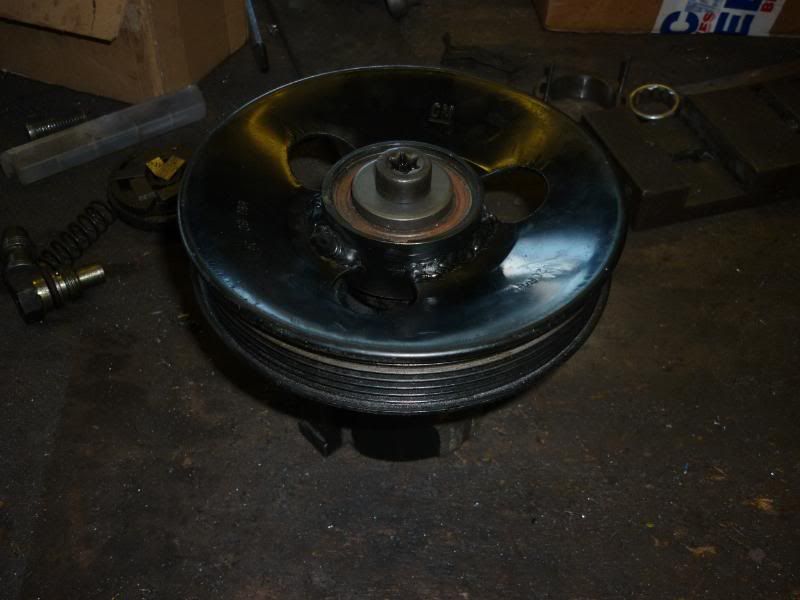
Used an old pinto head bolt to hold the whole thing together. And voila:
Might be just a bit more to come before my holiday draws to a close.
a productive morning on the lathe. To recap, I've fitted a PAS rack to the car for its quick ratio but don't want the Assistance so I've got loads of feel. Thing is I might change my mind so I'm retaining the original pump, and butchering another one to make a free wheel pulley so that the belt still takes the correct path over all the pulleys.
The cir-clip thingy wasn't coming out at all, so I got the dye grinder out and hacked away till I could pull the pump apart.
Interesting internals, I think its called a vein (sp?) type pump but its got little paddles thats ride round an odd shaped bore. Anyway thats all on the bin
I pressed the solid bearing out and started making an arrangement to get the new pulley mounted.
Checked all the dimensions out to make sure it'll be in the same possition as the original
Ground the hell out of the casing to lose a bit of weight, but hopefully not too much strength
Made a few more bits on the lathe and its all done
Starting from the left, there are the big washers that clamp the bearing in the pulley centre. There is the spacer that goes between them (still in the bearing), obviously this is a little too small to allow the washers to clamp down on the bearing. Then there's the T shaped thingy that goes into the PAS Pump casing, and again is slighty too short to allow the washer and nut to clamp down on the casing. Used an old pinto head bolt to hold the whole thing together. And voila:
Might be just a bit more to come before my holiday draws to a close.
Edited by lozzzzzz on Monday 2nd January 15:56
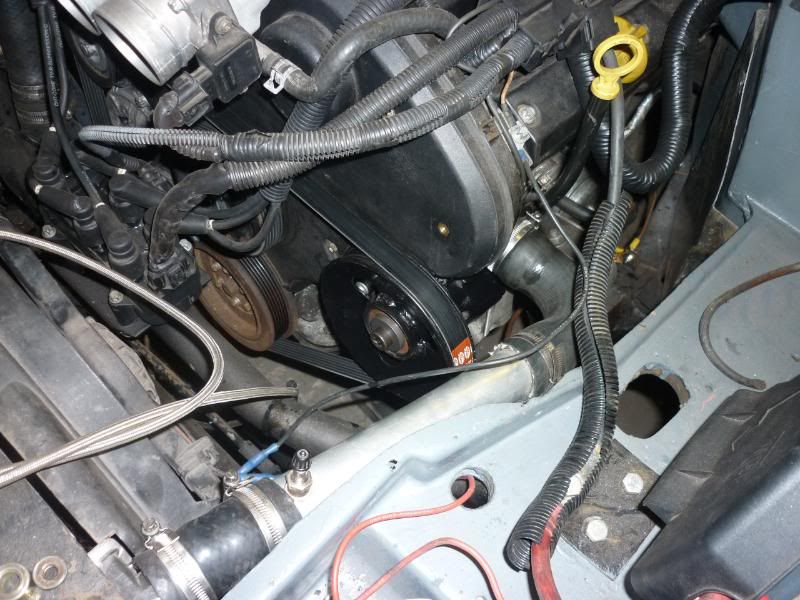
All done and back on, there are a whole load of parts that can go back on to pretty much finish the car forward of the A pillar, but they're all waiting on the new CPS to arrive. I think this is a good place to be before work starts again: easy weekend progress to keep the project ticking over week by week.
For now heres a pic of the new item installed with no bulky tank circulating oil, you can't see any wobbling due to out of alignment
Thanks for following.
For now heres a pic of the new item installed with no bulky tank circulating oil, you can't see any wobbling due to out of alignment
Thanks for following.

Slowly!
I'm so busy with work at the moment, Ive probably had a total of 2 hours in the garage since the christmas hols
The Crank sensor arrived, but thats not the issue as the running problem remains. So I'm in contact with the aftermarket ECU supplier who is being very helpful and suggesting lots of things to try.
It doesn't look like I'll have any time on it this weekend or the next either
I'll post as soon as there is something to post though.
Thanks for keeping an eye
Hi folks, I've had a little go in the garage today, misserably slow progress this morning, just cleaning up all the s**t that my brother has left in his despirate attempt to get his capri road worthy, I found so many broked tools, anyway!
This afternoon, I spent several hours chasing the CPS/ECU issue that prevents the engine from running properly and from starting sometimes. I've tried everything and reached the point that most aftermarket customers eventually reach: I think might be one of the very few unlucky ones where the ECU might perhaps be at fault....... but probably not
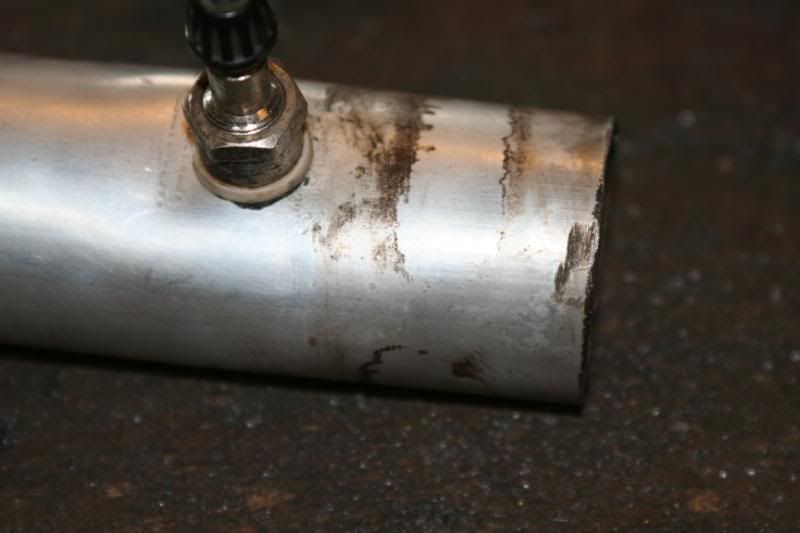
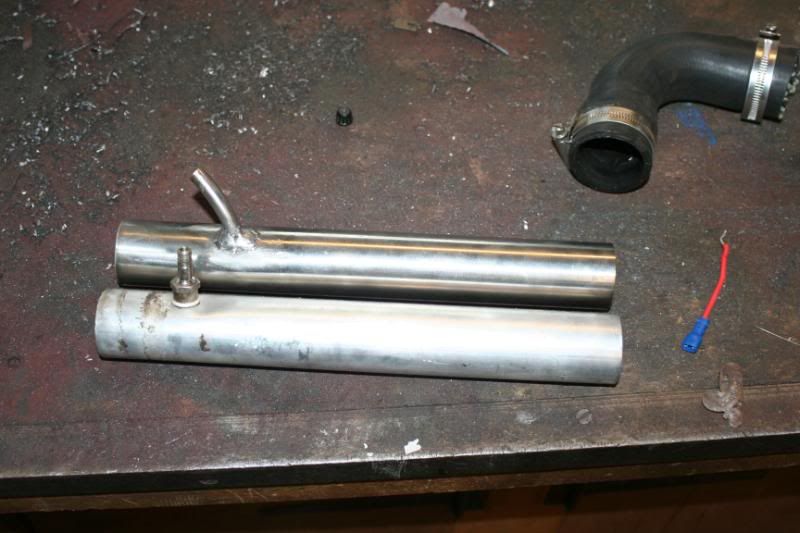
Then I set about making another water hose. I've previous made the radiator top hose from aluminium with a screw type car tyre valve T-peice. But it was always very slightly leaked, not at the valve as you'd expect but as the connection with the rubber radiator hose. the ali hose is slightly oval'd so the jubilee clamp didn't squeeze it tight enough, you can just see in the photo, whitness marks.
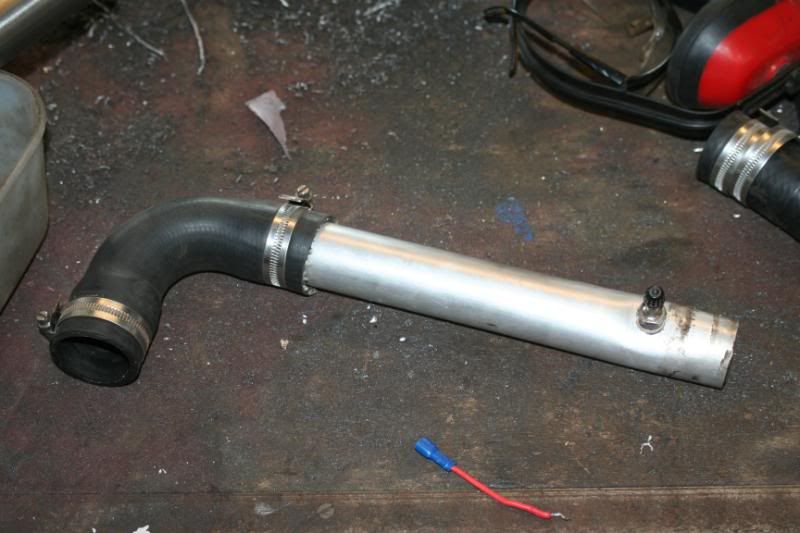
I got some SS tube instead so I could weld a T-piece on.
And now the hose is neatly (ish) tied to the top of the fan cowling.

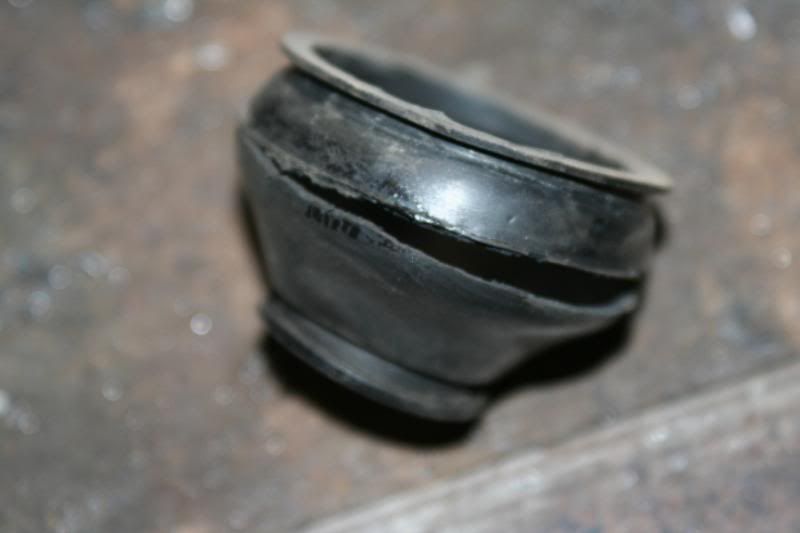
Then I changed both top ball joint rubbers that had already perished and cracked through even though the car hasn't even left the garage (ebay quality)
More to come
This afternoon, I spent several hours chasing the CPS/ECU issue that prevents the engine from running properly and from starting sometimes. I've tried everything and reached the point that most aftermarket customers eventually reach: I think might be one of the very few unlucky ones where the ECU might perhaps be at fault....... but probably not
Then I set about making another water hose. I've previous made the radiator top hose from aluminium with a screw type car tyre valve T-peice. But it was always very slightly leaked, not at the valve as you'd expect but as the connection with the rubber radiator hose. the ali hose is slightly oval'd so the jubilee clamp didn't squeeze it tight enough, you can just see in the photo, whitness marks.
I got some SS tube instead so I could weld a T-piece on.
And now the hose is neatly (ish) tied to the top of the fan cowling.
Then I changed both top ball joint rubbers that had already perished and cracked through even though the car hasn't even left the garage (ebay quality)
More to come
I had a cheaky little evening session on the car this evening. I'm by no means down in the dumps, I'm far too busy with work to be, but in terms of the project, it has reached a new low!
I'm been fighting with this running problem for months now. I've been emailing the very helpful folk at Canems for ages, suggestions have been going back and forth to no avail, to the point where the ECU was connected only to power, earth (straight to battery) and the brand new CPS, nothing else, there could be no earthing issues, it didn't even involve the car at all.
David at Canems eventually threw in the towel and admitted it was a bit odd, so suggested sending it back for testing. I got it back in the post today there is nothing wrong with it, its been running a real engine for a length of time, I'm so gutted, I was really hoping there would be something wrong with it
So I fitted it, with nothing else at all connected as before and it seemed to work the first 20 ish starts of the engine (just turning over on the starter), so I started connecting sensors and then... back to its old tricks! Took all the sensors back off again, right back to how I started again and the fault is still there.
So once again, I tried a mirriad of different things, there is so little interferrence its unbelieveable, nothing that could possible make (electrical) noise is on, (accept the starter) nothing that could posssibly pick up any electrical noise is connected to the ECU, even the alternator is fully disconected, not even turning (belt is off). Its so annoying.
SO....
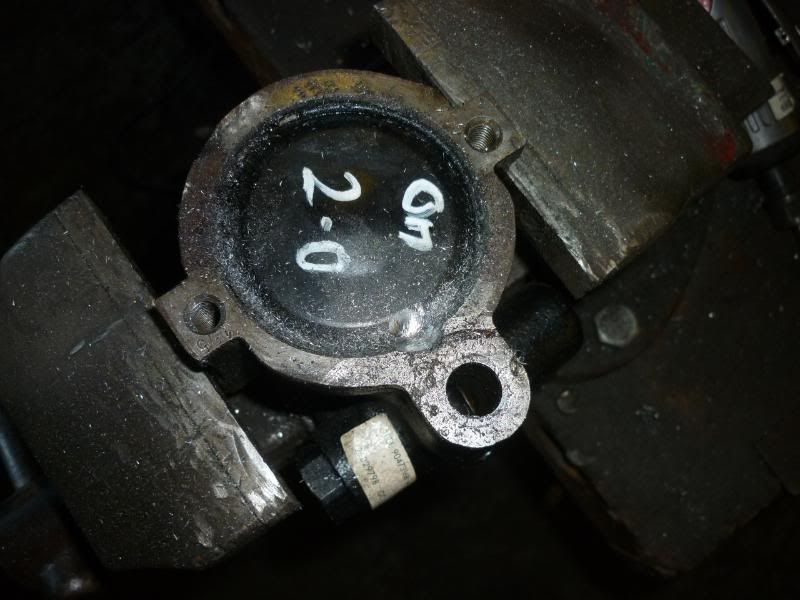
Back to the other plan, I'll get right on the Omega forum again and study the difference between the 2.5 and 3.0 CPS and see if the 2.5 will end up any closer to the trigger wheel, its got to be worth a try, its made by a different manufacturer apparently so could well make a stronger signal.
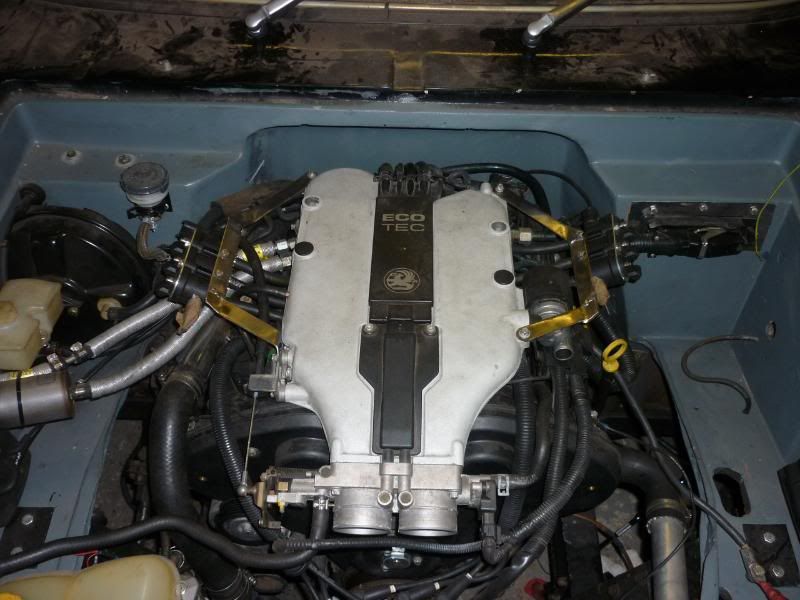
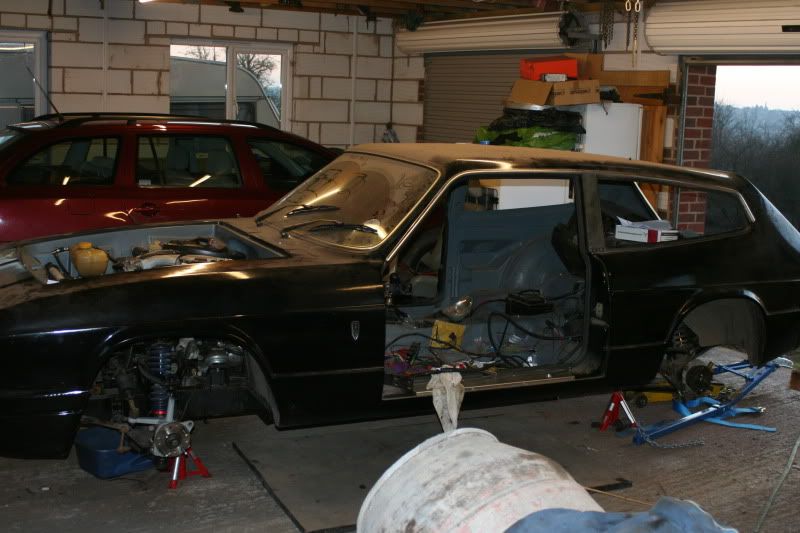
Here's a little reminder of how the car looks (yep exactly the same for now) taken with my new SLR (retail therapy helps)
More to come
I'm been fighting with this running problem for months now. I've been emailing the very helpful folk at Canems for ages, suggestions have been going back and forth to no avail, to the point where the ECU was connected only to power, earth (straight to battery) and the brand new CPS, nothing else, there could be no earthing issues, it didn't even involve the car at all.
David at Canems eventually threw in the towel and admitted it was a bit odd, so suggested sending it back for testing. I got it back in the post today
there is nothing wrong with it, its been running a real engine for a length of time, I'm so gutted, I was really hoping there would be something wrong with it So I fitted it, with nothing else at all connected as before and it seemed to work the first 20 ish starts of the engine (just turning over on the starter), so I started connecting sensors and then... back to its old tricks! Took all the sensors back off again, right back to how I started again and the fault is still there.
So once again, I tried a mirriad of different things, there is so little interferrence its unbelieveable, nothing that could possible make (electrical) noise is on, (accept the starter) nothing that could posssibly pick up any electrical noise is connected to the ECU, even the alternator is fully disconected, not even turning (belt is off). Its so annoying.
SO....
Back to the other plan, I'll get right on the Omega forum again and study the difference between the 2.5 and 3.0 CPS and see if the 2.5 will end up any closer to the trigger wheel, its got to be worth a try, its made by a different manufacturer apparently so could well make a stronger signal.
Here's a little reminder of how the car looks (yep exactly the same for now) taken with my new SLR (retail therapy helps)
More to come
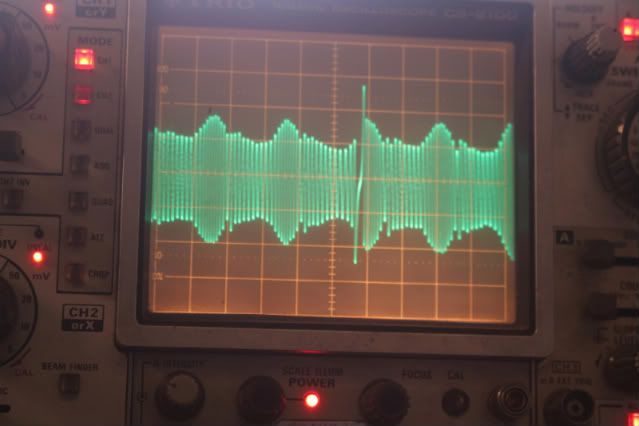
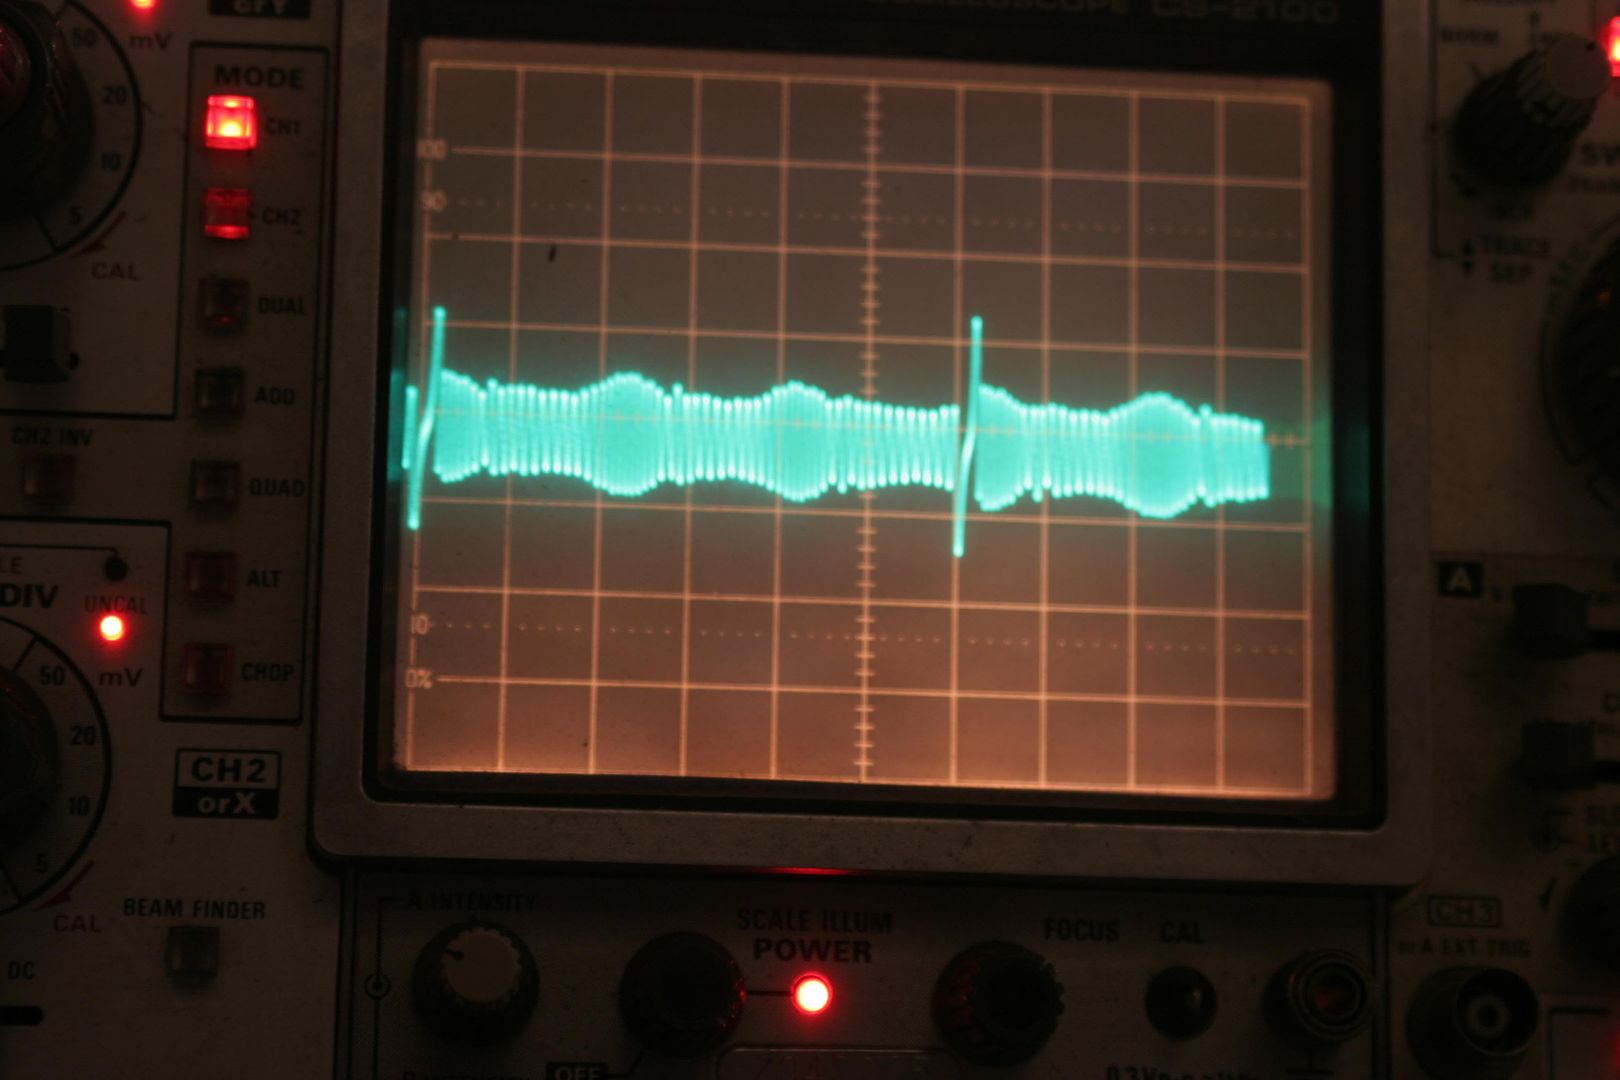
I've had about a day on the car in the last 5 weeks , but I had the opportunity to get a CRO on the sensor and have a look at the signal. I don't know what I'm looking for really, but its served a purpose, I've emailed it to the ECU manufacturer to see if its in spec (ish) for their ECU.
It looks pretty clean to me. I'm guessing the three "humps" are compressions (as its turning on the starter motor) and the spike is the gap of 2 teeth giving the ECU a possition as well as speed. The second photo is with the siemens sensor (thats another £40 down the pan then).
More to come (in another 6 months )
, but I had the opportunity to get a CRO on the sensor and have a look at the signal. I don't know what I'm looking for really, but its served a purpose, I've emailed it to the ECU manufacturer to see if its in spec (ish) for their ECU. It looks pretty clean to me. I'm guessing the three "humps" are compressions (as its turning on the starter motor) and the spike is the gap of 2 teeth giving the ECU a possition as well as speed. The second photo is with the siemens sensor (thats another £40 down the pan then).
More to come (in another 6 months
)Gassing Station | Scimitar | Top of Page | What's New | My Stuff