Project Scimitar MV6
Discussion


Mixed feedback from the Vids on a few other forums, so I'll stick to photos for the boring stuff, and Add a very exciting Vid soon.
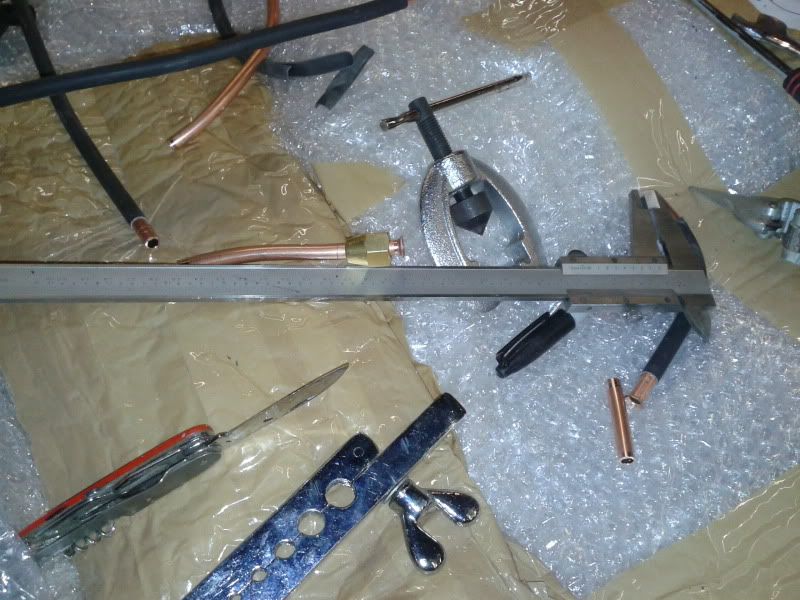
I borrowed a flaring tool and finally for the copper LPG line connected up.
And the covering pipe all connected up
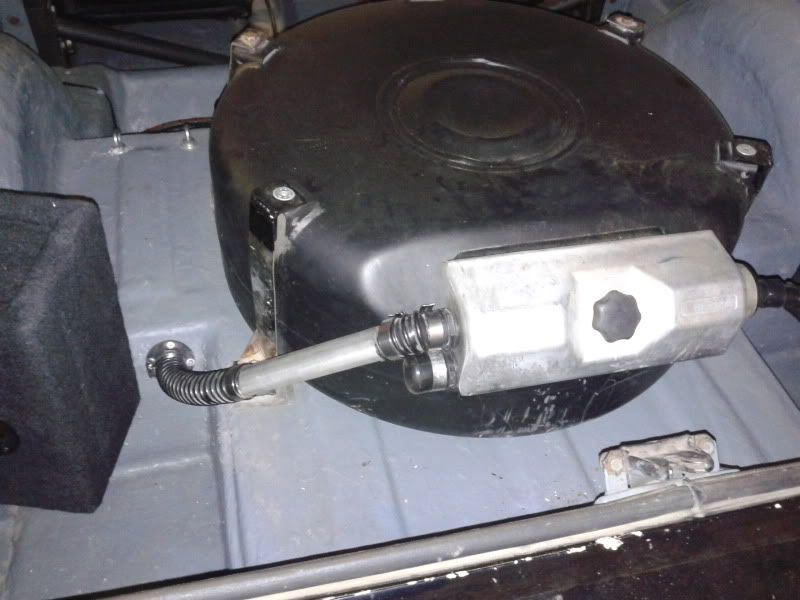
The engine bay of the copper line is done too, but I got the wrong size rubber hosing to go to the injectors, its fighting every step of the way. Still waiting on the grey paint before I can finish the doors and bonnet. Hopefully the prop is very nearly done, they were working on it on wednesday.
More to come
I borrowed a flaring tool and finally for the copper LPG line connected up.
And the covering pipe all connected up
The engine bay of the copper line is done too, but I got the wrong size rubber hosing to go to the injectors,
its fighting every step of the way. Still waiting on the grey paint before I can finish the doors and bonnet. Hopefully the prop is very nearly done, they were working on it on wednesday. More to come
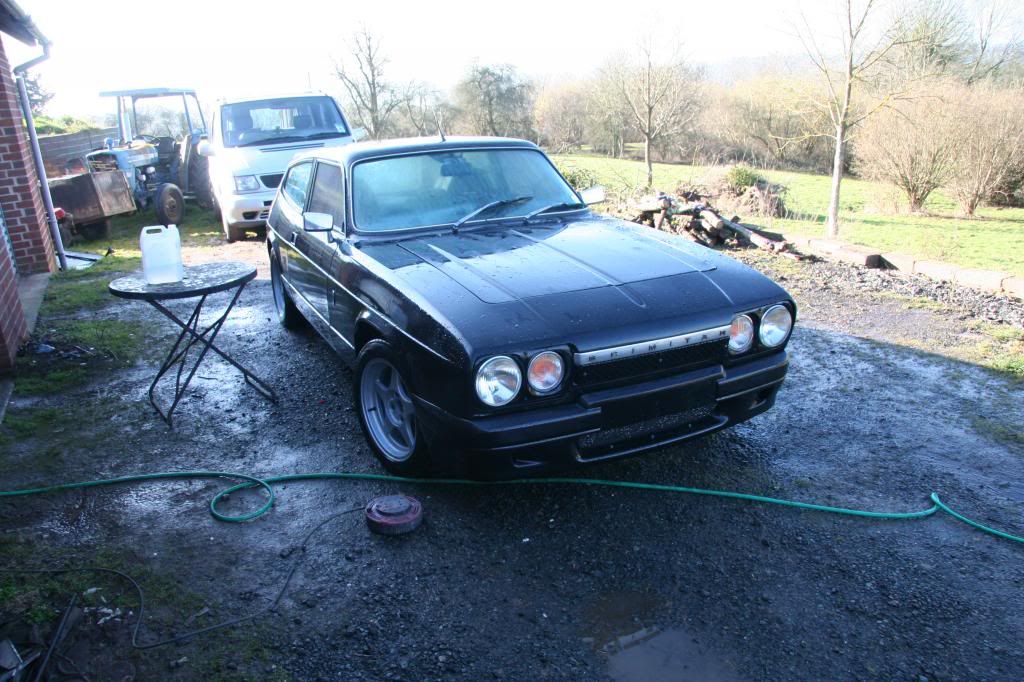
Today was an amazing day! On par with the first turn of the key some 18 months ago.
For the first time in 2 year and 10 months I drove my Scimitar out of hte garage, using Vauxhall V6 power.
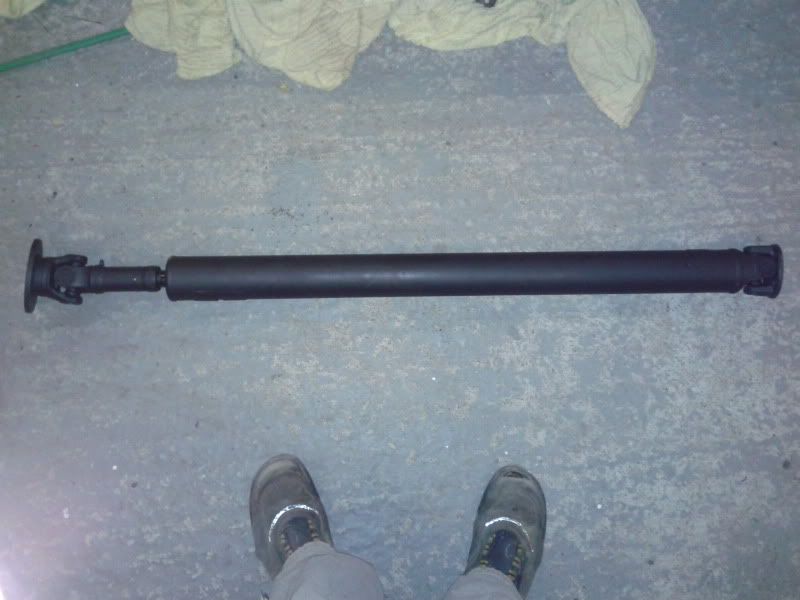
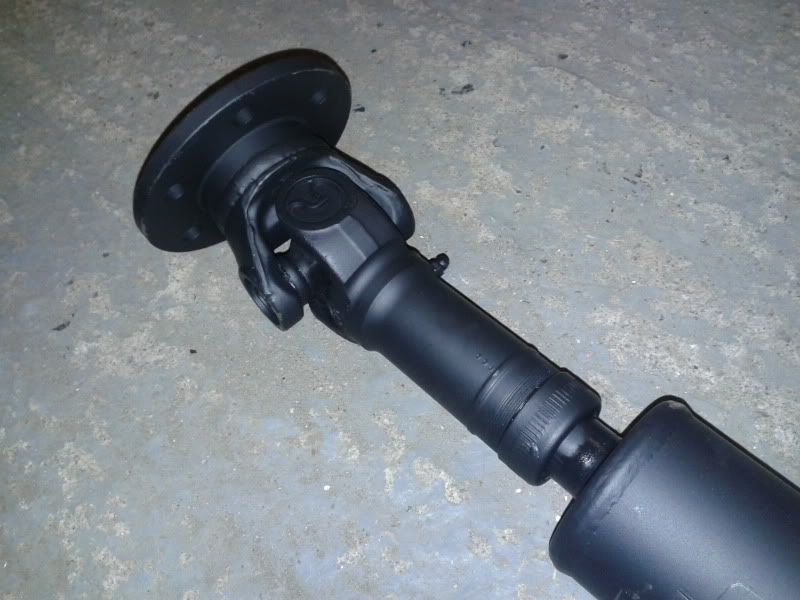
Here is the prop shaft all new.
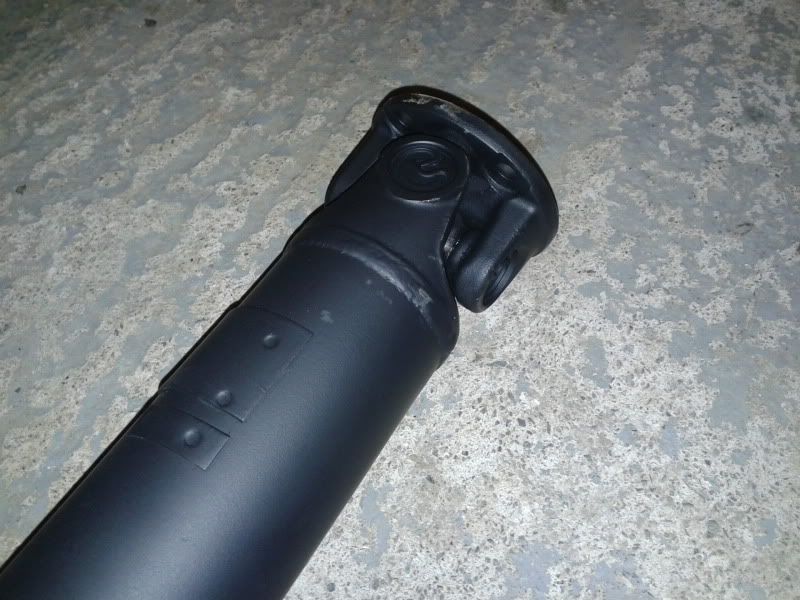
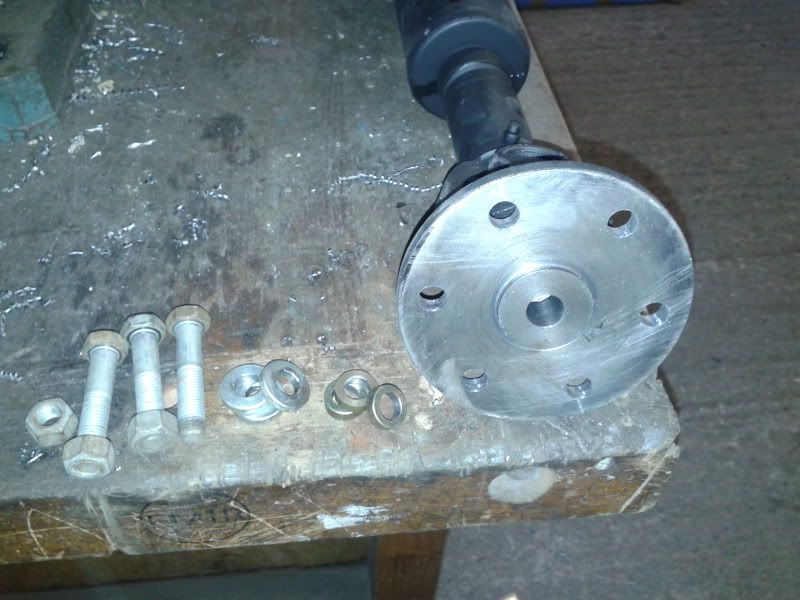
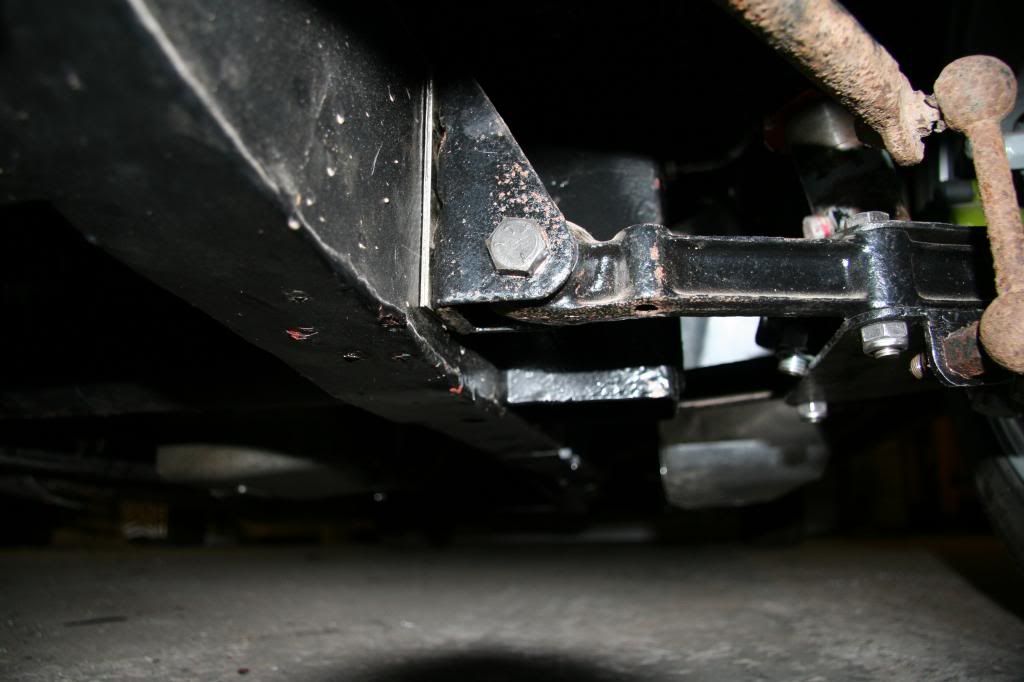
First of all I have to fit the prop, its a very well made thing, but there was a problem. I might be to blame for giving the wrong info, there was a little raised section in the middle that meant the mating face wouldn't touch so I made up some 5mm spacers to accurately fill the gap as you can see in the photo.
Bolts on the left (obviously), next along is the important spacer, then some other little spacers as the bolts were really long (and I couldn't go buy some shorter ones that would have been too long to wait), and then the mating face of the front of the prop, where you can see the raised section that caused the problem.
After that little fix, it all went together very well.

This is a pretty poor photo, but here it is in place, Its a 3" diameter beasty!
So here the video of the first time natural light has hit the car in 2 years and 10 months (you might be able to tell from the video that I was quite excited, maybe )
)
http://youtu.be/rQUYmWxcJag
There was no upsetting me after driving the car, but it has come to light that the bigger wheels are too close to the upper wishbones and will need a few more mm spacing out.
More to come
For the first time in 2 year and 10 months I drove my Scimitar out of hte garage, using Vauxhall V6 power.
Here is the prop shaft all new.
First of all I have to fit the prop, its a very well made thing, but there was a problem. I might be to blame for giving the wrong info, there was a little raised section in the middle that meant the mating face wouldn't touch so I made up some 5mm spacers to accurately fill the gap as you can see in the photo.
Bolts on the left (obviously), next along is the important spacer, then some other little spacers as the bolts were really long (and I couldn't go buy some shorter ones that would have been too long to wait), and then the mating face of the front of the prop, where you can see the raised section that caused the problem.
After that little fix, it all went together very well.
This is a pretty poor photo, but here it is in place, Its a 3" diameter beasty!
So here the video of the first time natural light has hit the car in 2 years and 10 months (you might be able to tell from the video that I was quite excited, maybe
)http://youtu.be/rQUYmWxcJag
There was no upsetting me after driving the car, but it has come to light that the bigger wheels are too close to the upper wishbones and will need a few more mm spacing out.
More to come
Its been a little while since an update. Having got it all planned out to get the car MOT'd at the start of next month, the BMW went and did something very selfish and run out of MOT itself (a month ago oooops). Turns out the insurance is due soon too, so it looks like the Scimitar being on the road will be set back another month. I'm alright with that though really, the weather wil be better (maybe) and I can finish all the niggle jobs properly.
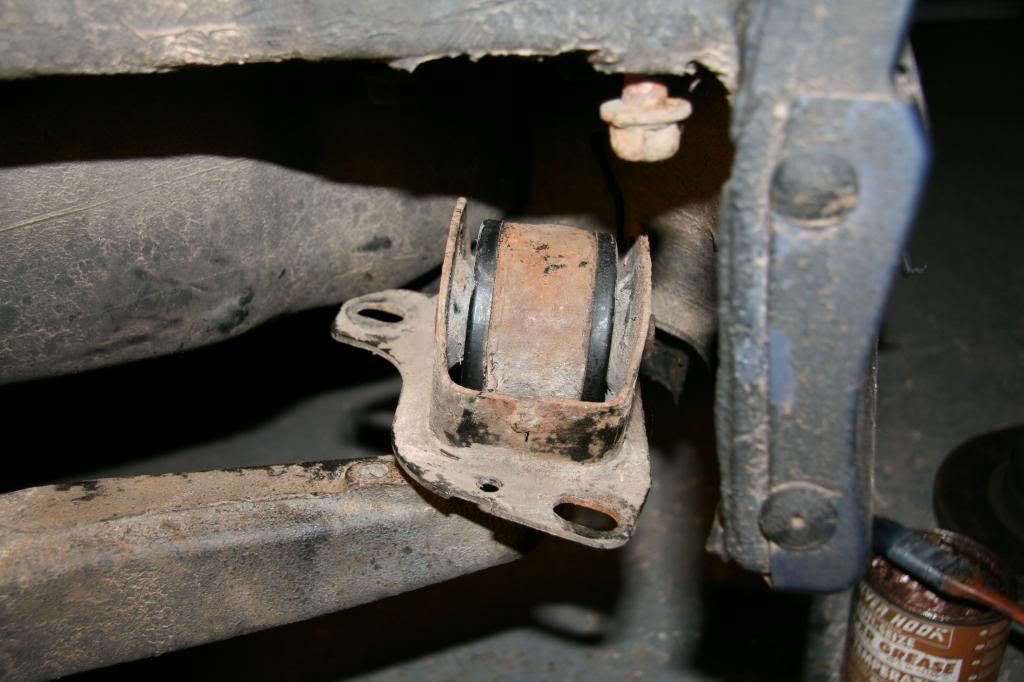
So I know the Beemer needs the Trailing arm bushes sorting (it waggles around a bit and all the front it new so I assumend it was the notorious traiing arm bushes).
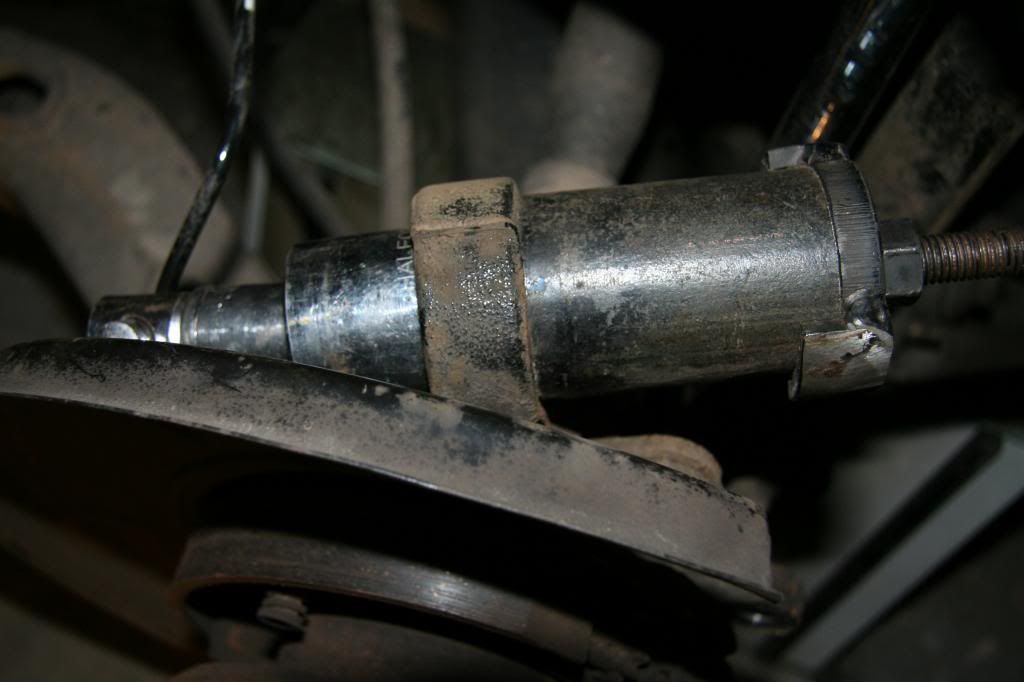
I bought a tool and set of Poly bushes.
But when I got them apart I found they were ok!!! They aren't new, but they're by no means worn out.
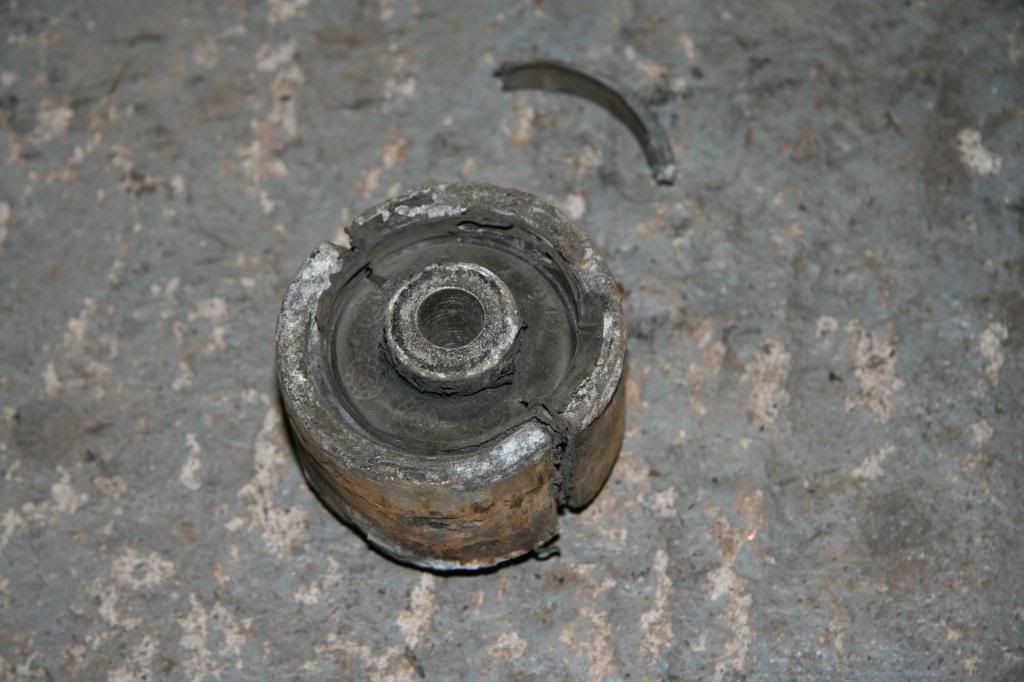
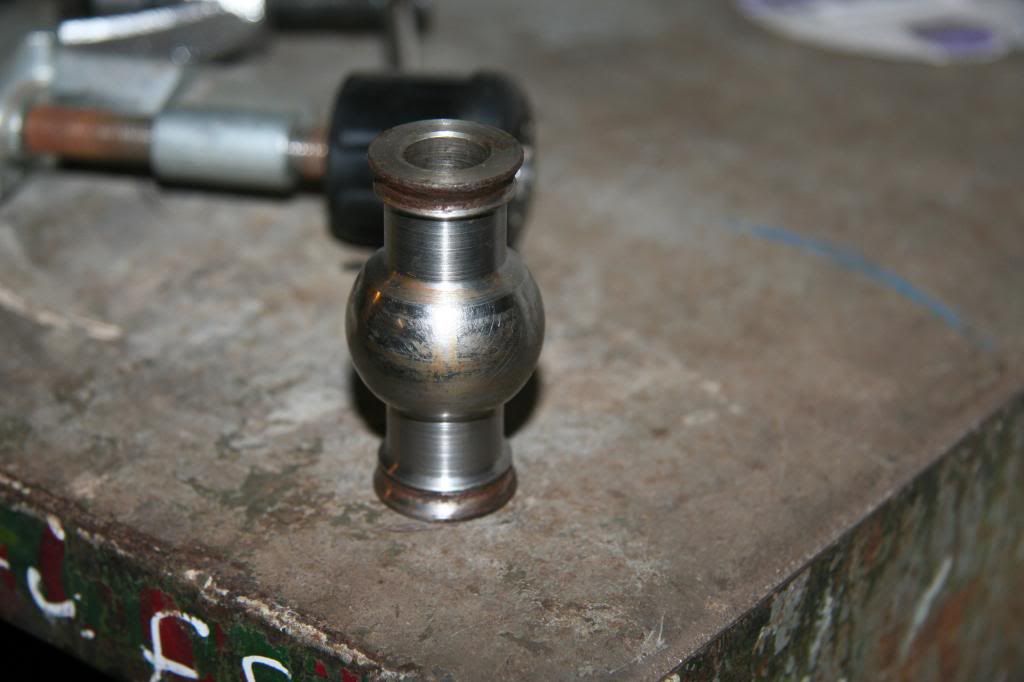
I think I'll stick with putting the poly's in though, it should make things better. I eventually found the culprit, one of the upper ball joints was very sloppy, so thats on its way too. When trying to extract it, I managed to dismantle it rather than pull it all out.
On the Scimitar front, The correct colour'd paint has finally arrived and I've put a thick coating on the underside of the bonnet and got the doors off and stripped down ready for painting too.
More to come (although it will probable be delayed with putting the BMW back together)
oooops). Turns out the insurance is due soon too, so it looks like the Scimitar being on the road will be set back another month. I'm alright with that though really, the weather wil be better (maybe) and I can finish all the niggle jobs properly. So I know the Beemer needs the Trailing arm bushes sorting (it waggles around a bit and all the front it new so I assumend it was the notorious traiing arm bushes).
I bought a tool and set of Poly bushes.
But when I got them apart I found they were ok!!! They aren't new, but they're by no means worn out.
I think I'll stick with putting the poly's in though, it should make things better. I eventually found the culprit, one of the upper ball joints was very sloppy, so thats on its way too. When trying to extract it, I managed to dismantle it rather than pull it all out.
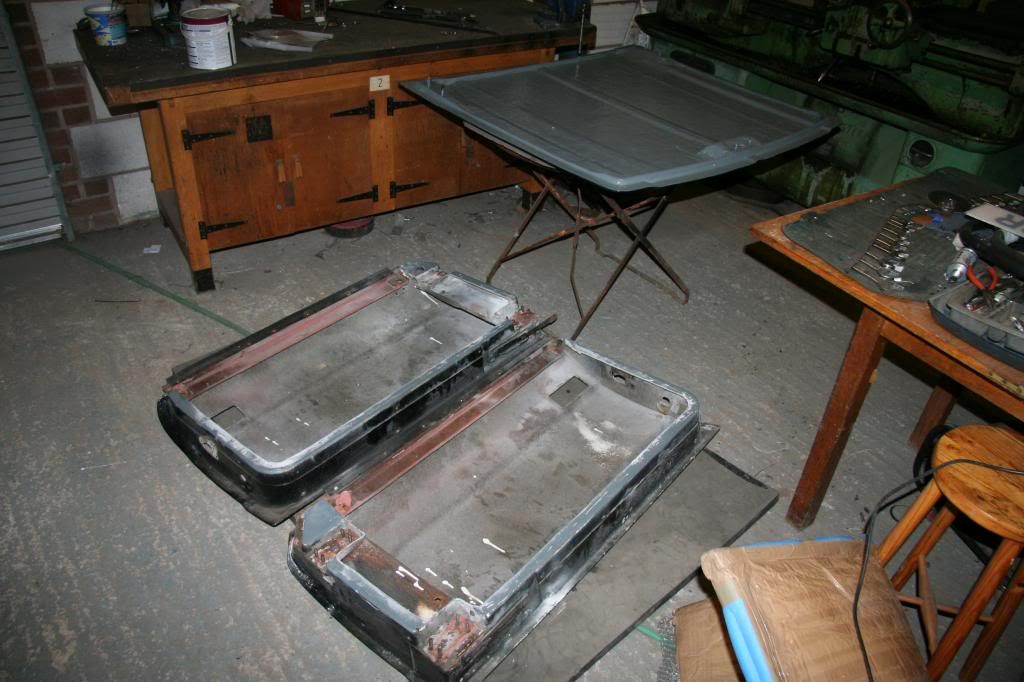
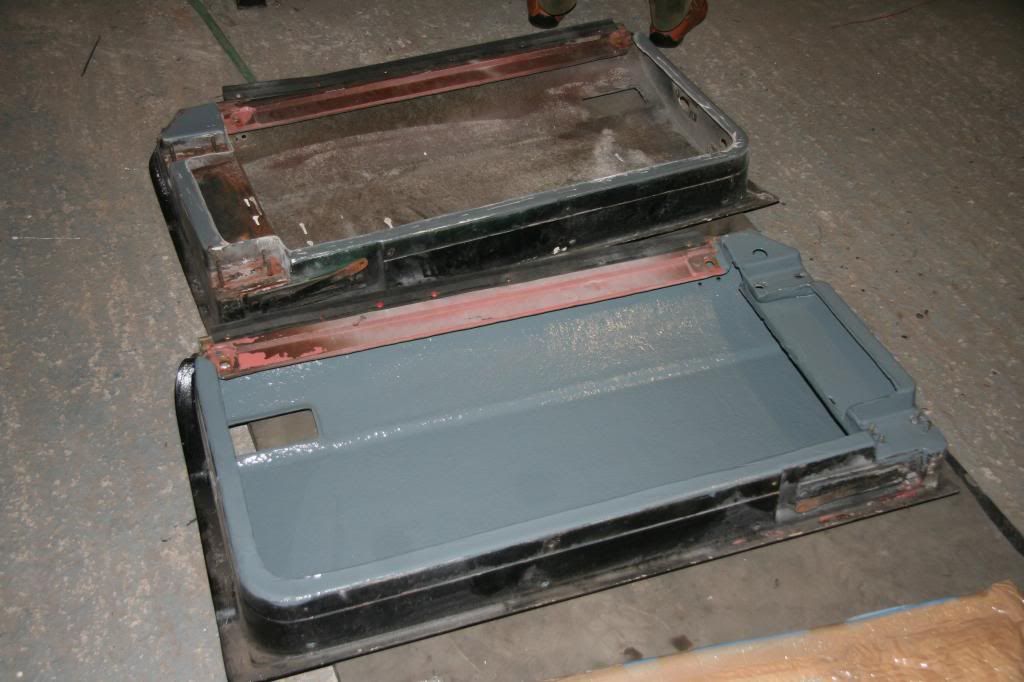
On the Scimitar front, The correct colour'd paint has finally arrived and I've put a thick coating on the underside of the bonnet and got the doors off and stripped down ready for painting too.
More to come (although it will probable be delayed with putting the BMW back together)
Thanks Rodders
Its strange, this isn't really the place to be telling folk about the BMW, yet here I am posting general garage progress, it might be that I'm justifying my reasons for the slow updates on the Scimitar?
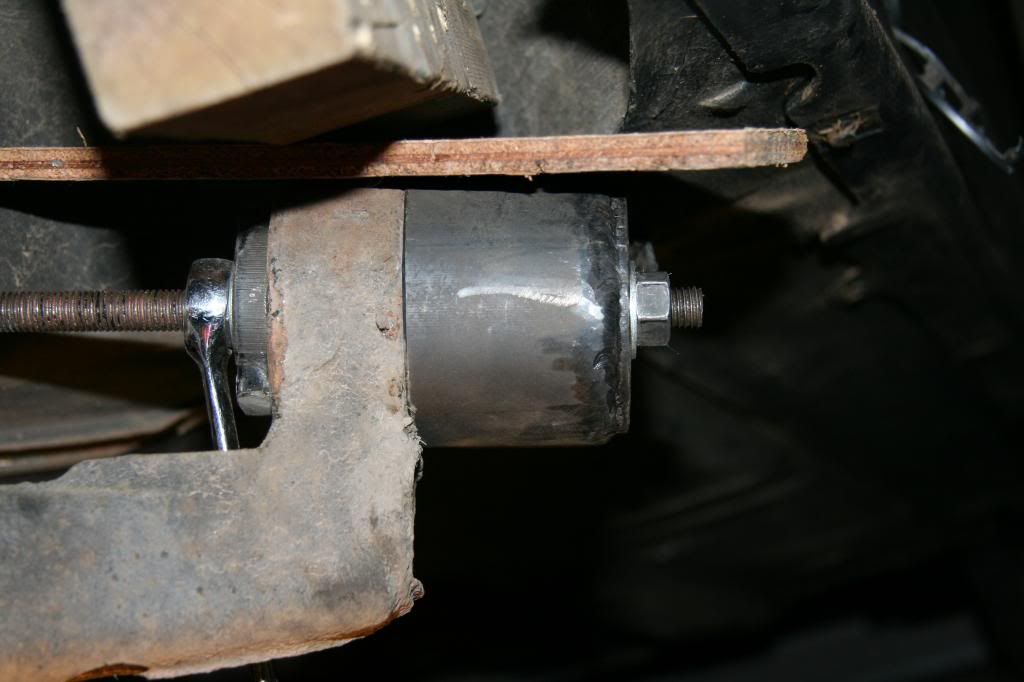
The poly bushes arrived for the E36's trailing arms yesterday, and they are HHHHAAAAAARRRRRDDD, they are really solid! I had to careful not to drop them as they might have cracked
I hope they don't transmit a disproportionate amount of road noise.
The removal tool served to squeeze them into place and I took the opportunity to clean and stonechip the whole area. Which was in incredably good shape, they really don't look far off new, which was very pleasing to see as these cars seem to go at the rear arches sometimes. Anyway.....
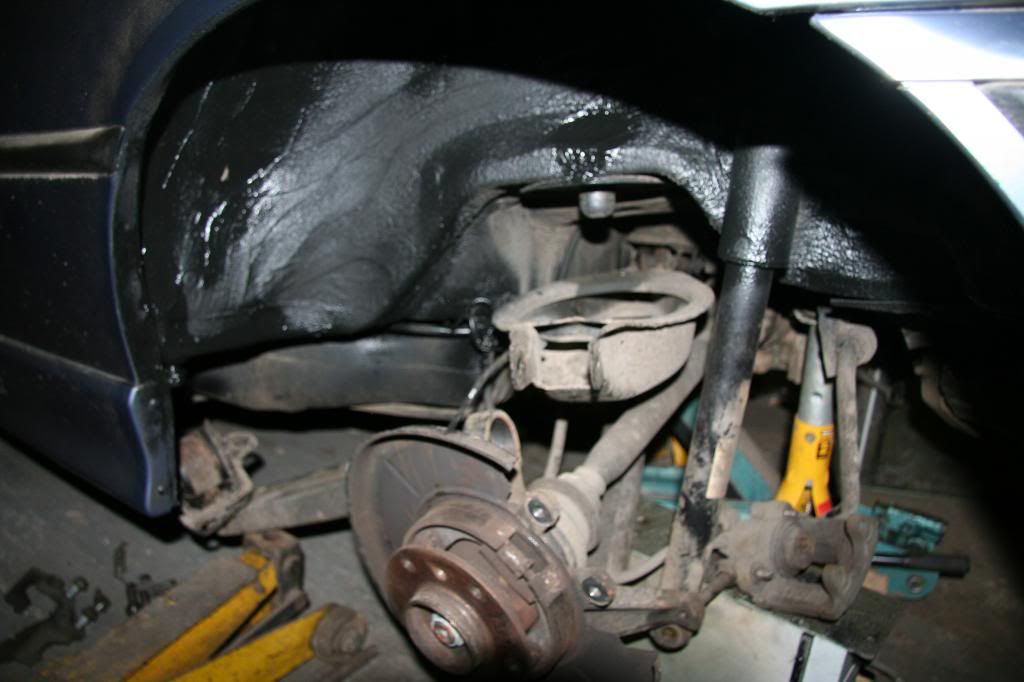
Then with no other parts having arrived I cleaned the doors down and started painting. There are a few difficult to reach areas so I only got the one done, but I'm pleased with progress.
More to come
Its strange, this isn't really the place to be telling folk about the BMW, yet here I am posting general garage progress, it might be that I'm justifying my reasons for the slow updates on the Scimitar?
The poly bushes arrived for the E36's trailing arms yesterday, and they are HHHHAAAAAARRRRRDDD, they are really solid! I had to careful not to drop them as they might have cracked
I hope they don't transmit a disproportionate amount of road noise.
The removal tool served to squeeze them into place and I took the opportunity to clean and stonechip the whole area. Which was in incredably good shape, they really don't look far off new, which was very pleasing to see as these cars seem to go at the rear arches sometimes. Anyway.....
Then with no other parts having arrived I cleaned the doors down and started painting. There are a few difficult to reach areas so I only got the one done, but I'm pleased with progress.
More to come
The last BMW parts still haven't arrived so it was back to work on the simitar tonight
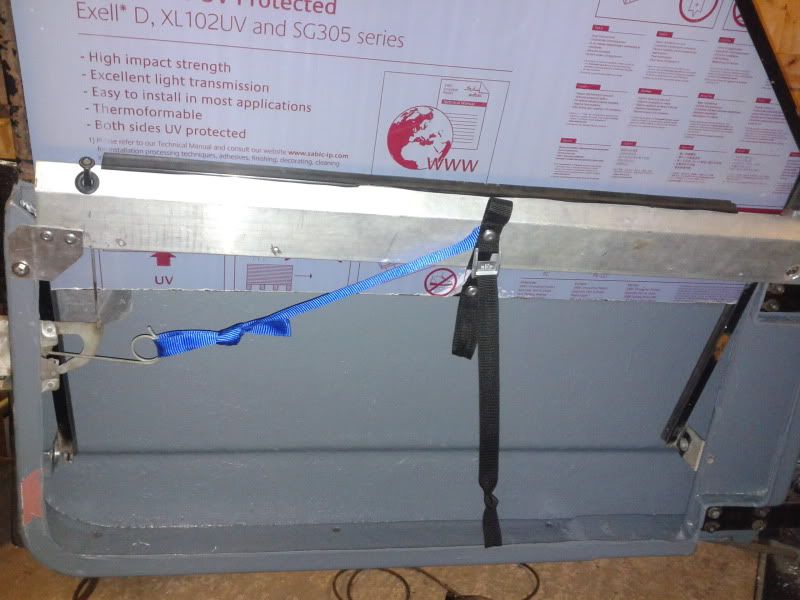
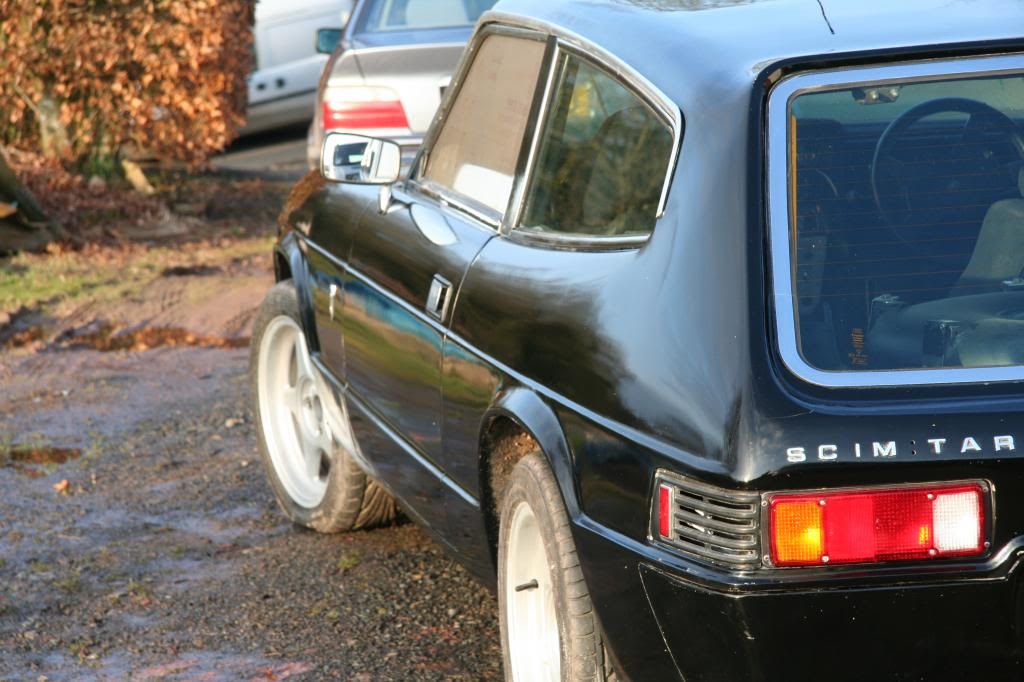
Got the passenger door fitted and pretty much finished, got to pull the protective film off the window thats all.
Hopefully the picture explains how it works, but if not the blue strap opens the door and the black one holds the window up and simply tied off at the right length to stop the window dropping too low. Its not pretty, its not even that easy to lower the window, but it sure is light, really light, and I'm really pleased with the outcome
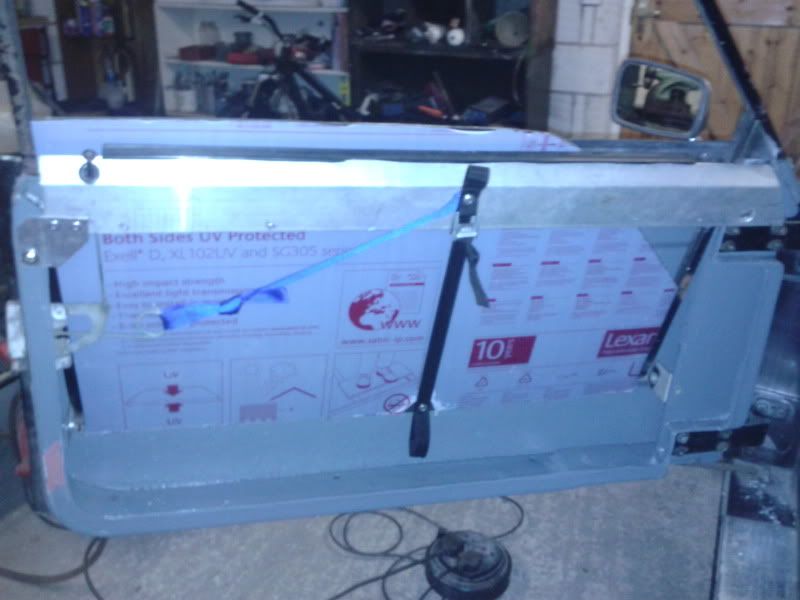
More to come (probably a mirror image of the above)
Got the passenger door fitted and pretty much finished, got to pull the protective film off the window thats all.
Hopefully the picture explains how it works, but if not the blue strap opens the door and the black one holds the window up and simply tied off at the right length to stop the window dropping too low. Its not pretty, its not even that easy to lower the window, but it sure is light, really light, and I'm really pleased with the outcome
More to come (probably a mirror image of the above)
Had a good day working on the car today. I spent this morning finishing off the drivers door and getting it to close properly, when I had a visit from MikeT, which was a nice surprise IUt was great to show the car off to a fellow owner, I can't wait to bring it to shows
I then made some shims for the front suspension to get the camber somehwere close to where it should be.
I got it somewhere close then, after looking at the lower wishbone mounts I decided I'd buy some new ones to be sure, so I'll leave the camber as it is for now.
Then I did the tracking with the dunlop gauges I've borrowed from work. I got it to about 20minutes toe in, that should do for now.
Then I moved my attention to cleaning the car. This was a pleasure to do, its been years!

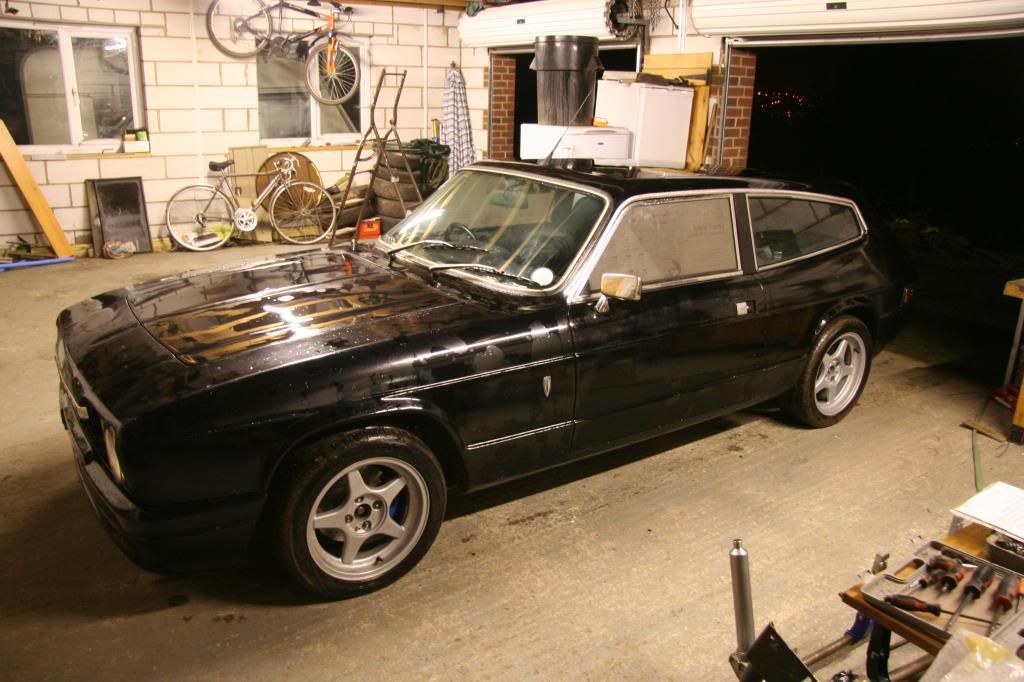
And I even tried the polisher that I've bought, although I only used it with the G3 paste so far, but the results are very pleasing
Hopefully lots more cleaning tomorrow.
More to come
IUt was great to show the car off to a fellow owner, I can't wait to bring it to shows I then made some shims for the front suspension to get the camber somehwere close to where it should be.
I got it somewhere close then, after looking at the lower wishbone mounts I decided I'd buy some new ones to be sure, so I'll leave the camber as it is for now.
Then I did the tracking with the dunlop gauges I've borrowed from work. I got it to about 20minutes toe in, that should do for now.
Then I moved my attention to cleaning the car. This was a pleasure to do, its been years!
And I even tried the polisher that I've bought, although I only used it with the G3 paste so far, but the results are very pleasing
Hopefully lots more cleaning tomorrow.
More to come
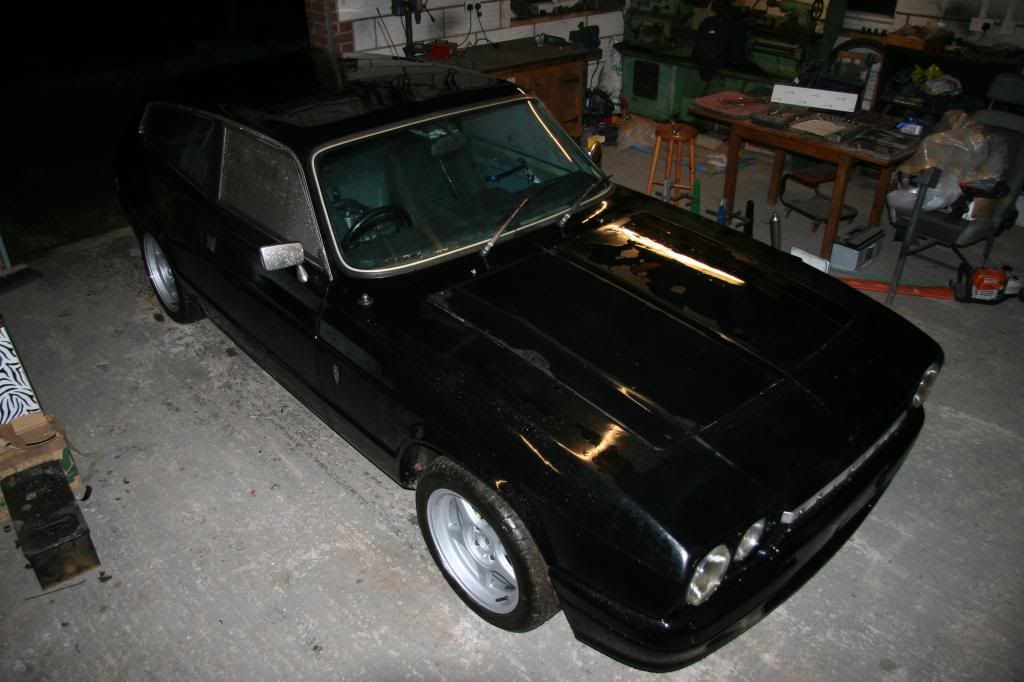
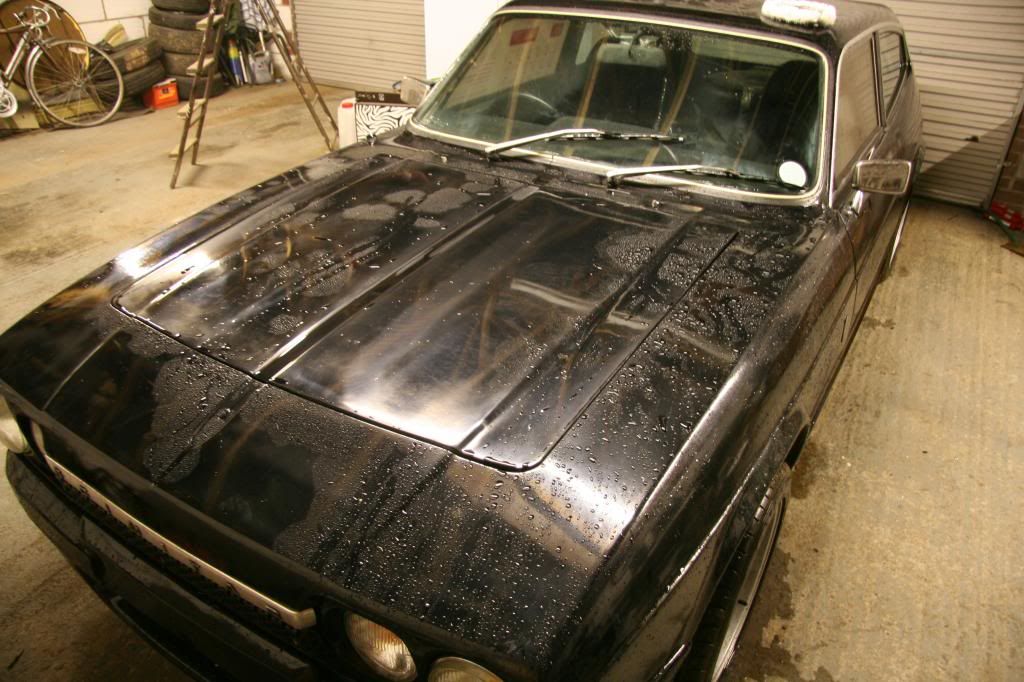
I started this morning just after 7am like some kind of mental person, there was one point where I was polishing what looked like runs in the paint, but the polished out really easily, turned out this was ice!!! Am I too keen???
I drive it out of the garage again and started with the Farecla G3 cutting compound and a clarke CP185 sander/polisher.

Its not like you needed these photos, I guess I'm getting a bit excited again
Then I washed it off and it looked like this

In the photos it doesn't really look that different, but it was worth my 3 hours effort. Tthe paint is now a lot lot flatter and with very little orange peel effect, so its ready for the Farecla G10 finishing compound now. So round two started, but then I got hungry and came up for my second breakfast... well another bowl of cereal for lunch
It looked like this when I left it, about half done:
More to come
I drive it out of the garage again and started with the Farecla G3 cutting compound and a clarke CP185 sander/polisher.
Its not like you needed these photos, I guess I'm getting a bit excited again
Then I washed it off and it looked like this
In the photos it doesn't really look that different, but it was worth my 3 hours effort. Tthe paint is now a lot lot flatter and with very little orange peel effect, so its ready for the Farecla G10 finishing compound now. So round two started, but then I got hungry and came up for my second breakfast... well another bowl of cereal for lunch
It looked like this when I left it, about half done:
More to come
I'll try and be brief as the pictures can do the talking (there are enough of them)
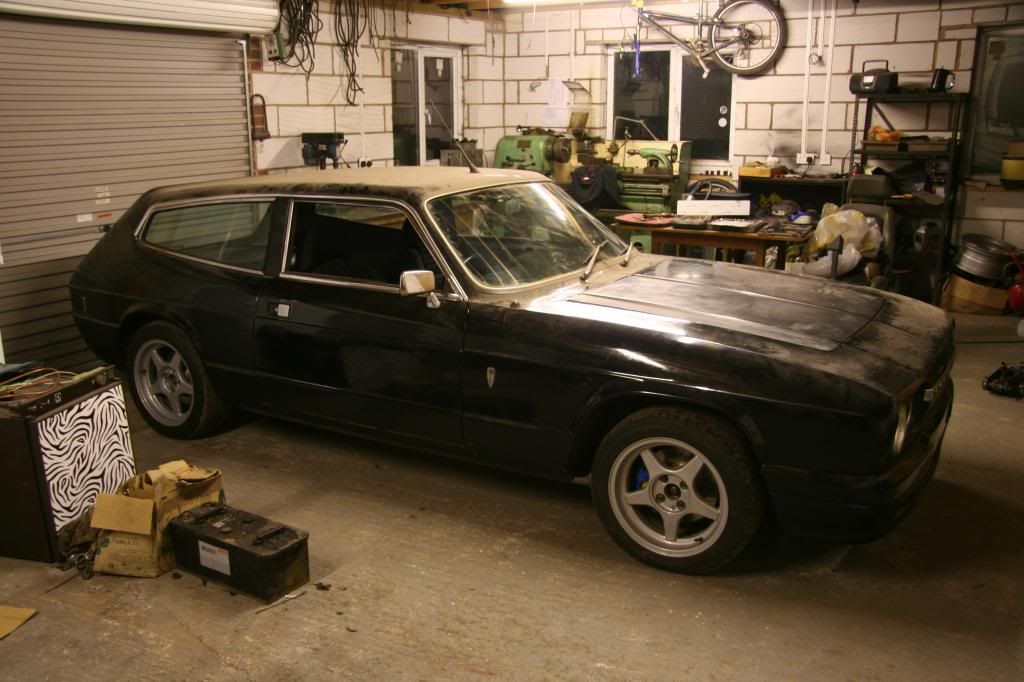
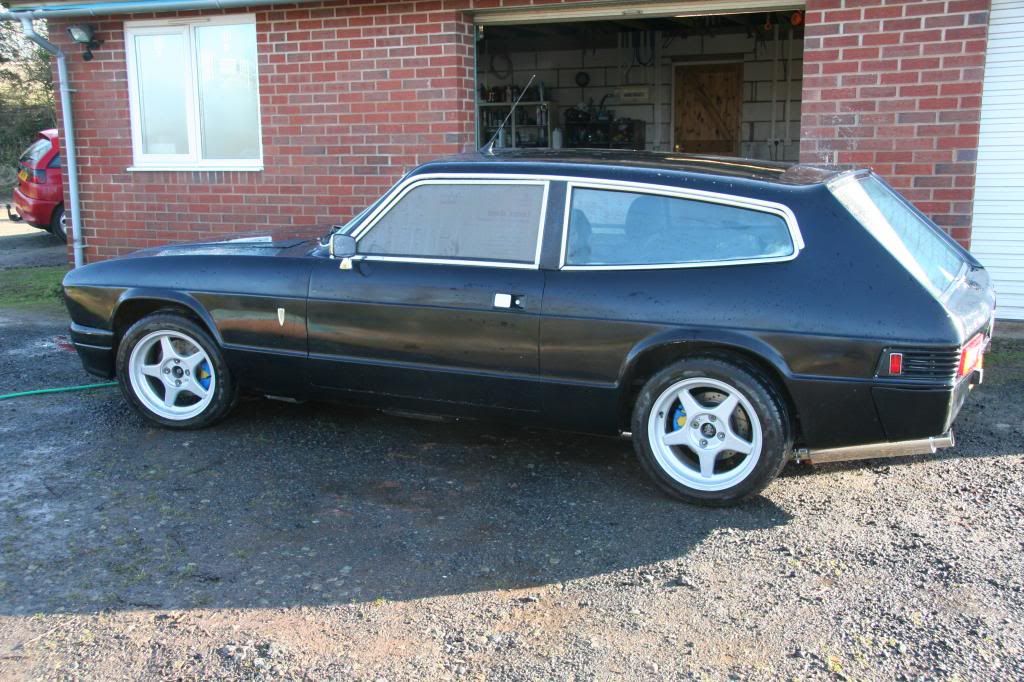
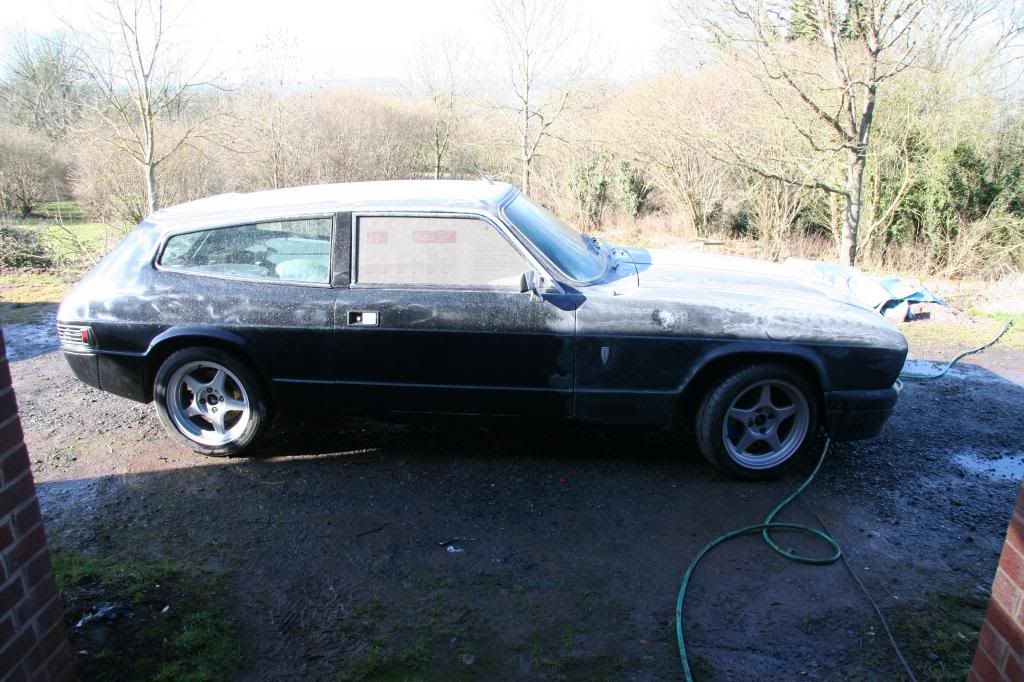
I finished putting the G10 on and it was a freakin nightmare to get it off again, it took forever and lots of scrubbing then although the paint was very flat it was still a bit dull. So I broke out the autoglim polish and it now looks like this. This is the result of nearly 8 hours cleaning just one car but as you can imagine I'm really pleased. There are countless blemishes in the paint, but I'm happy with it looking shiney from 10 feet, thats all I ever wanted really having painted it myself, I can't justify spending lots of a proper respay, I'll be afraid to use it. Anyway its never looked this shiney in my ownership

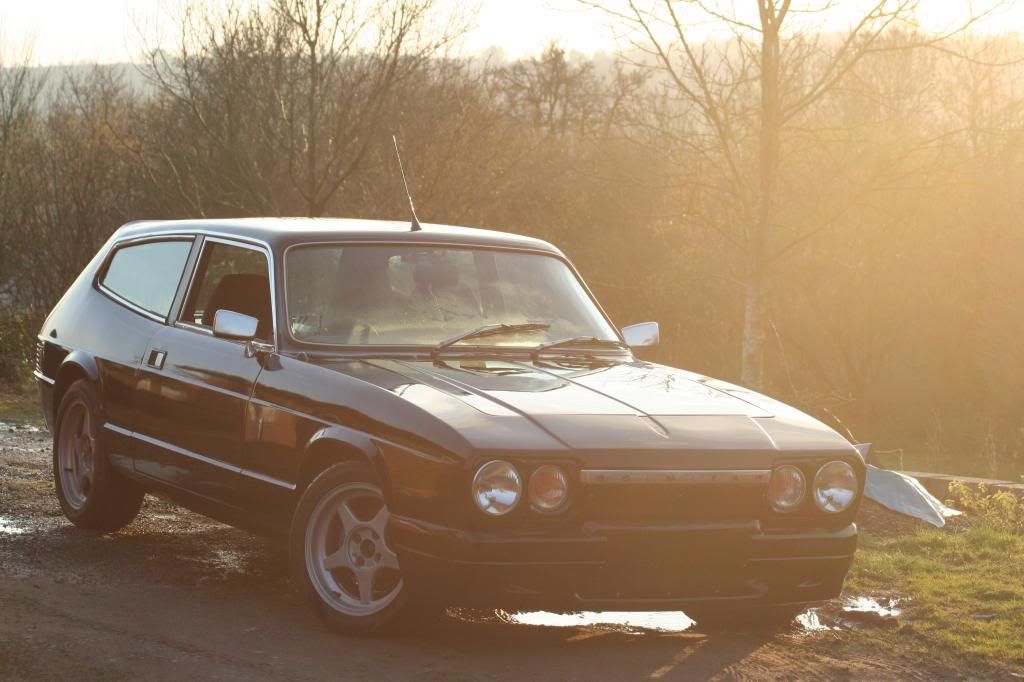

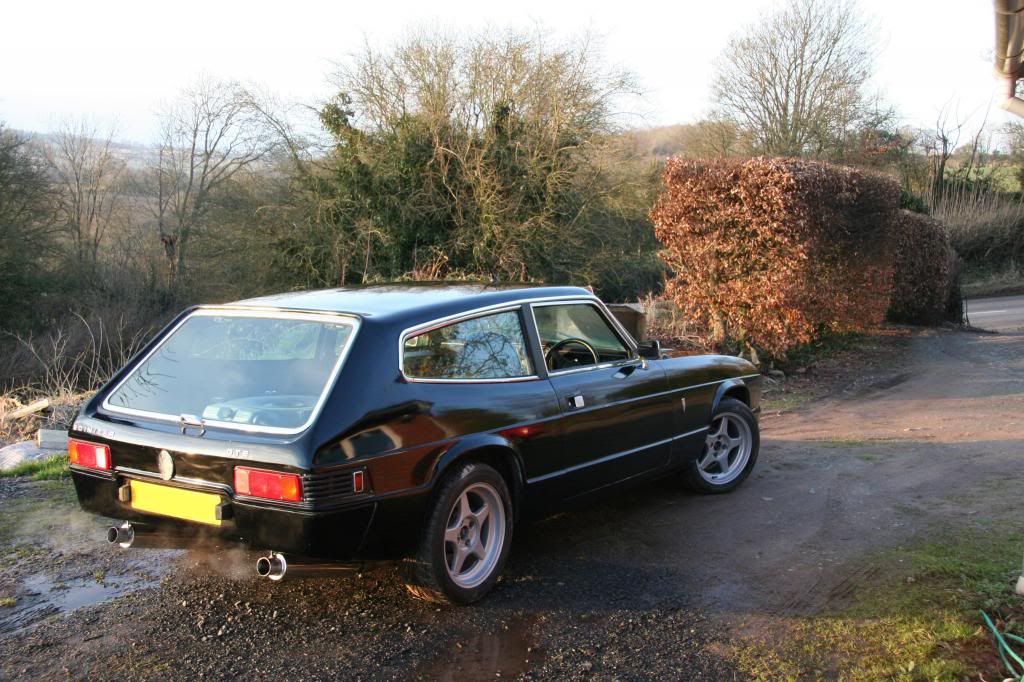
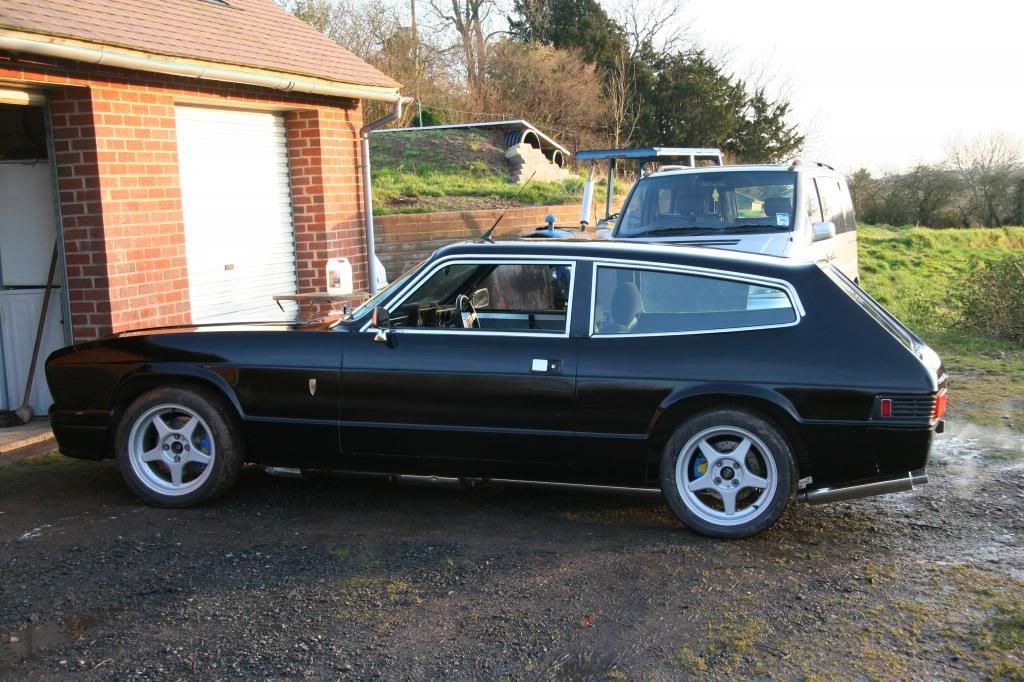
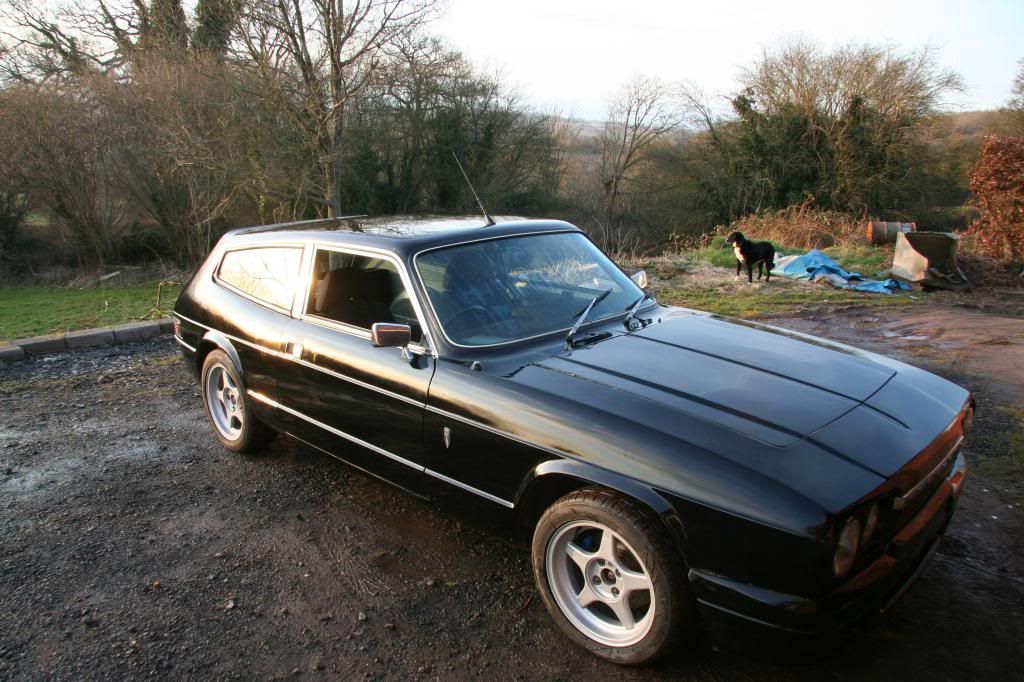
I was taking photos for a good half an hour.
Its so close now as you can see, I'm still waiting for the Gaz dampers, and I feel I should buy some reinforced lower wishbone mounts and its MOT time.
More to come
I finished putting the G10 on and it was a freakin nightmare to get it off again, it took forever and lots of scrubbing
then although the paint was very flat it was still a bit dull. So I broke out the autoglim polish and it now looks like this. This is the result of nearly 8 hours cleaning just one car but as you can imagine I'm really pleased. There are countless blemishes in the paint, but I'm happy with it looking shiney from 10 feet, thats all I ever wanted really having painted it myself, I can't justify spending lots of a proper respay, I'll be afraid to use it. Anyway its never looked this shiney in my ownership I was taking photos for a good half an hour.
Its so close now as you can see, I'm still waiting for the Gaz dampers, and I feel I should buy some reinforced lower wishbone mounts and its MOT time.
More to come
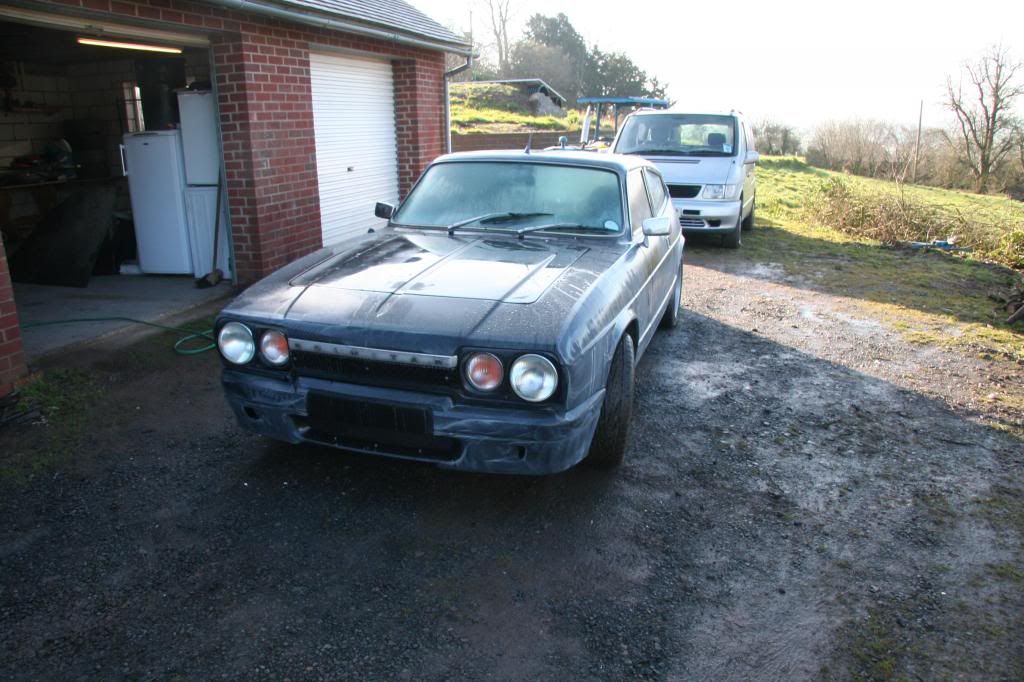
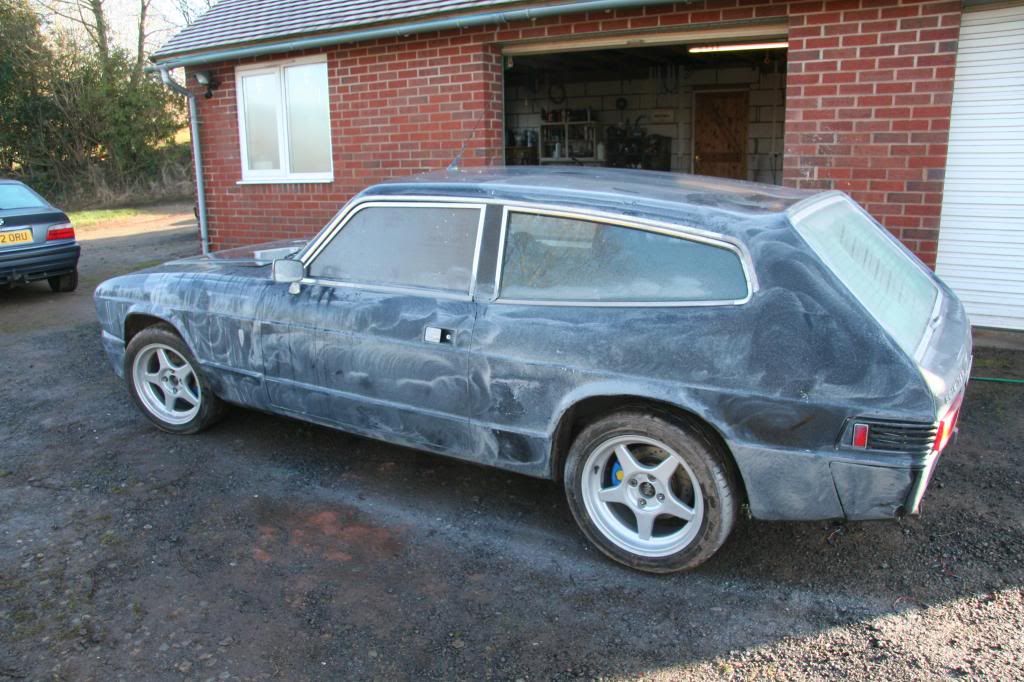
I fiddled with the car yesterday afternoon and this morning, adjusting ride height and checking wishone angles and camber.
I initially raised it up from what you saw in the photos, to get it somewhere near standard, but then realised that the lower wishbones are pointing downwards quite a lot. The uprights I made put the ball joints a bit lower than the trunnions used to be with respect to the wheel, so this makes the role centre higher, so I can get the car a bit lower without messing up the handling (thats if the lower ball joint hasn't messed it up already). It'll all be trial and error and for now its academic as its still sat on the AVO suspension. The height will need redoing when the Gaz dampers turn up.
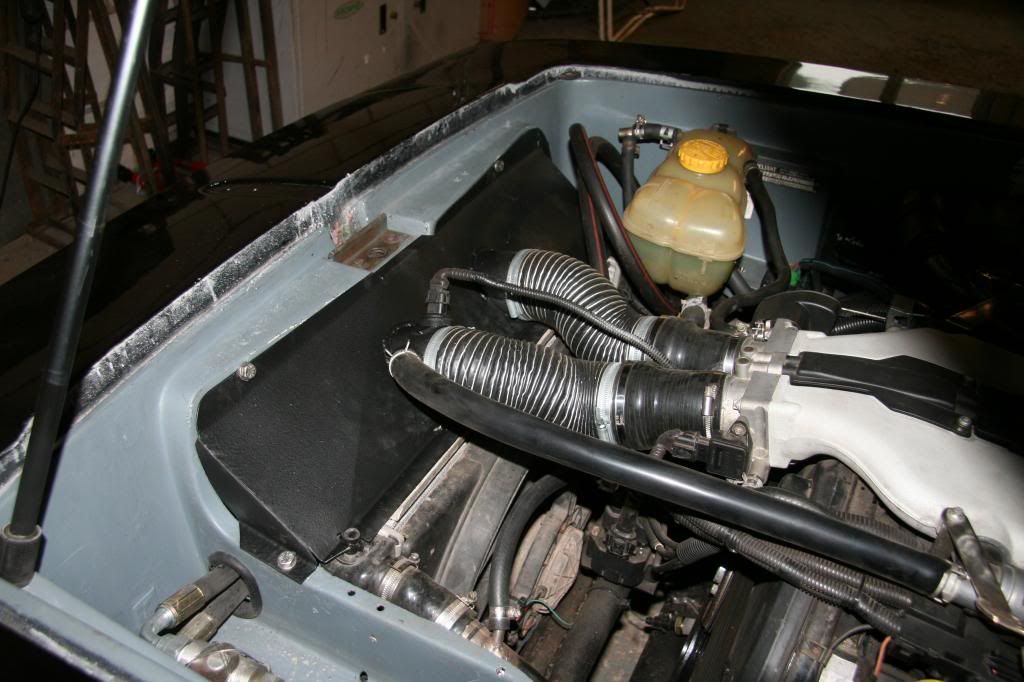
I took the SS (and non magnetic) radiator cover off to paint it. Strangly it has started to rust since I cleaned the car so it must be a lower grade of SS, but it is not magnetic.
Anyway while that was off I noticed that the oil cooler leak is coming from the union, result!!!! tightened that up, and fingers crossed that has saved £80 ish
Here's the newly painted (well stonechip) rad cover
I've also ordered the last of the LPG hose covers so that can be plumbed in.
MOT is booked for friday afternoon, a waste of 4 days insurance, but on the plus side I can drive it in myself
More to come.
I initially raised it up from what you saw in the photos, to get it somewhere near standard, but then realised that the lower wishbones are pointing downwards quite a lot. The uprights I made put the ball joints a bit lower than the trunnions used to be with respect to the wheel, so this makes the role centre higher, so I can get the car a bit lower without messing up the handling (thats if the lower ball joint hasn't messed it up already). It'll all be trial and error and for now its academic as its still sat on the AVO suspension. The height will need redoing when the Gaz dampers turn up.
I took the SS (and non magnetic) radiator cover off to paint it. Strangly it has started to rust since I cleaned the car so it must be a lower grade of SS, but it is not magnetic.
Anyway while that was off I noticed that the oil cooler leak is coming from the union, result!!!! tightened that up, and fingers crossed that has saved £80 ish
Here's the newly painted (well stonechip) rad cover
I've also ordered the last of the LPG hose covers so that can be plumbed in.
MOT is booked for friday afternoon, a waste of 4 days insurance, but on the plus side I can drive it in myself
More to come.
Evening all, a little update is due. The MOT was booked for Friday but.... I've changed my mind and will be waiting till the start of April. I'll have more money, I'll have a little more time to finish a few extra jobs, and most importantly I won't have any time this month to fiddle with or drive it, so I might as well wait and not spend any money on tax this month when I wouldn't be using it much. Its a bummer, but what is a couple more weeks after 3 years!
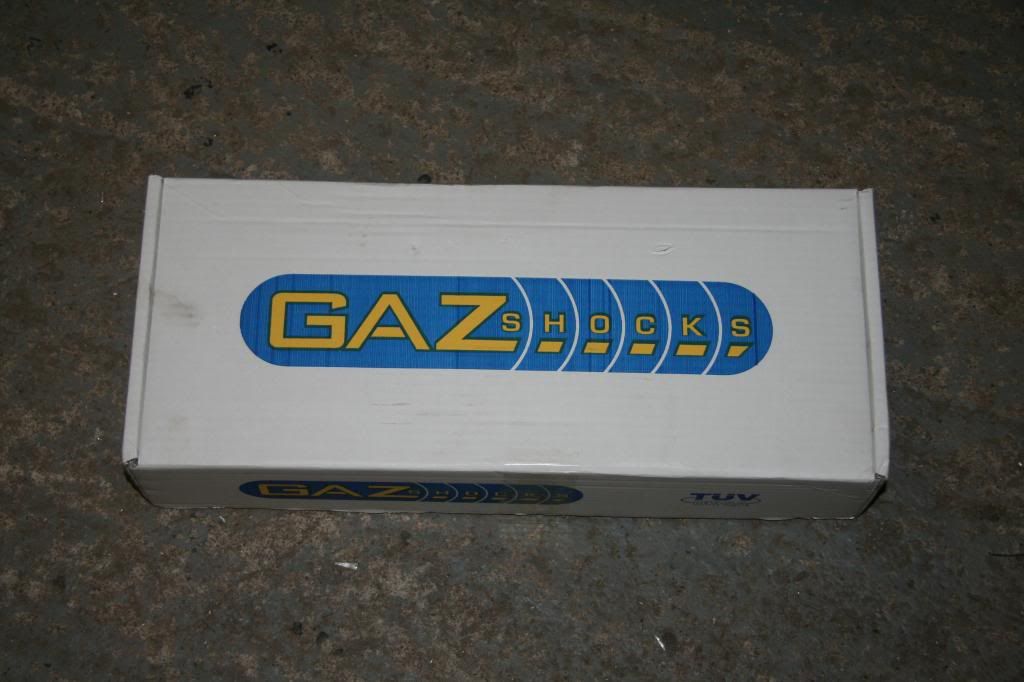
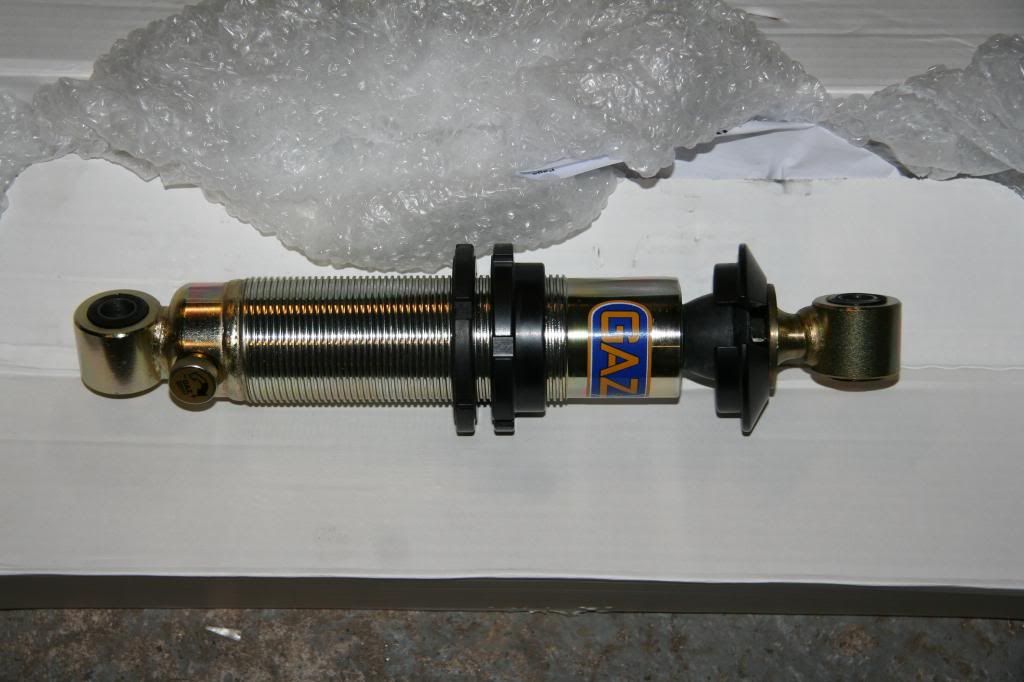
On a lighter note these arrived today, the fronts only at the moment, as the rear AVOs weren't as bad as the front's and money was tight. The rears will be on order very shortly.
I spent a few minutes with Rivnuts mounting the little fire extinguisher (or however you spell it)
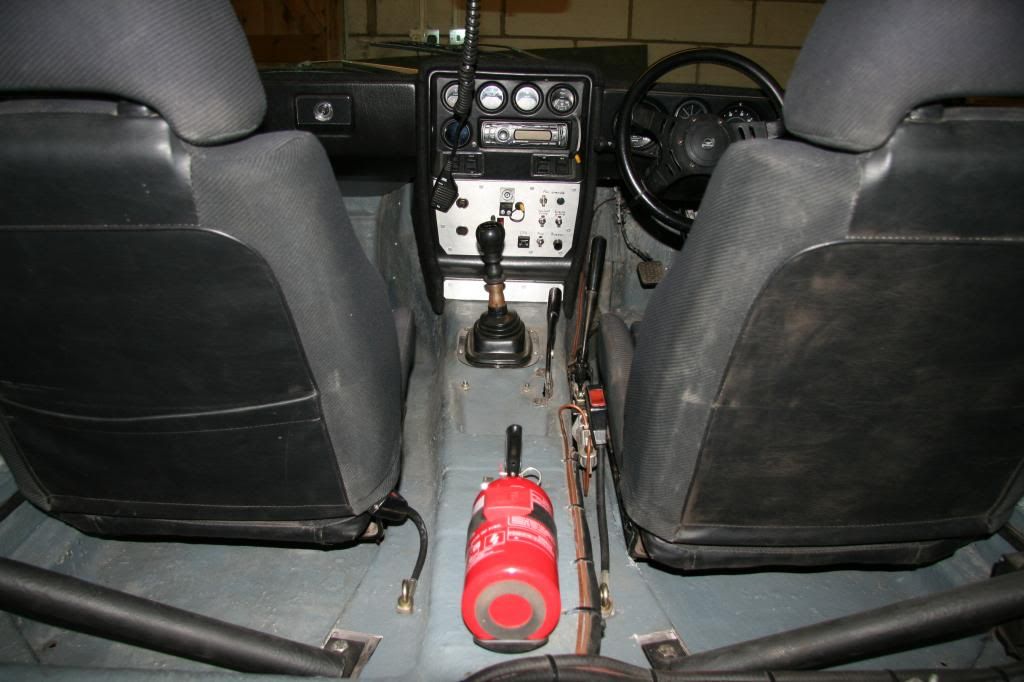
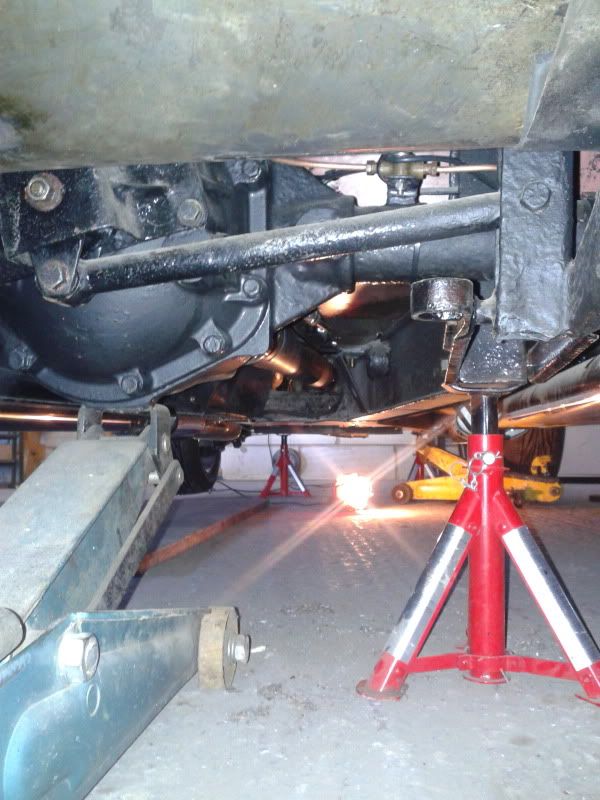
And the spare wheel arrived today, it appears to have never been used, so I'm quite pleased with £30 delivered Anyone guess what its from??
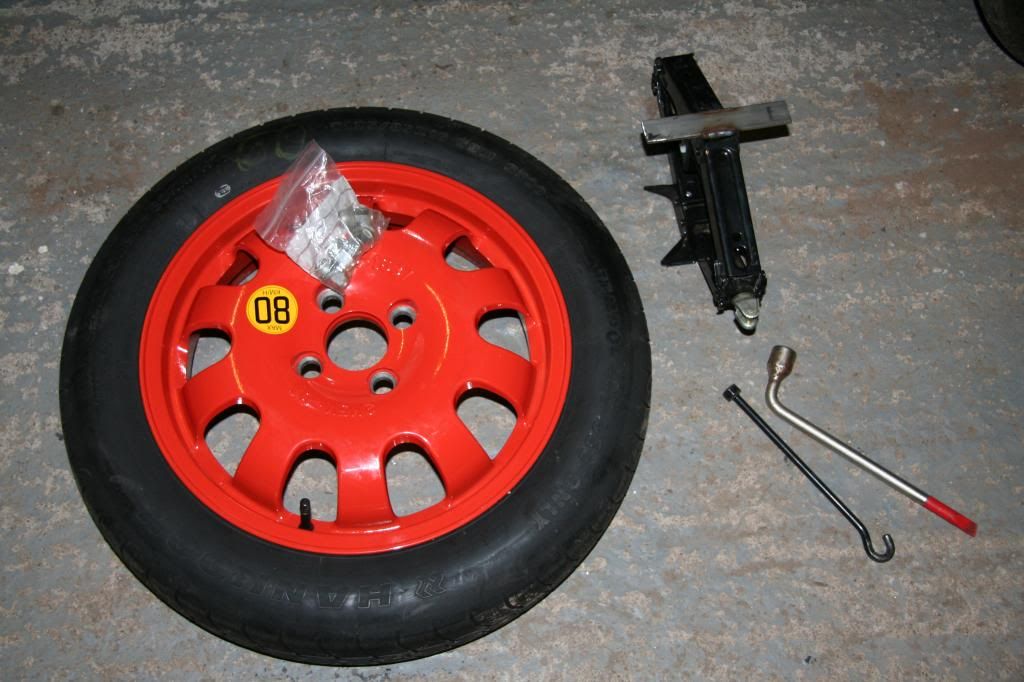
You can see I've found another jack too, and made a little modification to it to make it a little more stable. I know where the wheel is going, just got to find somewhere secure (reads no rattles) to put the jack and wheel brace.
On another note, I had a thought regarding the dampers. I'd like to protect these ones a bit better than I did the AVOs so I think I might try and find some covers for them, like water proof canvas or something.
More to come
I've changed my mind and will be waiting till the start of April. I'll have more money, I'll have a little more time to finish a few extra jobs, and most importantly I won't have any time this month to fiddle with or drive it, so I might as well wait and not spend any money on tax this month when I wouldn't be using it much. Its a bummer, but what is a couple more weeks after 3 years!On a lighter note these arrived today, the fronts only at the moment, as the rear AVOs weren't as bad as the front's and money was tight. The rears will be on order very shortly.
I spent a few minutes with Rivnuts mounting the little fire extinguisher (or however you spell it)
And the spare wheel arrived today, it appears to have never been used, so I'm quite pleased with £30 delivered
Anyone guess what its from??You can see I've found another jack too, and made a little modification to it to make it a little more stable. I know where the wheel is going, just got to find somewhere secure (reads no rattles) to put the jack and wheel brace.
On another note, I had a thought regarding the dampers. I'd like to protect these ones a bit better than I did the AVOs so I think I might try and find some covers for them, like water proof canvas or something.
More to come
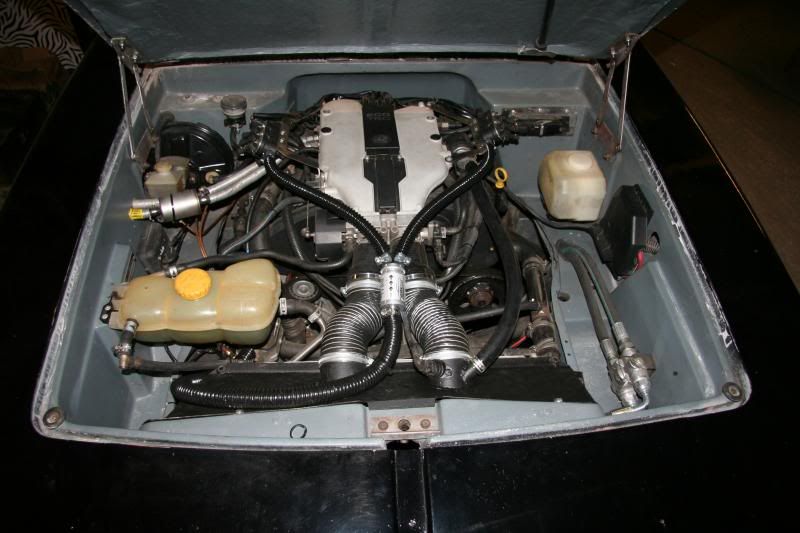
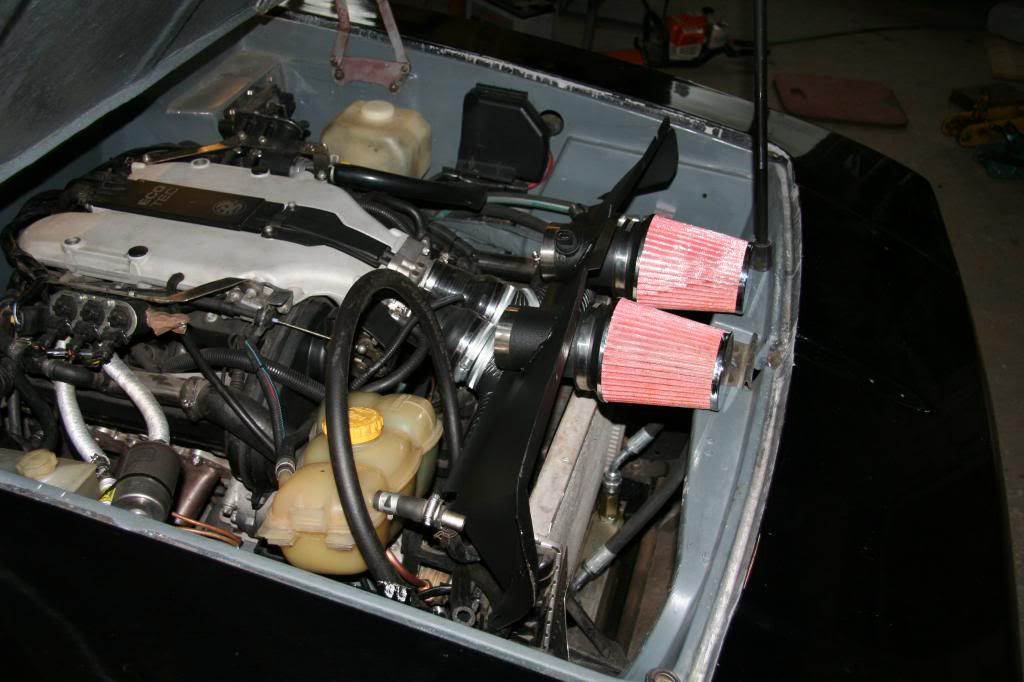
ridds, It ran like turd, but this is because I haven't done anything with the LPG software yet. It doesn't use a MAF sensor anymore, it measures load from a MAP sensor taken off the right side of the plenum. There is a large butterfly valve that opens making the plenum effectively one manifold rather than two at low RPMs, so it should all be seeing the same the pressure (at least at low rpm)
I hadn't considered the inbalance between side at middle and high RPM..... There should be very little inbalance really, the throttle bodies have been acurately machined with new butterfies very accurately made, the two butterflies share the same shaft and close together, I shouldn't think that will be an issue. In fact there is no accounting for inbalance when the engine was in the omega, the MAF sensor was upstream of the divide.
I hadn't considered the inbalance between side at middle and high RPM..... There should be very little inbalance really, the throttle bodies have been acurately machined with new butterfies very accurately made, the two butterflies share the same shaft and close together, I shouldn't think that will be an issue. In fact there is no accounting for inbalance when the engine was in the omega, the MAF sensor was upstream of the divide.
Gassing Station | Scimitar | Top of Page | What's New | My Stuff