Italeri 1:72 Macchi C.202 "Folgore"
Discussion


Yertis said:
How does paint take to the Klear? (Re the "24 hour / 24 week" Kittyhawk – I've never used Klear before, wasn't sure whether to paint the frame first or afterwards.)
Acrylic seem to take to it fine, never had much issue. What I do is dip the transparencies in Klear, leave for at least 24 hours in the airing cupboard for it to harden, then mask and spray the frames. First coat isn't primer, it's whatever colour the inside of the frames is (usually cockpit colour or black), then overcoat with camo colour. Weather the whole lot the same way you weather the rest of the airframe, apply final varnish and only then remove the masking. If there's any minor bleeding of paint, you can usually remove it with a sharp cocktail stick, either dry, or dipped in thinners for more stubborn bits.
ETA, after dipping, set it to dry on a tissue, and make sure the excess Klear is wicking onto it.
Yertis said:
dr_gn said:
Acrylic seem to take to it fine, never had much issue.
What I do is dip the transparencies in Klear, leave for at least 24 hours in the airing cupboard for it to harden, then mask and spray the frames. First coat isn't primer, it's whatever colour the inside of the frames is (usually cockpit colour or black), then overcoat with camo colour. Weather the whole lot the same way you weather the rest of the airframe, apply final varnish and only then remove the masking. If there's any minor bleeding of paint, you can usually remove it with a sharp cocktail stick, either dry, or dipped in thinners for more stubborn bits.
ETA, after dipping, set it to dry on a tissue, and make sure the excess Klear is wicking onto it.

Thanks for that. The Kittyhawk 24-hr quick cheap childhood build has turned into £££ new compressor buying exercise


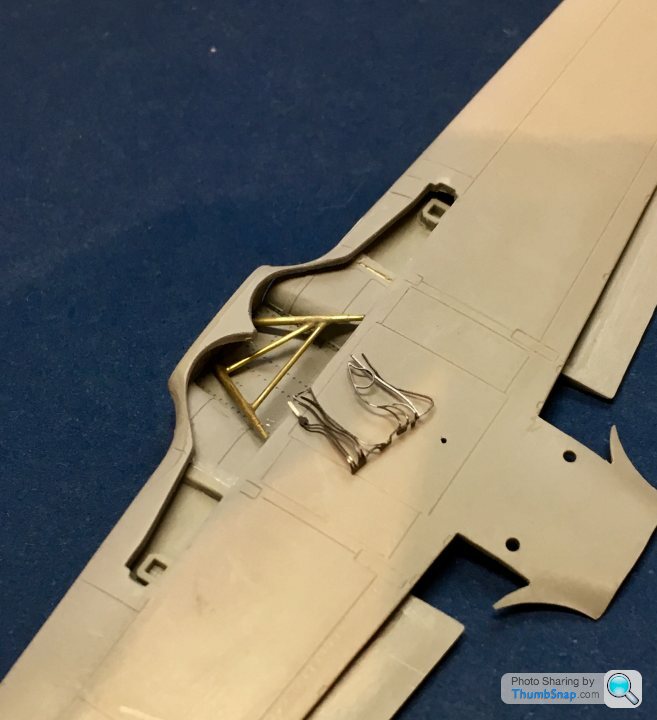


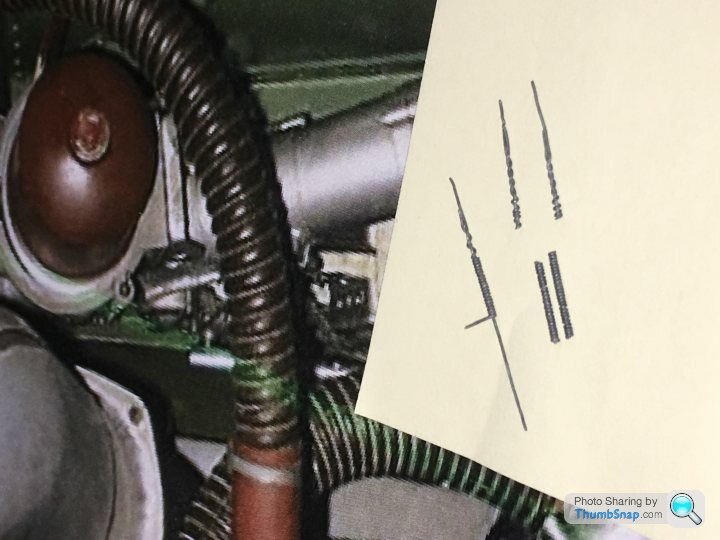
Continuing with the stupidly complicated central wheel well: I made some spiral wound pipe out of lead wire:
Then found some random bits and pieces to add a bit of complexity. I think there’s even a Spitfire gunsight in there somewhere:
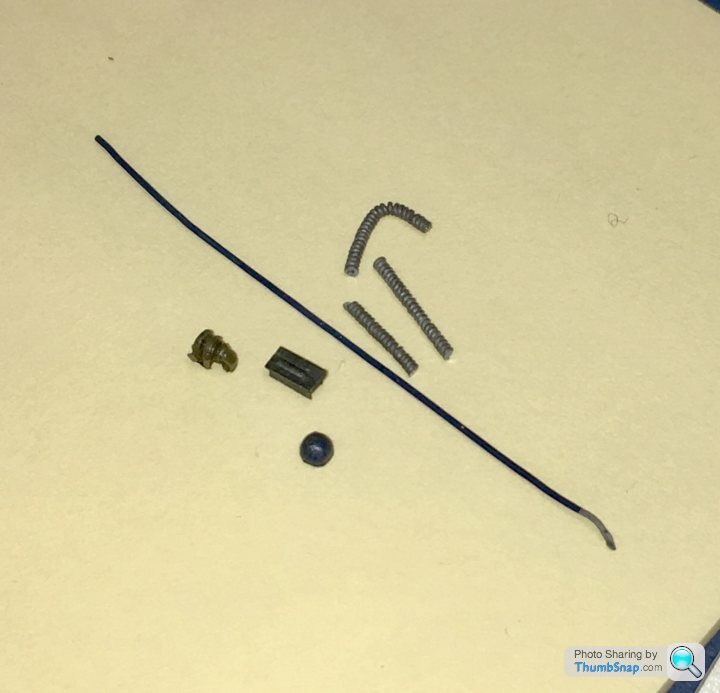
Added the central p/e stiffener and some more wiring. Will look ok with a matt coat at the end:

Then found some random bits and pieces to add a bit of complexity. I think there’s even a Spitfire gunsight in there somewhere:
Added the central p/e stiffener and some more wiring. Will look ok with a matt coat at the end:

henryk001 said:
Fair doos. At the scale you are using PE to add detail is really impressive. I think i would go crosseyed or worse if i tried to tackle
kits in 1/72. Im Struggling with 1/12th. Brilliant work
Thanks, yes this one is very fiddly. I think it’s got more photo etch than any other model I’ve built so far. kits in 1/72. Im Struggling with 1/12th.
Brilliant workI’ve been following your GT40 build - very impressive work. I’ve got a 1:12 McLaren F1 car underway, but finding time to work on it is difficult.
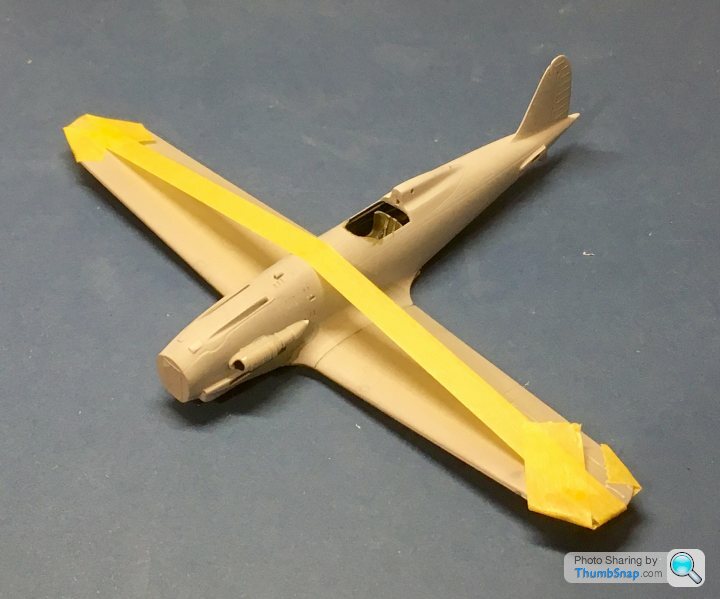
Araldited the flap innards in place:

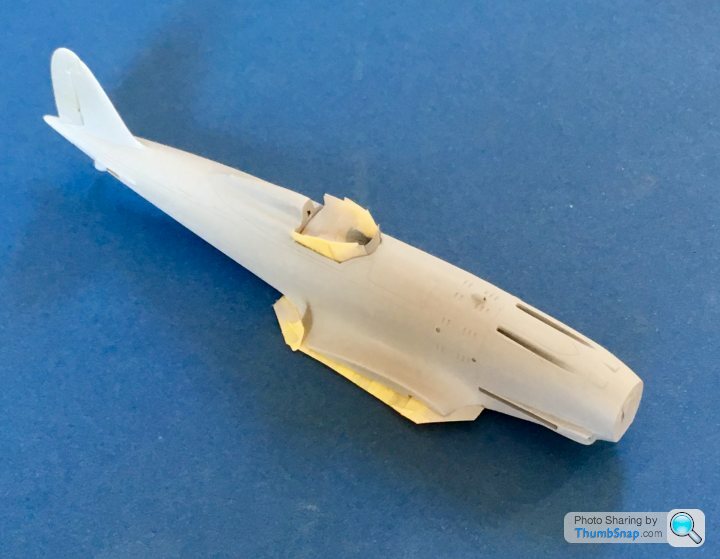
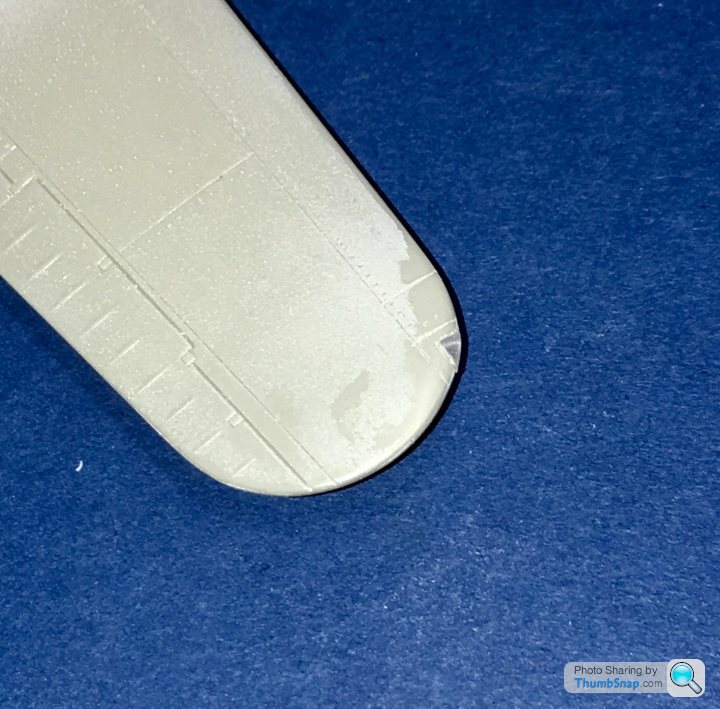
And filled in the numerous gaps using Milliput, plastic card and sprue dissolved in liquid cement. Also cut out the wingtip light covers:


Plenty of flatting and re-scribing still to do there I think.
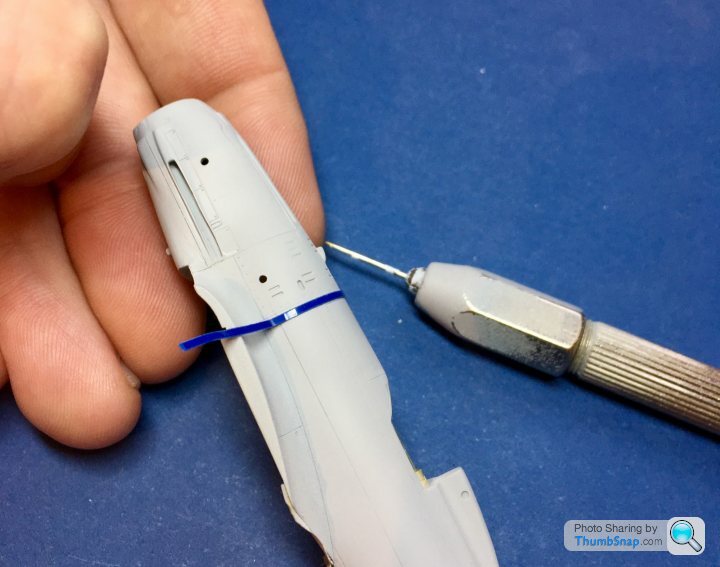
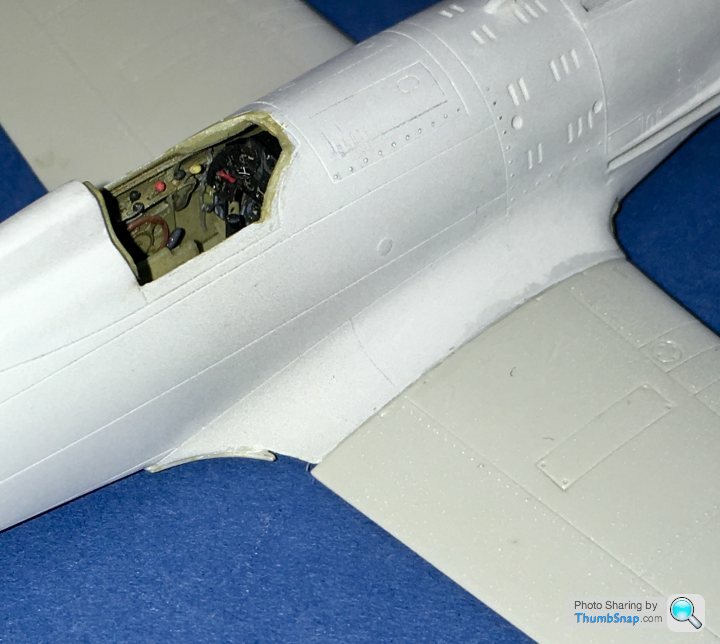
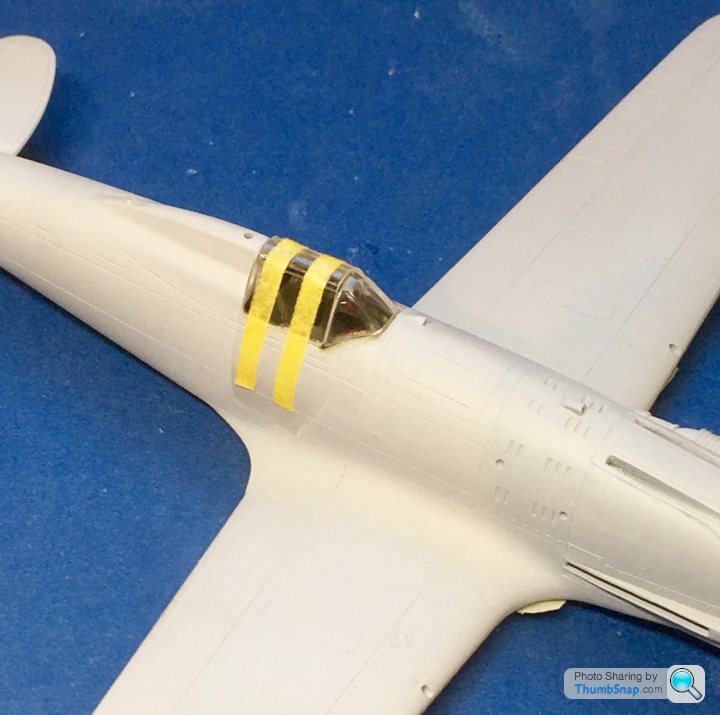
Also did a bit of work making a brass spigot for the aerial, drilled out the Venturi and made a more scale pitot head from brass tubes:

And filled in the numerous gaps using Milliput, plastic card and sprue dissolved in liquid cement. Also cut out the wingtip light covers:
Plenty of flatting and re-scribing still to do there I think.
Also did a bit of work making a brass spigot for the aerial, drilled out the Venturi and made a more scale pitot head from brass tubes:
CanAm said:
.......drilled out the Venturi ........
You make it sound so simple. How the hell do you drill out something so small so accurately?
Just using a micro drill - start it in what you hope is the middle of the hole and angle it while drilling if it’s not centred. Then open up with a larger one.You make it sound so simple. How the hell do you drill out something so small so accurately?
mcdjl said:
dr_gn said:
Just using a micro drill - start it in what you hope is the middle of the hole and angle it while drilling if it’s not centred. Then open up with a larger one.
So you start with a really small drill, then use a slightly less small drill? I guess we're still talking in the 0.5mm range? I tried it on some part but just ended up snapping it.If you're snapping a drill while just making a dimple in the surface of the plastic, you're doing something wrong!
It really helps to make sure the surface you are drilling is flat (use a stiff sanding stick).
I've got two drill holders - I sometimes use one to hold the part, and the other to hold the drill.
mcdjl said:
dr_gn said:
Yes.
If you're snapping a drill while just making a dimple in the surface of the plastic, you're doing something wrong!
It really helps to make sure the surface you are drilling is flat (use a stiff sanding stick).
I've got two drill holders - I sometimes use one to hold the part, and the other to hold the drill.
I've snapped drills...though i meant the plastic part which felt tin enough to start with. If you're snapping a drill while just making a dimple in the surface of the plastic, you're doing something wrong!
It really helps to make sure the surface you are drilling is flat (use a stiff sanding stick).
I've got two drill holders - I sometimes use one to hold the part, and the other to hold the drill.


Gassing Station | Scale Models | Top of Page | What's New | My Stuff