1:72 MPM Boulton Paul Defiant Mk.1
Discussion


Masking finished - it's a difficult one because of the turret, and now the windscreen not having any discernable framing. Started with the glazing and then the cockpit opening:

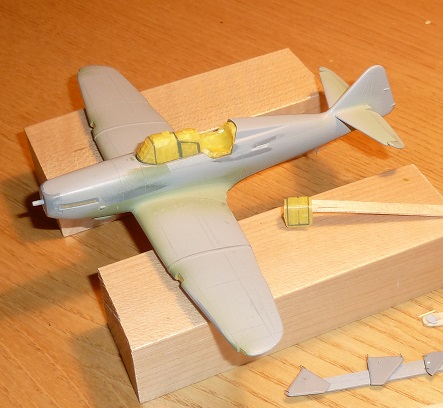
Not sure how long that aerial mast will last:

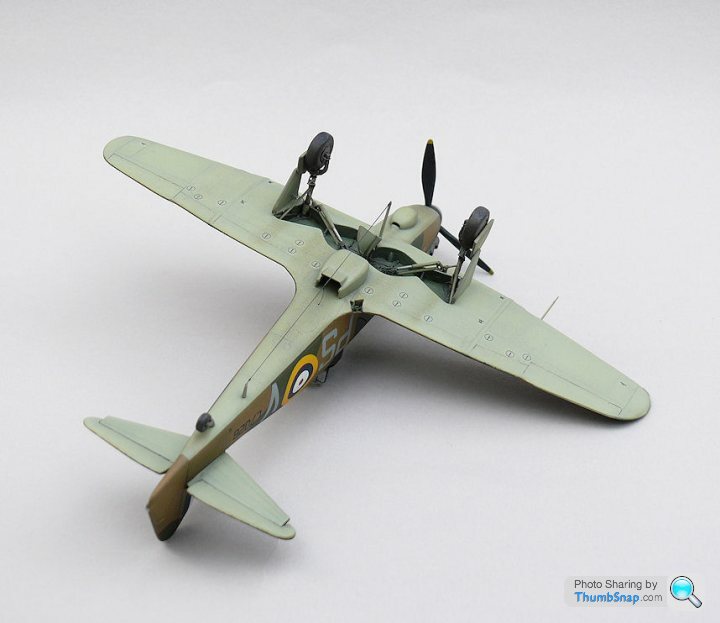
Got the underside preshaded with NATO black, and painted in Sky. I don't use a panel line wash much at 1:72 becasue I find that using a very dark preshade colour fills the panel lines and remains dark in there even after overcoating several times with the base colour:

Not sure how long that aerial mast will last:
Got the underside preshaded with NATO black, and painted in Sky. I don't use a panel line wash much at 1:72 becasue I find that using a very dark preshade colour fills the panel lines and remains dark in there even after overcoating several times with the base colour:


Red Firecracker said:
Looking good. I do have to admit I'd have liked to see it black though 
Black is very easy to apply as a featureless coat, but difficult to get looking 'right' in terms of weathering and depth. Most black Defiant models I've seen look either totally flat, or over weathered.No doubt Airfix will release a new tool version soon, so if it's any good I'll get one and experiment with a black finish on that.
lufbramatt said:
Eric Mc said:
I agree. All black aircraft are very hard to make look right when scaled down.
The Defiant at Hendon doesn't seem to look "right" and it's 1:1 scale! I think matt black aircraft in general look a bit strange unless well weathered- the lack of reflections and highlights hides the 3D shape of the thing.
Mutley said:
Excellent dr_gn, been following your build threads for a while, and am inspired to up my efforts.
One question, for the camo, do you use masks or go freehand?
Masks - at this scale for RAF stuff it's the best way IMO. Even for a more feathered edge effect (French Air Force for example) I'd still use masks, but raised off the surface a bit.One question, for the camo, do you use masks or go freehand?
Mutley said:
Thanks, one more is that a tape mask?
Yep, Tamiya tape.The technique I've settled on is:
1. Get some thin tracing film and lay a bit over the model where a demarcation needs to be.
2. Draw the camo outline on the film with pencil.
3. Stick two layers of Tamiya tape over the line.
4. Cut the profile out with scissors
5. Remove first layer of tape and apply to model.
6. When all the outlines are done, fill in the middle bits with more tape.
Dr Jekyll said:
dr_gn said:
No doubt Airfix will release a new tool version soon,
+1I'd really like one in 1/24th but that might be a bit much to hope for.
Lots of options for variants as well - BoB, night fighter, target tug etc, etc. Plus currently there are no mainstream kits of it.
About time it stood on its own two feet:

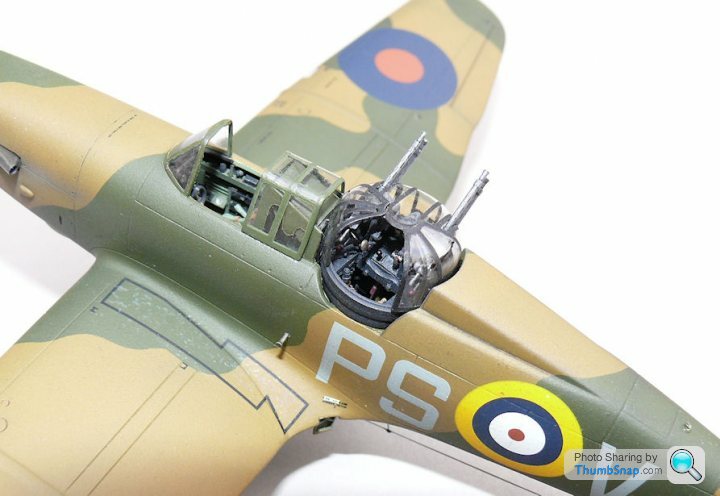
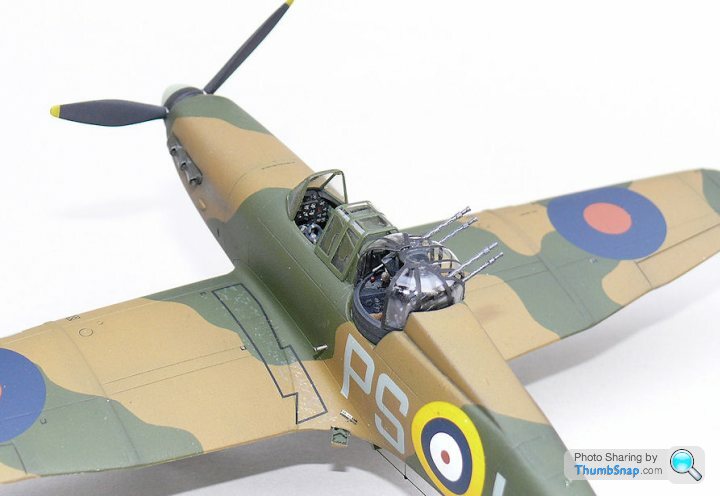
Applied a wash to the removable panels and control surfaces too - still needs finessing a bit before exhaust staining etc and a final matt coat.
I must admit it looks terrible. Hopefully a matt coat and little details like unmasking the canopy, pitot tube, wheel covers, lights etc. will transform it in the same way the did for the Spitfire. If not...oh dear!
Noticed today that the u/c legs are anout 2-3mm too long. This makes it impossible to get the right amount of overlap on the main gear doors. The razor saw beckoned, but was replaced in the toolbox with a resigned shake of the head - enough is enough.
Anyway, u/c is done and a quick coat of matt varnish and some light weathering has improved it a lot:


Next is fitting the propeller, lights, rear view mirrors, access step, canopy & release mechanism, aerial wire & insulators, and finally...the turret (which was completed what seems like years ago).
Anyway, u/c is done and a quick coat of matt varnish and some light weathering has improved it a lot:
Next is fitting the propeller, lights, rear view mirrors, access step, canopy & release mechanism, aerial wire & insulators, and finally...the turret (which was completed what seems like years ago).
Now finished - it's been a long slog, but really enjoyable - more modelling than kit assembly, and loads of scope (or necessity) to add your own details.
Maybe slightly under-weathered, but it'll do.


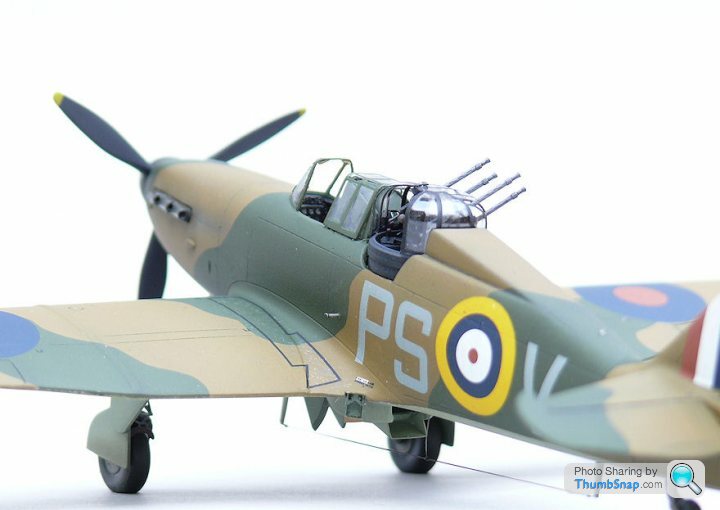

Scratchbuilt / additional details include...
Turret:
Master Model gun barrels
Door knobs
Gun controls
Decals for the air gauges and nameplate
Gun wiring and rear extensions
Hydraulic elevation piston & pipework
Gunners notepad & pencil
Mk.IIIa gunsight and mechanism
Front hinged table and brackets
Turret lifting struts
Stbd. electrical panels and the suit heating & radio pigtails
Falcon vacform canopy modded for doors open
Gunners head-pad.
Cockpit:
Head armour supports
Circular plate next to headrest
Rear fairing air cylinder body
Radio box retaining strap
Correct spade grip
Wheel brake lever
Throttle lever knobs
Rear view mirrors
Canopy release mechanism
Airframe:
Wing tip light covers & bulbs
Landing lights
Dorsal navigation light
Pitot tube
Wheel brake pipes
Wheel well hydraulics
Wheel door actuators & struts
u/c leg modifications
Vacform canopy and front fairing cut to be lowered
Aerial and insulators
Access step and spigot
Rear navigation light
Drooped elevators
Propeller bearing
Maybe slightly under-weathered, but it'll do.
Scratchbuilt / additional details include...
Turret:
Master Model gun barrels
Door knobs
Gun controls
Decals for the air gauges and nameplate
Gun wiring and rear extensions
Hydraulic elevation piston & pipework
Gunners notepad & pencil
Mk.IIIa gunsight and mechanism
Front hinged table and brackets
Turret lifting struts
Stbd. electrical panels and the suit heating & radio pigtails
Falcon vacform canopy modded for doors open
Gunners head-pad.
Cockpit:
Head armour supports
Circular plate next to headrest
Rear fairing air cylinder body
Radio box retaining strap
Correct spade grip
Wheel brake lever
Throttle lever knobs
Rear view mirrors
Canopy release mechanism
Airframe:
Wing tip light covers & bulbs
Landing lights
Dorsal navigation light
Pitot tube
Wheel brake pipes
Wheel well hydraulics
Wheel door actuators & struts
u/c leg modifications
Vacform canopy and front fairing cut to be lowered
Aerial and insulators
Access step and spigot
Rear navigation light
Drooped elevators
Propeller bearing
Edited by dr_gn on Thursday 28th November 11:25

Eric Mc said:
Very nice. Just like it's rolled off the production line and Boulton and Pauls.
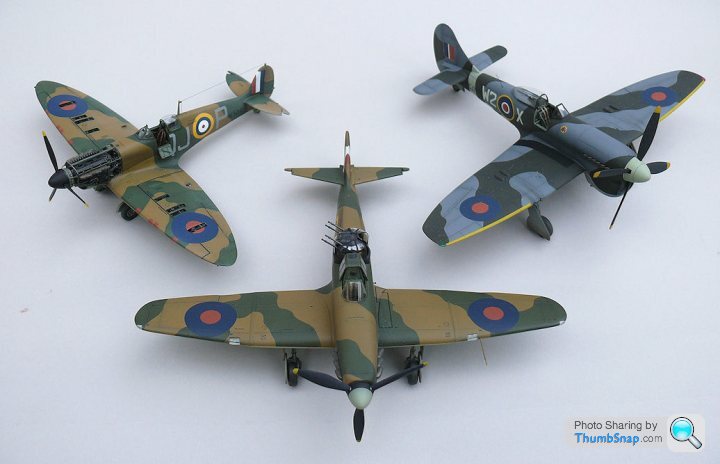
You can see in the shots with the 109 and Spitfire how much chunkier it was than a "normal" single engined fighter.
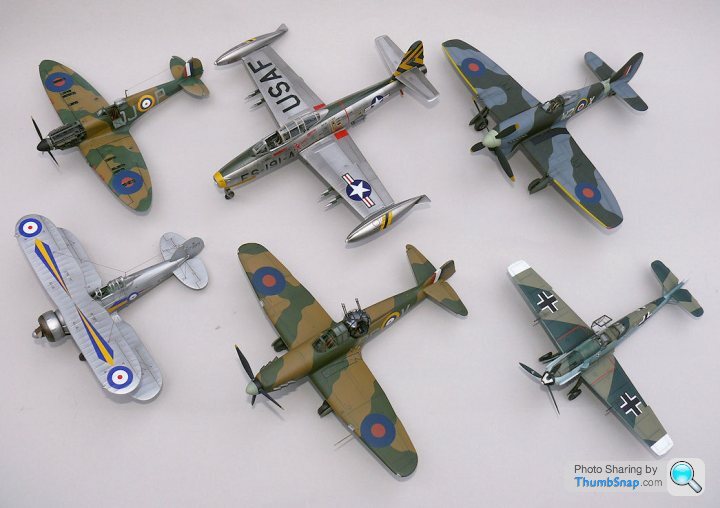
Thanks. When it was finished I was convinced it was way too big, and resorted to measuring wingspans / lengths and scaling them. Turns out it's pretty much spot on. It dwarfs the Spitfire. It's also surprising how big an aircraft the Gladiator is.You can see in the shots with the 109 and Spitfire how much chunkier it was than a "normal" single engined fighter.
Roy Lime said:
Dr, as I'm sure you'll understand I've been looking forward to seeing this one. Well done - turret in particular looks great.
It's been a really good thread - thanks.
Ta! glad you like it. Next one will be black...or I might do a black Hurricane. I think I've got enough earth/green aircraft now.It's been a really good thread - thanks.

Gassing Station | Scale Models | Top of Page | What's New | My Stuff