Frog (Rovex) Hawker Typhoon build [not GB]
Discussion


A little more progress
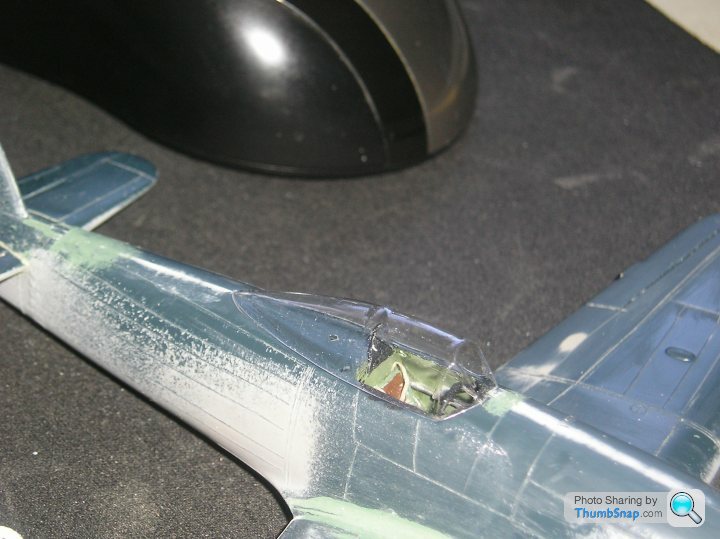
Yesterday I tried out the kit canopy and made the definite decision
It has to go, almost everything inside has vanished, so I will be "pull moulding" a new car door canopy with the extra rearview mirror bulge. I know I said I might so it's no biggie...
I will take a few pictures as I mould for the "archives" so anyone who hasn't done it can watch me screwitup first. (I usually mess at least one pull before I get workable acetate)
Here's how it won't look
And Taraaah
Today I was mostly learning how much I had forgotten about my Paasche airbrush and tyre pressure spraying
I needed an extra O ring behind the adapter to seal the pressure
for starters
Then I had fun keeping paint inside the small paint hopper/cup on the airbrush intead of all over the underwing surface
Then I had to get a paintable thinned mixture
And eventually after about three hours I had this
For some reason I couldn't get the flash right so here's the best of the rest
and the worst
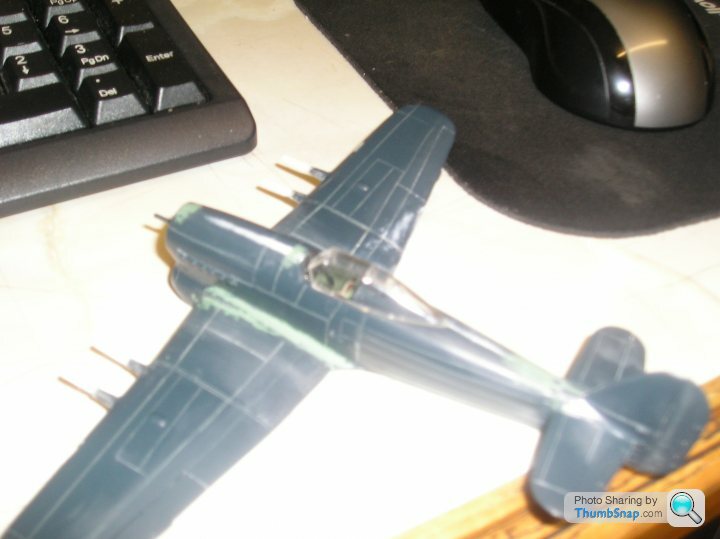
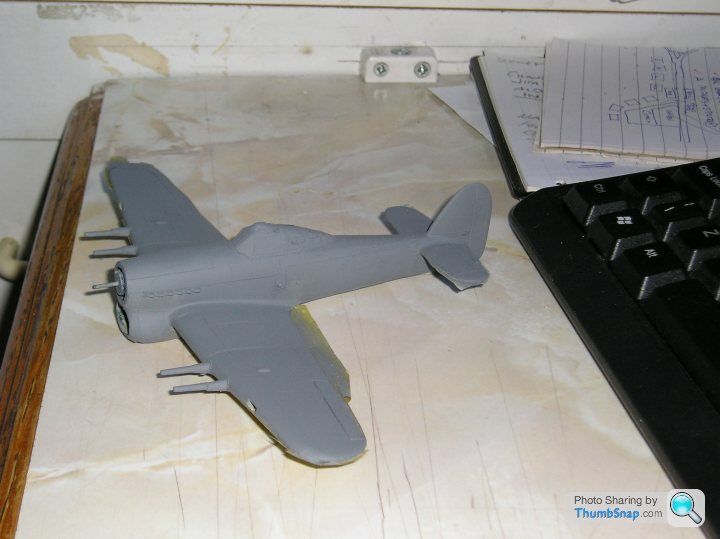
Sea Grey Medium from Humbrol Authentics, this paint is over thirty years old in the tin. Simply opened and stirred, thinned with white spirits and away we go
Eventually I had a decent(ish) all over finish
I might look into a quiet compressor, another fridge compressor again maybe
So maybe more tomorrow, there's lots more to do
Cut ejector slots for the Hispanos underwing I suppose, surely didn't take the empties back after tickling trains did they?

And fill the minor imperfections around the wheel well cut outs
Yesterday I tried out the kit canopy and made the definite decision
It has to go, almost everything inside has vanished, so I will be "pull moulding" a new car door canopy with the extra rearview mirror bulge. I know I said I might so it's no biggie...
I will take a few pictures as I mould for the "archives" so anyone who hasn't done it can watch me screwitup first. (I usually mess at least one pull before I get workable acetate)
Here's how it won't look
And Taraaah
Today I was mostly learning how much I had forgotten about my Paasche airbrush and tyre pressure spraying
I needed an extra O ring behind the adapter to seal the pressure
for starters
Then I had fun keeping paint inside the small paint hopper/cup on the airbrush intead of all over the underwing surface
Then I had to get a paintable thinned mixture
And eventually after about three hours I had this
For some reason I couldn't get the flash right so here's the best of the rest
and the worst
Sea Grey Medium from Humbrol Authentics, this paint is over thirty years old in the tin. Simply opened and stirred, thinned with white spirits and away we go
Eventually I had a decent(ish) all over finish
I might look into a quiet compressor, another fridge compressor again maybe
So maybe more tomorrow, there's lots more to do
Cut ejector slots for the Hispanos underwing I suppose, surely didn't take the empties back after tickling trains did they?
And fill the minor imperfections around the wheel well cut outs
I DID say this wouldn't be finished when you guys finish the group build didn't I
I can't stop meddling with the details
Anyway I have started with the canopy mould making
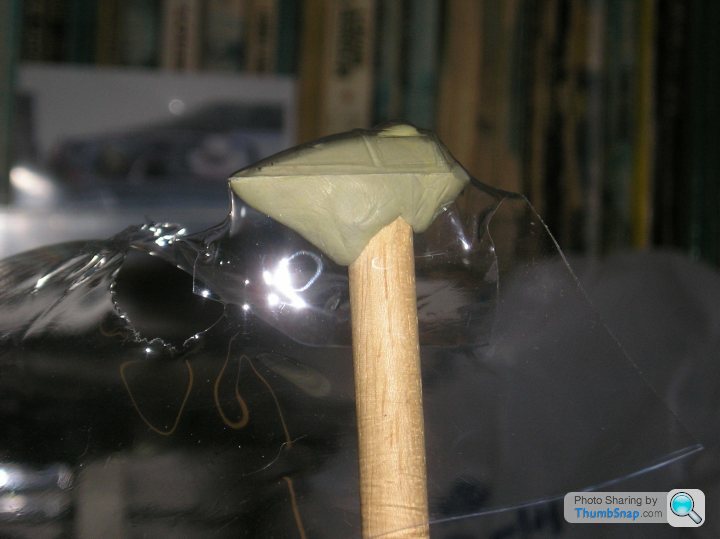
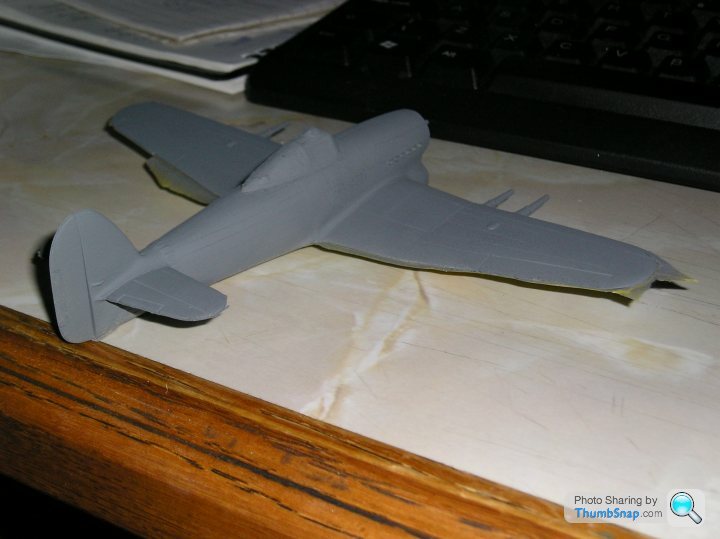
The thick Frog moulding (I just couldn't use it!) has been milliputted onto an 8" long 3/8" dowel and after fully hardening (probably tomorrow afternoon) will be shaped to the actual dimensions I want
First make sure the dowel will fit snugly
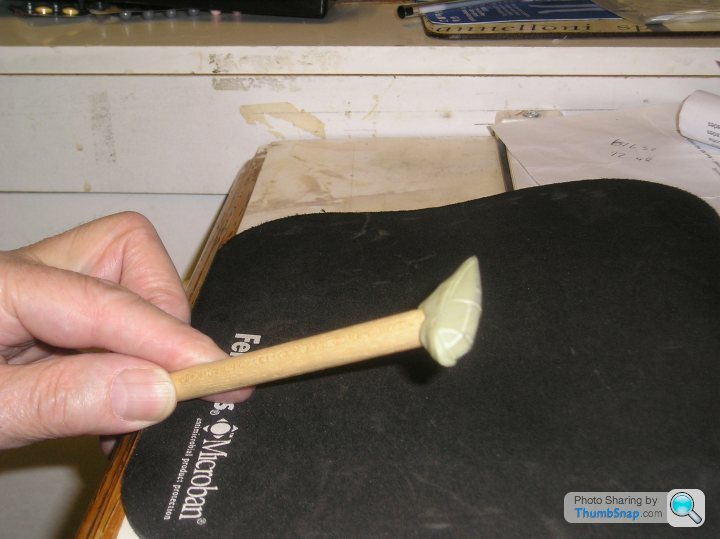
And trap it inside the canopy
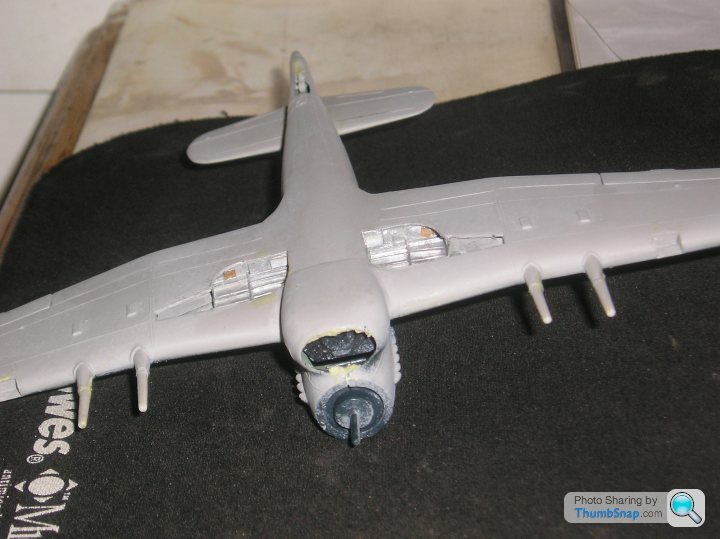
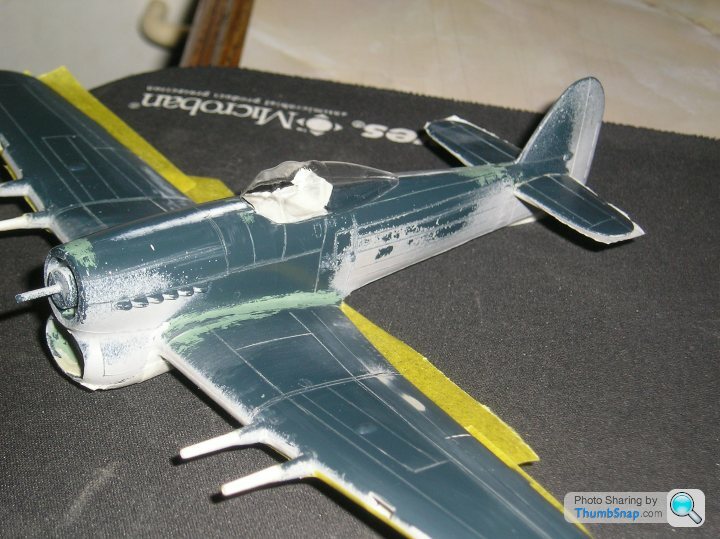
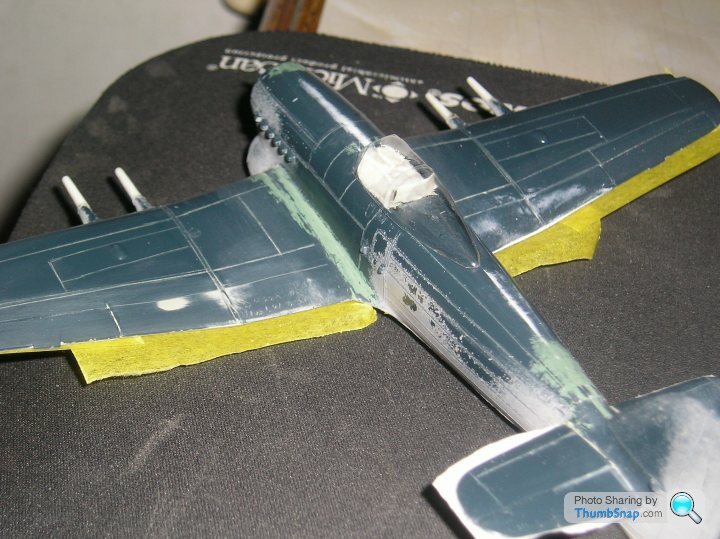
I have used some of the excess Milliput to fill inside the radiator intake hole, this should allow me to carve a decently shaped entrance
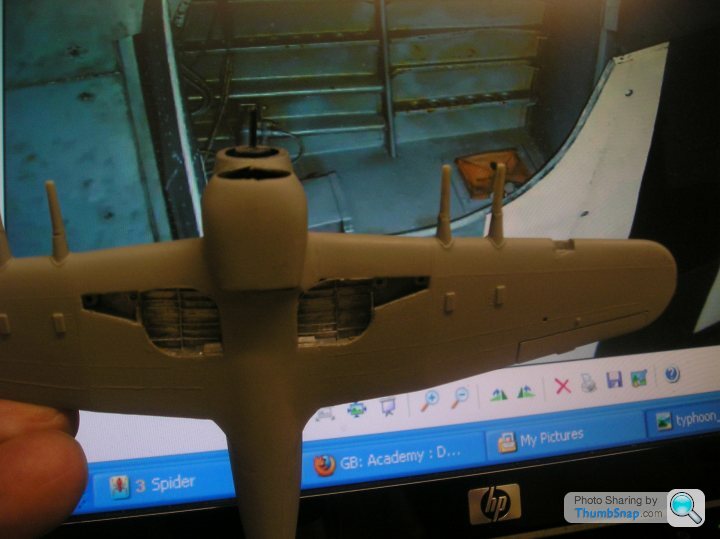
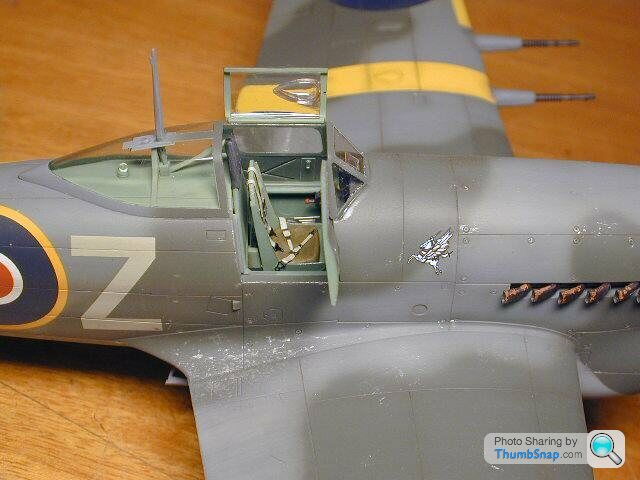
You can see the (probable) finished wheel well colour, I'm getting fed up with trying to get it quite like the colour on my photograph, this will have to do. Additional well wall details now added including the spar inspection panel (orangey transparent-ish plastic on the real thing) from brown waxed paper Swann-Morton blade wrapping sheet. The small equipment boxes are too prominent and will be getting a slim line look this evening
See what I mean about meddling with things
I have drilled out and squared off the cannon's shell ejector slots and the vents that are alongside them
The ejector slots stand proud of the wing and in real life have small fences around them, Frog moulded them as rectangular blocks on the undersurface of the wings, drilling the holes here helped me by not having to make the fences, simply leaving the edges of the blocks in place
I think three of the cannon barrels look OK and there is just the one to adjust (Starboard outer)
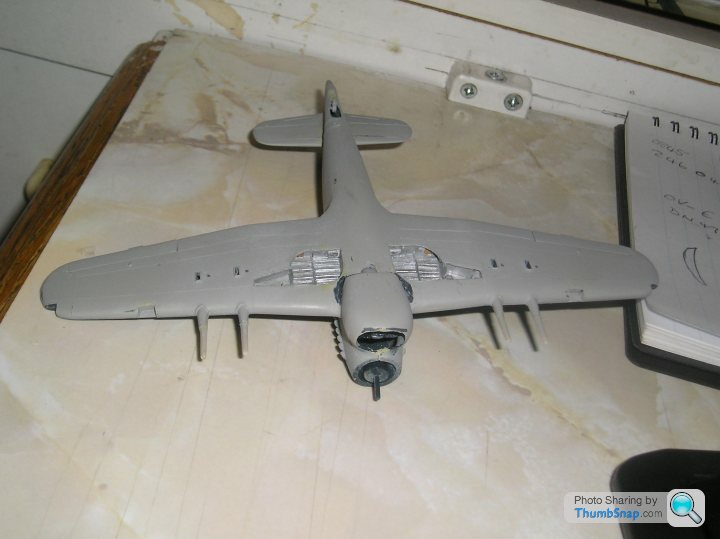
The radiator cowling was too close to the undercarriage bays from my photographs so I have pared away much of it to get a far more realistic shape and as I was working the area I have added a better cockpit warm air duct. Not perfect but better than the moulded little blob that was there this afternoon
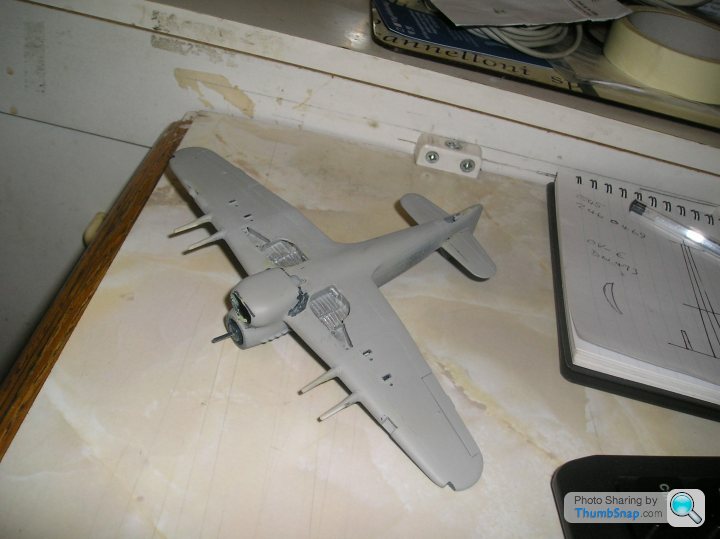
And to finish today's little bit I added the cutouts for navigation lamps to the wing tips and will be adding the nav lights and landing lamps soon to their cut away sections
I was hoping to find a pair of Typhoon Bomb carriers in my spares box, but no go, so I will have to carve a couple from old Airfix bomb casings
I keep making more work all the time dont I?
Oh well more pictures soon of the moulding process if I can get the timer on the camera working properly...
I can't stop meddling with the details
Anyway I have started with the canopy mould making
The thick Frog moulding (I just couldn't use it!) has been milliputted onto an 8" long 3/8" dowel and after fully hardening (probably tomorrow afternoon) will be shaped to the actual dimensions I want
First make sure the dowel will fit snugly
And trap it inside the canopy
I have used some of the excess Milliput to fill inside the radiator intake hole, this should allow me to carve a decently shaped entrance
You can see the (probable) finished wheel well colour, I'm getting fed up with trying to get it quite like the colour on my photograph, this will have to do. Additional well wall details now added including the spar inspection panel (orangey transparent-ish plastic on the real thing) from brown waxed paper Swann-Morton blade wrapping sheet. The small equipment boxes are too prominent and will be getting a slim line look this evening
See what I mean about meddling with things
I have drilled out and squared off the cannon's shell ejector slots and the vents that are alongside them
The ejector slots stand proud of the wing and in real life have small fences around them, Frog moulded them as rectangular blocks on the undersurface of the wings, drilling the holes here helped me by not having to make the fences, simply leaving the edges of the blocks in place
I think three of the cannon barrels look OK and there is just the one to adjust (Starboard outer)
The radiator cowling was too close to the undercarriage bays from my photographs so I have pared away much of it to get a far more realistic shape and as I was working the area I have added a better cockpit warm air duct. Not perfect but better than the moulded little blob that was there this afternoon
And to finish today's little bit I added the cutouts for navigation lamps to the wing tips and will be adding the nav lights and landing lamps soon to their cut away sections
I was hoping to find a pair of Typhoon Bomb carriers in my spares box, but no go, so I will have to carve a couple from old Airfix bomb casings
I keep making more work all the time dont I?
Oh well more pictures soon of the moulding process if I can get the timer on the camera working properly...
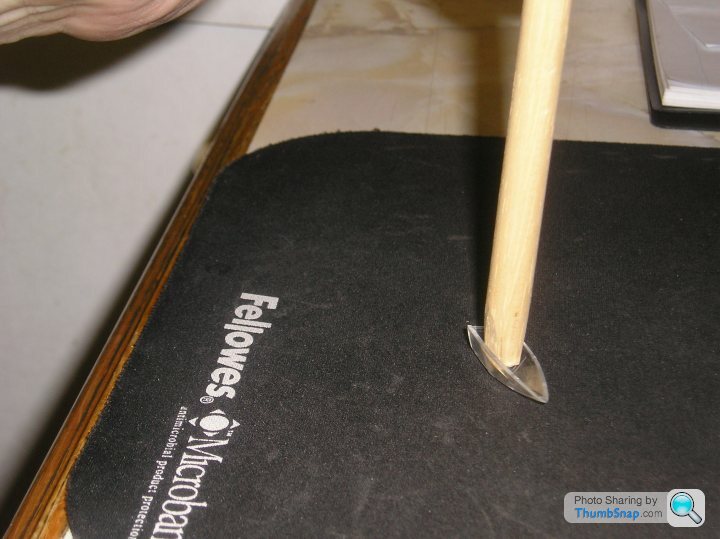
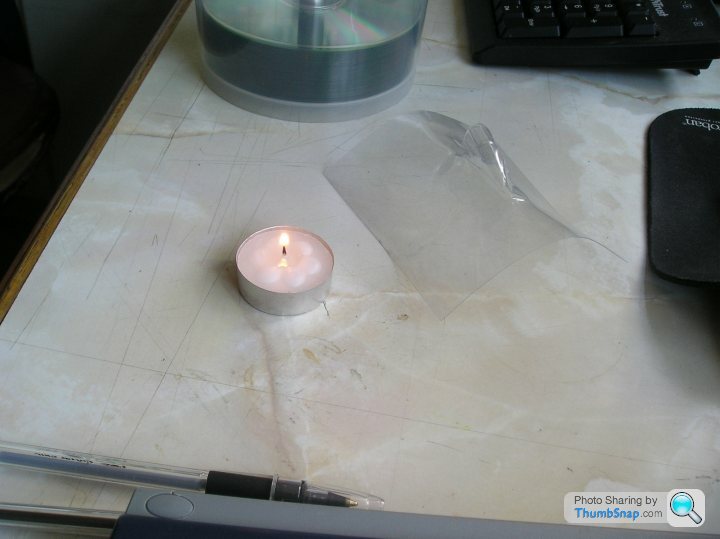
This is the set up I used to "pull" the canopy from acetate sheet
( I used the box a twenty pack of small square Christmas Cards came in, very very much part of the throwaway society. I always save such sheets of free acetate.)
The dowel is sitting inside the centre tube of a 100 pack of recordable CDs, because I don't have an "upstairs" bench vice. Too damned cold in the garage, still winter downstairs dontcha know!
The first "pull" was a definite fail, I allowed the acetate to get too hot
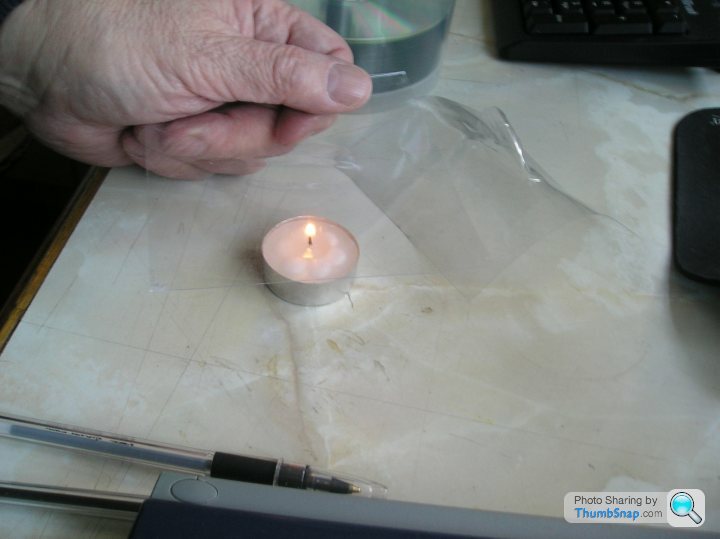
This piece started to burn but it was far enough away from the planned area that I used it anyway

The burnt bit is offset and the main piece pulled down over the former. Keep the pull constant and pull it down and in so it keeps the shape at the bottom as well as across the top. The top bit is the easy part, keeping the shape lower is the key to a successful moulding.
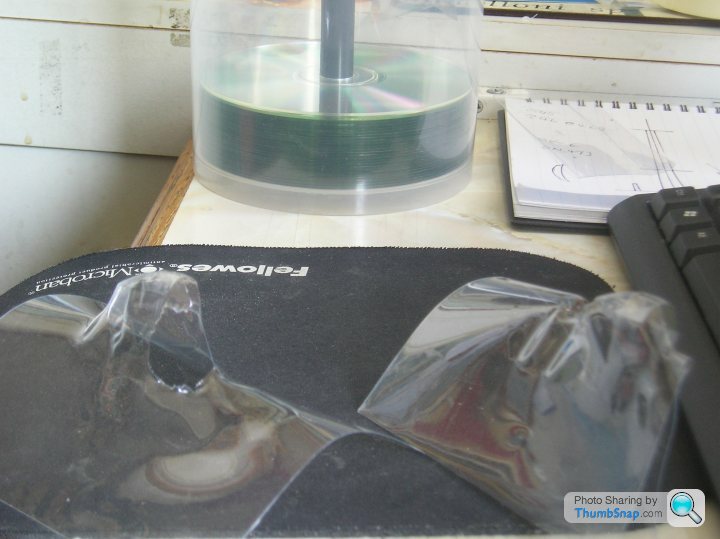
The first one on the left shows its inherent "thinness", see the stretched hole caused by excess heating time. It isn't very easy to see in this picture but the one on the right is nigh on perfick!!!
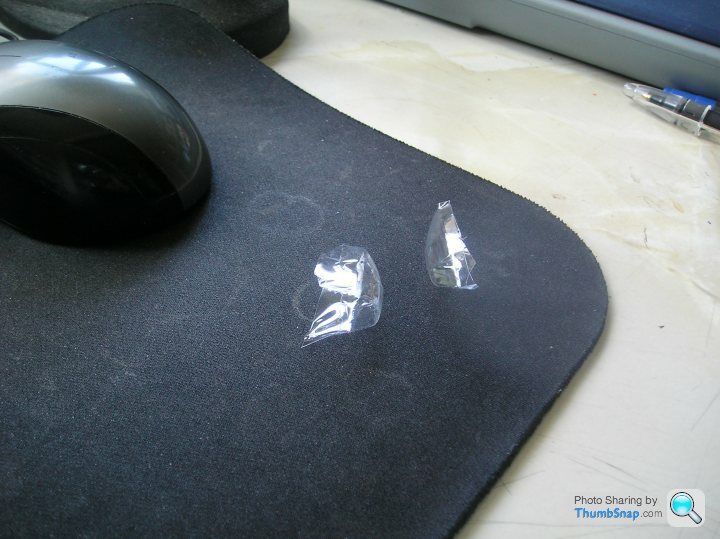
I've trimmed both so you can see how it looks, see the healthy shaped piece on the right.
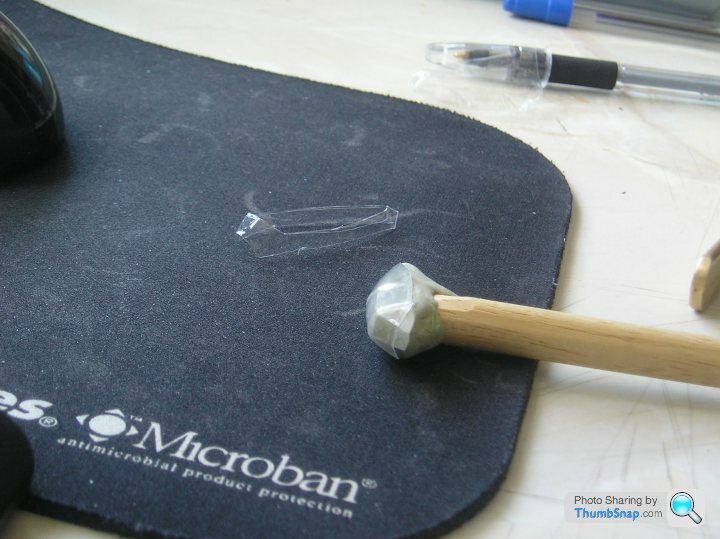
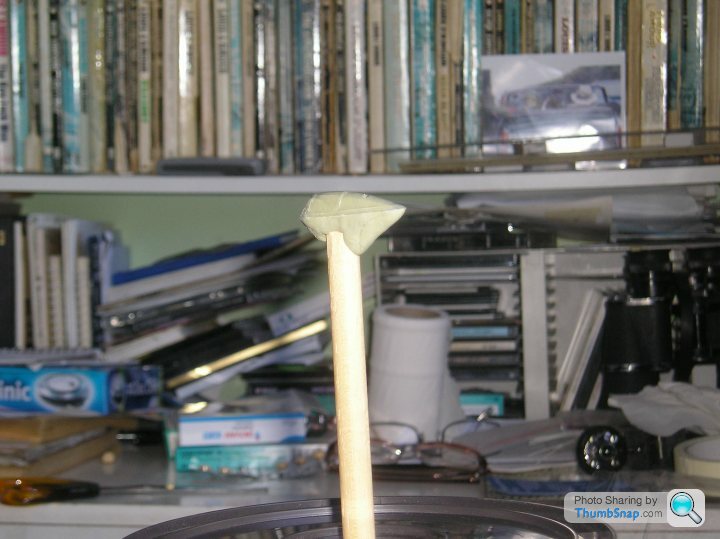
The basic trimmed canopy on the former and the cut off waste behind it
Et voila!
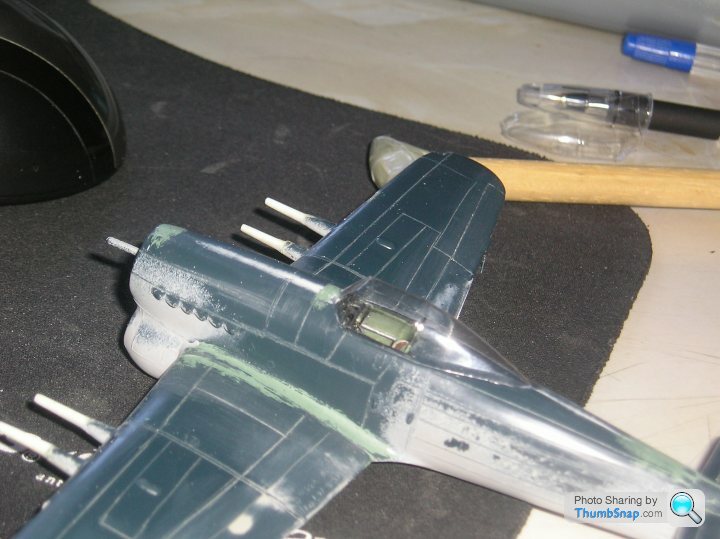
First sitting on the model, no extra trimming yet.
Can you tell how pleased I am with it?
Now I am glad I did put in some extra detailing
As this came out so well (first time in I cannot remember how long except the number thirty is in there) I am considering stopping here instead of adding the bulged upper canopy for the rear view mirror.
Must have a think
The bulge is to be added to the present mould so yes I might give it a go, nowt to lose now after all
I found that with "double bubble" moulding like this that you need to be very lucky to get a secondary bulge laid in so it has definition around itself, this is where a vaccuum really would help by squeezing the air from around the lower extremities
With the roof section of the Typhoon canopy I think there's enough time to help it with at judicious thumbnail tracing the extremity round and pushing the acetate into the corners. because it is a small addition to the mould
We will see, maybe tomorrow
I told you I'd scratchbuilt the Shorts C23A Sherpa, years ago, this is how I moulded the undercarriage sponsons, worked very nicely from moulds carved from fine grain pine.
I hope to find a rogue photo somewhere, I wish I'd hung on to it
Oooops
Another good question
but
I have one that works for the basic Typhoon configuration.
I suppose I could "pull" another one, they are very easy to do, and oven that one
Does acetate shrink in the oven I wonder?
Tomorrow I plan to respray the underside then mask to cover the Ocean Grey upper surfaces
Soon be time to paint the stripes too, many of those in the actual wartime pictures look very "pukka", so proper straight lines are called for.
A few questions answered today
me: Mr Surfacer?
him: never heard of it squire
me: its a liquid filler you just paint on
him: I have another weird git who makes "statics" who comes in, I'll check it out and if it seems OK I'll get some in...
So
a roll of Tamiya masking tape and a Humbrol acrylics Sky (type S?)
And maybe a promise
Tonight the other questions answered were
Can you mould a double bubble into the Typhoon Canopy by adding a judicious amount of Milliput to the first strike mould and shaping carefully?
answer: yes
and
When you mould with this method do you need to accent the double bubble by thumbnailing the acetate around the "bump"?
answer: no, it filled in the extra space on its own
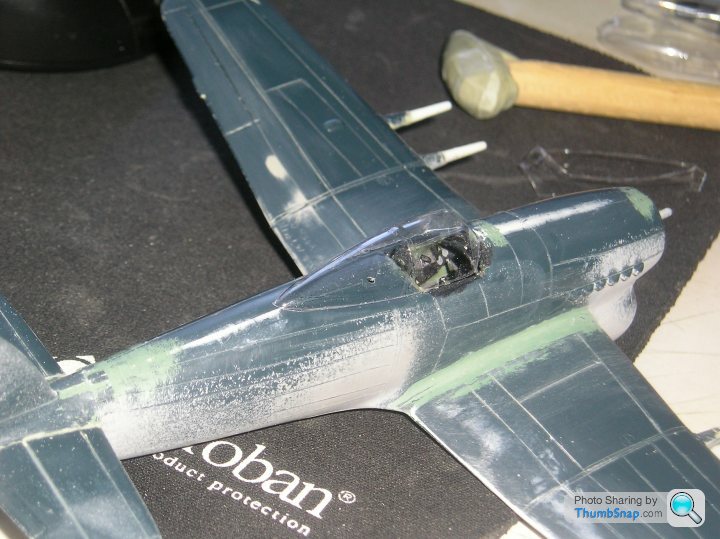
Seen added to the model over the masked off fuselage
and
I have begun making the Typhoon bomb carriers from left over Millput after making the bubble
Quite happy about this I usually make up far too much epoxy filler to use that on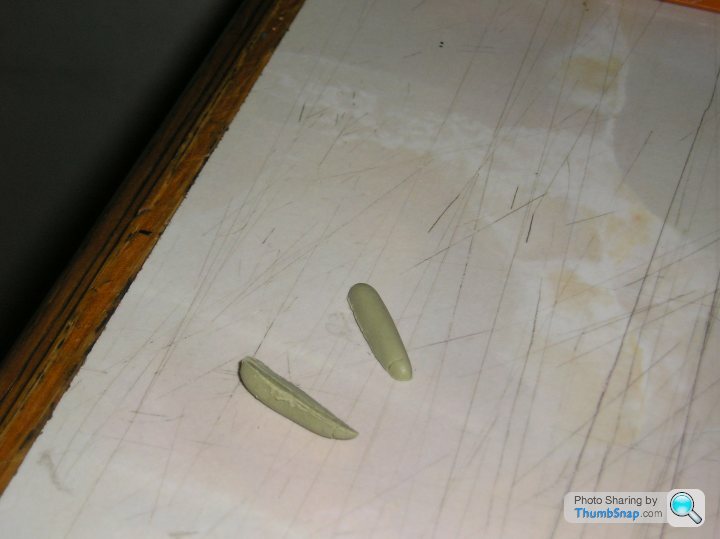
me: Mr Surfacer?
him: never heard of it squire
me: its a liquid filler you just paint on
him: I have another weird git who makes "statics" who comes in, I'll check it out and if it seems OK I'll get some in...
So
a roll of Tamiya masking tape and a Humbrol acrylics Sky (type S?)
And maybe a promise
Tonight the other questions answered were
Can you mould a double bubble into the Typhoon Canopy by adding a judicious amount of Milliput to the first strike mould and shaping carefully?
answer: yes
and
When you mould with this method do you need to accent the double bubble by thumbnailing the acetate around the "bump"?
answer: no, it filled in the extra space on its own
Seen added to the model over the masked off fuselage
and
I have begun making the Typhoon bomb carriers from left over Millput after making the bubble
Quite happy about this I usually make up far too much epoxy filler to use that on
A question requesting info AND opinions
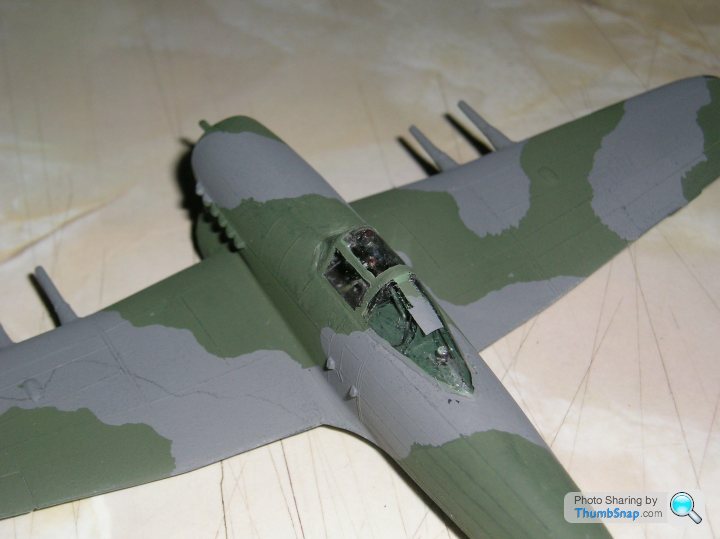
This model I found on t'internet
basically the version I'm into
I find it hard to believe Cockpit Grey Green on upper surfaces exposed to view under the canopy, but can't find much definitive wartime info except
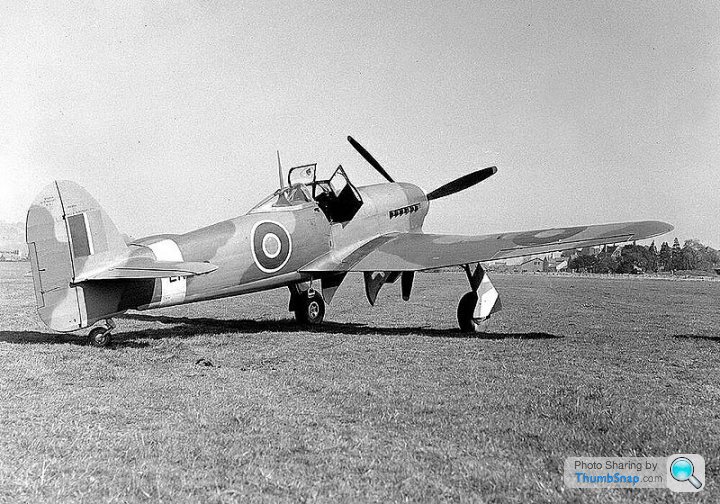
Which shows an apparent camouflage demarcation under the rear of the car door hood rear section and also has a different paint pattern on the outer framing, suggesting it has been swapped from another machine
I would love a concensus here, I'm just making the interior mirror at the mo' so it will be "paint the upper surface" time soon and I am planning to fit then spray with the hood in place
This model I found on t'internet
basically the version I'm into
I find it hard to believe Cockpit Grey Green on upper surfaces exposed to view under the canopy, but can't find much definitive wartime info except
Which shows an apparent camouflage demarcation under the rear of the car door hood rear section and also has a different paint pattern on the outer framing, suggesting it has been swapped from another machine
I would love a concensus here, I'm just making the interior mirror at the mo' so it will be "paint the upper surface" time soon and I am planning to fit then spray with the hood in place
I get you.
So if I assume the rear canopy section came off at some time it's feasible that the rear fuselage area section was painted in full camo at an MU somewhere.
I'd believe black more than Grey Green myself, it would be a pale "here I am" for any fighter opposition.
Suppose I'd better delve deeper
Cheers
Yes it does look as if he knows a bit or two...
I think, as I have to build the seat back brace and other ironmongery I will do it the same manner. Cockpit grey/greenpaint? I think I have a couple to choose from to finish it all off with...
ta
edit 'cos it made no sense
as usual
I think, as I have to build the seat back brace and other ironmongery I will do it the same manner. Cockpit grey/greenpaint? I think I have a couple to choose from to finish it all off with...
ta
edit 'cos it made no sense
as usual
Edited by perdu on Sunday 13th March 01:41
A bit more this weekend
Made and drilled and polished the wingtip lamps (clear poly drilled inside, colour dropped in and glued, sanded and polished on the wingtips.
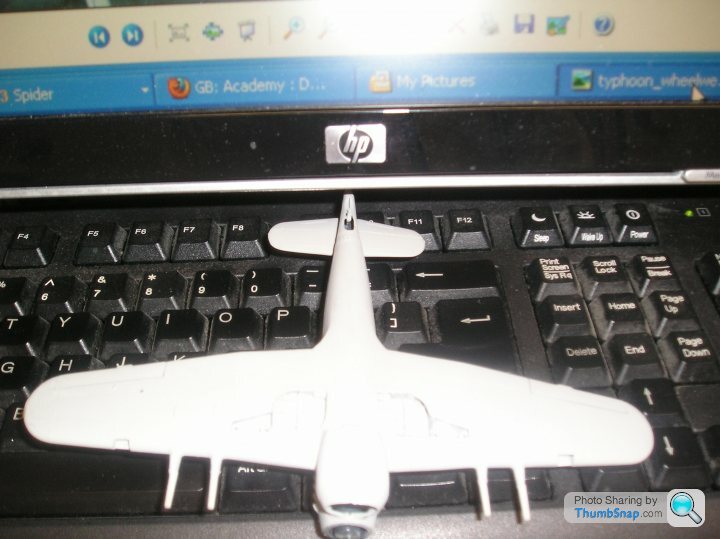
Need to repaint the tips in Sea Grey Medium now but I have managed to spray thirty (plus) year old Humbrol Authentics Ocean Grey overall and it looks like good coverage to me.
Just the basic RAF Dark Green HB1 to add using a lifted mask on the upper surfaces, probably using Blutak as recently demonstrated here. I haven't used Blutak myself and as it looks a useful technique and this, trying out new ideas, is what I'm doing I'll give it a go.
Made and drilled and polished the wingtip lamps (clear poly drilled inside, colour dropped in and glued, sanded and polished on the wingtips.
Need to repaint the tips in Sea Grey Medium now but I have managed to spray thirty (plus) year old Humbrol Authentics Ocean Grey overall and it looks like good coverage to me.
Just the basic RAF Dark Green HB1 to add using a lifted mask on the upper surfaces, probably using Blutak as recently demonstrated here. I haven't used Blutak myself and as it looks a useful technique and this, trying out new ideas, is what I'm doing I'll give it a go.
Well I ended up not using blutak
I masked off with Maskol instead
In 1/72 I'm never certain how much feathering a spray finish should have so for this build I have done "none"
Later efforts will try out other methods
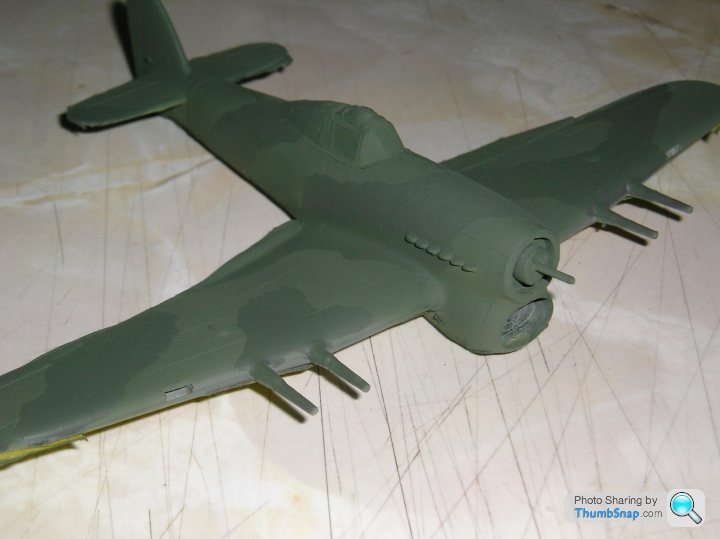
Here I have sprayed the Dark Green over the masking fluid
And here is the unmasked paintjob, rough and requiring detailing to trim edges and curves
Now it is time to detail the rest of the model, here are the new landing lights added to the wing leading edge. Silver foil from pain killer caplets was used as the reflector on a drilled out piece of 5/64" plastic rod so the concave lens effect is made.
I masked off with Maskol instead
In 1/72 I'm never certain how much feathering a spray finish should have so for this build I have done "none"
Later efforts will try out other methods
Here I have sprayed the Dark Green over the masking fluid
And here is the unmasked paintjob, rough and requiring detailing to trim edges and curves
Now it is time to detail the rest of the model, here are the new landing lights added to the wing leading edge. Silver foil from pain killer caplets was used as the reflector on a drilled out piece of 5/64" plastic rod so the concave lens effect is made.
I'd forgotten the ragged edge effect with Maskol
We live, learn and remember as we go
I'm quite happy with the detailing I've done, the mirror in the dome (good info, Kleer used as an adhesive for canopies instead of PVA which is an unreliable "clearer upper")
The tip lamps and the landing lamps and wheel well interior, seem good and altogether a nice feel to it now, certainly more "flyable" now.
Choose a plane and finish it up now
How tidy should I go?
Or with weathering, should one go THIS far?
Must be quite a tale to this one...
Pity it is a short cannon version, or I just might
Mostly been a slow week, but some progress to show
I made a pair of bomb ejector racks for the Typhoon, had to carve thick polystyrene sheet as there were no suitable candidates in the spares box (I have a shoe box that had Totectors working shoes in it about twenty five years ago, absolutely chokka with "things under wings". Bombs, missiles, fuel tanks and even floatplane floats.
To think I almost bunged that on eBay once when I was selling some of my old cache... Phew I'm glad I kept it now, found the basis for my 500 pounders in there. Only two though, good job the Tiffie only flew with a pair at at a time.
This is the beginning of making the ejector racks, carving laminated plasticard to suit the underwing profile here
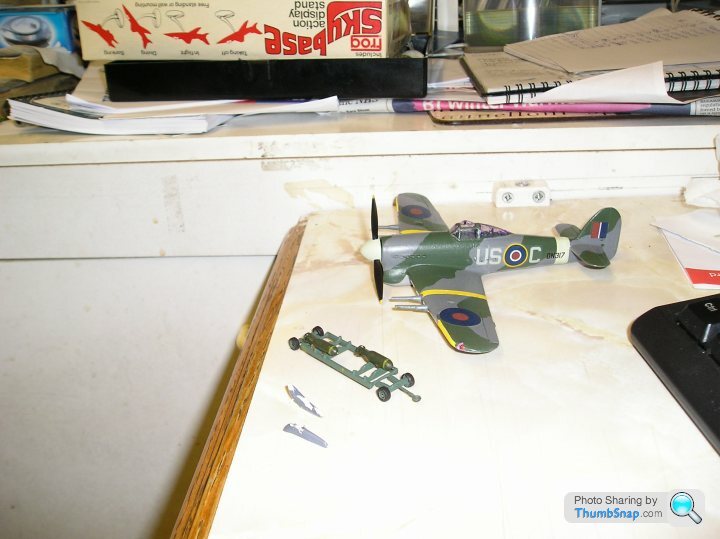
Here is this evening's offering. The finished (OK almost) ejector racks sit in front of an Airfix Short Stirling kit's bomb trolley which bears the pair of 500 lb'ers ready to load. This won't be appearing with the Typhoon on a display (I haven't got one ready yet anyway) but provides a nice period feel to the task.
Behind US*C sits part finished still in its Klear "skin" awaiting detailing and then matting down and weathering.
The transfers/decals (whatever) are probably fifty years old, I was amazed that they still worked and as was usual with Frog, had a very good representation of the proper wartime reds and blues.
The model is awaiting its cannon's rear fairings being painted yellow to match the recognition stripes and oviously will be getting its undercart and wheel well covers too. I have even found a pair of retraction jacks that should fit the inner doors, good stuff in that spares box!
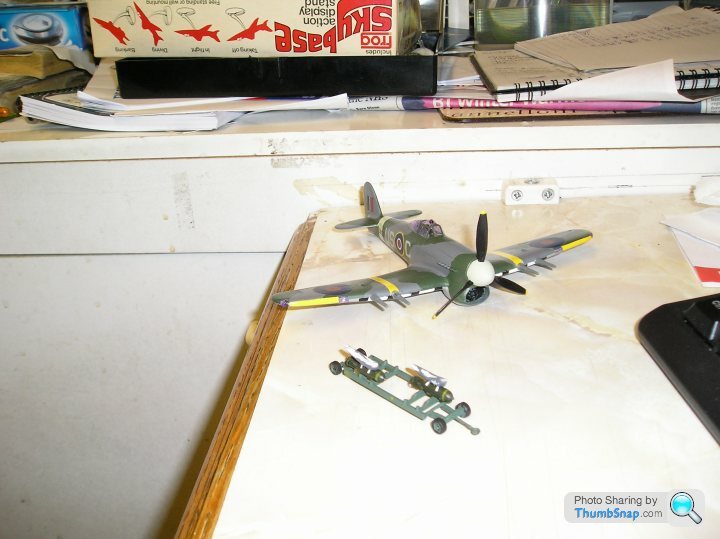
Still much to do detailing wise, exhausts to pick out and such. I am really pleased how the rear view mirror shows up in its personal extra dome on the canopy roof.
The ejector racks have been perched on the bombs for effect, when they are ready they will have steady feet added after the bombs are glued in to their spots, quite a lot to do there really if it's to look right.
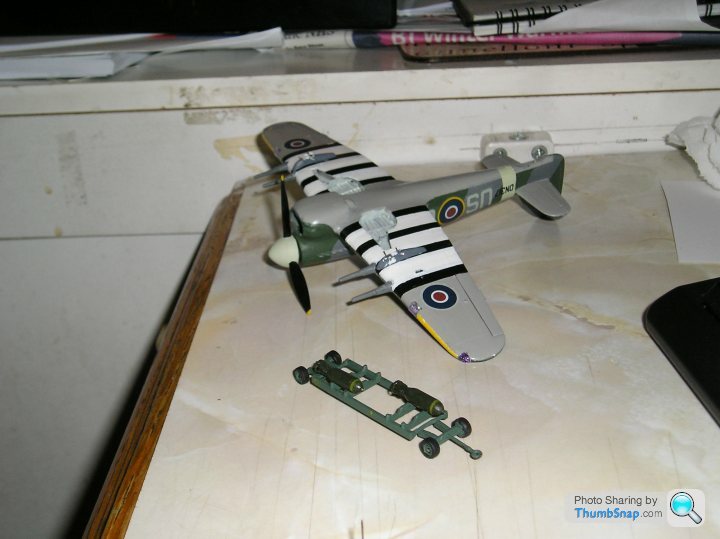
The ejectors here posed on the wings to check the fit, minor scraping to do but I am happy with them, going to look good I hope
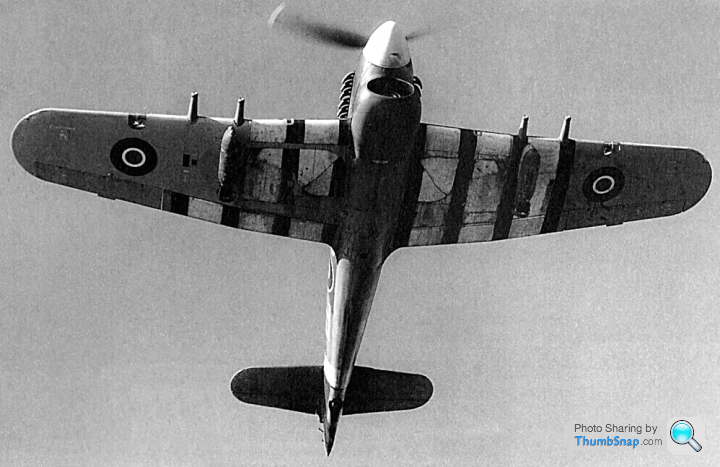
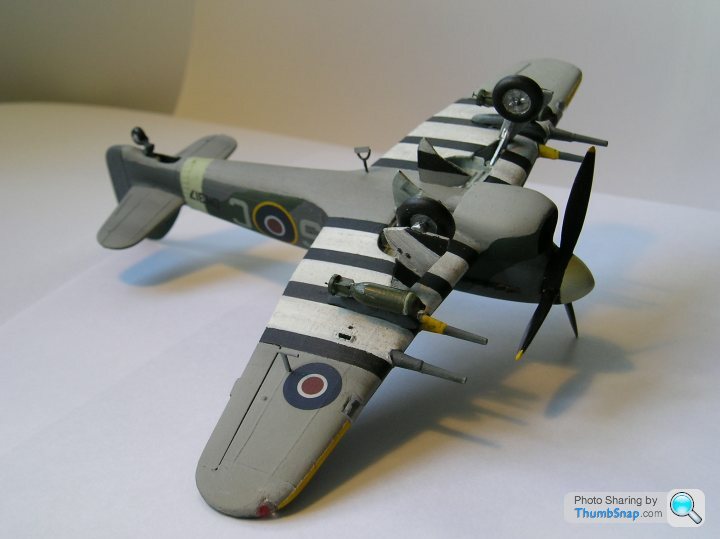
The underwing stripes...
Not D-Day invasion stripes, Typhoons were flying thoughout 1943 with these identification markings.
At times and from certain angles they had a "look of a FW190" about them and were being targetted by our own anti-aircraft batteries so the recognition markings were added to them to reduce the occurences. The upper wing yellow stripes were to serve the same purpose as protection from our own friendly fighters because of the "190 factor" too.
Well I did say I wouldn't be taking the same time scale as the GB, good job I stayed away
I made a pair of bomb ejector racks for the Typhoon, had to carve thick polystyrene sheet as there were no suitable candidates in the spares box (I have a shoe box that had Totectors working shoes in it about twenty five years ago, absolutely chokka with "things under wings". Bombs, missiles, fuel tanks and even floatplane floats.
To think I almost bunged that on eBay once when I was selling some of my old cache... Phew I'm glad I kept it now, found the basis for my 500 pounders in there. Only two though, good job the Tiffie only flew with a pair at at a time.
This is the beginning of making the ejector racks, carving laminated plasticard to suit the underwing profile here
Here is this evening's offering. The finished (OK almost) ejector racks sit in front of an Airfix Short Stirling kit's bomb trolley which bears the pair of 500 lb'ers ready to load. This won't be appearing with the Typhoon on a display (I haven't got one ready yet anyway) but provides a nice period feel to the task.
Behind US*C sits part finished still in its Klear "skin" awaiting detailing and then matting down and weathering.
The transfers/decals (whatever) are probably fifty years old, I was amazed that they still worked and as was usual with Frog, had a very good representation of the proper wartime reds and blues.
The model is awaiting its cannon's rear fairings being painted yellow to match the recognition stripes and oviously will be getting its undercart and wheel well covers too. I have even found a pair of retraction jacks that should fit the inner doors, good stuff in that spares box!
Still much to do detailing wise, exhausts to pick out and such. I am really pleased how the rear view mirror shows up in its personal extra dome on the canopy roof.
The ejector racks have been perched on the bombs for effect, when they are ready they will have steady feet added after the bombs are glued in to their spots, quite a lot to do there really if it's to look right.
The ejectors here posed on the wings to check the fit, minor scraping to do but I am happy with them, going to look good I hope
The underwing stripes...
Not D-Day invasion stripes, Typhoons were flying thoughout 1943 with these identification markings.
At times and from certain angles they had a "look of a FW190" about them and were being targetted by our own anti-aircraft batteries so the recognition markings were added to them to reduce the occurences. The upper wing yellow stripes were to serve the same purpose as protection from our own friendly fighters because of the "190 factor" too.
Well I did say I wouldn't be taking the same time scale as the GB, good job I stayed away
Gokartmozart said:
A lot of nice work there.
Do you have ground crew to go with the bomb carriage.
I'm glad you like it Do you have ground crew to go with the bomb carriage.
No there will be no crew with the model at all, probably not the bomb trolley either this time around
All the figures and associated equipment I had accumulated over the years has all gone now after a clear out about thirty years ago
I expect many of you will have hoped that one day...
Well it's arived
finished (OK I do have to re attach the prop and dab some paint inside the air intake on one side, but)
Bombphoon US*C
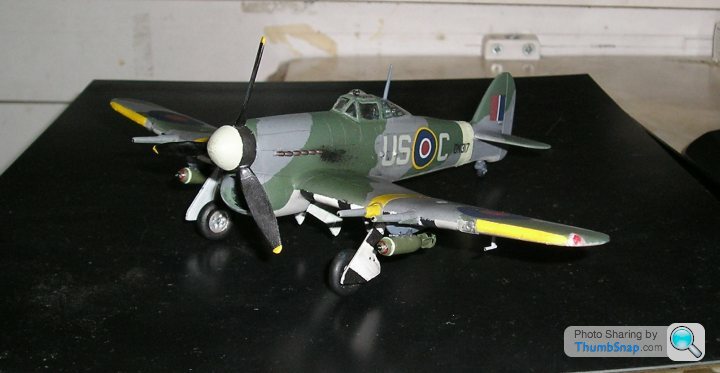
matt varnish went on like a dream (cheers doc) and final dusting of grime top and bottom then wheels and other bits and bobs
I'm not that happy with one bomb, low on its rack, maybe later next year. and the prop doesn't "sit" right, that will be sorted before bed tonight
Step made and fitted, retraction jacks for the inner wheel well covers and aerial fitted into canopy
That is it
First model for a long time
And not after all as neat a job as I'd hoped
Sorry to have been going on about it too, much too much information I think, count it as exuberance this time please.
I won't be making so much fuss in future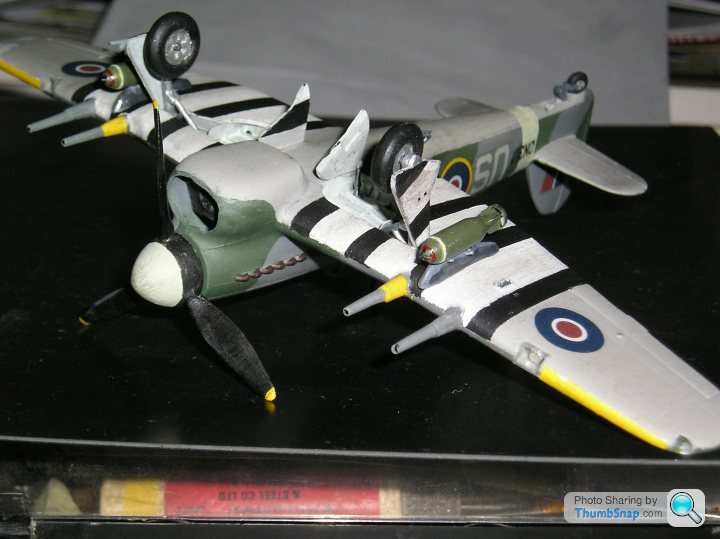
Well it's arived
finished (OK I do have to re attach the prop and dab some paint inside the air intake on one side, but)
Bombphoon US*C
matt varnish went on like a dream (cheers doc) and final dusting of grime top and bottom then wheels and other bits and bobs
I'm not that happy with one bomb, low on its rack, maybe later next year.
and the prop doesn't "sit" right, that will be sorted before bed tonightStep made and fitted, retraction jacks for the inner wheel well covers and aerial fitted into canopy
That is it
First model for a long time
And not after all as neat a job as I'd hoped
Sorry to have been going on about it too, much too much information I think, count it as exuberance this time please.
I won't be making so much fuss in future
Red Firecracker said:
The camera has a habit of being very cruel, Perdu, but saying that I can't see anything there to be upset about. Lovely model.
thank youappreciated very much
I have seen my bloomin camera get very "nasty"

I enjoyed it but after a while I saw I'd been too ambitious with the aims for a "first in years" jobby
Next one will be more fun I hope
Thanks dr_gn
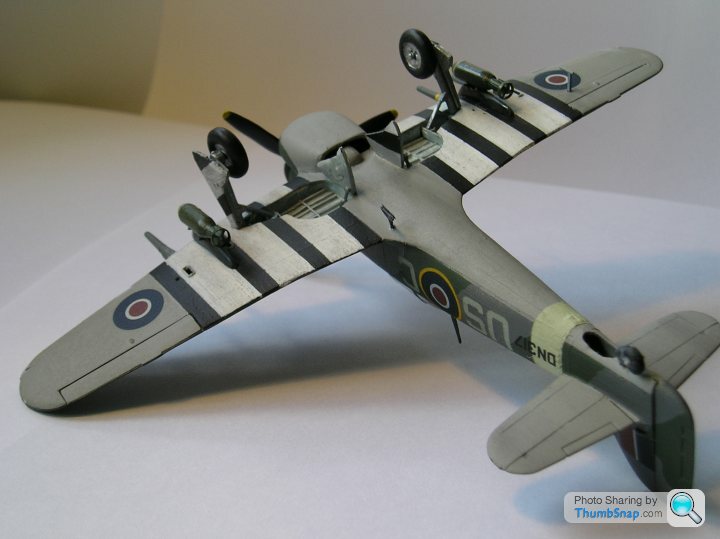
here's one of todays pictues
The weathering fades away under flash but shows a bit better in daylight
I agree about the masking, I thought I'd use maskol as you know, but never again for main masking
I used it on the canopy

Much of the B&W stripe marking was left deliberately rough to show the condition Typhoons got into in service, especially when harrying armour but also much of mine has become over worked
As I say, early days for me. Hopefully I will improve before the eyes go completely
I am not too happy yet with the Tamiya tape, seems to allow seepage more than ordinary masking tape but has a far better "cut'n'trim" ability. But that is a tool idiosynchracy I need to master. Cannot blame the tape for it.
edit cos an idiot put the wrong picture in and misspolled a word or two
here's one of todays pictues
The weathering fades away under flash but shows a bit better in daylight
I agree about the masking, I thought I'd use maskol as you know, but never again for main masking
I used it on the canopy
Much of the B&W stripe marking was left deliberately rough to show the condition Typhoons got into in service, especially when harrying armour but also much of mine has become over worked
As I say, early days for me. Hopefully I will improve before the eyes go completely
I am not too happy yet with the Tamiya tape, seems to allow seepage more than ordinary masking tape but has a far better "cut'n'trim" ability. But that is a tool idiosynchracy I need to master. Cannot blame the tape for it.
edit cos an idiot put the wrong picture in and misspolled a word or two
Edited by perdu on Sunday 3rd April 21:54
Shar2 said:
She's come out really well. A lot of work though to get her into such a presentable state.
ThanksTo be honest I enjoyed the effort of getting it "all right" far more than I ought to have
Must be my strong streak of pedant finding an outing
Still much more I would/should have done to the basic kit to make it exactly what I wanted, including slimming down the trailing edges even more. Still too "expletive" thick at the edges
Gassing Station | Scale Models | Top of Page | What's New | My Stuff