1:250 Scale Paper Model: Multi-Purpose Vessel "Mellum"
Discussion


Turn7 said:
I reckopon you must have the patience of a saint.
That was me, the little bits would get stick to my fingers and anyhting else, then destryoyed getting them off...etc etc
It's more frustrating when things don't stick together...But overall once you get the hang of it it's not too bad.That was me, the little bits would get stick to my fingers and anyhting else, then destryoyed getting them off...etc etc
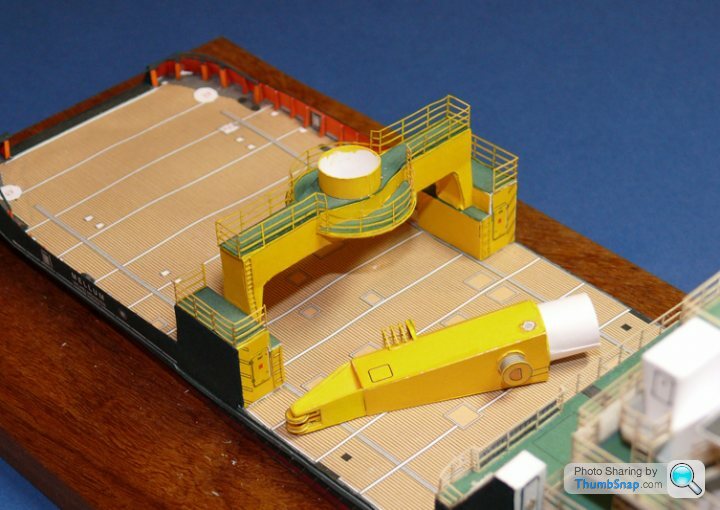
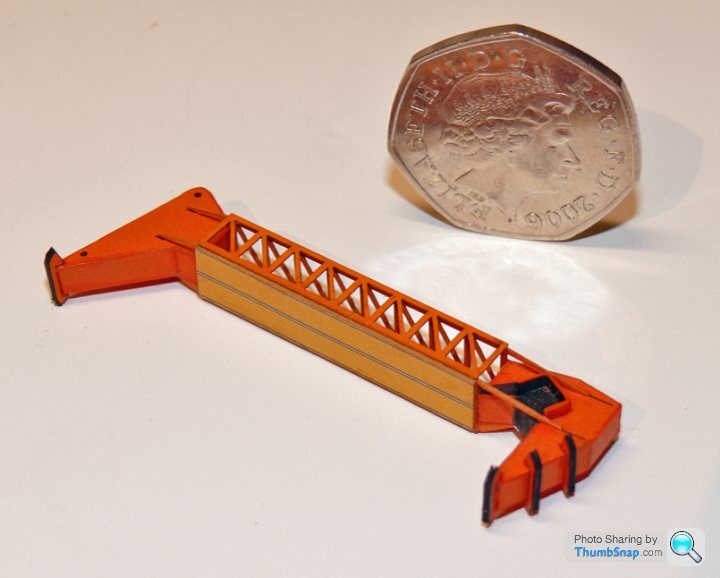

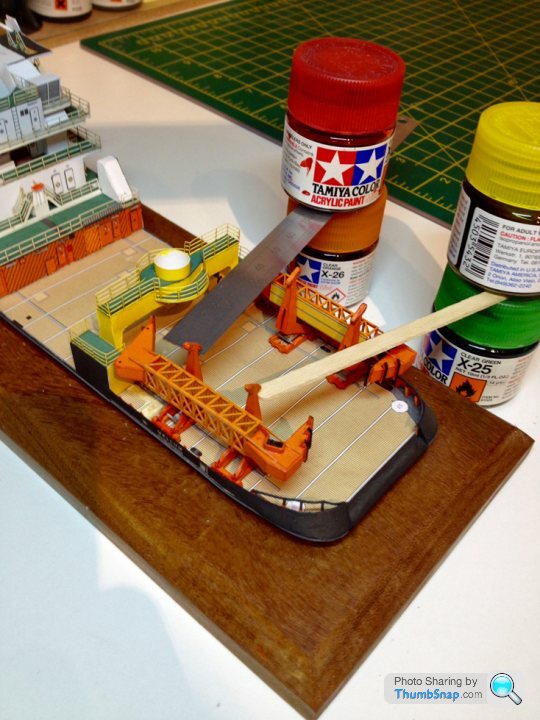
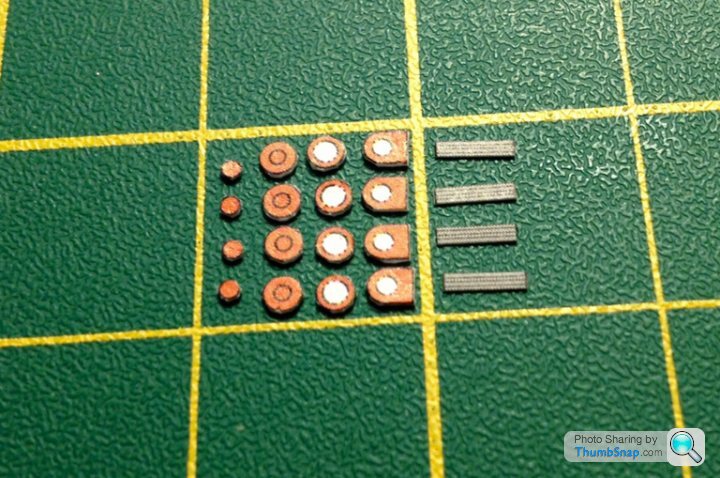
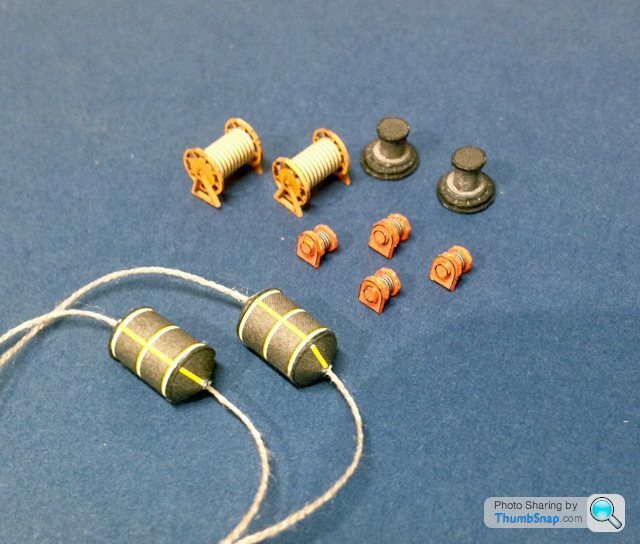
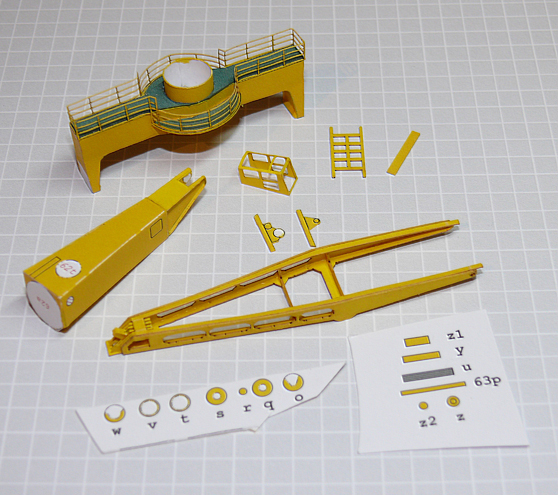
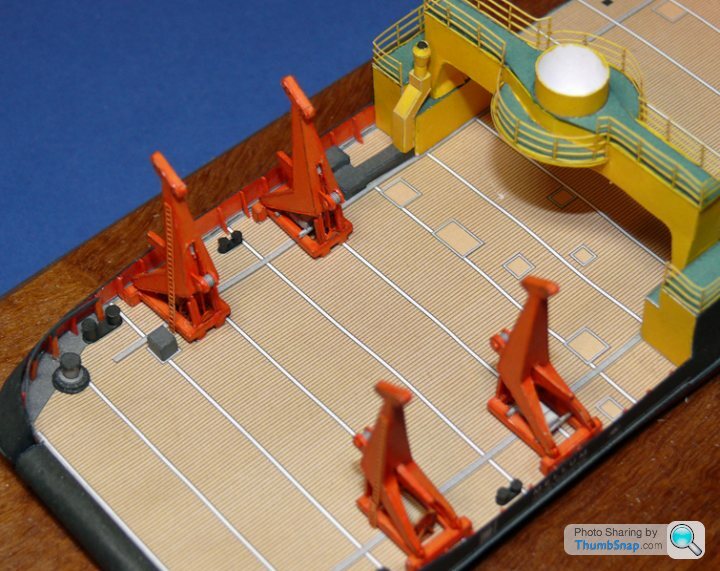
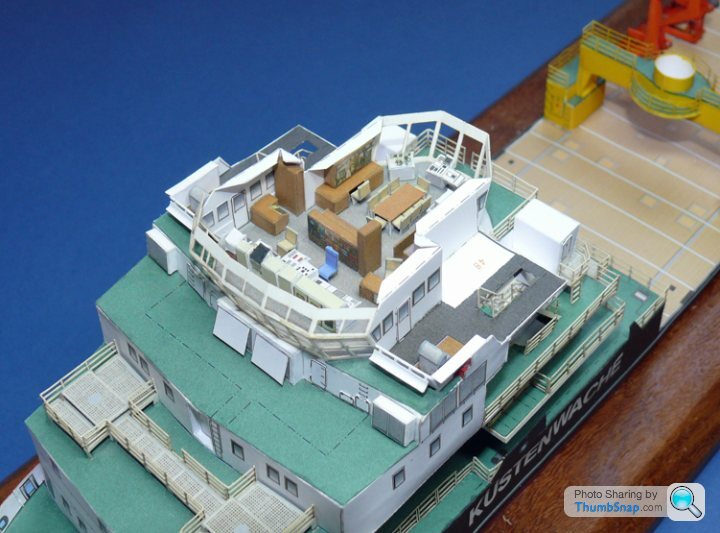
Boom derricks are now fitted with their hydraulic actuators, winch drums and ladders, plus some bollards and capstans installed on the rear deck. Also the chinmey and ducting adjacent to the port side crane gantry pillar.
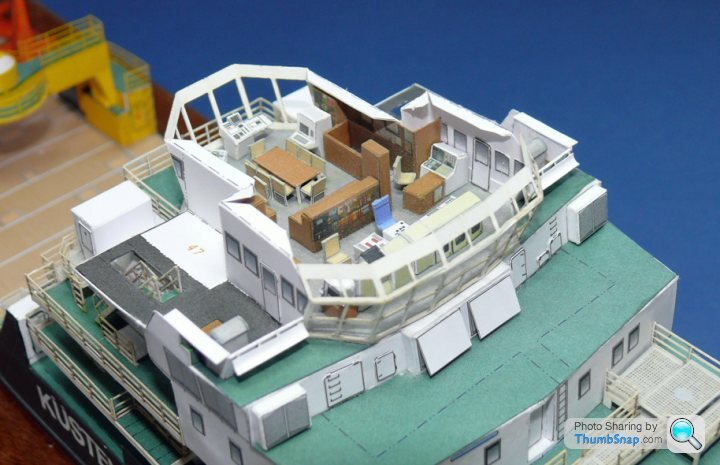
I'd been putting off the last major structural assembly: The bridge "greenhouse", which is laser-cut card. As expected it was a complete pain in the arse to fit, in terms of it only fitted where it touched (not many places):
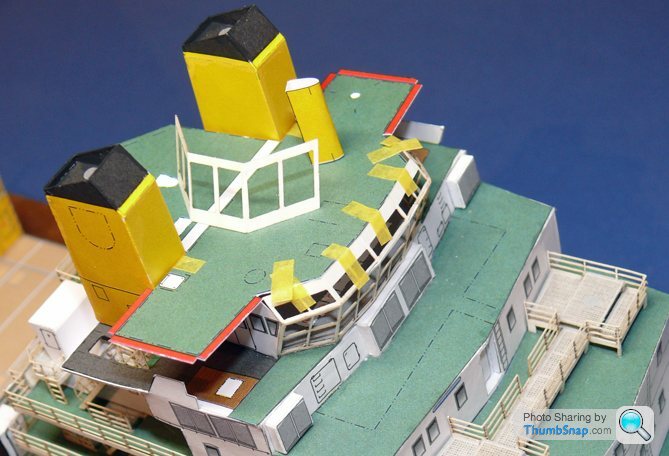
With a lot of cutting, bending and "it'll do"-ing I'm at the stage where with a bit more creasing and filling, plus some additional parts fitted around it, it will hopefully not look too bad. Still got the rear frameork to fit (which looked like it wouldn't be too tricky), the entire interior of the bridge, plus some acetate glazing, when I find something suitable.
I'd been putting off the last major structural assembly: The bridge "greenhouse", which is laser-cut card. As expected it was a complete pain in the arse to fit, in terms of it only fitted where it touched (not many places):
With a lot of cutting, bending and "it'll do"-ing I'm at the stage where with a bit more creasing and filling, plus some additional parts fitted around it, it will hopefully not look too bad. Still got the rear frameork to fit (which looked like it wouldn't be too tricky), the entire interior of the bridge, plus some acetate glazing, when I find something suitable.
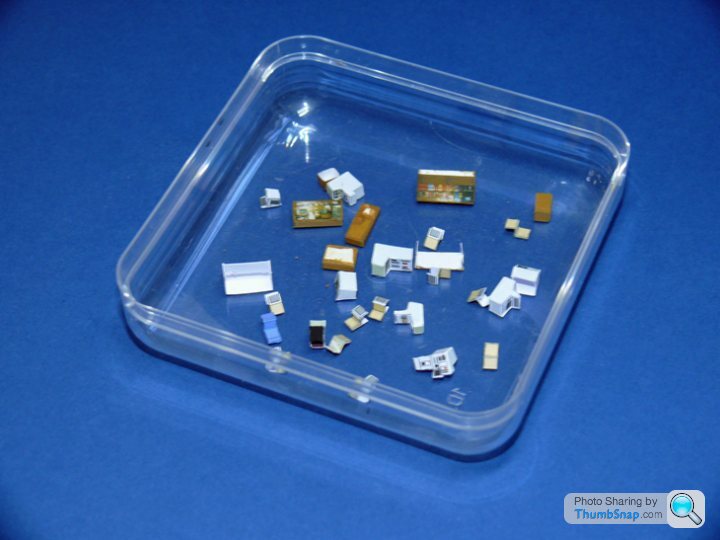
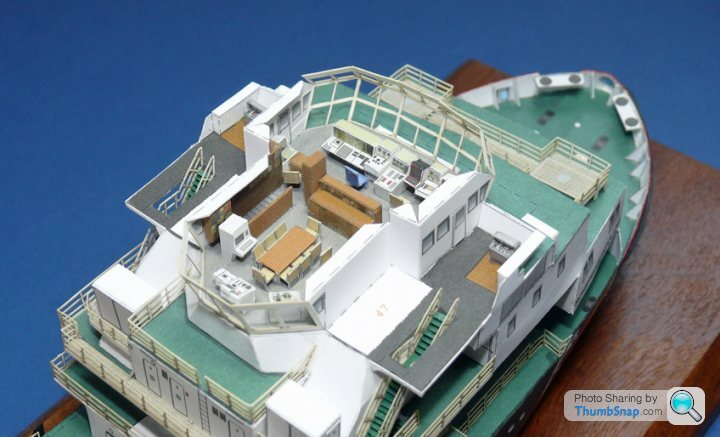
Interior parts assembled:
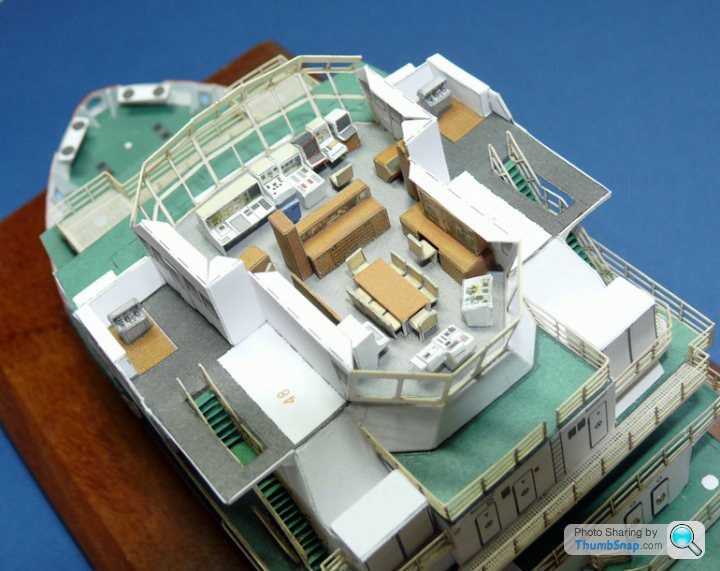
And fitted into and around the cabin, along with the bridge control consoles, water deflectors and navigation lights (which are inexplicably supposed to be assembled differently, even though they are symmetrical port-stbd). In the end I made-up some missing parts and shoved them together:
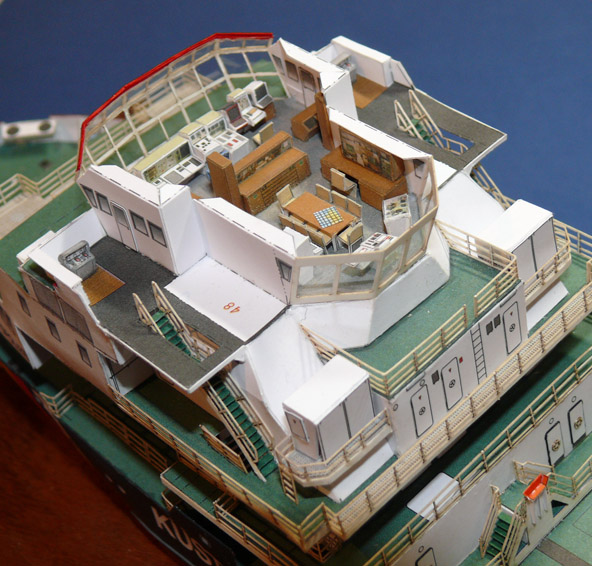
Now for the glazing and roof fitting - which will be a pain, but hopefully the last thing that can pose a major issue.
And fitted into and around the cabin, along with the bridge control consoles, water deflectors and navigation lights (which are inexplicably supposed to be assembled differently, even though they are symmetrical port-stbd). In the end I made-up some missing parts and shoved them together:
Now for the glazing and roof fitting - which will be a pain, but hopefully the last thing that can pose a major issue.
Fitted the glazing (scrap acetate from a chocolate fudge cake box). I had to cut 13 individual pieces to give me a bit of flexibility in the framework when fitting the roof. I wicked dilute PVA along the outside of all the frames, and it seems to have sealed any residual gaps, and dried pretty clear; the glazing doesn't show up very well in the photo, which I guess is a good sign. Also printed a navigation map of Helgoland and stuck it on the table:
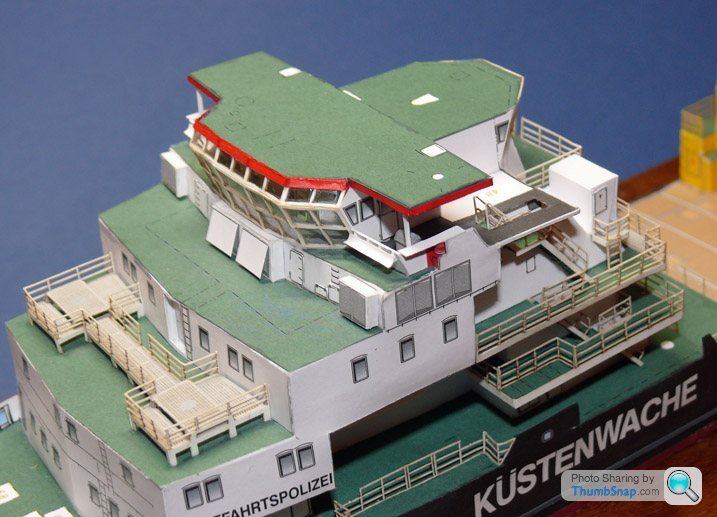
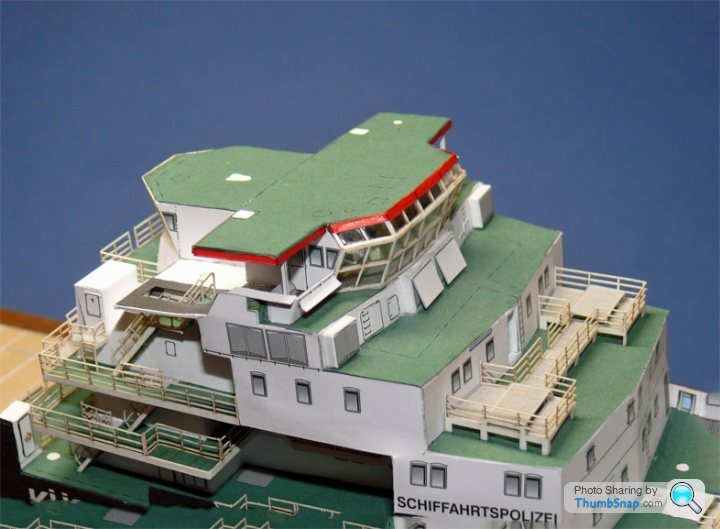
Obviously, the roof didn't fit, the white parts at the back needed adding, and have now been painted green, along with all the other white edges. Luckily there is an angled fairing around this top edge, which will cover the modification, although i guess the fairing itself will not fit...:

Now to fit it.
Obviously, the roof didn't fit, the white parts at the back needed adding, and have now been painted green, along with all the other white edges. Luckily there is an angled fairing around this top edge, which will cover the modification, although i guess the fairing itself will not fit...:
Now to fit it.

Gassing Station | Scale Models | Top of Page | What's New | My Stuff