My 1968 Olsen Nimbus restoration project.
Discussion


elster said:
mickrick said:
Actually... I am mad!
I think we all knew that with starting this project.Good luck with the house project. Just finished mine after 8 years. But I took my time (as I do) and did it as funds and time allowed, no borrowing from the pesky banks.
It was quite a project, 2 small houses into one, and I ended up doing what I did with this little boat. Taking it back to the bare shell.
It was also an awkward one, as there's not a square room in the place... It's shaped like half a cheese.
Anyway back to boats, you could always try and persuade your good lady onto a live aboard...

I'll leave the antifouling colour decision until the day, just wondered if it would look a bit daft with a pale blue hull against a red bum! The colour apps are a big help. Thanks Fish

You make some very valid points there John. Thanks for the tips
I´ll definitely be going for the soft stuff, as it doesn't need sanding after lifting, and doesn't build up like the hard stuff.
I like to get over the side and give her a rub as you say. Financed my Europa 1994/95 round the world rally that way. Scrubbing bottoms and fixing broken bits on other peoples boats
Did a bit more the last couple of days.
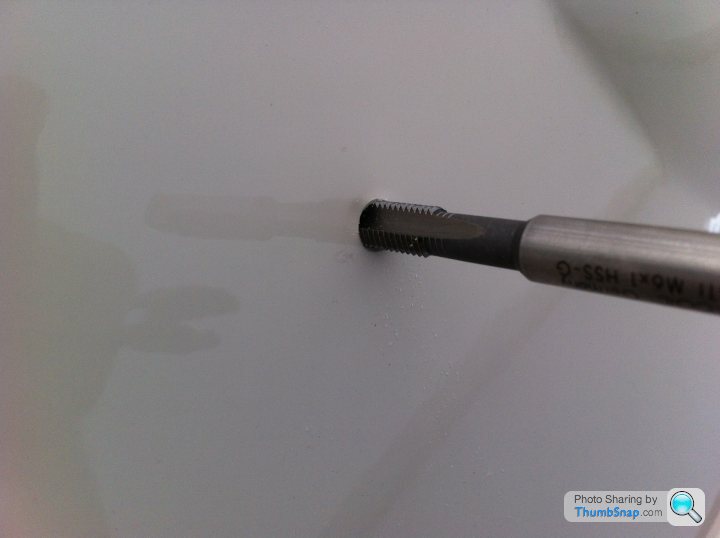
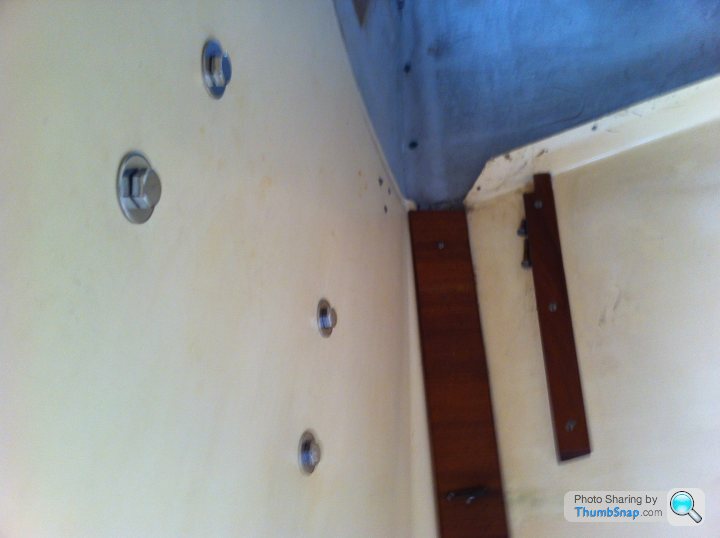
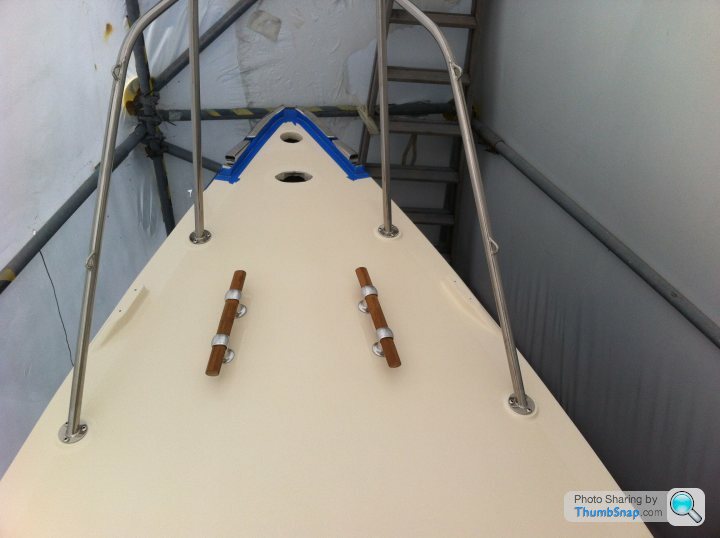
I fitted the station/guardrail bases. They were originally screwed on with machine screws tapped into the glassfiber. I didn't like the look of it, so I decided to use Helicoil inserts. I also went for metric screws instead of the original imperial sizes.
I drilled out the old thread, and re-tapped for the insert.
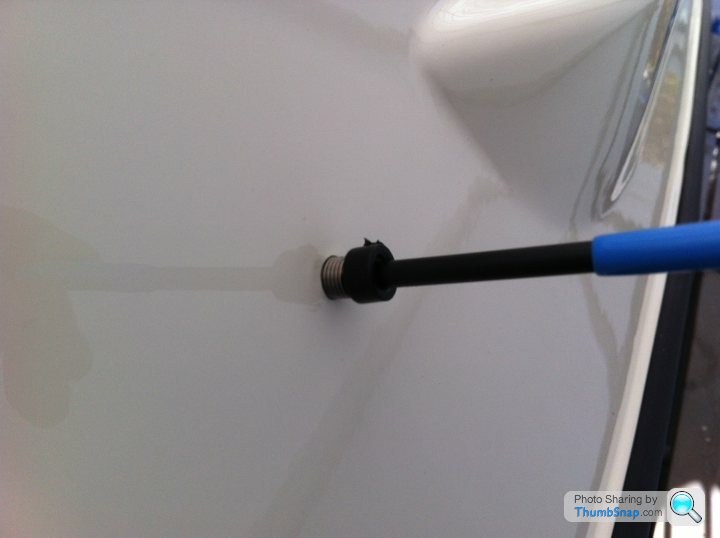
I then wet out the holes with West System epoxy resin.

In goes the insert.
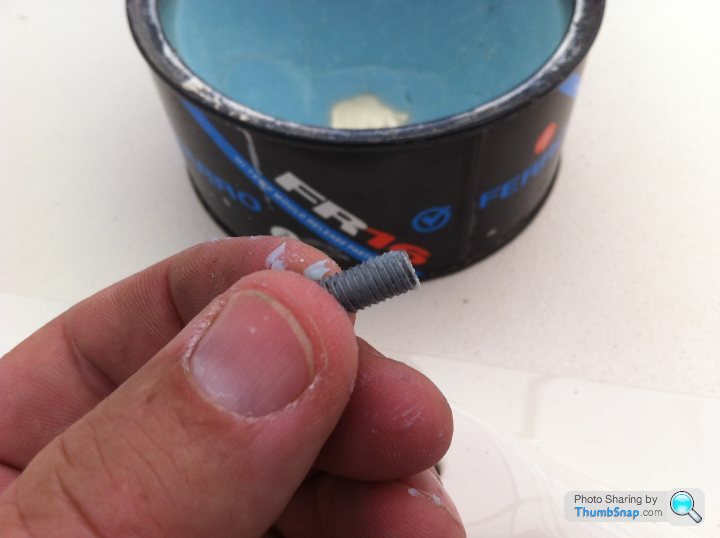
I did this to all 20 threads on 4 station bases. Than I coated the screws with mould release wax to stop the epoxy sticking to the screws. This would stop the epoxy getting into the insert threads.
I need to pass the heads of the screws over the buffing wheel, so they match the shininess of the station bases.
Here are the station bases, after being straightened out (as best as possible) and given a buff up.
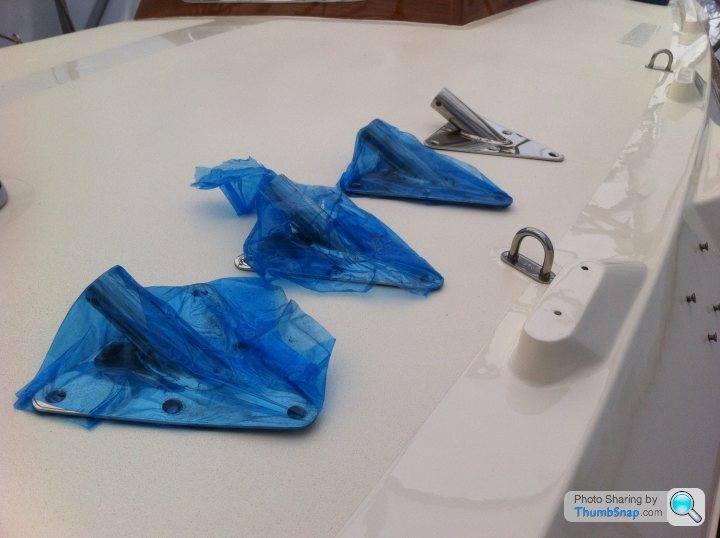
Then I realised I'd forgotten to clean off the old bedding compound!
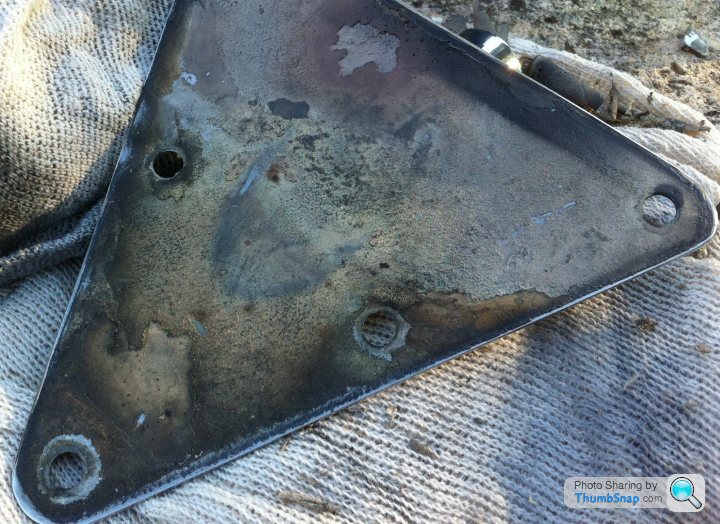
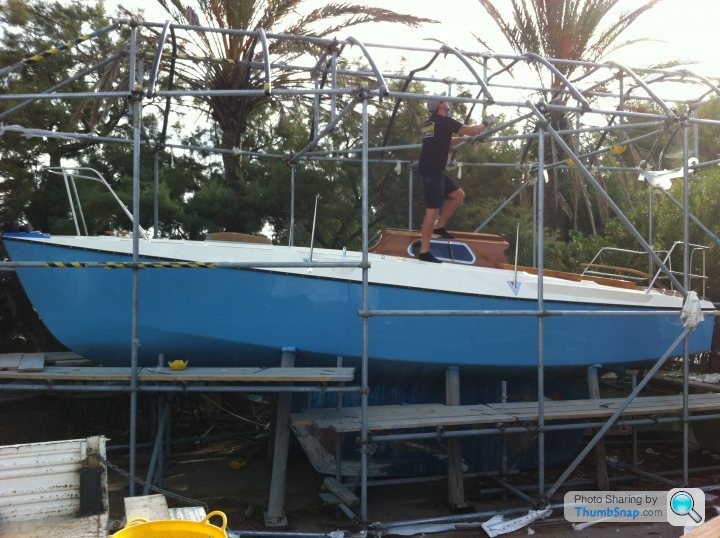
I left the epoxy to set for 24 hours before knocking out the thread insert drive tangs, and fitting the bases, and stations. The stations have also been fettled at the metal shop by my Argentinian welding maestro mate
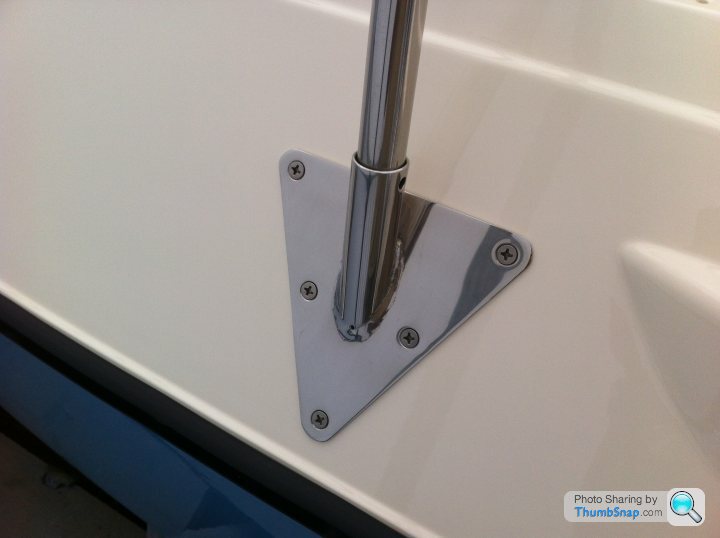
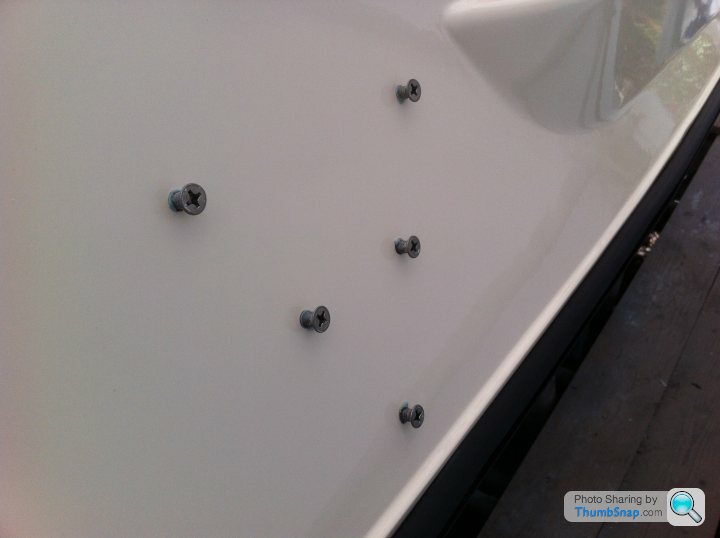
I also put the rest of the screws in the rubbing strake. I doubled up, halving the centres. I'm much happier with the way it sits now
More to come...
Thanks for looking.
M.
I fitted the station/guardrail bases. They were originally screwed on with machine screws tapped into the glassfiber. I didn't like the look of it, so I decided to use Helicoil inserts. I also went for metric screws instead of the original imperial sizes.
I drilled out the old thread, and re-tapped for the insert.
I then wet out the holes with West System epoxy resin.
In goes the insert.
I did this to all 20 threads on 4 station bases. Than I coated the screws with mould release wax to stop the epoxy sticking to the screws. This would stop the epoxy getting into the insert threads.
I need to pass the heads of the screws over the buffing wheel, so they match the shininess of the station bases.
Here are the station bases, after being straightened out (as best as possible) and given a buff up.
Then I realised I'd forgotten to clean off the old bedding compound!
I left the epoxy to set for 24 hours before knocking out the thread insert drive tangs, and fitting the bases, and stations. The stations have also been fettled at the metal shop by my Argentinian welding maestro mate
I also put the rest of the screws in the rubbing strake. I doubled up, halving the centres. I'm much happier with the way it sits now
More to come...
Thanks for looking.
M.
Edited by mickrick on Thursday 24th July 17:37
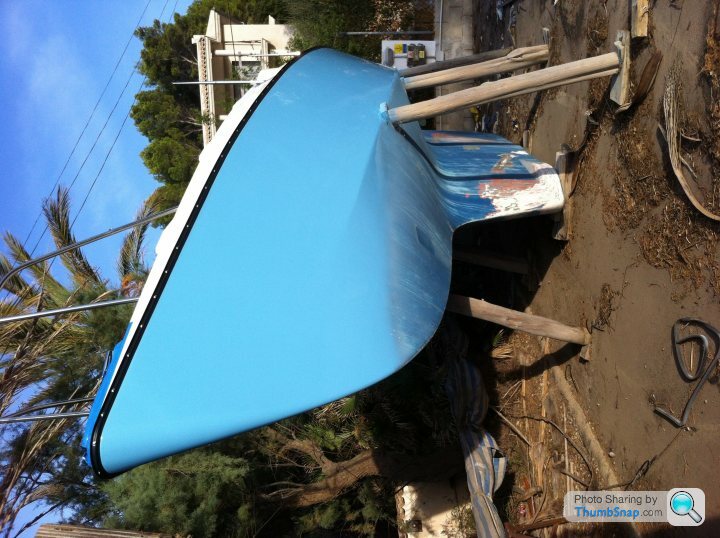
Never sailed her yet! Found her as in the first picture. Old Bukh DV10 in bits, some in the bilge, and the block wrapped in rope, sitting on bits of wood.
She still had personal stuff inside, which I boxed up and gave to the broker who promised to send it back. he didn´t, even though he asked me to box it up and give to him....
She may sail like a dog!.... We´ll see
She still had personal stuff inside, which I boxed up and gave to the broker who promised to send it back. he didn´t, even though he asked me to box it up and give to him....
She may sail like a dog!.... We´ll see


 Lovely! Definitely going for the red anti fouling when the time comes
  Oh dear! What have I started?
I have also dry fit the cleats. They had these nasty 1/2" iron bolts holding then on.
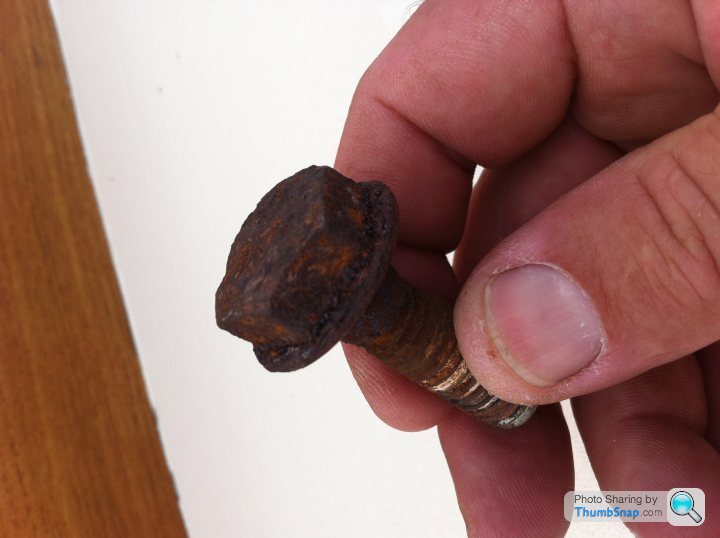
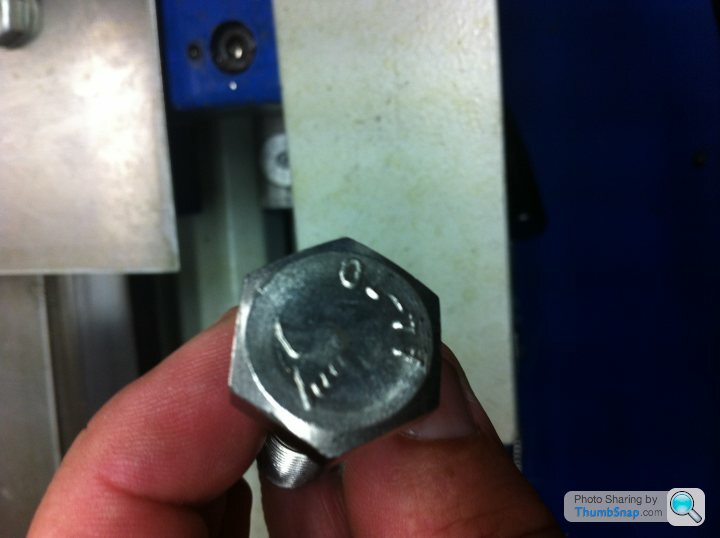
So I had the old threads drilled out of cleat bases and re-tapped to M14. The local tornero charged me 20€ to do all 8, so it wasn´t worth staying after work to do it as homework.
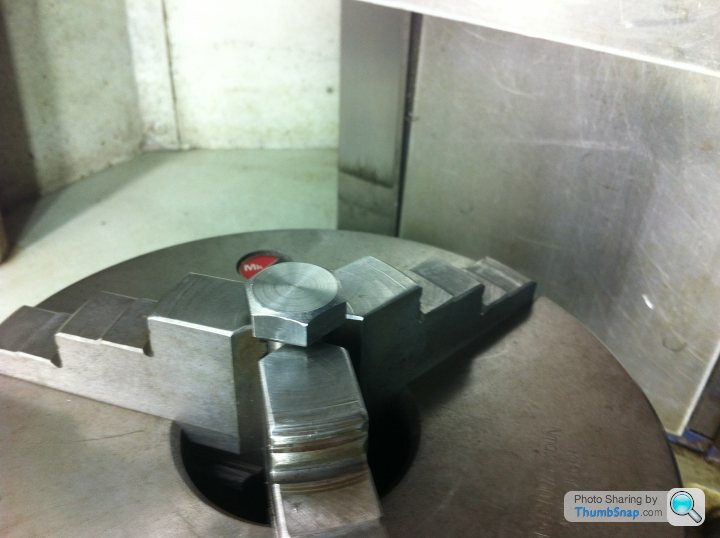
I purchased the new M14 bolts in stainless, but 4 of them are in the deckhead of the V berth, so I machined the heads in the lathe at work, then polished them on the buffing wheel, so they look a bit nicer inside the cabin.
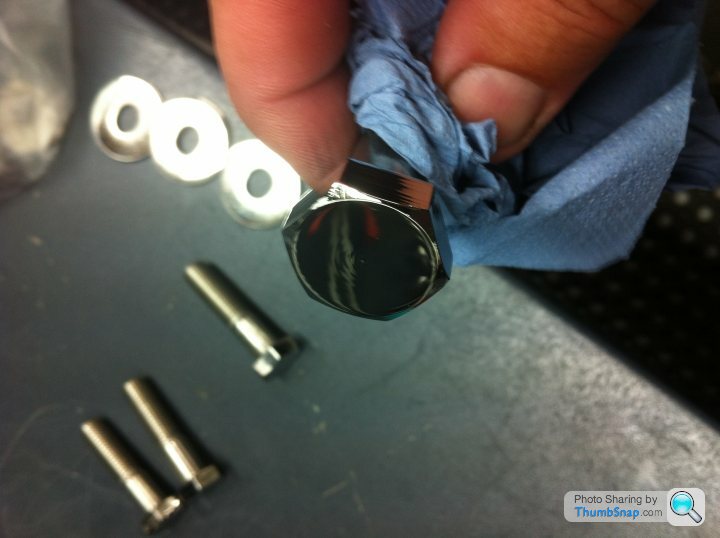
The teak is held in place by a boat screw driven up inside the cleat base.
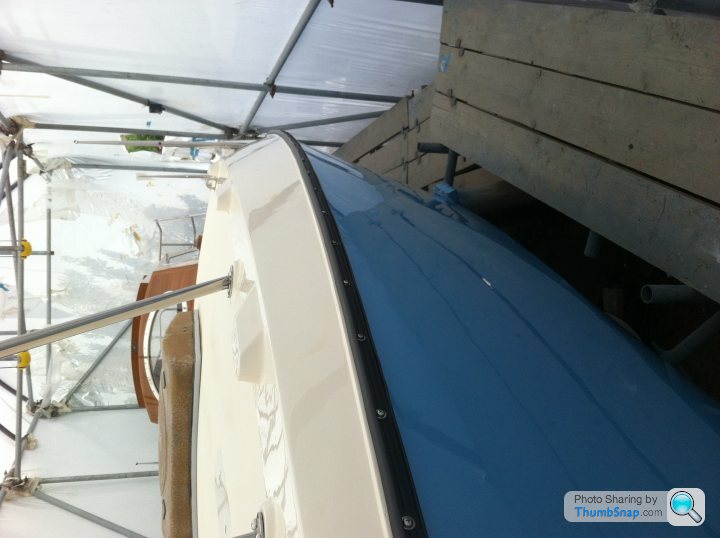
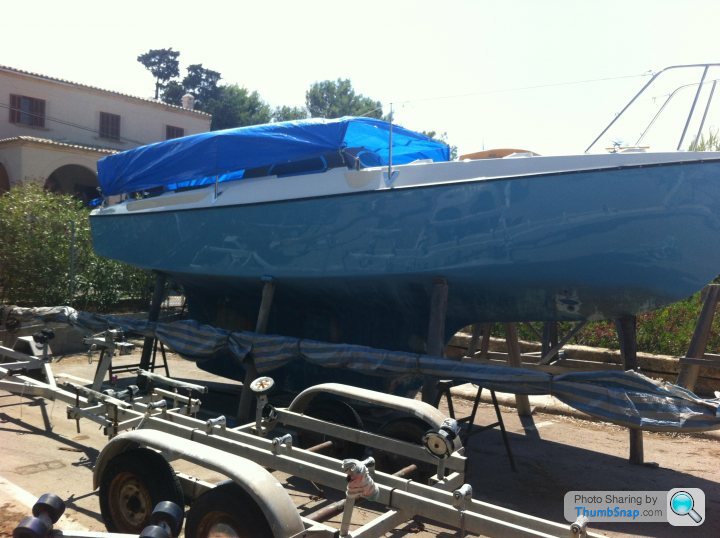
So now the tent has gone, and she's out in the sun for the first time in her new clothes
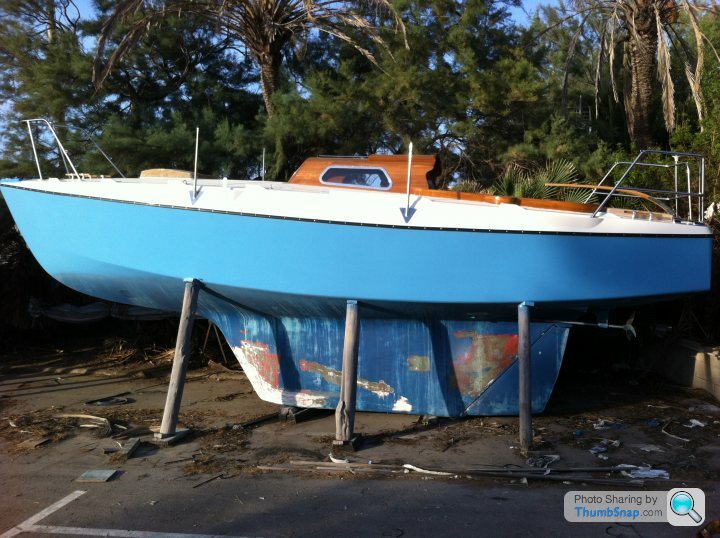
A big Thank You to Undercover Solutions for their patience. The smallest boat they have ever done
Thanks for looking in
Mick.
So I had the old threads drilled out of cleat bases and re-tapped to M14. The local tornero charged me 20€ to do all 8, so it wasn´t worth staying after work to do it as homework.
I purchased the new M14 bolts in stainless, but 4 of them are in the deckhead of the V berth, so I machined the heads in the lathe at work, then polished them on the buffing wheel, so they look a bit nicer inside the cabin.
The teak is held in place by a boat screw driven up inside the cleat base.
So now the tent has gone, and she's out in the sun for the first time in her new clothes
A big Thank You to Undercover Solutions for their patience. The smallest boat they have ever done
Thanks for looking in
Mick.
Edited by mickrick on Saturday 16th August 16:19
 I don't know about the best thread on PH, but thank you for the kind words. Glad you like it
Anyway... I´m on varnish again. I'm up to 9th coat of Epifanes PP on the coch roof grab rails, and 4th coat on the tiller and cockpit coaming. I think they'll take 12 coats and two coats of PU for UV protection.
Then it's time to get my friend Marko in to knock up some Sunbrella covers.
Shipwright Heiko is booked for mid September to install the teak toe rail.
She has a temporary sun hat in blue to compliment her new frock
I've had a couple of people pop over to chat while I've been tinkering. Yesterday one very observant fellow asked me if she was a Nimbus? "Well spotted" I said!
Apparently his parents had one when he was a boy. He said he drove past the yard, and spotted her, stopped, and backed up for a second look. Very unusual to see one in this part of the world he said. He also spotted the stainless fairleads and window trims, and commented that they weren't standard. He certainly knew his Nimbus's! His Pal has a very nice Bertram 32 opposite Svip.
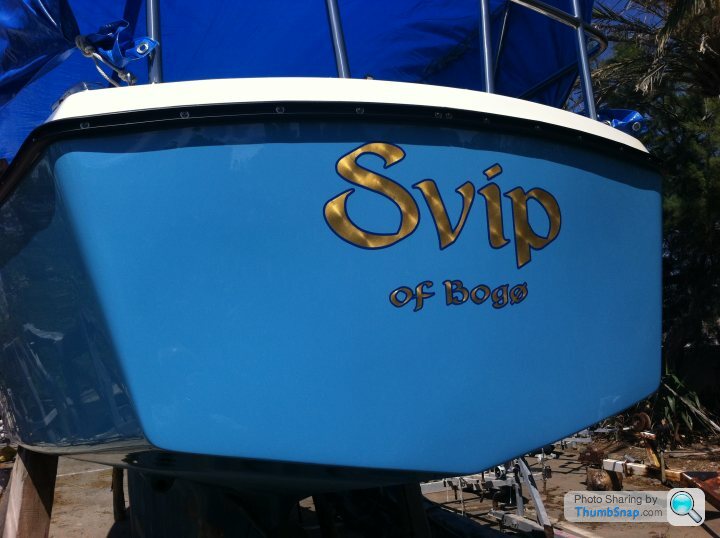
I think the gold leaf sparkles nicely in the sun
Then it's time to get my friend Marko in to knock up some Sunbrella covers.
Shipwright Heiko is booked for mid September to install the teak toe rail.
She has a temporary sun hat in blue to compliment her new frock
I've had a couple of people pop over to chat while I've been tinkering. Yesterday one very observant fellow asked me if she was a Nimbus? "Well spotted" I said!
Apparently his parents had one when he was a boy. He said he drove past the yard, and spotted her, stopped, and backed up for a second look. Very unusual to see one in this part of the world he said. He also spotted the stainless fairleads and window trims, and commented that they weren't standard. He certainly knew his Nimbus's! His Pal has a very nice Bertram 32 opposite Svip.
I think the gold leaf sparkles nicely in the sun
Gassing Station | Boats, Planes & Trains | Top of Page | What's New | My Stuff