The ebay generator restoration thread
Discussion


paolow said:
PM sent
Thanks, I will give them a try 
creationracing said:
Interesting forum post here - could you retrofit a Honda unit if you can find one at a good price?
I looked at the Honda inverter, the replacement Kipor inverter is around £250. The equivalent Honda is £900+ !!I believe this particular series of generator was subject to a patent dispute as it appears to be a direct copy of a Honda EU series(Kipor manufactured for Honda)so parts are supposedly interchangeable there is a photo somewhere of a skip full of generators which had been taken from the importer.
hidetheelephants said:
I've done a few bits of potting archaeology, some successful some not; you definitely need to be slightly OCD to complete it. 
Me too, I have spent many happy hours with a scalpel and Dremel removing the stuff. There are some acids which will remove the potting compound, but they will also remove markings from components and damage the PCB.The Wolf went to a new home last week and I decided to order a inverter for the dead Kippor which should turn up in the next few days.
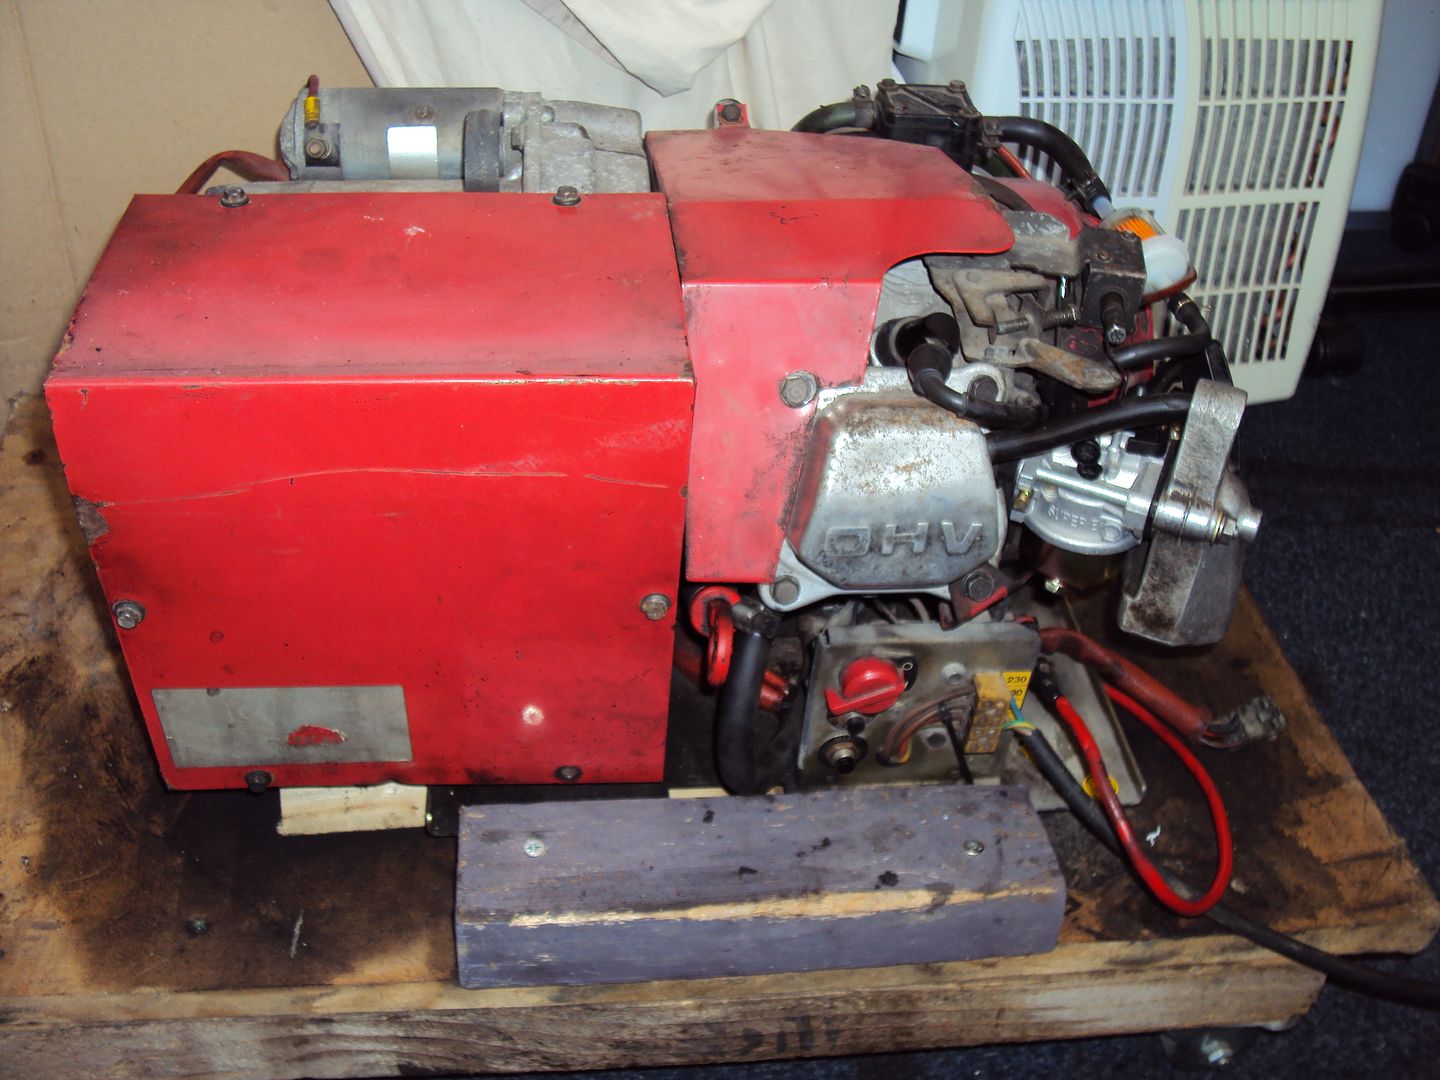
During the week we picked up another Honda, this one dates back to the late 60s/ early 70s!
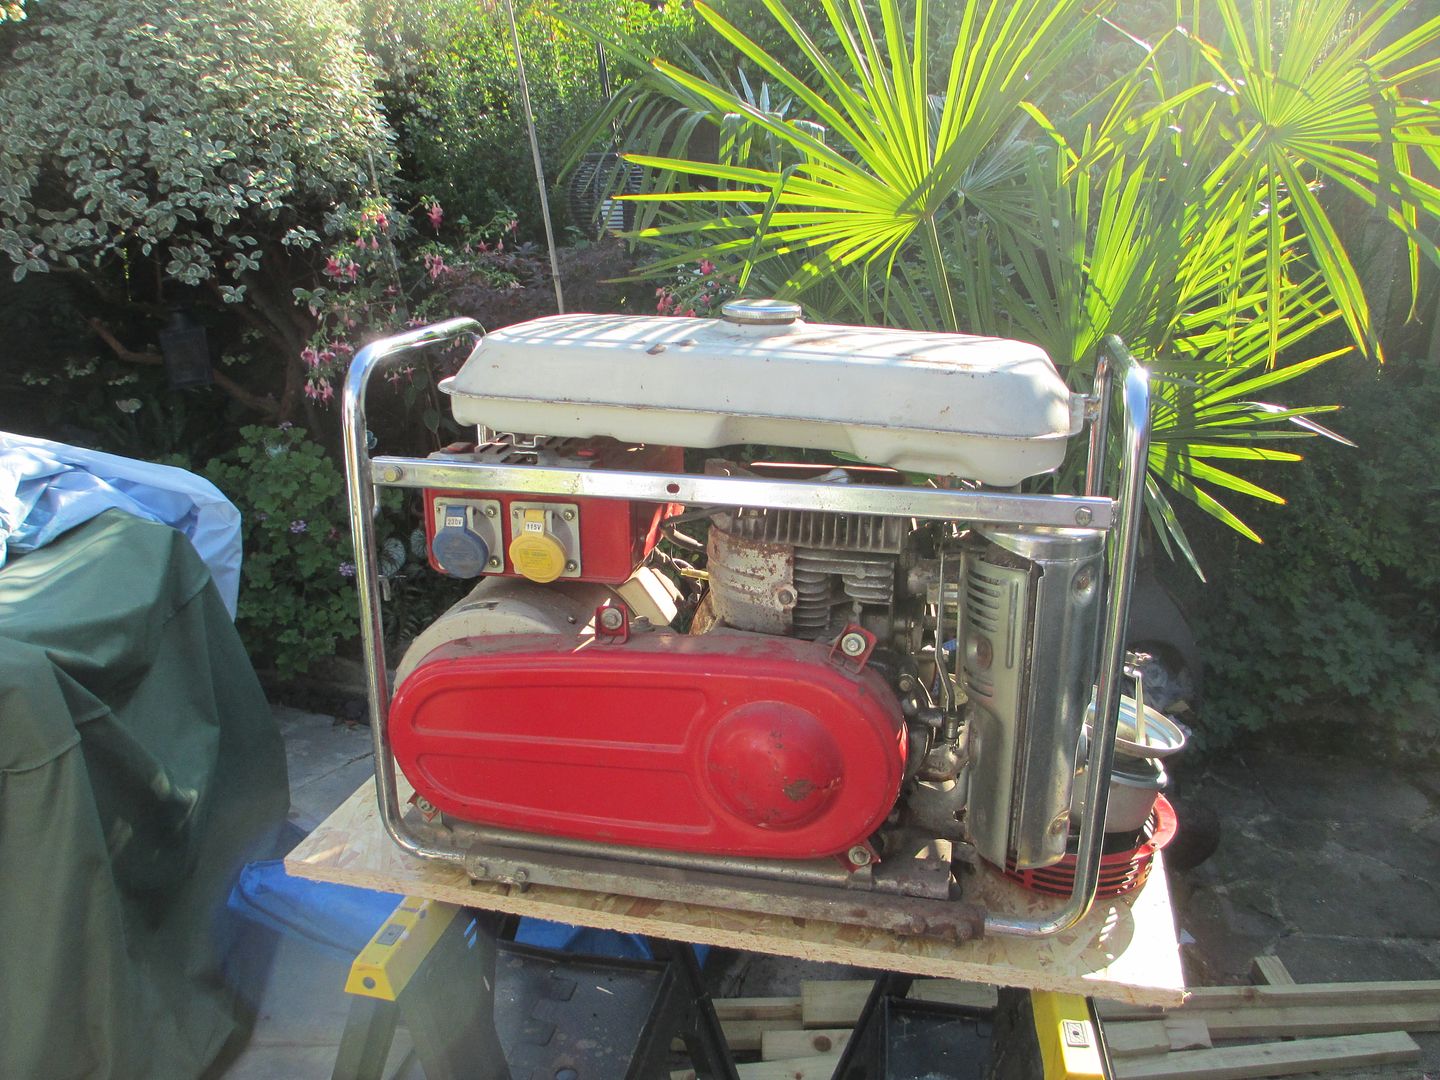
The fault is that it won’t start, we quickly found it had no compression as when the pull start was pulled the engine would turn with no resistance so started the strip down.
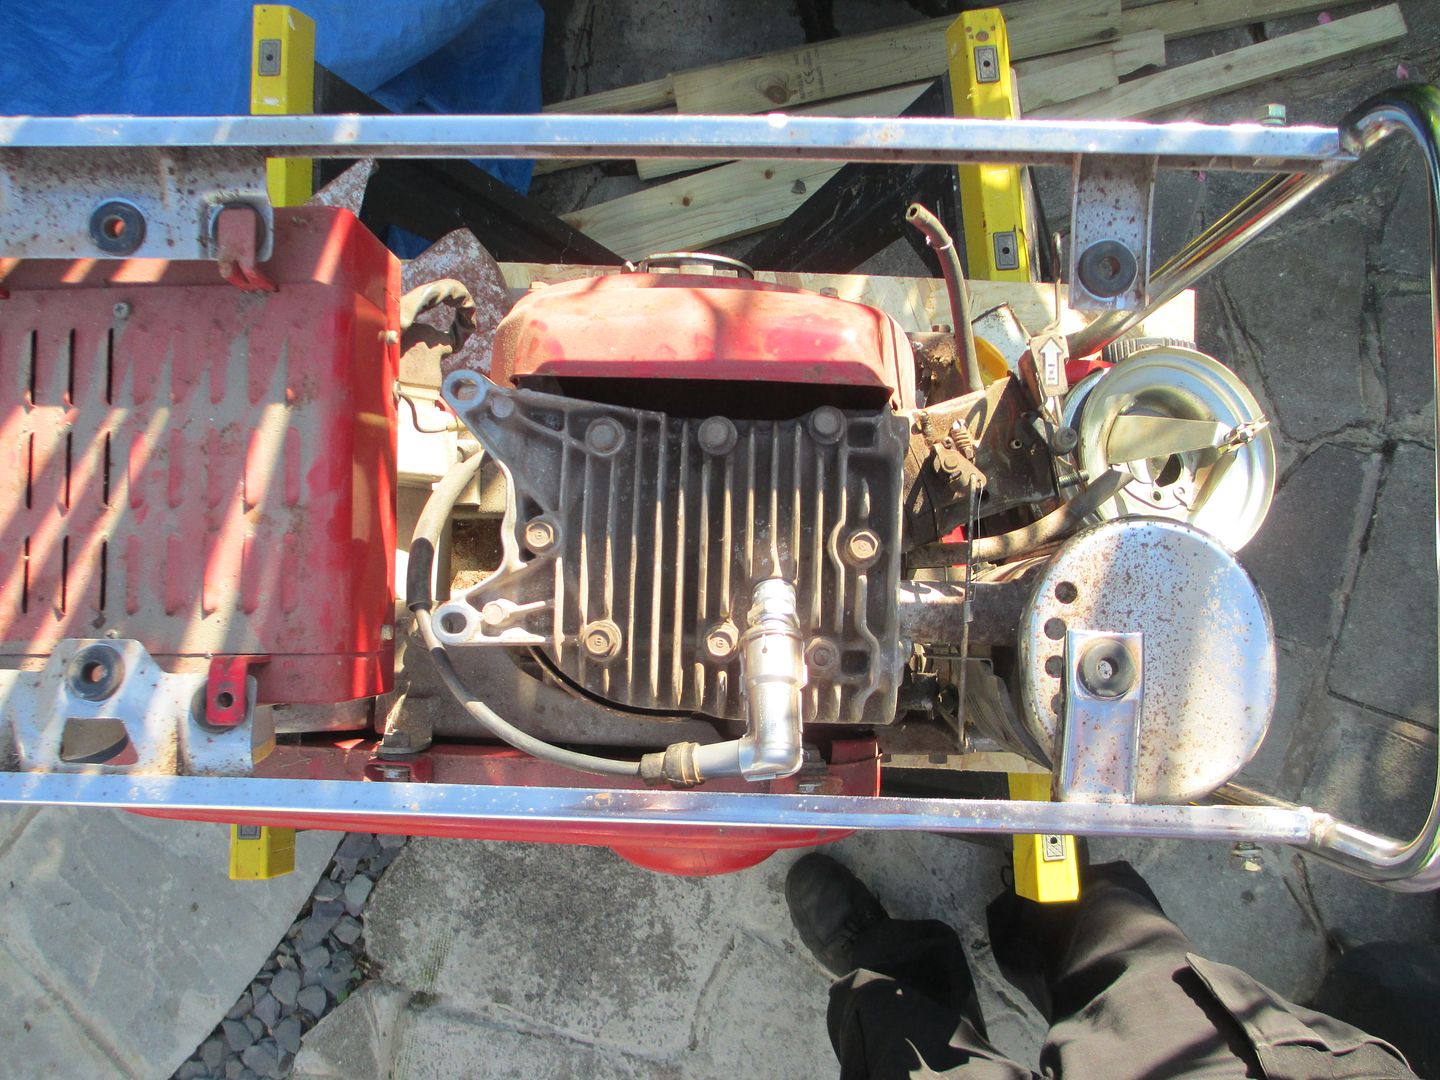
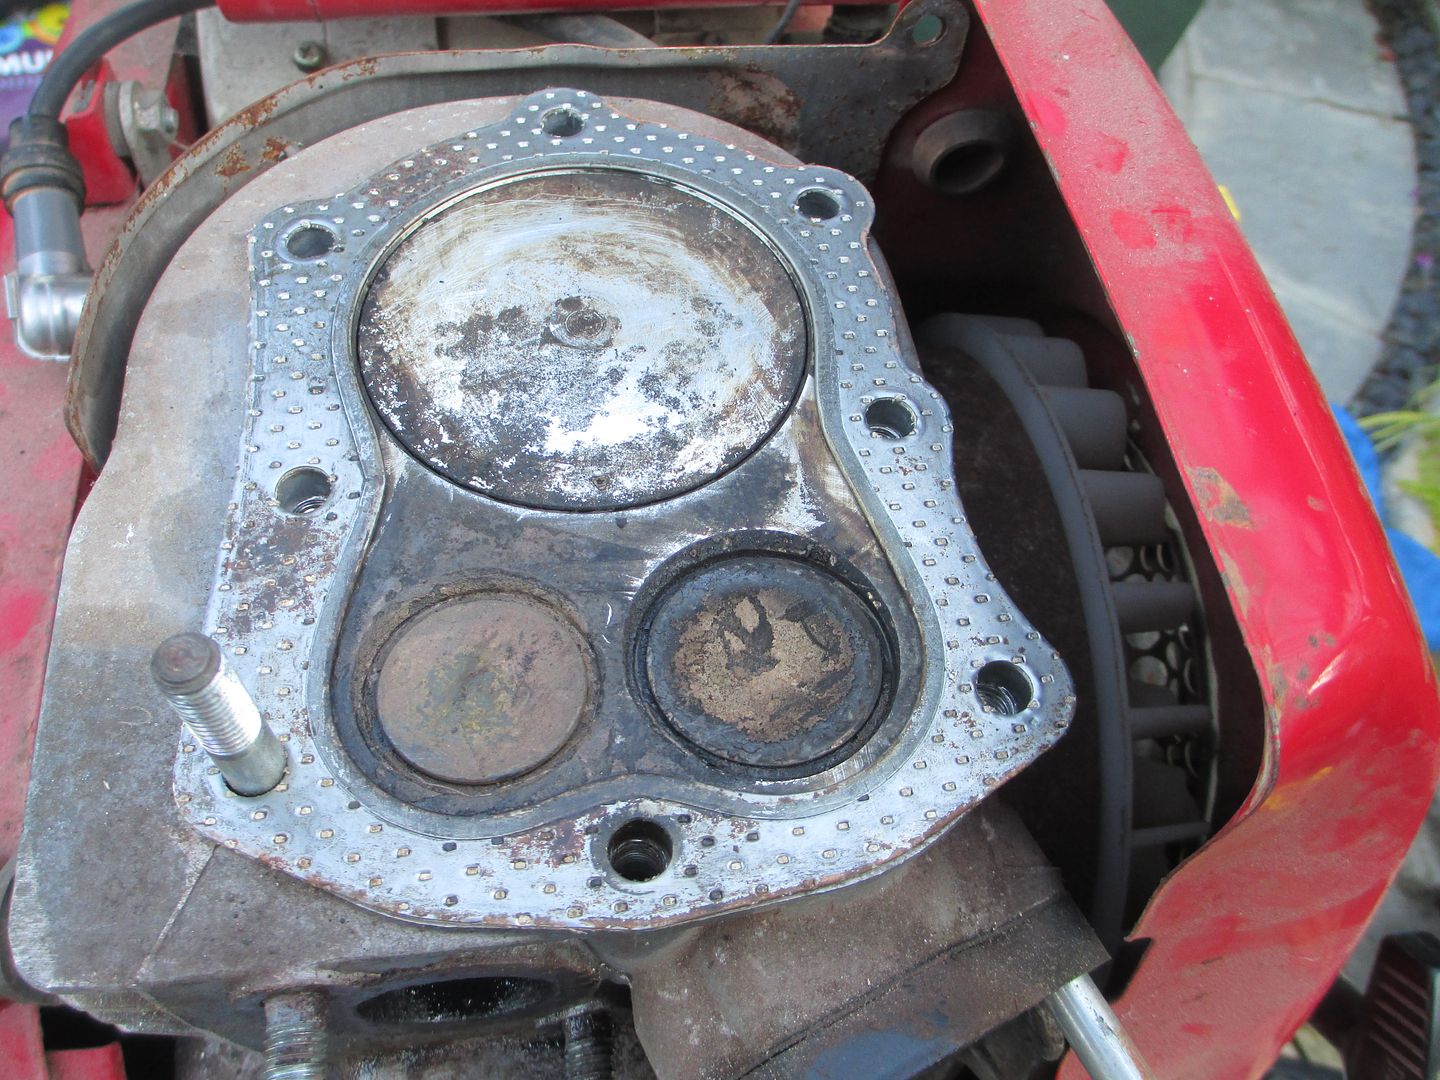
Valves and piston are present look ok.
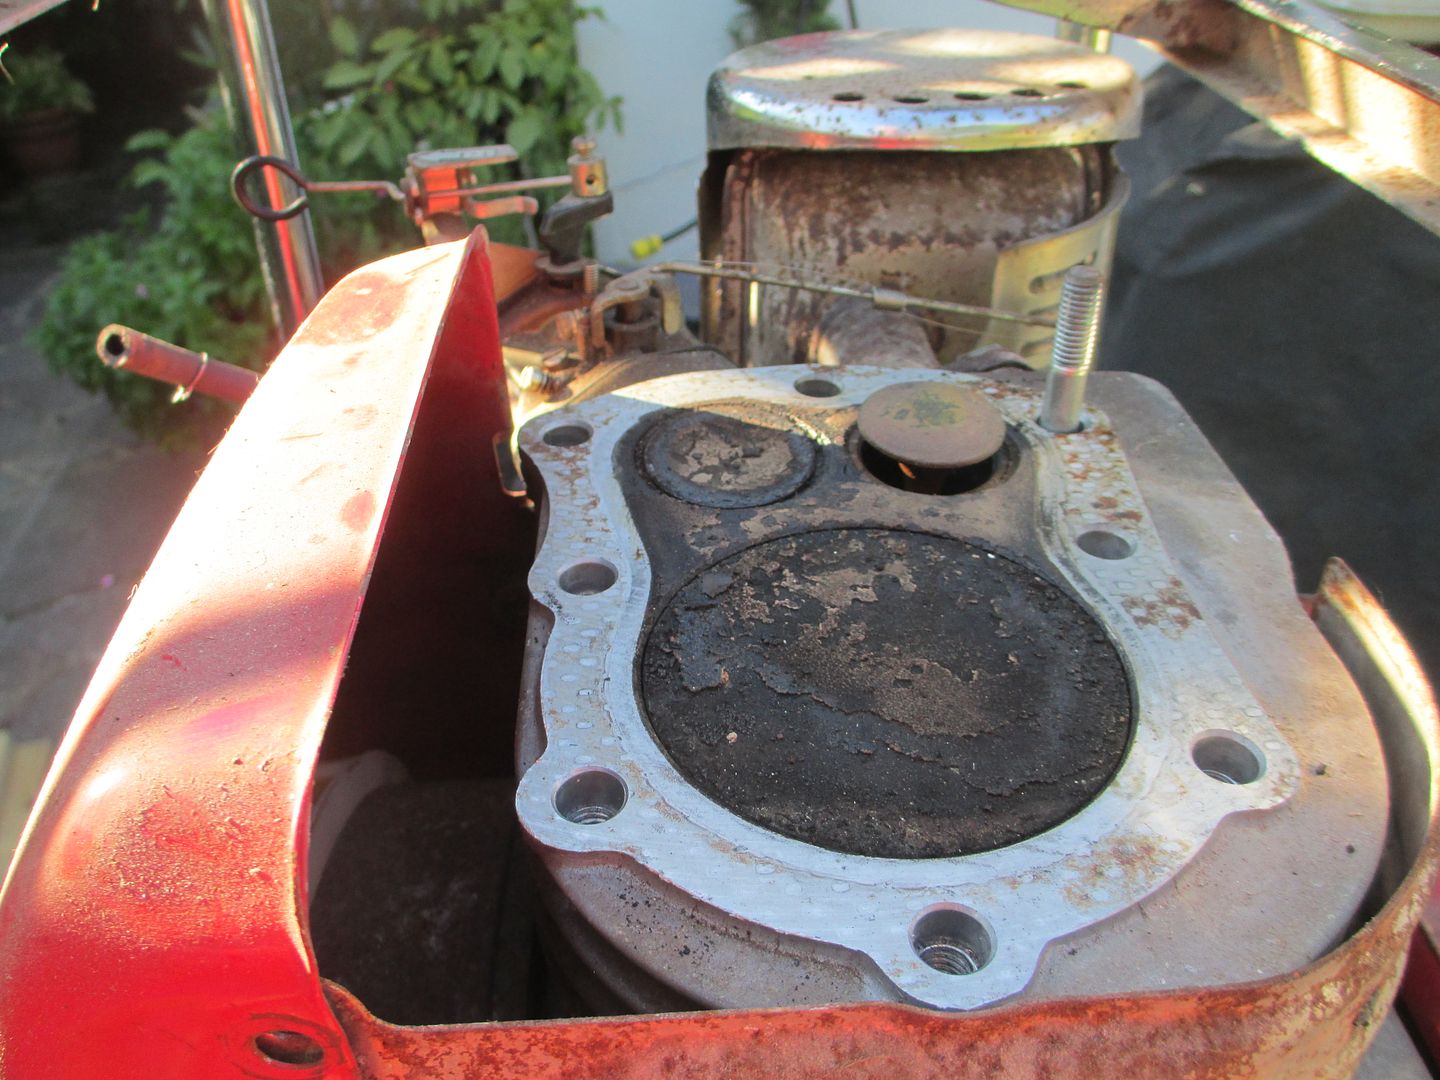
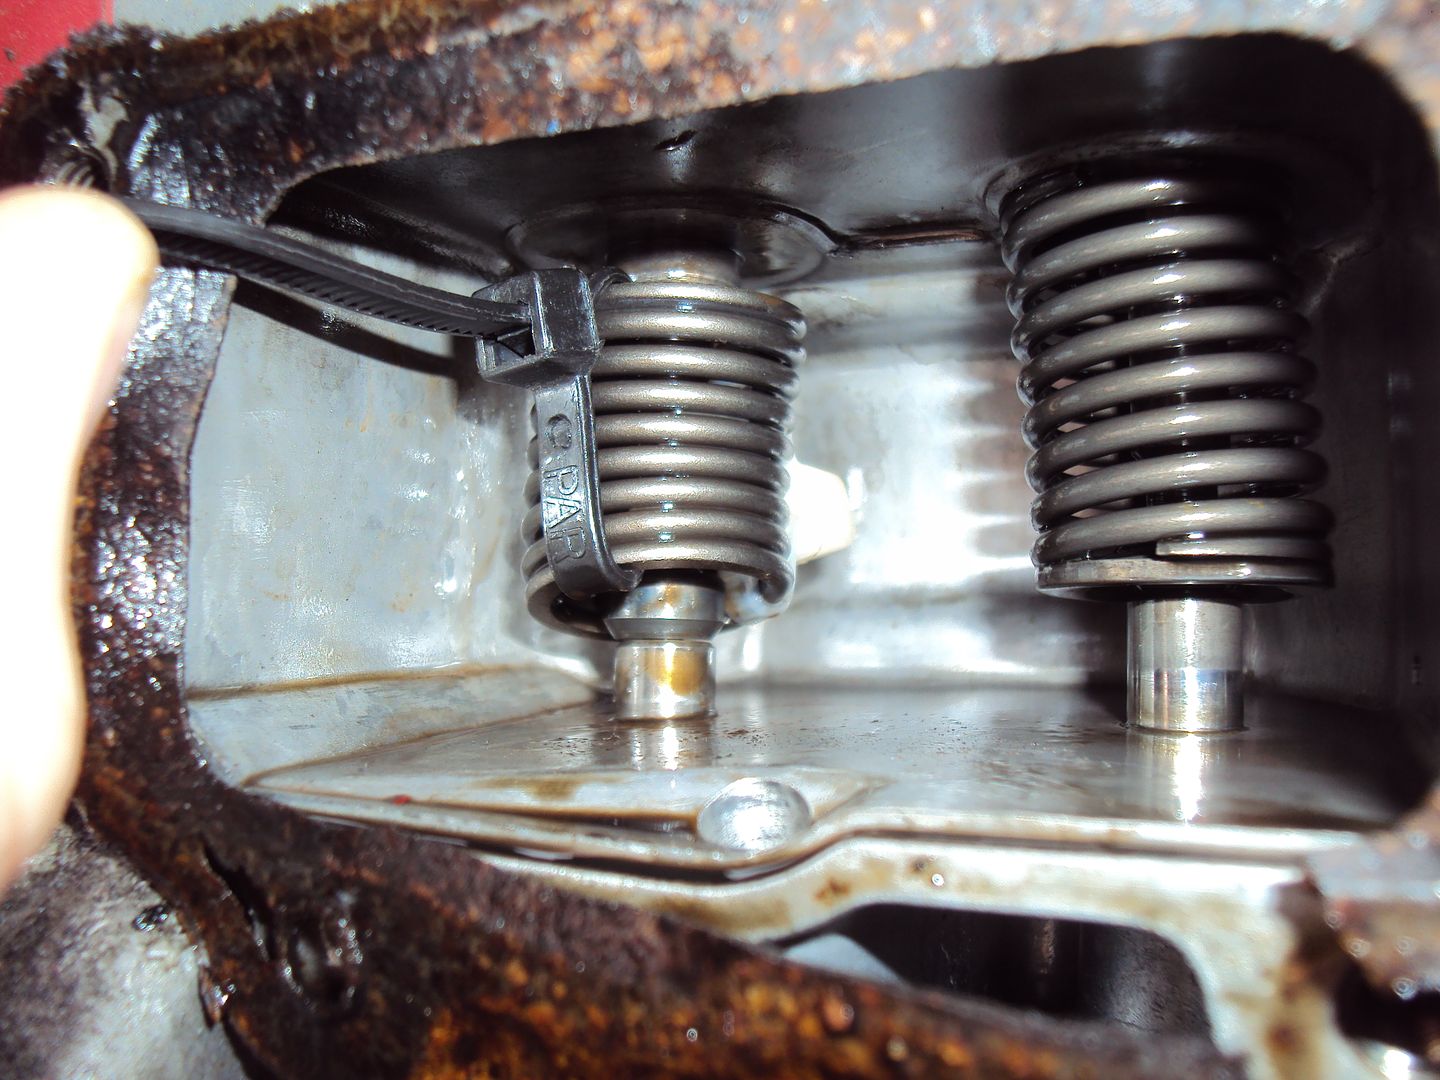
Pretty sure both valves shouldn’t be open at the same time.
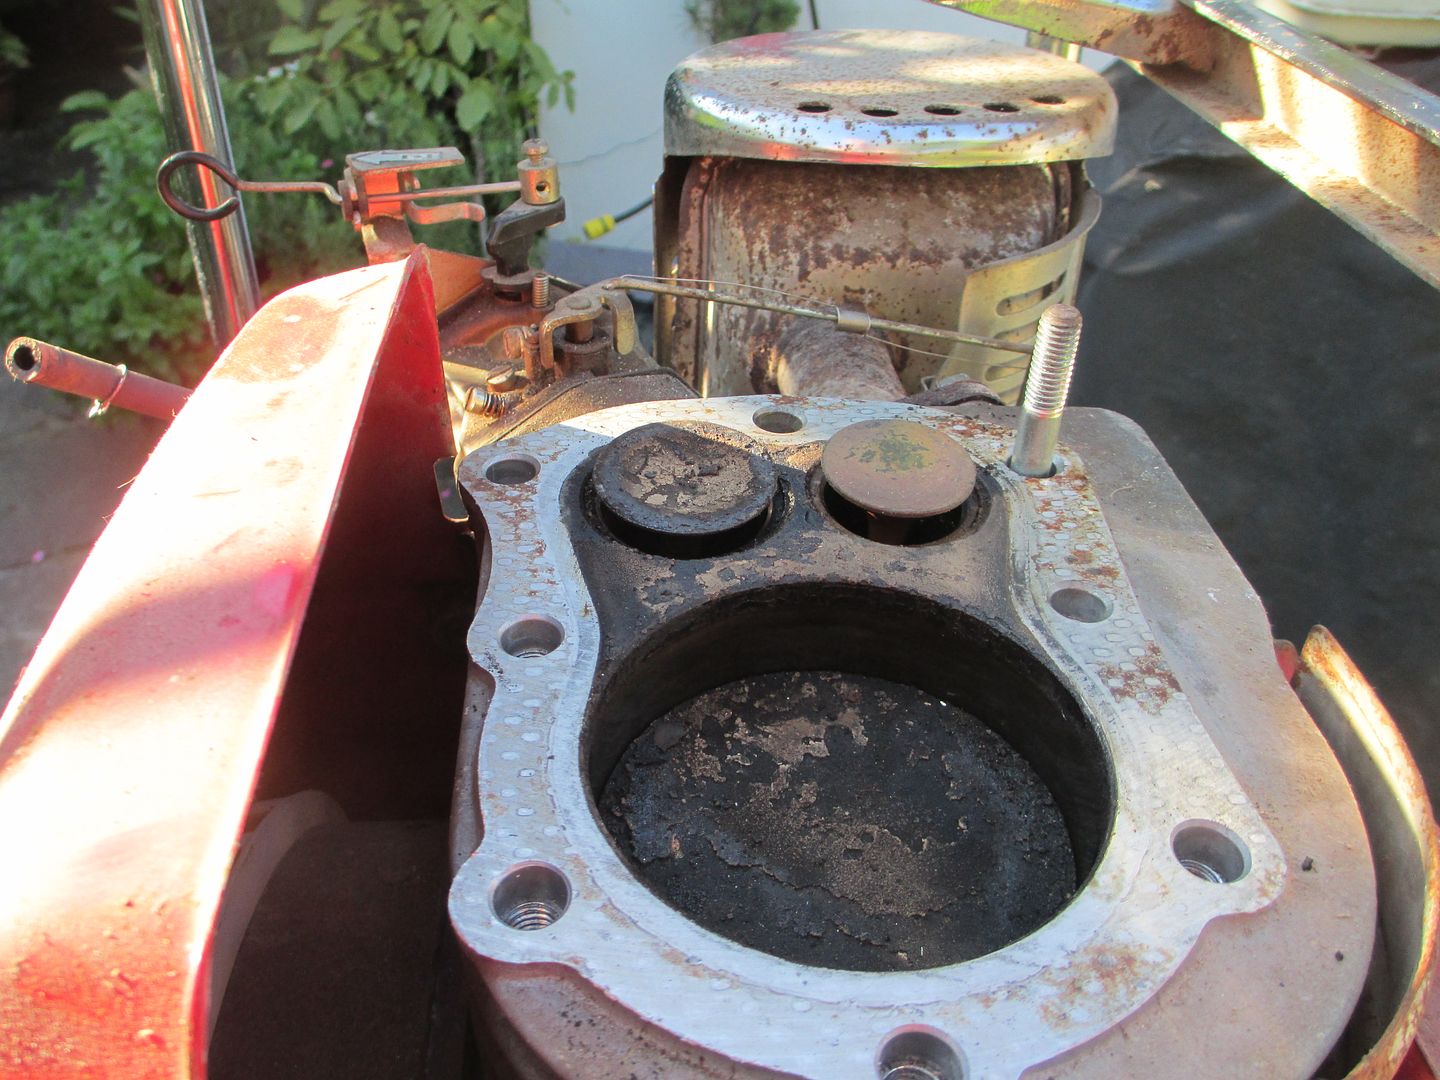
Looks like the exhaust valve is stuck open.
We tried putting some oil on the valve stem too see if it would free up.

The valve would close with a gentle tap
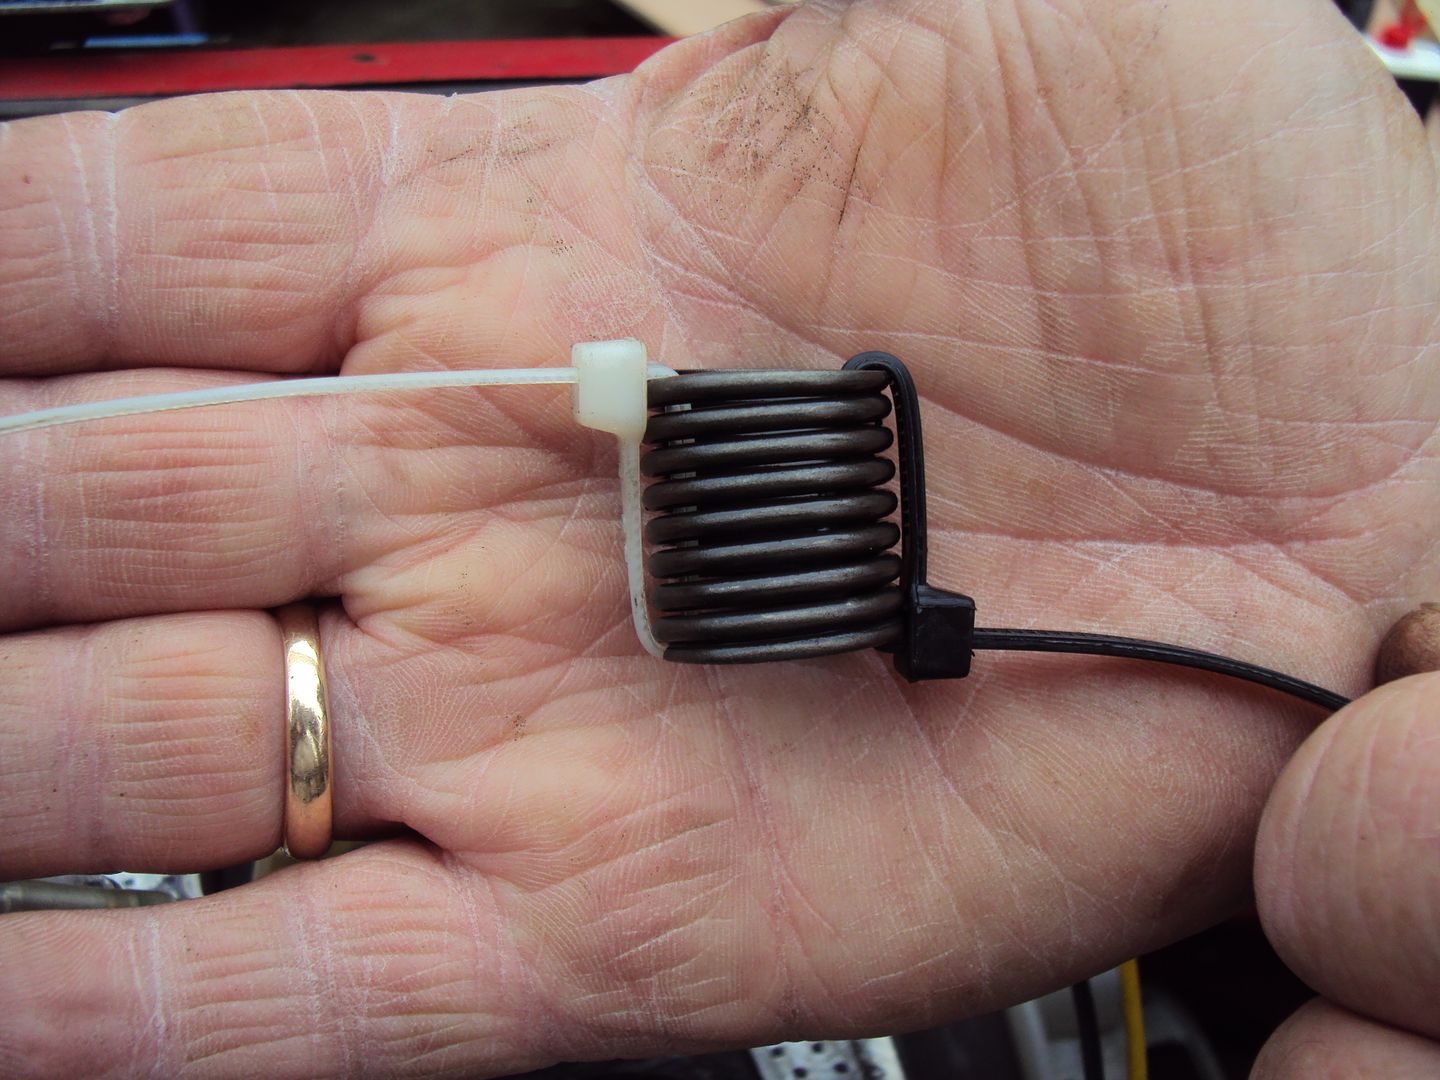
Opened up the valve chest to check the valve springs were ok.
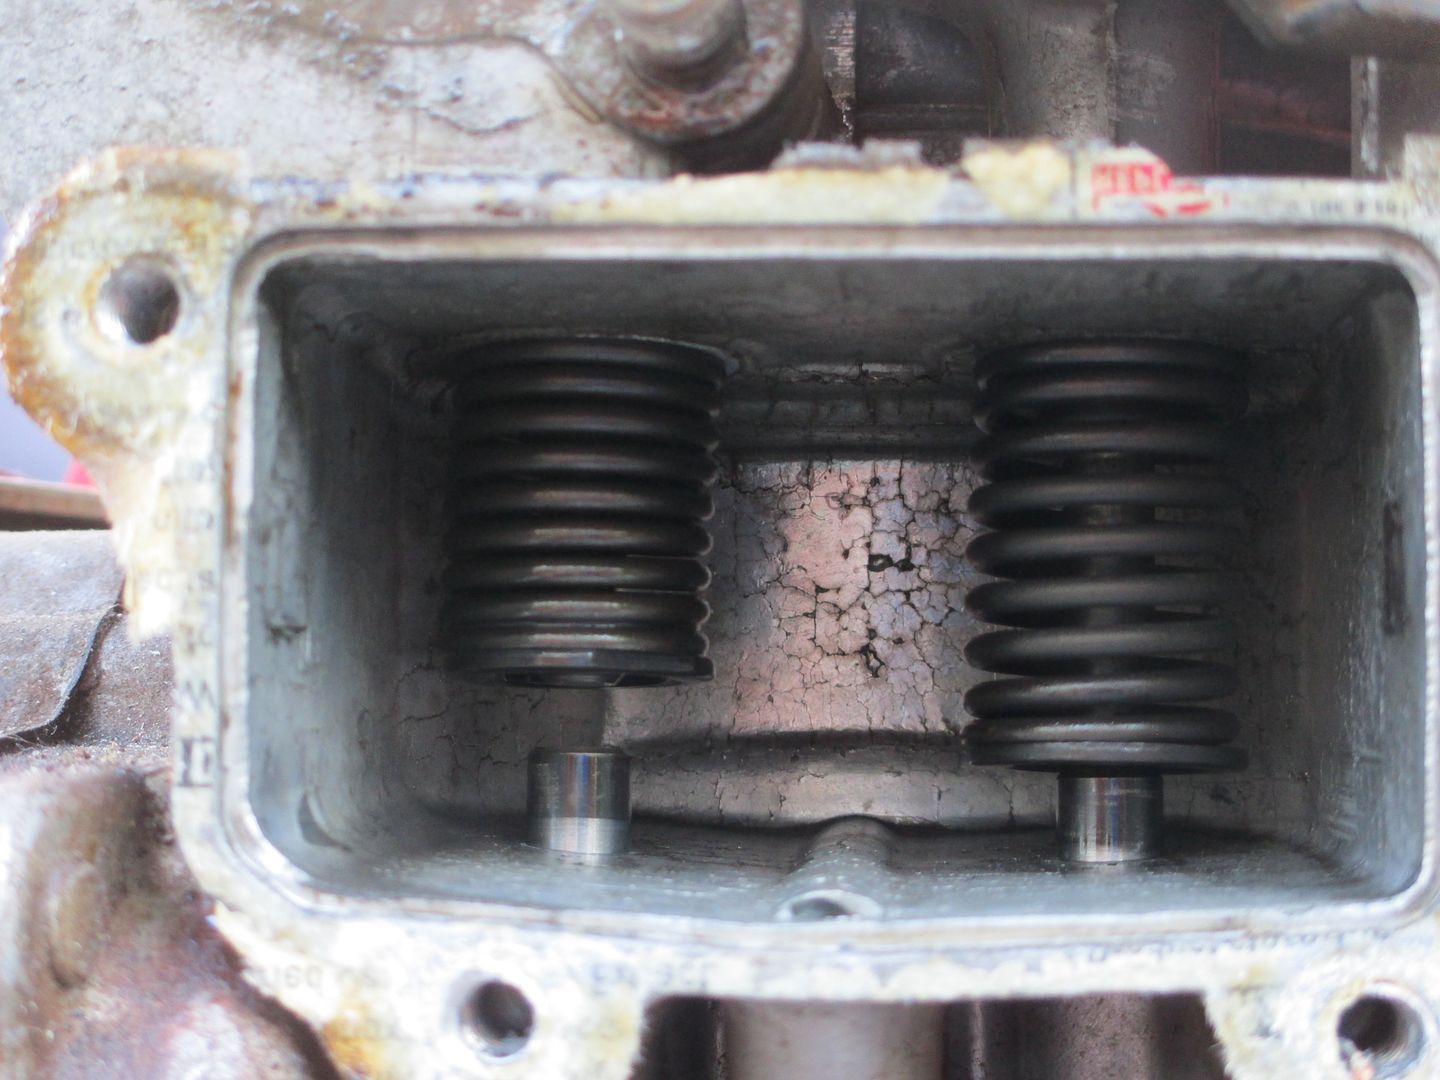
There shouldn’t be a gap between the valve stem and the tappet.
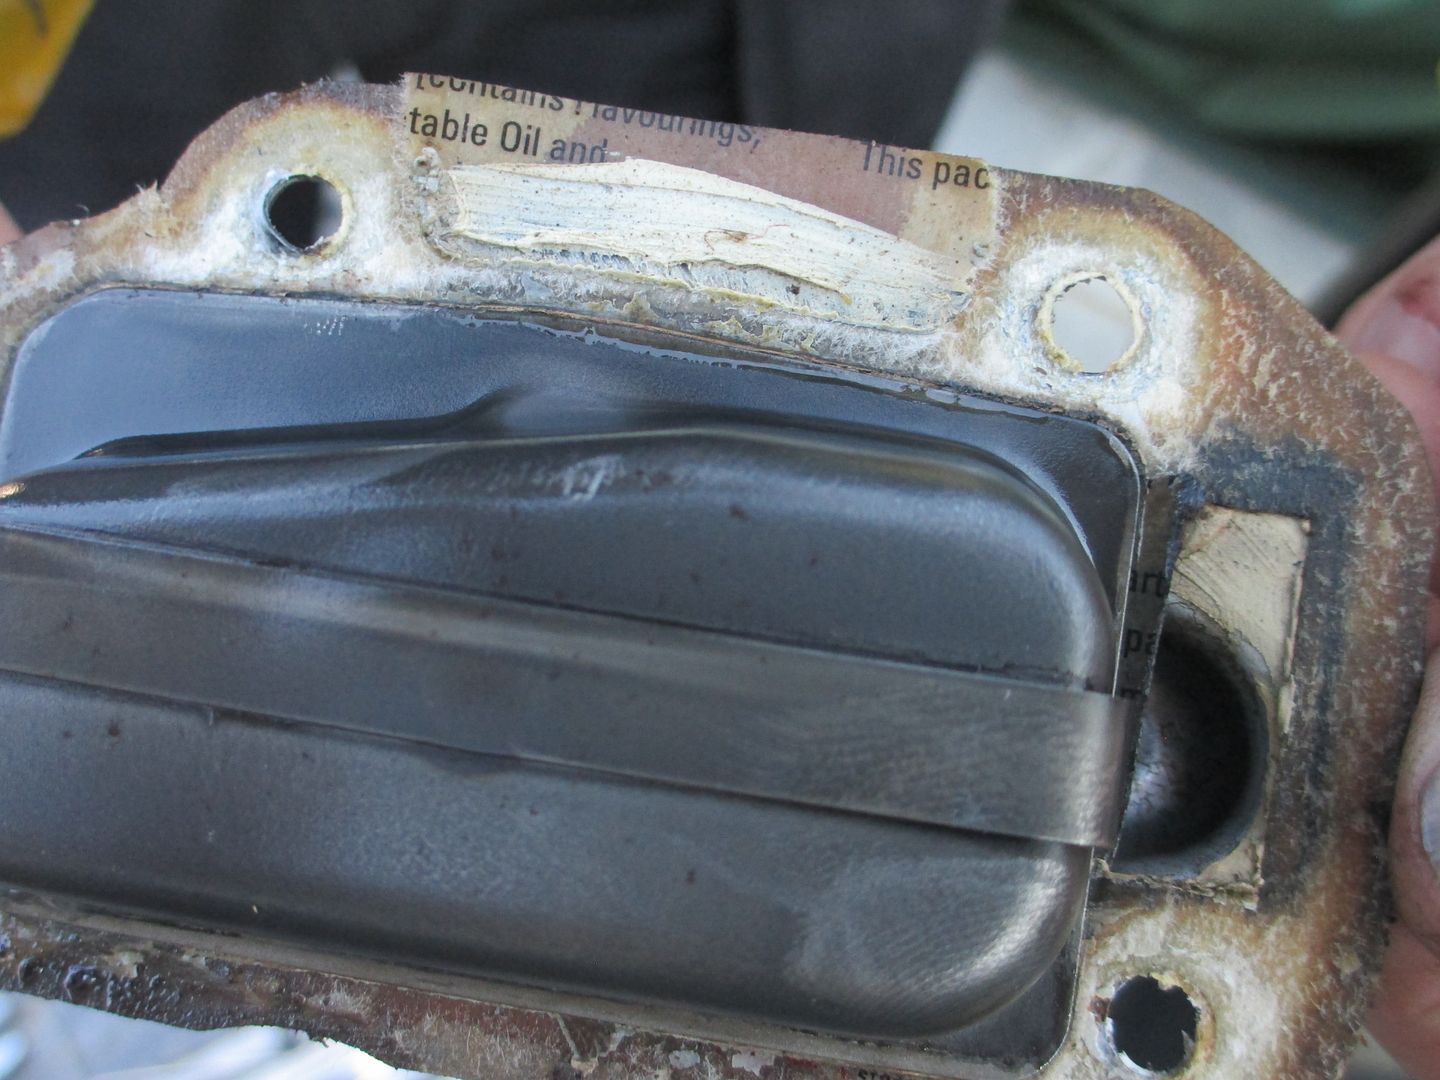
Recipes on the valve chest gasket!
We managed to get the valve freed up, so cleaned all the carbon off the piston and out of the cylinder head.

Once reassembled it fired up on the second pull and made power.
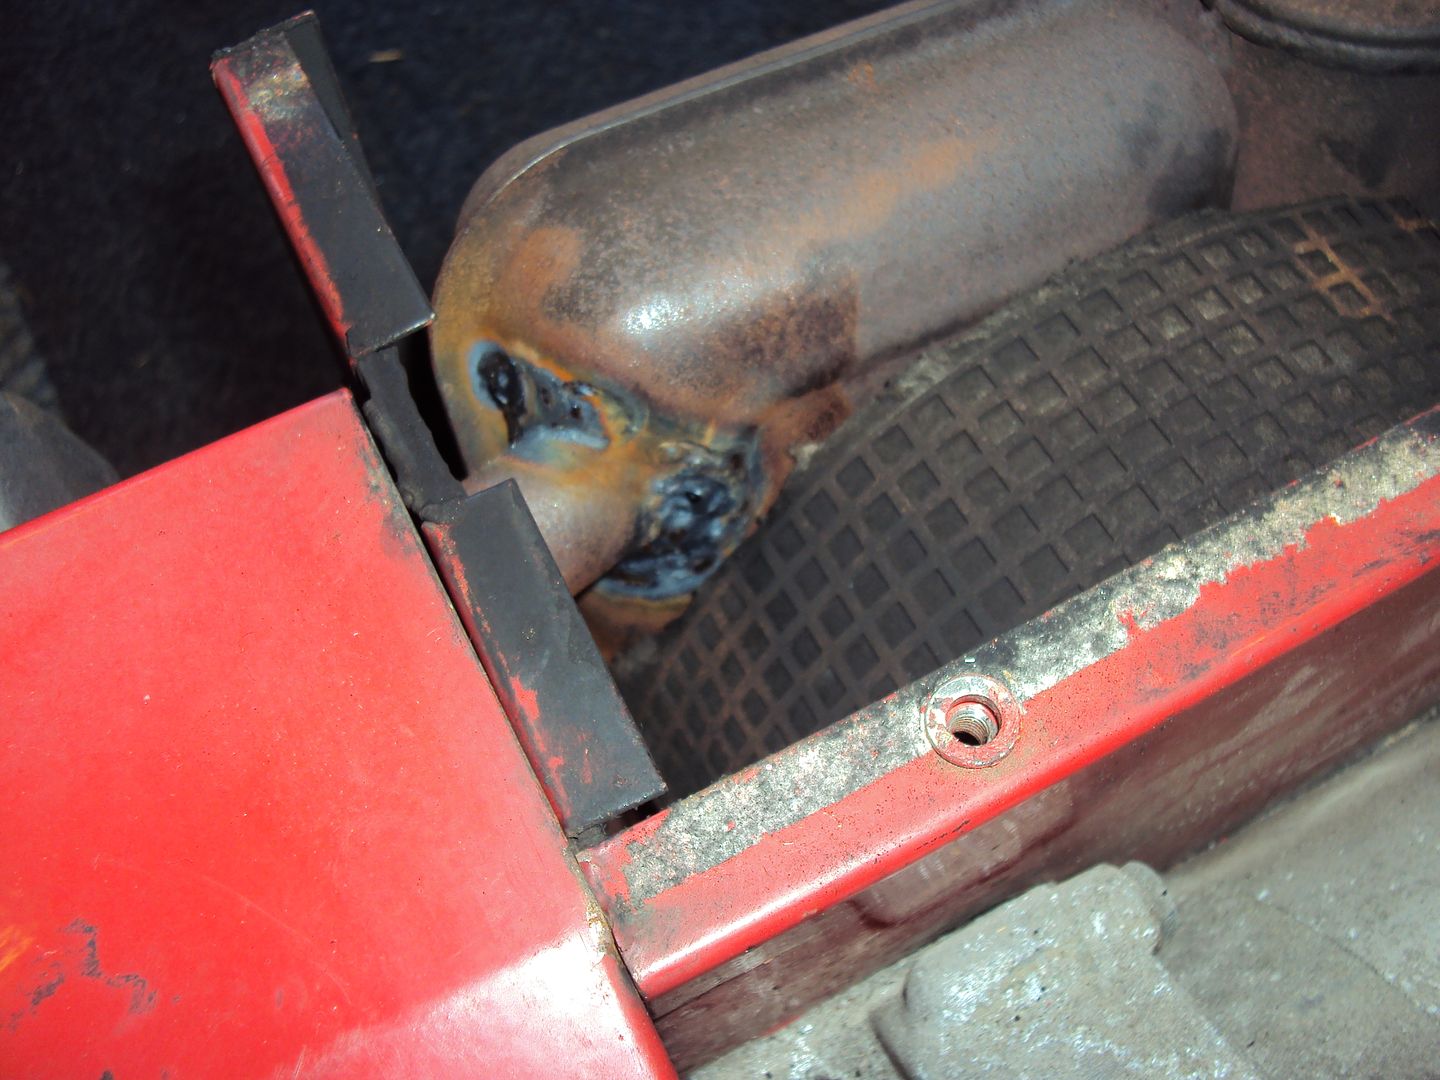
I couldn’t resist trying some metal polish on the exhaust heat shield

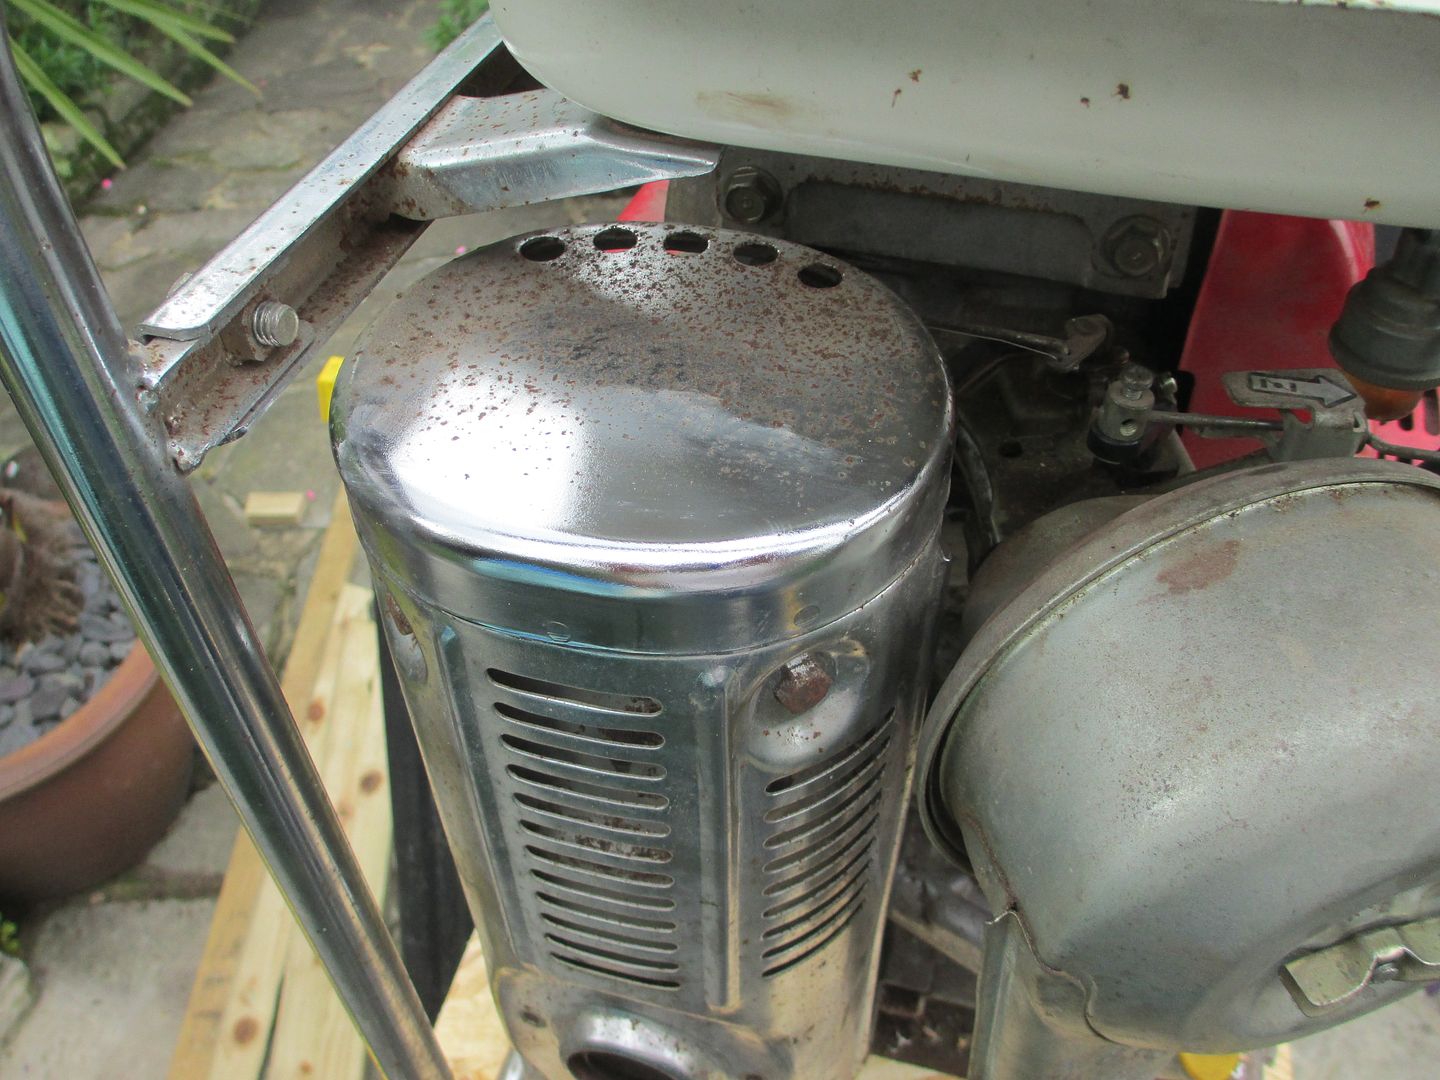
And some Autoglym on the belt cover, 50/50 for the detailing geeks
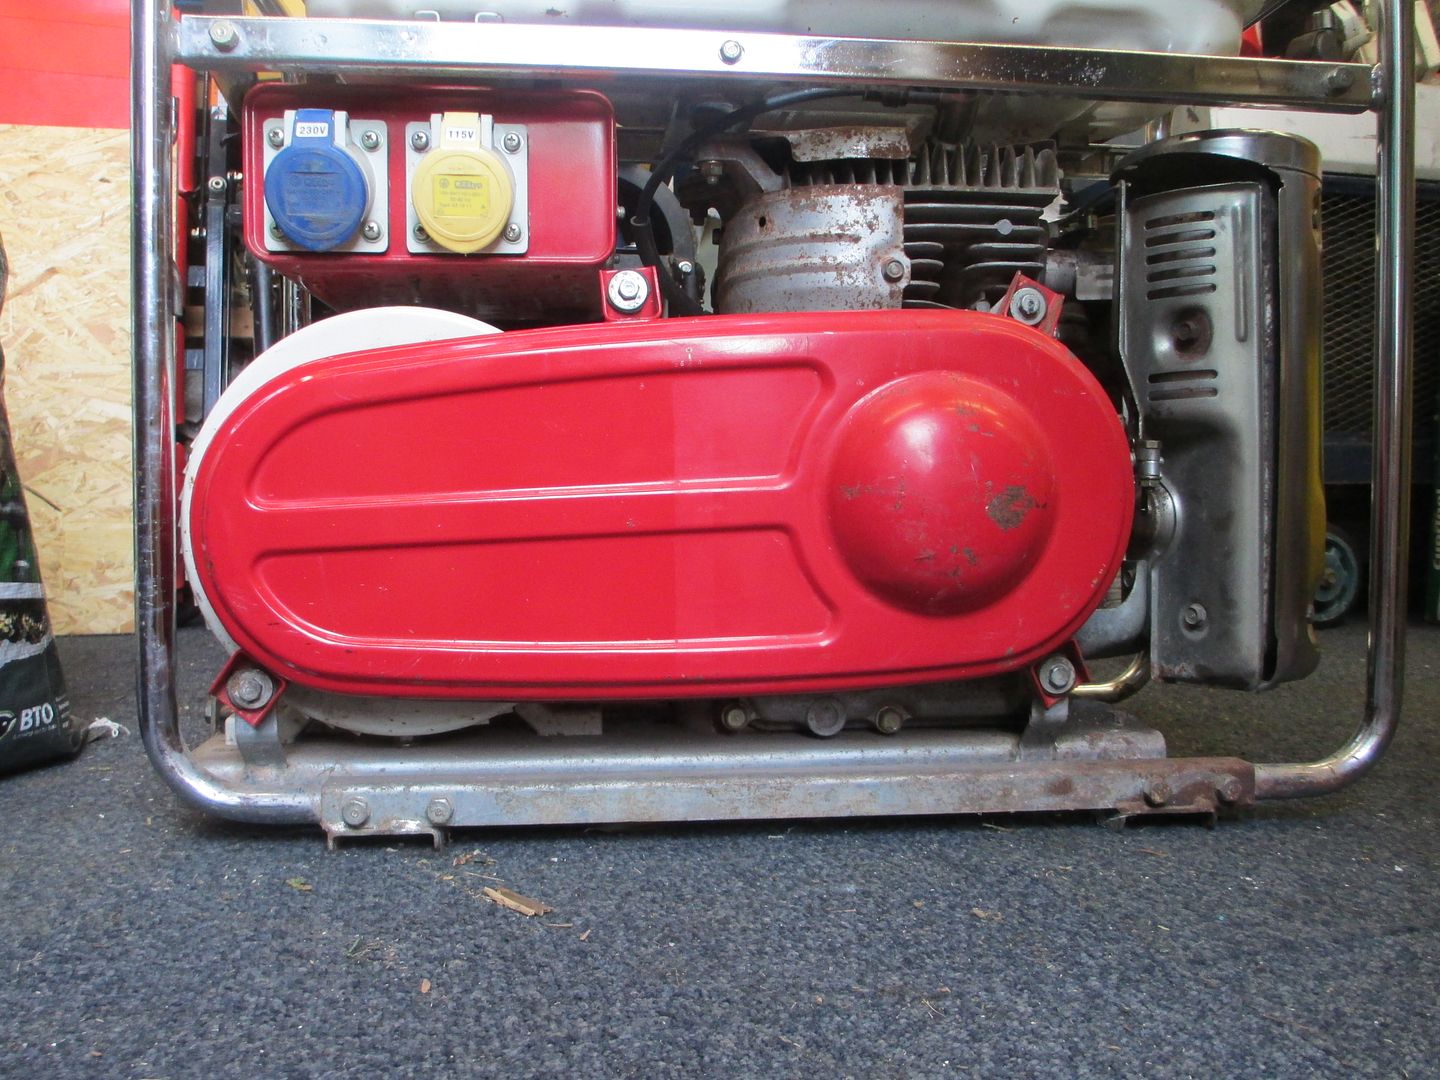
I gave the rest of the exhaust heat shield a polish along with the air filter housing.

We just need to get a new pull start as the current one has a broken spring which makes it a bit temperamental.
paolow said:
Amazing - both that it is still going strong 50 years later but also the design of the valve assembly. Presumably it uses a vertical pushrod directly on the valve stem? Must have made getting the colletts off to lessen the spring tension and lap the valves a breeze - or maybe not given it is all recessed? Any real wear after all these years? Also do things like the springs still, well stay 'sprung' after such a period?
Thinking about it I had a Capri that had 2 lay up periods of about 4 years a piece in its history and seemed fine so why not?
Yes the push rod runs directly on the cam and pushes against the valve stem. We were planning to remove and lap the valves, but couldn’t release the collets to free the springs so decide to leave it. The springs were fine, when we tapped the exhaust valve it would snap shut. Thinking about it I had a Capri that had 2 lay up periods of about 4 years a piece in its history and seemed fine so why not?
There was just some stiction in the valve guide, presumably through lack of use. Once we got the oil worked in to it, the valve moved freely.
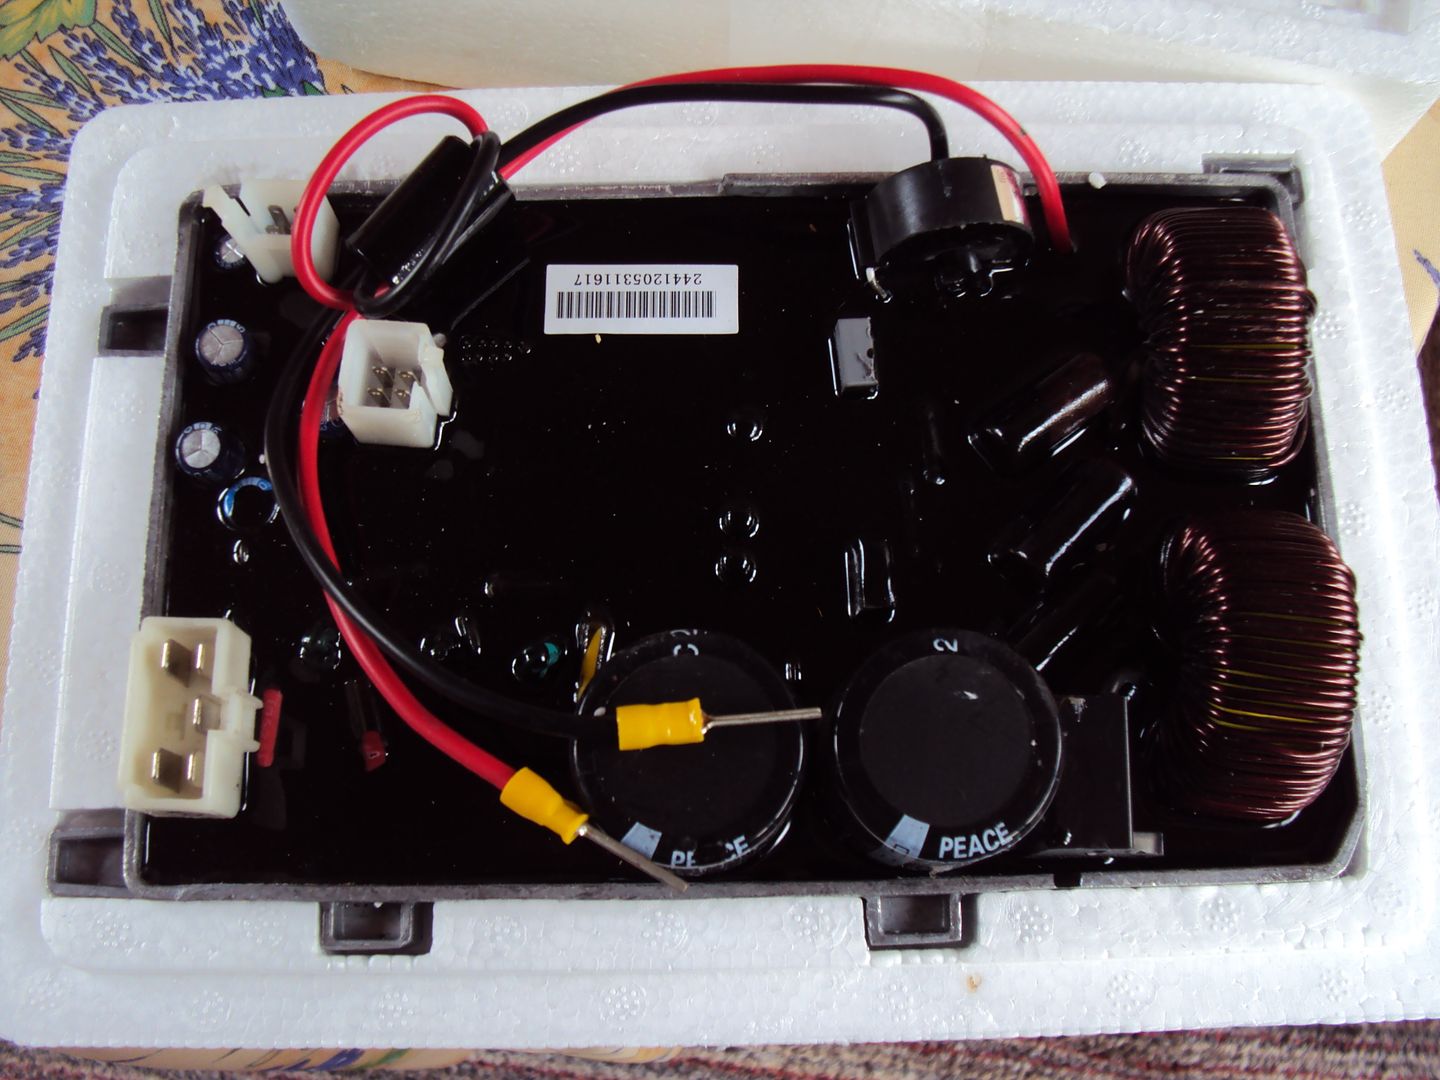
The new inverter from Kipor arrived, the design has changed a bit as it doesn’t have the big capacitor anymore.
I picked up the next project during the week, another non starter, this one has the same engine as the last one, but with the added bonus of optional electric start.

After a bit of poking around we found there was no spark, even though the ignition system all checked out ok. We determined the spark plug was at fault, when tested with the multimeter it was open circuit.
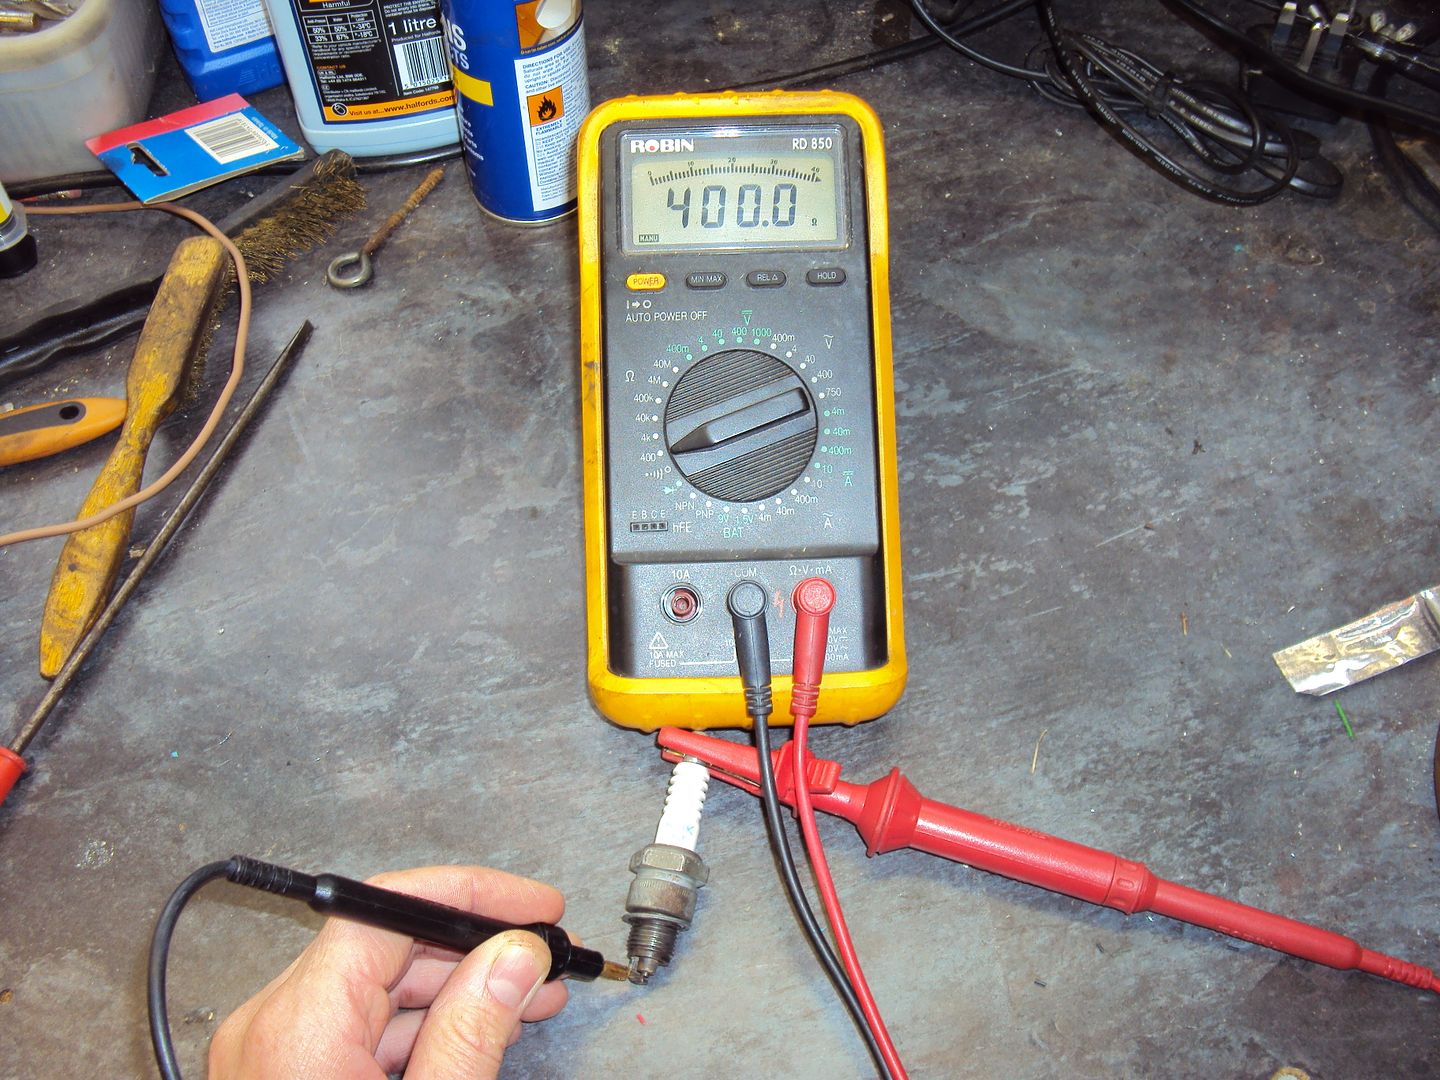
Resistance of a good plug
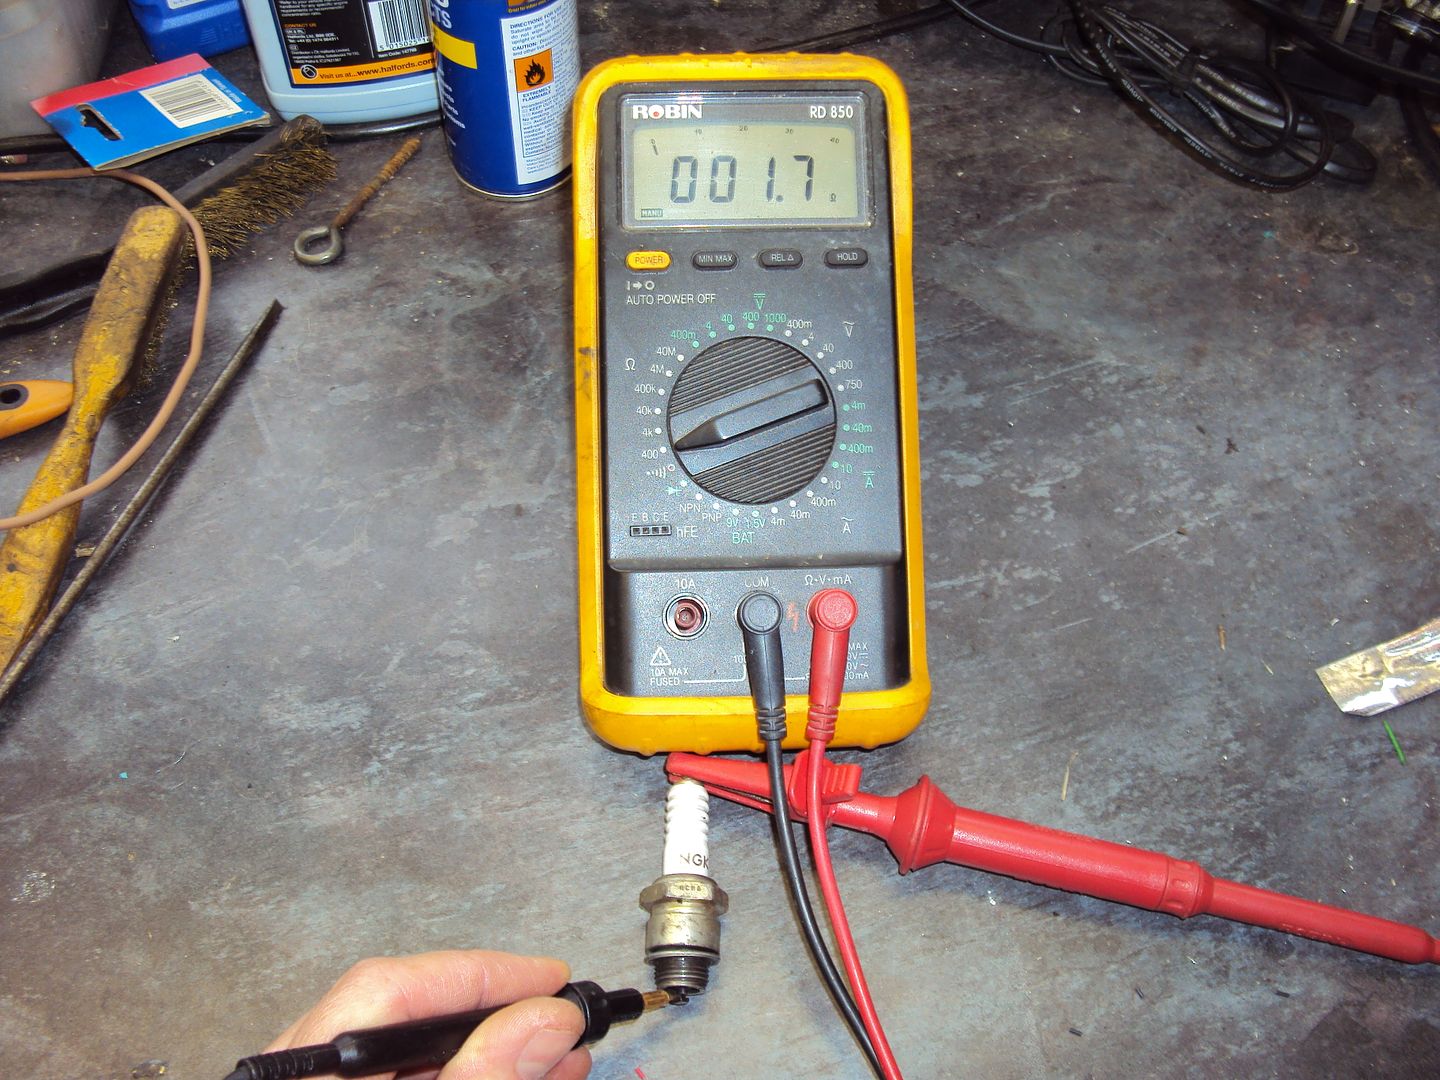
After replacing the sparkplug the engine spluttered into life, however there were a couple of problems. The first was there was a very loud metallic rattle, the second was it would only run with the choke on.
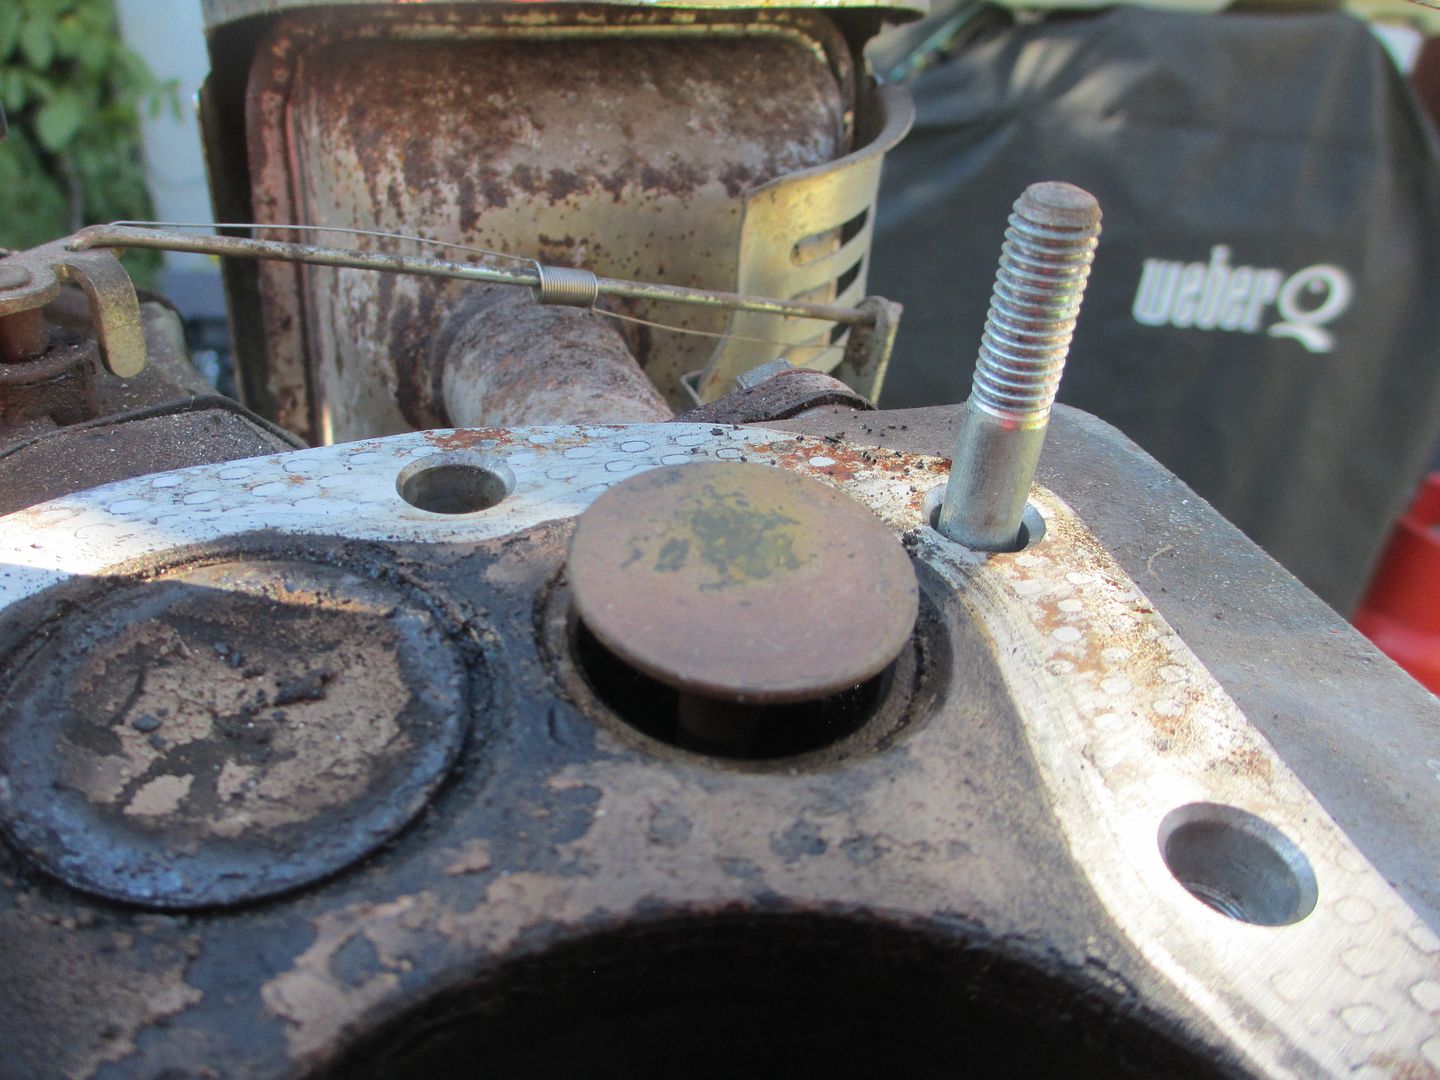
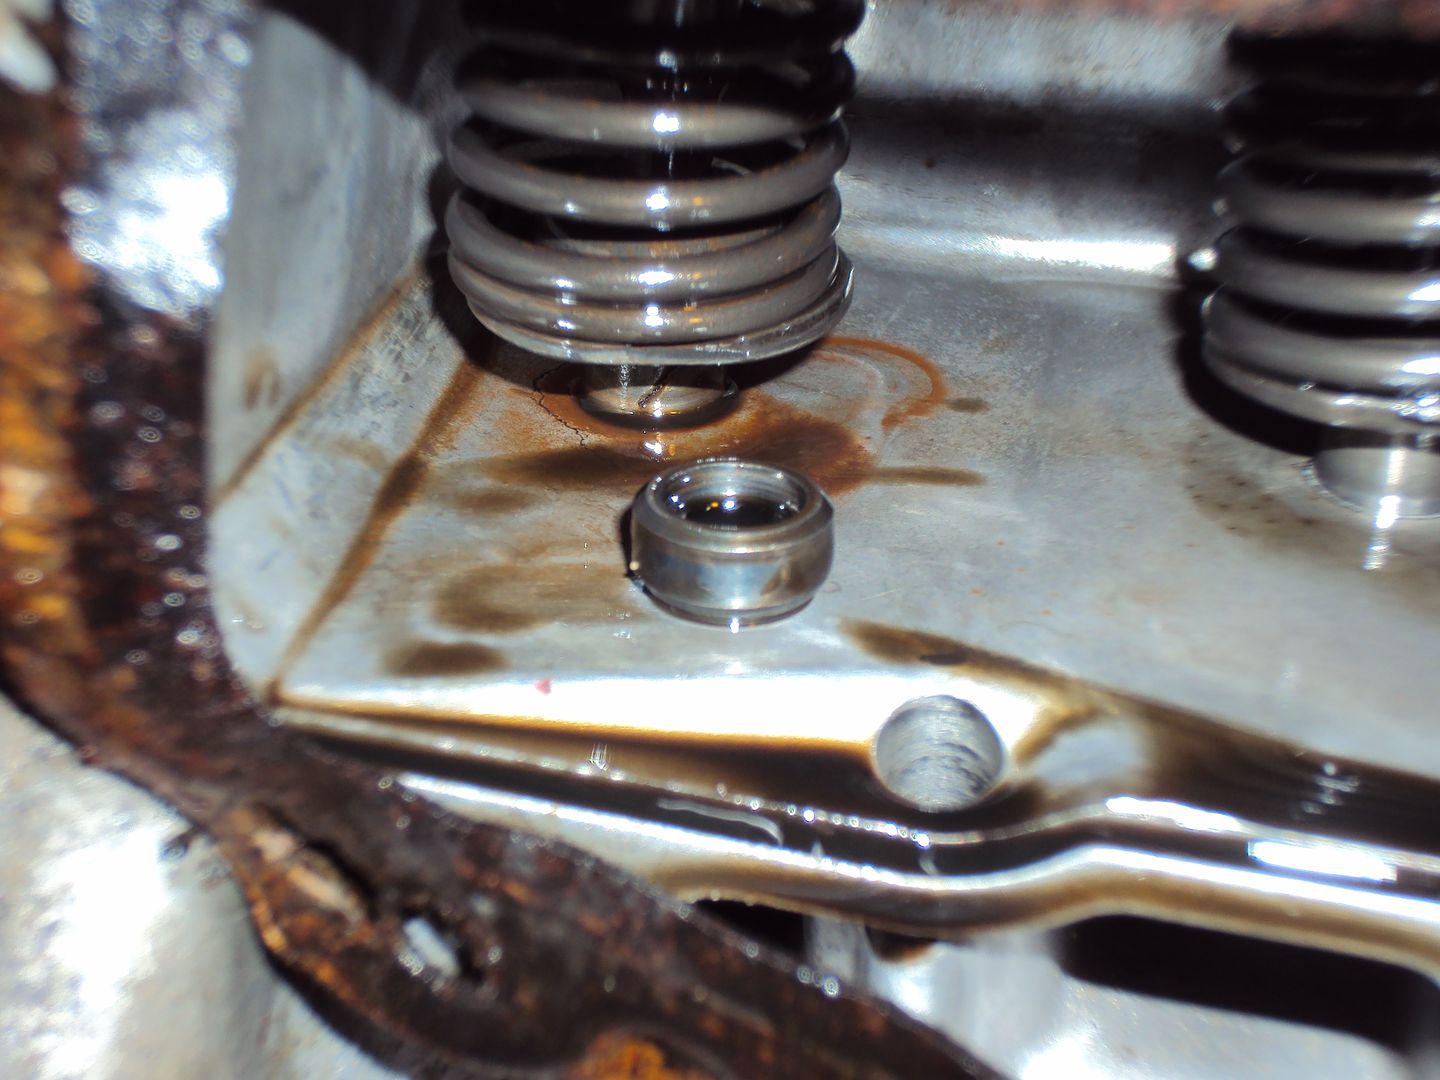
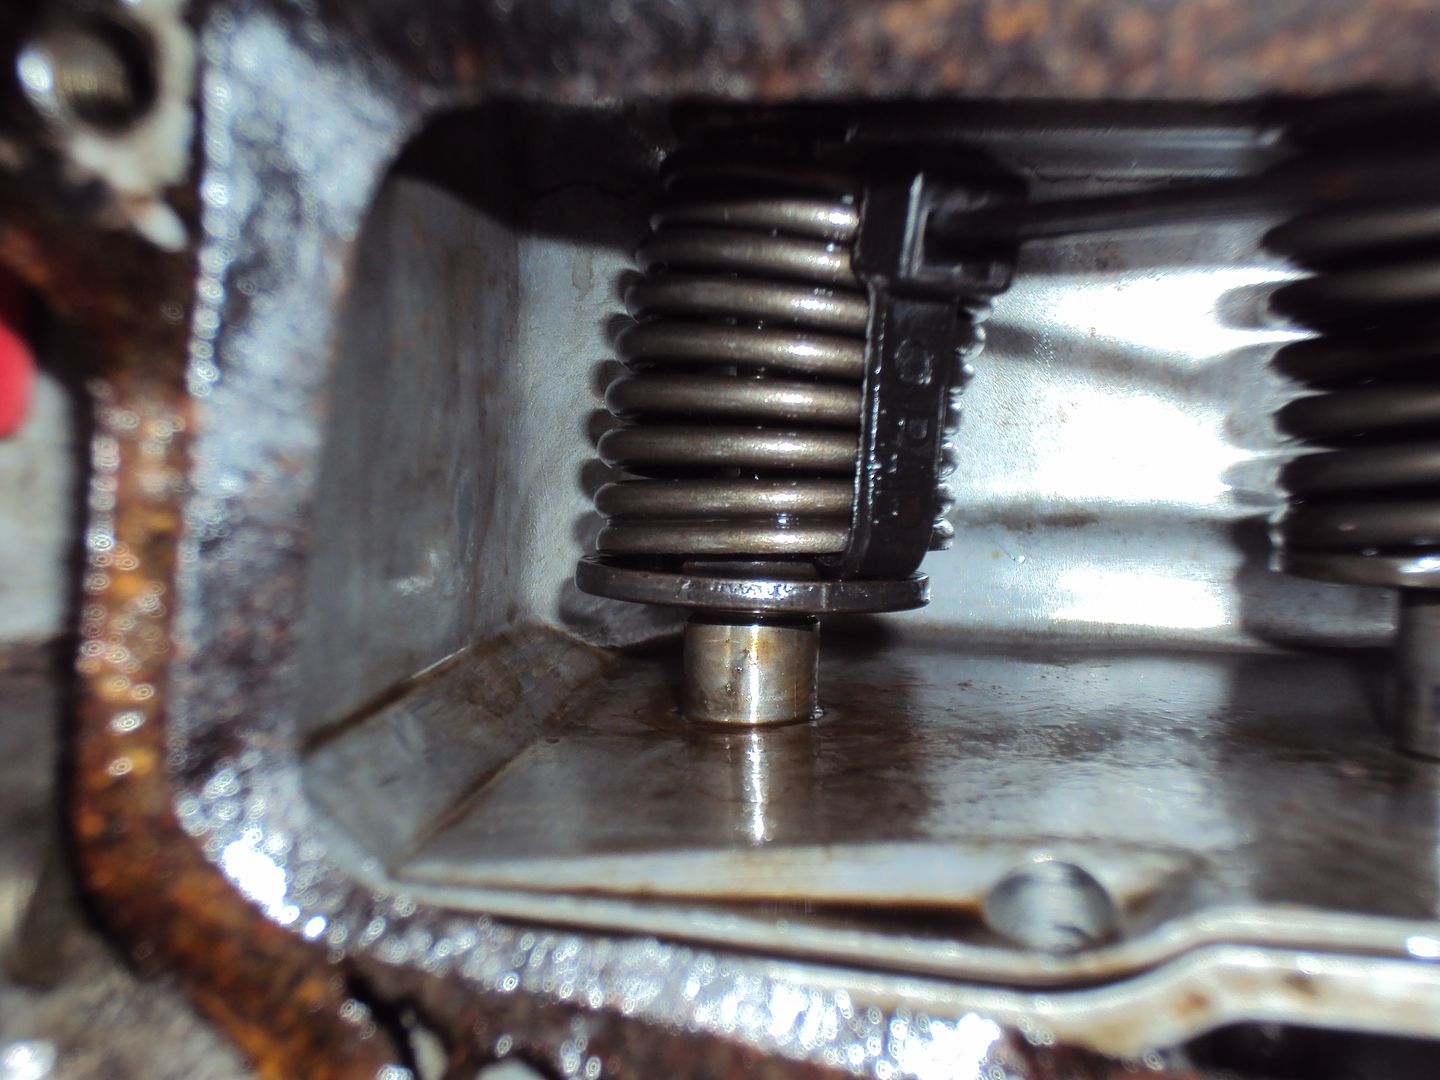
I started with looking for the source of the rattle, I removed the valve chest cover and found a loose part.
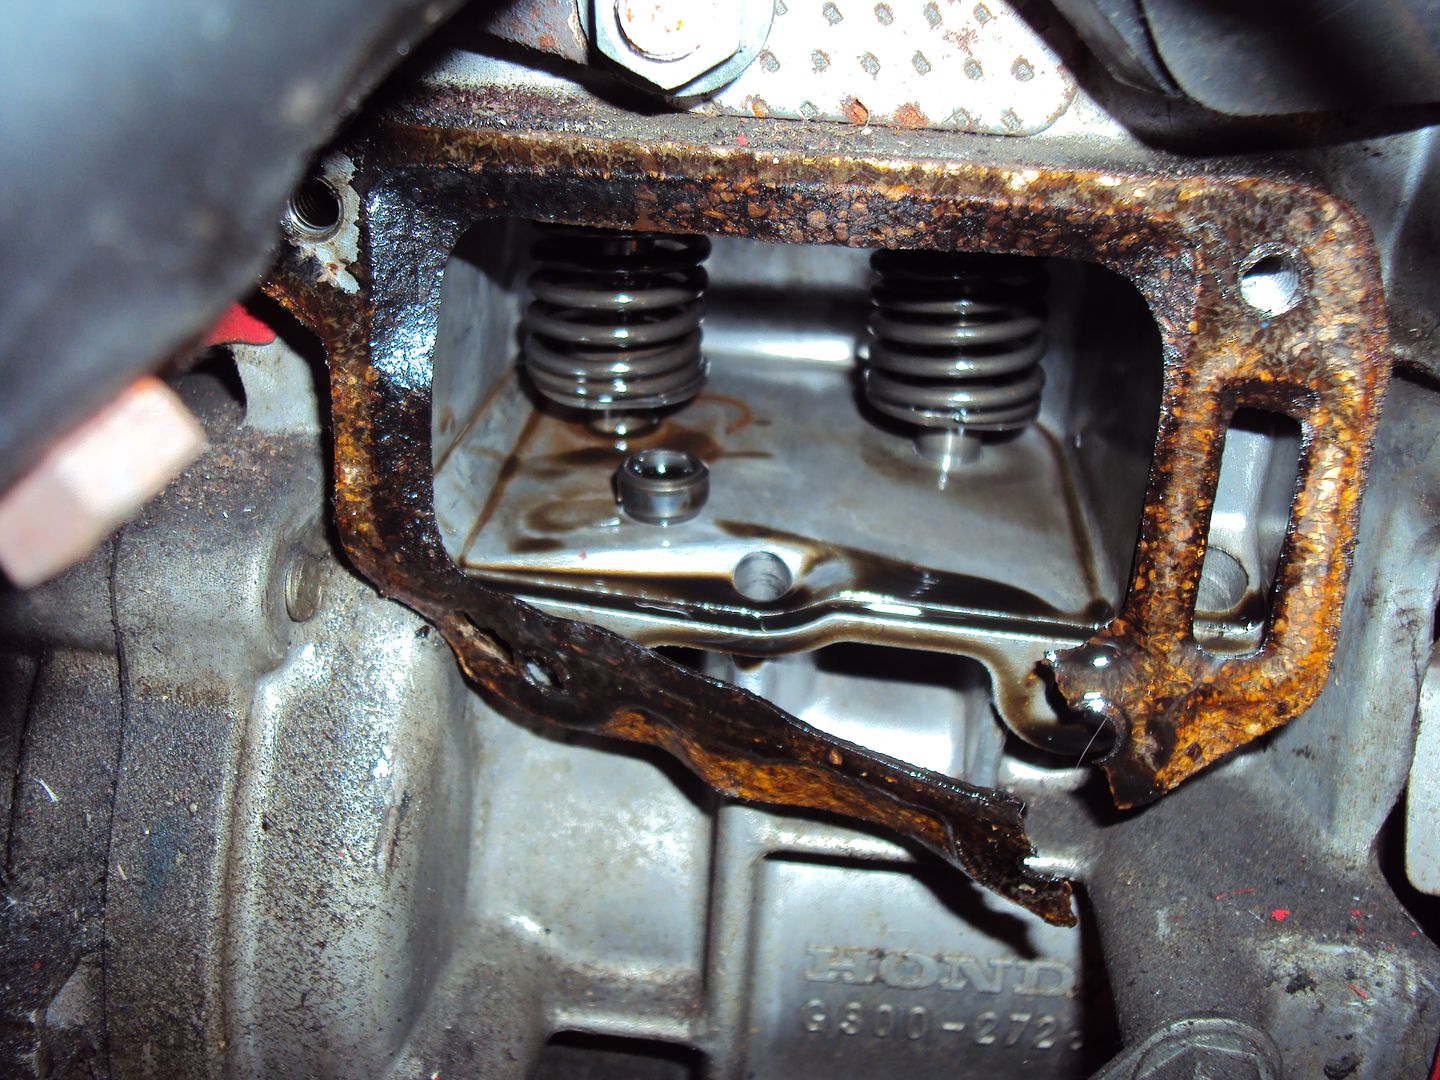
The cap should be on top of the tappet against the valve stem.
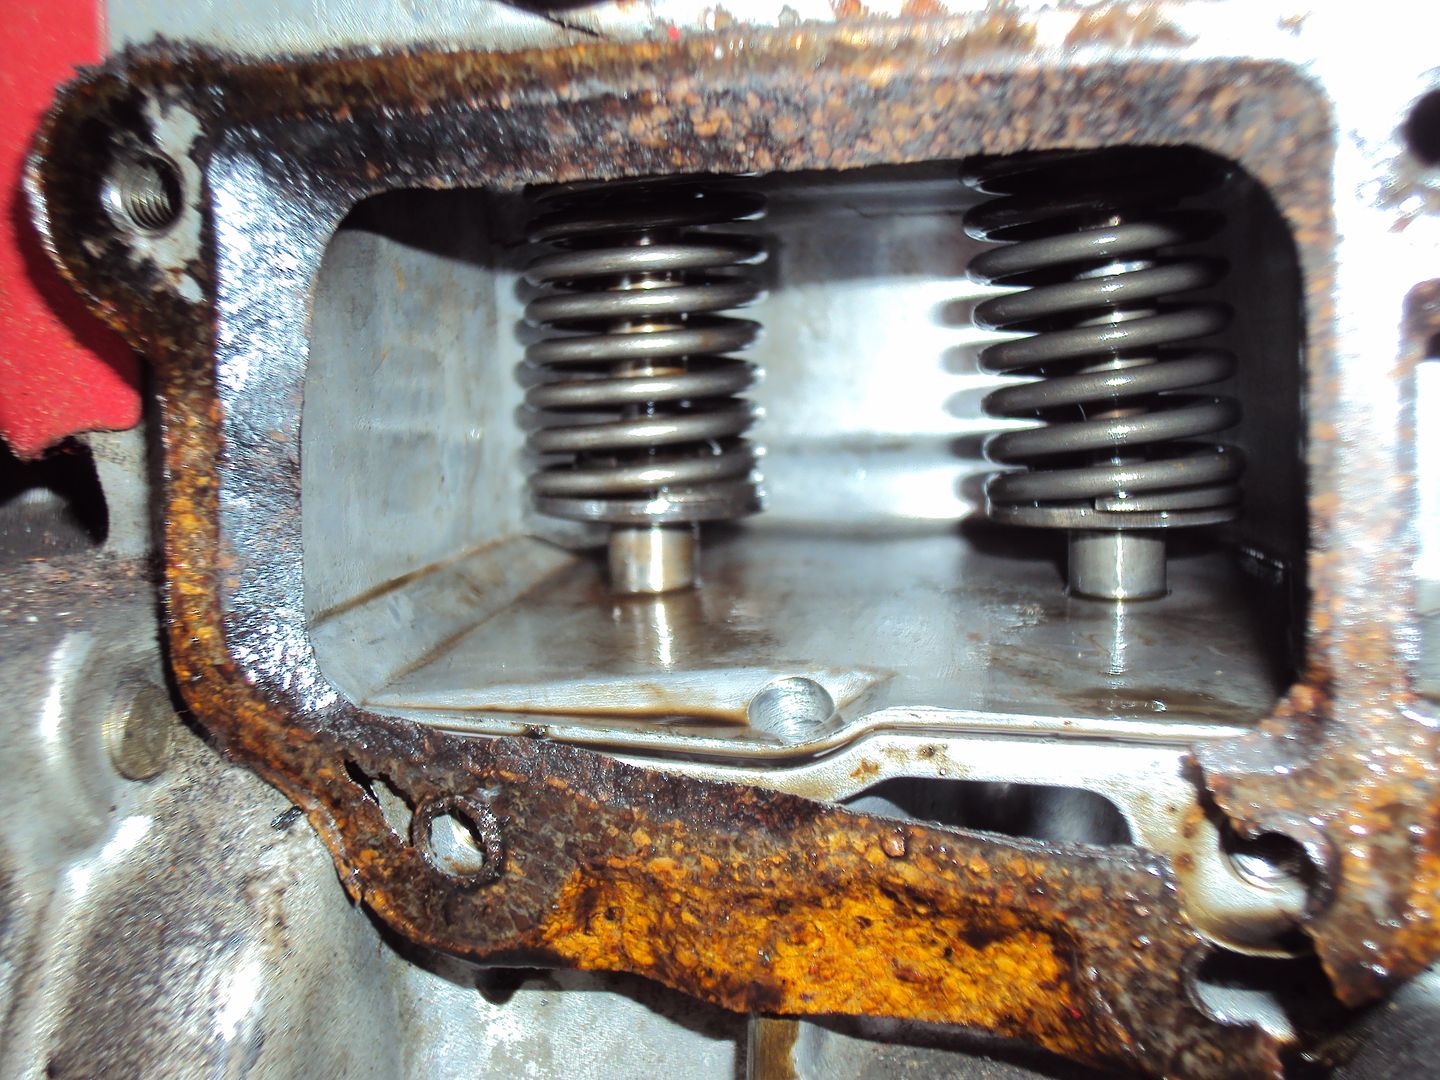
The valve spring retainer was removed so the valve could be lifted out and the spring removed.
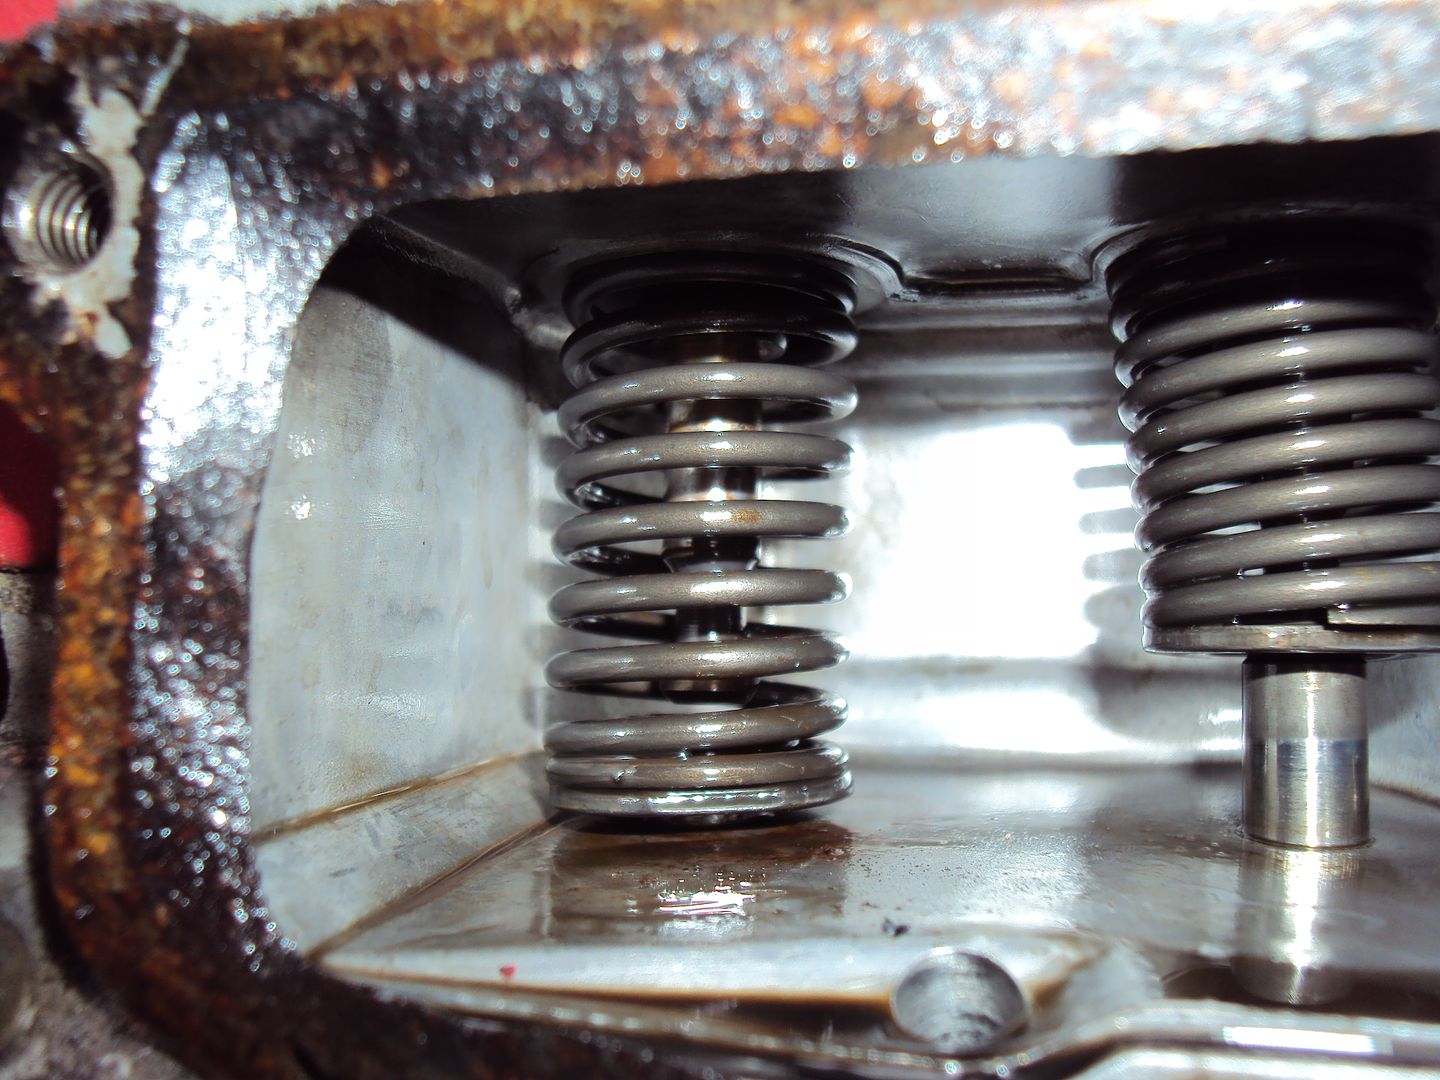
Ghetto valve spring compressor
Cap back in place
Valve spring retainer back in place
All back together
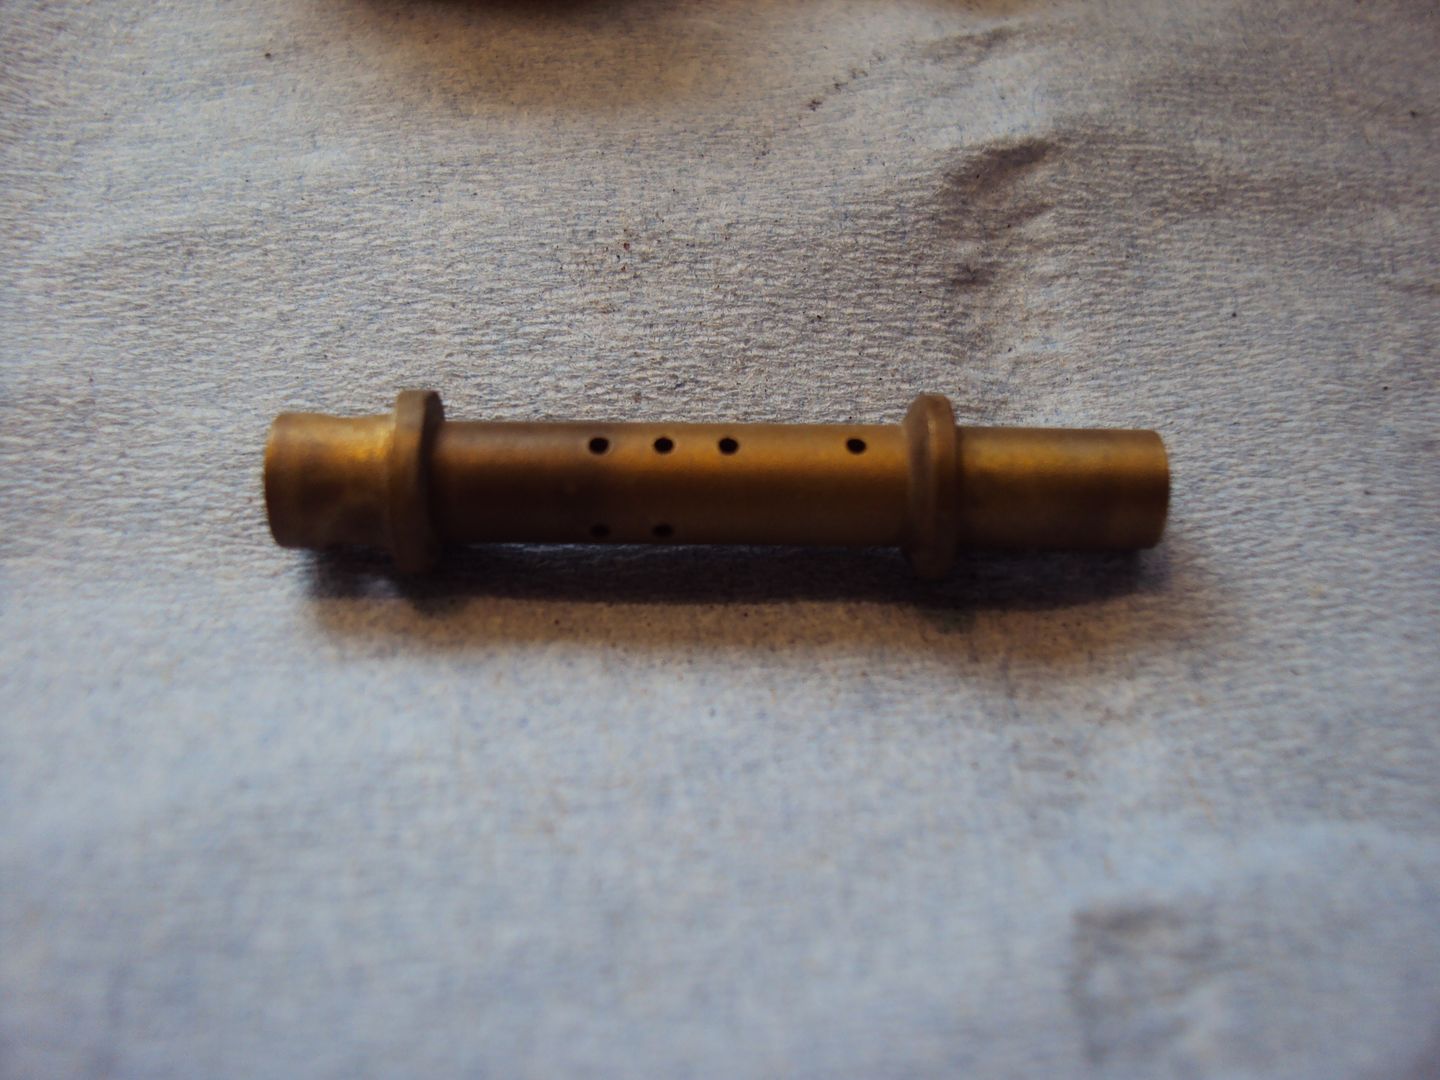
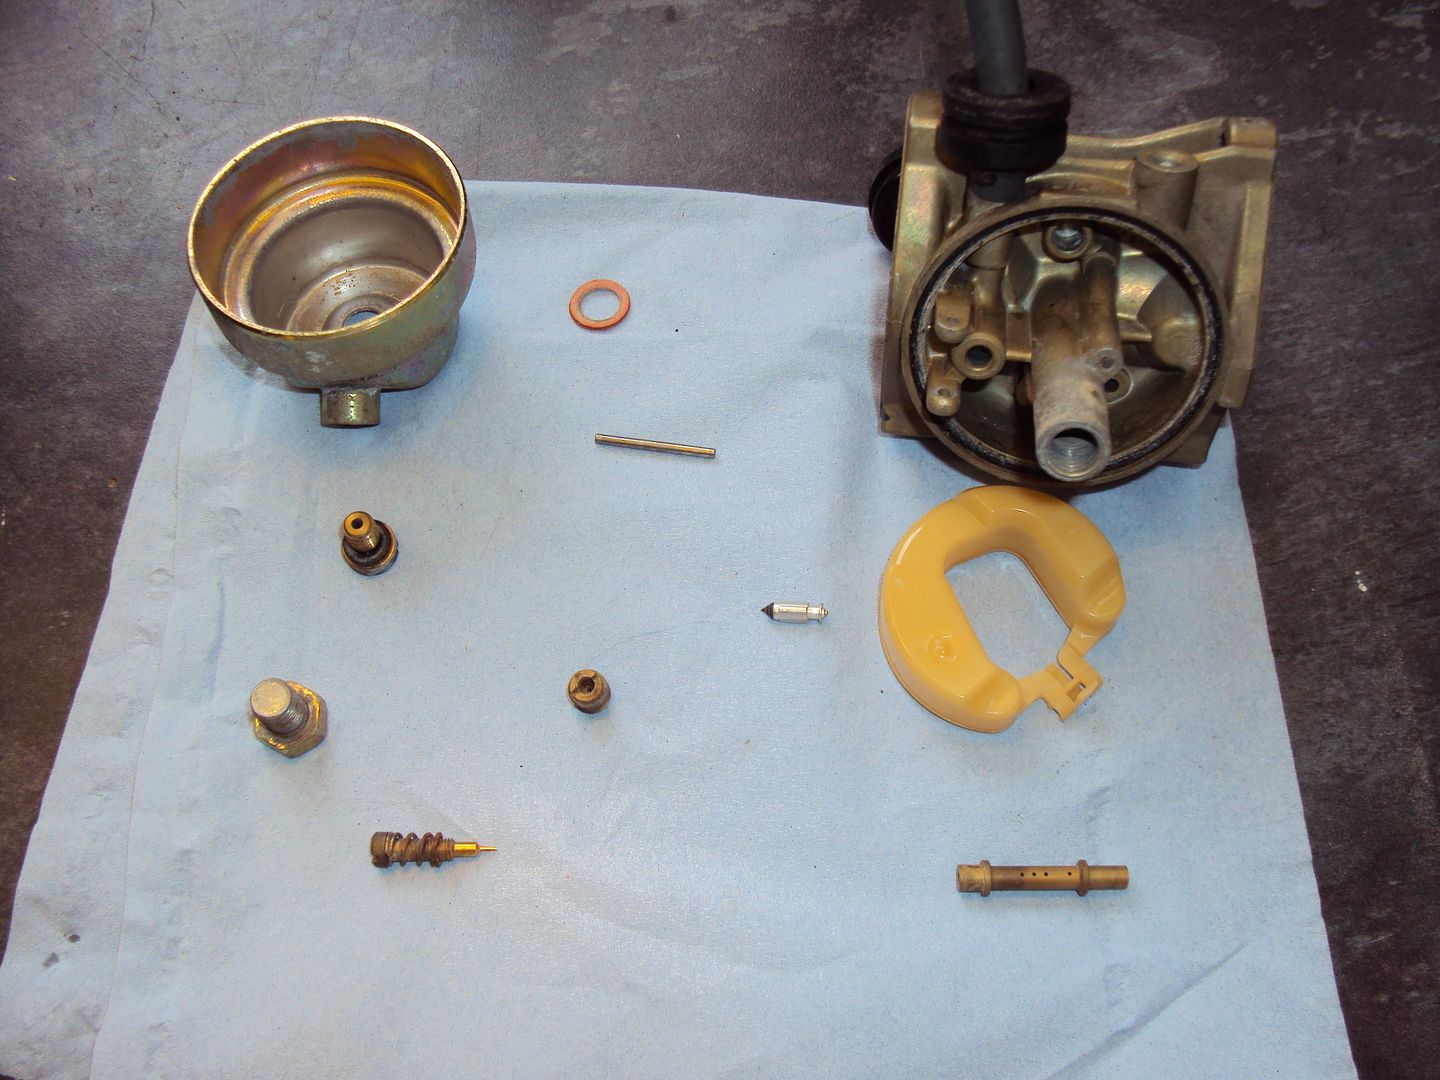
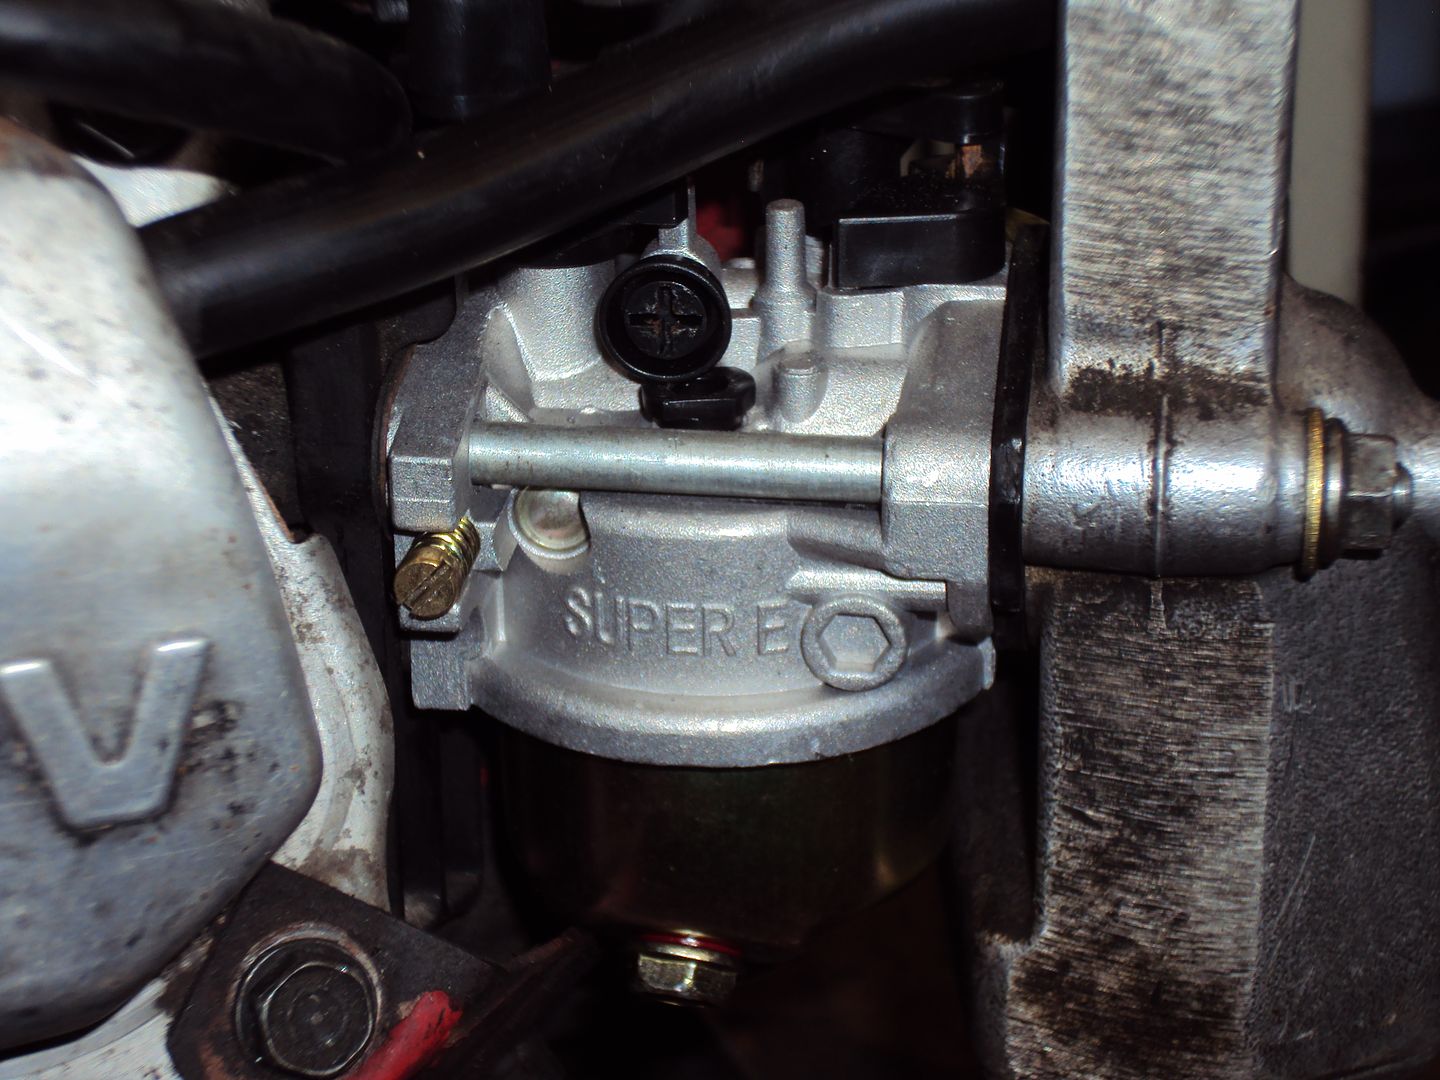
Once everything was re-assembled we go the engine running and it sounded a lot better but still needed the choke to be on to allow it to run. We started stripping the carburettor, there was a fair bit of sediment in the bowl
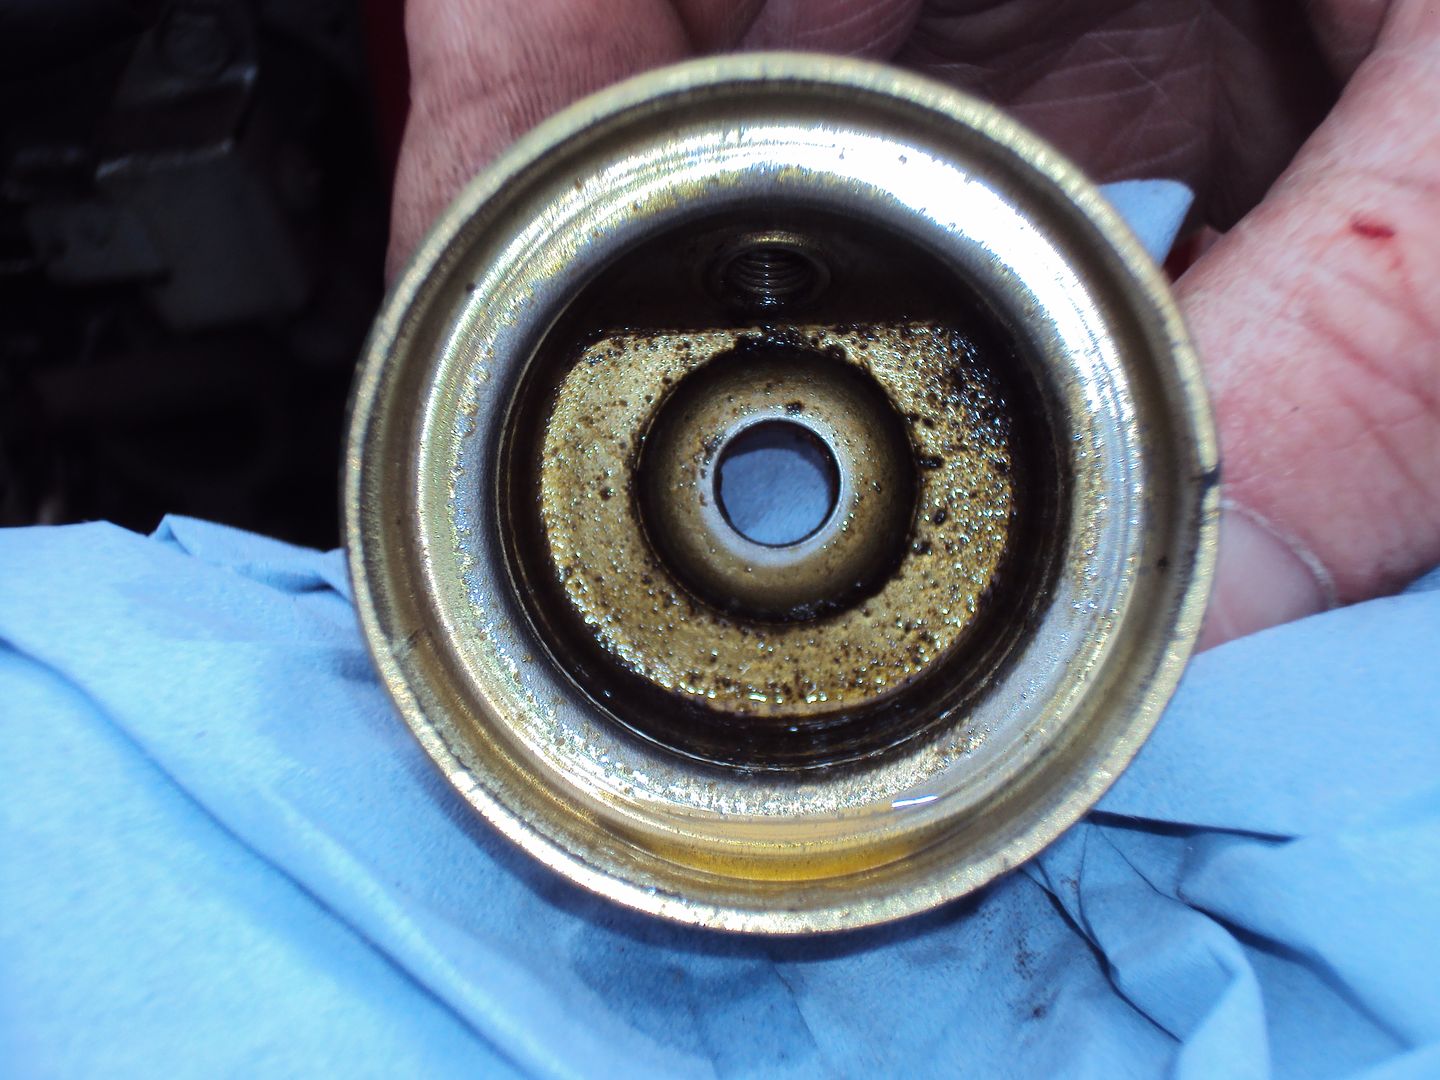

Pickup tube for main jet
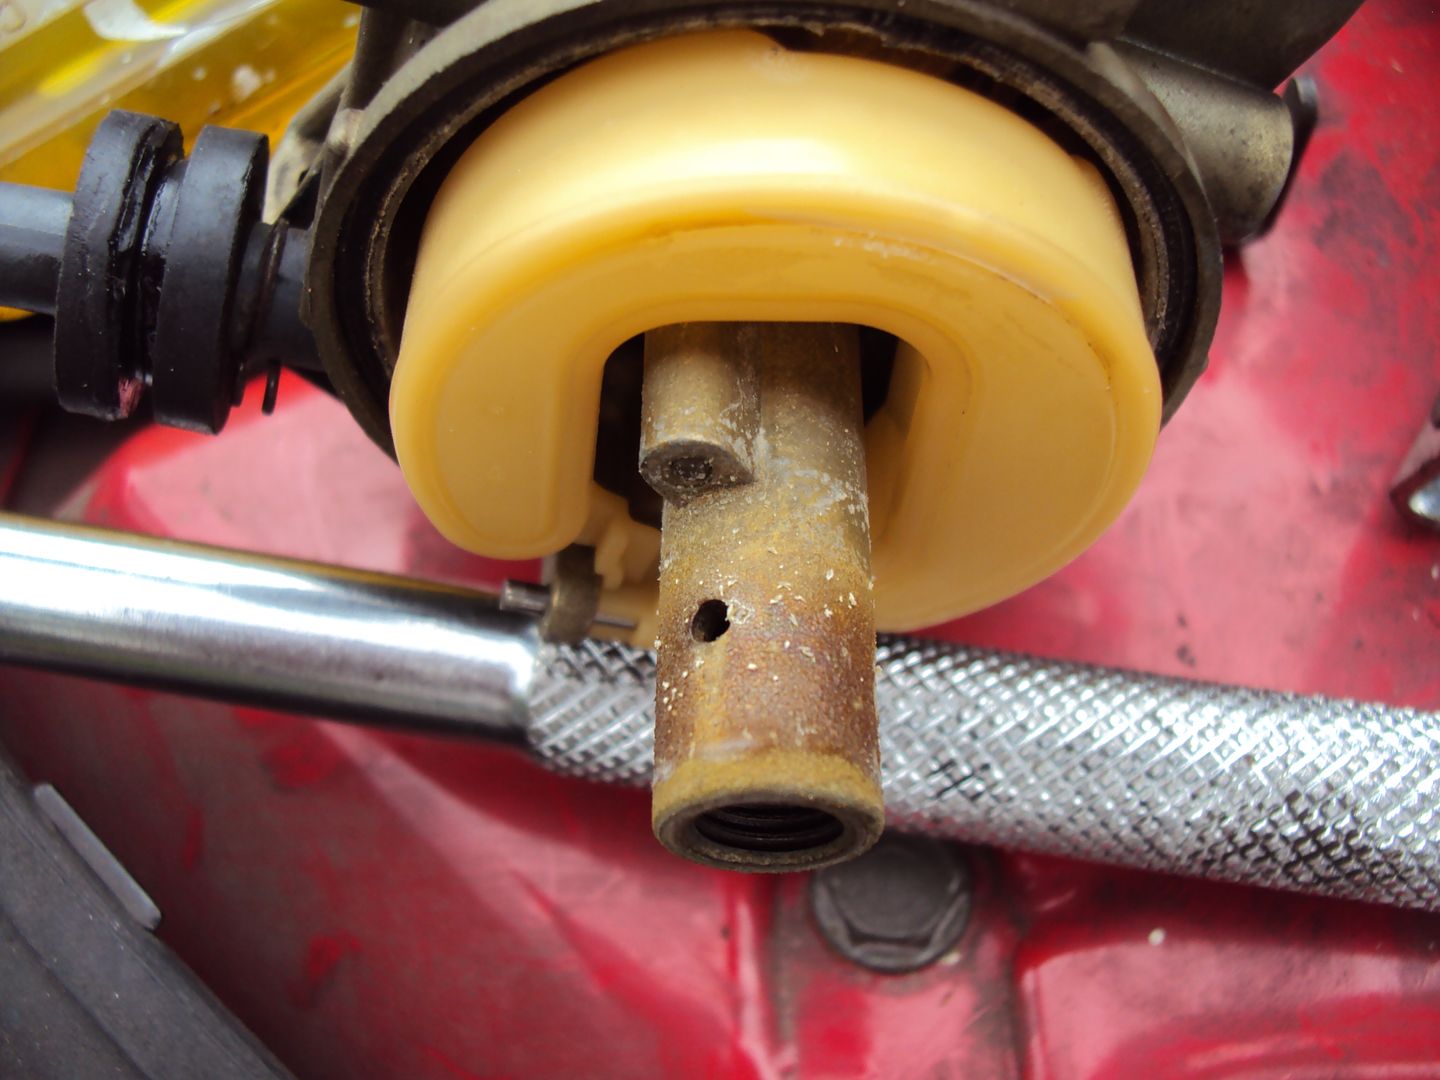
The main jet had a fair bit of crud around it
More to follow
I picked up the next project during the week, another non starter, this one has the same engine as the last one, but with the added bonus of optional electric start.
After a bit of poking around we found there was no spark, even though the ignition system all checked out ok. We determined the spark plug was at fault, when tested with the multimeter it was open circuit.
Resistance of a good plug
After replacing the sparkplug the engine spluttered into life, however there were a couple of problems. The first was there was a very loud metallic rattle, the second was it would only run with the choke on.
I started with looking for the source of the rattle, I removed the valve chest cover and found a loose part.
The cap should be on top of the tappet against the valve stem.
The valve spring retainer was removed so the valve could be lifted out and the spring removed.
Ghetto valve spring compressor
Cap back in place
Valve spring retainer back in place
All back together
Once everything was re-assembled we go the engine running and it sounded a lot better but still needed the choke to be on to allow it to run. We started stripping the carburettor, there was a fair bit of sediment in the bowl
Pickup tube for main jet
The main jet had a fair bit of crud around it
More to follow
jet_noise said:
A little bit more of a challenge this one.
Have you ever had to admit defeat?
regards,
Jet
Yep this one had a bit more to do which makes it more interesting, was getting bored with the easy fixes.Have you ever had to admit defeat?
regards,
Jet
The only one which has defeated me so far was a diesel one similar to the one in the photo at the beginning. The alternator was burnt out and only worked on 110v, it ended up being shipped out to Africa.
I fitted the inverter to the Kipor, so that one is finished now.
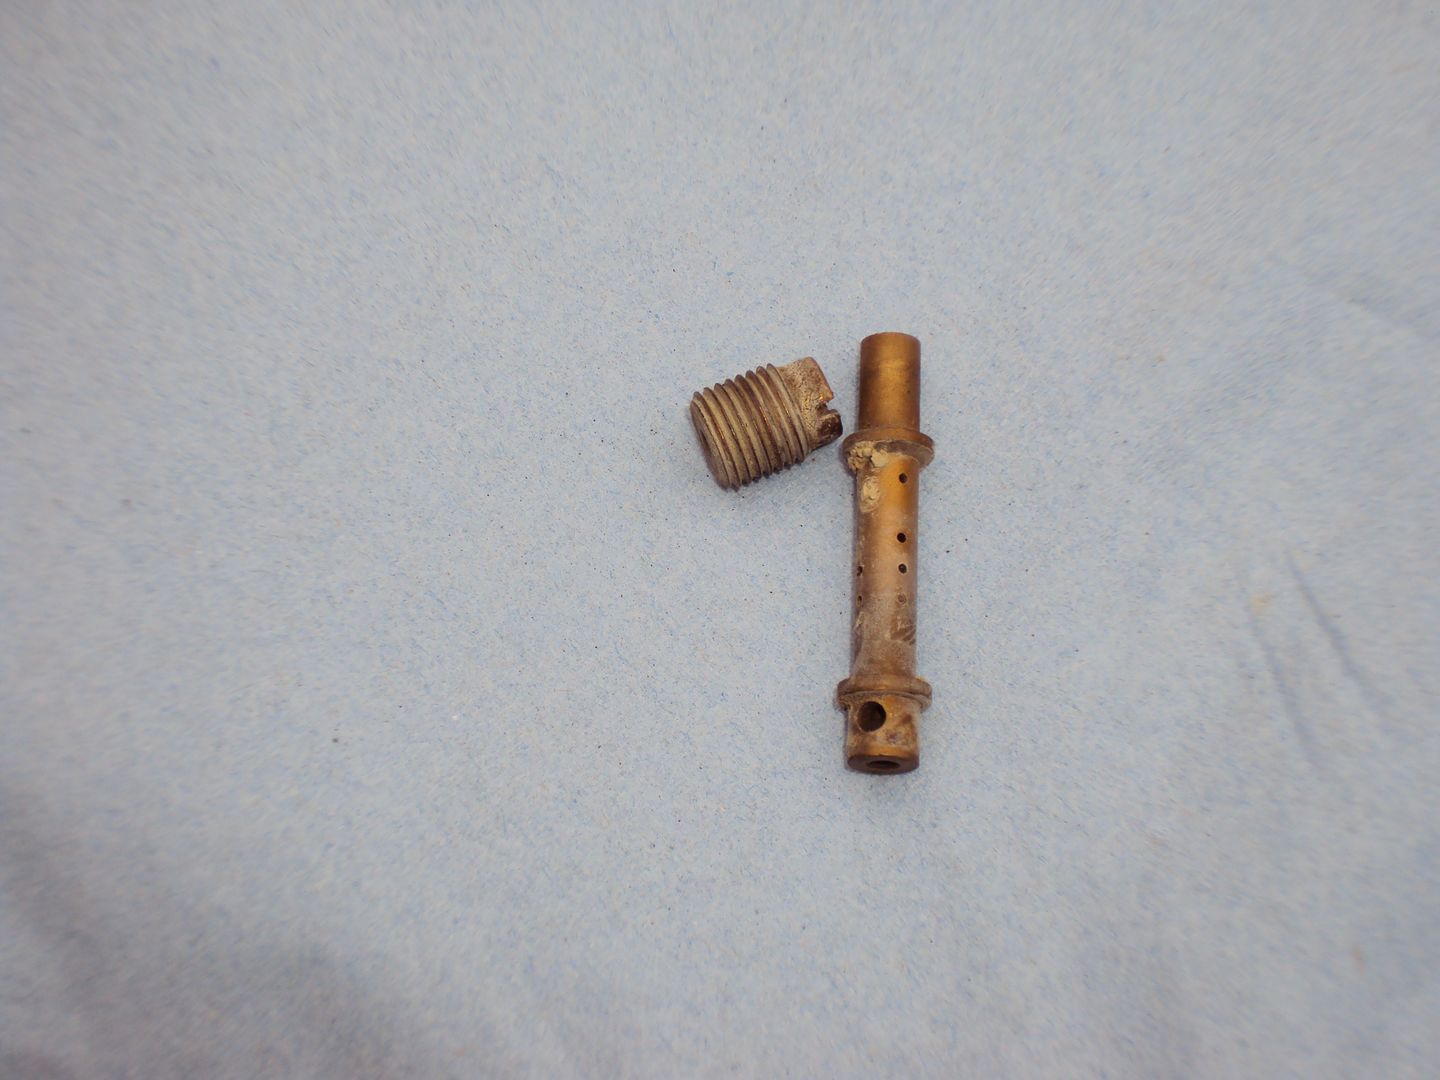
Carried on with cleaning the carburettor, the holes in the main jet were cleared using thin wire.
Float bowl all clean
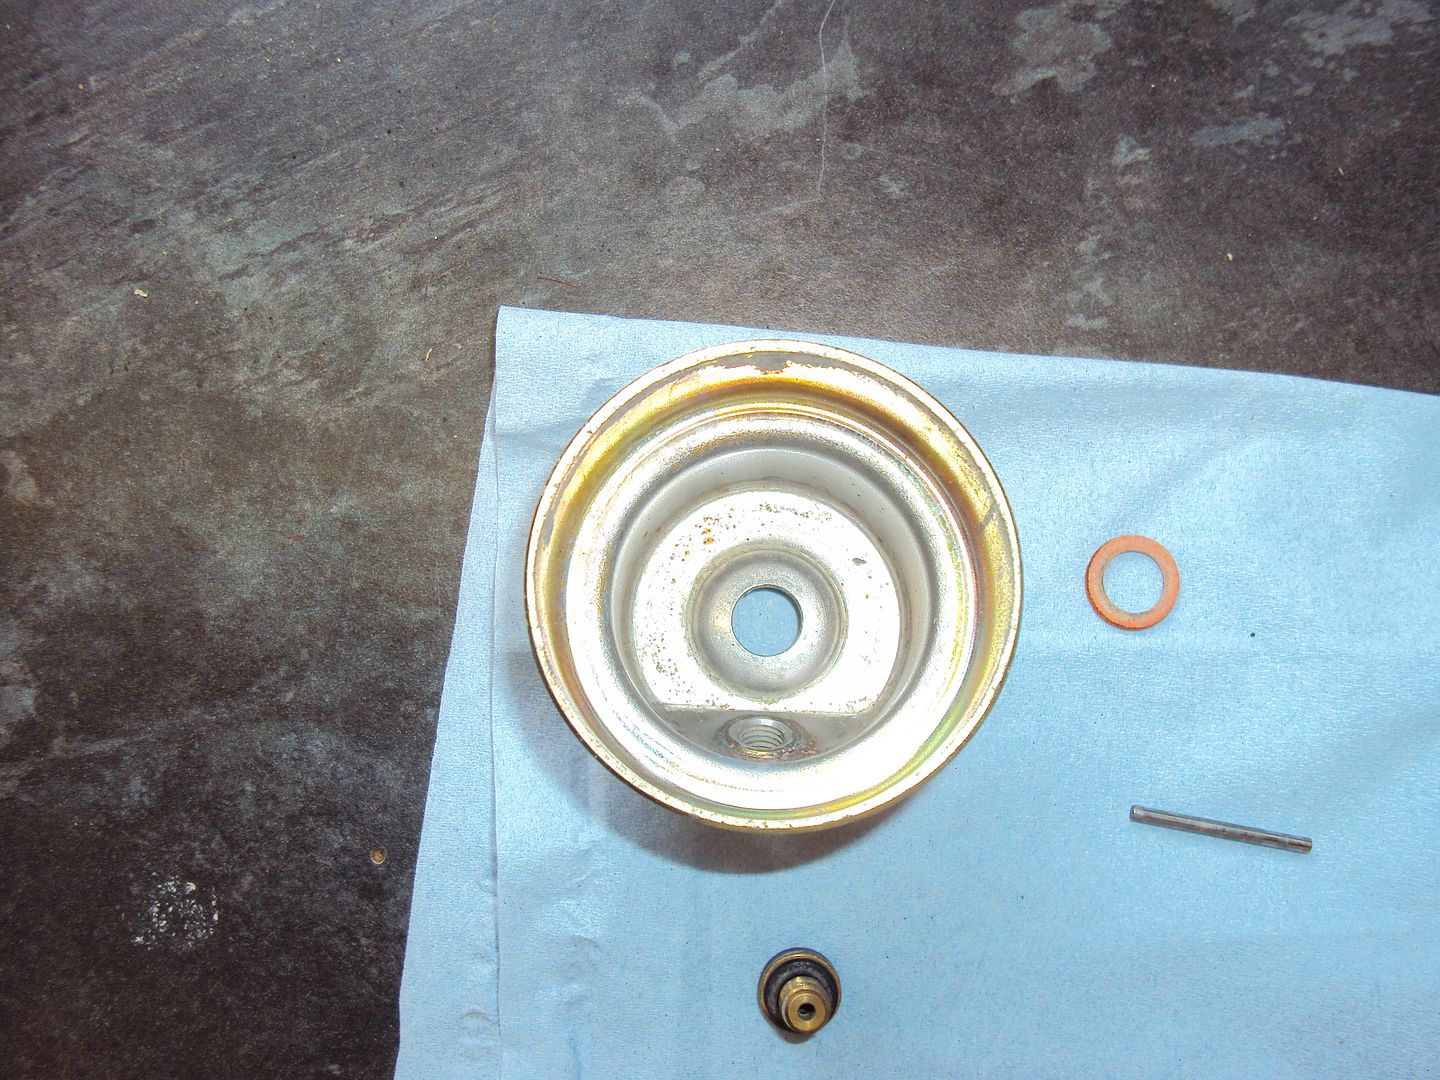
Everything clean and ready to go back together
I re-assembled and refitted the carburettor and started the engine. All was fine after a few seconds the engine settled down to a constant speed and was running without the choke.
The next task is to find out why the electric starter motor isn’t working.
shtu said:
Slight hijack, but as you're a man with many generators and a 'scope it's worth an ask.
How good\bad is the output from a typical DIY-Shed generator like this sort, though my particular one was a B&Q own-brand one, http://www.amazon.co.uk/Generator-Petrol-2-8kva-6-...
Reason being, I'd like to use one to run the central heating during power cuts. Nothing fancy, simple oil boiler and a pump to match.
The output would be ok for the simple appliances you mentioned, it will probably keep the fridge running as well. How good\bad is the output from a typical DIY-Shed generator like this sort, though my particular one was a B&Q own-brand one, http://www.amazon.co.uk/Generator-Petrol-2-8kva-6-...
Reason being, I'd like to use one to run the central heating during power cuts. Nothing fancy, simple oil boiler and a pump to match.
We have used a similar genny to run the house during a power cut a few years ago. The only thing which got upset was the UPS on the computer, it couldn't decide if he mains was there or not.
herewego said:
Why was the valve stem cap displaced and won't that happen again?
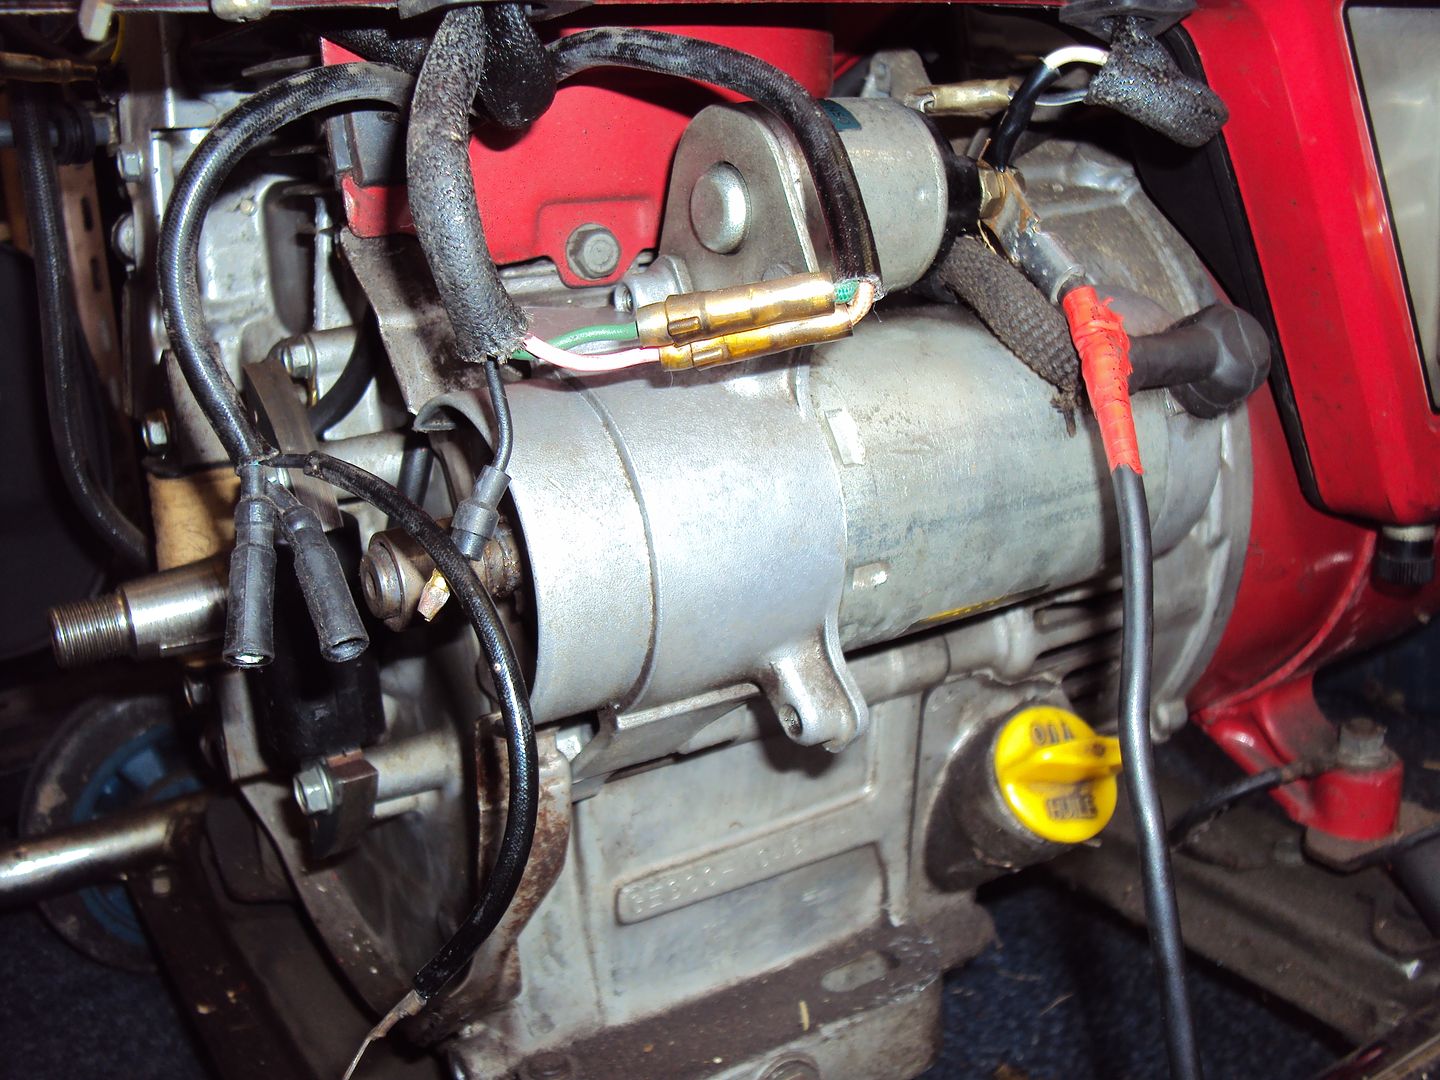
Not sure why the cap fell out, only guess is the engine might have been over revved?? Today’s task was to get the starter motor working, To remove the starter motor, the flywheel needs to be removed.
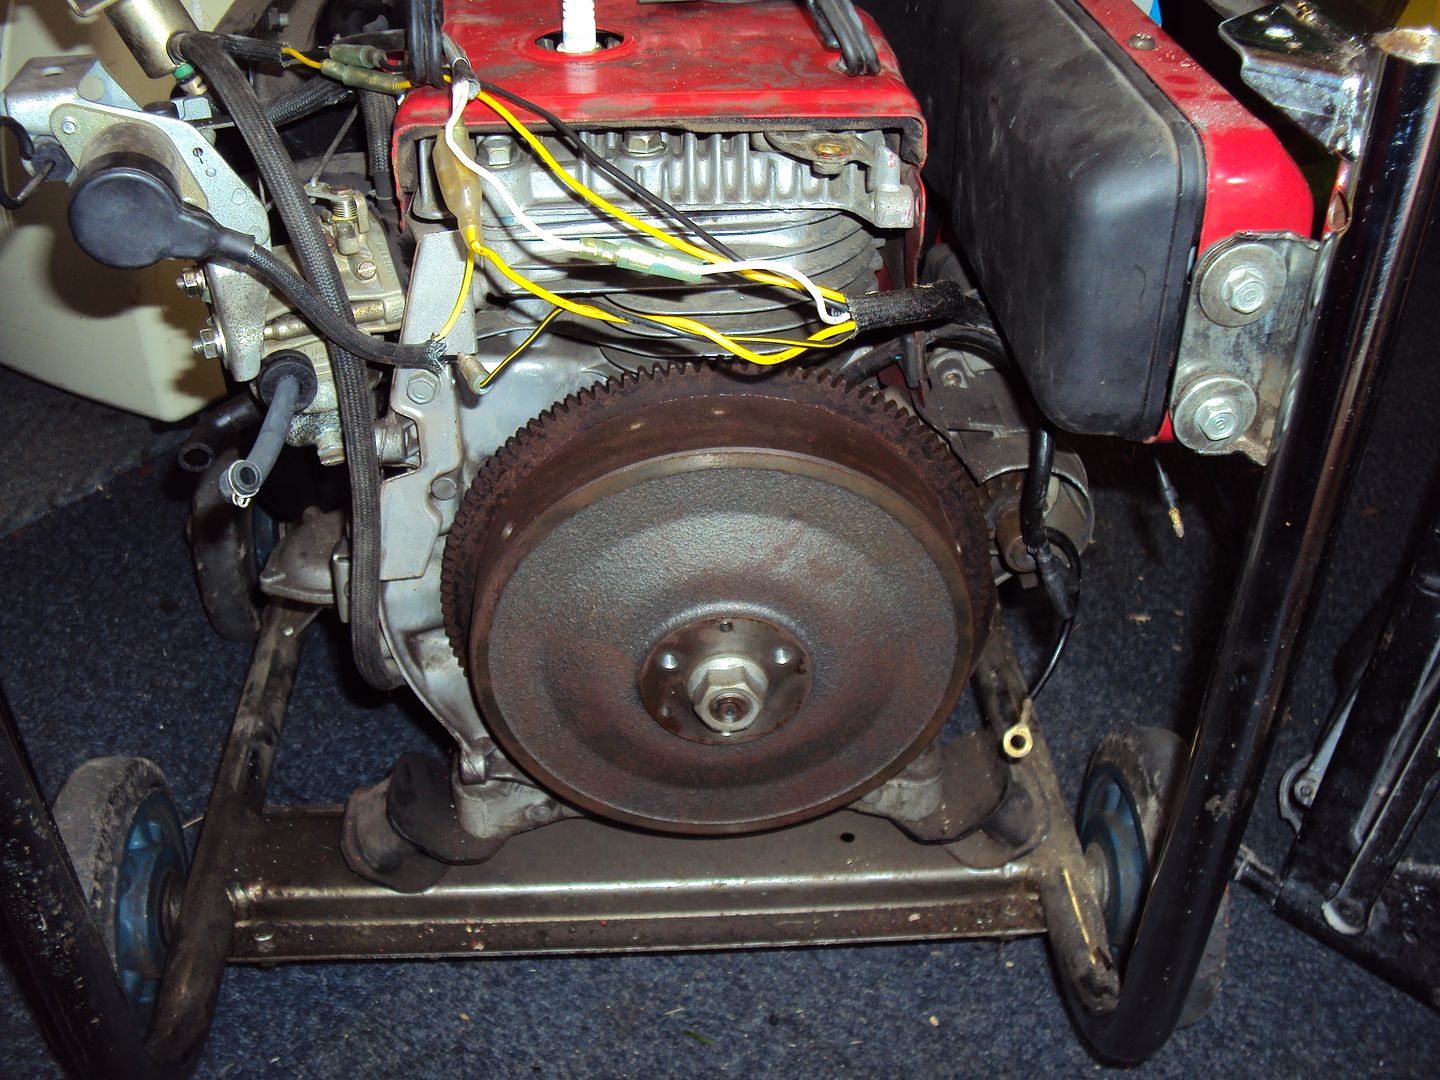
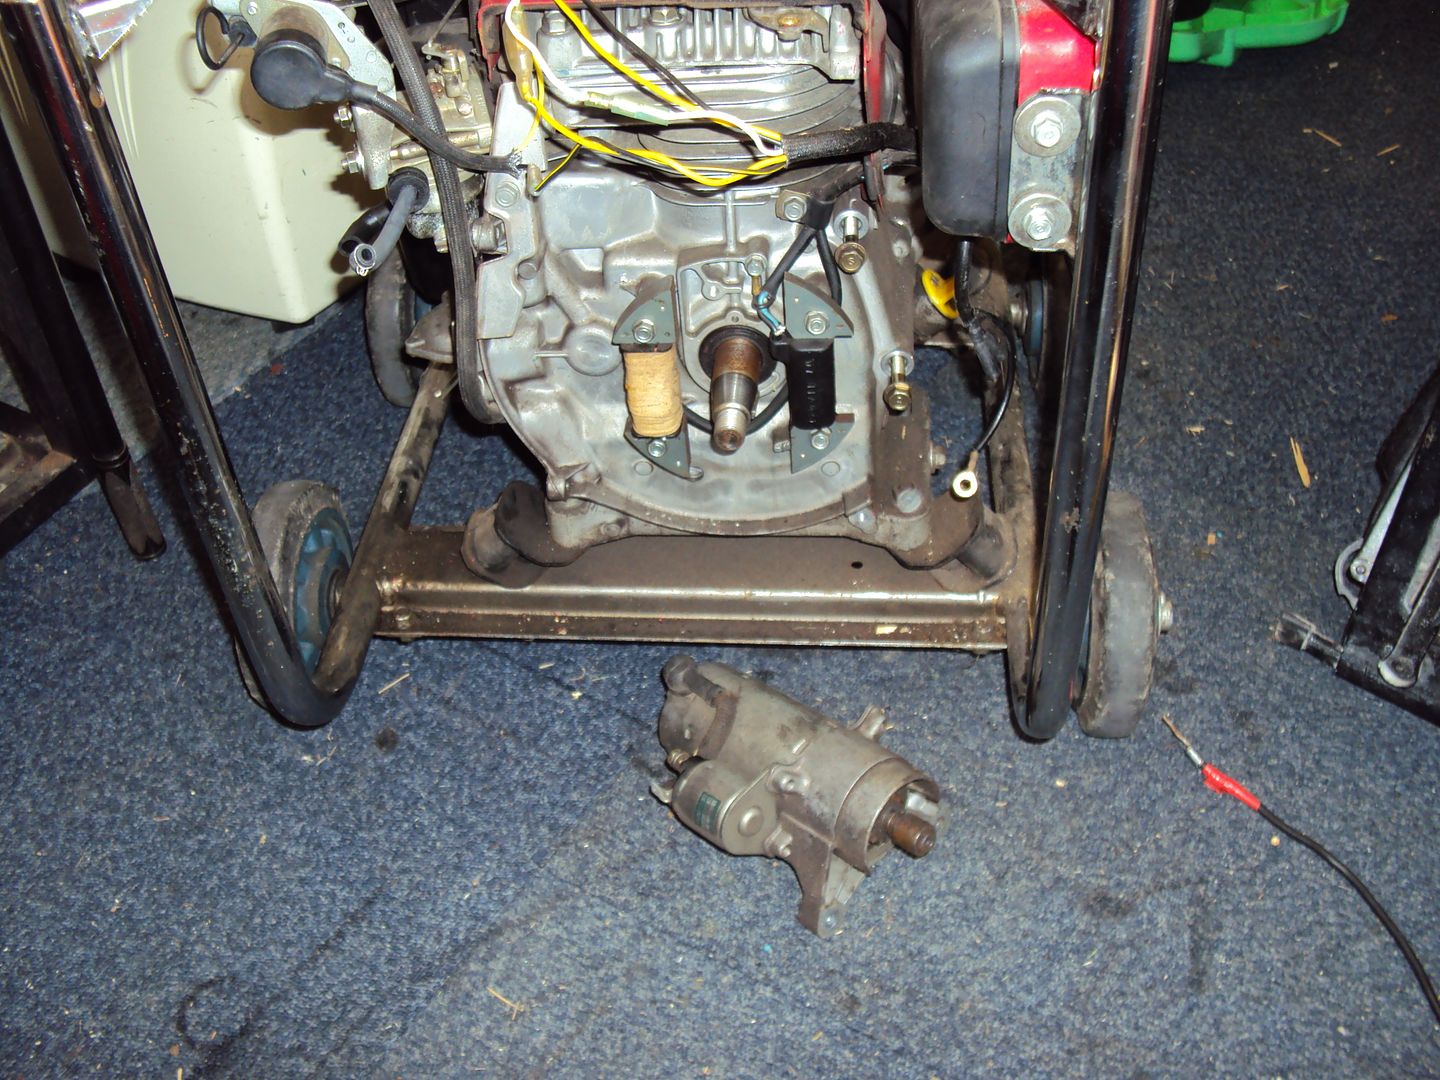
Flywheel removed
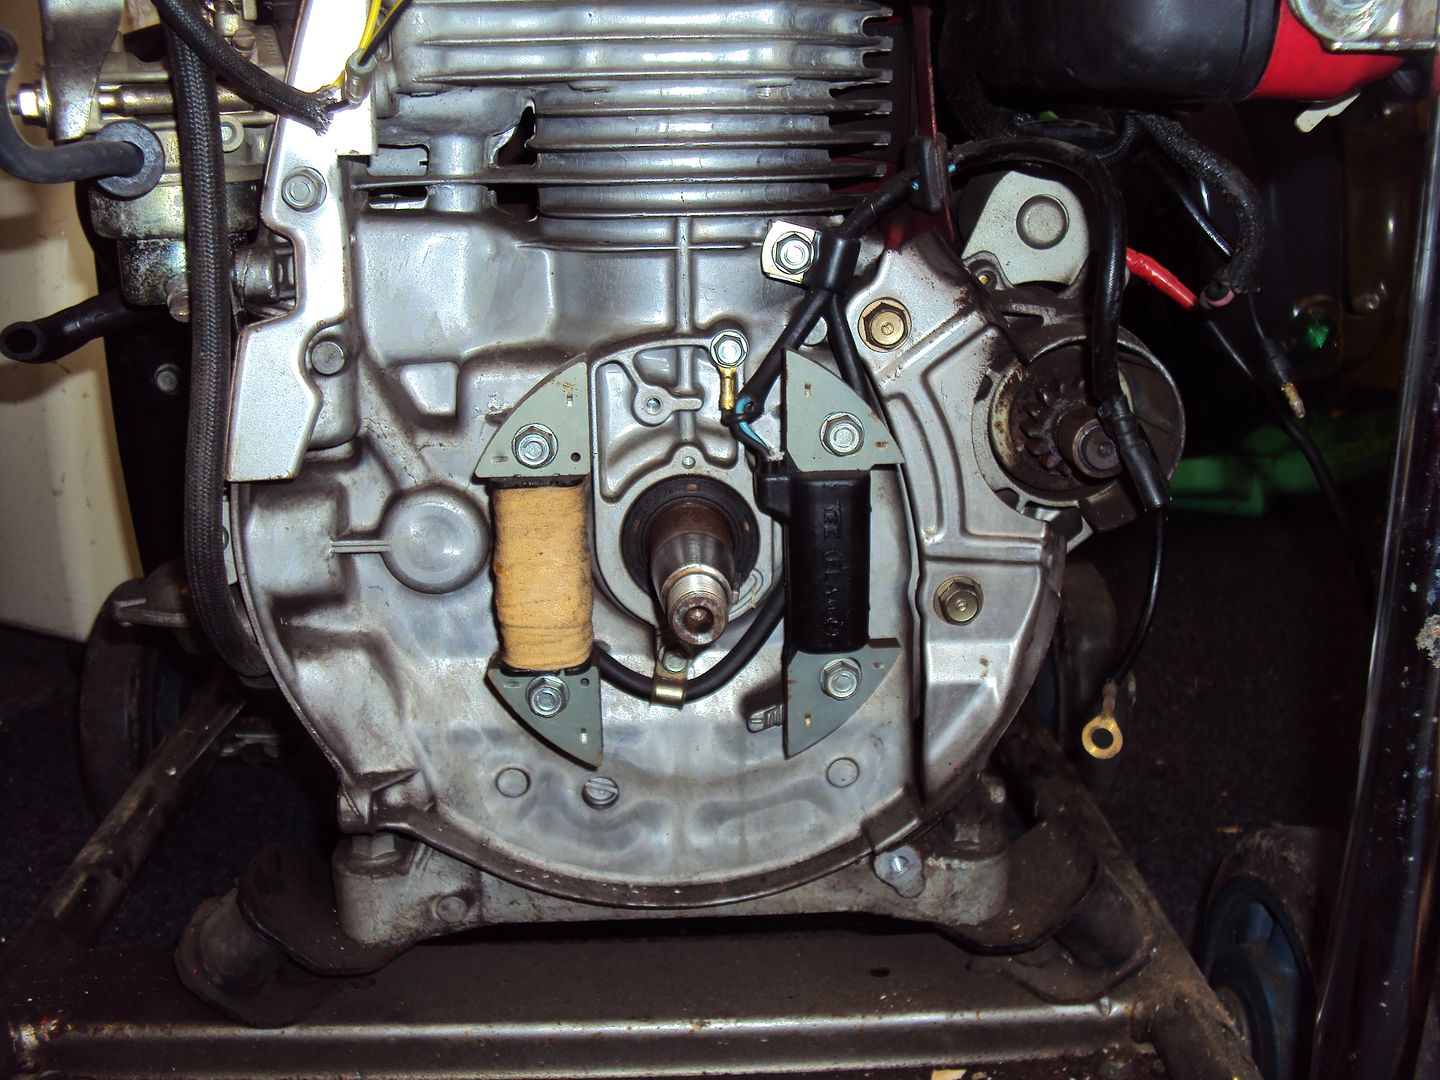
Starter motor removed
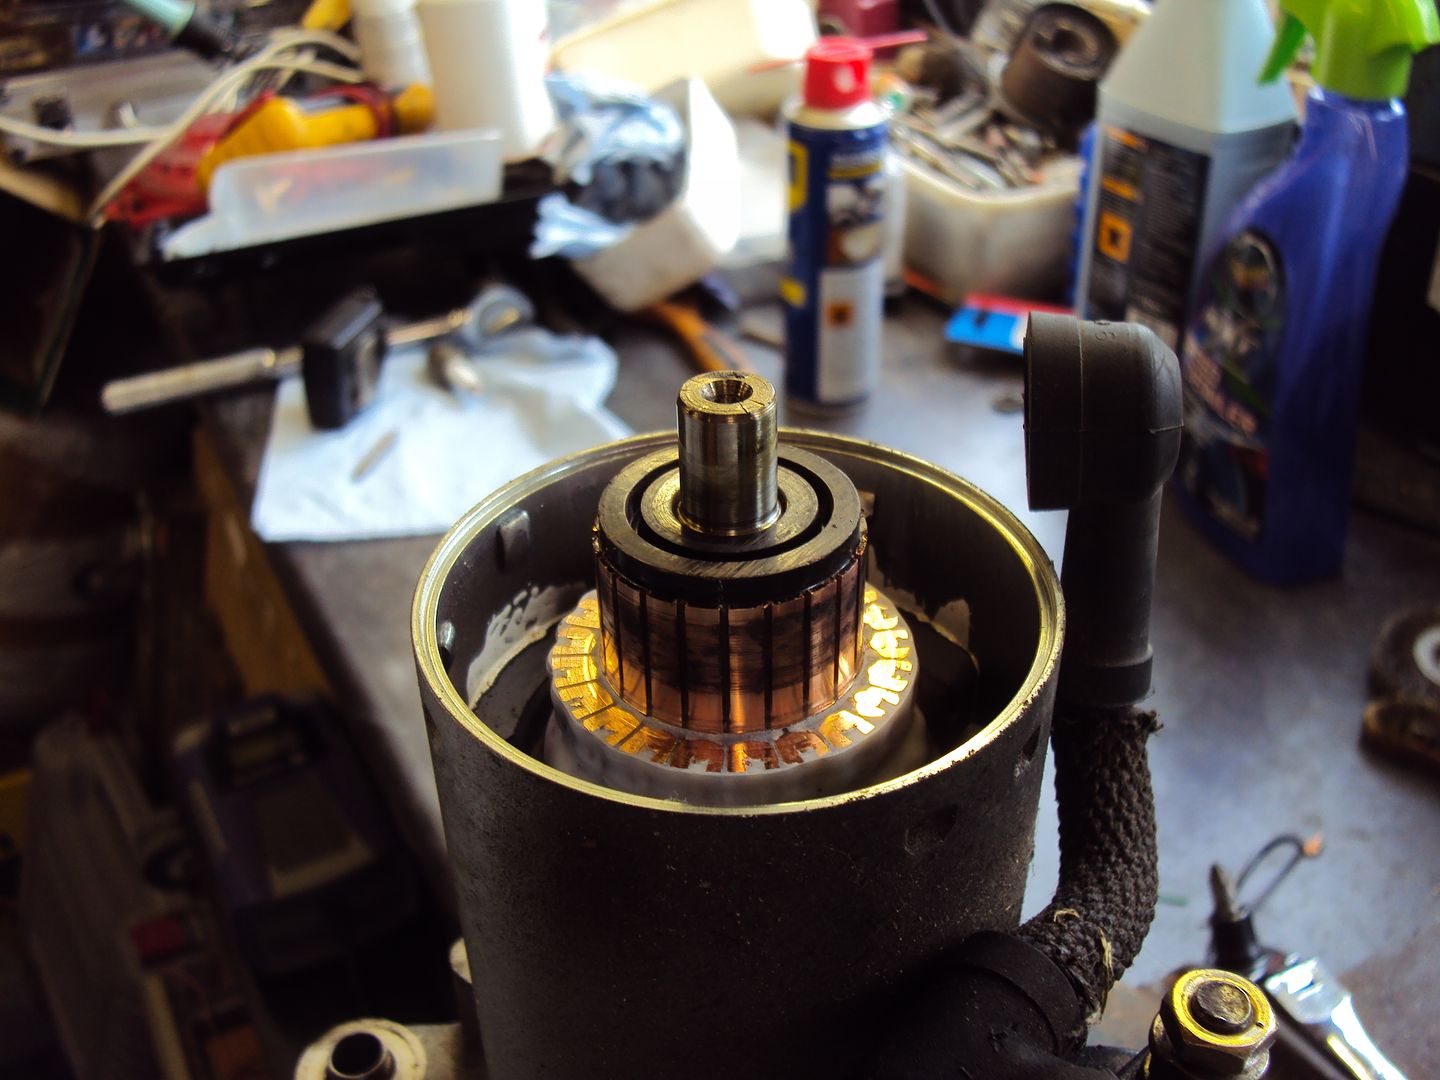
We removed the end cap from the motor, and found the commutator was in great condition. This is because when new, the generator is supplied with the starter motor. However an optional kit has to be purchased which consists of a battery cradle and wiring to enable the electric start.
This generator never had it fitted so the starter motor had never been used.
We removed the brush holder and found the –ve brush was stuck (top left) whereas the +ve (top right) brush moved freely.
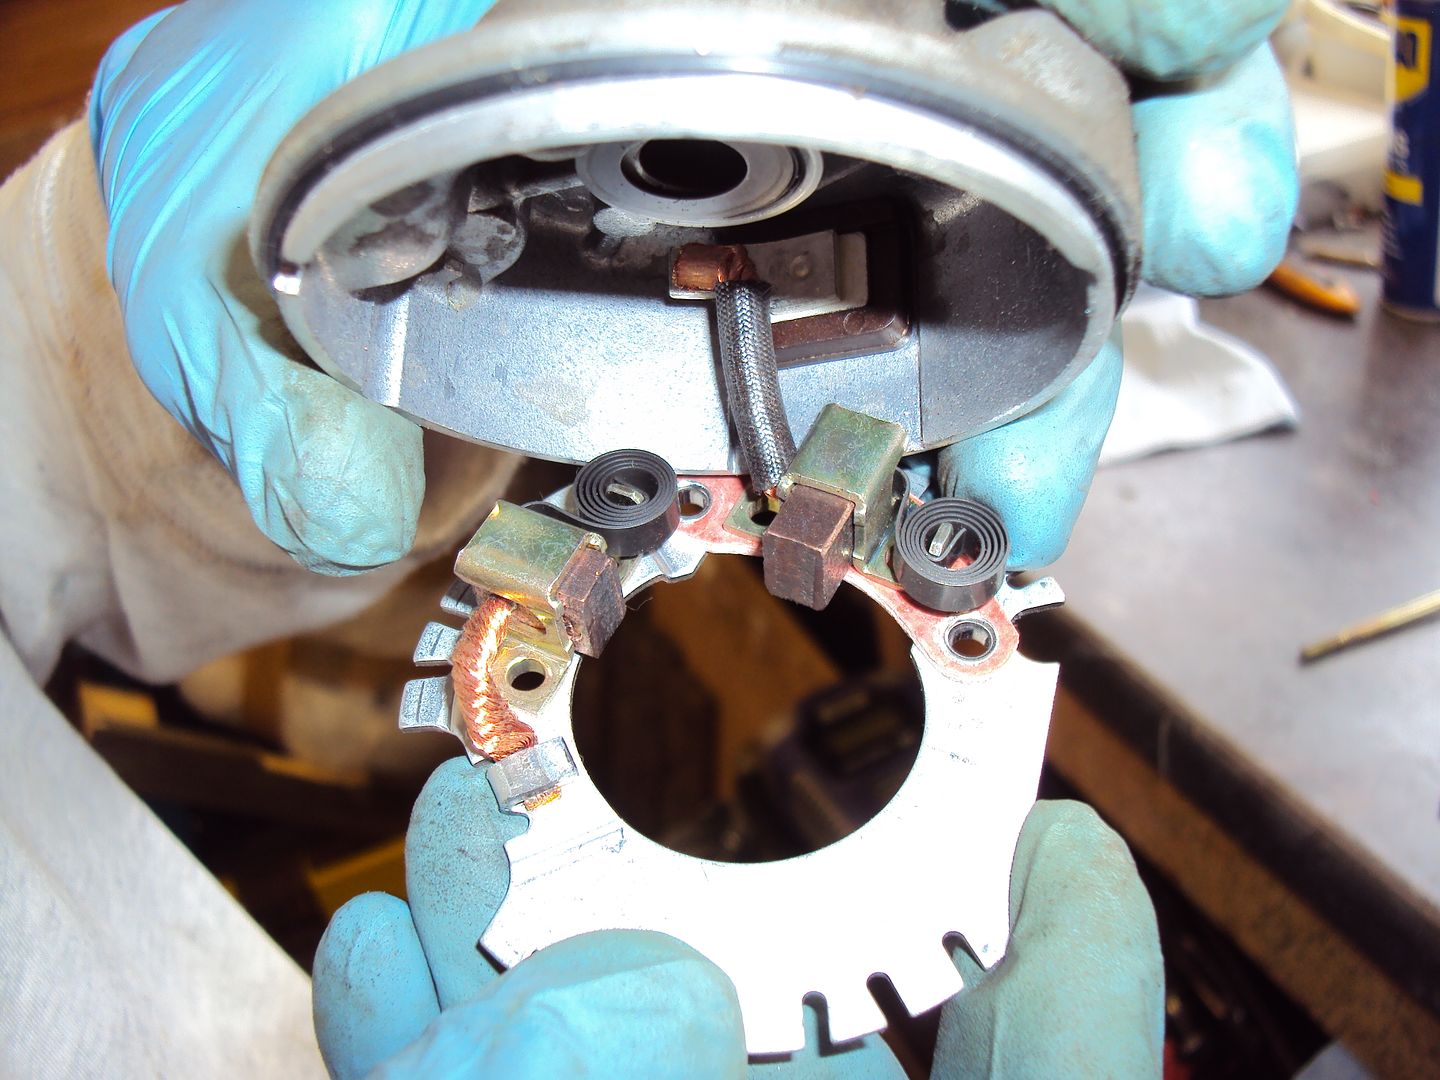
After a liberal application of copper grease the brush was moving freely again

The motor was re-assembled, cleaned and re-fitted to the engine
We hooked up a battery using jump leads, turned the key and it worked.
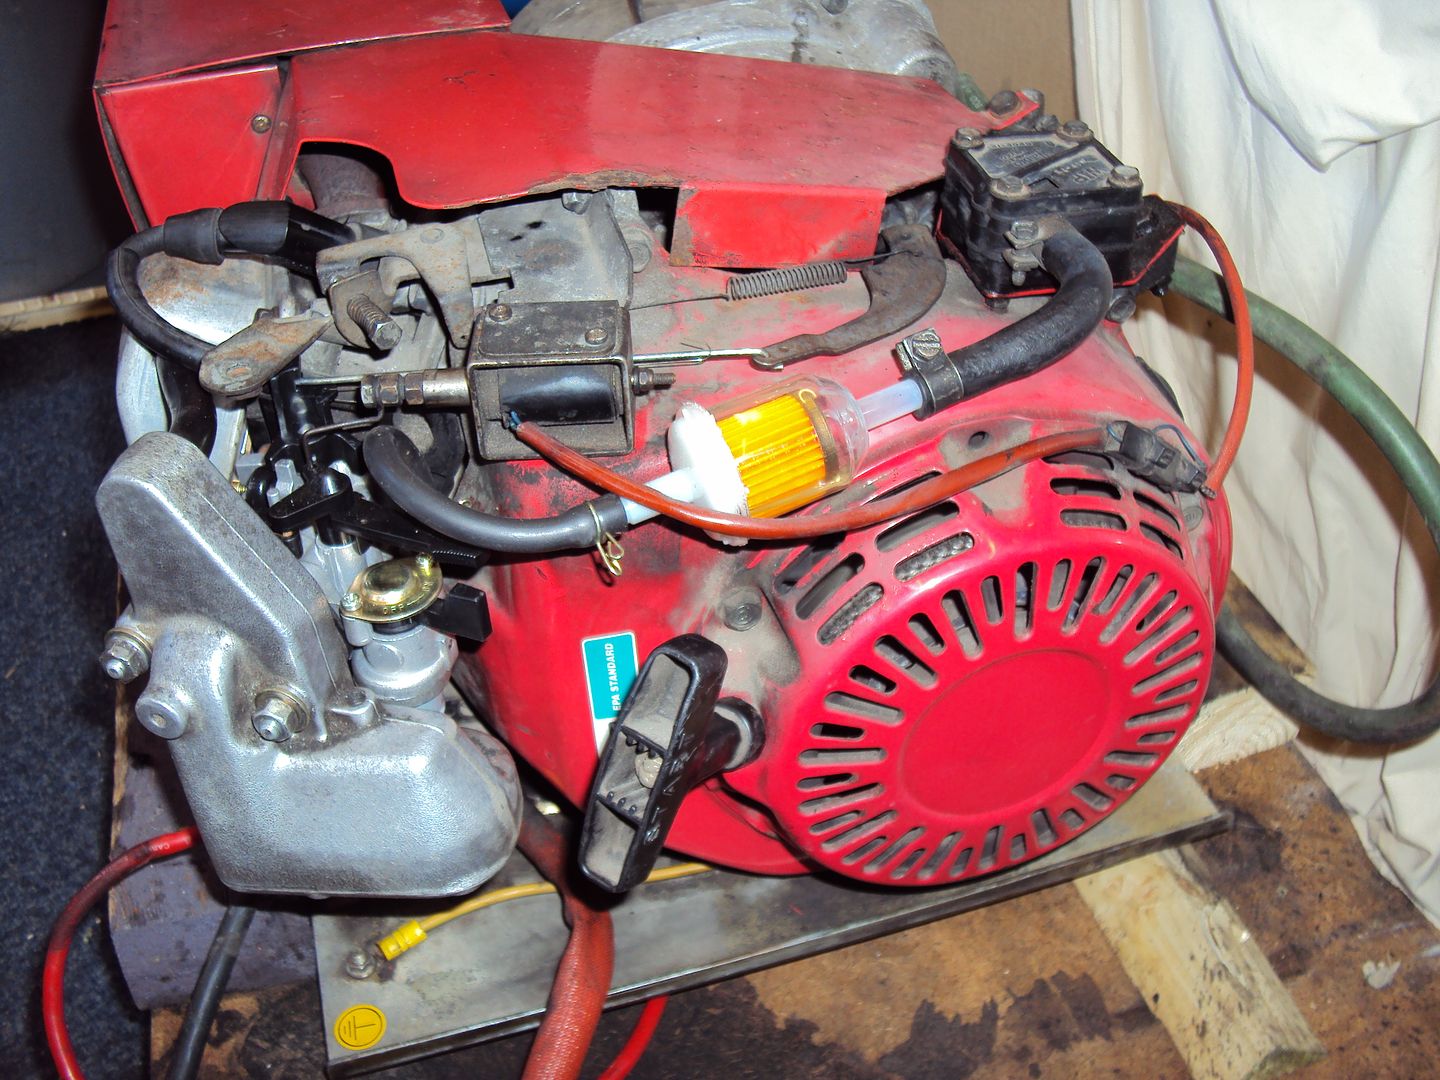
When I originally collected the generator, it was missing the air filter carrier and cover
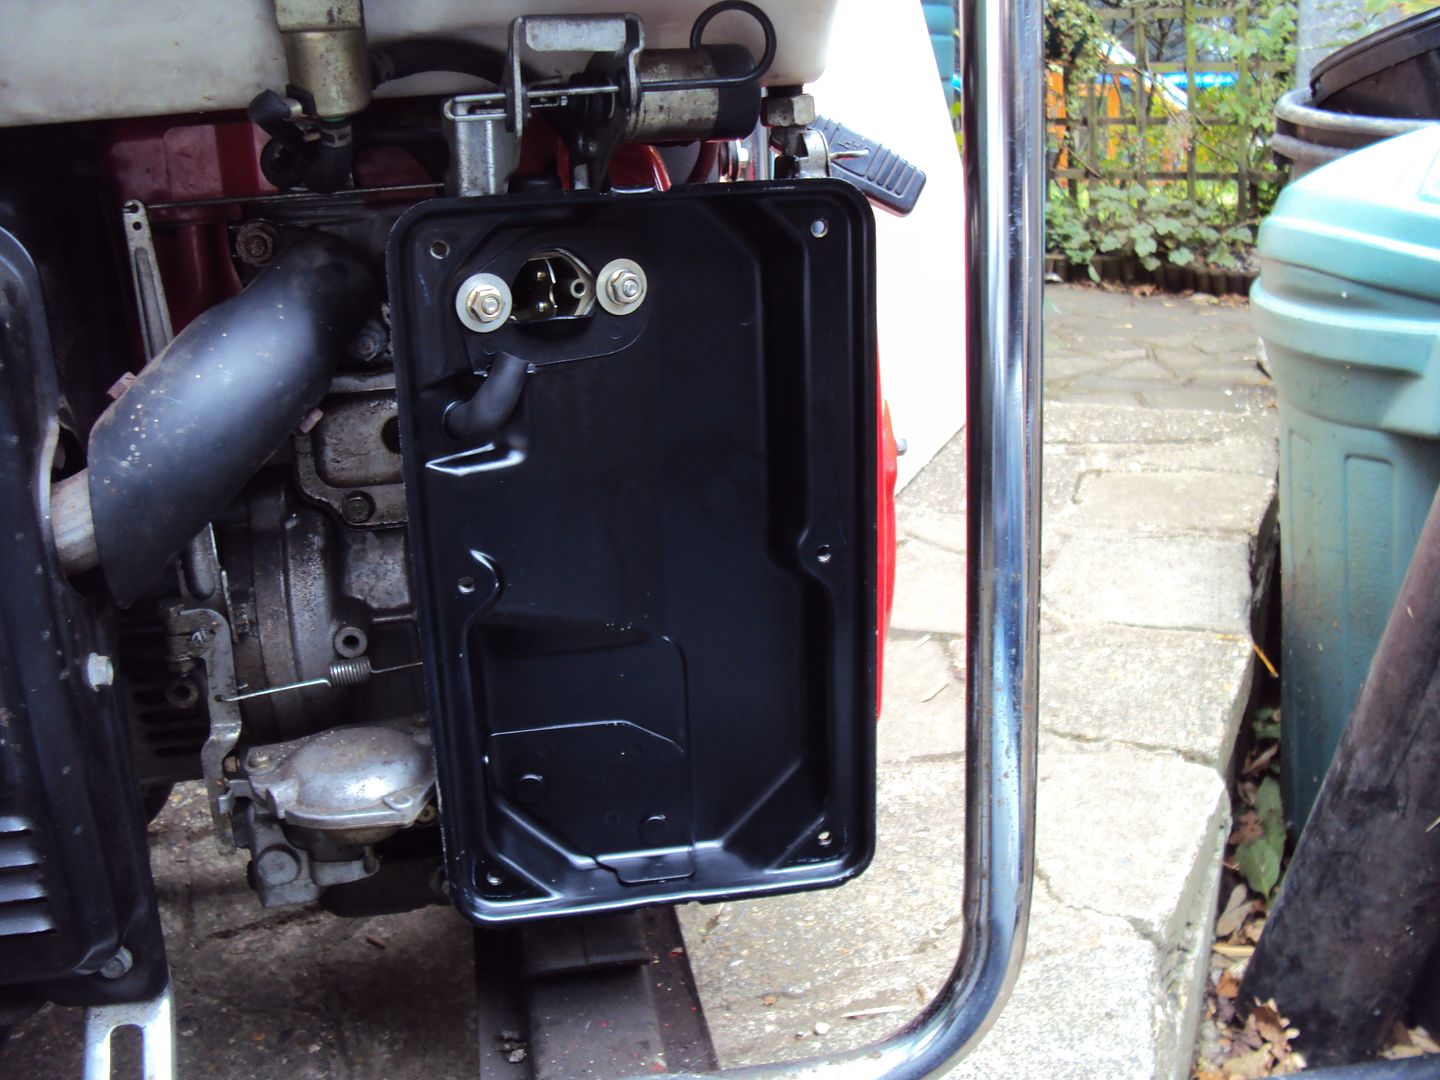
After a bit of searching I found a complete new air cleaner for £34.00 (copy of the Honda parts) which was a lot cheaper than the nearly £80! For the 2 genuine Honda parts I needed. I just needed the filter carrier (middle) and cover (right)from the replacement unit
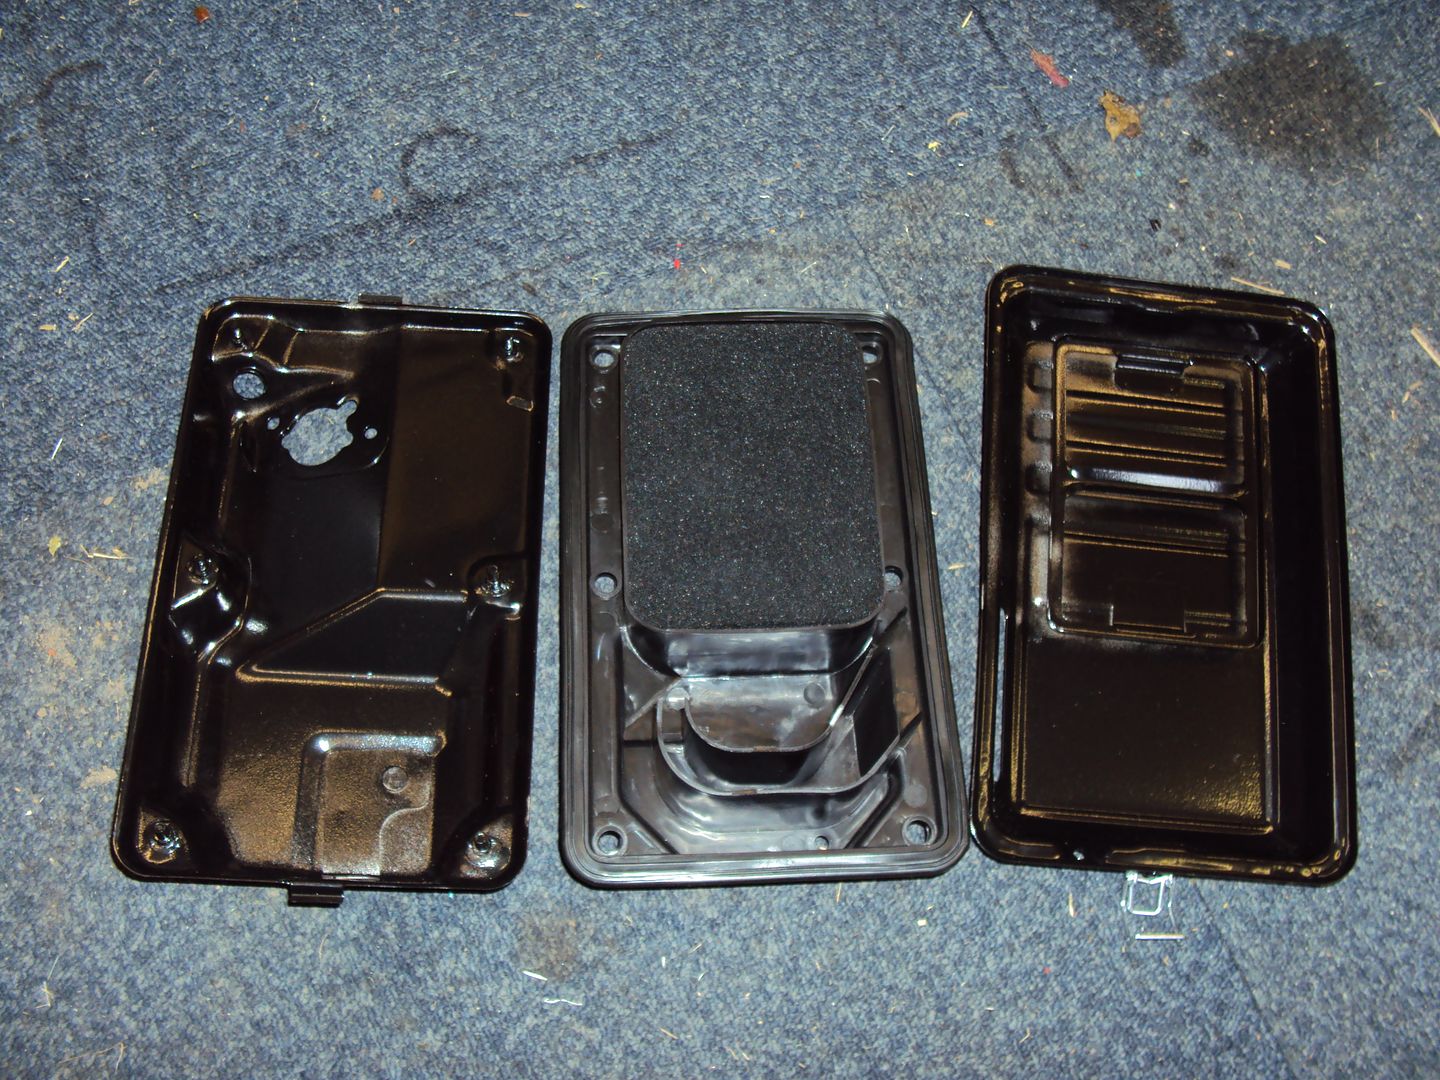
The filter carrier bolted straight into the original housing
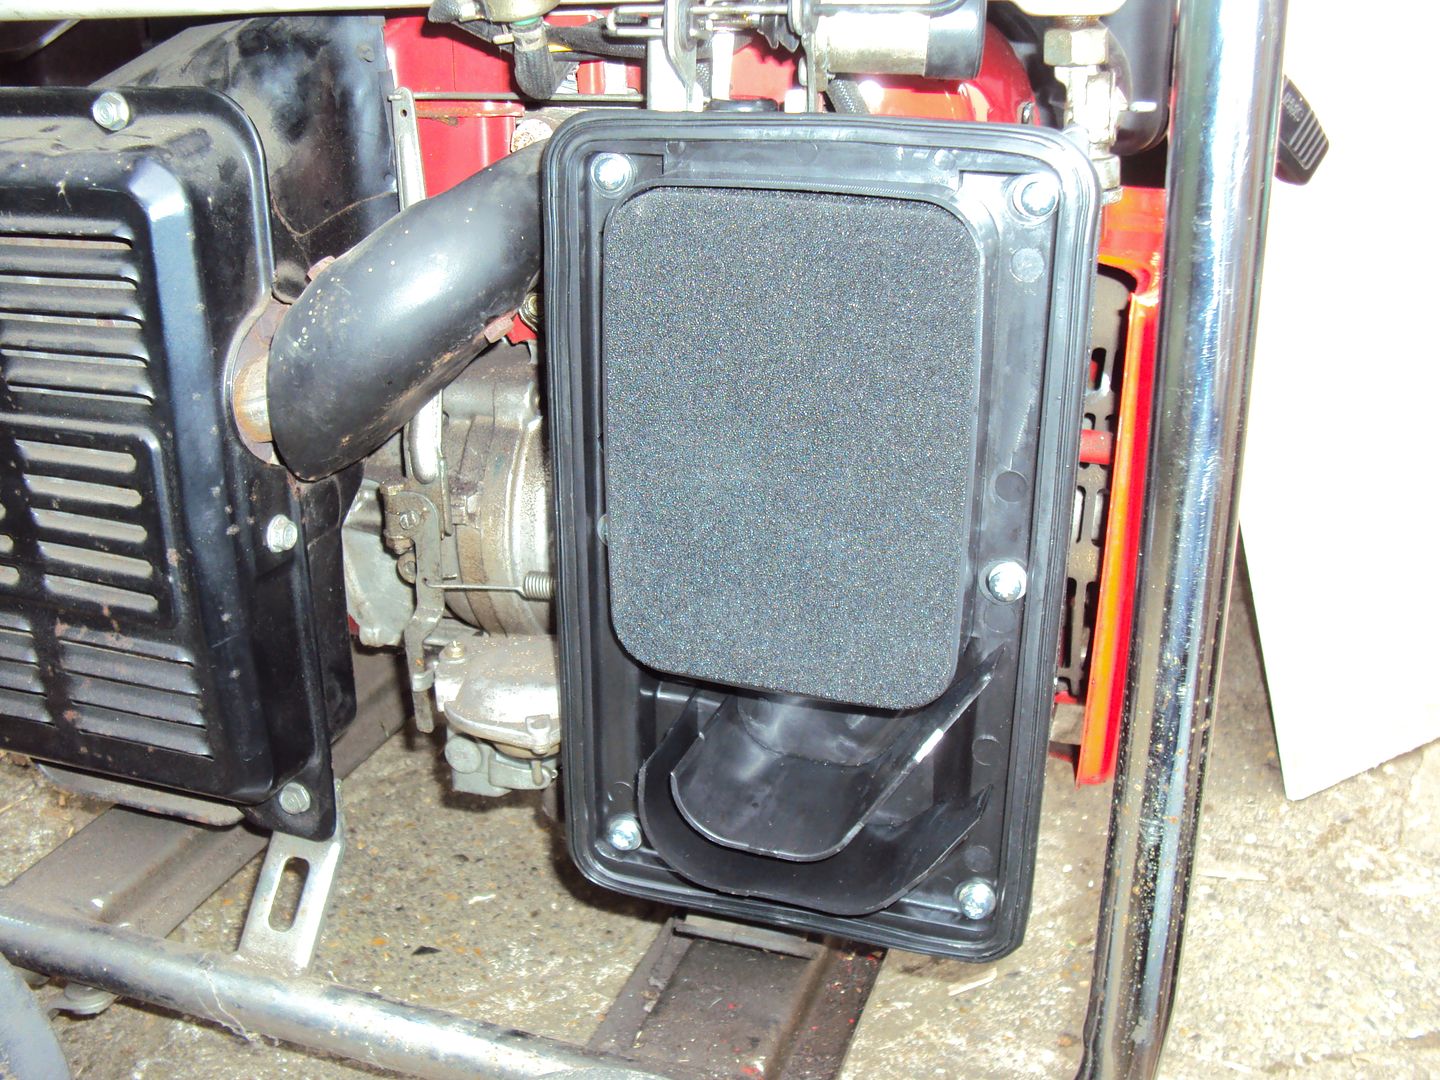
And the cover clipped straight on.
Next I started on making the wire to link the starter motor to the battery
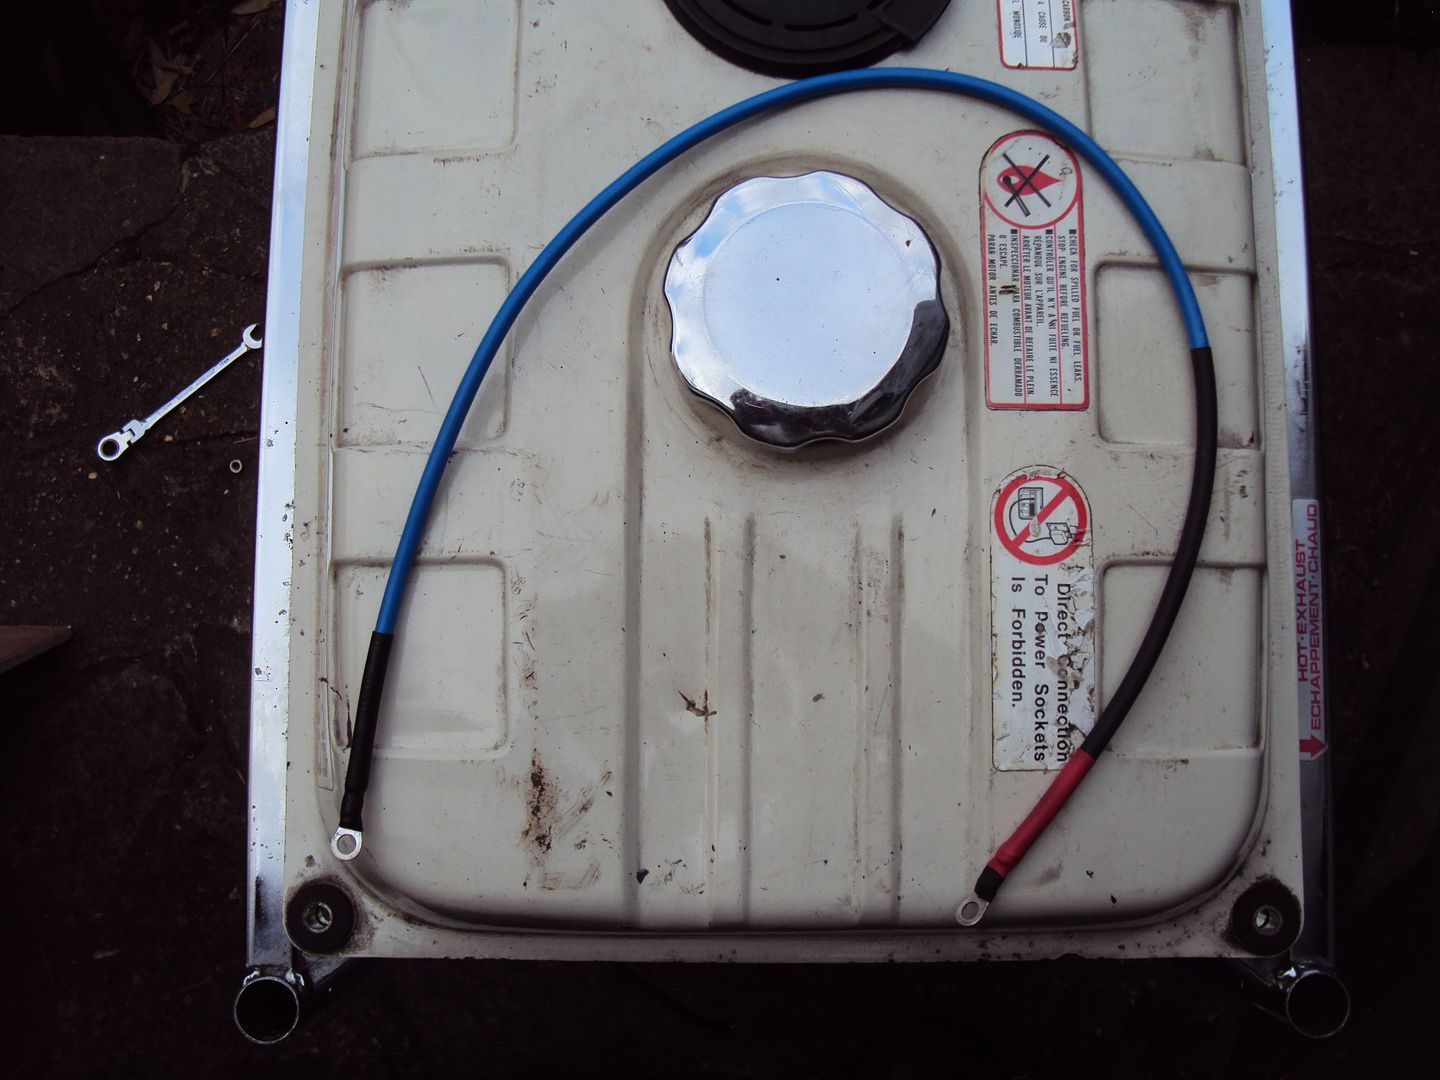
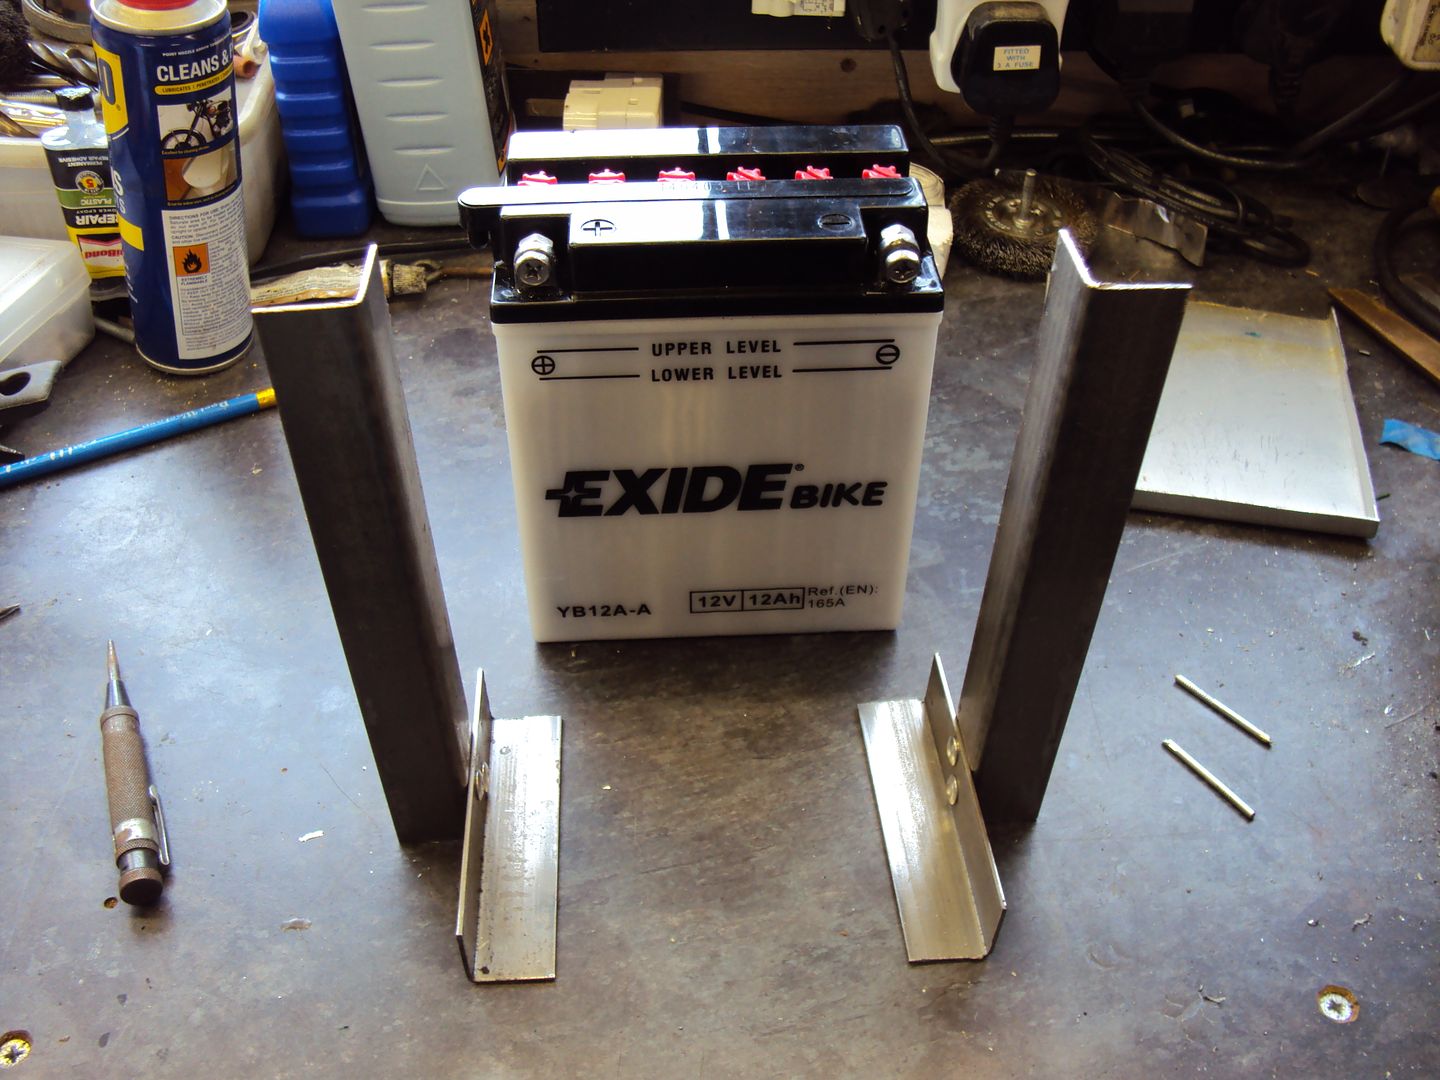
Just need to build the cradle to hold the battery, the genuine battery fitting kit costs over £250! So I’m not buying one of those.
We picked up some bits from B&Q which will hopefully enable us to build a suitable cradle.
Flywheel removed
Starter motor removed
We removed the end cap from the motor, and found the commutator was in great condition. This is because when new, the generator is supplied with the starter motor. However an optional kit has to be purchased which consists of a battery cradle and wiring to enable the electric start.
This generator never had it fitted so the starter motor had never been used.
We removed the brush holder and found the –ve brush was stuck (top left) whereas the +ve (top right) brush moved freely.
After a liberal application of copper grease the brush was moving freely again
The motor was re-assembled, cleaned and re-fitted to the engine
We hooked up a battery using jump leads, turned the key and it worked.
When I originally collected the generator, it was missing the air filter carrier and cover
After a bit of searching I found a complete new air cleaner for £34.00 (copy of the Honda parts) which was a lot cheaper than the nearly £80! For the 2 genuine Honda parts I needed. I just needed the filter carrier (middle) and cover (right)from the replacement unit
The filter carrier bolted straight into the original housing
And the cover clipped straight on.
Next I started on making the wire to link the starter motor to the battery
Just need to build the cradle to hold the battery, the genuine battery fitting kit costs over £250! So I’m not buying one of those.
We picked up some bits from B&Q which will hopefully enable us to build a suitable cradle.
Edited by Blue32 on Saturday 27th September 19:03
RDM said:
As many have said this is, at the moment, the best thread on Pistonheads by far.
Keep it up.
Thanks, glad it's providing some entertainment even if it is a bit Keep it up.
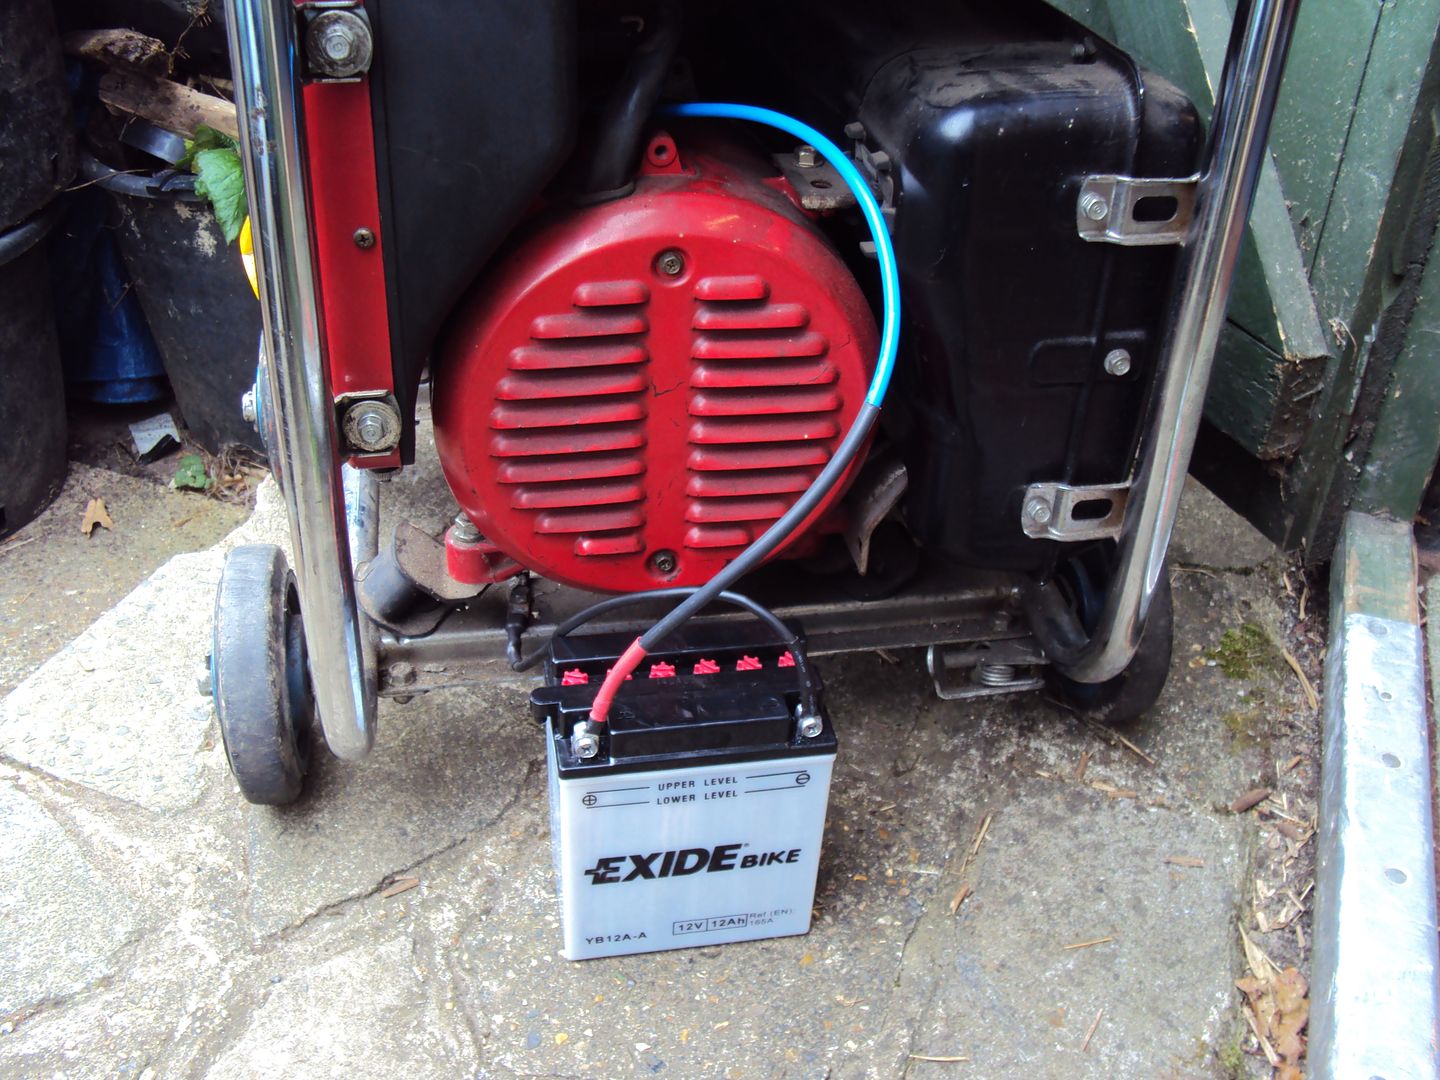
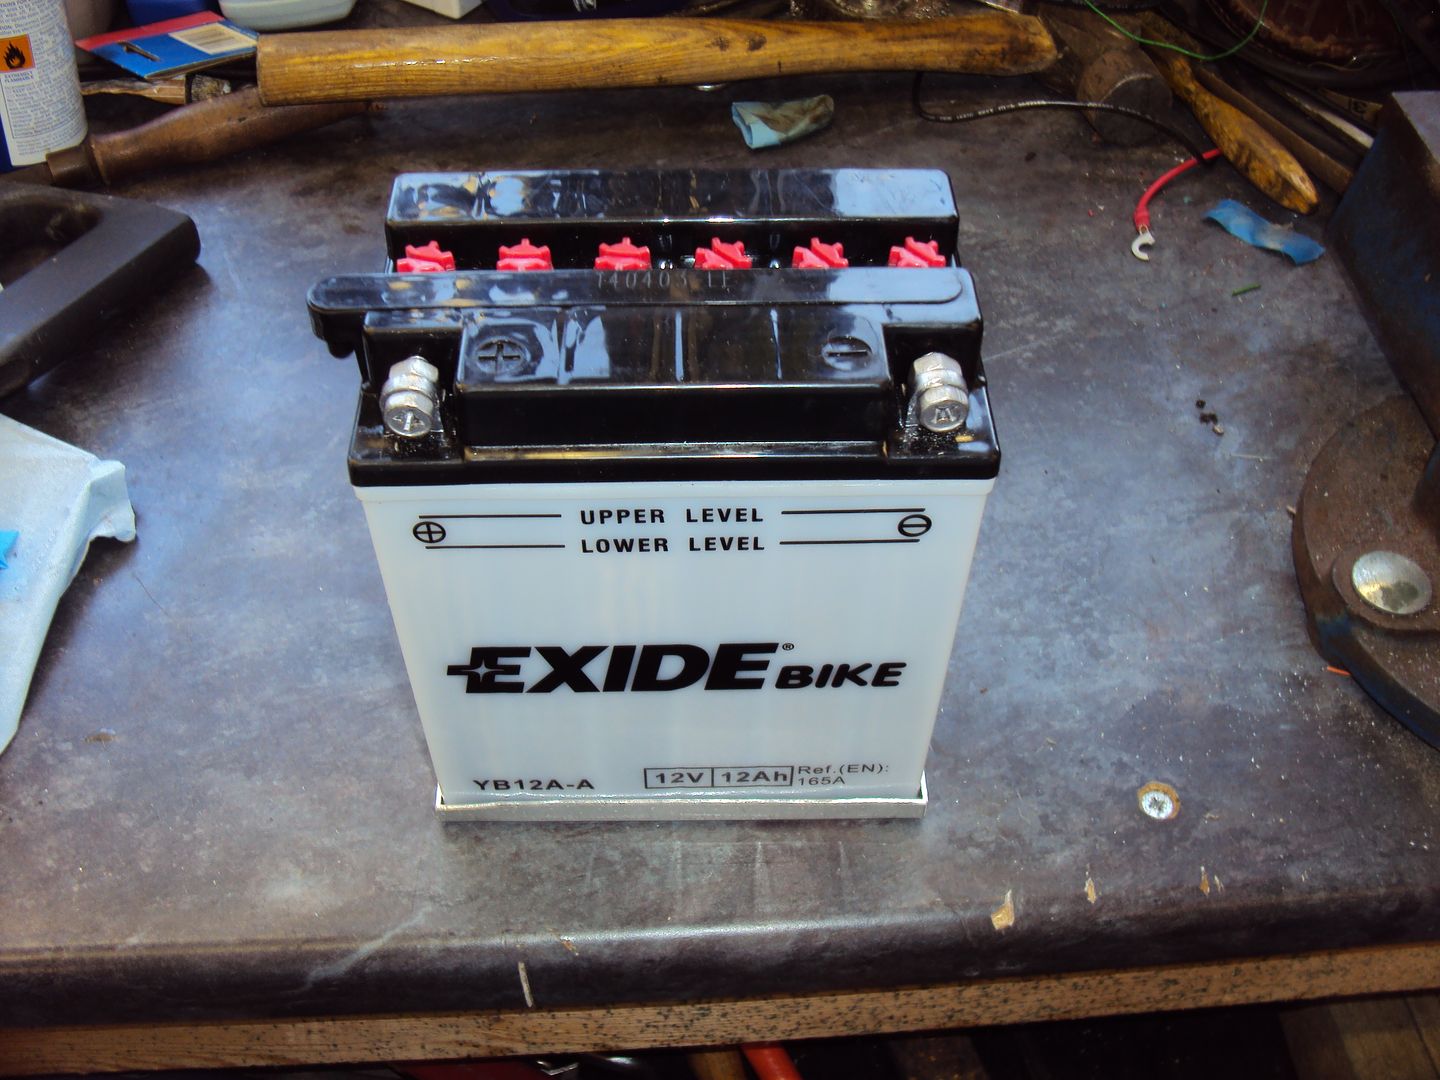
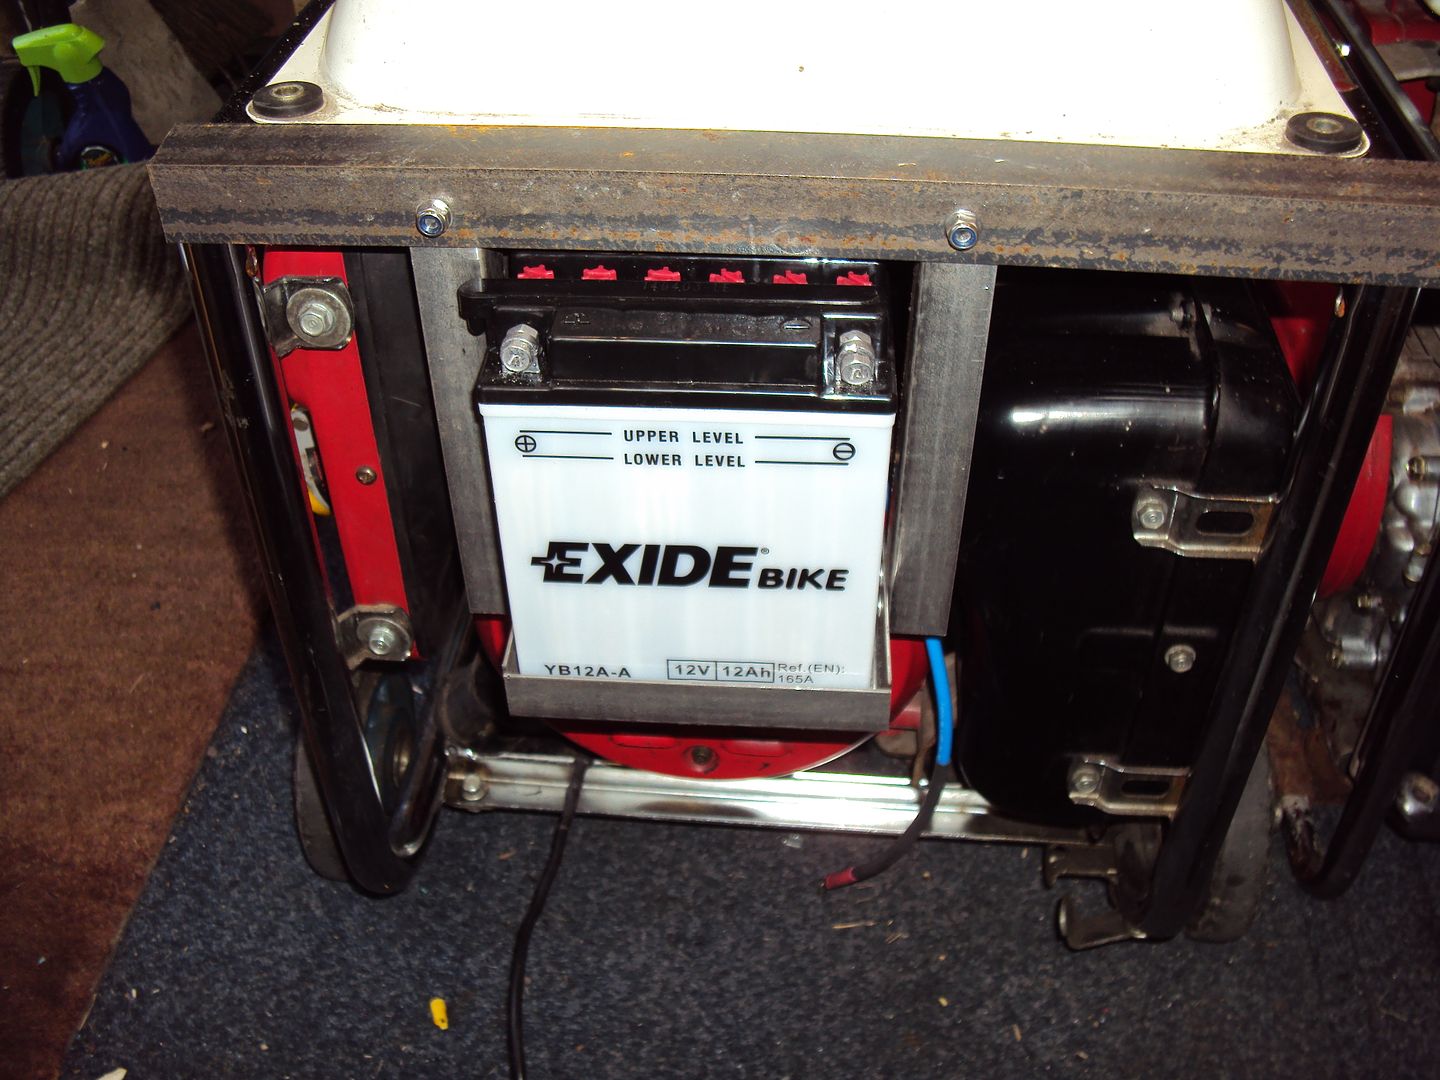
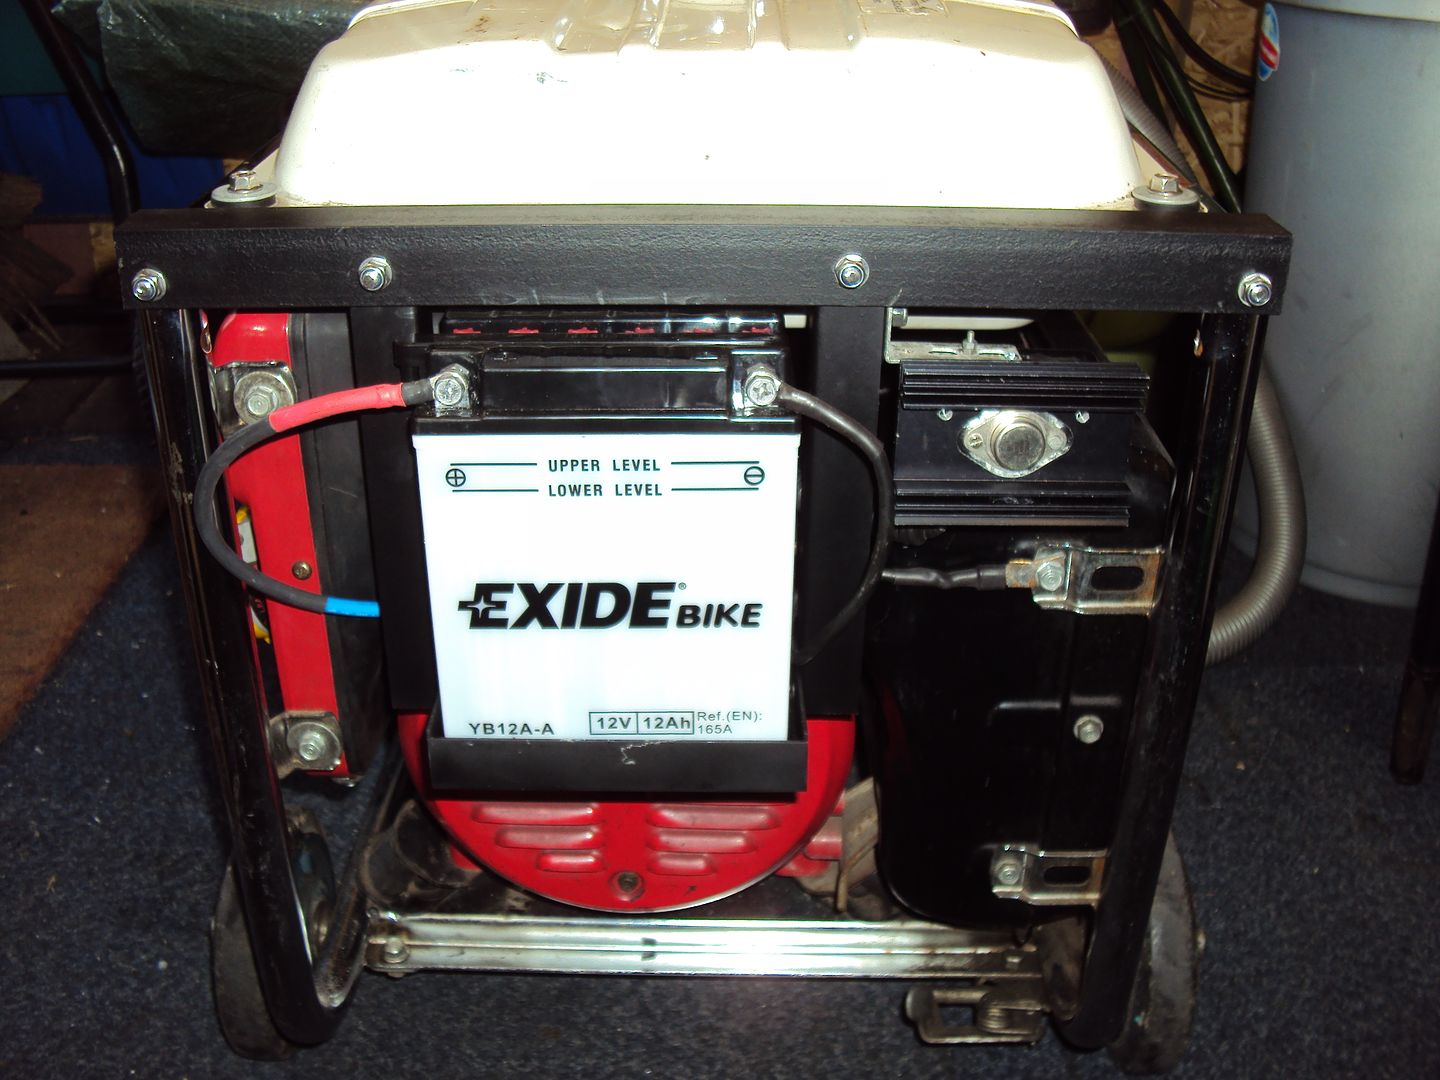
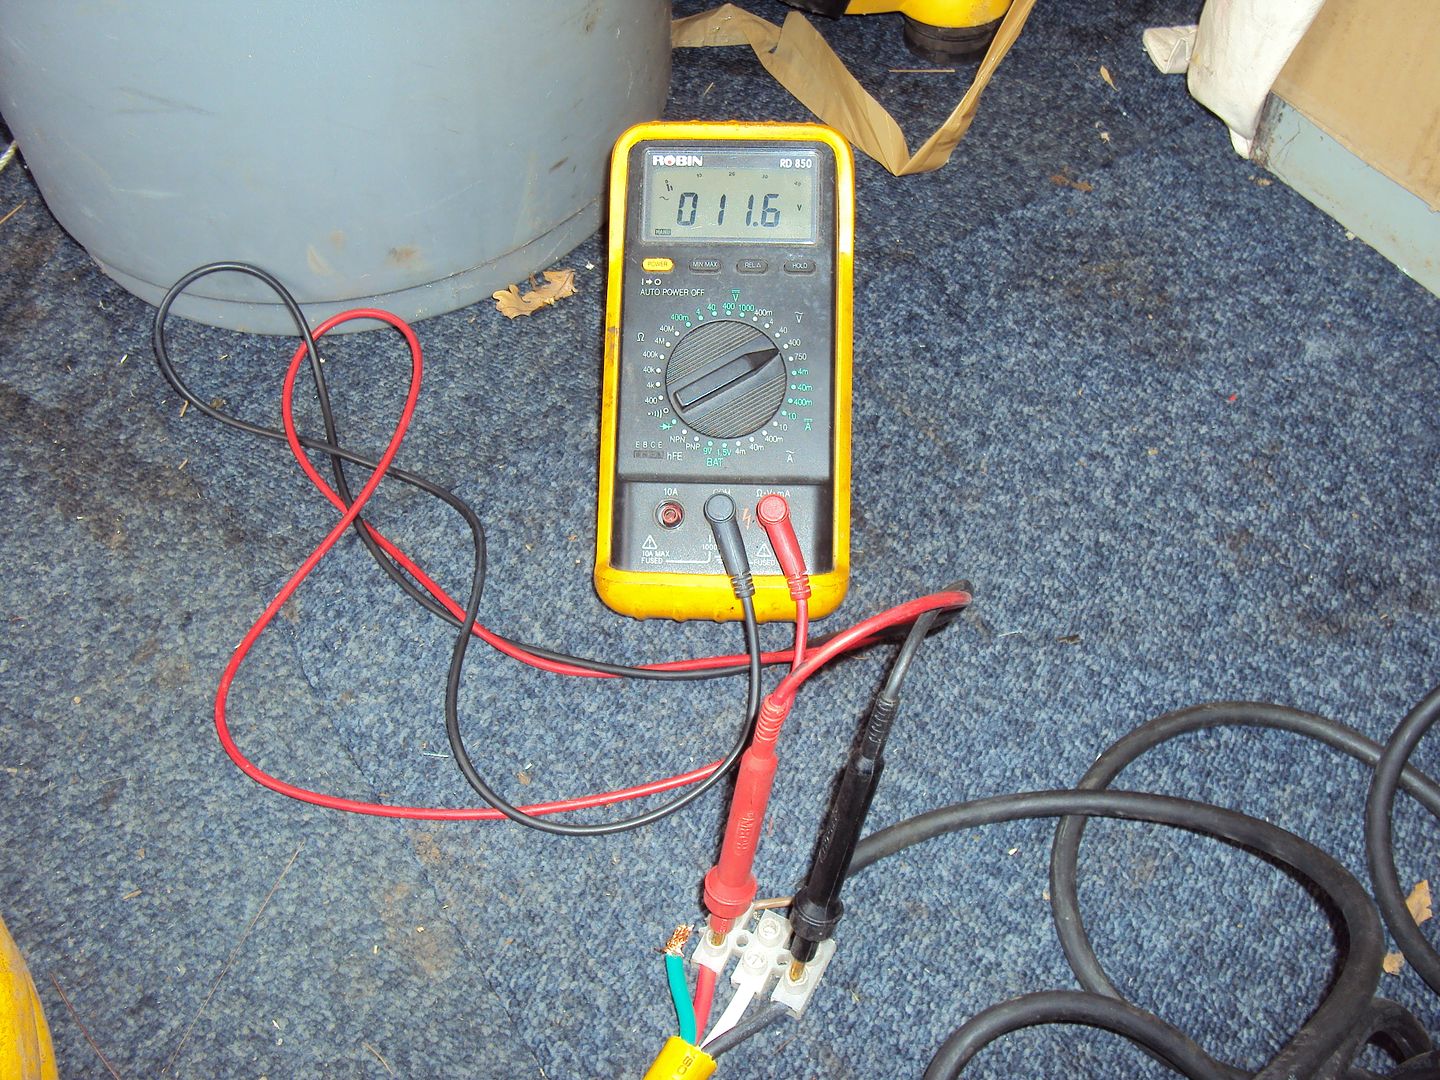
I connected the new battery to test the wiring and start working on a cradle to mount the battery in.
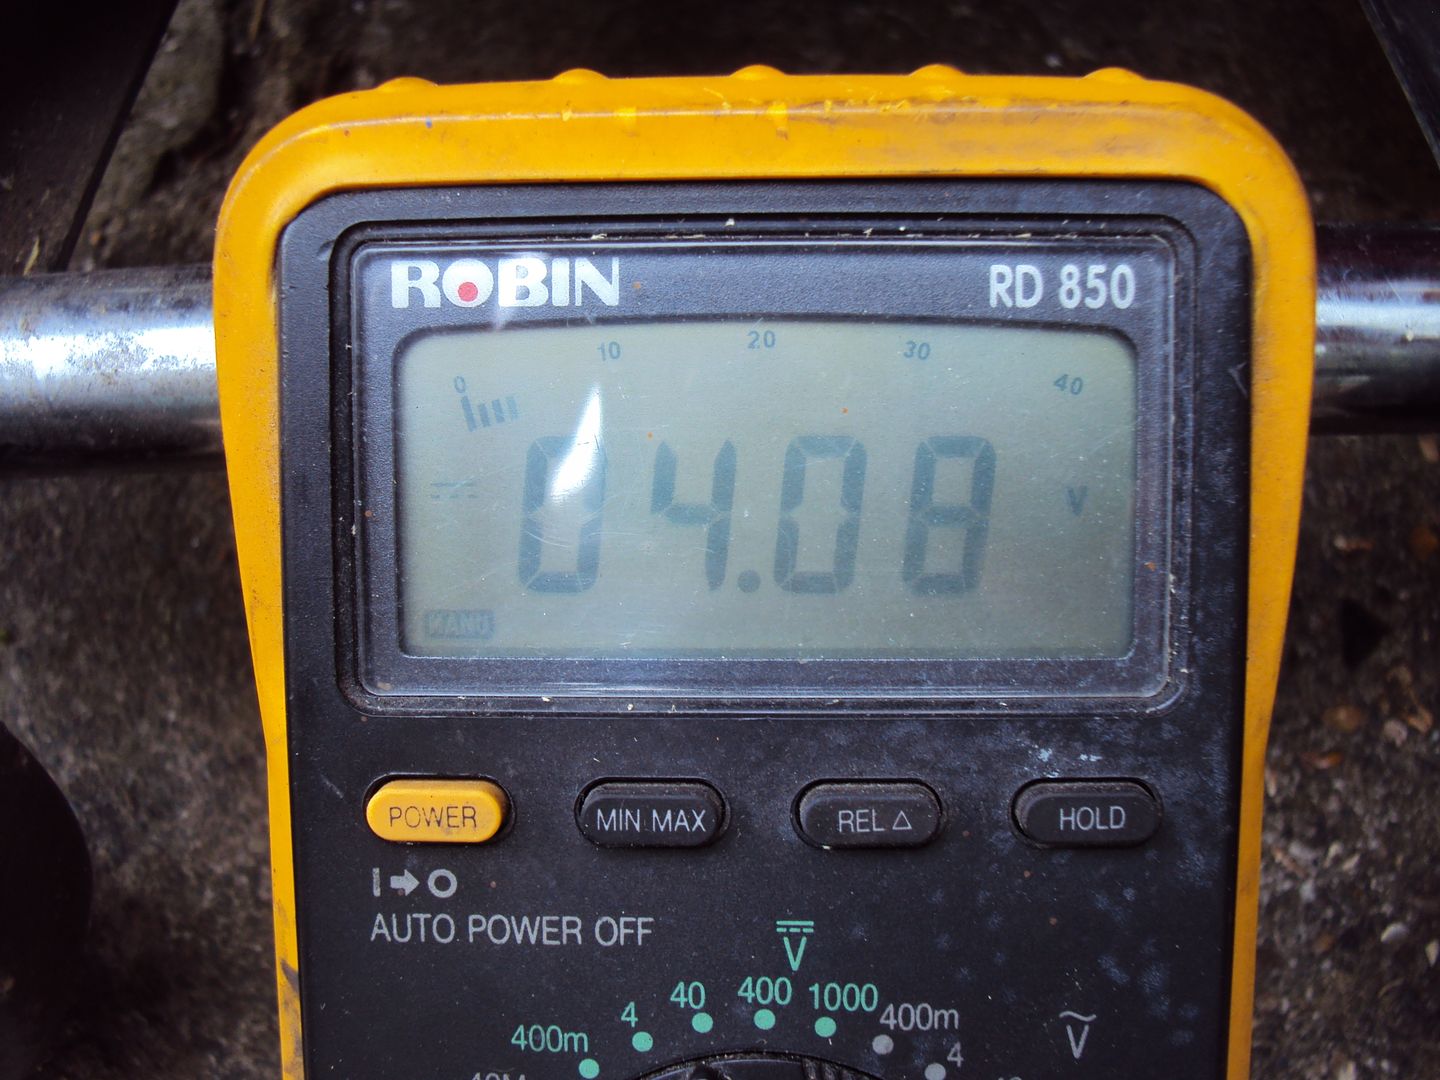
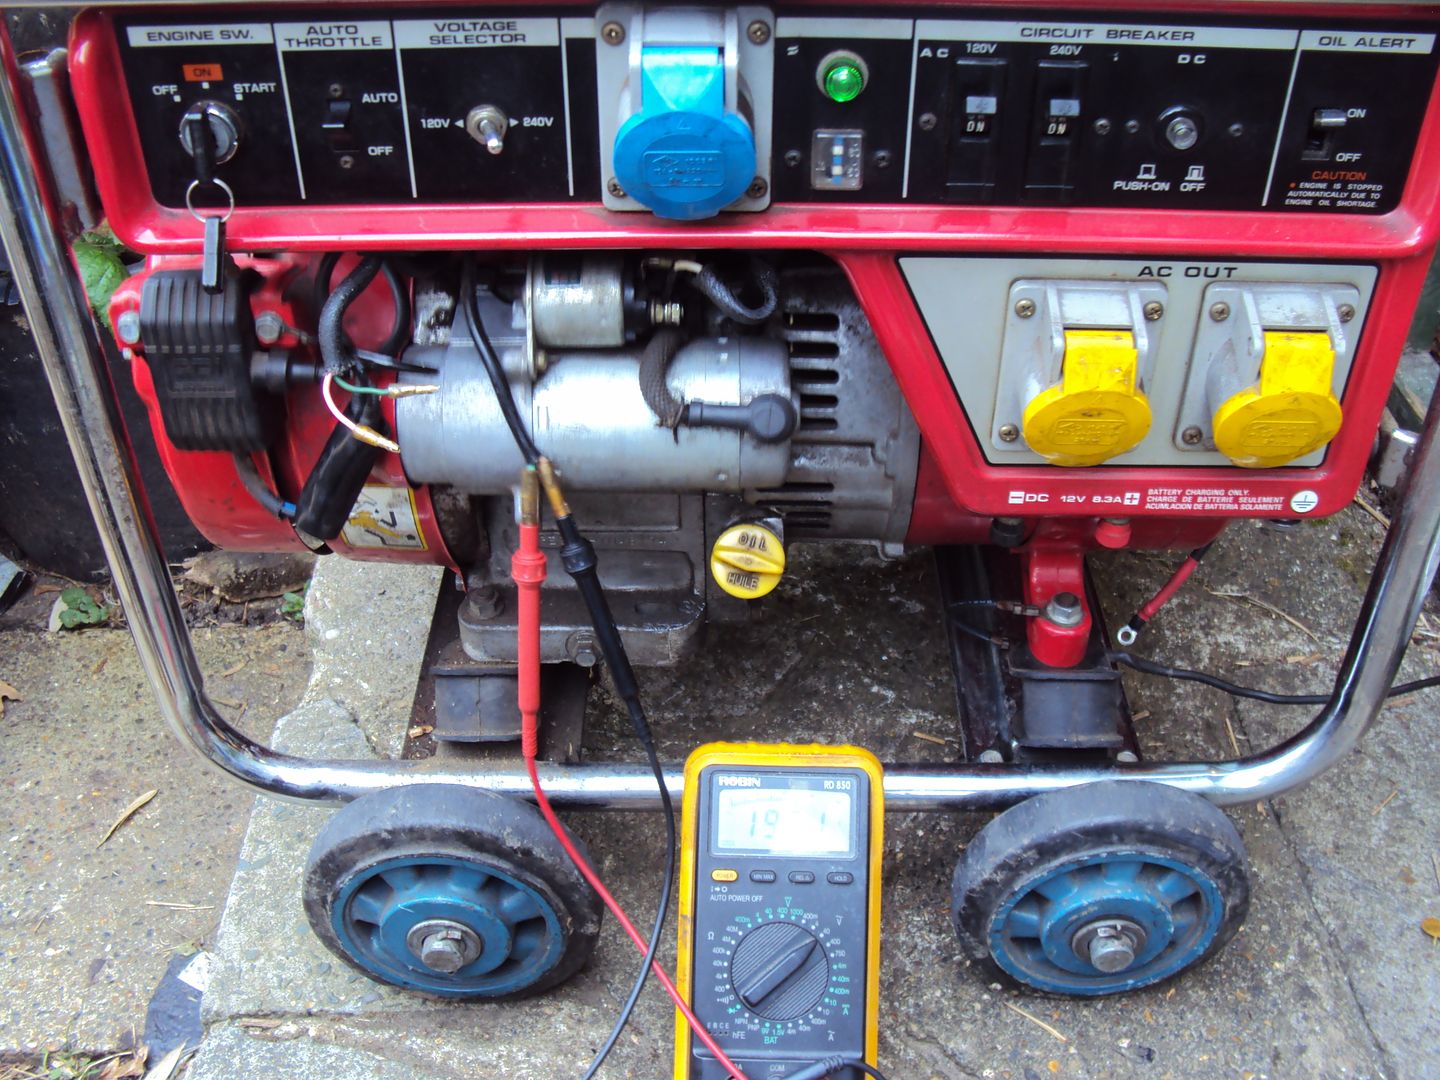
After a few starts I noticed it was starting to struggle to crank the engine, I found the battery was nearly flat. After a bit if investigation it turned out that the battery charging circuit wasn’t working, as with the engine running the charge voltage was 4v not 12 like it should be.
Testing the charging circuit
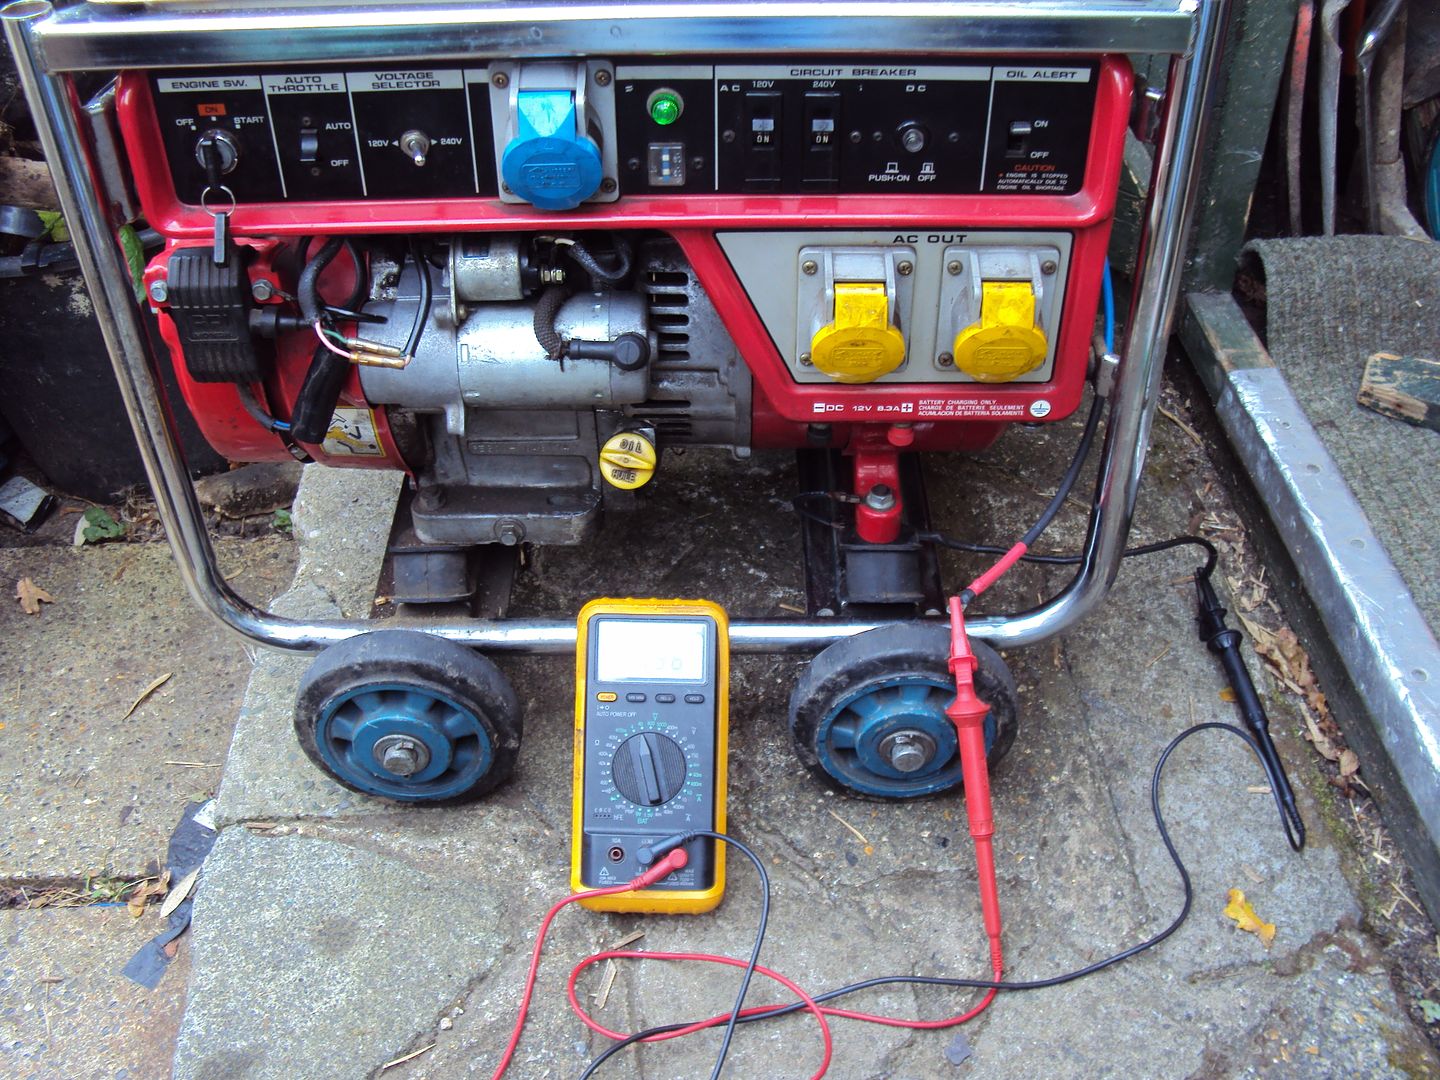
Charge voltage
The charge voltage is from a coil mounted behind the flywheel, I disconnected the coil from the control box and hooked up the multimeter to see what the output was,
Voltage from the charge coil
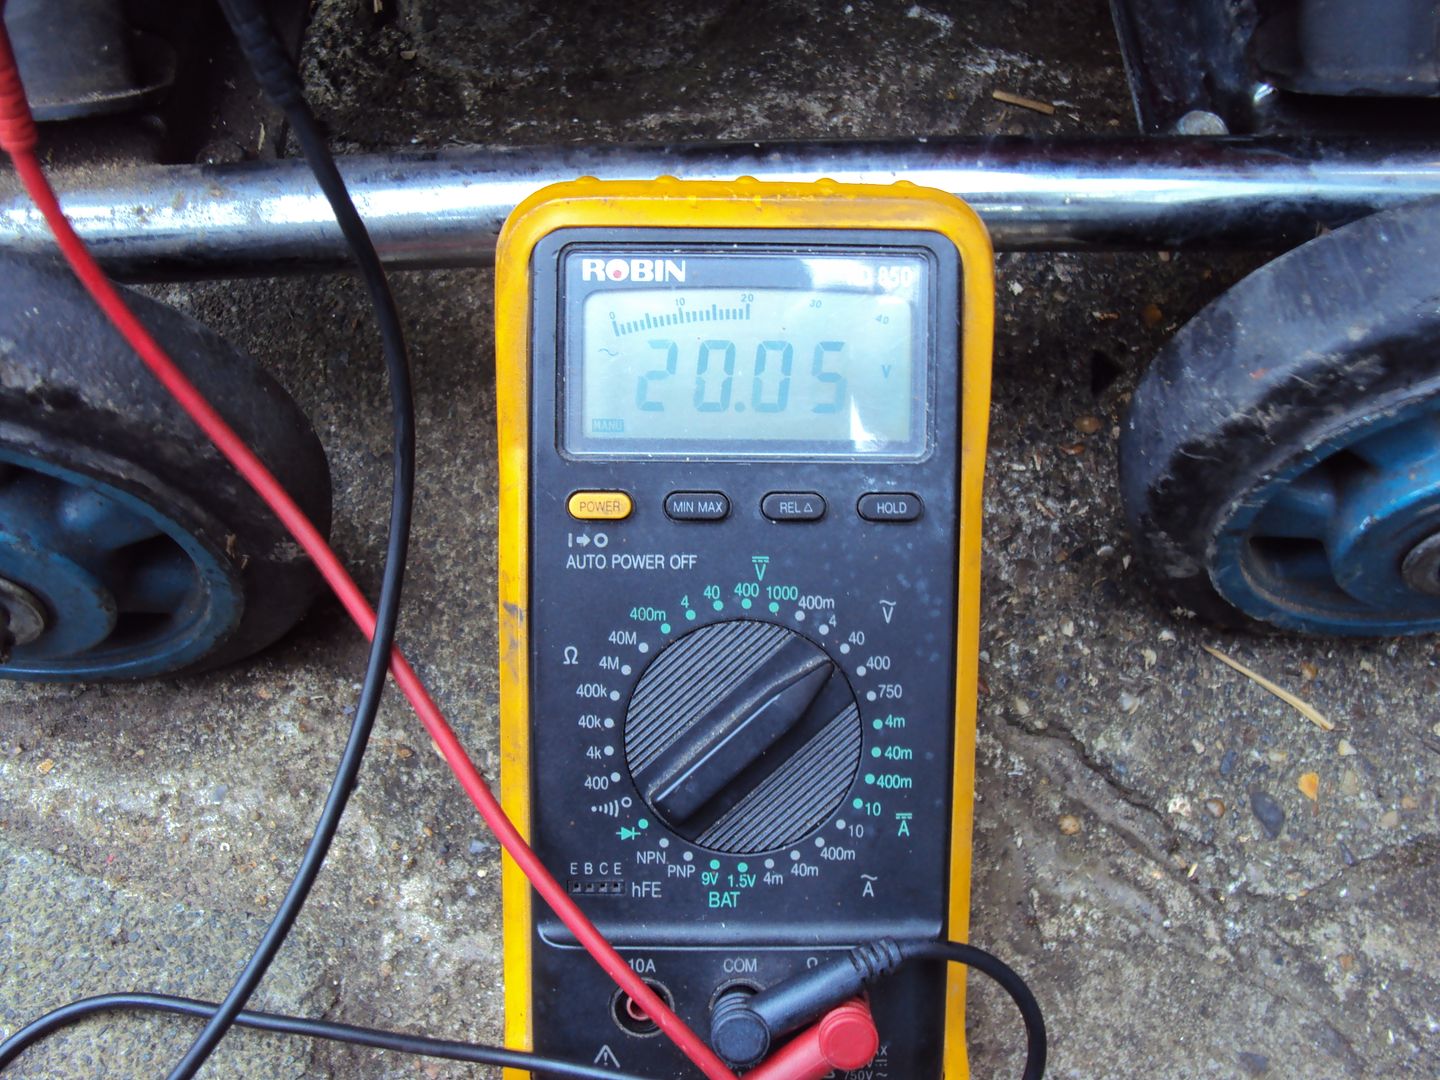
So the coil works….. the output is an AC voltage which goes into a rectifier in the control box to convert it into DC voltage suitable for charging the battery.
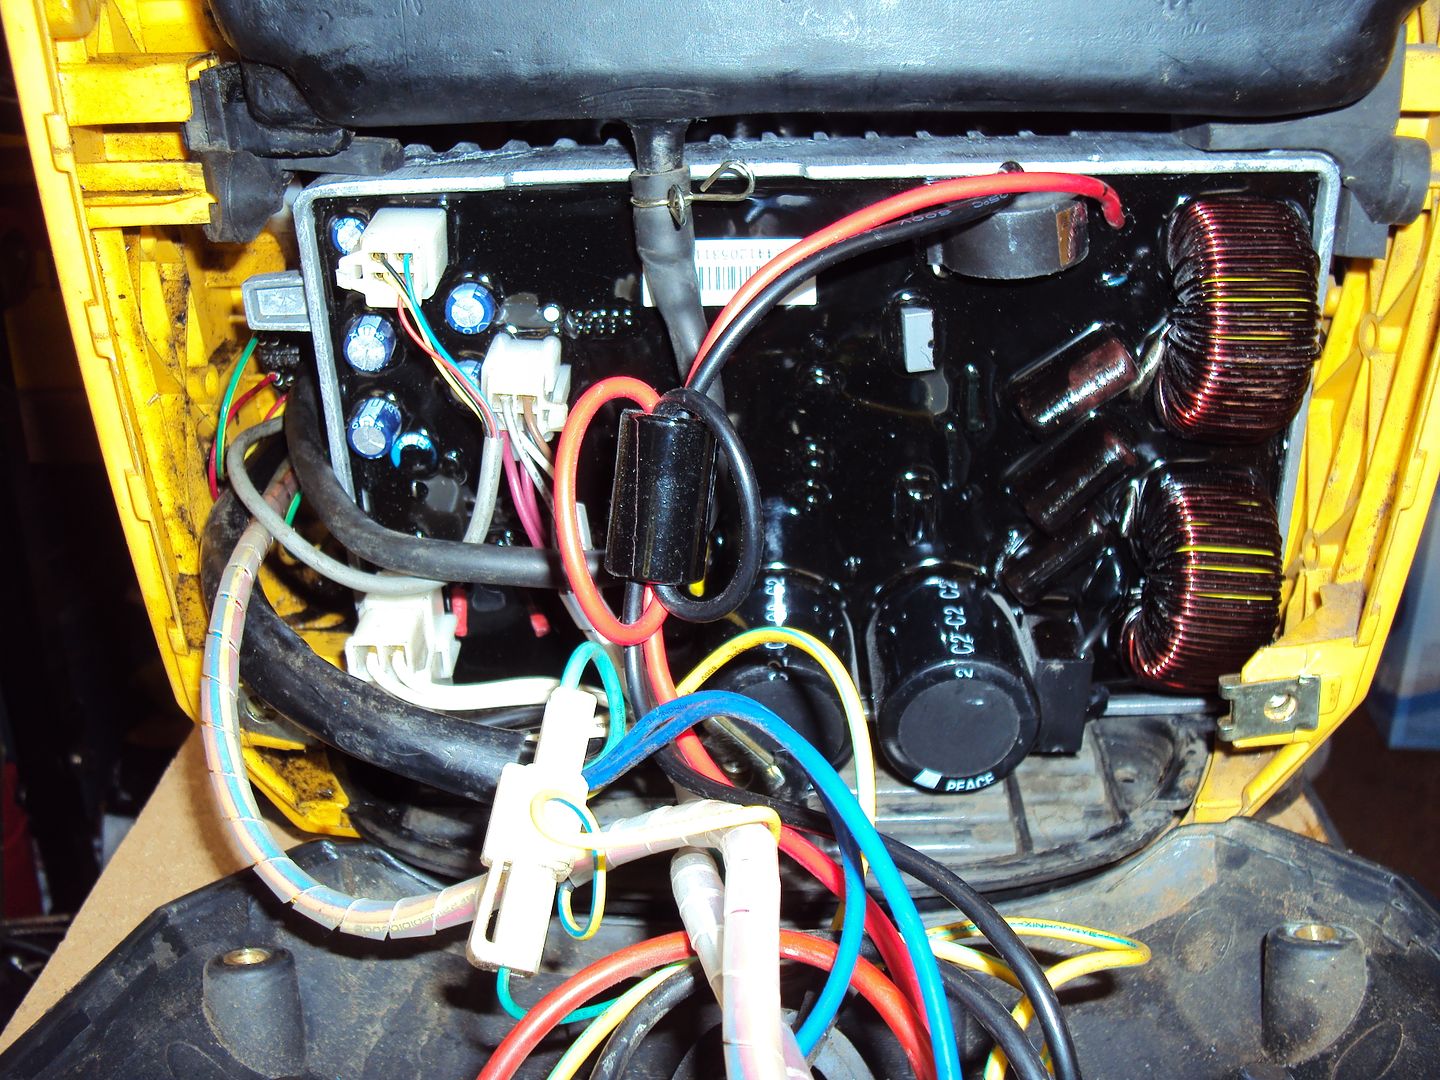
I opened the control box and found the rectifier unit
I was expecting it to have 4 wires going to it, looking at the circuit diagram it looks like there are other components inside the unit which would account for the extra wires. It looks like the other components in the module are working as they should so, the plan is to build a simple charging circuit which will replace the rectifier part of the module and will be better for the battery as the voltage will be controlled.
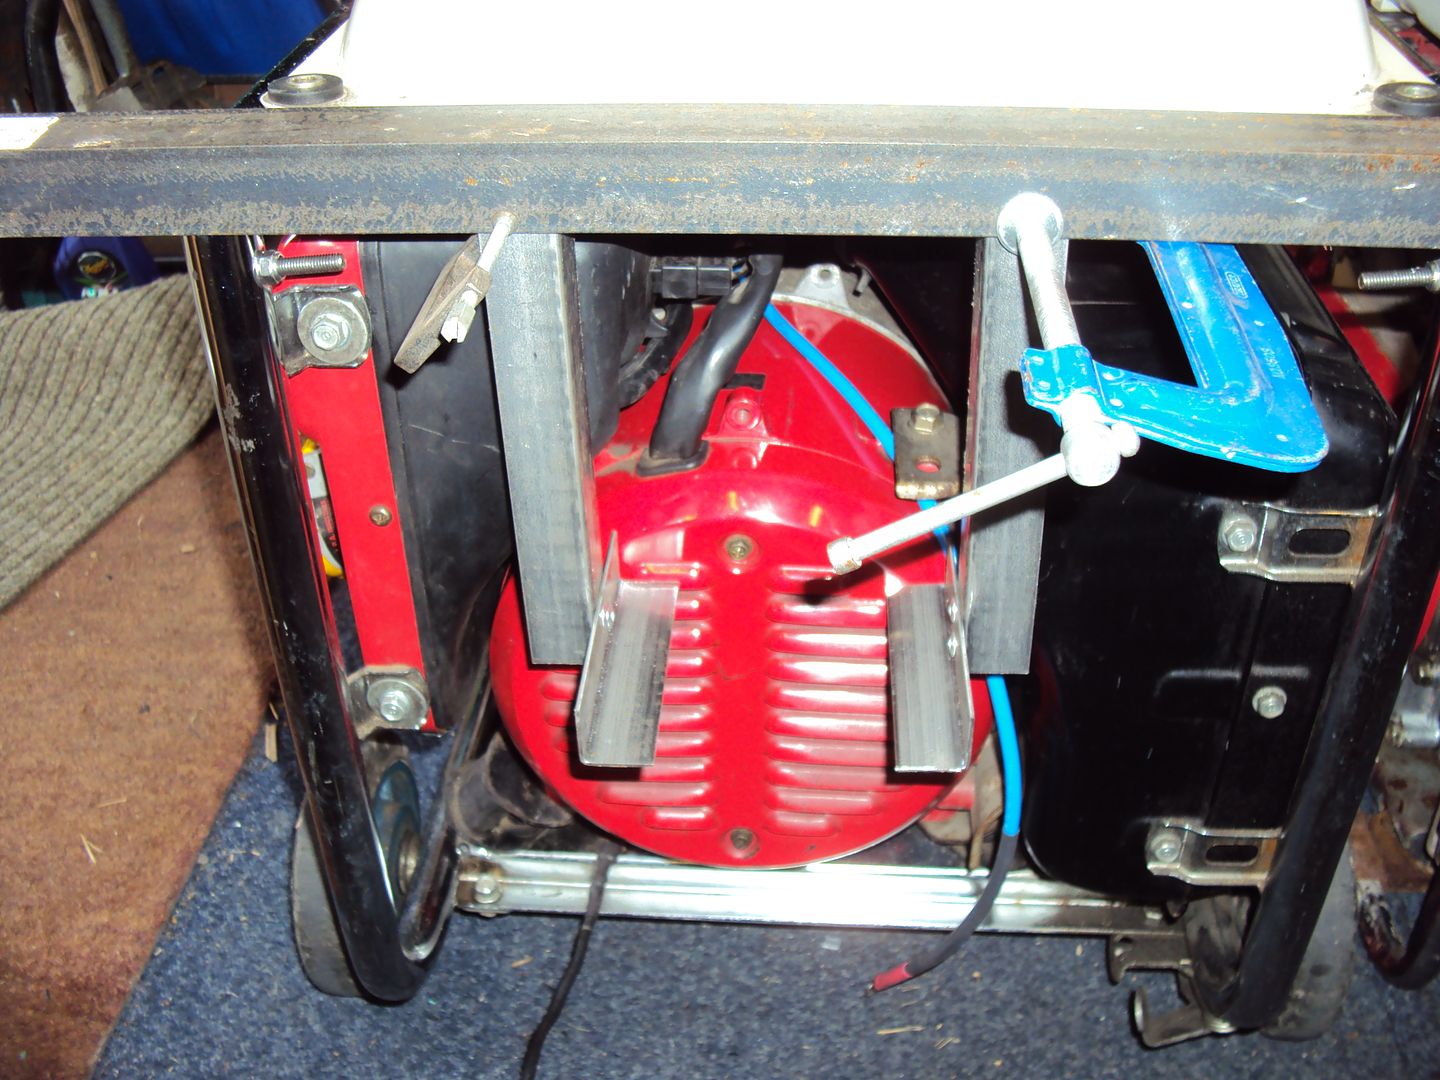
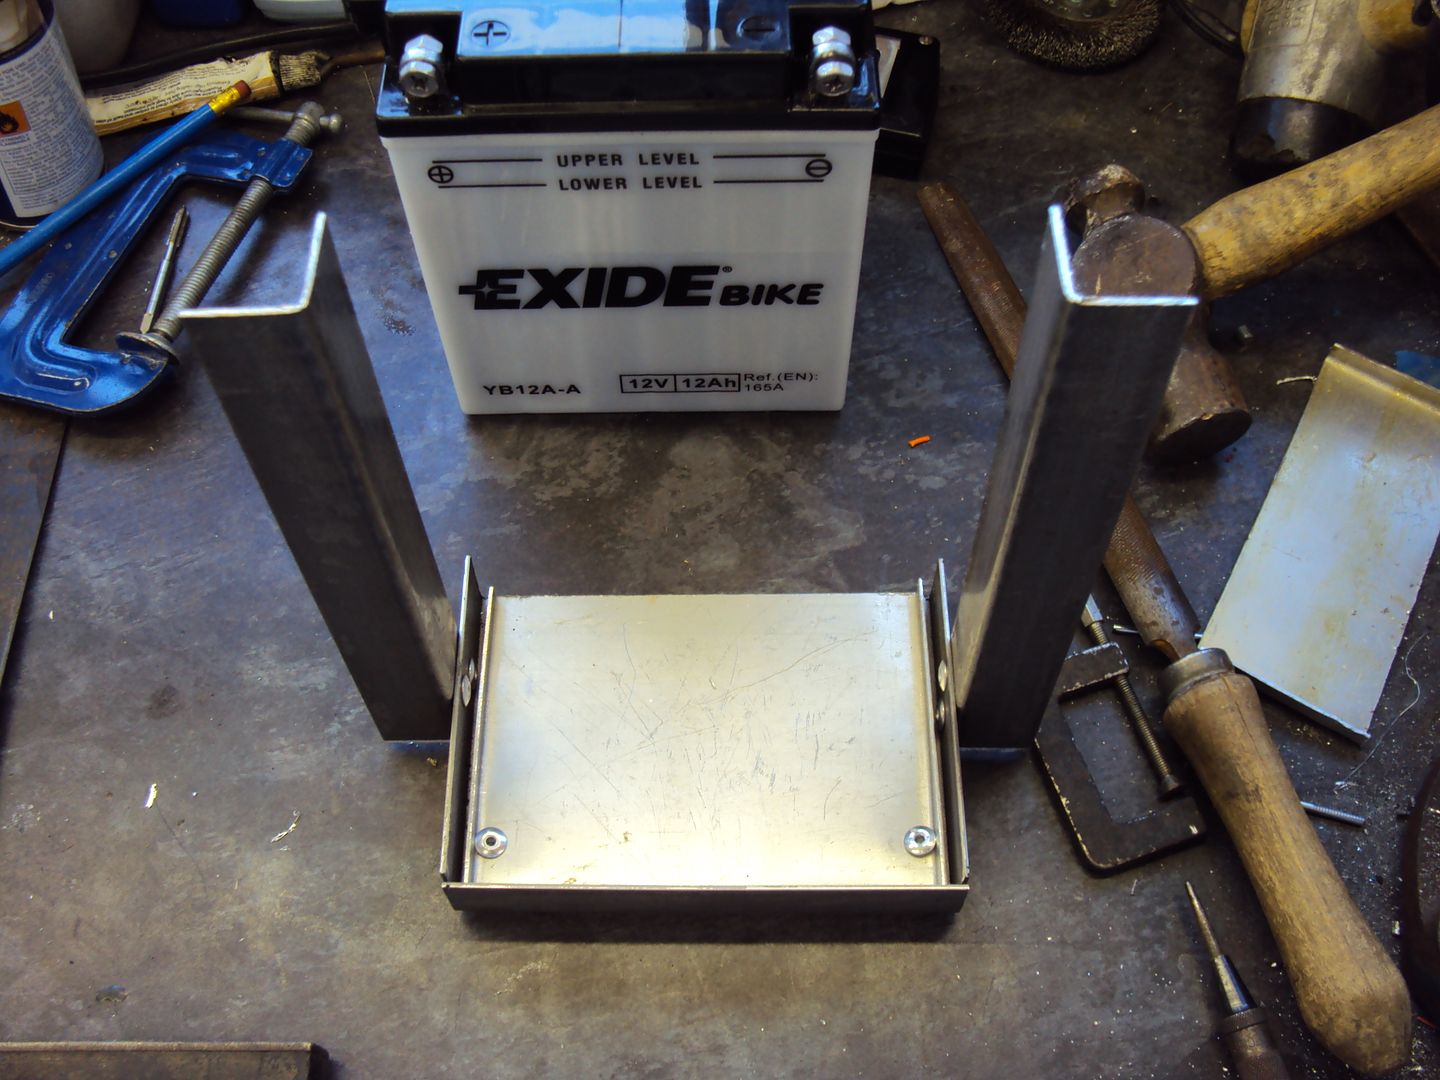
Whilst thinking about the charging circuit I made a tray for the battery to sit in

The tray will be supported using steel bar which will be attached to the generator frame.
 ]
]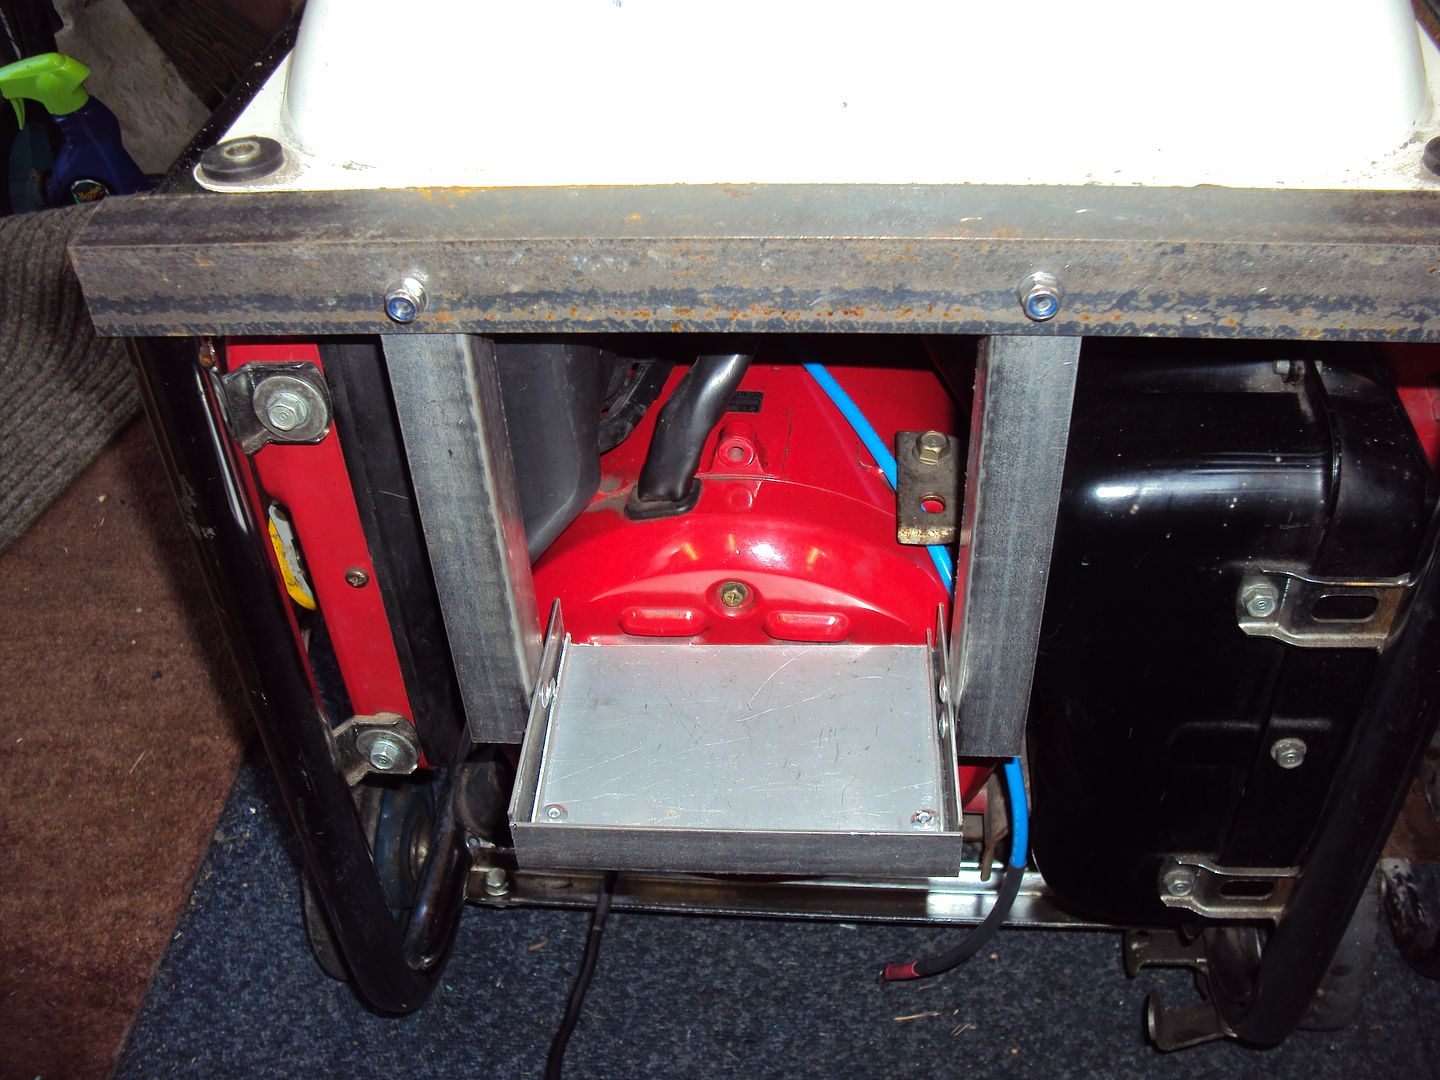
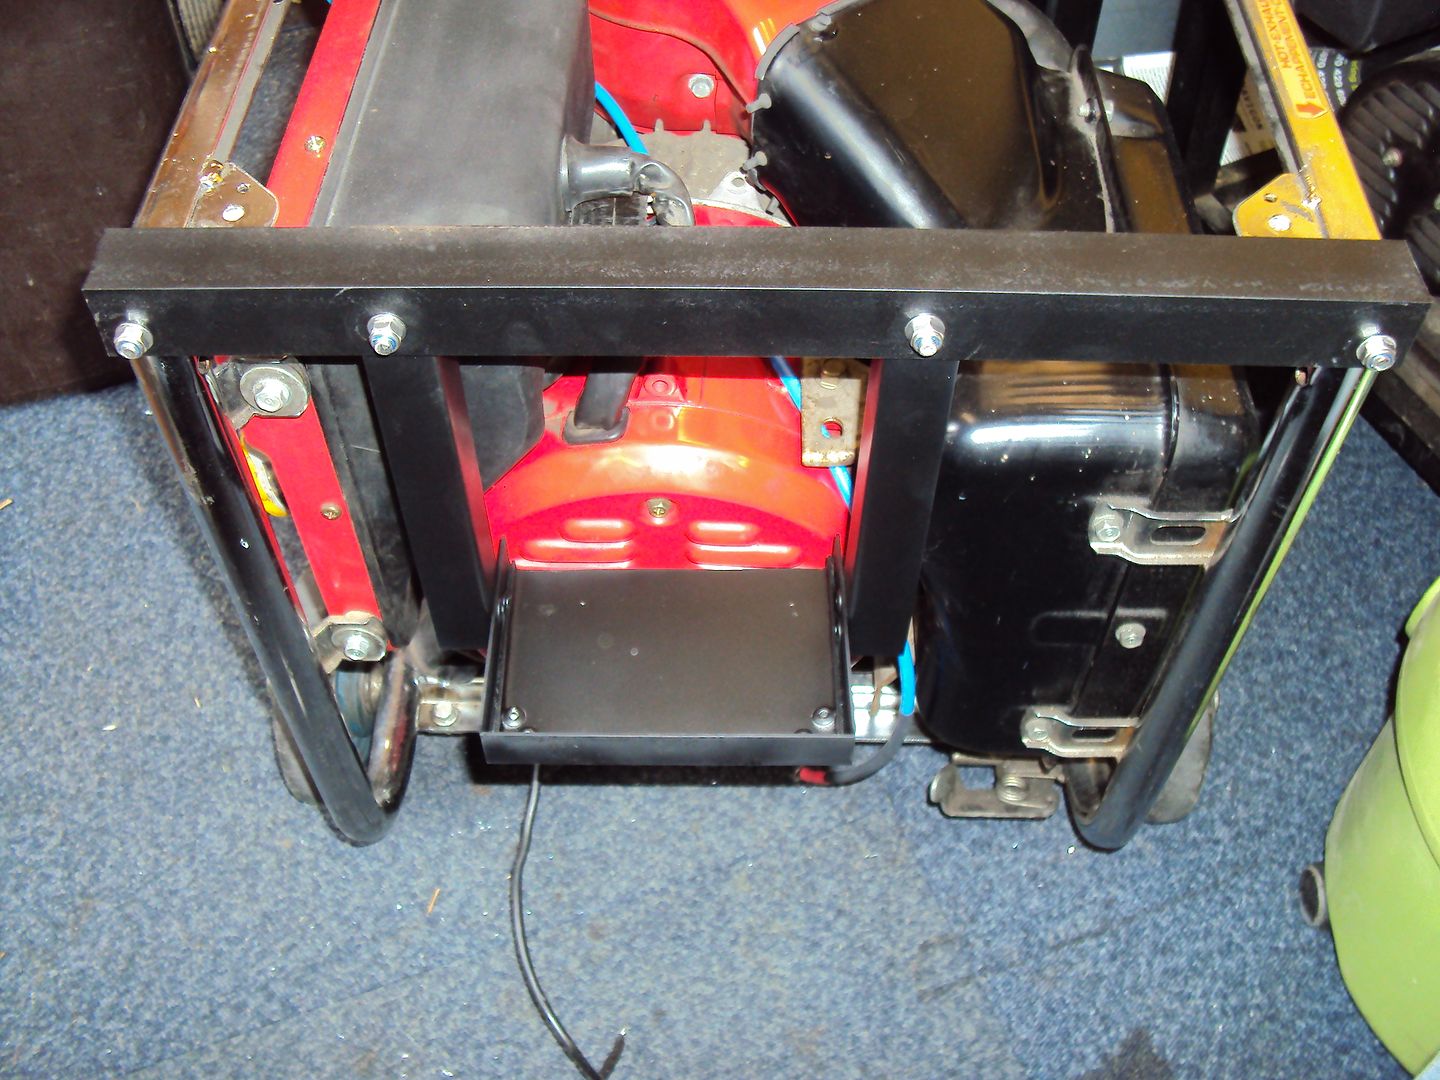
I gave the battery tray a couple of coats of satin black paint and attached to the frame.
Battery charging circuit built, its based on a LM350K voltage regulator. The output of the regulator has been set to 13.8v so it will bring the battery up to the correct voltage without over charging.
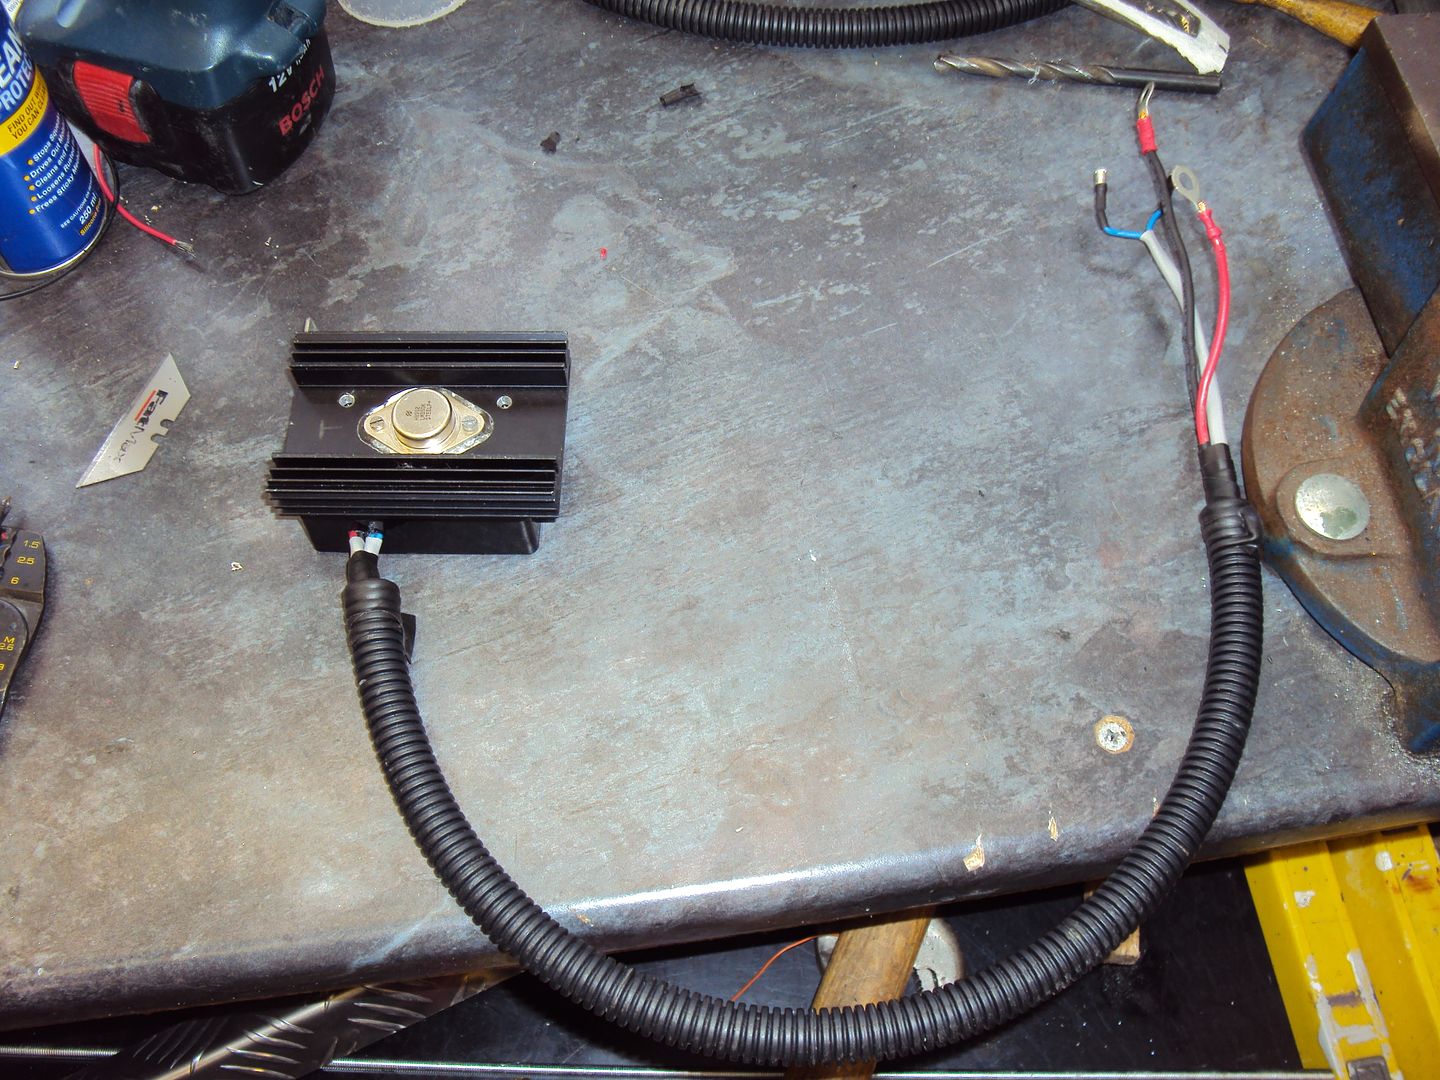
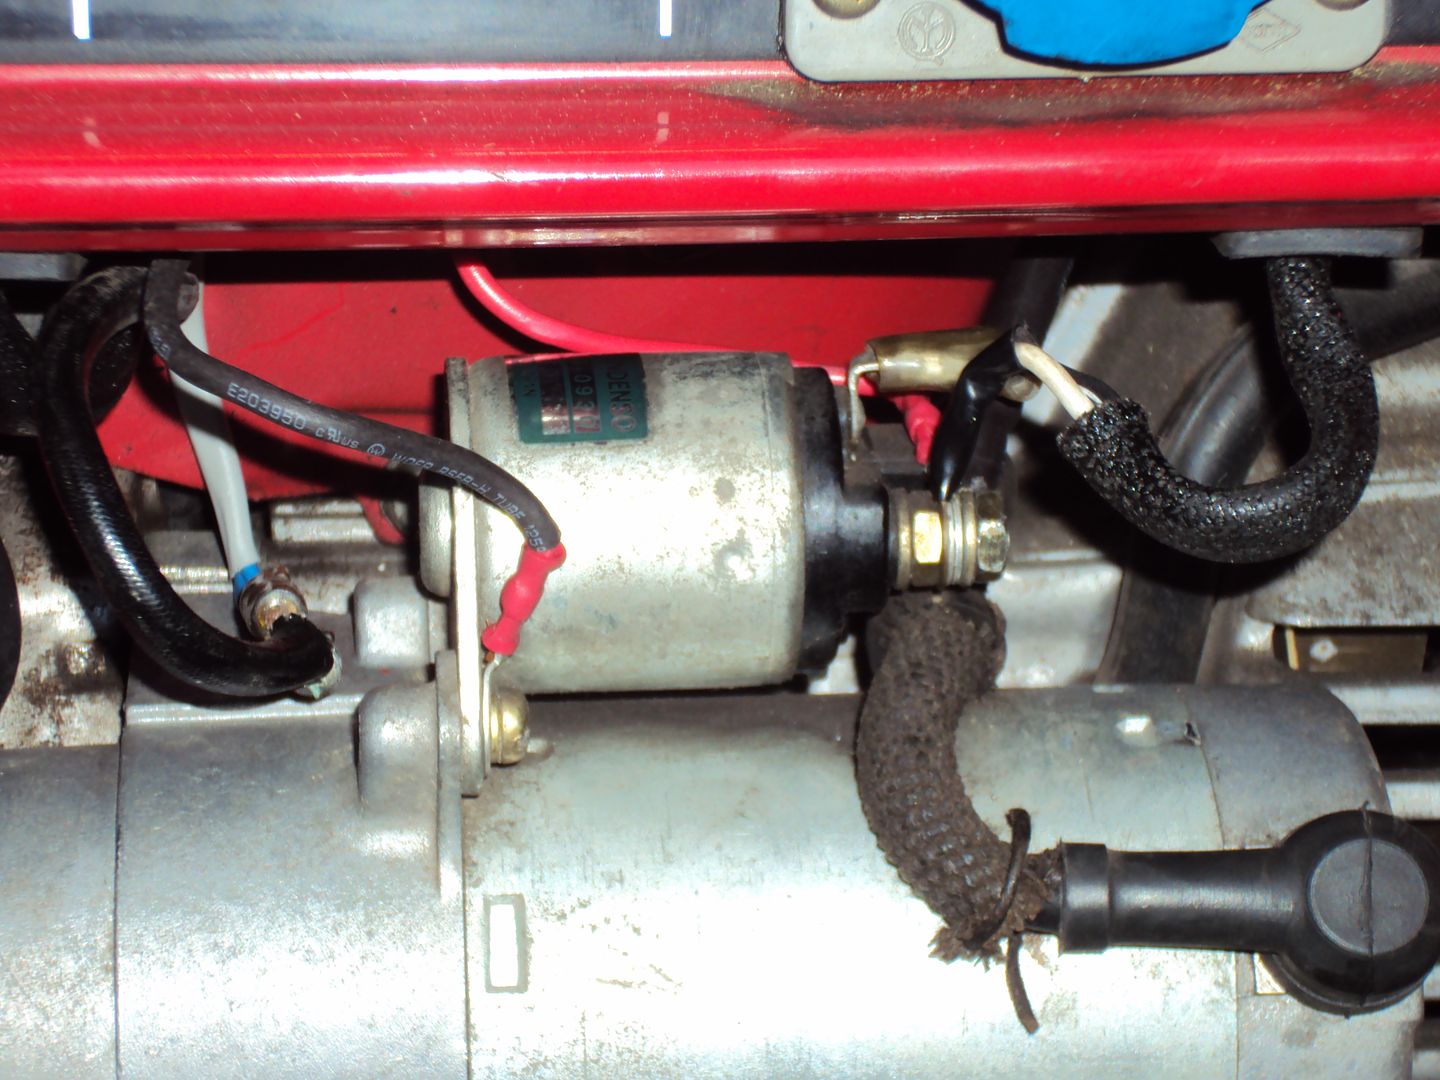
I connected the charging circuit to the battery cable which feeds the starter motor, the output from the charger is the red wire behind solenoid.
All finished
Battery charging circuit built, its based on a LM350K voltage regulator. The output of the regulator has been set to 13.8v so it will bring the battery up to the correct voltage without over charging.
I connected the charging circuit to the battery cable which feeds the starter motor, the output from the charger is the red wire behind solenoid.
All finished
The unstable engine speed sounds like it’s a problem with the carburettor, Honda have a check sheet for diagnosing running problems http://www.honda-engines-eu.com/web/eec-public-sit...
It's probably worth stripping the carb down and cleaning the jets, it's common for the small holes in the main jet (no5 in the diagram) to become clogged. The trick is to find some really fine wire (I used a strand from some mains flex) and push it through all the holes and jets in the carburettor. Contact cleaner (aerosol type) from Maplin can be used to flush through the tubes inside the carburettor. My post on the 20th Sept on the previous page shows the main jet and the innards of the carburettor
Most of the poor/ non running engines we have encountered have been cured by stripping down and cleaning the carburettor, it can take a couple of attempts to get it right.
grahamr88 said:
Thanks for the advice, that's a handy check sheet!
I've had the carb apart once, and ultrasonically cleaned the jets, but it's certainly possible that it's still partially blocked so I'll have another go tomorrow.
I've bought myself a better multimeter (this is definitely a false economy!) which can measure frequency, so I'll try to measure the engine speed with that to determine whether it's the engine or alternator at fault.
I measured the output frequency with it earlier, and it seemed to be about 120 Hz... I'll confirm tomorrow, but that came as a bit of a surprise, especially since the voltage seemed to be about correct at the time.
120Hz doesn't sound right, the engine would be running at 6k rpm for that! What's the frequency when a load is applied ?I've had the carb apart once, and ultrasonically cleaned the jets, but it's certainly possible that it's still partially blocked so I'll have another go tomorrow.
I've bought myself a better multimeter (this is definitely a false economy!) which can measure frequency, so I'll try to measure the engine speed with that to determine whether it's the engine or alternator at fault.
I measured the output frequency with it earlier, and it seemed to be about 120 Hz... I'll confirm tomorrow, but that came as a bit of a surprise, especially since the voltage seemed to be about correct at the time.
The engine speed should be around 3600 rpm for 50Hz. I think the governor should be set to give 53Hz at no load.
It might be worth checking the multimeter against the mains (via a transforemr for safety) as mains will be spot in 50Hz(just to confirm the multimeter is working properly).
spikey78 said:
Hi, I wonder if you could help me with an old Honda genny I've got.. I think it's a gx240 engine, it all works fine but I wonder if there is supposed to be some kind of idle control? The problem is that when running off load it's fine-as soon as you start putting electrical load on the genny the idle drops way down and then off course the power output drops too.
I seem to remember that it should maintain the rpm? Whereas now I have to manually wind up the idle when it's under load..
Hope that makes some kind of sense!
Thanks
What are you using to increase the speed when under load? Are you manually holding the throttle open/I seem to remember that it should maintain the rpm? Whereas now I have to manually wind up the idle when it's under load..
Hope that makes some kind of sense!
Thanks
The engine speed should be controlled by a governor which operates an arm that opens/closes the throttle.
It could be worth checking the carburettor as it is most likely the main jet is blocked, the carburettor should be the same as the one in the link I posted earlier (bottom of page 6)
Can you post some photos?
The last Honda found a new home a couple of weeks ago which left space for the next project.
A Kipor 6kVA Inverter generator, this one had been removed from a race support truck.
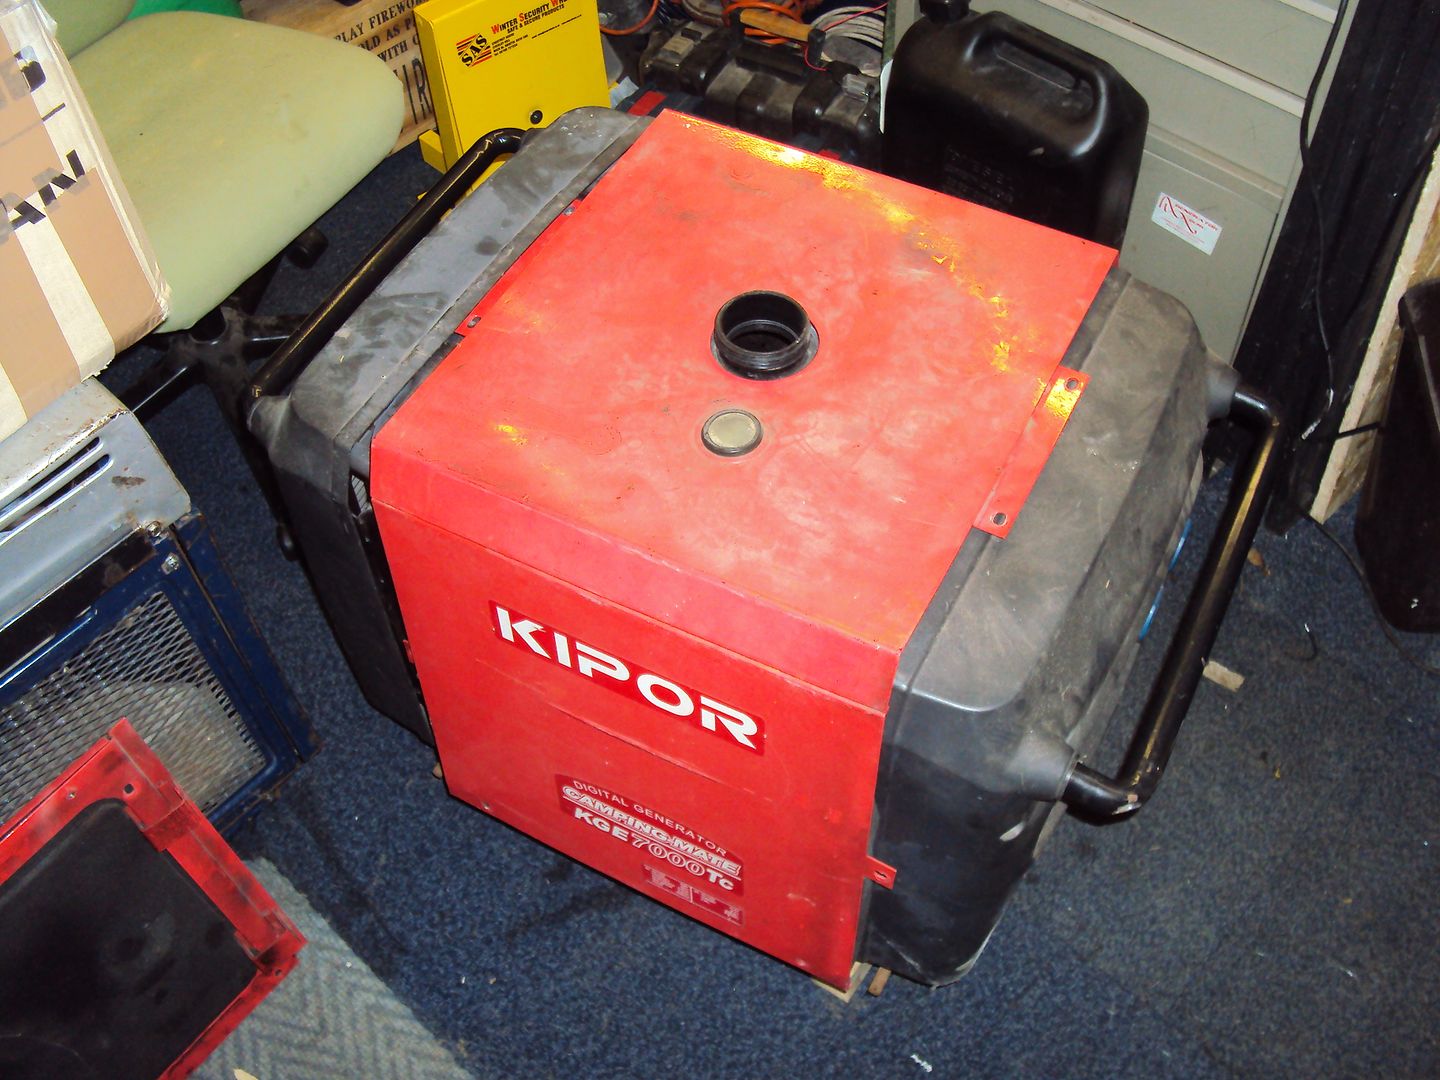
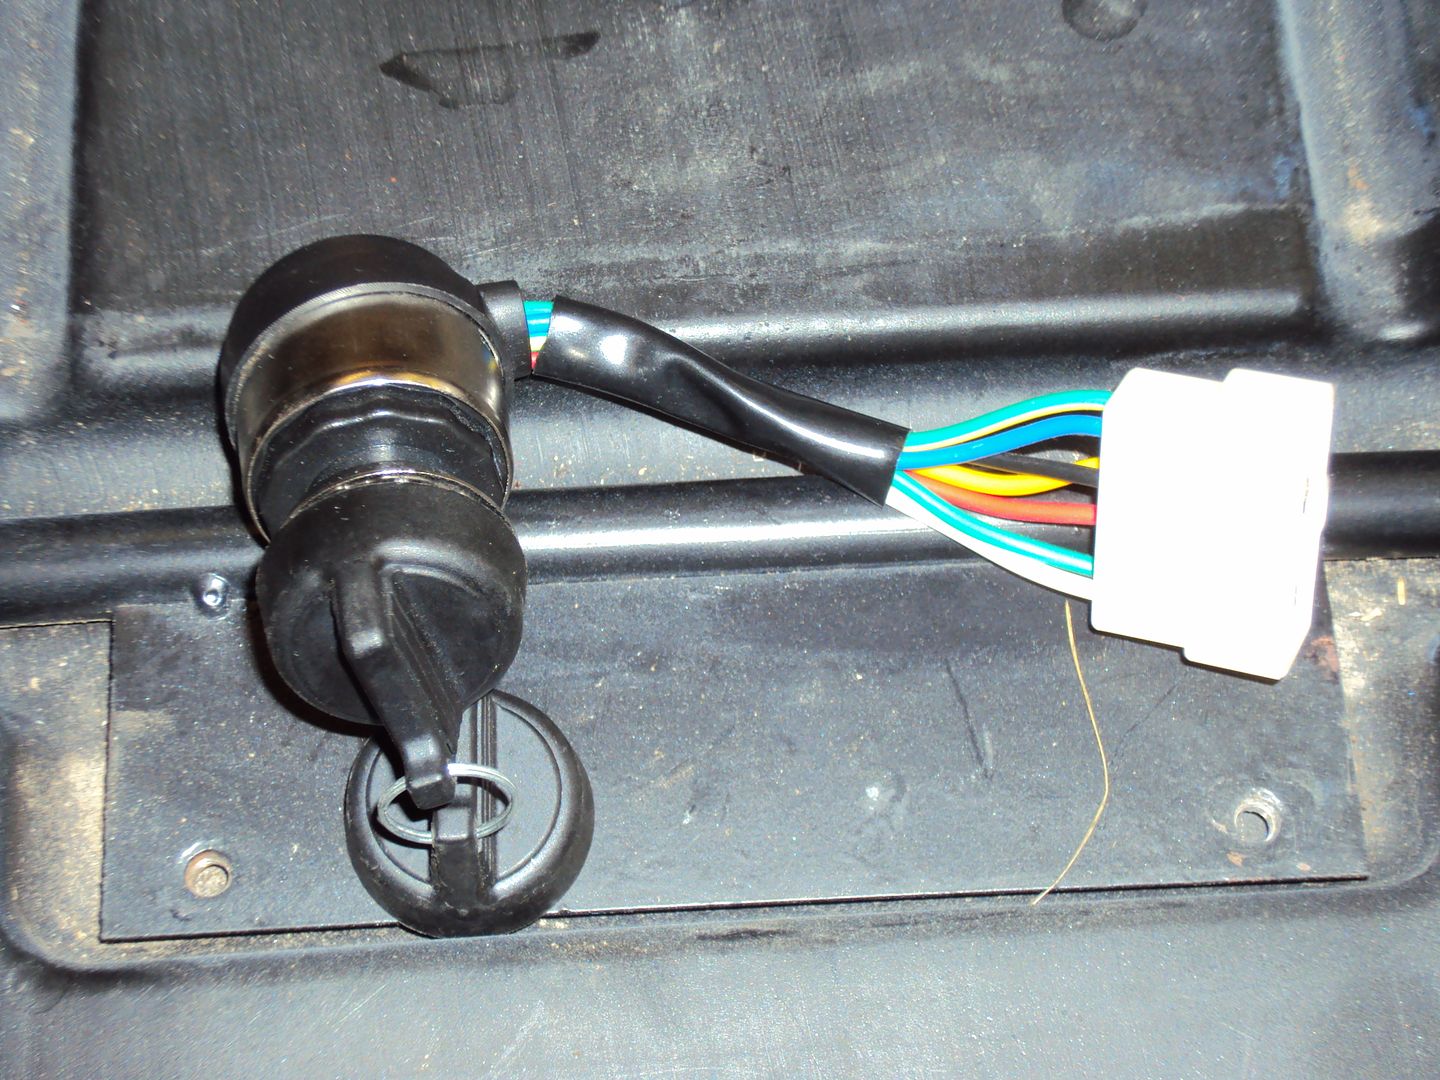
The problem was that the ignition key switch was relocated to the truck cab, unfortunately when removed a record wasn’t kept of where wires went so it won’t start or run.
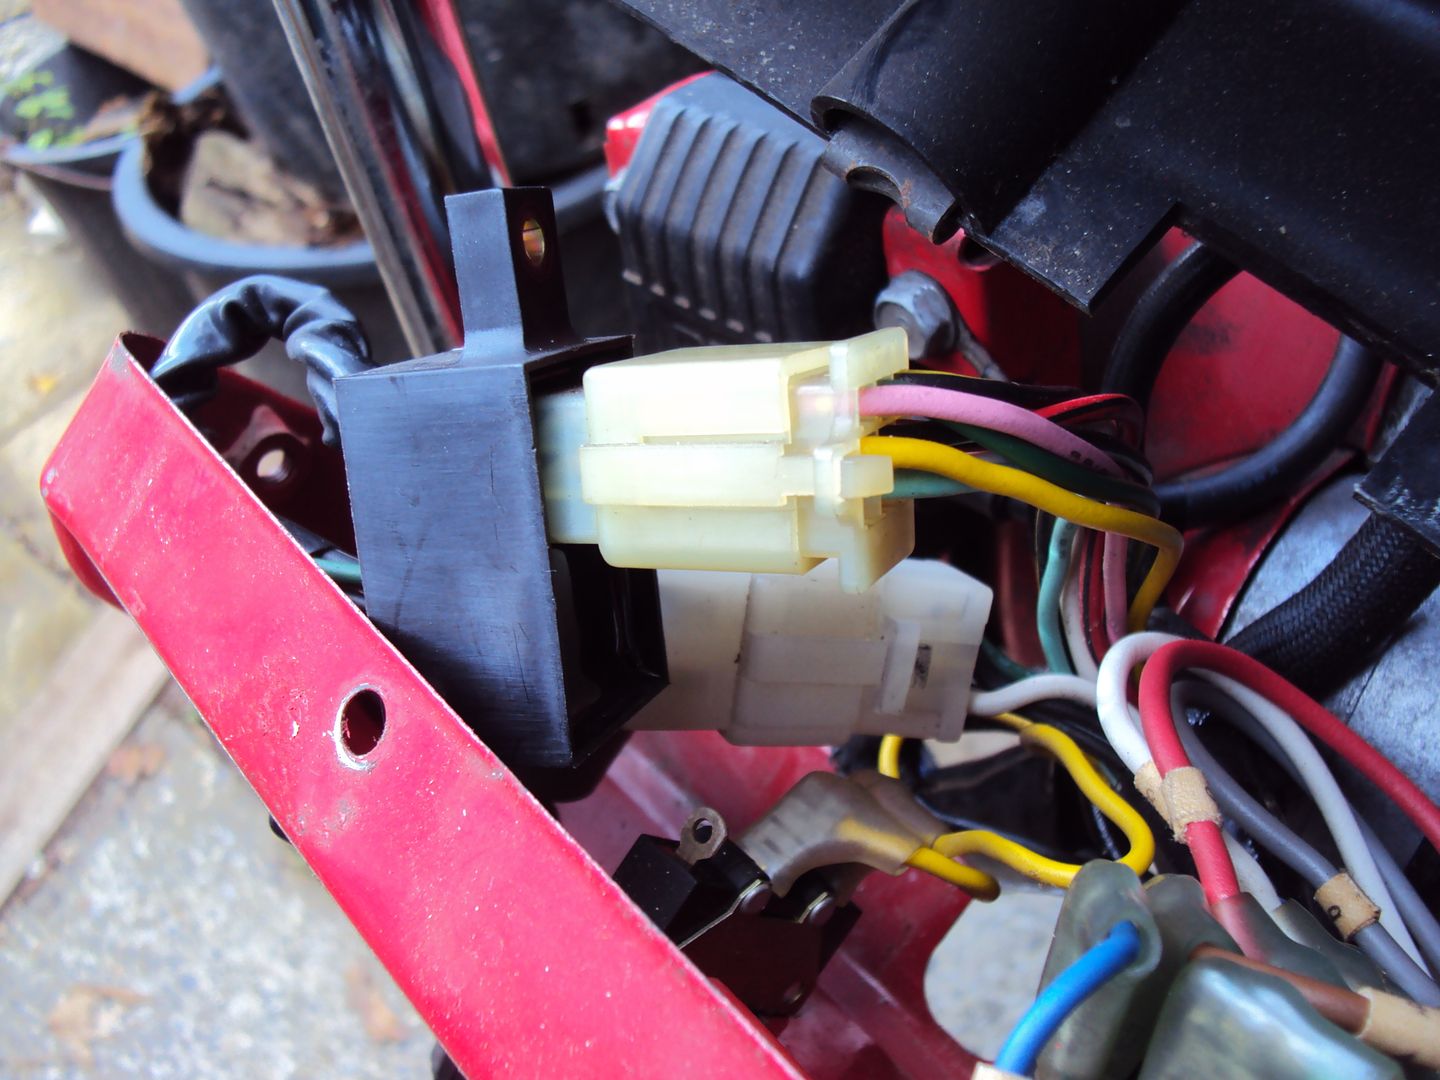
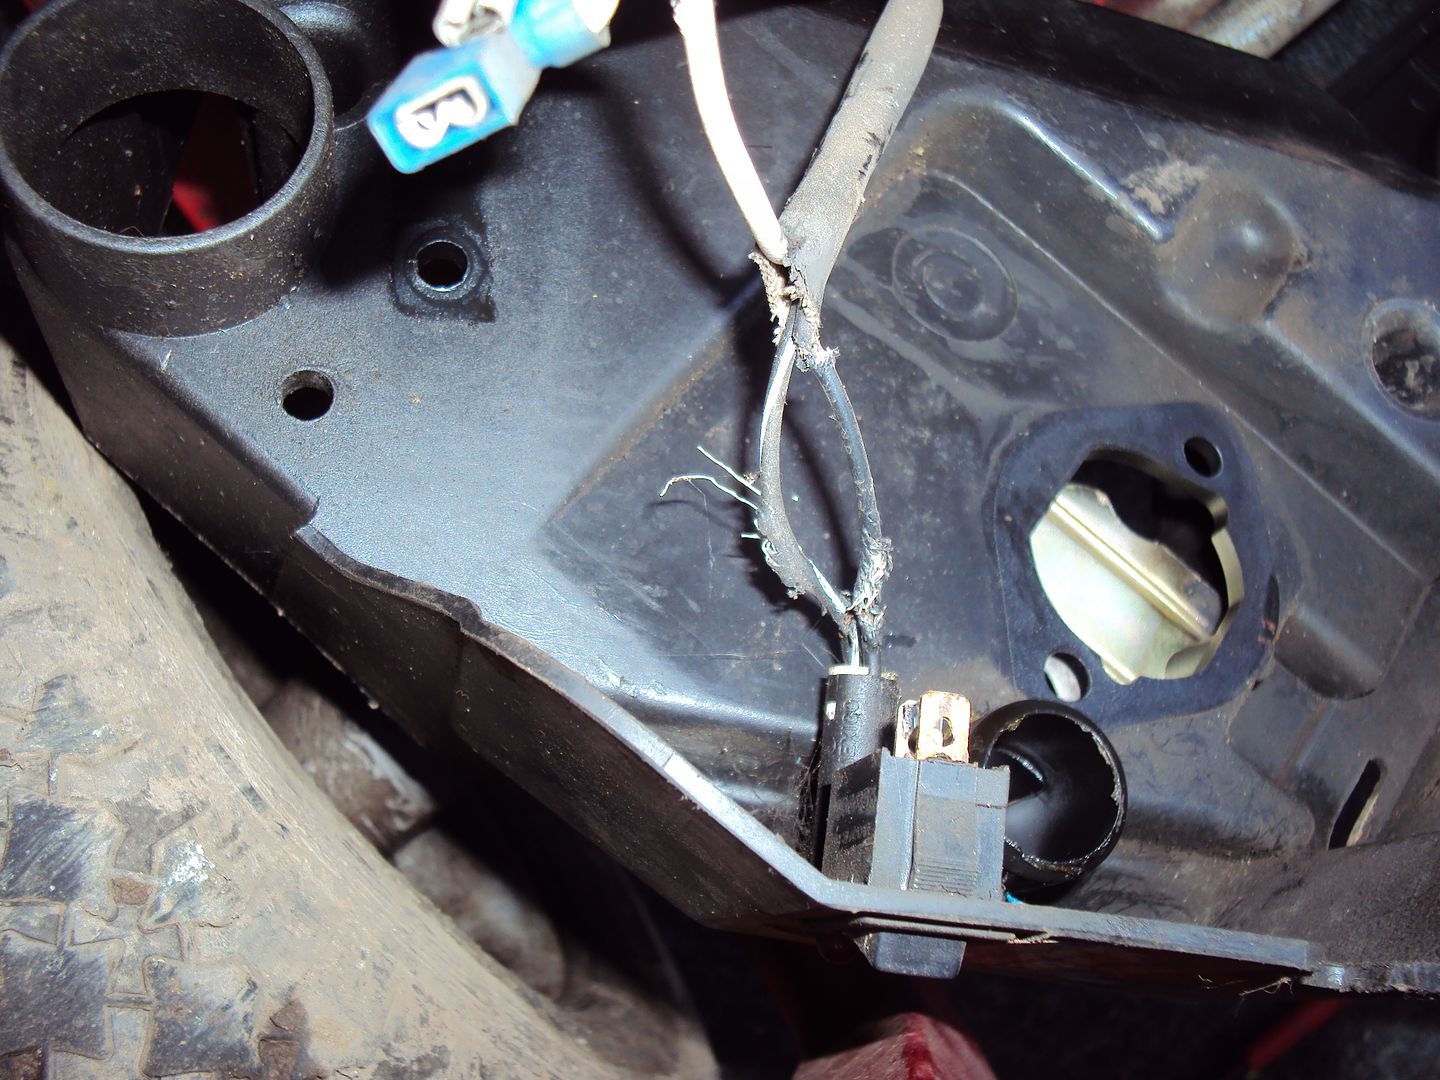
Fortunately the seller gave me a new ignition key switch when I collected it
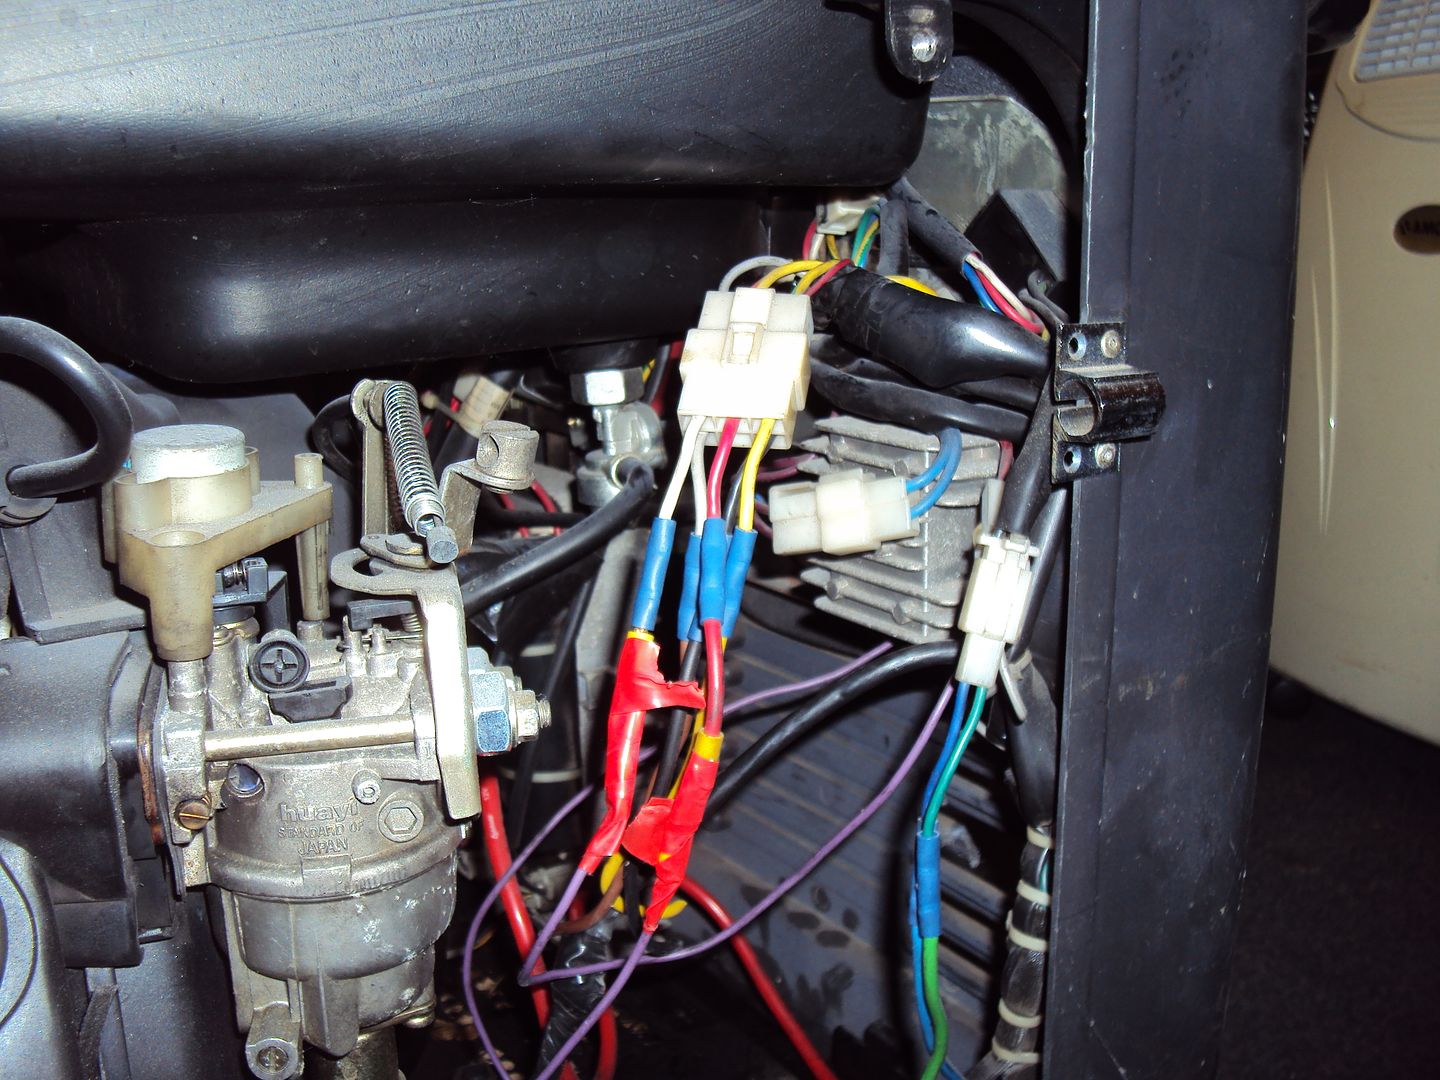
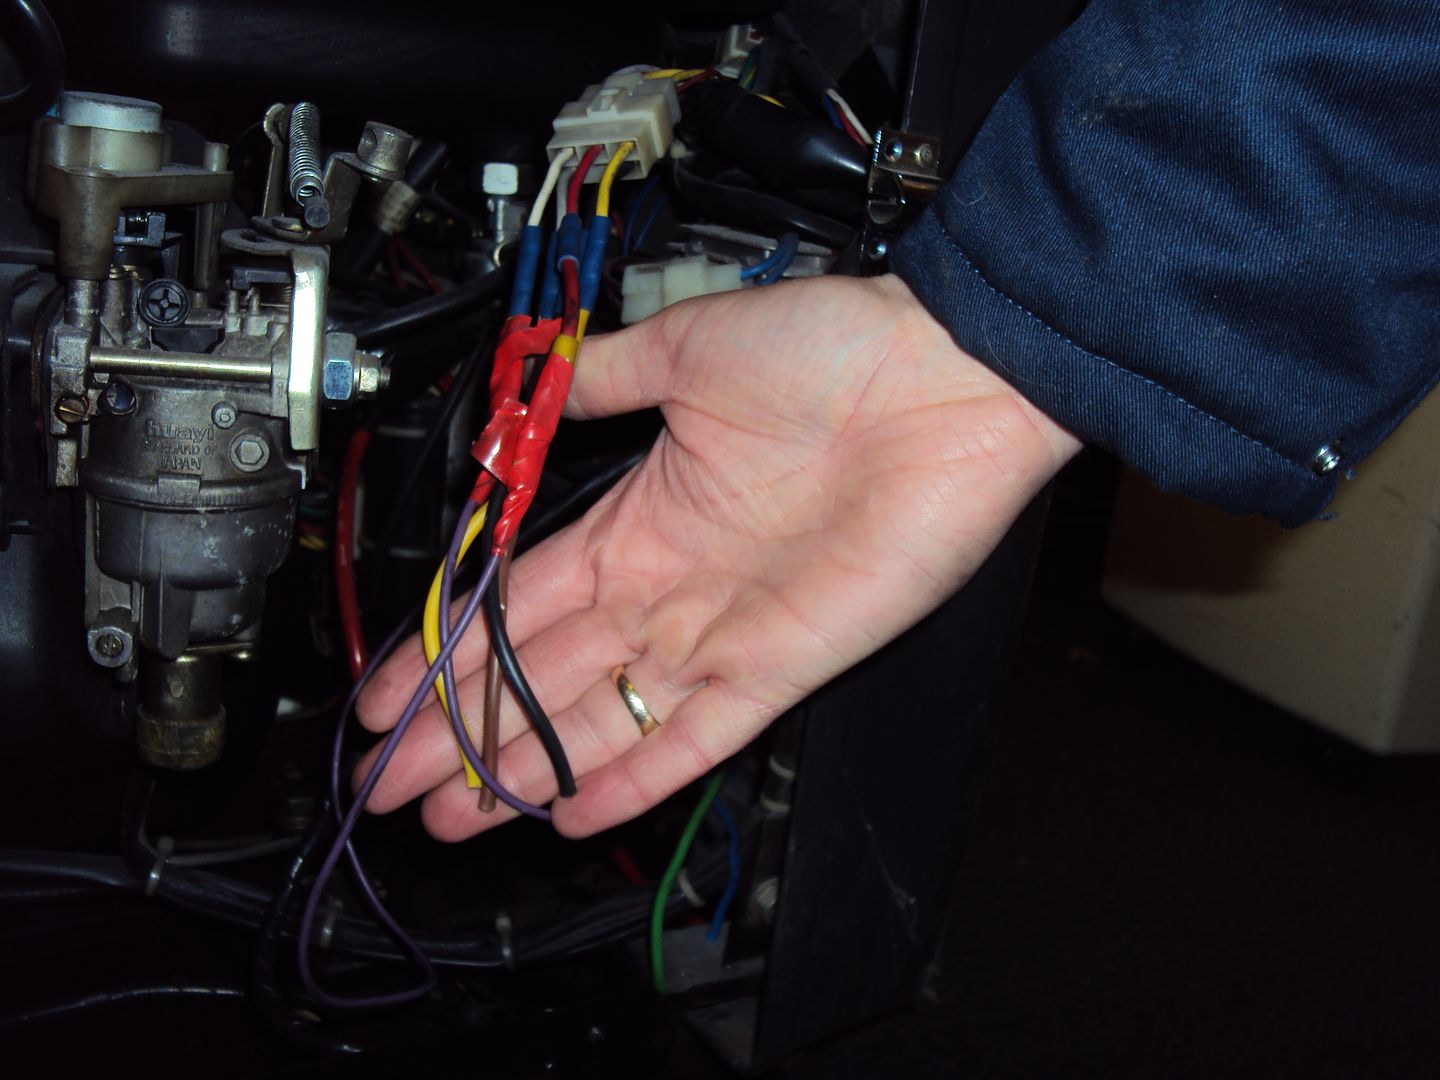
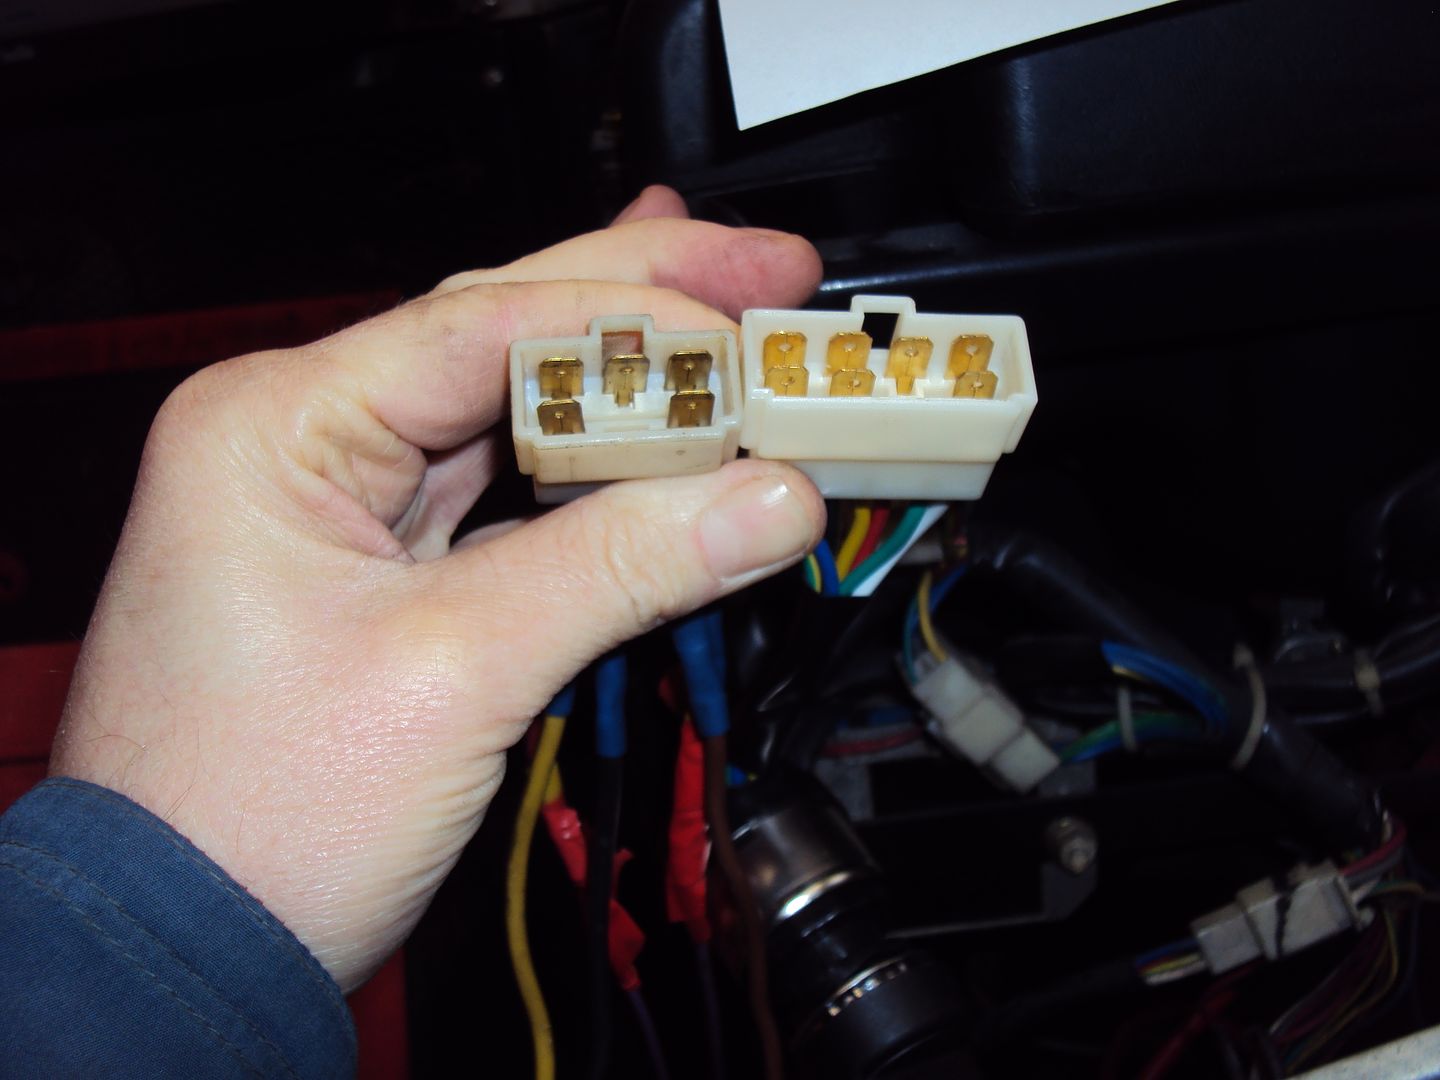
The only problem was that the connector on the new switch (right) is different to the original (left)
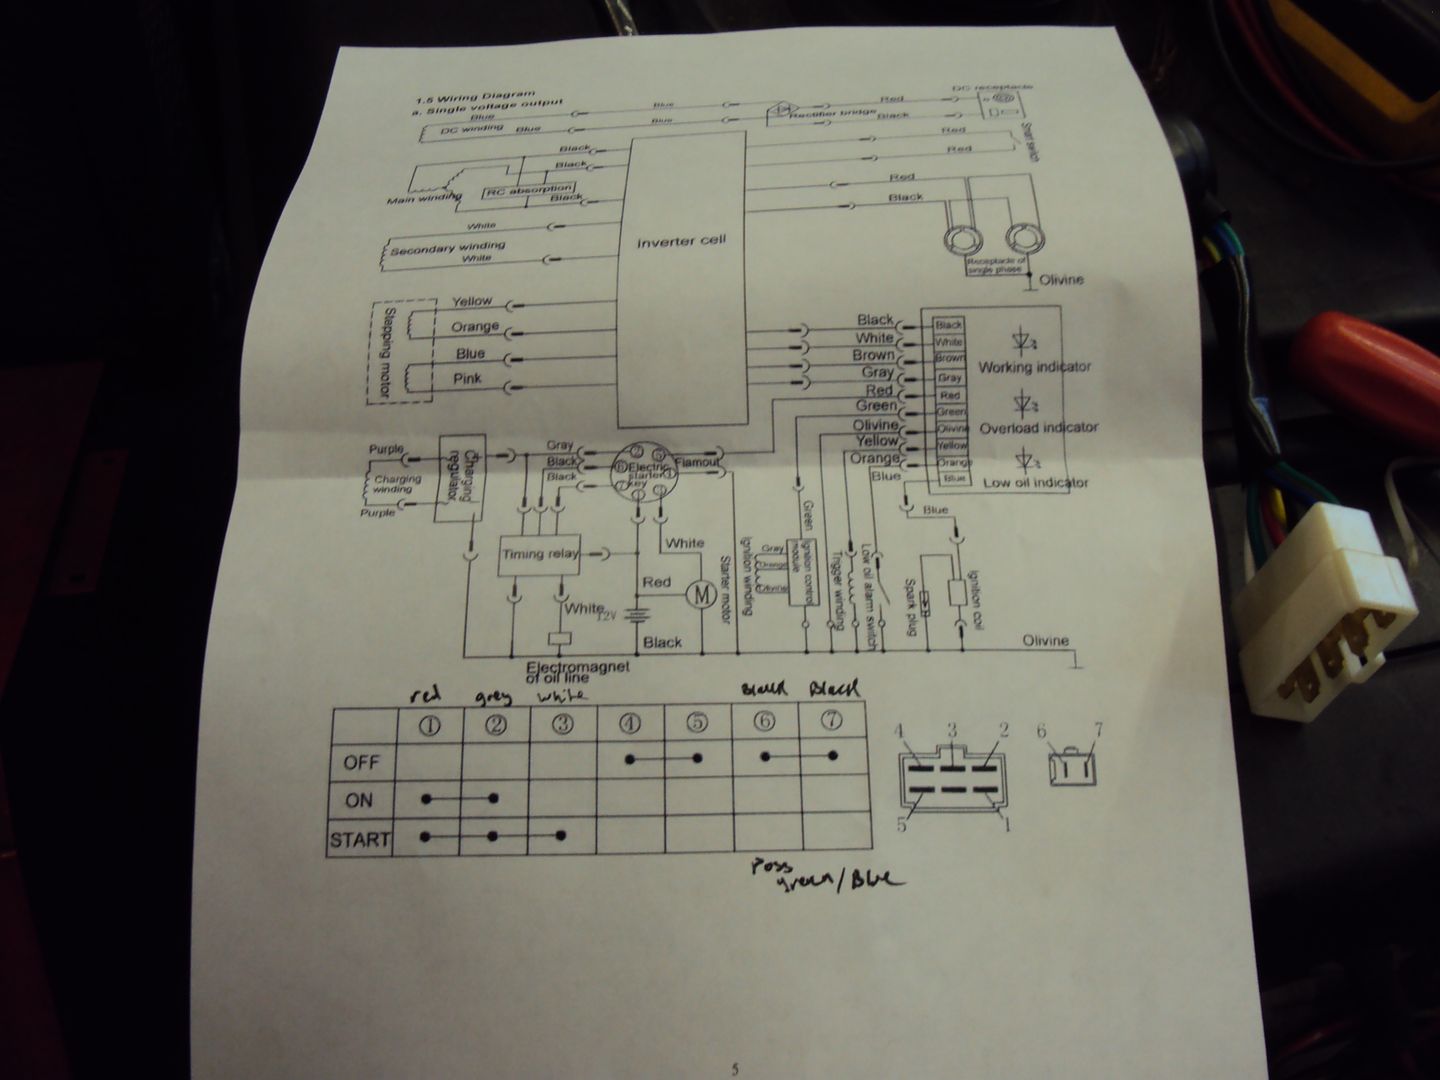
So armed with the wiring diagram I figured out how it needed to be connected.
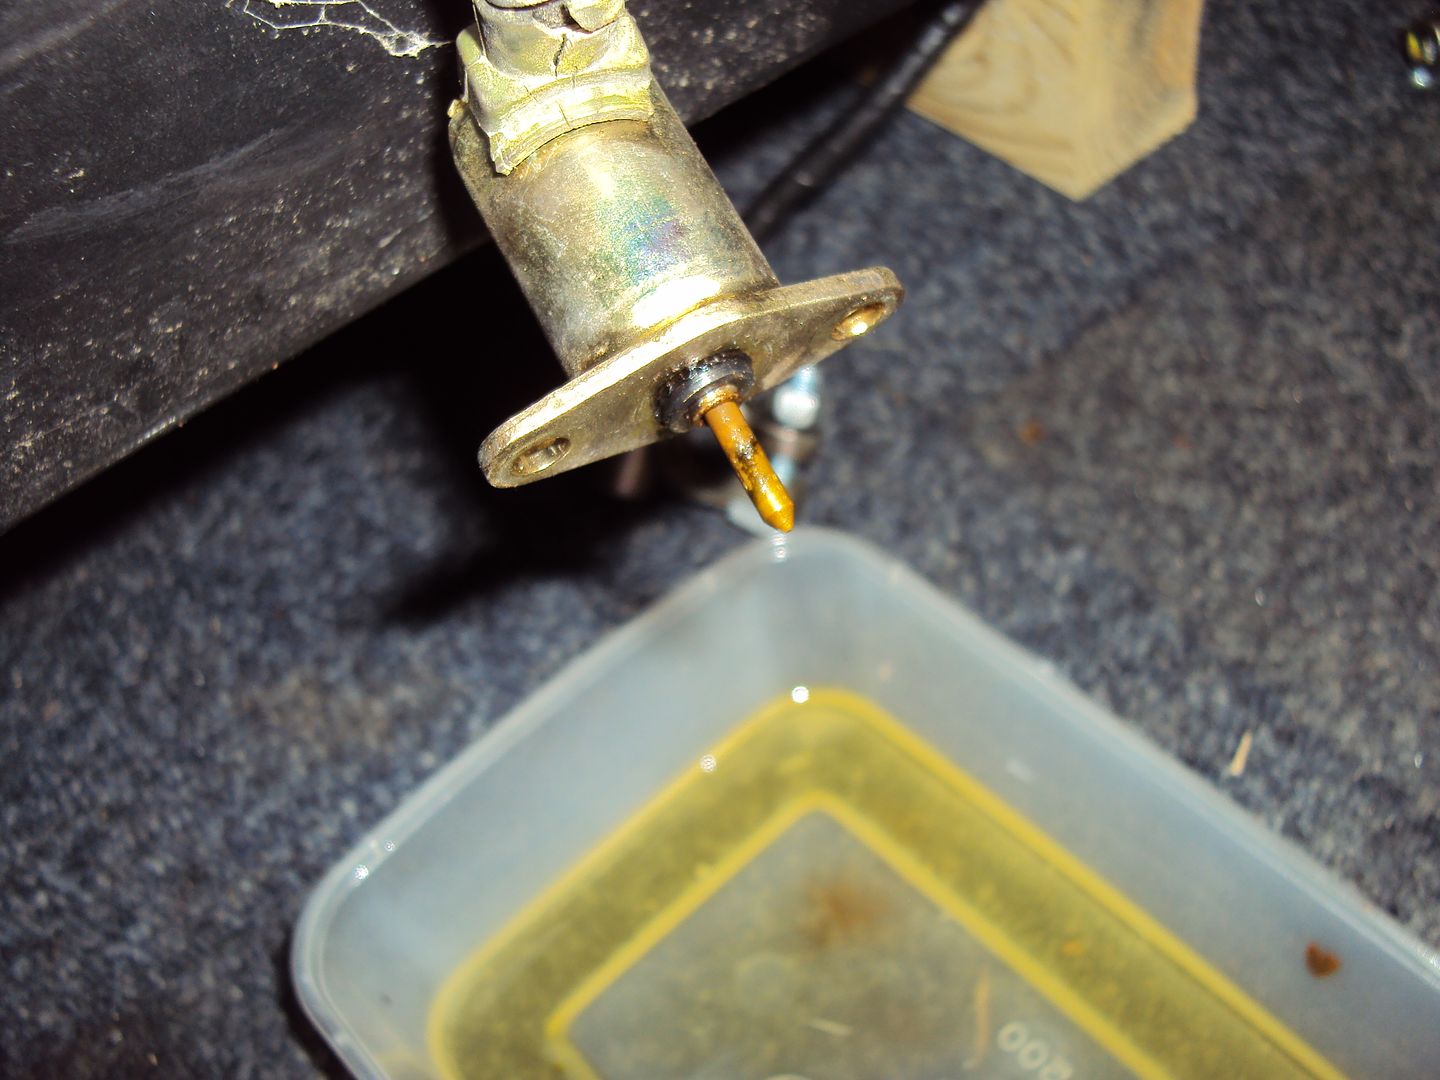
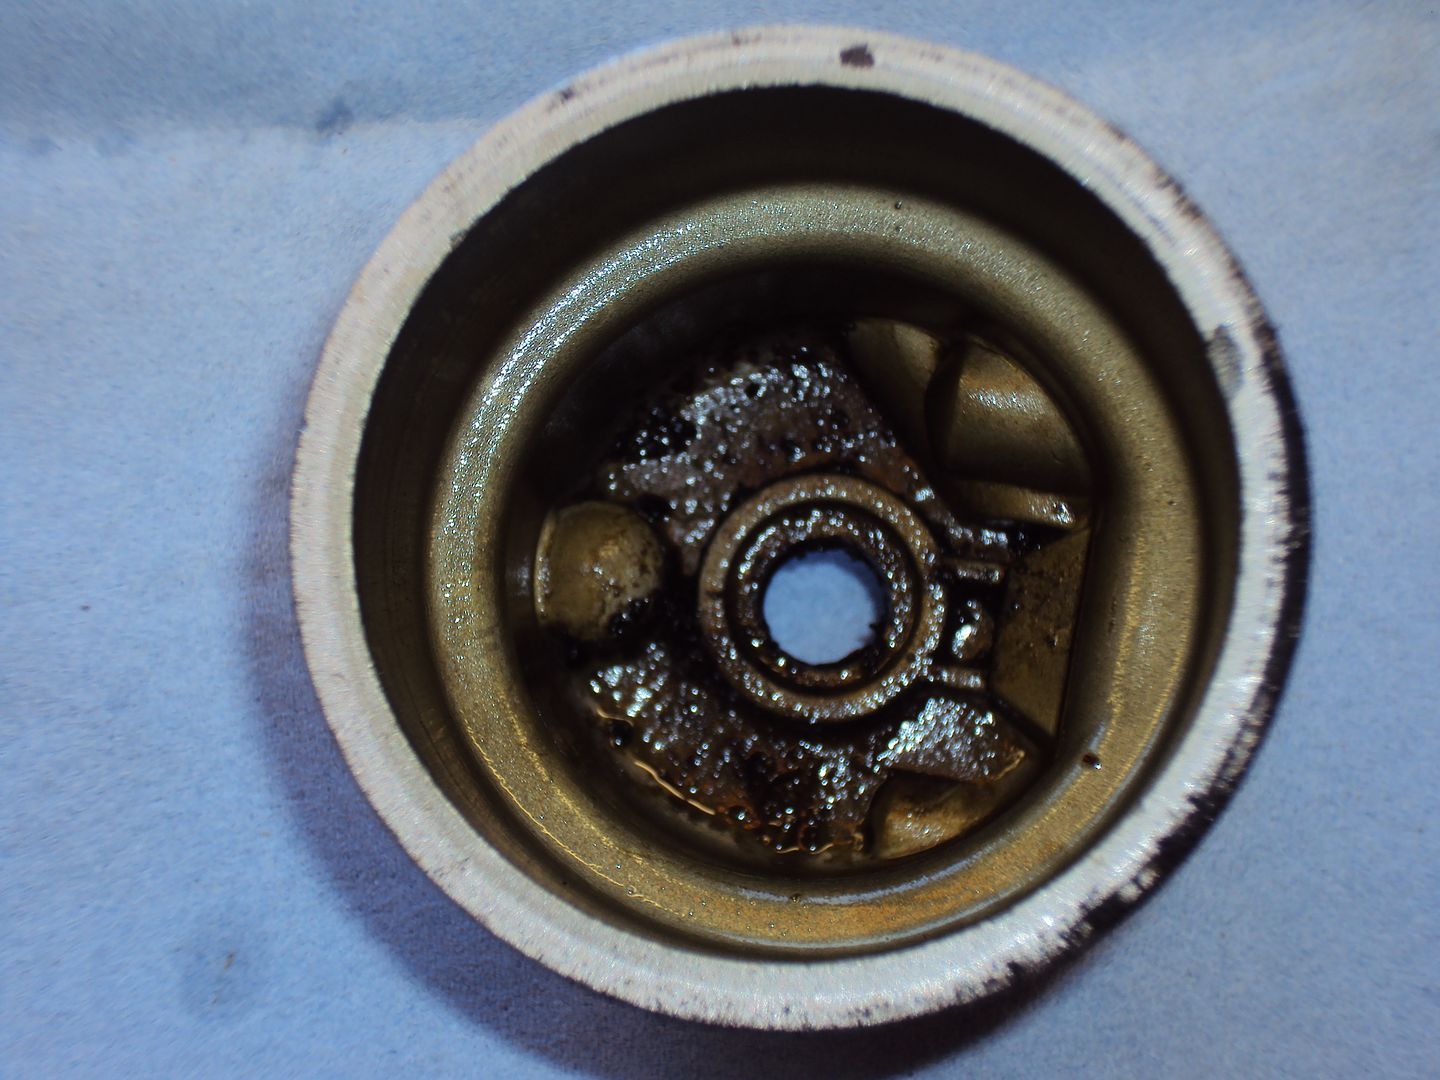
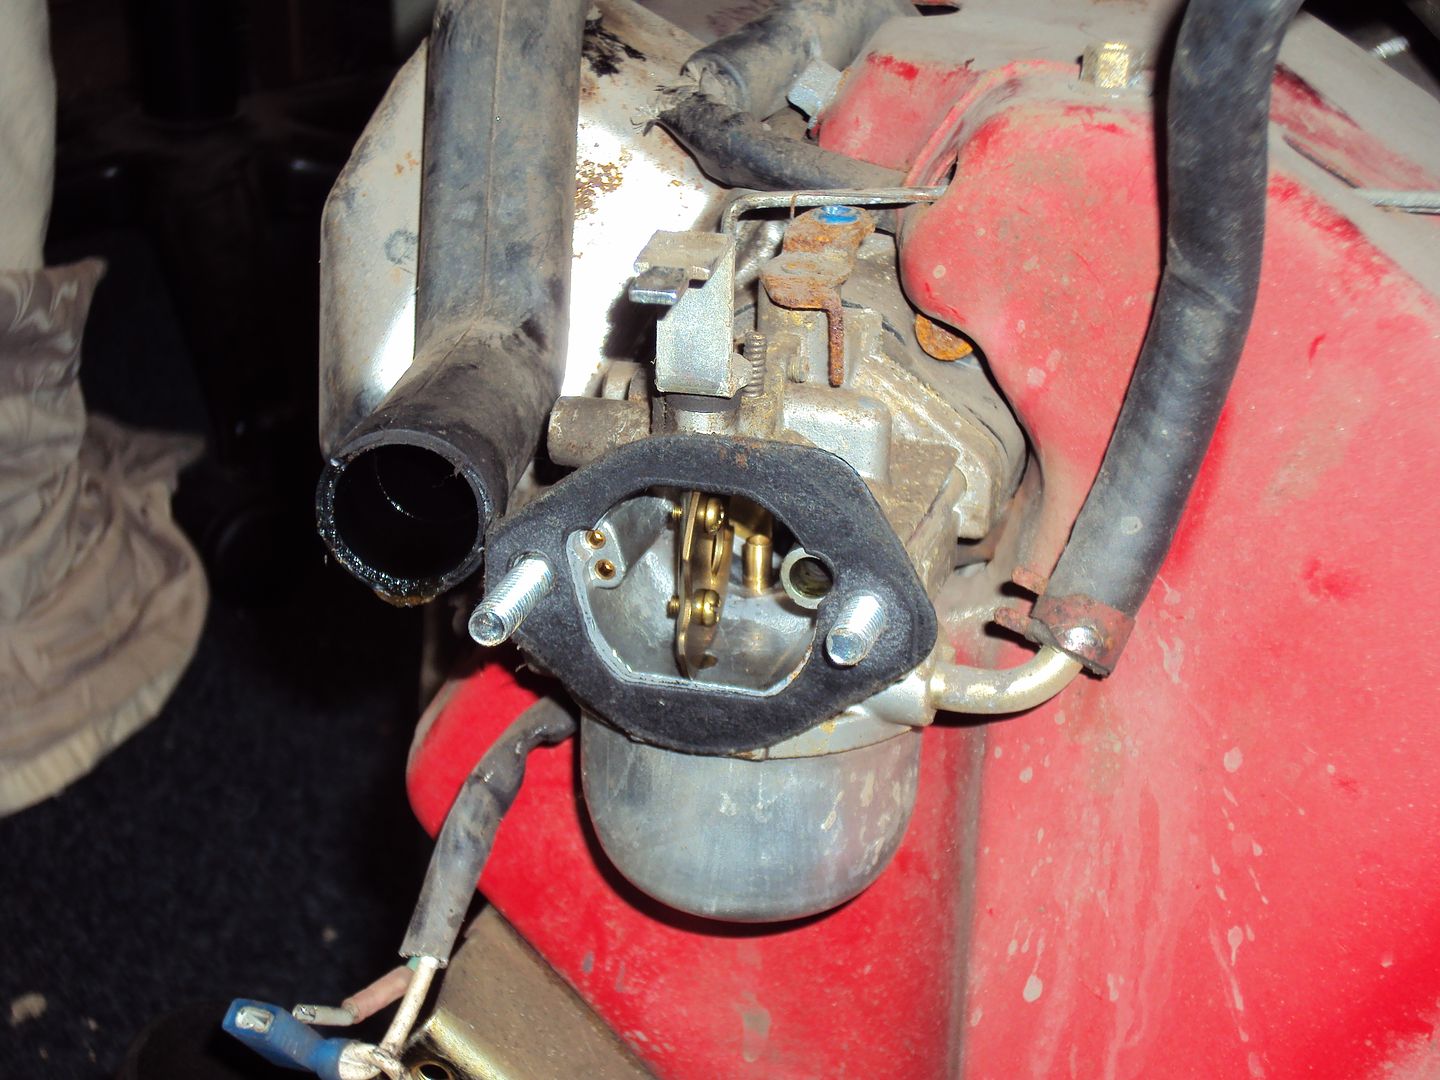
After getting it all wired up, the engine wouldn’t start so checked the carburettor, the fuel that came out didn’t look quite right, also found the fuel cut off valve was stuck.
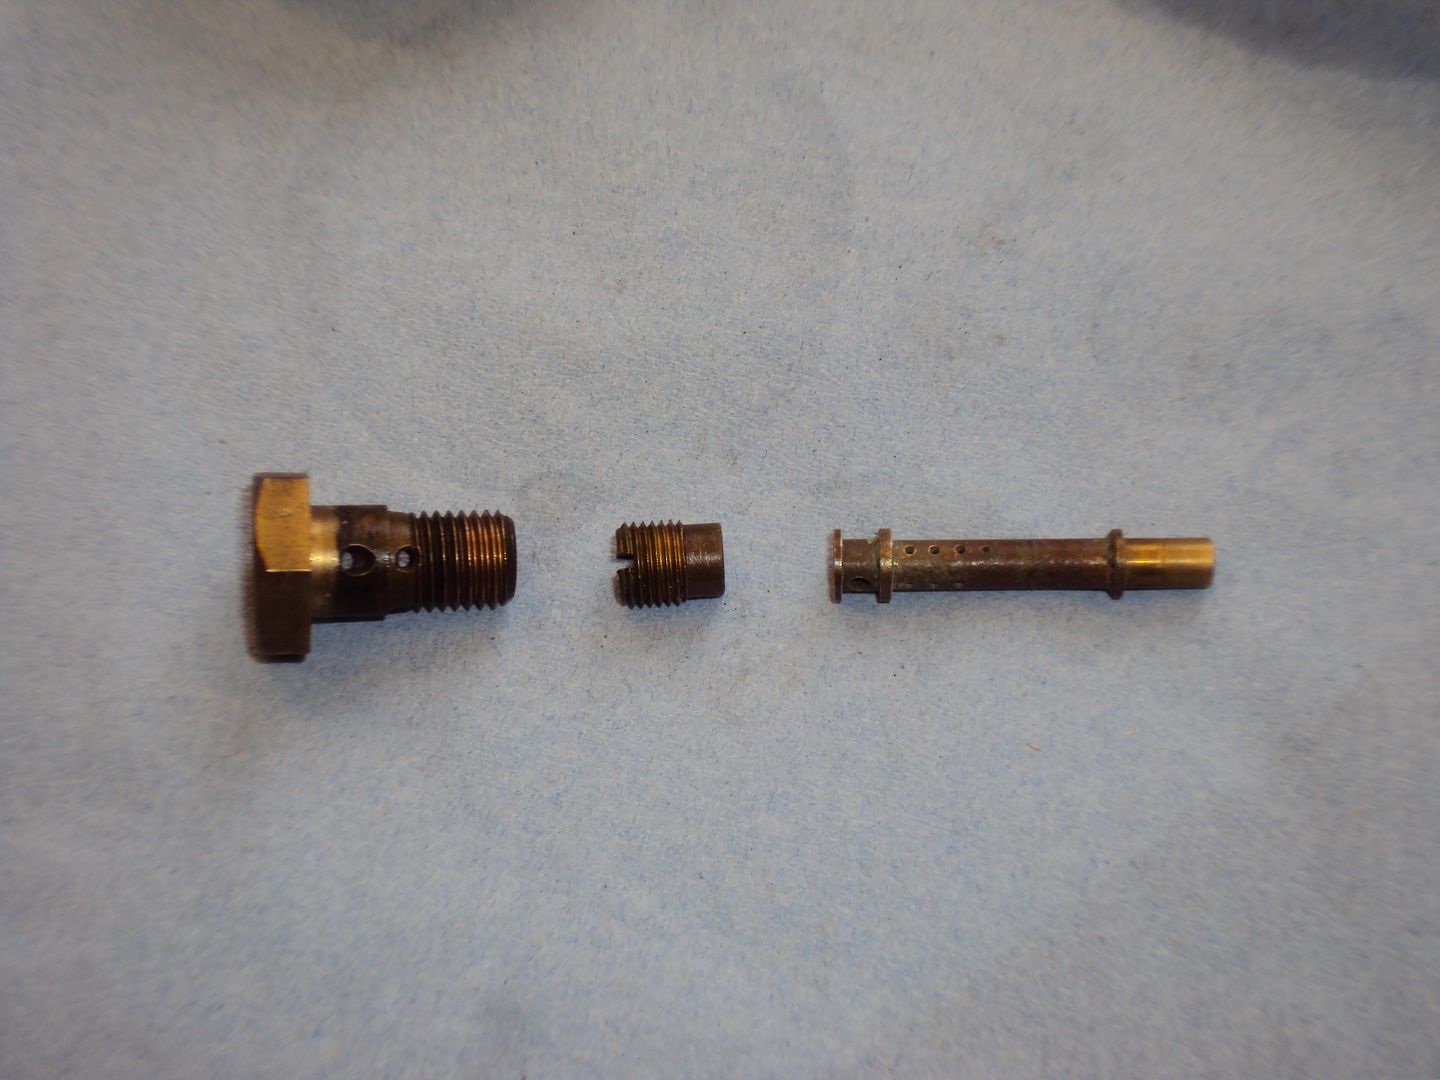
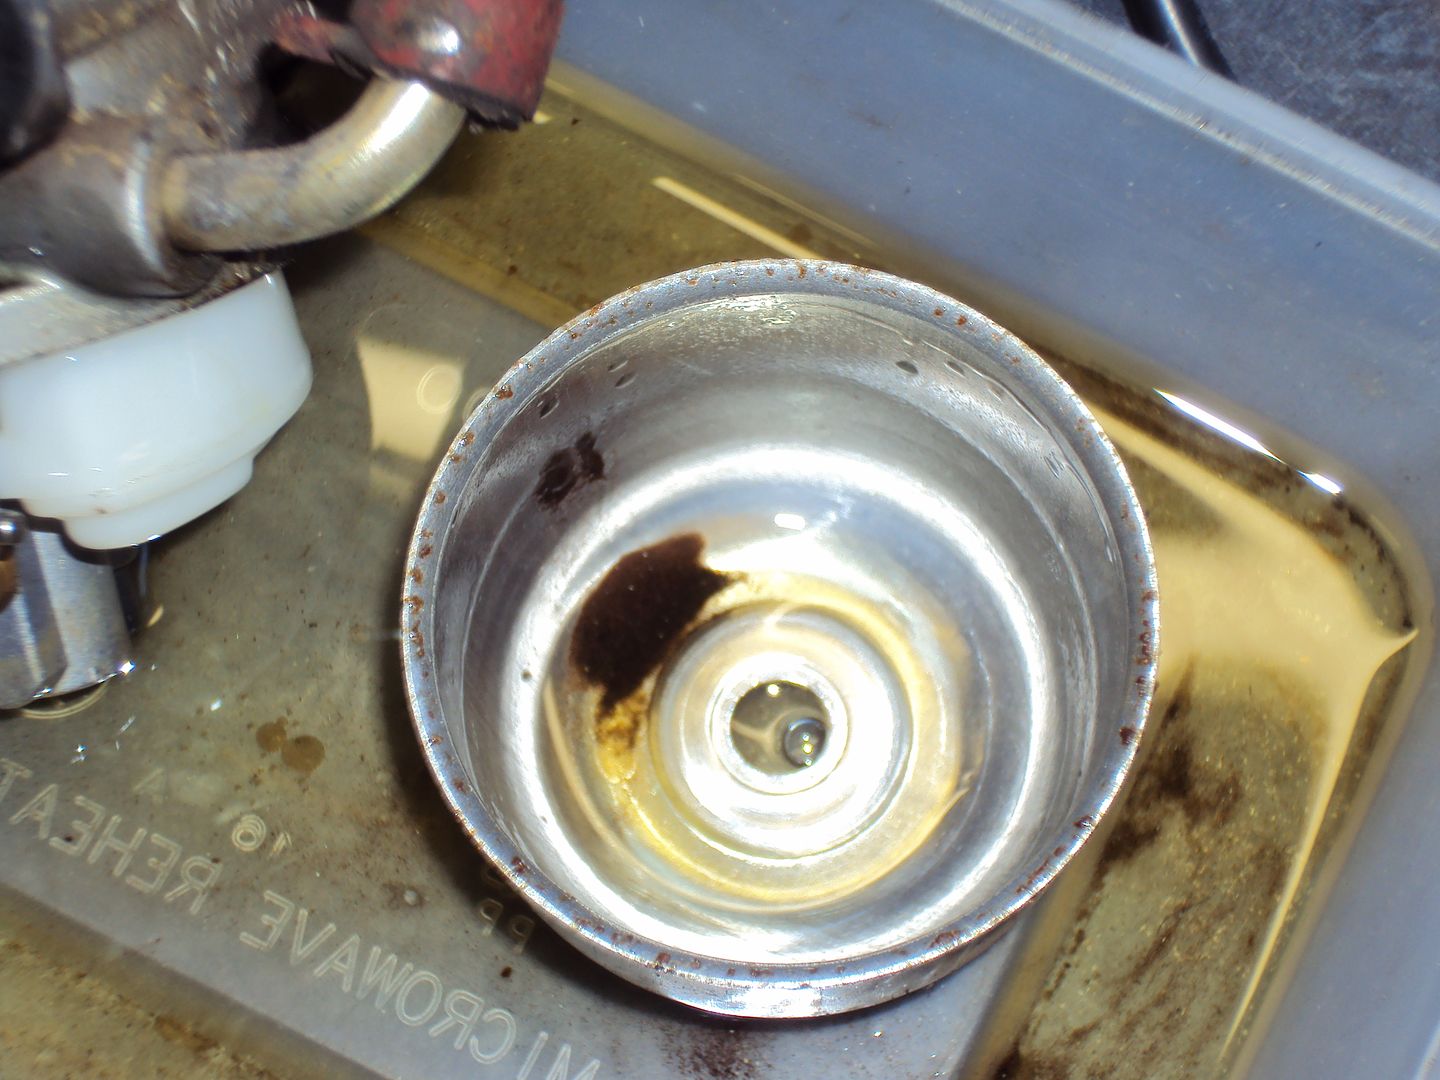
Got the valve freed up and stripped the rest of the carb, the main jet was in a poor state along with a lot of gunge in the bowl.
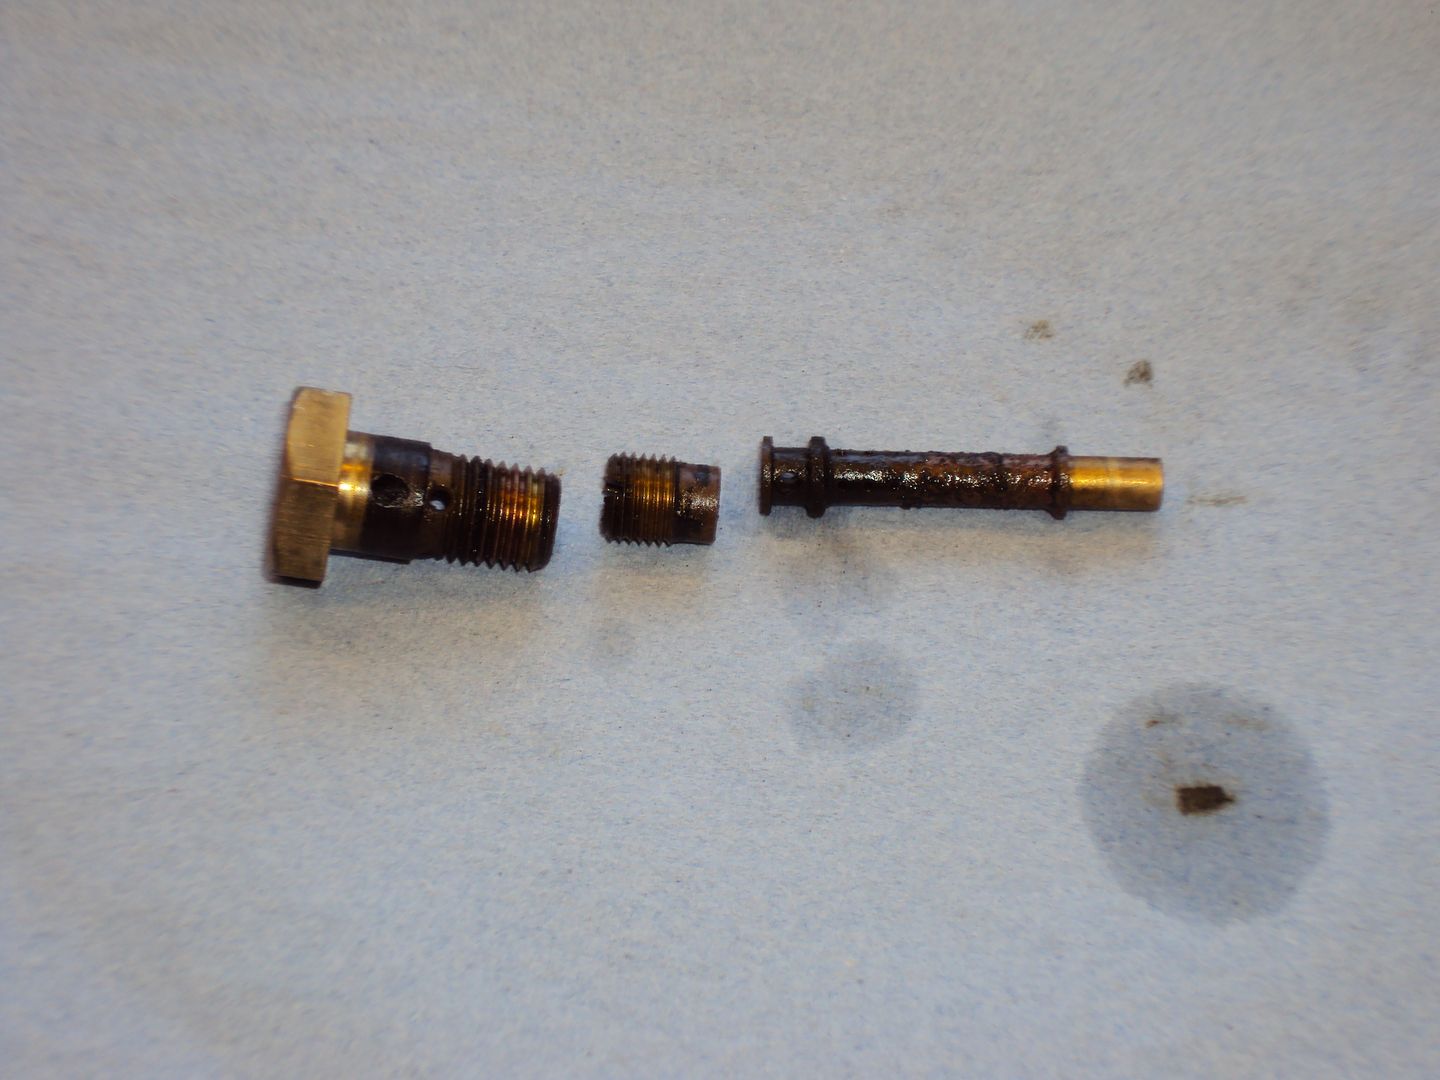
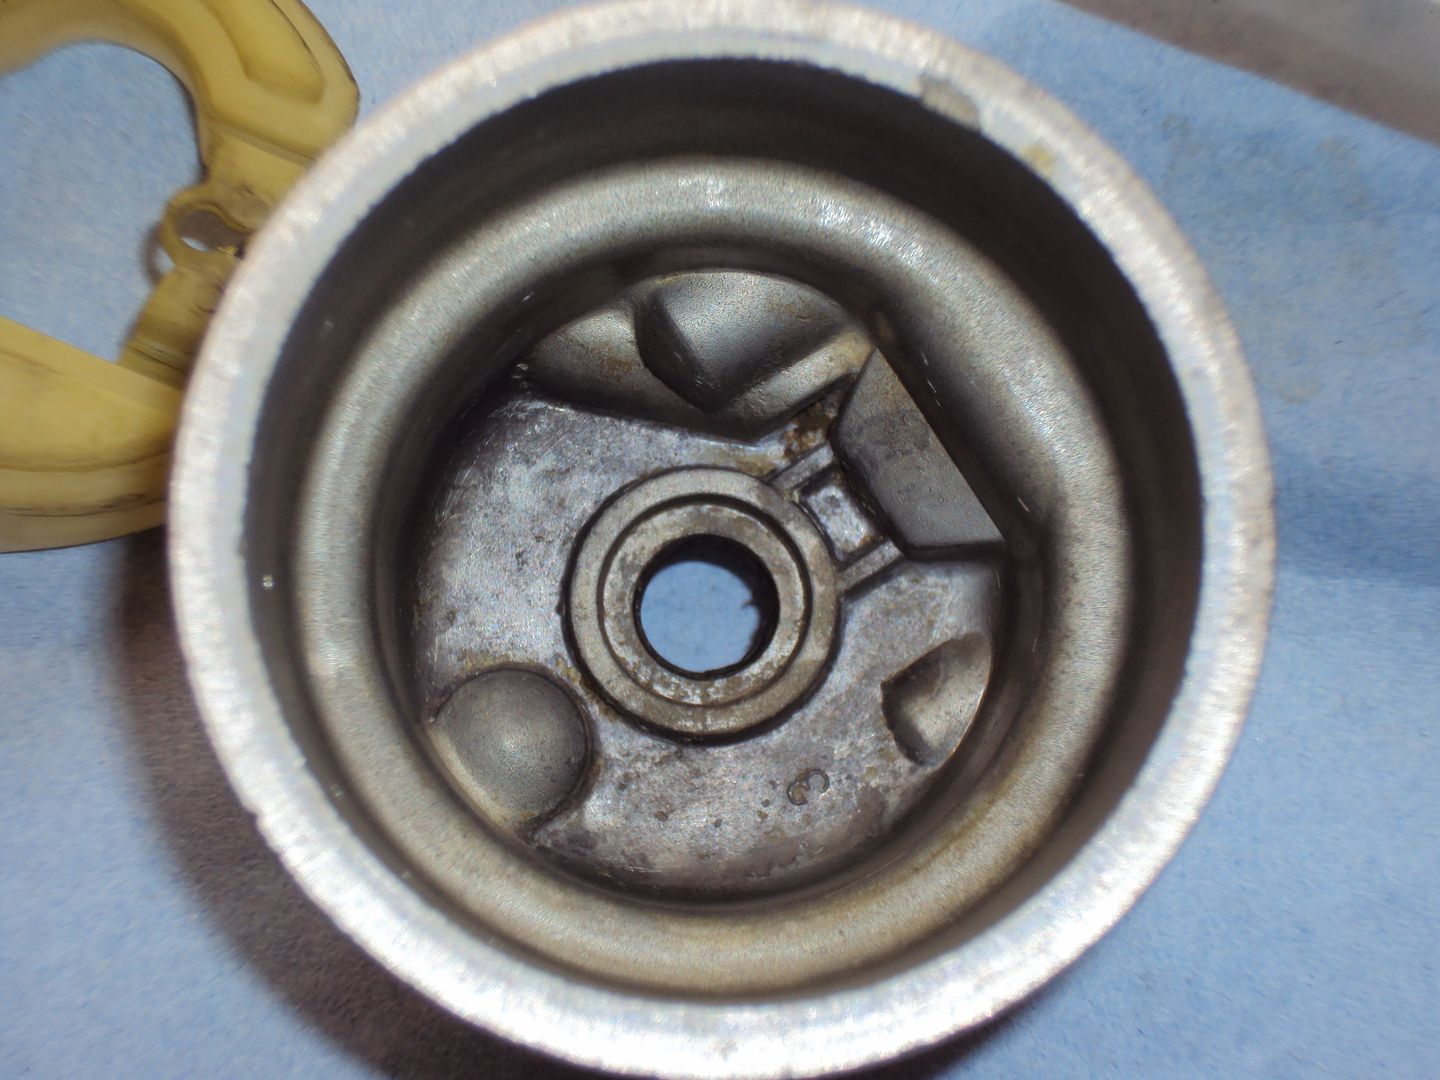
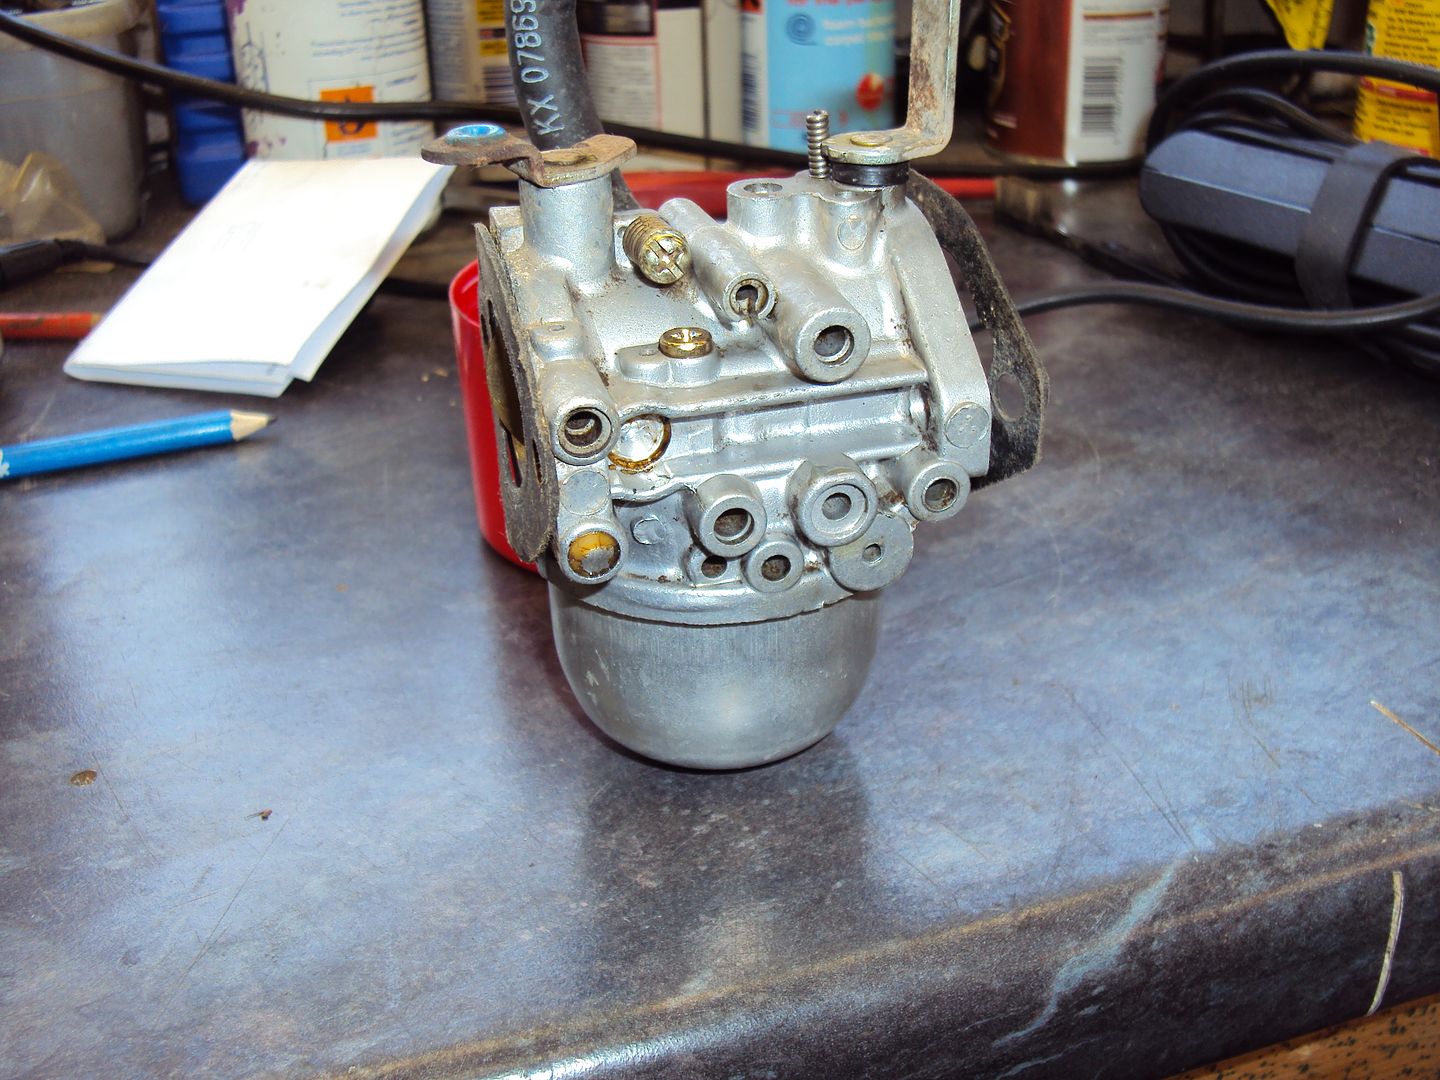
After a clean the bits were looking better,
Once reassembled, the engine spluttered into life but wasn’t running very well so I need to strip the carb down again .
.
A Kipor 6kVA Inverter generator, this one had been removed from a race support truck.
The problem was that the ignition key switch was relocated to the truck cab, unfortunately when removed a record wasn’t kept of where wires went
so it won’t start or run.Fortunately the seller gave me a new ignition key switch when I collected it
The only problem was that the connector on the new switch (right) is different to the original (left)
So armed with the wiring diagram
I figured out how it needed to be connected.After getting it all wired up, the engine wouldn’t start so checked the carburettor, the fuel that came out didn’t look quite right, also found the fuel cut off valve was stuck.
Got the valve freed up and stripped the rest of the carb, the main jet was in a poor state along with a lot of gunge in the bowl.
After a clean the bits were looking better,
Once reassembled, the engine spluttered into life but wasn’t running very well so I need to strip the carb down again
. creationracing said:
Gingerbread Man said:
What ever happened to the thread starter? Find a generator he couldn't fix?
I was wondering if there's a shed somewhere with a half-fixed generator and a skeleton draped over it... No, I'm still alive
 . Just not bought any lately as they have either been too expensive or too far away. Missed out on a 10KVA unit which went for £78 due to a dodgy internet connection at the wrong time
 The red Kipor took a wile to getting running correctly due to blockages in the carburettor, but finally got it sorted.
Sold it in January for about £300 more than I paid for it.
The big Honda is on eBay at the moment, had a few silly offers for it, including the inevitable "I'll give you £150 for it yeah..."

The profits have paid for some of the parts for converting my MKIV Golf R32 from manual to DSG, so that project is taking up most of my time and space. The workshop (aka garden shed) is currently full of gearbox bits so I don't have any space to work.
Might start tinkering again once the Golf is done
Morningside said:
I love this thread and wondering if there was any news on new projects?
ThanksI’m still tinkering with them, I have worked on another 2 since the last update, but I haven’t posted as they have just needed the carburettor cleaning so not very exciting.
I will keep this updated if I get anything interesting.
SHutchinson said:
Maybe not exciting to you but we are all gripped by this stuff!
Make sure you buy only proper knackers from now on, they've been the best episodes of this show so far! ;-)
As per request, here is the latest I got this one for less than £30!Make sure you buy only proper knackers from now on, they've been the best episodes of this show so far! ;-)
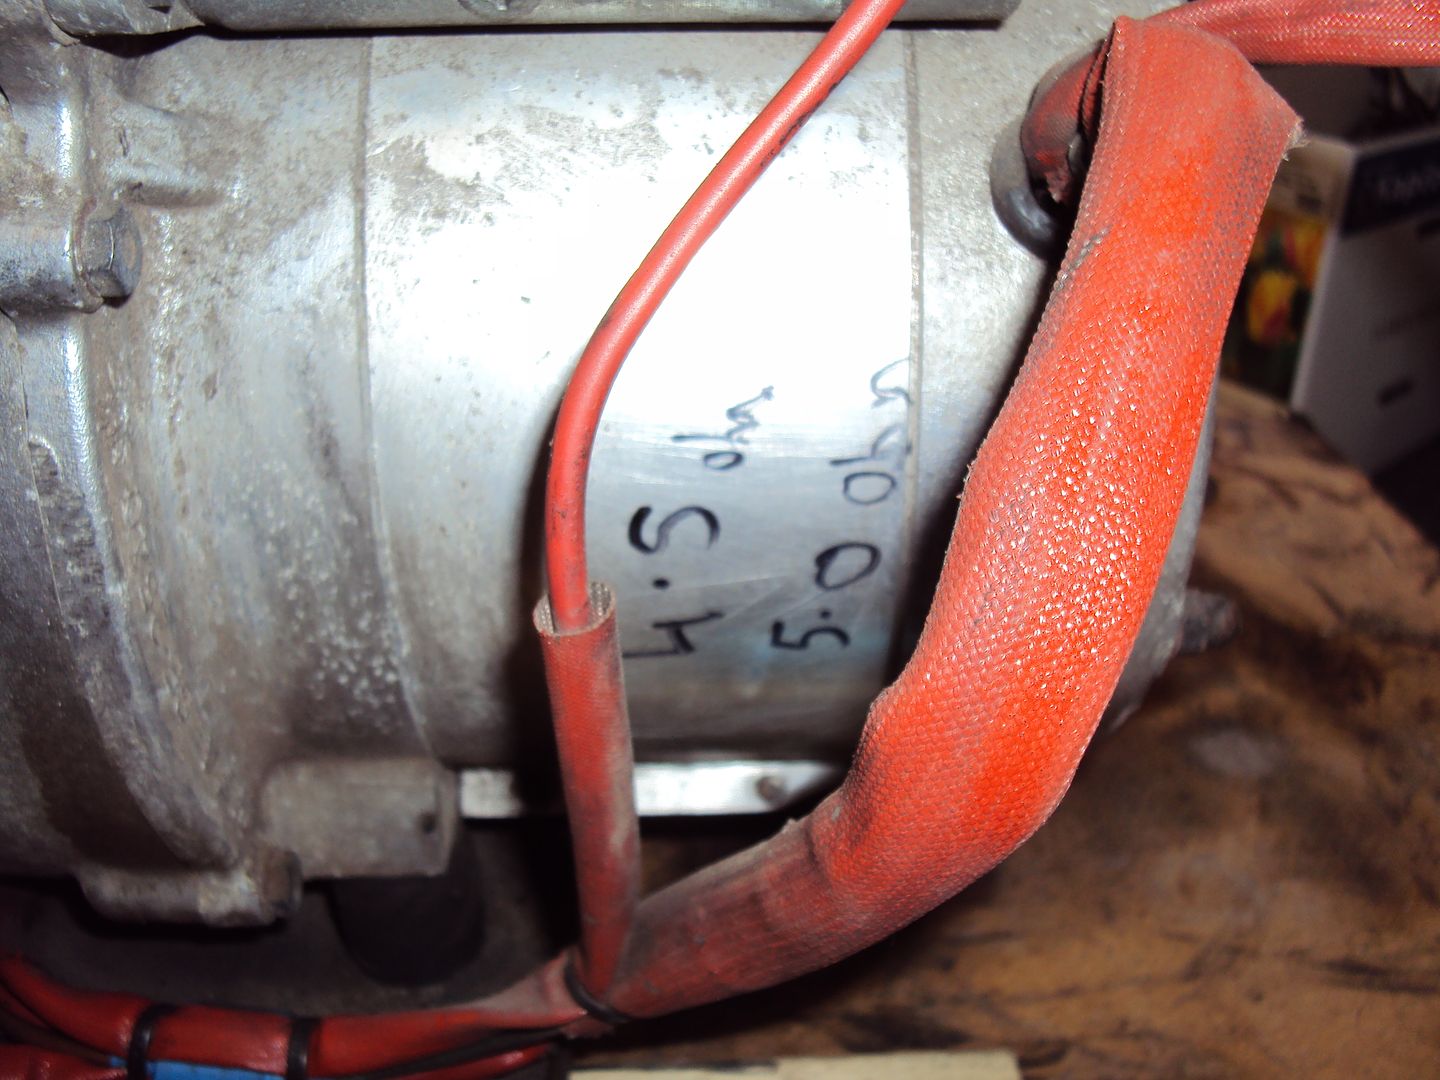
From what I can make out from the faded label it’s a Dometic 2500h which is meant for installation in a motor home, it came with an enclosure but was missing the front cover. It’s a basic capacitor stabilised alternator which is ok for running lights, fridge’s Air conditioners etc but no good for sensitive electronics unless a surge protector is used.
It had the usual problem of the carburettor jest were clogged so the engine wouldn’t run properly. Someone had previously had a go and completely destroyed the screw slot in the main jet making it impossible to remove.

I ended up buying a new carburettor (was only £10!) and got the engine running.
And fitted a fuel filter to protect my £10 investment
It also needed a bit of welding on the exhaust as weld around the pipe into the silencer had split
When I picked it up it was missing the capacitor and it looked like someone had previously had a go at it (winding resistance written on case).
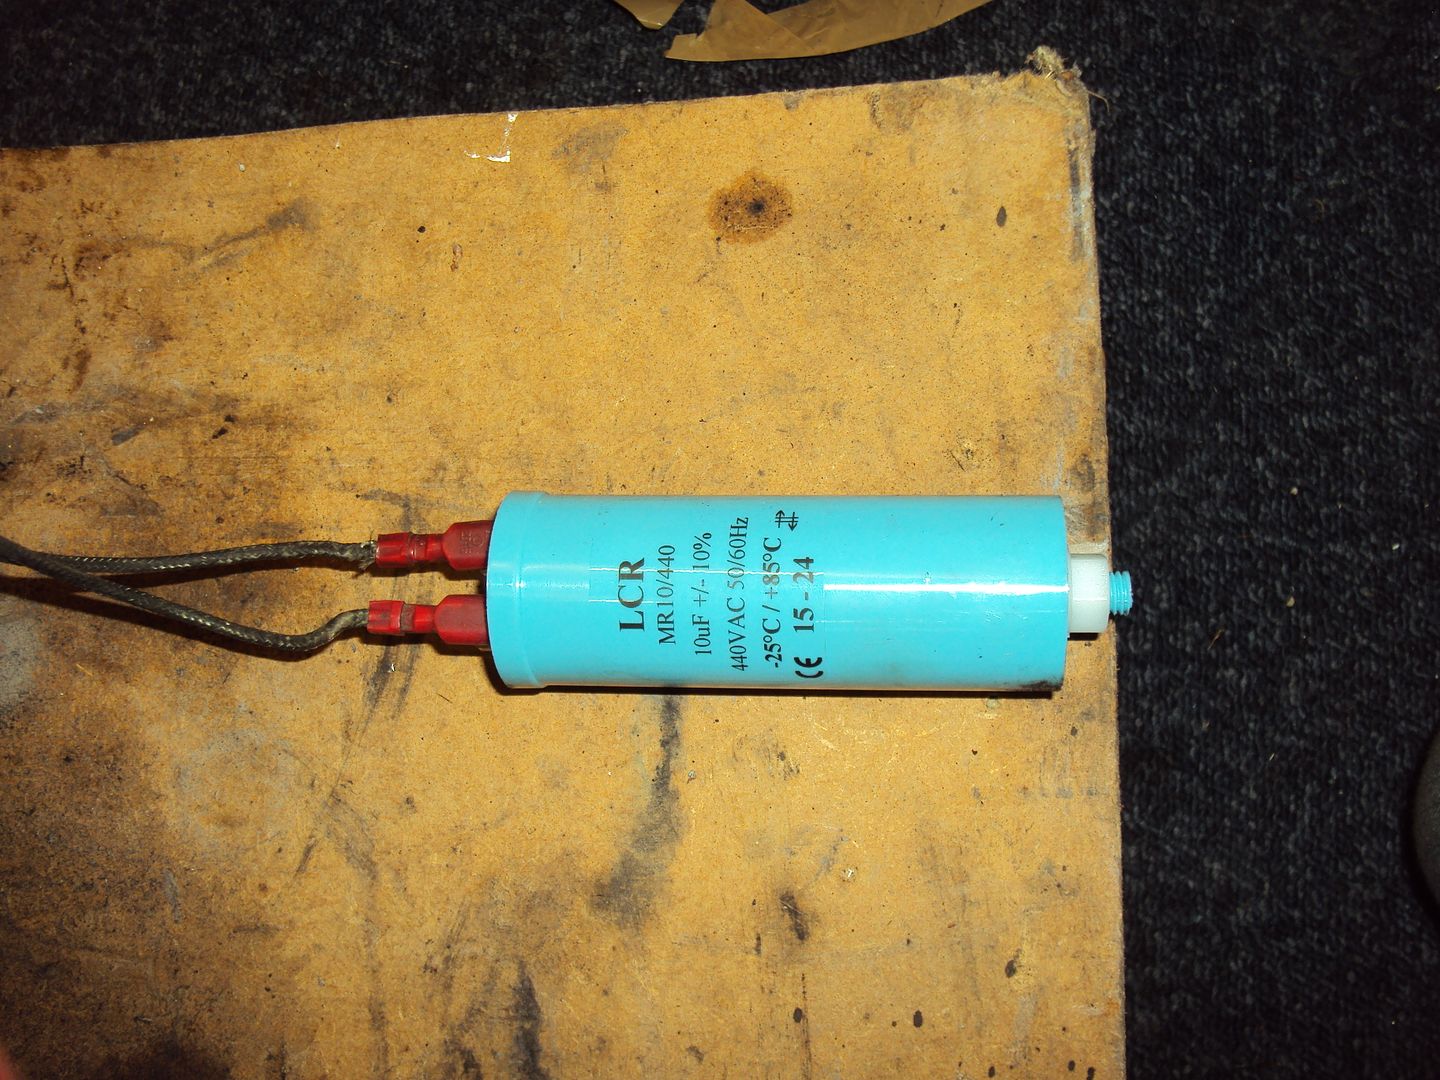
After a bit of digging around I found that it should have a 12.5uf capacitor. I took a chance and picked up a 10uf from Maplin, it was only a couple of quid.
It worked!
Still to do
Get a 12.5uf cap as the voltage is a bit down, currently it’s outputting 205 on load and 215 off load, should be 220 ish
Make a control panel as it’s missing the original control panel so need to build one so the electric start can be used without hotwiring it
richierich37 said:
creationracing said:
Great work man.
But you need to increase your workrate. We need entertained.
^^^^ This! But you need to increase your workrate. We need entertained.

The replacement capacitor has arrived; it’s as close to 12.5uF as I could get.
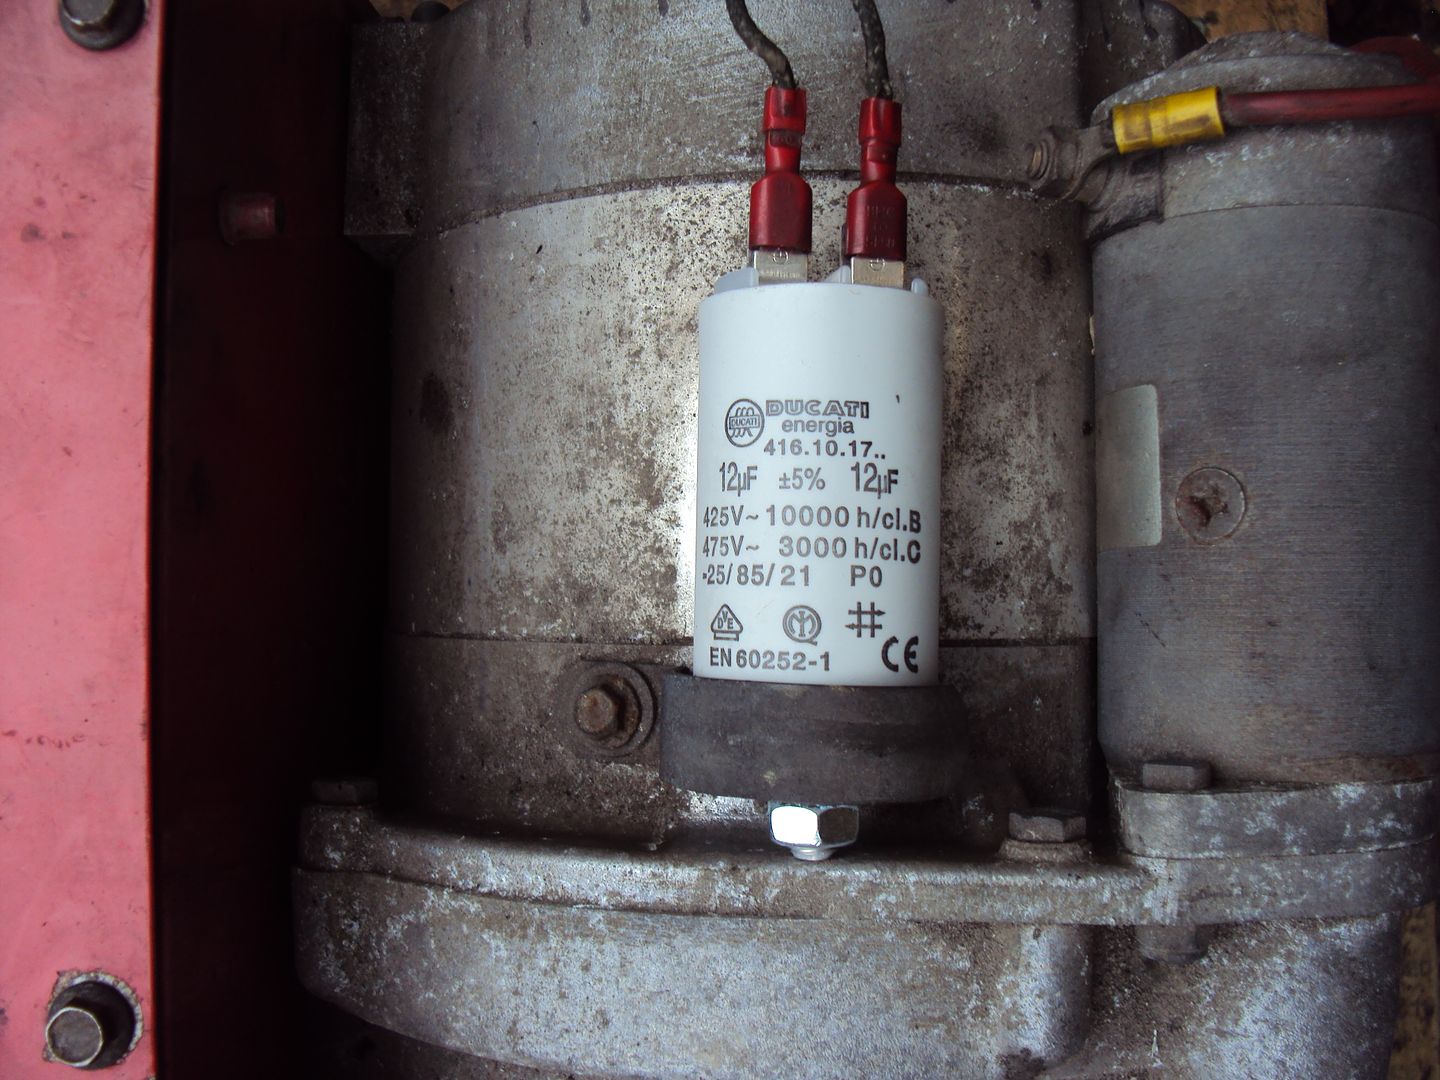
I took some before/after photos to show the difference it made.
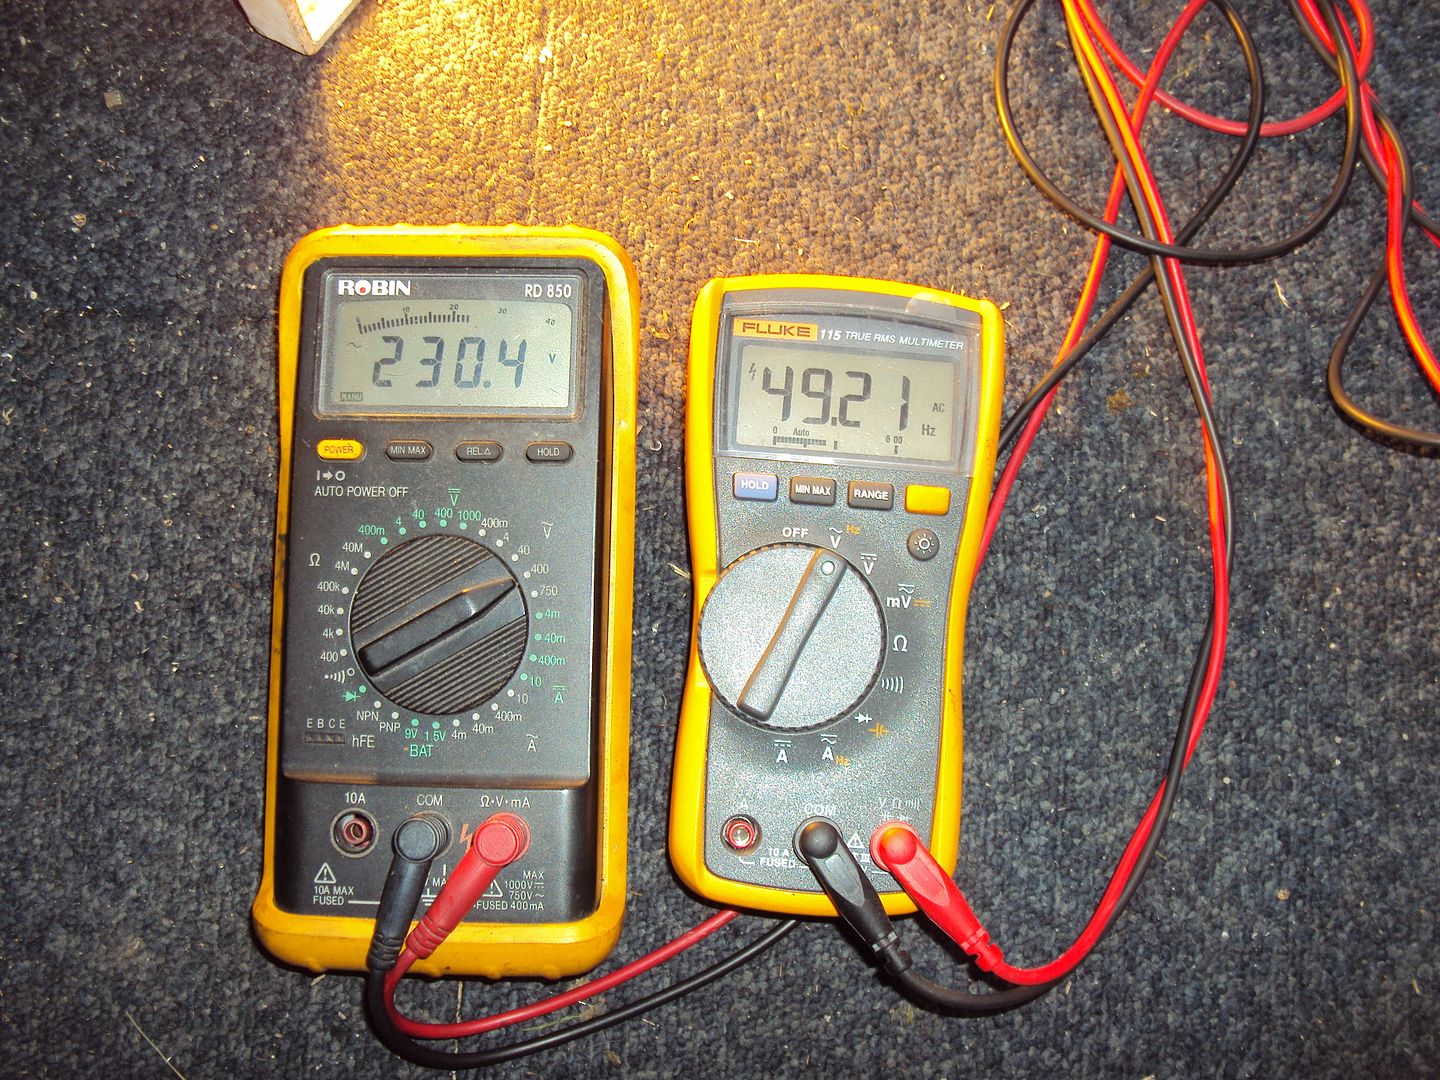
Output voltage and frequency with 10uF capacitor and 1400w load

Output voltage and frequency with 12uF capacitor and 1400w load
The parts to for the control panel have arrived, so just need to get it built so the electric start can be used.
Here is the latest project, It’s a 7.5kW Gernerac so a change from the usual Honda & Kippor generators that I have worked on in the past.
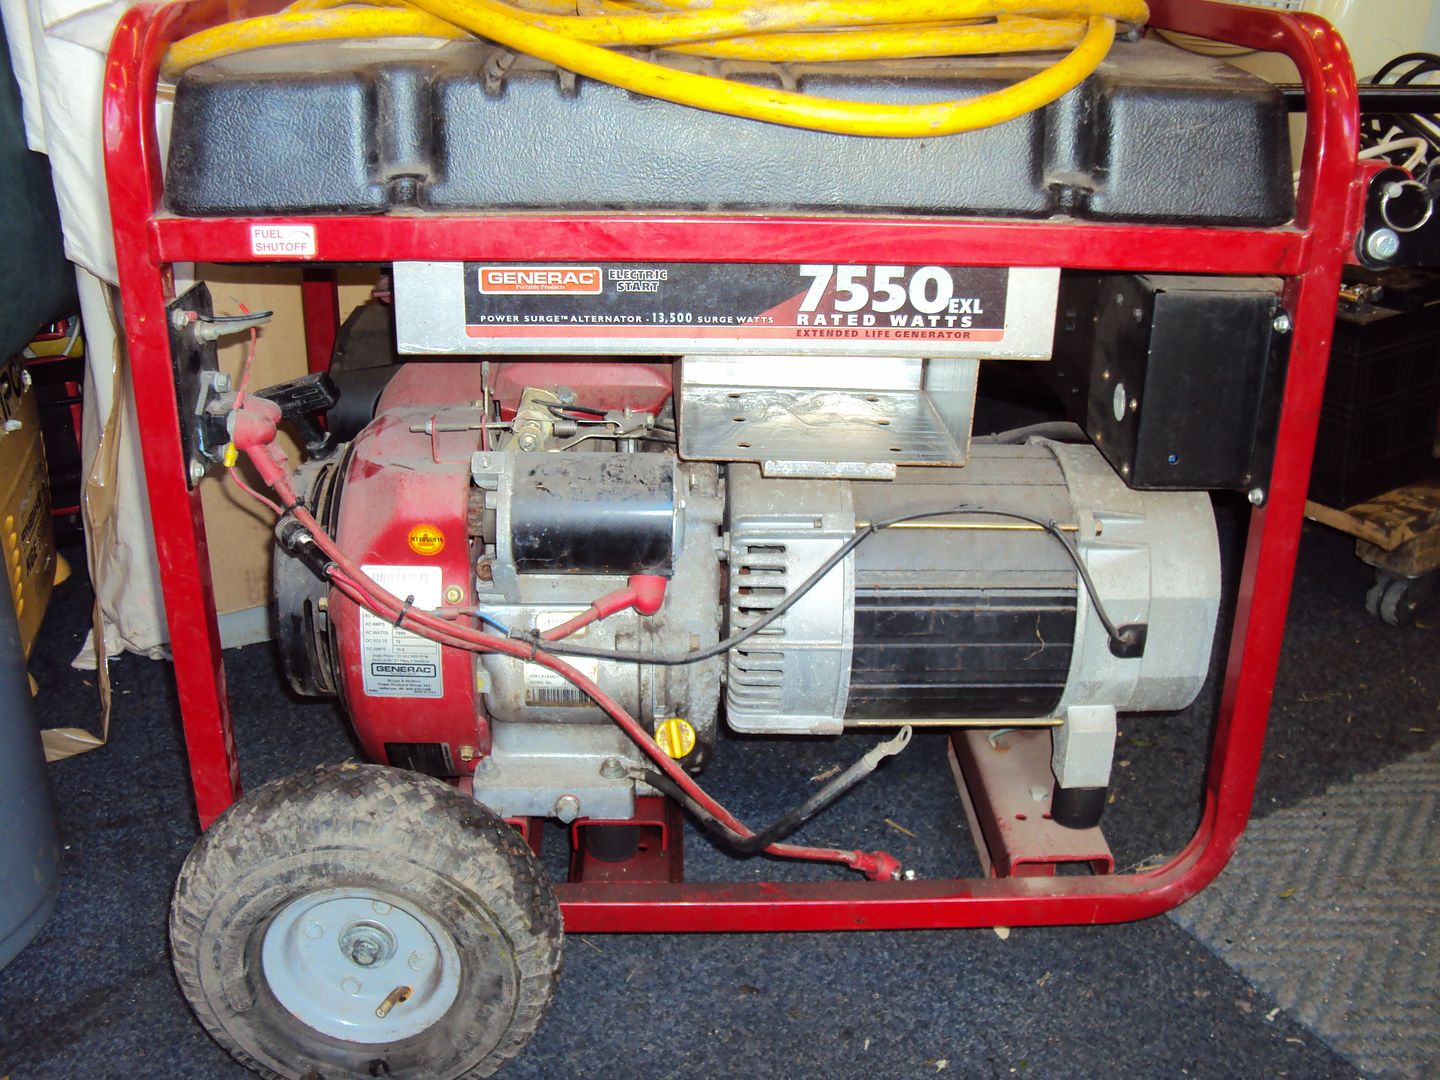
American plugs
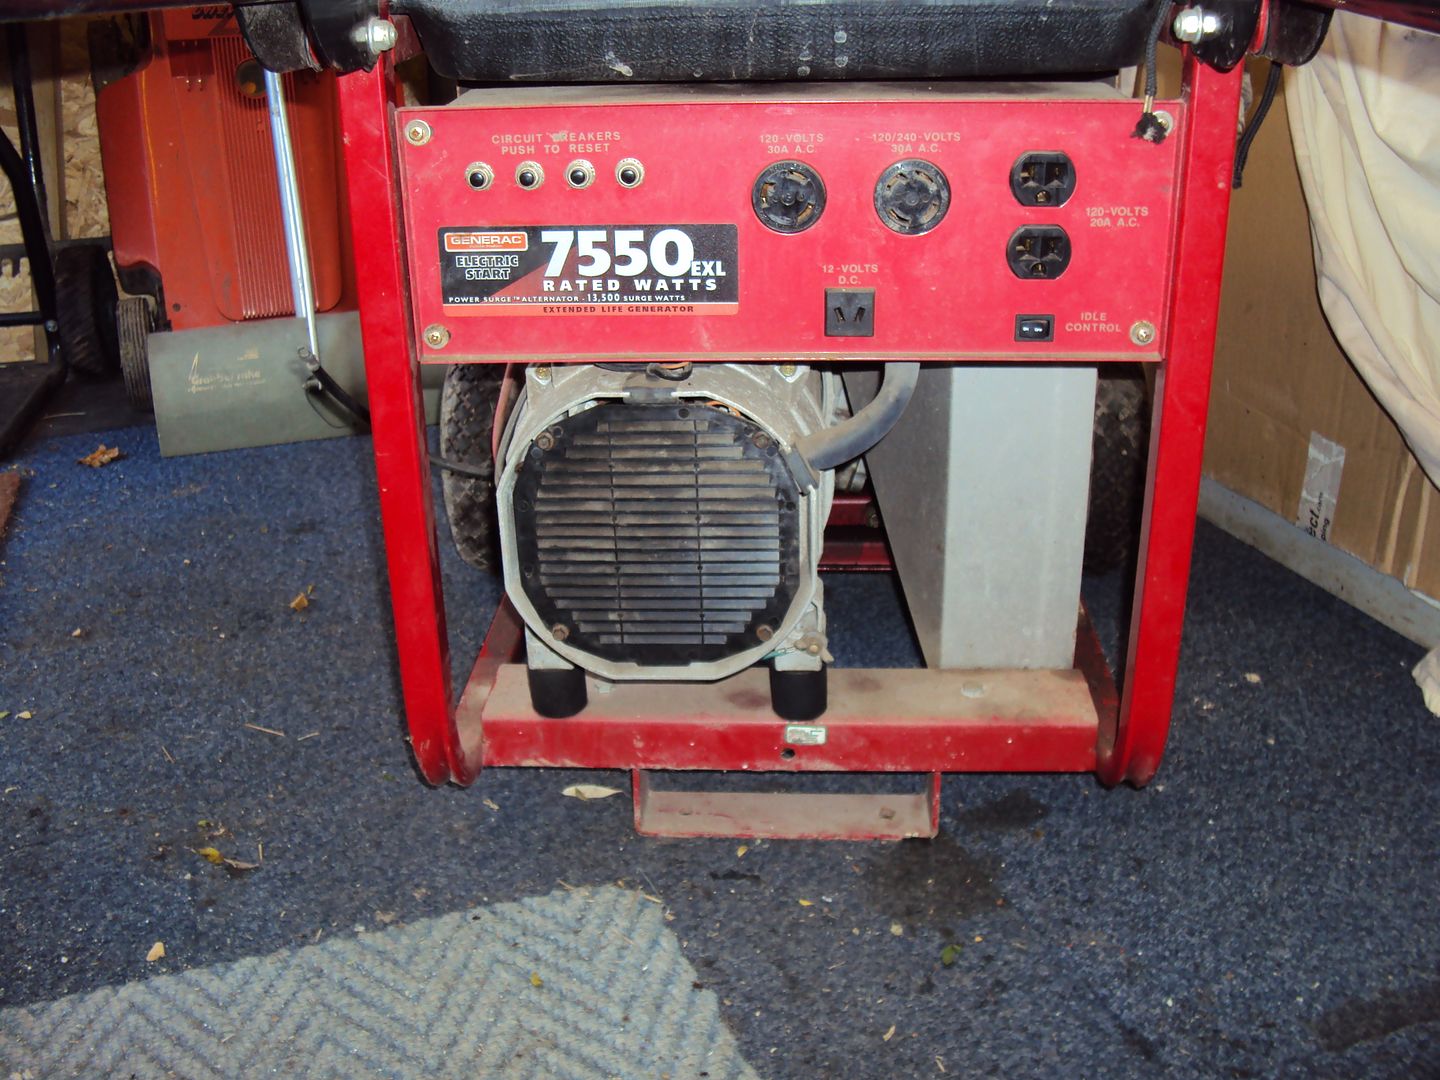
Initial testing shows:
No output, when I collected it I was told it worked 2 months ago…. hmmmmm
The engine is seems to be running too fast,
The starter battery is dead
One of the tyres has a slow puncture
First step was to get the engine running properly, started by removing the carburettor so I can be checked and cleaned
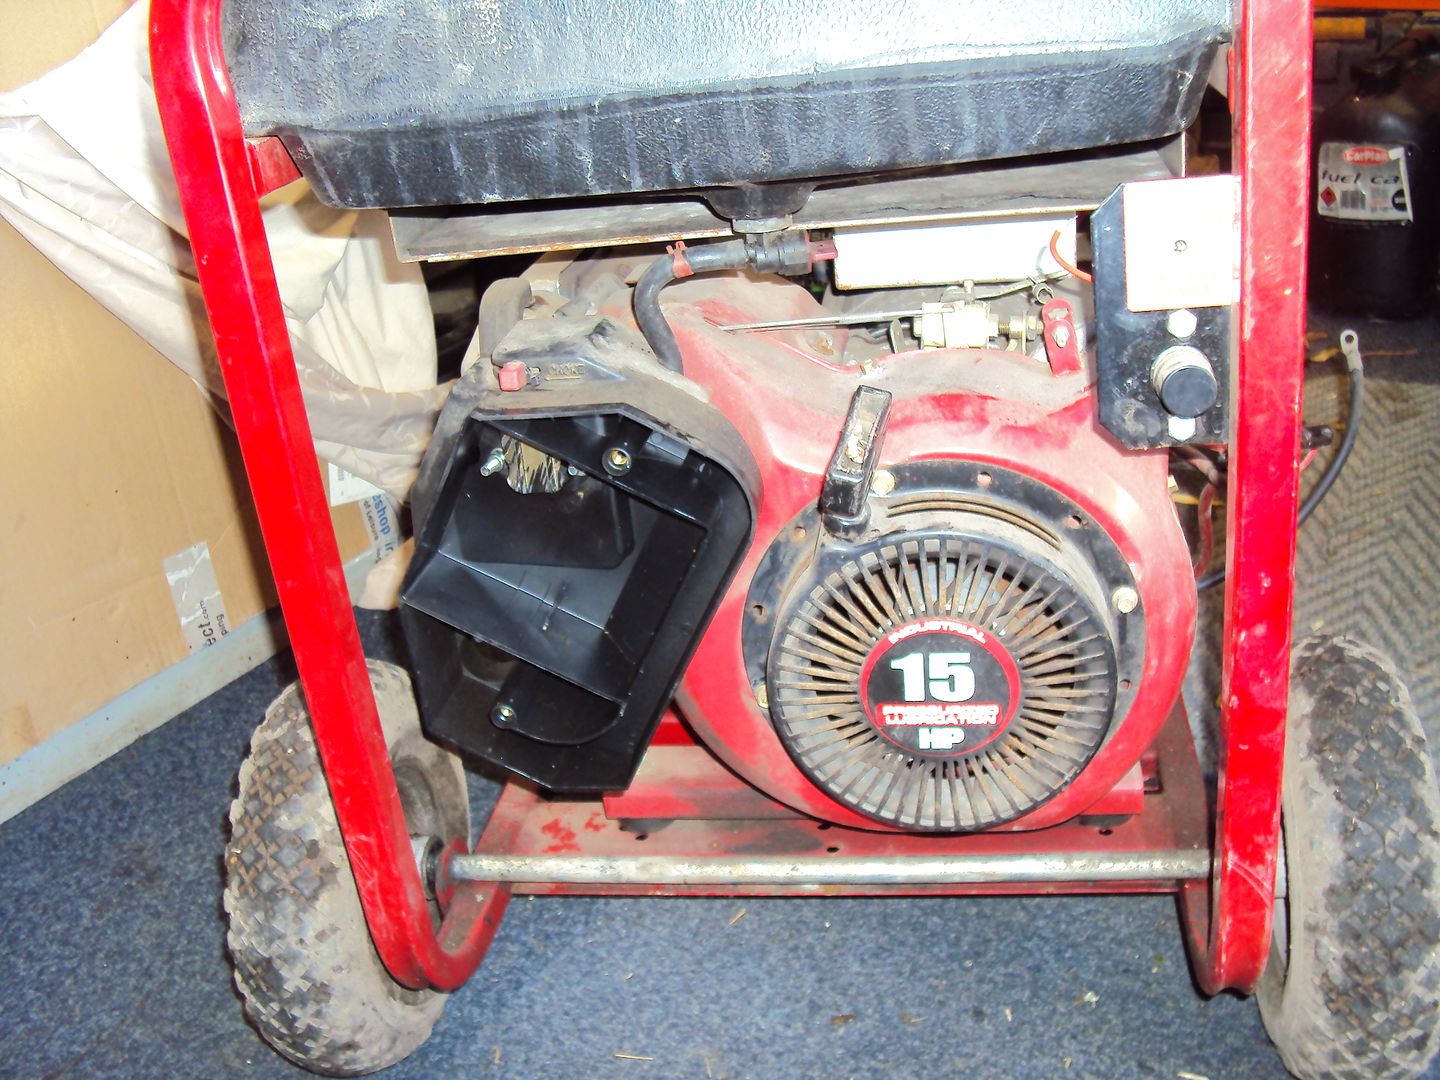
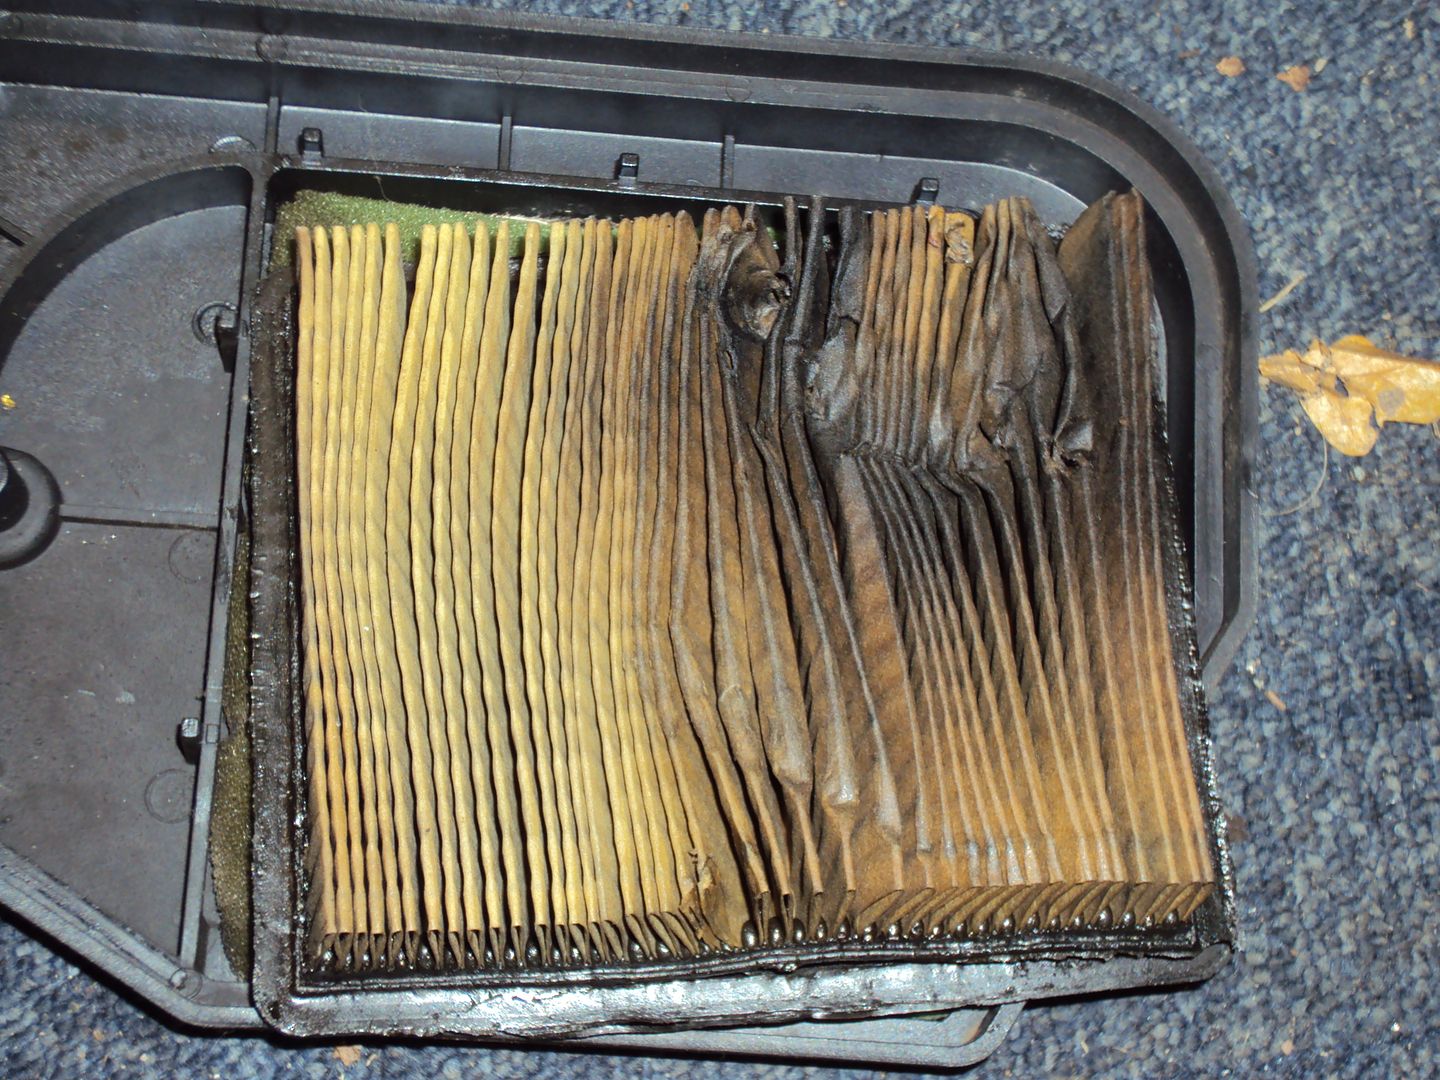
The air filter was soaking with petrol so it looks like it has been running a bit rich
During disassembly I found some visitors had been living in the engine wiring
Carburettor
I removed the bowl and found some fine sediment, so not too bad. All the jets and internal passageways were clean so I just reassembled and cleaned it up for the moment.
Repaired the damaged wiring
Once re-assembled I found the engine would only run for a few seconds before cutting out. After a bit of poking around I decided to test the oil pressure as the symptoms pointed to low oil pressure or faulty oil pressure switch.
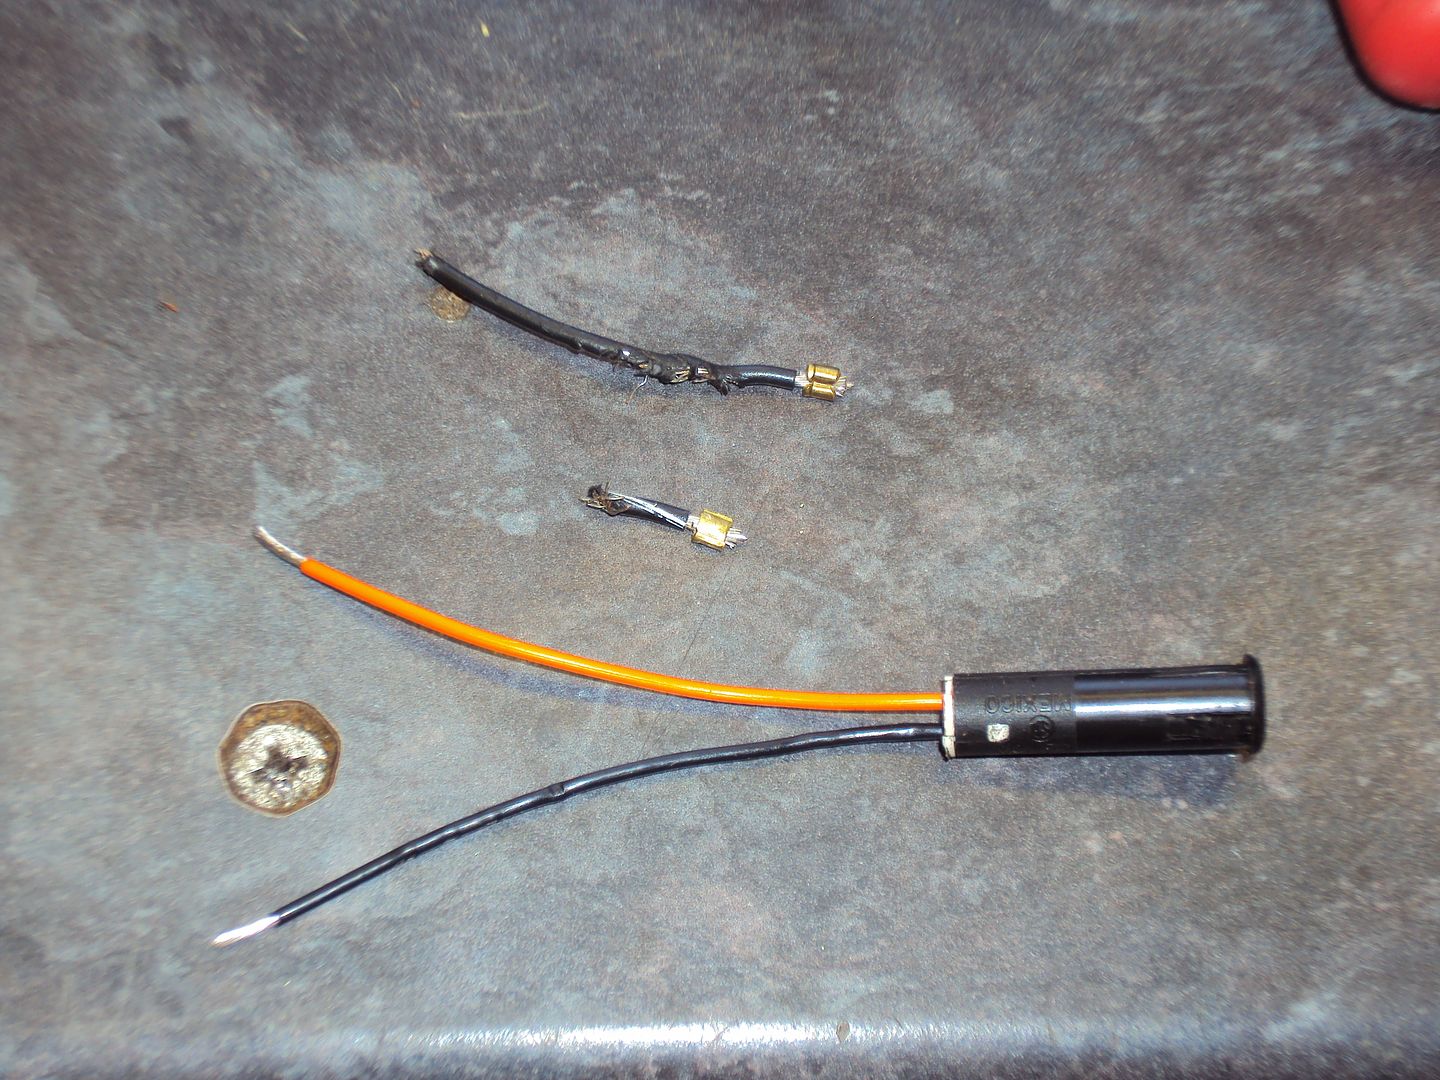
I replaced the oil pressure switch with a pressure gauge, the yellow wires went to the pressure switch.
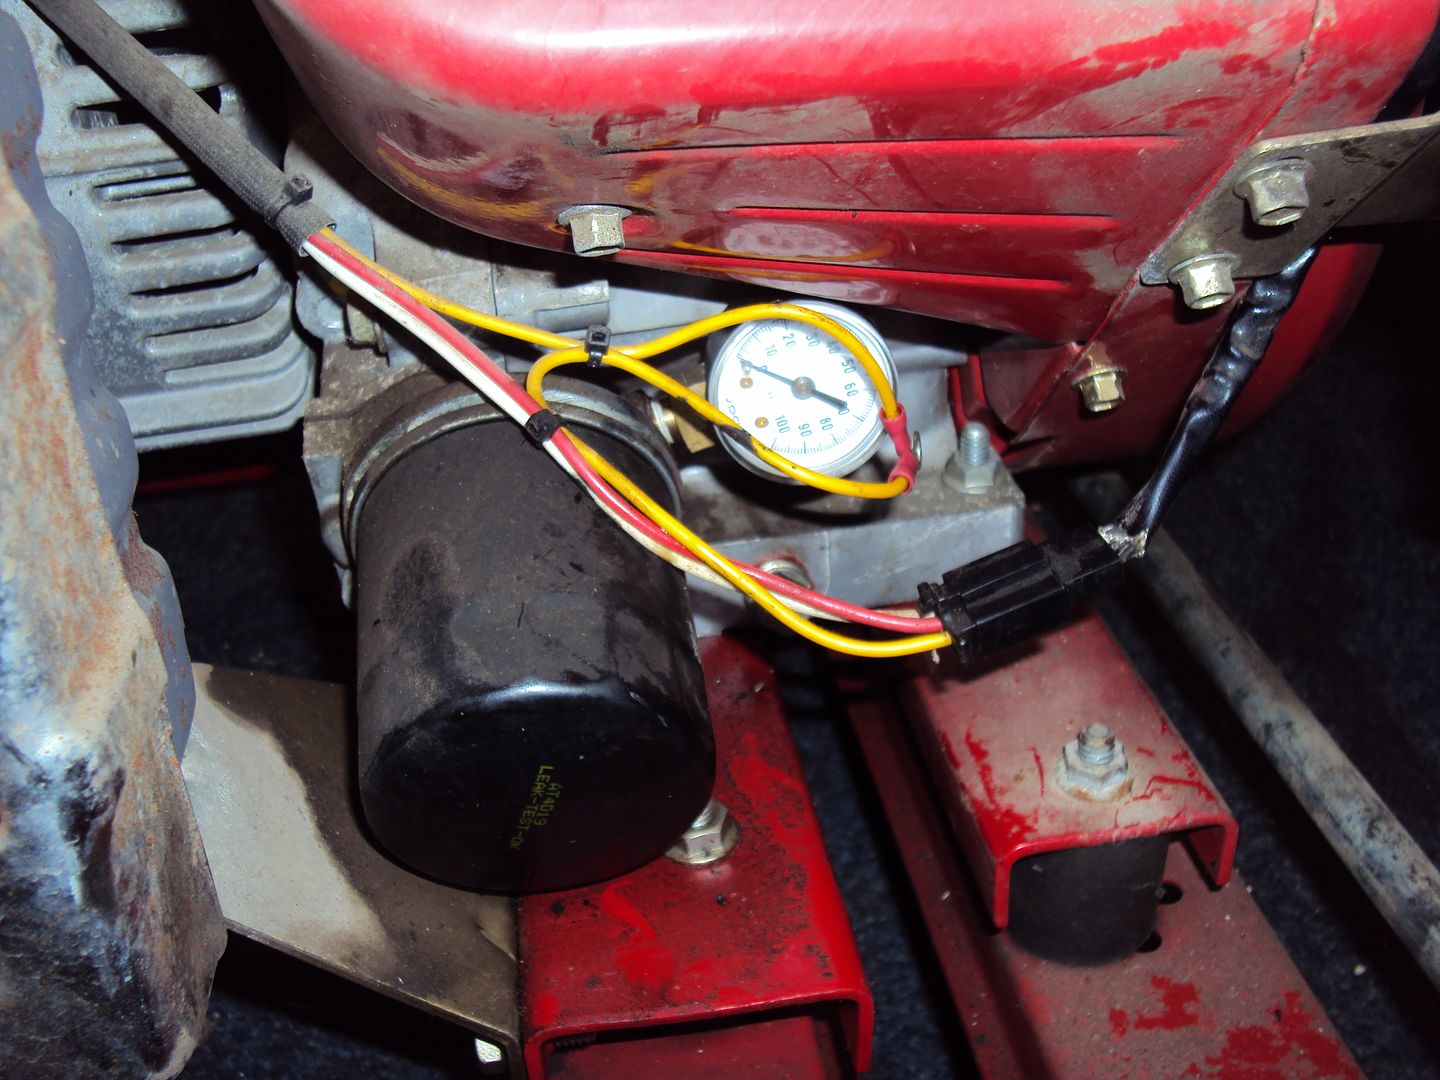
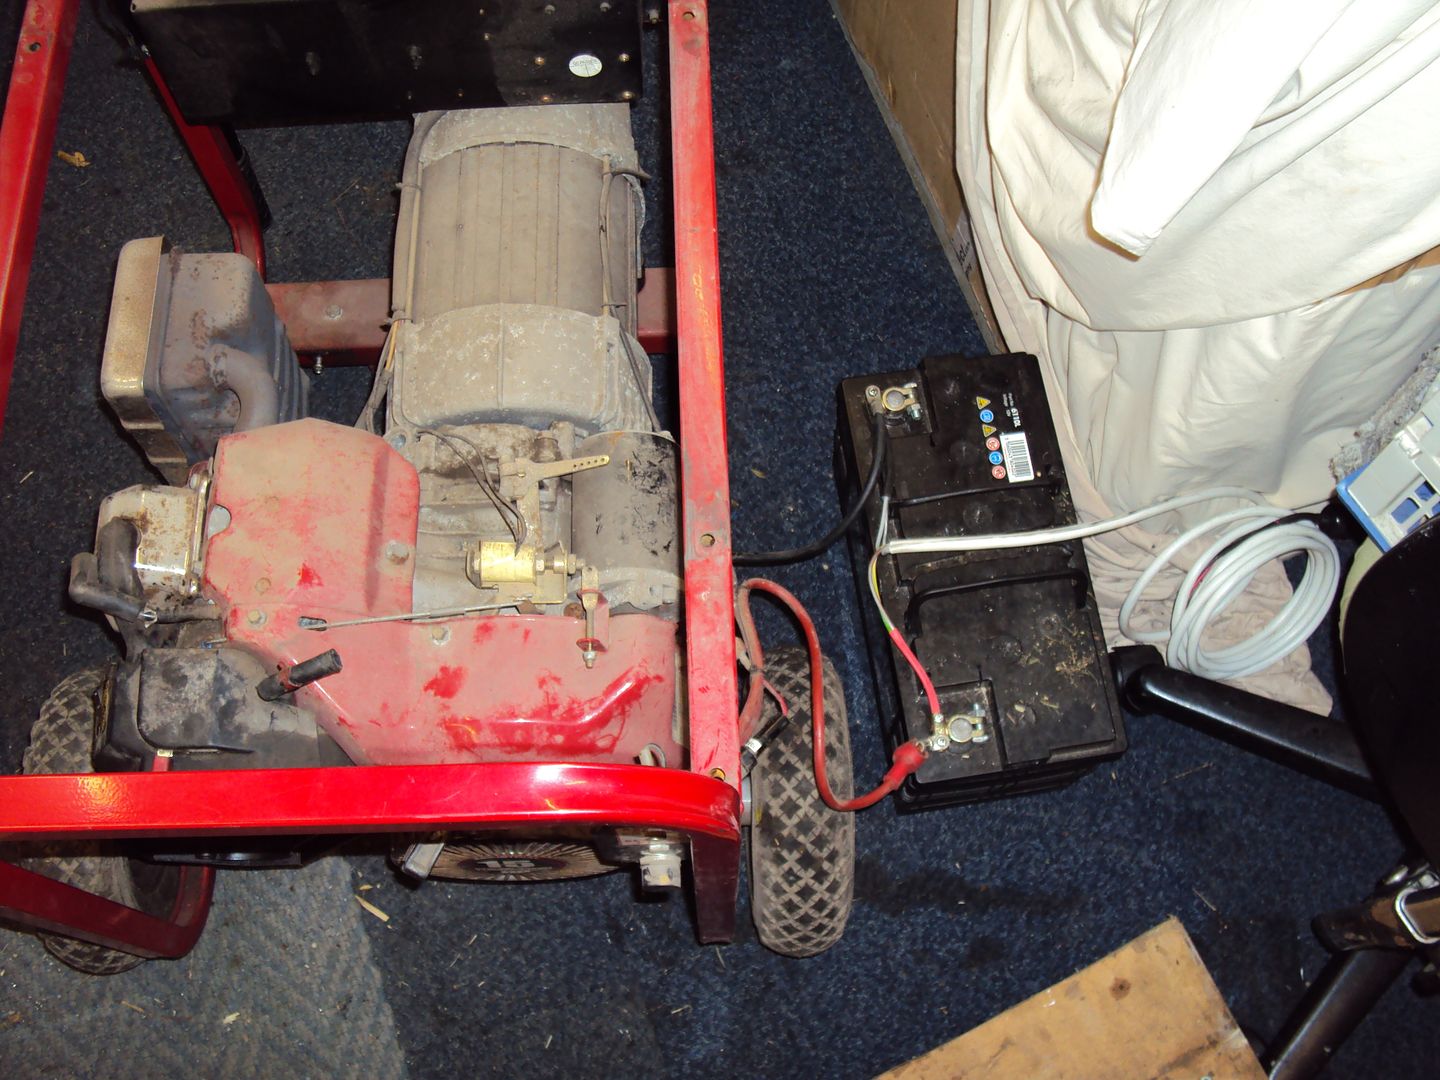
Hooked up a battery so I could crank it with the starter motor (spark plug removed)
Oil pressure with starter motor running

Pressure looks ok, as engine spec says oil pressure switch should cut the ignition when the pressure goes below 8psi.
Looks like the damaged wiring was preventing the oil pressure switch from cutting the ignition, so the repair uncovered the fault.
For the moment I’ll carry on testing with the oil pressure switch disconnected so the engine stays running.
Might start fault finding the lack of output tomorrow
American plugs
Initial testing shows:
No output
, when I collected it I was told it worked 2 months ago…. hmmmmmThe engine is seems to be running too fast,
The starter battery is dead
One of the tyres has a slow puncture
First step was to get the engine running properly, started by removing the carburettor so I can be checked and cleaned
The air filter was soaking with petrol so it looks like it has been running a bit rich
During disassembly I found some visitors had been living in the engine wiring
Carburettor
I removed the bowl and found some fine sediment, so not too bad. All the jets and internal passageways were clean so I just reassembled and cleaned it up for the moment.
Repaired the damaged wiring
Once re-assembled I found the engine would only run for a few seconds before cutting out. After a bit of poking around I decided to test the oil pressure as the symptoms pointed to low oil pressure or faulty oil pressure switch.
I replaced the oil pressure switch with a pressure gauge, the yellow wires went to the pressure switch.
Hooked up a battery so I could crank it with the starter motor (spark plug removed)
Oil pressure with starter motor running
Pressure looks ok, as engine spec says oil pressure switch should cut the ignition when the pressure goes below 8psi.
Looks like the damaged wiring was preventing the oil pressure switch from cutting the ignition, so the repair uncovered the fault.
For the moment I’ll carry on testing with the oil pressure switch disconnected so the engine stays running.
Might start fault finding the lack of output tomorrow
Had a bit more time to tinker with it today now the engine is running properly, I could start diagnosing the lack of output.
I started with measuring the output voltage to see if it was generating at all. There was some voltage however it was a bit low….
So following the faultfinding guide I downloaded for the generator, the next point to check was the rotor.
The rotor “excites” the main windings, to do this a voltage is applied to a coil via carbon brushes and slip rings to induce a magnetic field in the rotor.
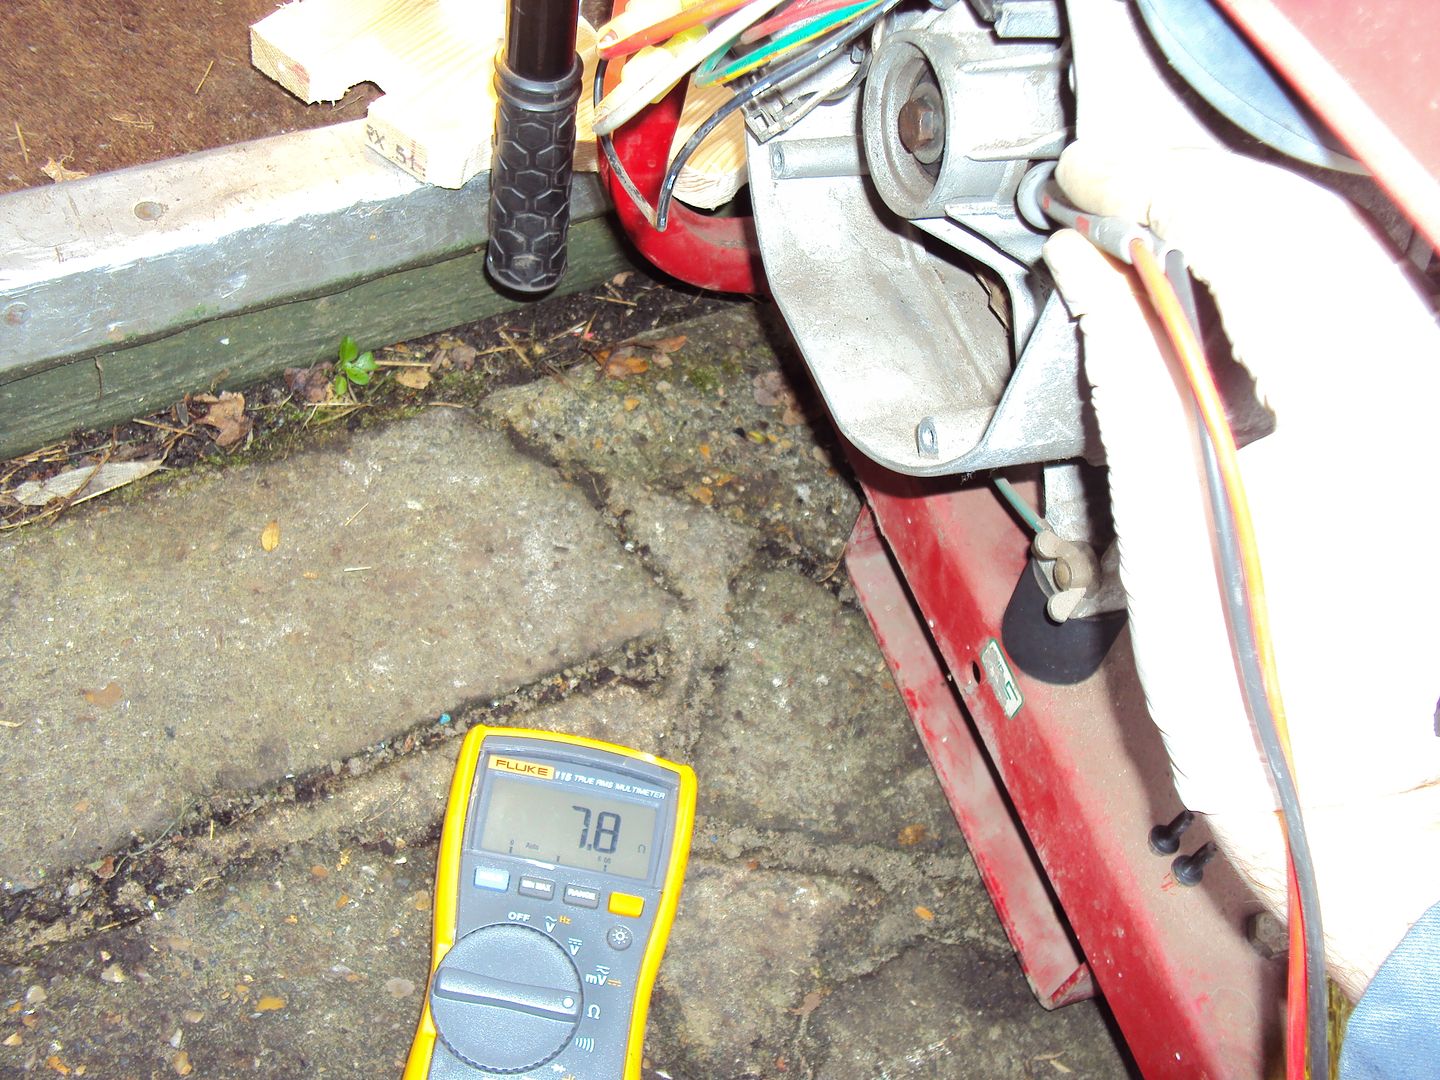
The first step is to check the rotor resistance, which should be between 7 & 9 ohms.
Slip rings, the carbon brushes have been removed for access.
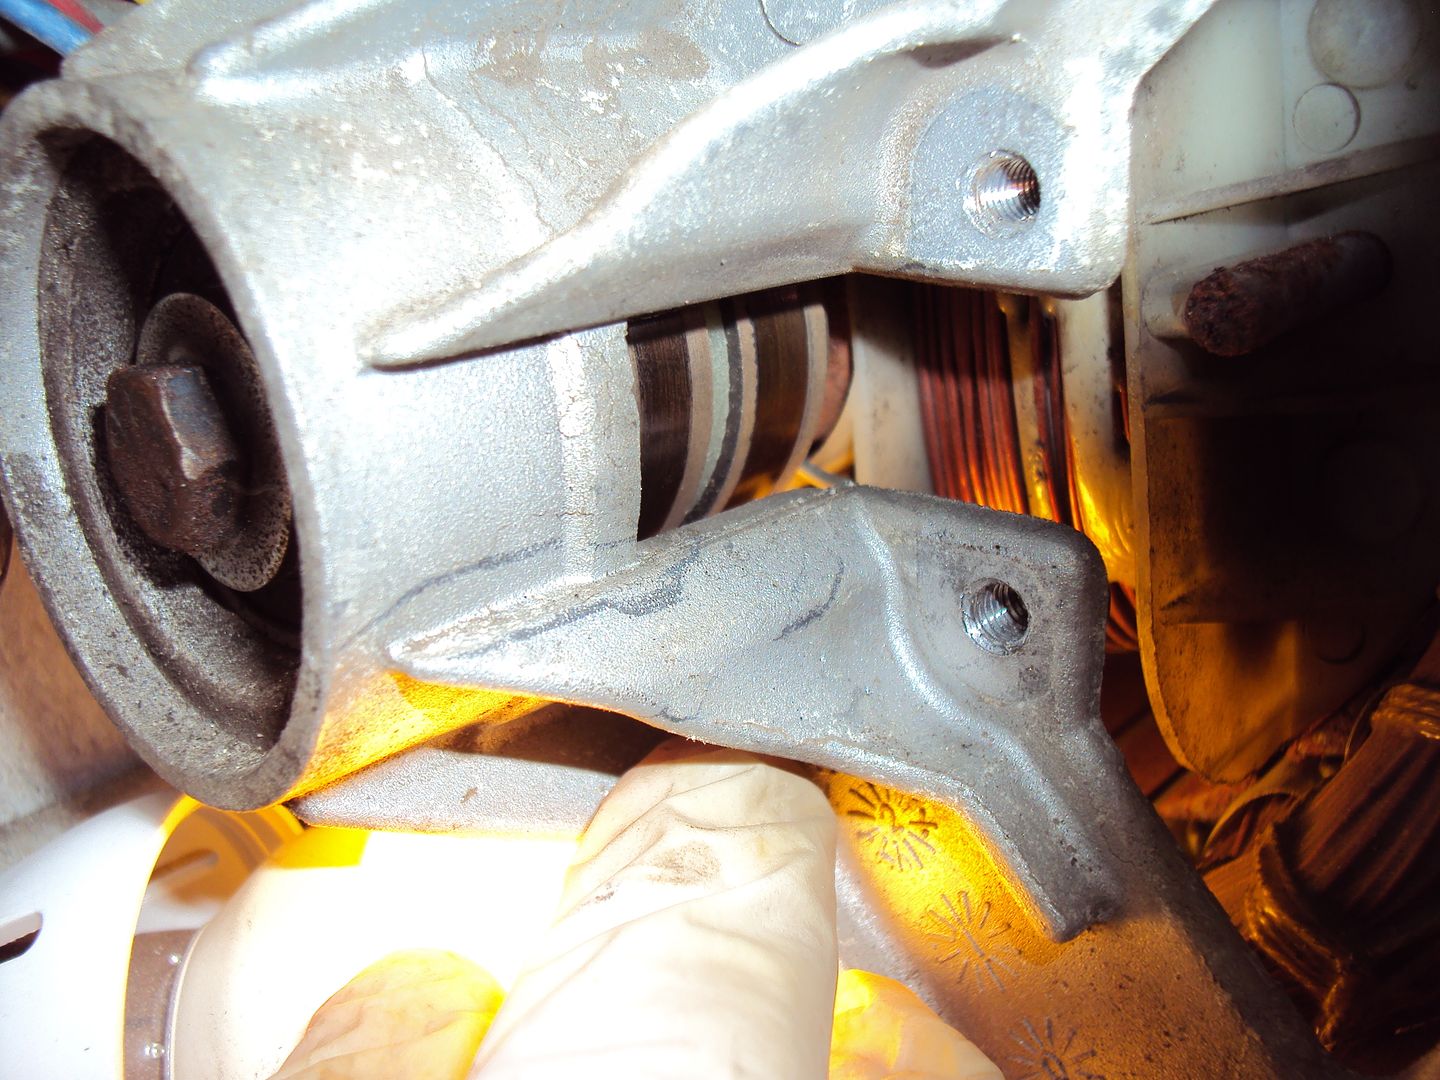
The resistance, seems to be within spec.
When I measured the resistance via the carbon brushes it was 200-300 ohms, so the next step is to clean both the brushes and the slip rings as the reading via the brushes should be 10-12 ohms.
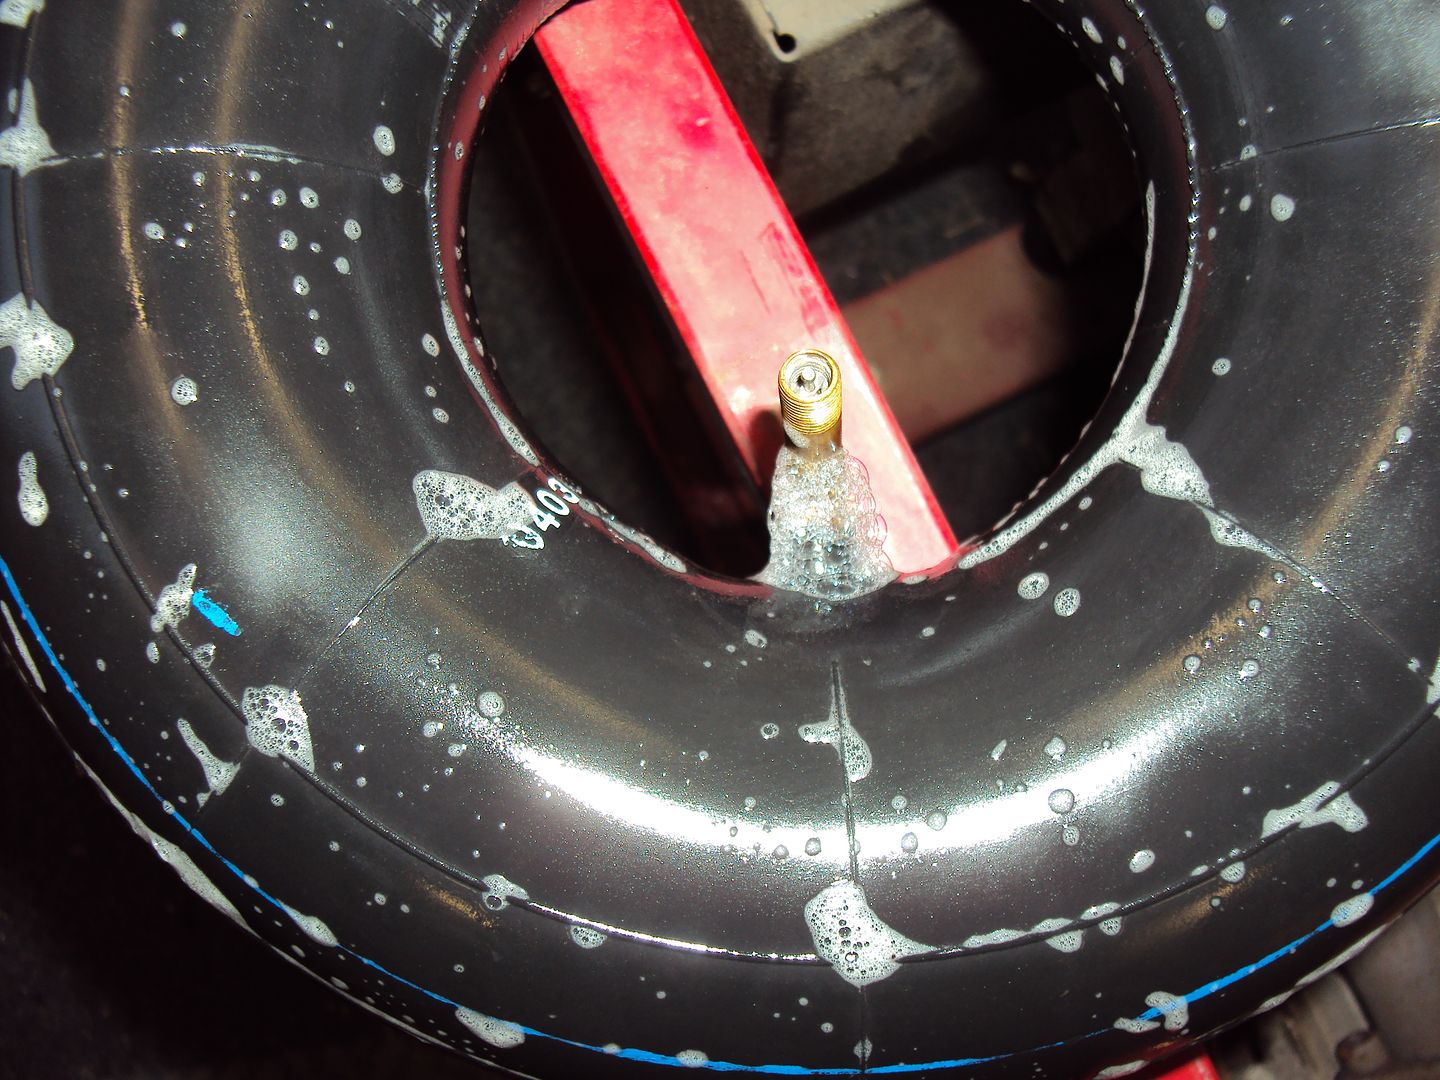
That’s about as far as I got today, on the plus side I found the leak in the tyre inner tube.
I started with measuring the output voltage to see if it was generating at all. There was some voltage however it was a bit low….
So following the faultfinding guide I downloaded for the generator, the next point to check was the rotor.
The rotor “excites” the main windings, to do this a voltage is applied to a coil via carbon brushes and slip rings to induce a magnetic field in the rotor.
The first step is to check the rotor resistance, which should be between 7 & 9 ohms.
Slip rings, the carbon brushes have been removed for access.
The resistance, seems to be within spec.
When I measured the resistance via the carbon brushes it was 200-300 ohms, so the next step is to clean both the brushes and the slip rings as the reading via the brushes should be 10-12 ohms.
That’s about as far as I got today, on the plus side I found the leak in the tyre inner tube
.Gassing Station | Homes, Gardens and DIY | Top of Page | What's New | My Stuff