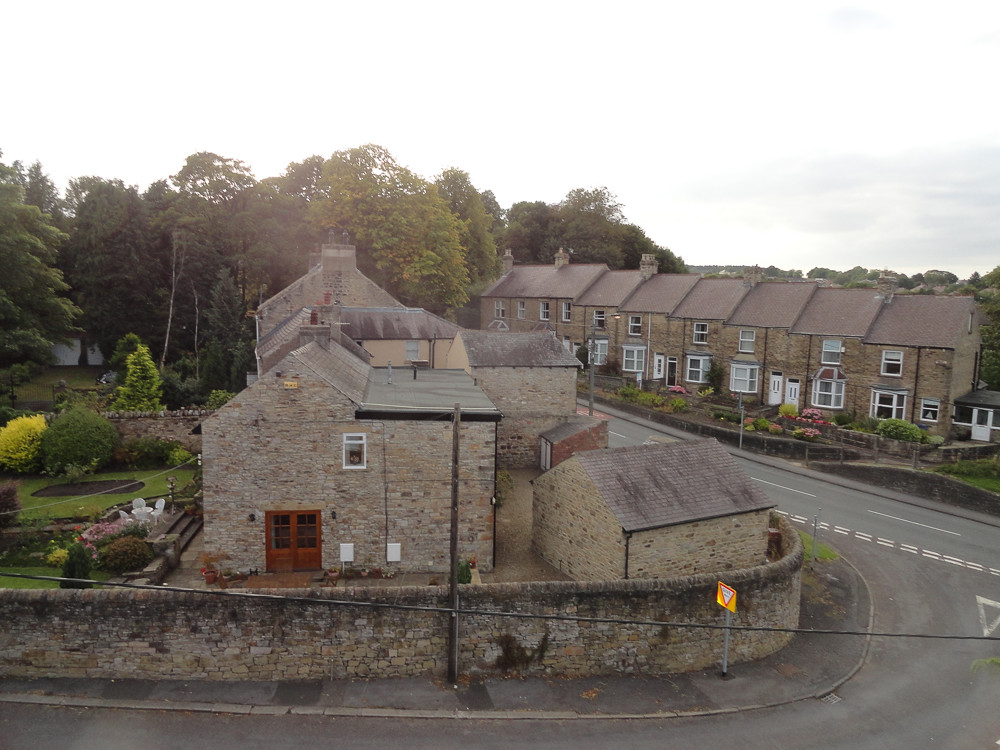
Our Little Durham Restoration Project...
Discussion


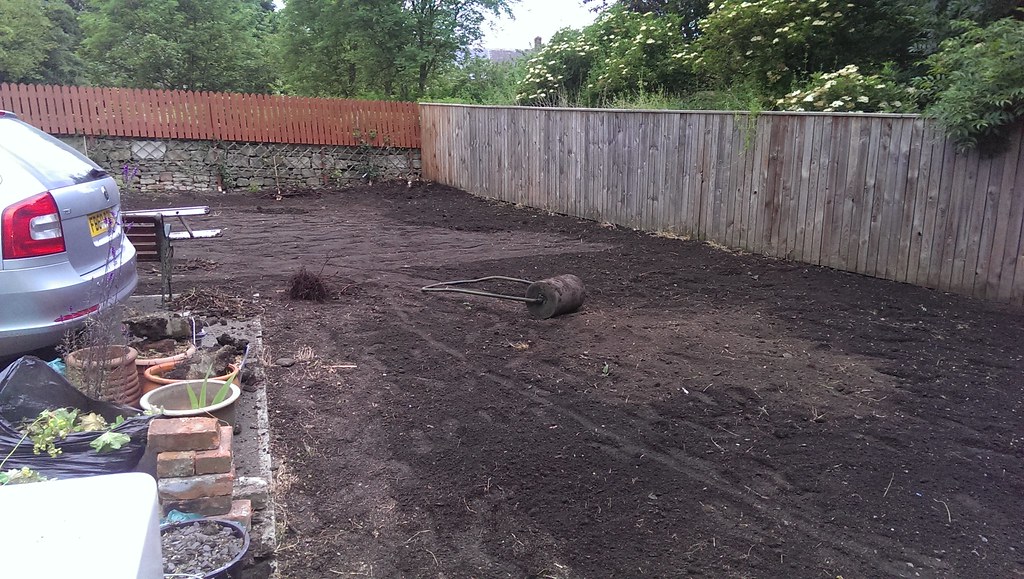
Quick update for you:
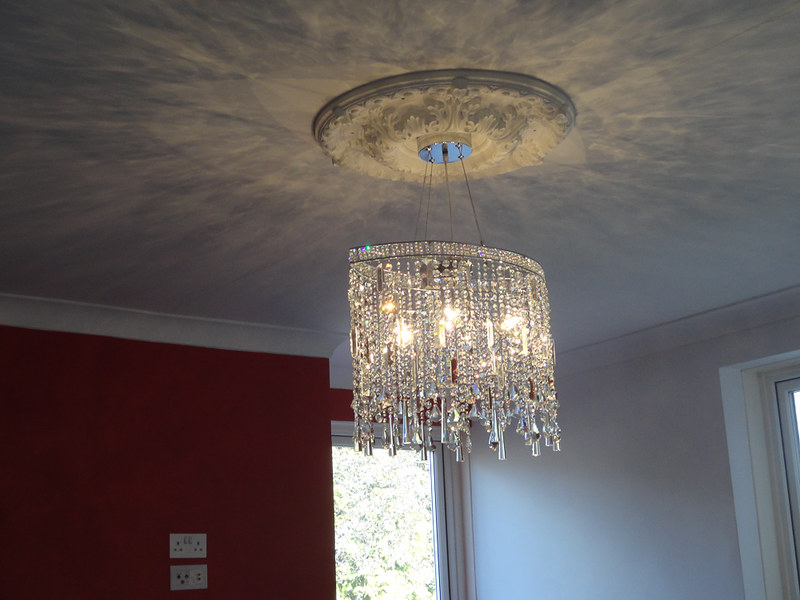
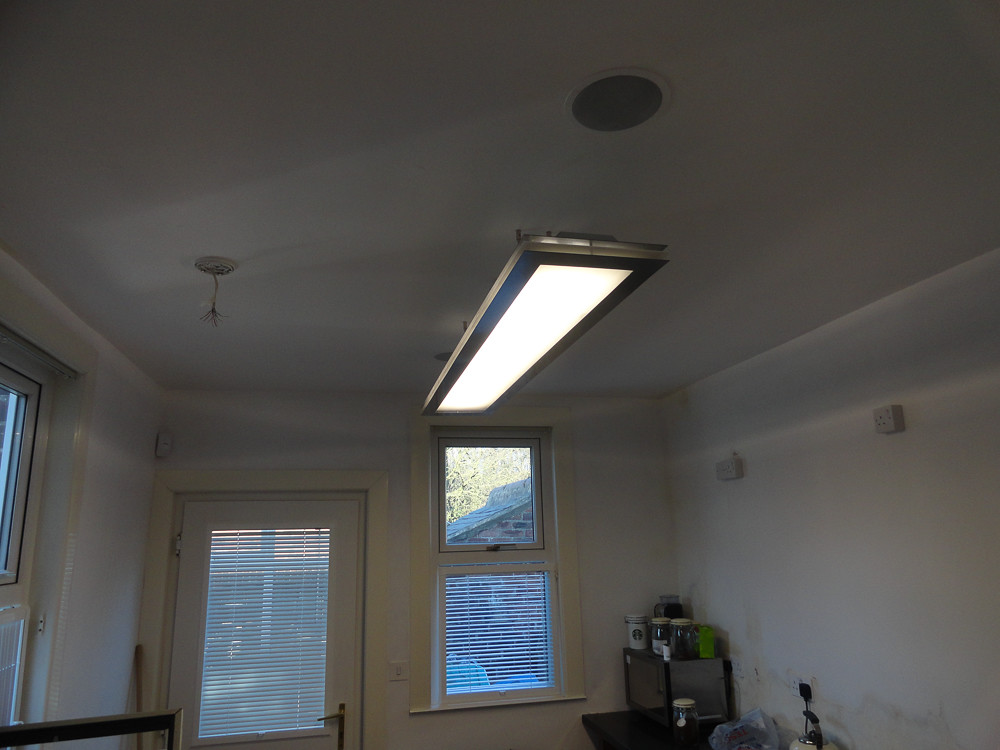
After loads of hassle with BHS, finally got the dining room light fitted:
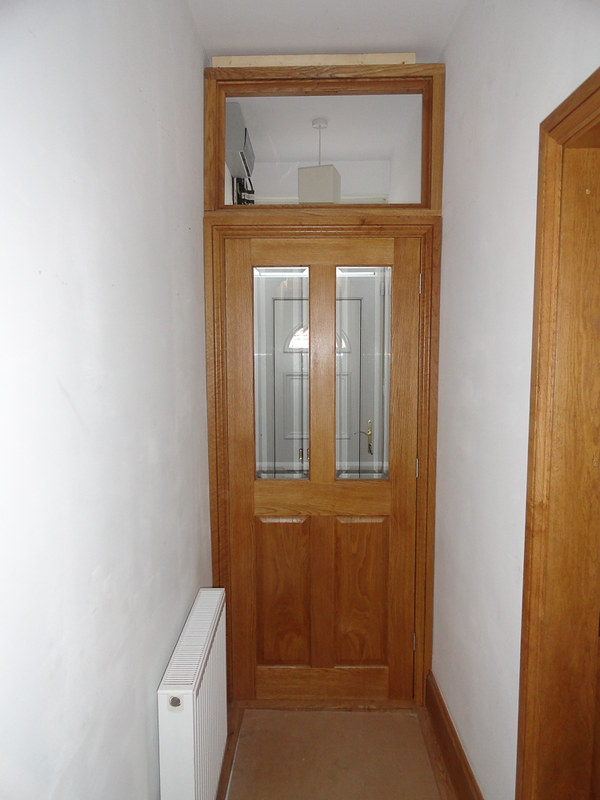
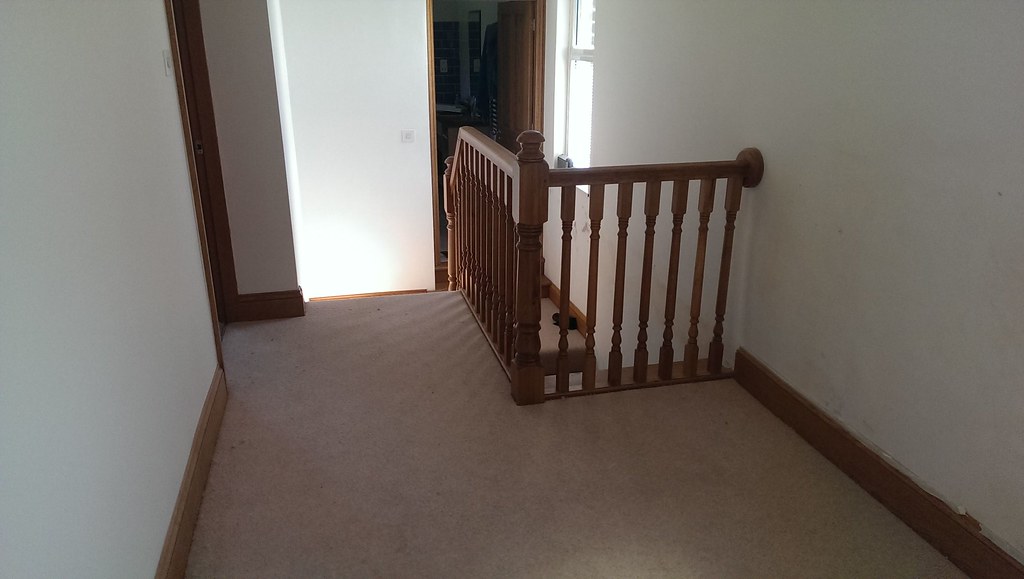
Just the handle and a pane of glass left to do on the hallway door, though there's still coving to go up and decorating to do here. And the other side of the door to deal with:
Wires are all working now:
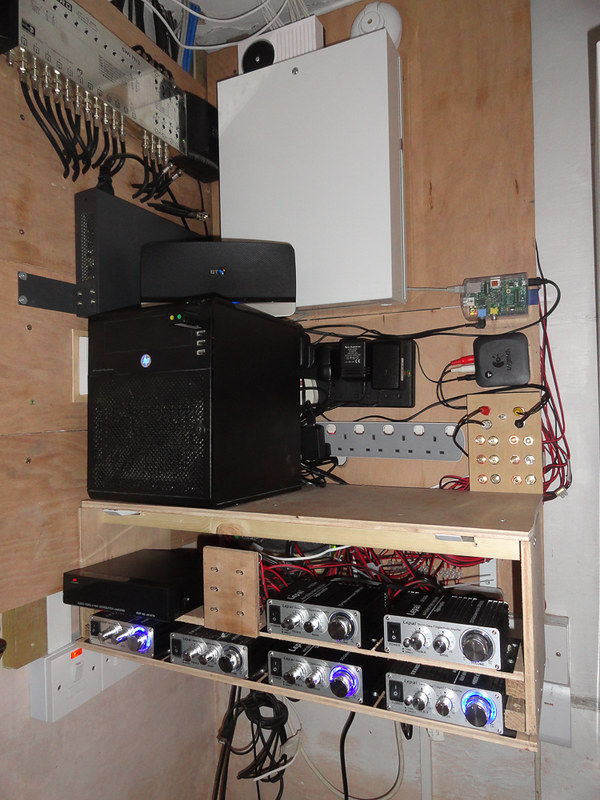
That's the door bell, alarm, TV multiplex for satellite, terrestrial and FM, network switch, broadband router and server. Raspberry Pi and a bluetooth connection that feed the distribution amplifier. Distribution amplifier supplies all 6 amplifiers. The bank of 6 switches lets you select between the distribution amplifier or another input. The other inputs are any local connections in the rooms, eg TVs etc, or the bank of sockets above, so anything can be connected to anything. All works very well and I'm pretty pleased with it considering I've gone for cheap stuff rather than spending a fortune. The distribution amplifier was £10.50 on eBay!
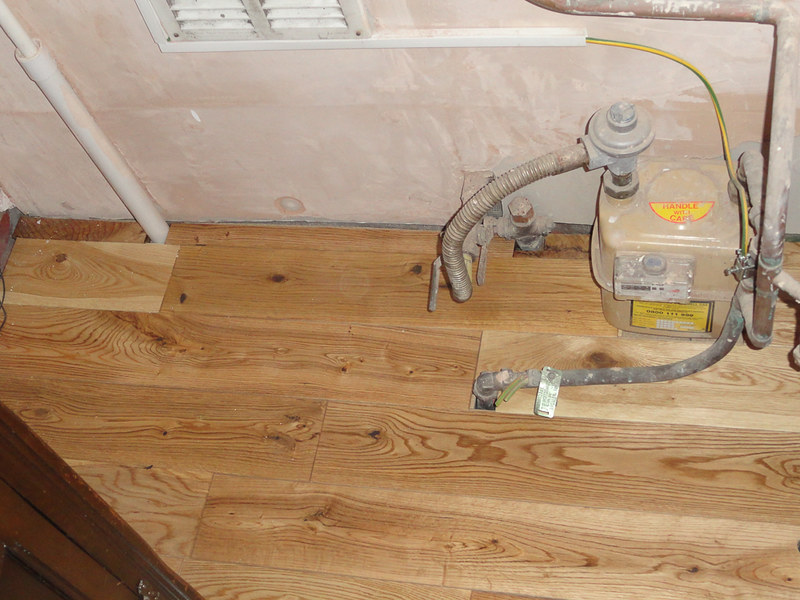
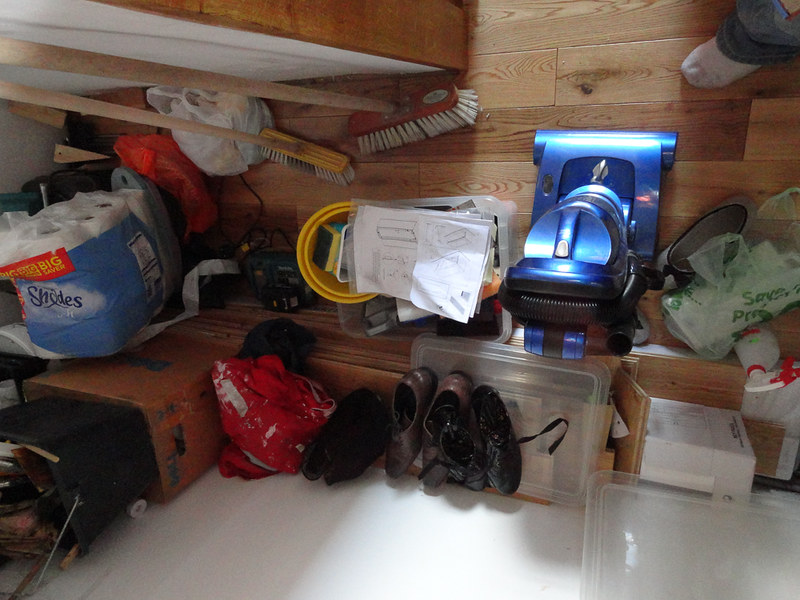
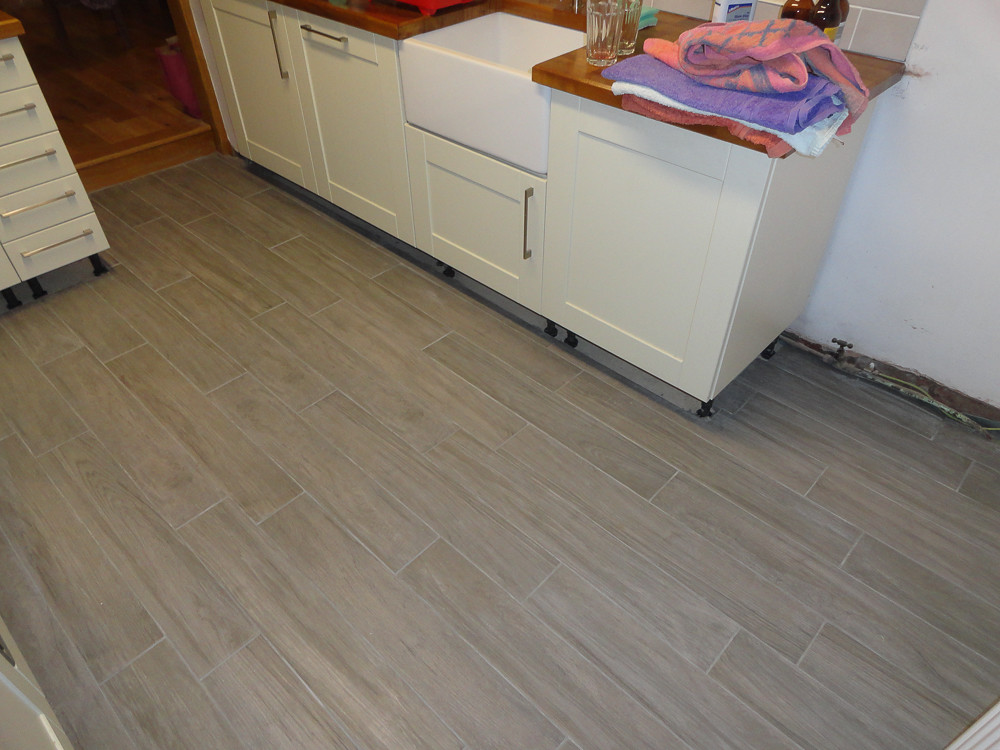
Added the flooring in the corner beneath all the wiring stuff:
I need to order the wood to make the doors for the cupboard and then fit a clothes rail for hanging coats up and construct a shoe rack of some description.
Same under the stairs; flooring fitted:
Needs skirting adding, painting and then all the pantry shelves constructing.
Seems like I've not done much in the last month when that's all I've got to post! The rest of the time has been spent working on the damp issues we've had. We spent a weekend fitting cavity trays above two windows, which seems to have sorted most of it out. We've repaired a few bits of pointing, but there's still one bit that's beyond my reach. Got a few builders quoting for repointing the whole side of the house.
We also blocked a few holes up and sorted out the mess the electrician made of fitting the bathroom extractor - outlet plate stuck on with 4 dabs of silicone, no seal. So pissing water into the cavity!
I need to spend a day removing bricks from the bottom of the wall to clear out the cavity as what water got in has tracked through all the crap in the bottom and I think there's a few bits where there's something bridging the cavity that need dealing with too.
Overall the house is drying out now, hopefully we'll get to a point where we can finish painting and get the rest of the carpets down soon!
After loads of hassle with BHS, finally got the dining room light fitted:
Just the handle and a pane of glass left to do on the hallway door, though there's still coving to go up and decorating to do here. And the other side of the door to deal with:
Wires are all working now:
That's the door bell, alarm, TV multiplex for satellite, terrestrial and FM, network switch, broadband router and server. Raspberry Pi and a bluetooth connection that feed the distribution amplifier. Distribution amplifier supplies all 6 amplifiers. The bank of 6 switches lets you select between the distribution amplifier or another input. The other inputs are any local connections in the rooms, eg TVs etc, or the bank of sockets above, so anything can be connected to anything. All works very well and I'm pretty pleased with it considering I've gone for cheap stuff rather than spending a fortune. The distribution amplifier was £10.50 on eBay!
Added the flooring in the corner beneath all the wiring stuff:
I need to order the wood to make the doors for the cupboard and then fit a clothes rail for hanging coats up and construct a shoe rack of some description.
Same under the stairs; flooring fitted:
Needs skirting adding, painting and then all the pantry shelves constructing.
Seems like I've not done much in the last month when that's all I've got to post! The rest of the time has been spent working on the damp issues we've had. We spent a weekend fitting cavity trays above two windows, which seems to have sorted most of it out. We've repaired a few bits of pointing, but there's still one bit that's beyond my reach. Got a few builders quoting for repointing the whole side of the house.
We also blocked a few holes up and sorted out the mess the electrician made of fitting the bathroom extractor - outlet plate stuck on with 4 dabs of silicone, no seal. So pissing water into the cavity!
I need to spend a day removing bricks from the bottom of the wall to clear out the cavity as what water got in has tracked through all the crap in the bottom and I think there's a few bits where there's something bridging the cavity that need dealing with too.
Overall the house is drying out now, hopefully we'll get to a point where we can finish painting and get the rest of the carpets down soon!
elanfan said:
OP - sorry if I've missed the solution in the text somewhere as I've only skimmed - you said
"Opening up a hole meant I was able to confirm that there's no insulation in that roof. It's fairly inevitable that I'm going to have to fit a hatch and get up there to insulate as it gets very cold in there at the moment!"
How about this solution - either drill a suitable hole in the ceiling or via and adjacent space and 'blow' some insulation in there. Got to be a lot less hassle than fitting a loft hatch. Should be able to hire equipment for the job (just remember to bag the backs of the speakers to prevent them clogging up)
HTH
Hello, thanks for the idea, I hadn't thought of that. "Opening up a hole meant I was able to confirm that there's no insulation in that roof. It's fairly inevitable that I'm going to have to fit a hatch and get up there to insulate as it gets very cold in there at the moment!"
How about this solution - either drill a suitable hole in the ceiling or via and adjacent space and 'blow' some insulation in there. Got to be a lot less hassle than fitting a loft hatch. Should be able to hire equipment for the job (just remember to bag the backs of the speakers to prevent them clogging up)
HTH
The roof construction above the bathroom is a bit odd, it's a single pitch roof sloping perpendicular to the main roof, with no over-lap. The roof intrudes into the room over the last 12" or so of it's slope too. I'd want to make sure I wasn't creating a trap at the edge where condensation could form and then cause damp in the bathroom ceiling and I'm not sure I'd get that control with blown insulation.
My primary consideration is that that space is currently inaccessible and *anything* could be up there. Got to be worth a look surely! Joking aside, the lack of access means it likely hasn't been touched in a very long time so I'd like to be able to check it's all OK. Maximum warmth means getting insulation right to the edge of the bit that's impossible to insulate because it's straight to tile, so celotex will be the way to go I think. Might make some handy storage too if I convert the other loft to a proper room.
Cheers, on the wiring, I've added a Tado to the collection of boxes, so I've now got heating control on my phone. Really impressed with this, was a doddle to install, and looks like it'll do a great job of keeping my house warm at the right times and keeping my bills down. I can make sure Aida isn't getting carried away with the heating too.
I've also found an Android app that will talk to another Raspberry Pi over the WiFi, which will control a bank of switch relays. So all those switches are coming out to be replaced with relays, so I'll be able to control the sound sources and turn the amps on and off with my phone too. Going to add one to the floodlights outside too while I'm at it.
I've not updated the thread in a while as I've been busy for he last month or so and not had time to a) do work and b) tell you all about it. I've got a mini-update now, though I'm off work next week and hoping to get a lot done then.
Main visual thing what I've done is chop down those bloody leylandii that were taking up half the garden:
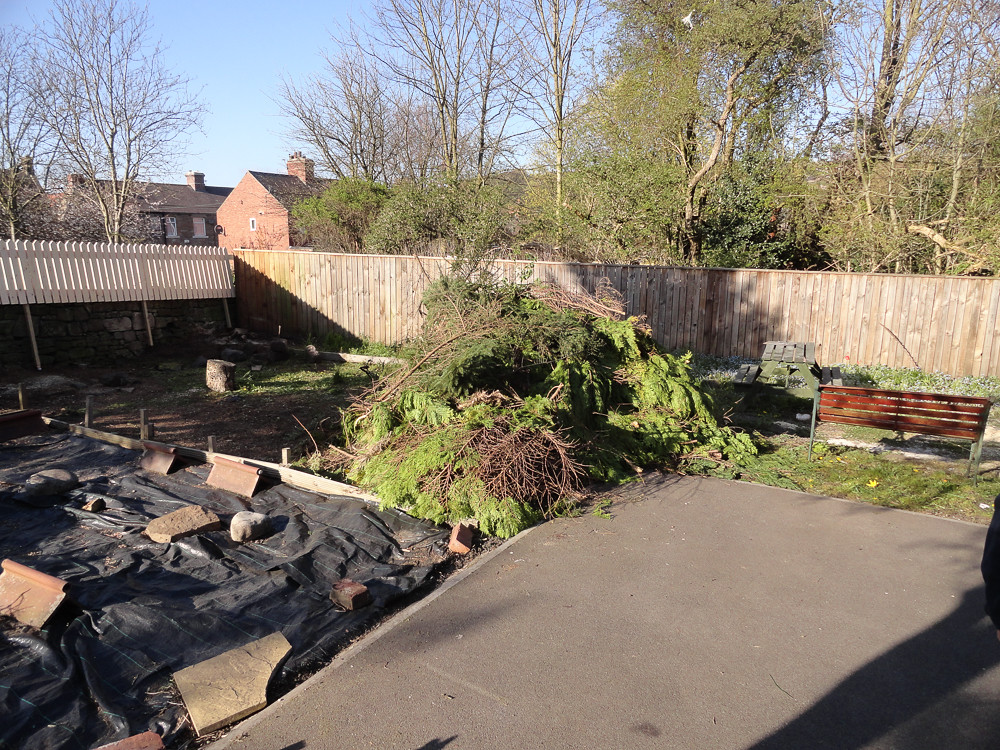
They didn't put up a great fight and I'll be taking the branches to the tip at the weekend in the trailer. Unfortunately the wall level drops away towards the bottom of the garden and there's a footpath on the otherside, so we were suddenly a bit over-looked. Not badly, but Aida went nuts and insisted it was sorted. So the next day we went to Travis Perkins and bought a load of timber and built this:
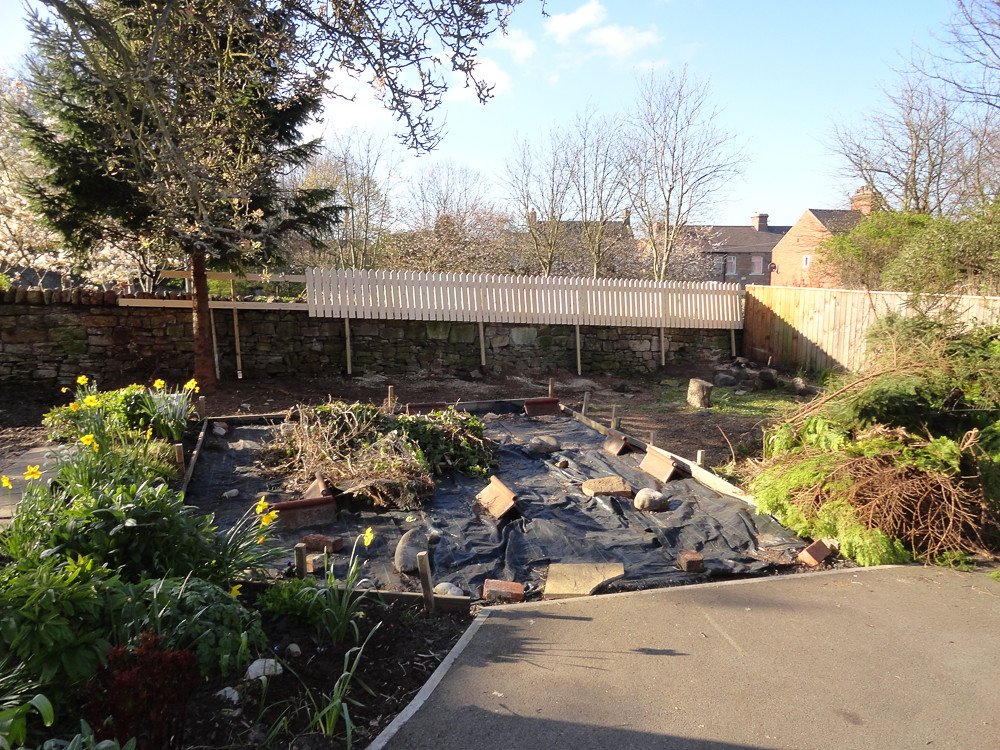
Really pleased with this, though we ran out of wood for the last few bits. Has since been stained with a preservative. The soldiers get gradually shorter so they match the wall line at the bottom, so the lengths were calculated on excel, then I chopped them and added the points, while my Dad screwed it all together.
There's trellis to go across the bottom, then it'll be covered in climbers, which should look pretty good without encroaching too far into the newly reclaimed space. Only thing left to do is to remove some of the larger roots. Anyone tried pulling them out with a car, if I dig out as much as I can and sever the largest roots? Will the smaller roots rot away and will they have any impact on the soil fertility?
On the subject of that wall btw, a house came on the market in the village that claims to have been built from stone stolen from the Roman fort that is 400m up the hill, the stone looks very similar and there's some big lumps in my wall, so I suspect the wall may also be of Roman origin. Cool huh!
Conifer logs have been stacked to dry and will be burned in a couple of winters time. I've also spent a few days trying to reclaim my garage, I'm about halfway through cutting up all the wood that was in there and have a pretty big stack ready to burn now. Pics when I've finished that job....
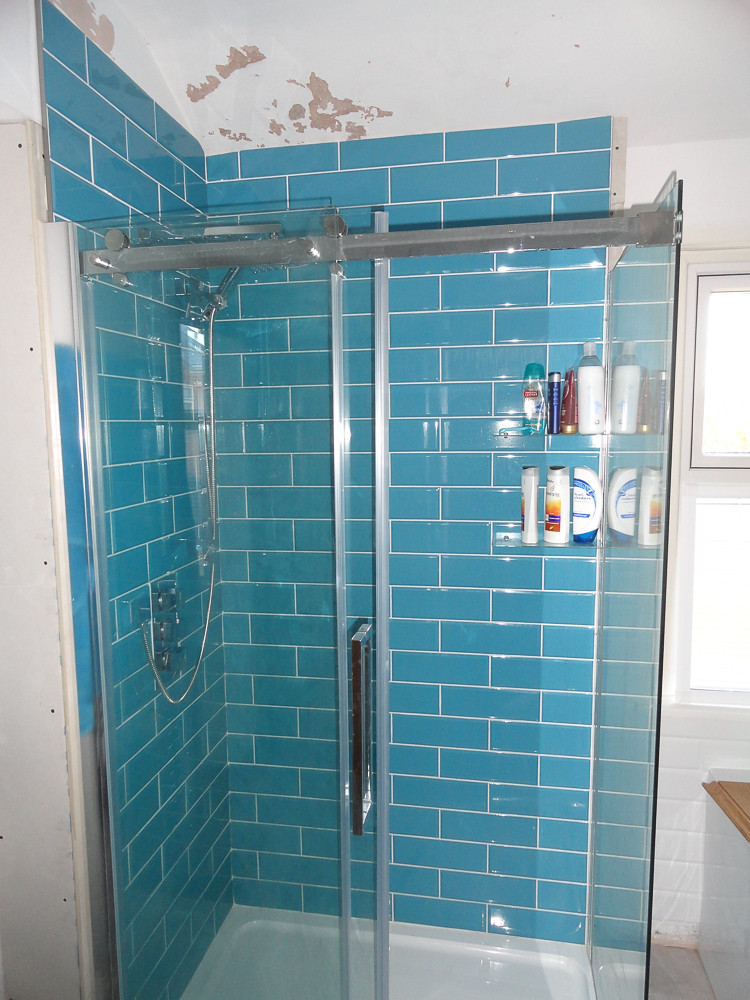
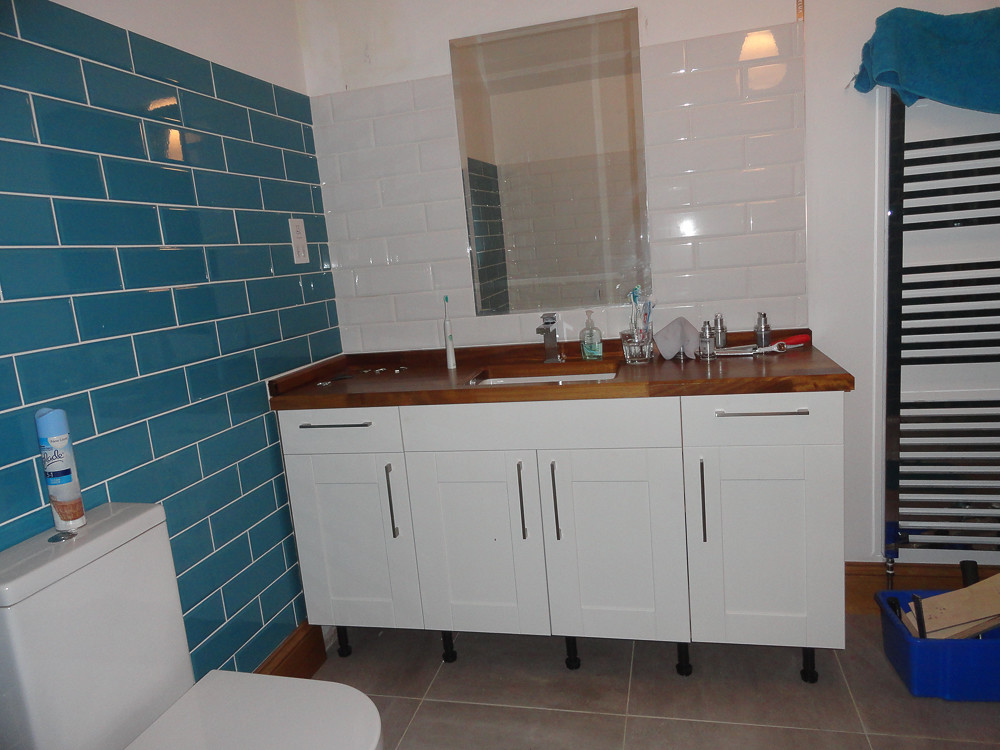
Finished the tiling and grouting in the bathroom:
Have plaster boarded the corners ready for plaster, ceiling needs a sand and the whole room is to paint with the proper bathroom paint once that's done. I've got everything ready for building the bathroom cabinet, so that's hopefully a job for next week, then I can think about getting it all properly finished in there.
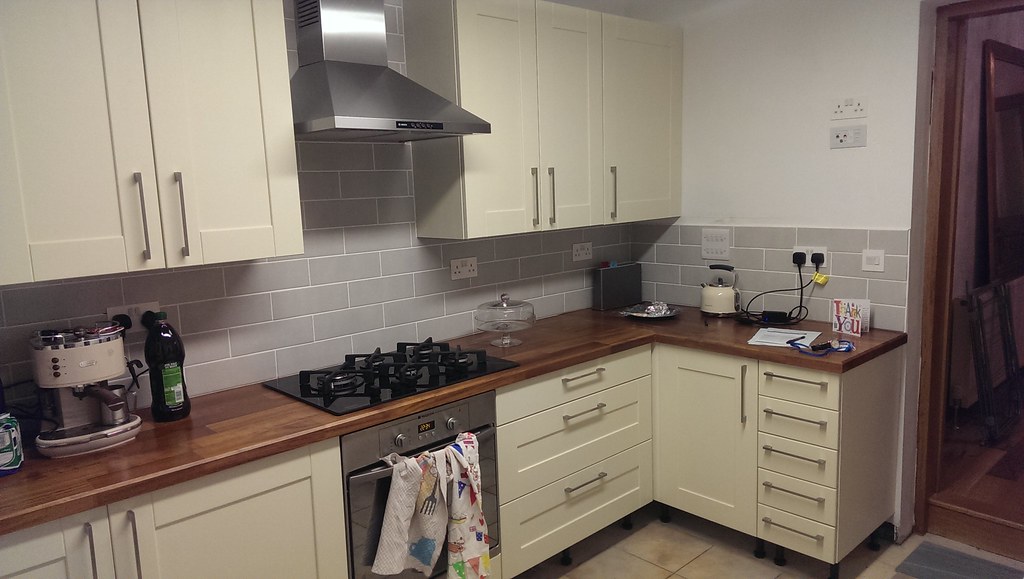
Kitchen light is practical, yet stylish. Fills the room really nicely and is incredibly bright!
Similarly, 10 x those little halogen bulbs is probably over-kill on the landing, but these are also really nice:
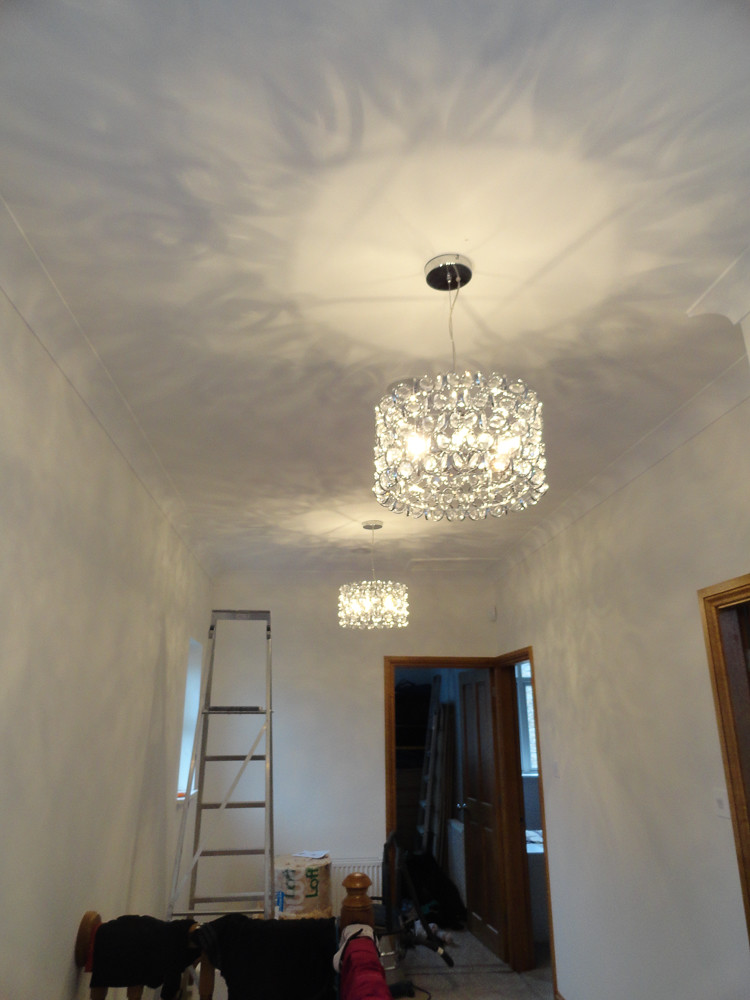
After struggling for months to find any lights that we liked, we're really pleased with what we've found, BHS is definitely the place to go for lights.
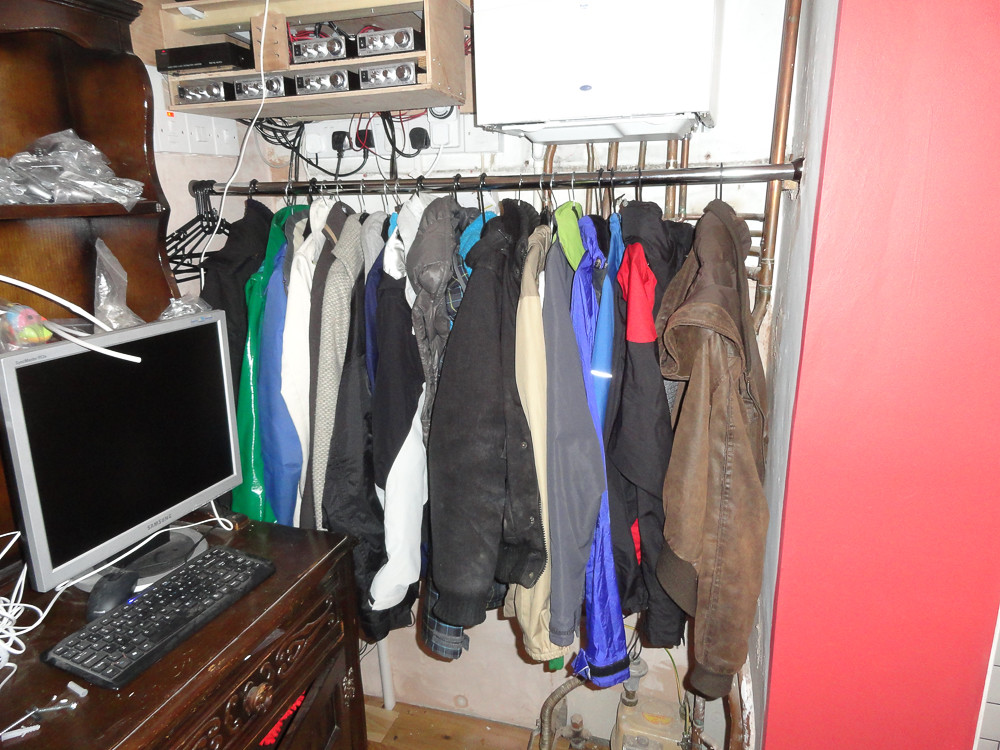
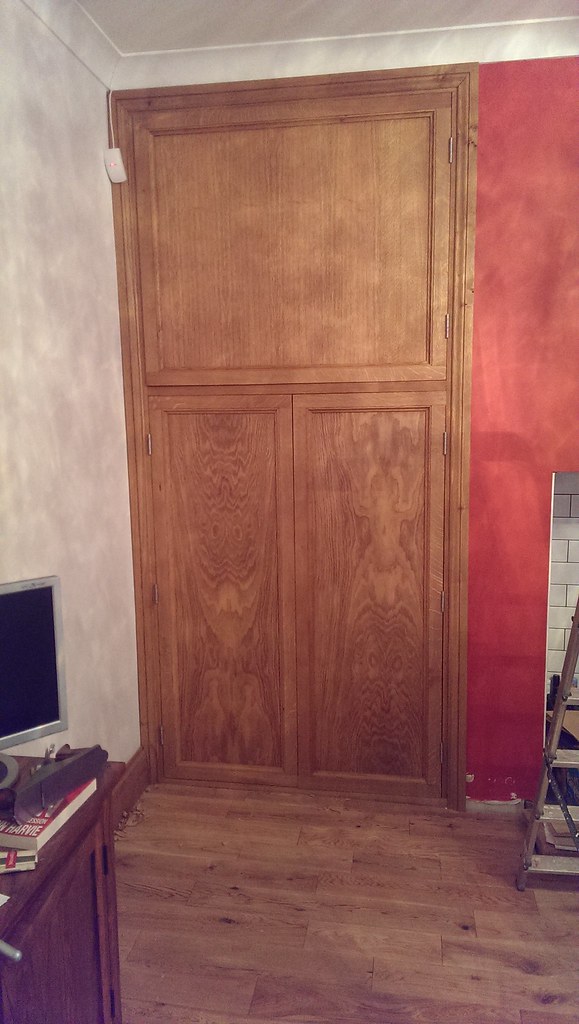
We've moved a lot more stuff in and have been really struggling for storage space, so I've started fitting out some of the cupboards where I can do a quick and easy job, coats all hung up:
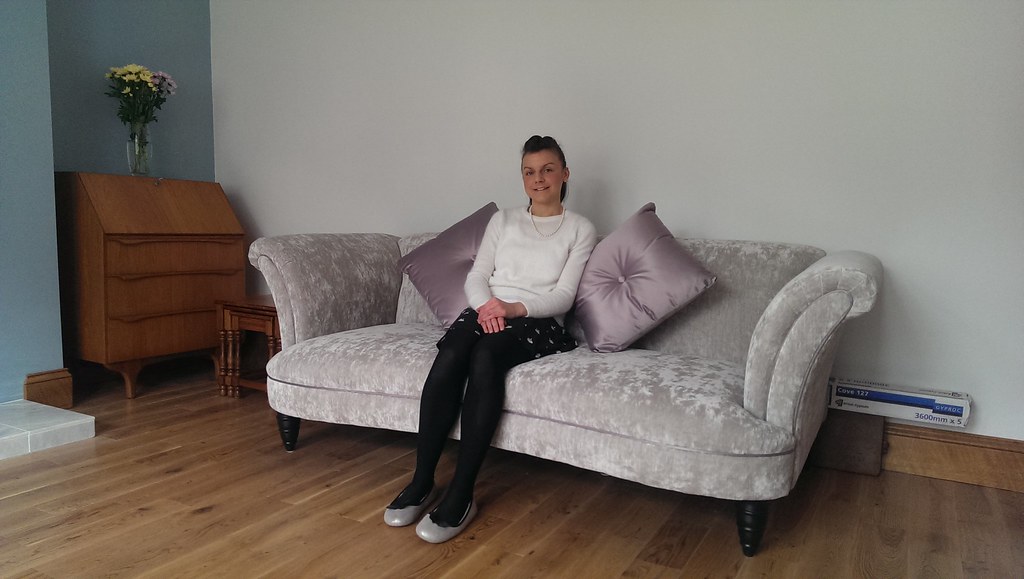
We had our first friends over to stay last weekend, so I was finally allowed to remove the cardboard from the floors and uncover the sofas. That and a proper tidy, including all my tools going outside, has made a huge difference to the house, it starting to feel like home now. I'd forgotten what the sofas looked like, but here's one. They're from DFS, they're very comfortable and go well with the style of the house.
And yes, that is a Mousey Thompson peeking out the back of the sofa. That will be two mantelpieces eventually.
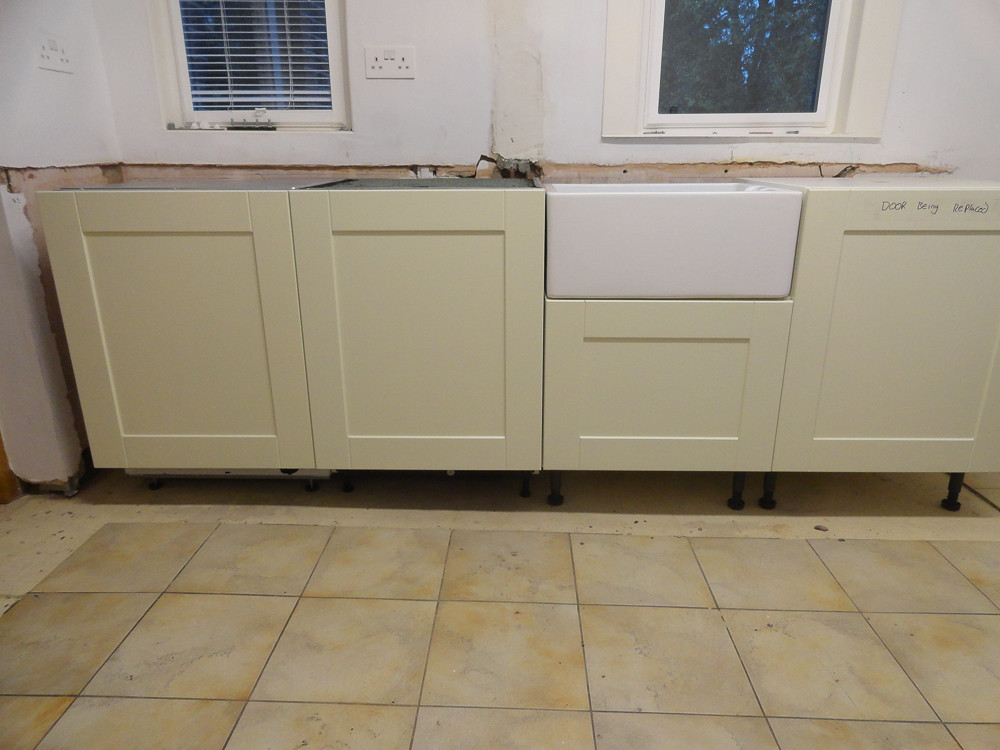
While I've been busy I've been doing a load more shopping; new dishwasher and washing machine, gas hob, belfast sink and a stack of iroko worktops have arrived:
We're ready to order the new kitchen now, all the details are sorted out, so that's happening tomorrow. Will likely be a couple of months before it's in, but that'll be the last big job to do inside the house, so is quite exciting. I would have waited on ordering the worktops, but I need one for the bathroom, so figured save on delivery costs and get the lot now.
I've also ordered a new sink for the bathroom as the one we have is a bit annoying, looks good, very modern and stylish, but the flat bottom means your toothpaste/spit mix doesn't drain very well. New one is broadly the same, but with a curved bottom. Annoying to have that extra expense, but it does mean I get a posh sink in the workshop. Awesome.
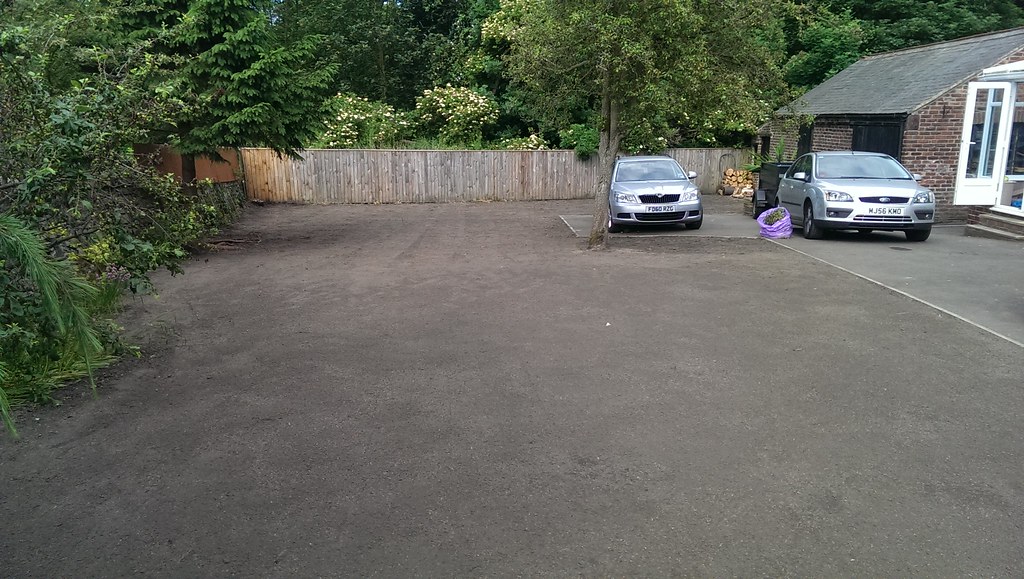
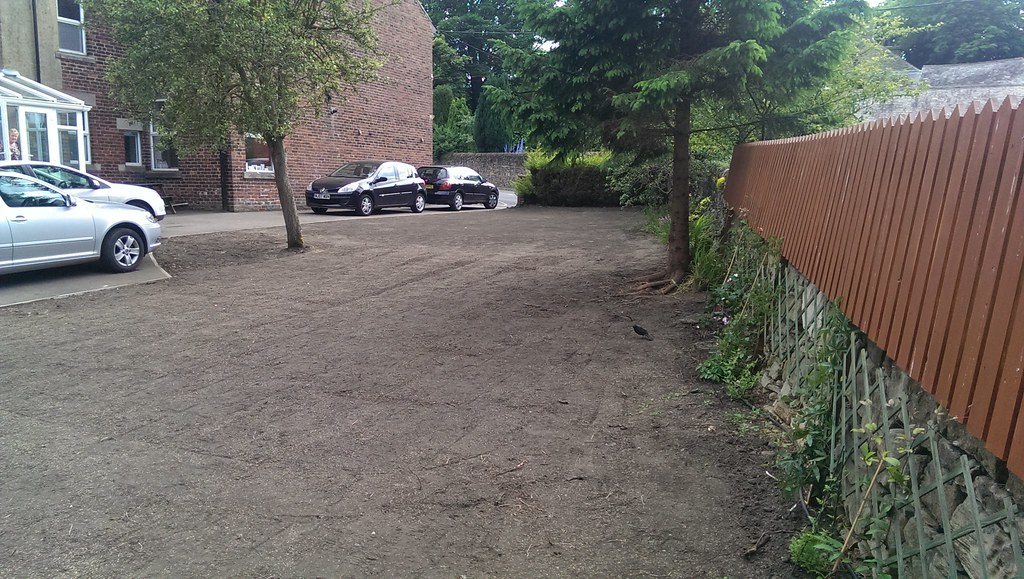
I've made a start on clearing the garden, so next time my Dad is here we'll be rotorvating and levelling it. Hopefully I won't need to bring any more soil in, but I think there's a bit of work to do moving soil around. That needs to be got properly on with as I think there's a garden party planned for August bank holiday, so we'll need some grass!
Hopefully I'll have a decent update in a couple of weeks time when I've had a good crack at the various finishing off jobs.
Oh yeah, in other news, I'm moving offices at the end of the month, so I've only 7 days left in Manchester. Will make a huge difference to be able to live at home properly and will free up a lot of time for working during the week, so things should progress a bit quicker.
I've also found an Android app that will talk to another Raspberry Pi over the WiFi, which will control a bank of switch relays. So all those switches are coming out to be replaced with relays, so I'll be able to control the sound sources and turn the amps on and off with my phone too. Going to add one to the floodlights outside too while I'm at it.
I've not updated the thread in a while as I've been busy for he last month or so and not had time to a) do work and b) tell you all about it. I've got a mini-update now, though I'm off work next week and hoping to get a lot done then.
Main visual thing what I've done is chop down those bloody leylandii that were taking up half the garden:
They didn't put up a great fight and I'll be taking the branches to the tip at the weekend in the trailer. Unfortunately the wall level drops away towards the bottom of the garden and there's a footpath on the otherside, so we were suddenly a bit over-looked. Not badly, but Aida went nuts and insisted it was sorted. So the next day we went to Travis Perkins and bought a load of timber and built this:
Really pleased with this, though we ran out of wood for the last few bits. Has since been stained with a preservative. The soldiers get gradually shorter so they match the wall line at the bottom, so the lengths were calculated on excel, then I chopped them and added the points, while my Dad screwed it all together.
There's trellis to go across the bottom, then it'll be covered in climbers, which should look pretty good without encroaching too far into the newly reclaimed space. Only thing left to do is to remove some of the larger roots. Anyone tried pulling them out with a car, if I dig out as much as I can and sever the largest roots? Will the smaller roots rot away and will they have any impact on the soil fertility?
On the subject of that wall btw, a house came on the market in the village that claims to have been built from stone stolen from the Roman fort that is 400m up the hill, the stone looks very similar and there's some big lumps in my wall, so I suspect the wall may also be of Roman origin. Cool huh!
Conifer logs have been stacked to dry and will be burned in a couple of winters time. I've also spent a few days trying to reclaim my garage, I'm about halfway through cutting up all the wood that was in there and have a pretty big stack ready to burn now. Pics when I've finished that job....
Finished the tiling and grouting in the bathroom:
Have plaster boarded the corners ready for plaster, ceiling needs a sand and the whole room is to paint with the proper bathroom paint once that's done. I've got everything ready for building the bathroom cabinet, so that's hopefully a job for next week, then I can think about getting it all properly finished in there.
Kitchen light is practical, yet stylish. Fills the room really nicely and is incredibly bright!
Similarly, 10 x those little halogen bulbs is probably over-kill on the landing, but these are also really nice:
After struggling for months to find any lights that we liked, we're really pleased with what we've found, BHS is definitely the place to go for lights.
We've moved a lot more stuff in and have been really struggling for storage space, so I've started fitting out some of the cupboards where I can do a quick and easy job, coats all hung up:
We had our first friends over to stay last weekend, so I was finally allowed to remove the cardboard from the floors and uncover the sofas. That and a proper tidy, including all my tools going outside, has made a huge difference to the house, it starting to feel like home now. I'd forgotten what the sofas looked like, but here's one. They're from DFS, they're very comfortable and go well with the style of the house.
And yes, that is a Mousey Thompson peeking out the back of the sofa. That will be two mantelpieces eventually.
While I've been busy I've been doing a load more shopping; new dishwasher and washing machine, gas hob, belfast sink and a stack of iroko worktops have arrived:
We're ready to order the new kitchen now, all the details are sorted out, so that's happening tomorrow. Will likely be a couple of months before it's in, but that'll be the last big job to do inside the house, so is quite exciting. I would have waited on ordering the worktops, but I need one for the bathroom, so figured save on delivery costs and get the lot now.
I've also ordered a new sink for the bathroom as the one we have is a bit annoying, looks good, very modern and stylish, but the flat bottom means your toothpaste/spit mix doesn't drain very well. New one is broadly the same, but with a curved bottom. Annoying to have that extra expense, but it does mean I get a posh sink in the workshop. Awesome.
I've made a start on clearing the garden, so next time my Dad is here we'll be rotorvating and levelling it. Hopefully I won't need to bring any more soil in, but I think there's a bit of work to do moving soil around. That needs to be got properly on with as I think there's a garden party planned for August bank holiday, so we'll need some grass!
Hopefully I'll have a decent update in a couple of weeks time when I've had a good crack at the various finishing off jobs.
Oh yeah, in other news, I'm moving offices at the end of the month, so I've only 7 days left in Manchester. Will make a huge difference to be able to live at home properly and will free up a lot of time for working during the week, so things should progress a bit quicker.
So that big pile of conifers got dealt with a few weeks ago, got the lot into the trailer in one load by chopping the branches off the branches with an axe. Took a few hours, but saved me wasting some of my 12 free trailer passes unnecessarily. Still can't believe that the branches of three large conifers all fitted in here:
I've been a bit busy with things recently and although I managed a week off work I managed to pick up some bug or other and lost most of it and didn't get a great deal done in the end. I've finally moved out of Manchester, first week working up here this week, so I've had packing and moving and sorting to deal with too.
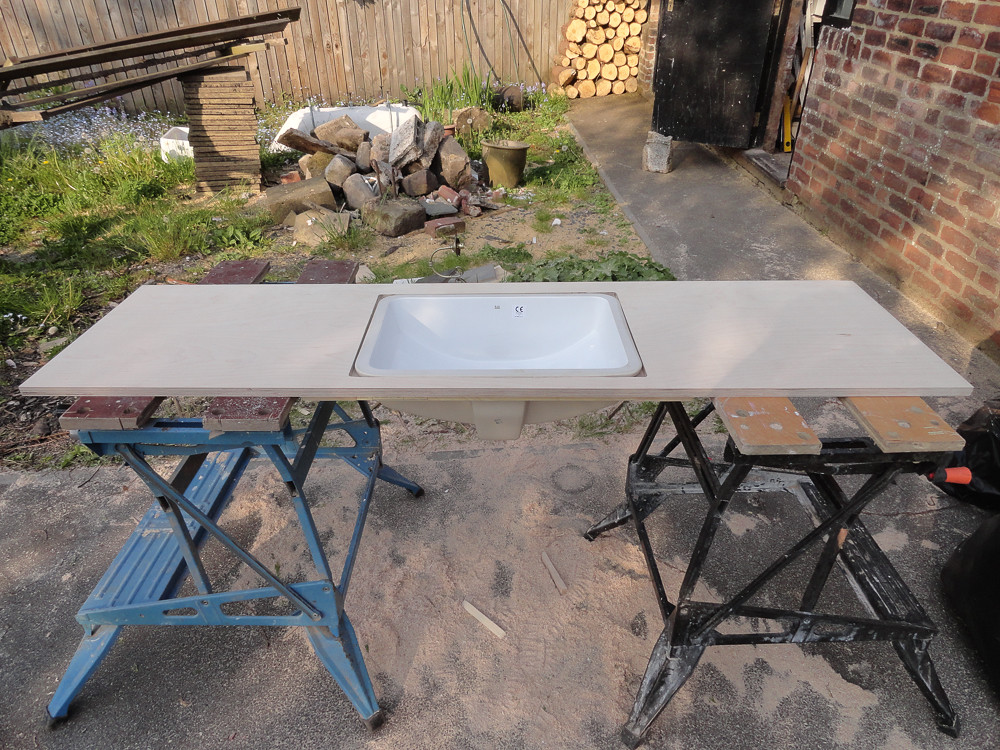
Anyway, during my week off this was about all I got done; built the bathroom cabinet that we wanted for about half the price of buying something flimsy crap and not exactly what we wanted.
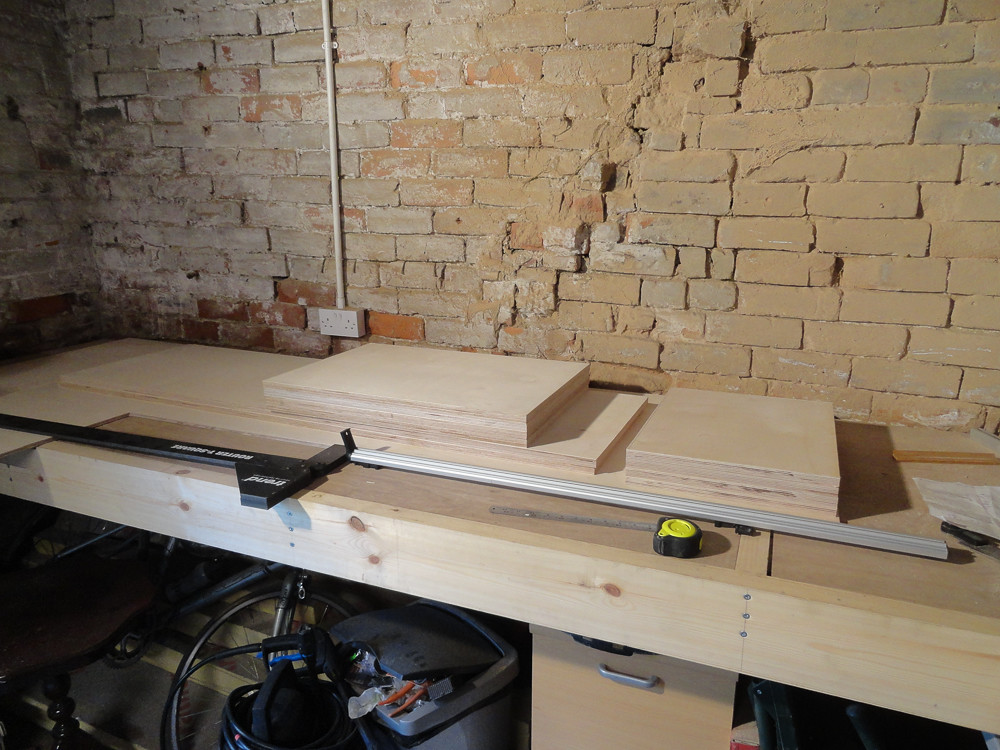
First up, scribble a bit on some paper:
Then rough-cut all the pieces while there's someone to help support the 8' x 4' sheets while you saw:
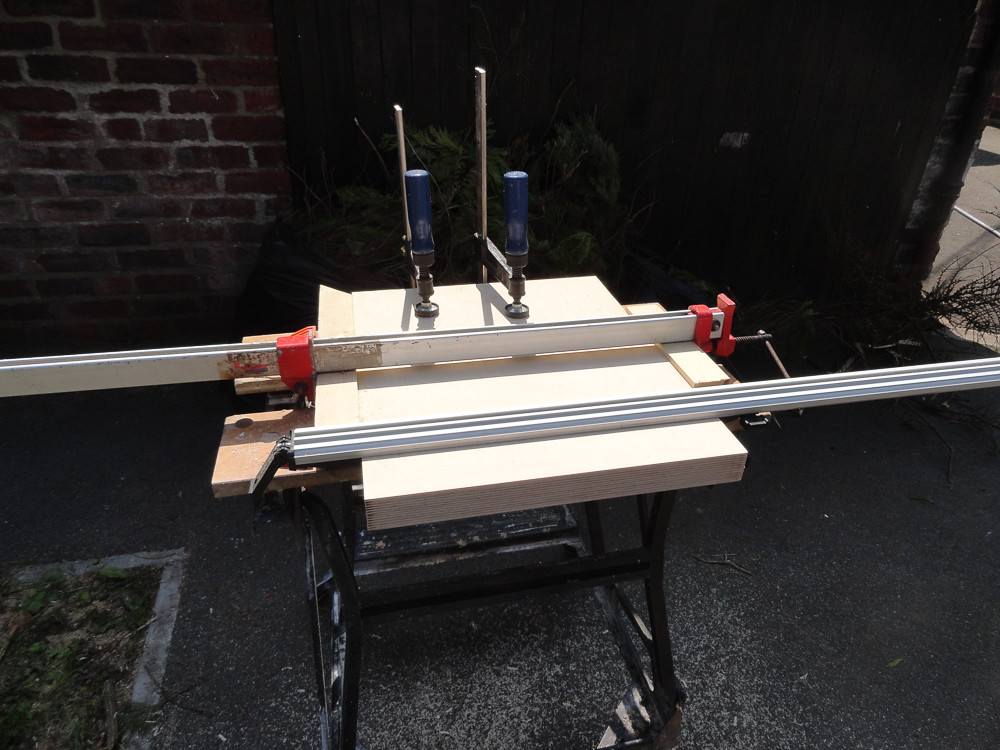
Then cut to exact sizes by clamping pairs together and trimming back to length with the router and a guide:
Rout a recess for the sink to sit in up top:
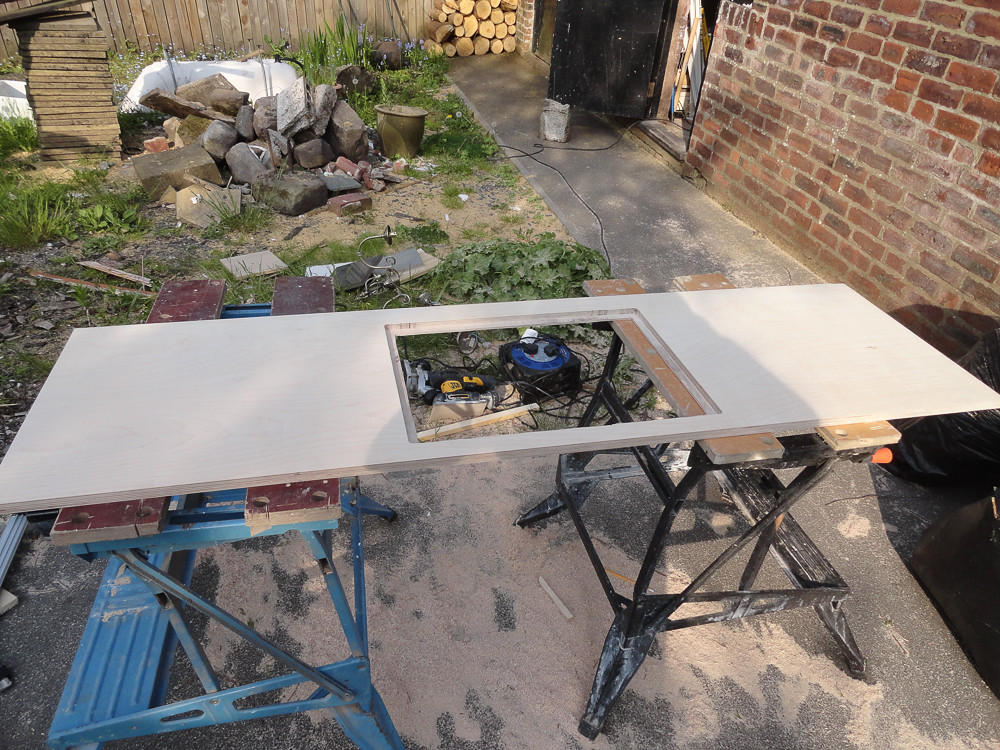
Reinforce underneath:
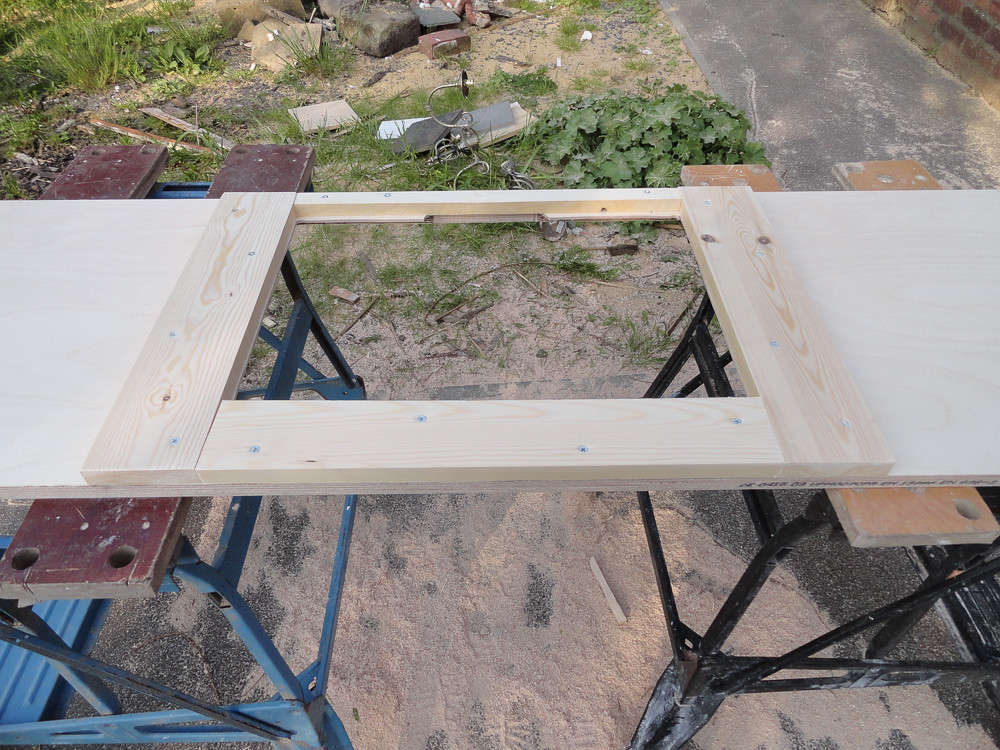
Fit sink and you're done!
OK, it didn't quite pass the herindoors test for aesthetics and and was a waste of good workmates, so plan B; carry all the bits up to the bathroom and get screwing:
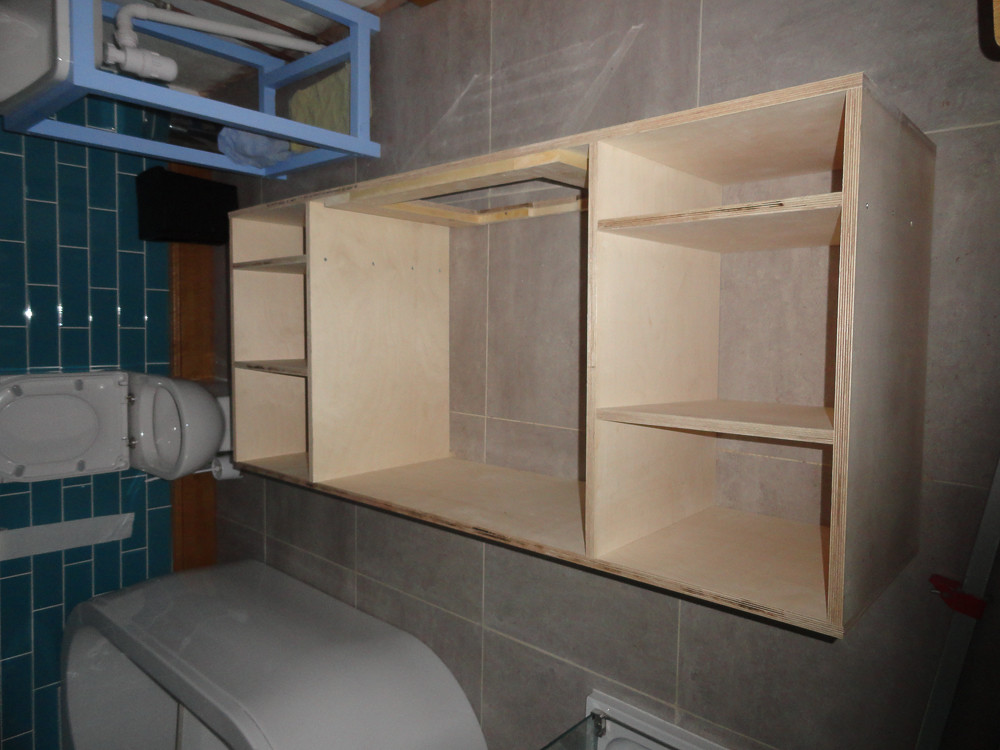
Day Two; Shelves fitted, front panel in, back added. Curse letting my Dad nick a strip from the back piece and make note to make some skirting-like bits to cover the gap later:
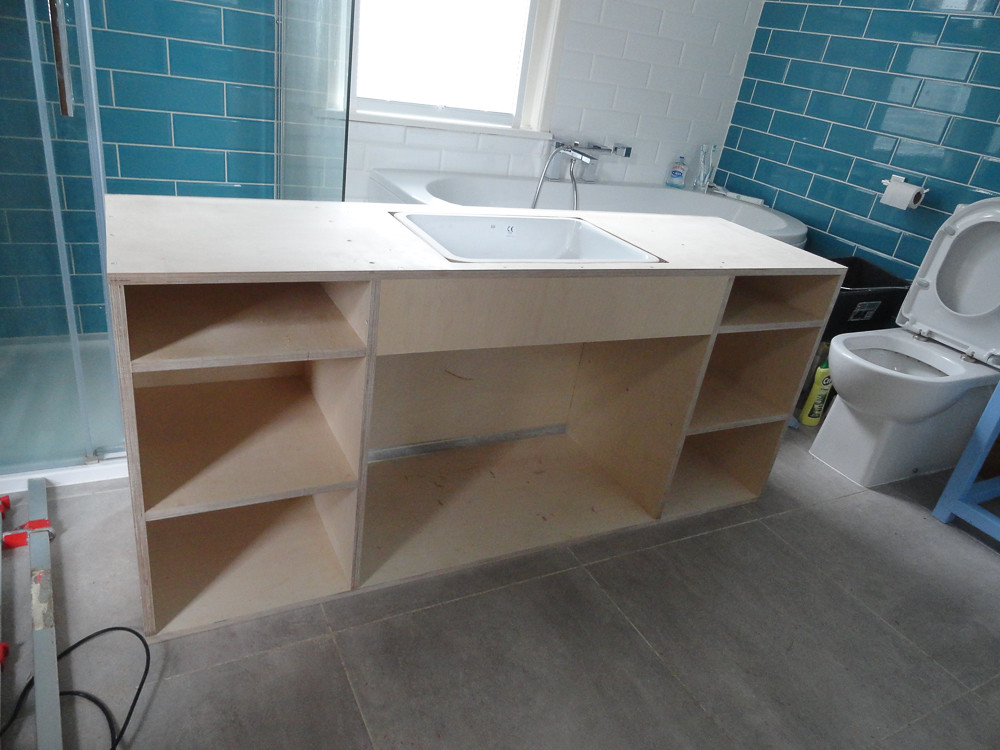
Varnish:
Legs on, test fit:
Cut a lump of iroko and get the plumbing through:
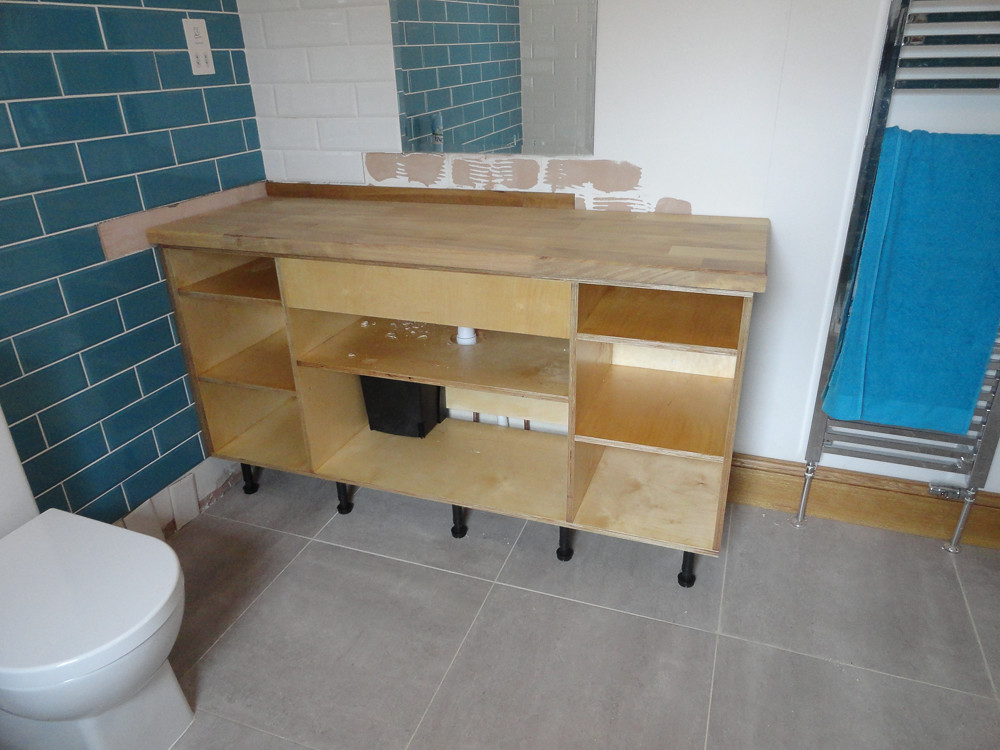
Now I'm a bit stuck. I need to make or acquire a suitable router guide to let me do the sink cut-out. I've decided to modify the back and then box in the pipework so I can move it back 50mm closer to the wall too.
Once that's done I've got to sort out a splash back and 3 coats of IPV67 to keep the worktop sealed. I've got the drawer and doors on order with my new kitchen and then I need to make an end panel to match. Should look good when it's finished!
I've been a bit busy with things recently and although I managed a week off work I managed to pick up some bug or other and lost most of it and didn't get a great deal done in the end. I've finally moved out of Manchester, first week working up here this week, so I've had packing and moving and sorting to deal with too.
Anyway, during my week off this was about all I got done; built the bathroom cabinet that we wanted for about half the price of buying something flimsy crap and not exactly what we wanted.
First up, scribble a bit on some paper:
Then rough-cut all the pieces while there's someone to help support the 8' x 4' sheets while you saw:
Then cut to exact sizes by clamping pairs together and trimming back to length with the router and a guide:
Rout a recess for the sink to sit in up top:
Reinforce underneath:
Fit sink and you're done!
OK, it didn't quite pass the herindoors test for aesthetics and and was a waste of good workmates, so plan B; carry all the bits up to the bathroom and get screwing:
Day Two; Shelves fitted, front panel in, back added. Curse letting my Dad nick a strip from the back piece and make note to make some skirting-like bits to cover the gap later:
Varnish:
Legs on, test fit:
Cut a lump of iroko and get the plumbing through:
Now I'm a bit stuck. I need to make or acquire a suitable router guide to let me do the sink cut-out. I've decided to modify the back and then box in the pipework so I can move it back 50mm closer to the wall too.
Once that's done I've got to sort out a splash back and 3 coats of IPV67 to keep the worktop sealed. I've got the drawer and doors on order with my new kitchen and then I need to make an end panel to match. Should look good when it's finished!
Managed to forget to keep you updated the last few weeks, have been working fairly hard on things and have got quite a bit done.
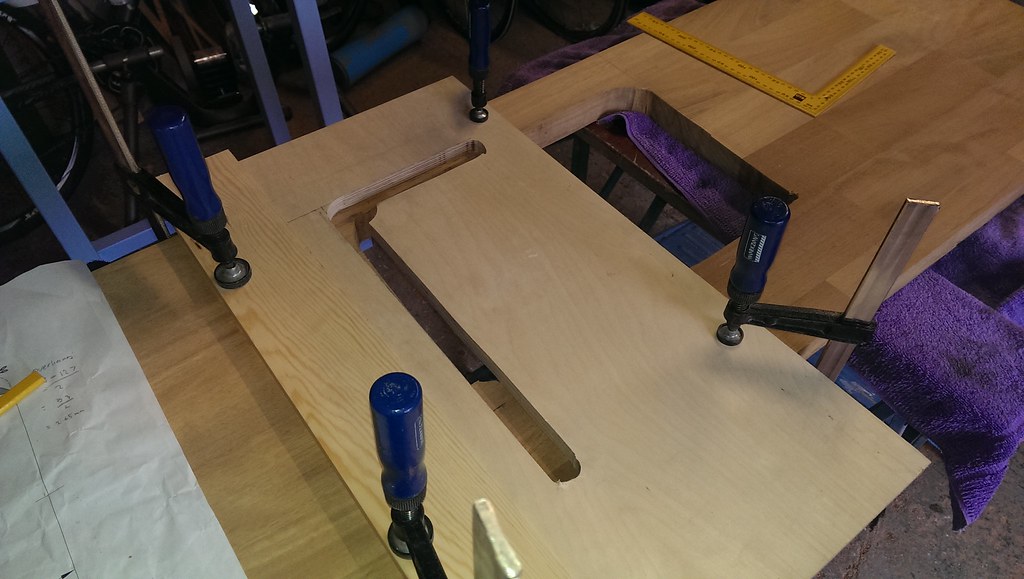
First up I done some maths then bought a hole saw kit. Then I spent four hours making this:
 IMAG0131 by paulrockliffe, on Flickr
It's a sink cut-out template, as you can probably tell. Really pleased with the radius, which matches the sink perfectly.
Clamped in place and ready for the cut:
 IMAG0132 by paulrockliffe, on Flickr
All done, sanded and the edge has been chamfered:
 IMAG0133 by paulrockliffe, on Flickr
Then I've given it 4 coats of Sadolin IPV67 2-pack varnish, which should keep the water off the wood. Really really pleased with how this has come out, looks superb. It's exactly the same as we'll have in the kitchen eventually.
 IMAG0134 by paulrockliffe, on Flickr
Trial fitted:
 IMAG0135 by paulrockliffe, on Flickr
 IMAG0136 by paulrockliffe, on Flickr
I've used the off-cut from the back to make an upstand, I've got as far as being ready to fix the upstand to the worktop, then fix the worktop to the cabinet, then get the plumbing done. Doors and drawers will arrive with the kitchen and there's an end panel to make and paint. No pics of the upstand today, but will post pics when I get it all fixed in place this week.
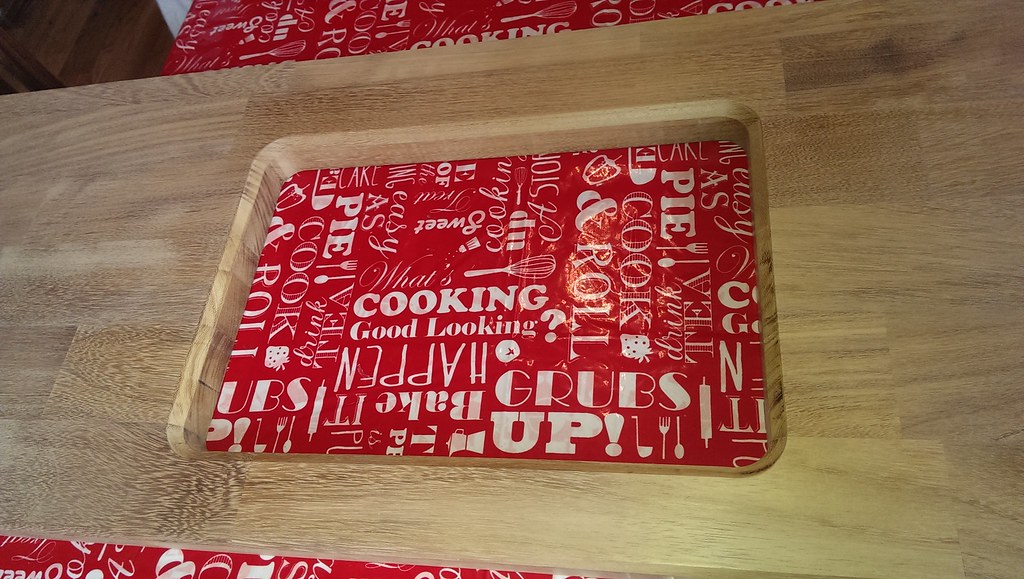
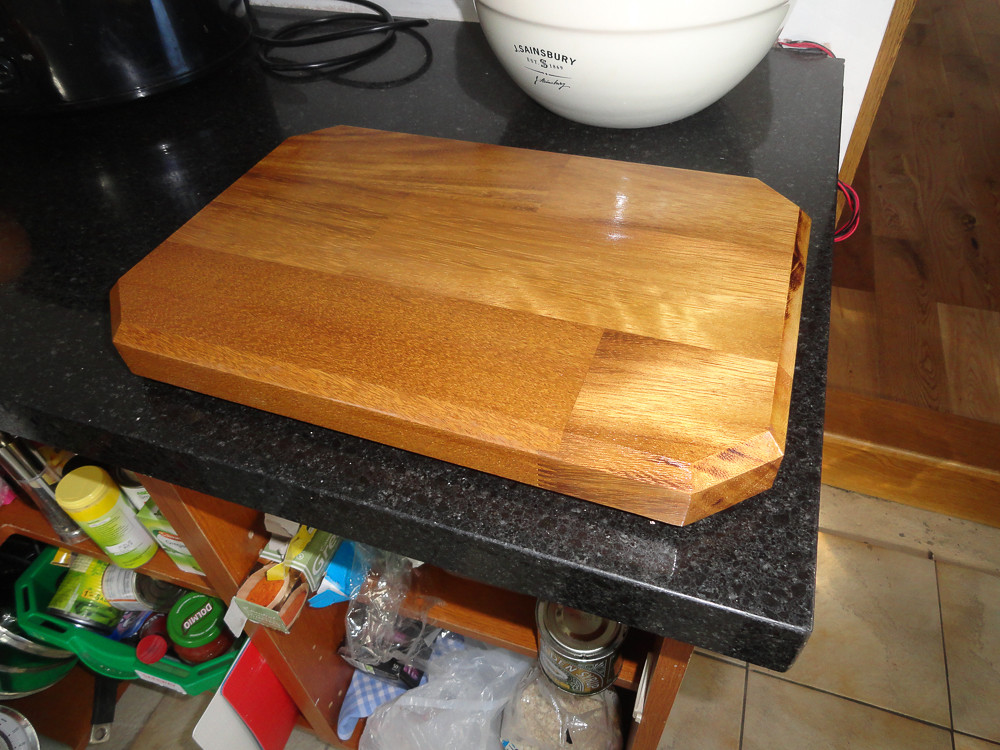
You're probably wondering what happened to the sink cut-out? I think this is called a trivet or something? It was going to be a chopping board, but we have a decent set of boards already and we don't want to be cluttering up the worktop in a small kitchen with this sort of thing, so it'll look good on the dining table with pans etc on. When the kitchen is done I'll have a few more pieces so can make some more.
 20140626-DSC00784.jpg by paulrockliffe, on Flickr
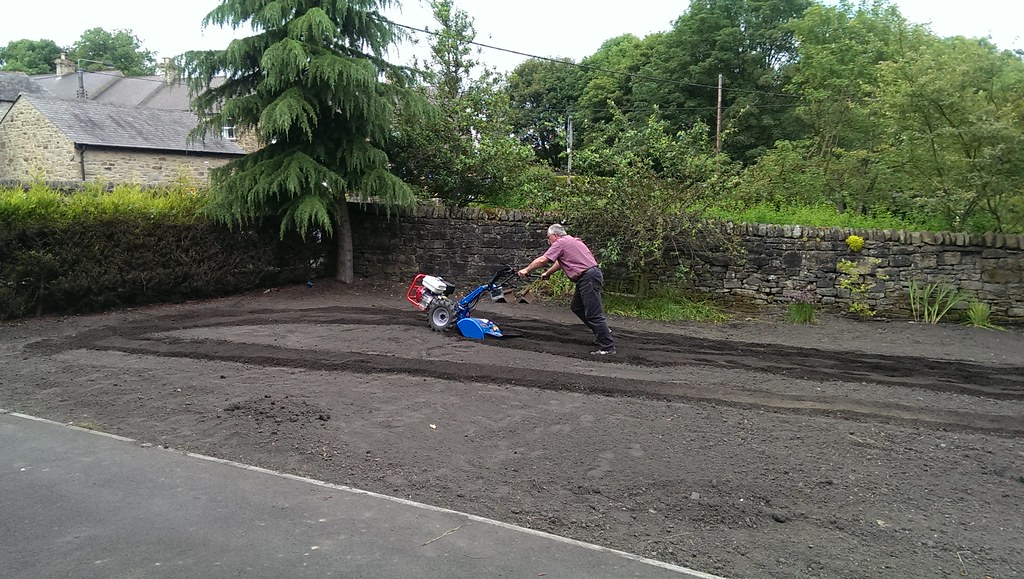
A couple of weekends ago I cleared and rotovated the top half of the garden ready for grass. Then I spent all day on the Sunday dragging a weighted ladder around to give it all a constant gradient, fill in the dips and reduce the height in a few places. I got a bit stuck when Dad's rotovator packed in, I eventually traced it to a chewed bottom-end bearing that was letting the crank move so much that the *something* wouldn't open and the engine wouldn't spark. Returned to owner for repair!
Fortunately my aprents were over the following weekend and Travis Perkins lent me this little number for just £45 for the weekend:
 20140622-DSC00778.jpg by paulrockliffe, on Flickr
Turns out these things are three grand. 8hp engine absolutely ripped the ground to bits!
 IMAG0137 by paulrockliffe, on Flickr
We got the top half lifted again so we could move more soil about and get it levelled again, then got the grass seed in. When we bought the house we were left an iron roller, which came in very handy, but was pretty exhausting! Sunday we did the bottom half and got that seeded, as well as finishing off the fence.
 IMAG0139 by paulrockliffe, on Flickr.
Finished garden:
 IMAG0140 by paulrockliffe, on Flickr
 IMAG0141 by paulrockliffe, on Flickr
 IMAG0142 by paulrockliffe, on Flickr
By Friday we had this:
 IMAG0144 by paulrockliffe, on Flickr
And now we've got a bit of a fuzz over quite a bit of the garden. Again, we're really pleased with how the garden has turned out. It looked like this when we bought it:
 20130422-DSC00282.jpg by paulrockliffe, on Flickr
 20130422-DSC00287.jpg by paulrockliffe, on Flickr
One thing I've learned about myself doing this project is that I love to get stuck in to new tasks, but hate to do all the fiddly finishing off jobs. I hope it's because I'm prioritising jobs on the impact they'll have and will get to the little jobs eventually, but at the moment I've loads of bits that are 80% finished. Need to focus on finishing things off over the next few weeks.
In that vein I spent much of the free time this weekend trying to get my workshop tidy again and ended up starting this:
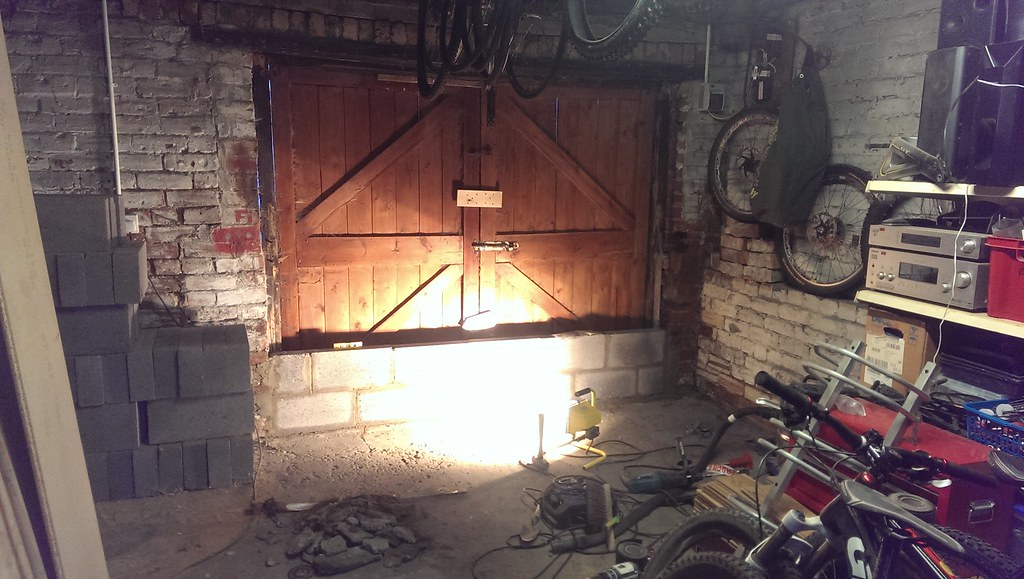 IMAG0145 by paulrockliffe, on Flickr
That door exits onto the side road, we don't need it and I need the wall space to hang the bikes off. Those blocks have been sat waiting to be put in that hole for nearly 12 months now!
Plan for the week is to get that wall finished and get the sink operational. Won't get much done next weekend as we've got things on, so need to crack on this week.
First up I done some maths then bought a hole saw kit. Then I spent four hours making this:
IMAG0131 by paulrockliffe, on FlickrIt's a sink cut-out template, as you can probably tell. Really pleased with the radius, which matches the sink perfectly.
Clamped in place and ready for the cut:
IMAG0132 by paulrockliffe, on FlickrAll done, sanded and the edge has been chamfered:
IMAG0133 by paulrockliffe, on FlickrThen I've given it 4 coats of Sadolin IPV67 2-pack varnish, which should keep the water off the wood. Really really pleased with how this has come out, looks superb. It's exactly the same as we'll have in the kitchen eventually.
IMAG0134 by paulrockliffe, on FlickrTrial fitted:
IMAG0135 by paulrockliffe, on FlickrIMAG0136 by paulrockliffe, on FlickrI've used the off-cut from the back to make an upstand, I've got as far as being ready to fix the upstand to the worktop, then fix the worktop to the cabinet, then get the plumbing done. Doors and drawers will arrive with the kitchen and there's an end panel to make and paint. No pics of the upstand today, but will post pics when I get it all fixed in place this week.
You're probably wondering what happened to the sink cut-out? I think this is called a trivet or something? It was going to be a chopping board, but we have a decent set of boards already and we don't want to be cluttering up the worktop in a small kitchen with this sort of thing, so it'll look good on the dining table with pans etc on. When the kitchen is done I'll have a few more pieces so can make some more.
20140626-DSC00784.jpg by paulrockliffe, on FlickrA couple of weekends ago I cleared and rotovated the top half of the garden ready for grass. Then I spent all day on the Sunday dragging a weighted ladder around to give it all a constant gradient, fill in the dips and reduce the height in a few places. I got a bit stuck when Dad's rotovator packed in, I eventually traced it to a chewed bottom-end bearing that was letting the crank move so much that the *something* wouldn't open and the engine wouldn't spark. Returned to owner for repair!
Fortunately my aprents were over the following weekend and Travis Perkins lent me this little number for just £45 for the weekend:
20140622-DSC00778.jpg by paulrockliffe, on FlickrTurns out these things are three grand. 8hp engine absolutely ripped the ground to bits!
IMAG0137 by paulrockliffe, on FlickrWe got the top half lifted again so we could move more soil about and get it levelled again, then got the grass seed in. When we bought the house we were left an iron roller, which came in very handy, but was pretty exhausting! Sunday we did the bottom half and got that seeded, as well as finishing off the fence.
IMAG0139 by paulrockliffe, on Flickr.Finished garden:
IMAG0140 by paulrockliffe, on FlickrIMAG0141 by paulrockliffe, on FlickrIMAG0142 by paulrockliffe, on FlickrBy Friday we had this:
IMAG0144 by paulrockliffe, on FlickrAnd now we've got a bit of a fuzz over quite a bit of the garden. Again, we're really pleased with how the garden has turned out. It looked like this when we bought it:
20130422-DSC00282.jpg by paulrockliffe, on Flickr20130422-DSC00287.jpg by paulrockliffe, on FlickrOne thing I've learned about myself doing this project is that I love to get stuck in to new tasks, but hate to do all the fiddly finishing off jobs. I hope it's because I'm prioritising jobs on the impact they'll have and will get to the little jobs eventually, but at the moment I've loads of bits that are 80% finished. Need to focus on finishing things off over the next few weeks.
In that vein I spent much of the free time this weekend trying to get my workshop tidy again and ended up starting this:
IMAG0145 by paulrockliffe, on FlickrThat door exits onto the side road, we don't need it and I need the wall space to hang the bikes off. Those blocks have been sat waiting to be put in that hole for nearly 12 months now!
Plan for the week is to get that wall finished and get the sink operational. Won't get much done next weekend as we've got things on, so need to crack on this week.
Not a great deal to report this week, have been out at a wedding for most of the weekend. I've been out in the workshop tidying for much of the week, block-work almost finished:
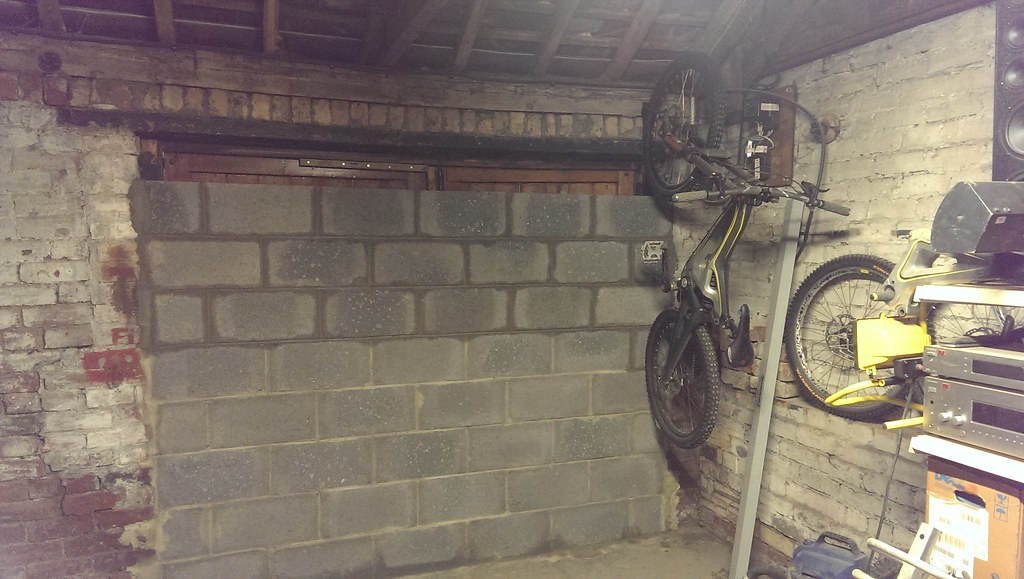 IMAG0151 by paulrockliffe, on Flickr
I tested the bike hooks I have and then put them all up. Then I decided the bikes were taking up too much room, so I redid them all and I've hung them without the front wheels so the bars can be turned. S-hooks to hang the front wheel off the frames (made from wire coat hangers) and I've managed to half the space required and get the bikes a bit higher. Plan is to build a wheeled chest to sit underneath that can be filled with all my biking kit when I get chance.
I used a bottle jack to support the centre of the lintel and will be straightening the roof out when I put the last row of blocks in. Very surprised how easy it was to jack the lintel!
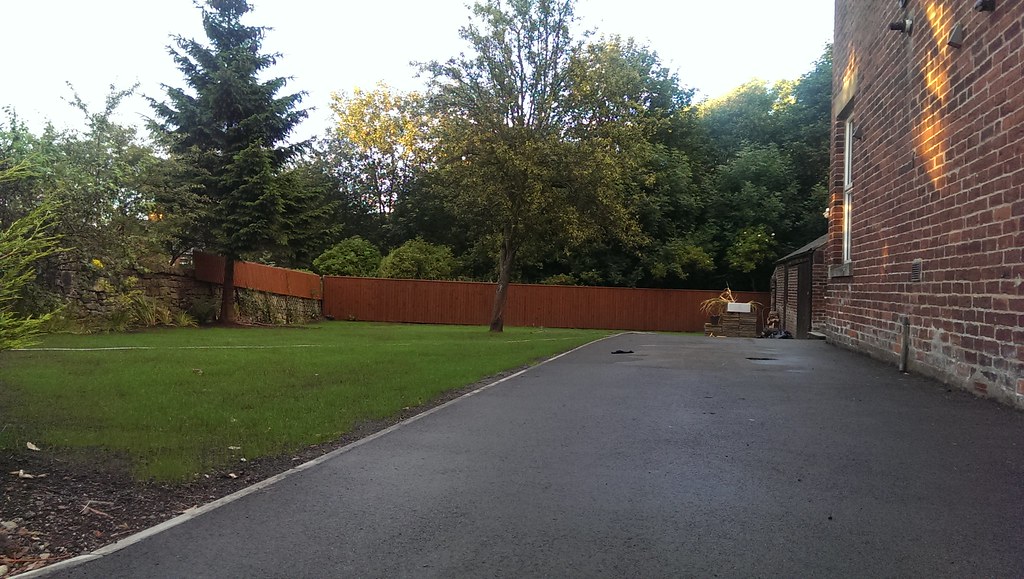
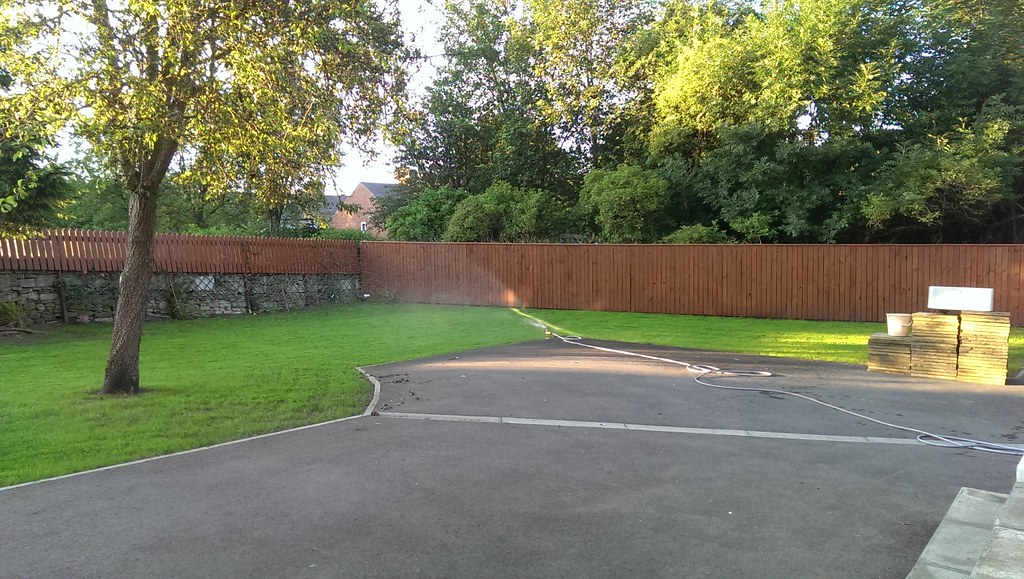
The grass continues to grow at a pace! Two weeks it's been in now. Picture is a bit dishonest as the low angle makes it look much thicker, but looks like it's going to be really nice. Definitely need to go lawn mower shopping this week:
 IMAG0155 by paulrockliffe, on Flickr
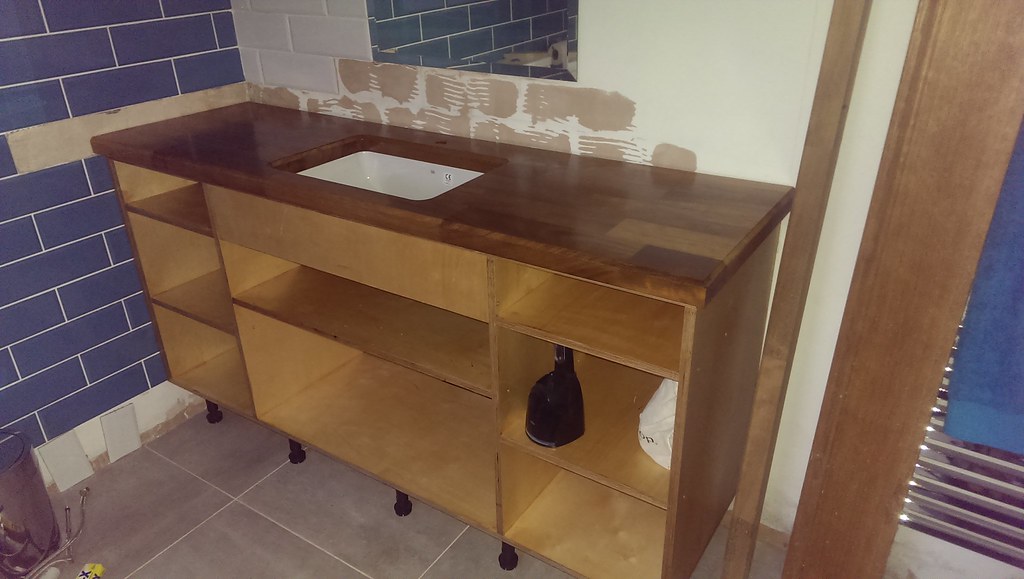
Finished and attached the upstand to the bathroom worktop:
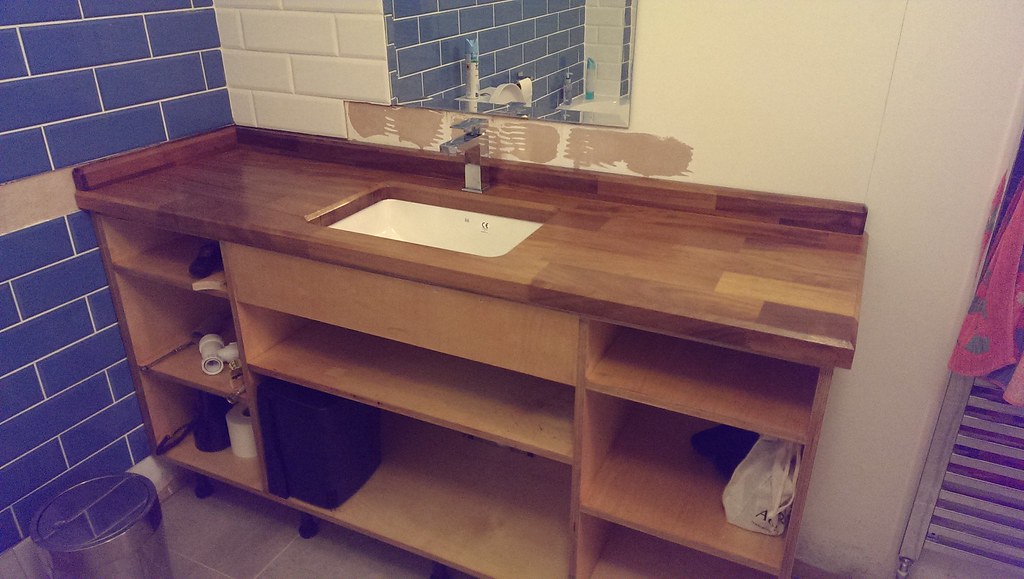 IMAG0156 by paulrockliffe, on Flickr
Need to seal the sink in, fix worktop, attach plumbing and finish off. Hopefully doors will be here soon and it can all be finished off.
IMAG0151 by paulrockliffe, on FlickrI tested the bike hooks I have and then put them all up. Then I decided the bikes were taking up too much room, so I redid them all and I've hung them without the front wheels so the bars can be turned. S-hooks to hang the front wheel off the frames (made from wire coat hangers) and I've managed to half the space required and get the bikes a bit higher. Plan is to build a wheeled chest to sit underneath that can be filled with all my biking kit when I get chance.
I used a bottle jack to support the centre of the lintel and will be straightening the roof out when I put the last row of blocks in. Very surprised how easy it was to jack the lintel!
The grass continues to grow at a pace! Two weeks it's been in now. Picture is a bit dishonest as the low angle makes it look much thicker, but looks like it's going to be really nice. Definitely need to go lawn mower shopping this week:
IMAG0155 by paulrockliffe, on FlickrFinished and attached the upstand to the bathroom worktop:
IMAG0156 by paulrockliffe, on FlickrNeed to seal the sink in, fix worktop, attach plumbing and finish off. Hopefully doors will be here soon and it can all be finished off.
Quick update for you, some decent progress to report for once.
Grass continues to grow and has thickened up nicely, have been weeding most nights and not been able to get on top of them all, so I've treated the lawn tonight. Hopefully just the weeds will die!
 IMAG0171 by paulrockliffe, on Flickr
The last of the carpets went in last Friday, which has made a huge difference to the house. I screwed the s t out of the stairs the day before, so it's now completely solid and squeak-free:
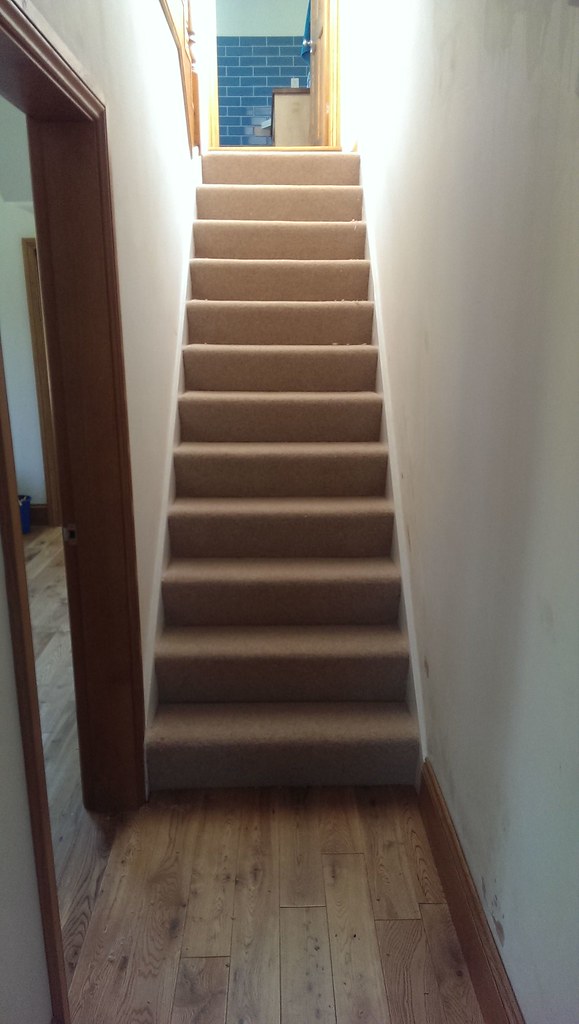 IMG-20140725-WA0024 by paulrockliffe, on Flickr
 IMG-20140725-WA0026 by paulrockliffe, on Flickr
 IMG-20140725-WA0028 by paulrockliffe, on Flickr
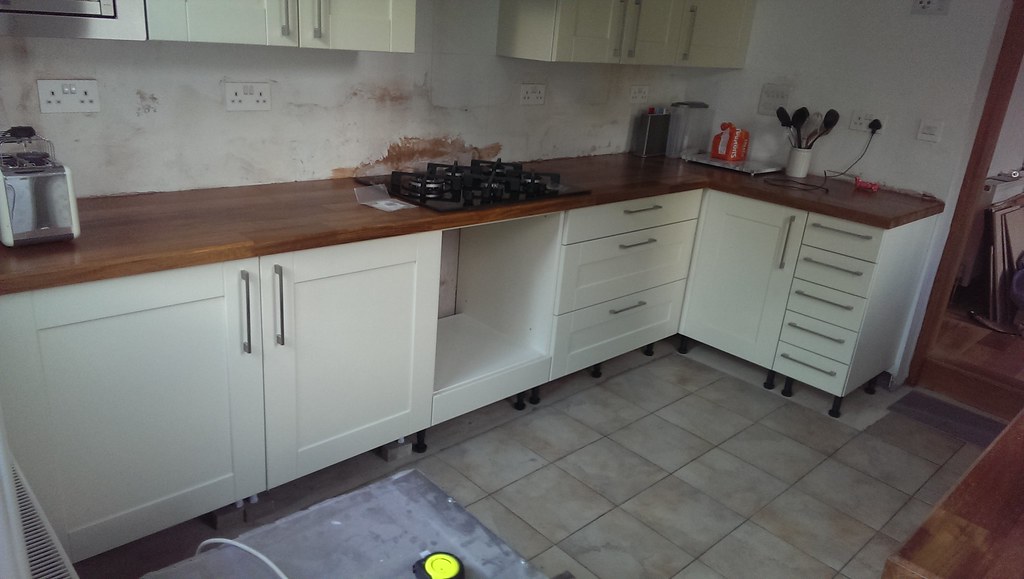
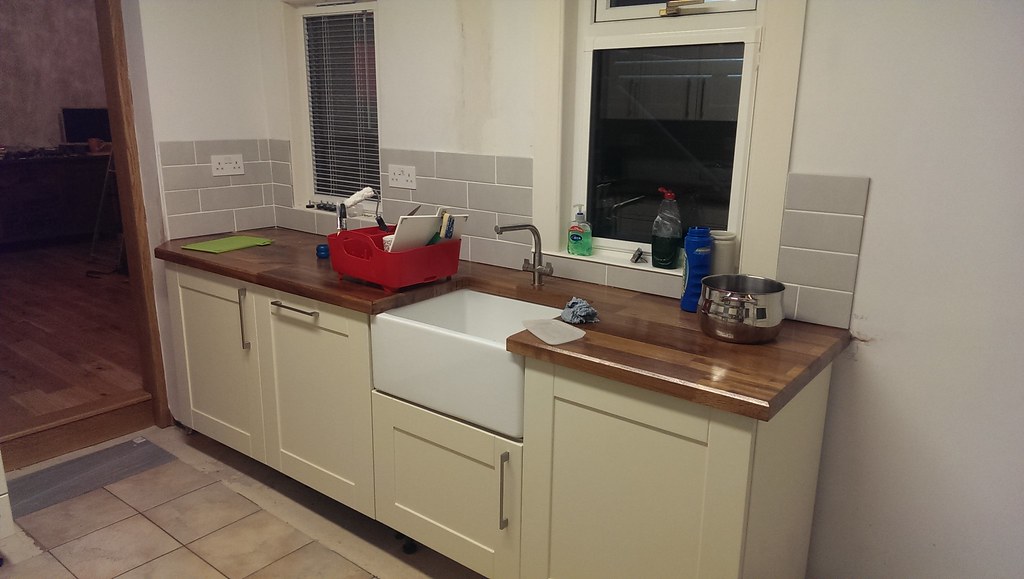
And after 12 months of dialogue, changing specs and not being ready, we finally have a new kitchen...... in the conservatory:
 IMAG0180 by paulrockliffe, on Flickr
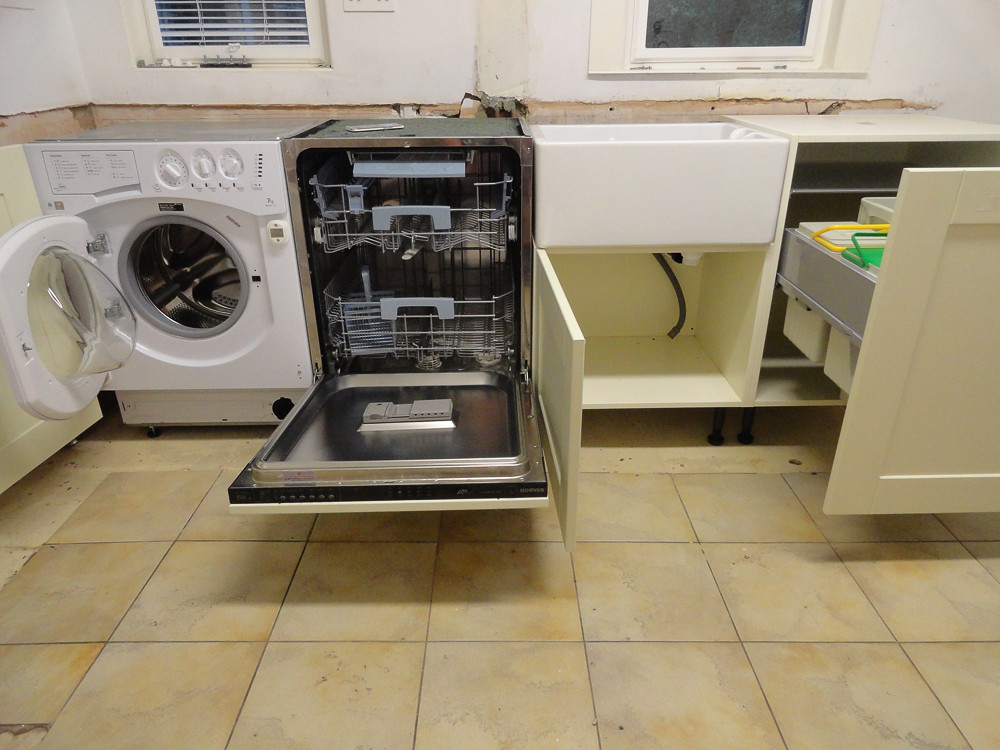
That also arrived on Friday. It came via stabbedrat on here and we're really please with it, the quality appears to be exceptional, everything is rock solid and exactly as we wanted. We gutted the old kitchen on Sunday and made a start and then have been working in the evenings this week. I've mostly got one side of the room in now, it's taken a lot longer than I was hoping!
The first unit went in very quickly, once I'd worked out levels etc:
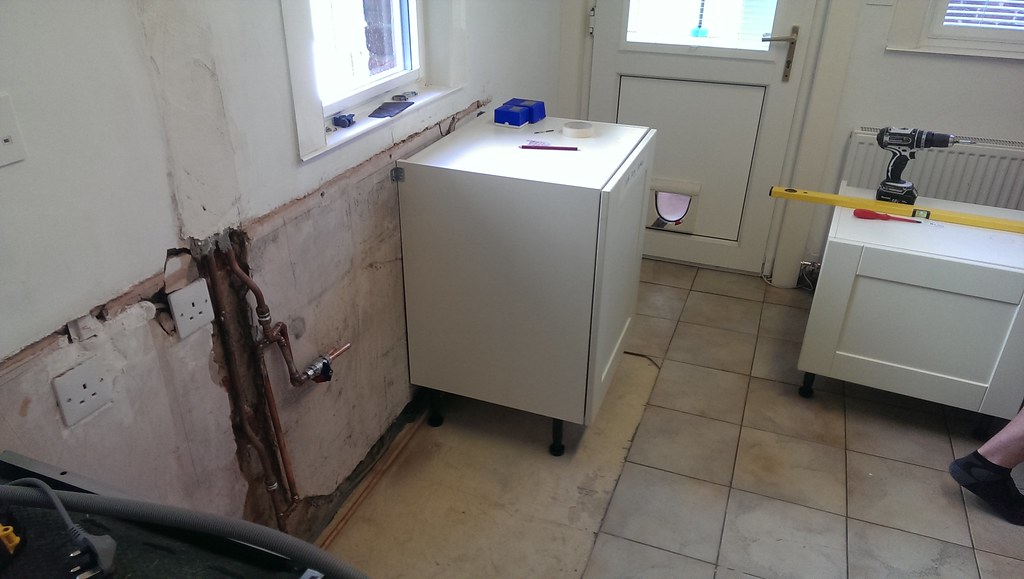 IMAG0182 by paulrockliffe, on Flickr
The problem I've had is that the walls aren't square and the plumbing is a nightmare because we put a kink in a pipe months ago bringing the hot water to the kitchen so that it would connect up to the existing plumbing. Unfortunately I couldn't remove the kink without hacking the wall to bits, so I had to do all sorts to get clearance on the dishwasher. And then the waste pipe had to be run behind the water pipes by recessing into the wall. By the time I was finished I was left with this:
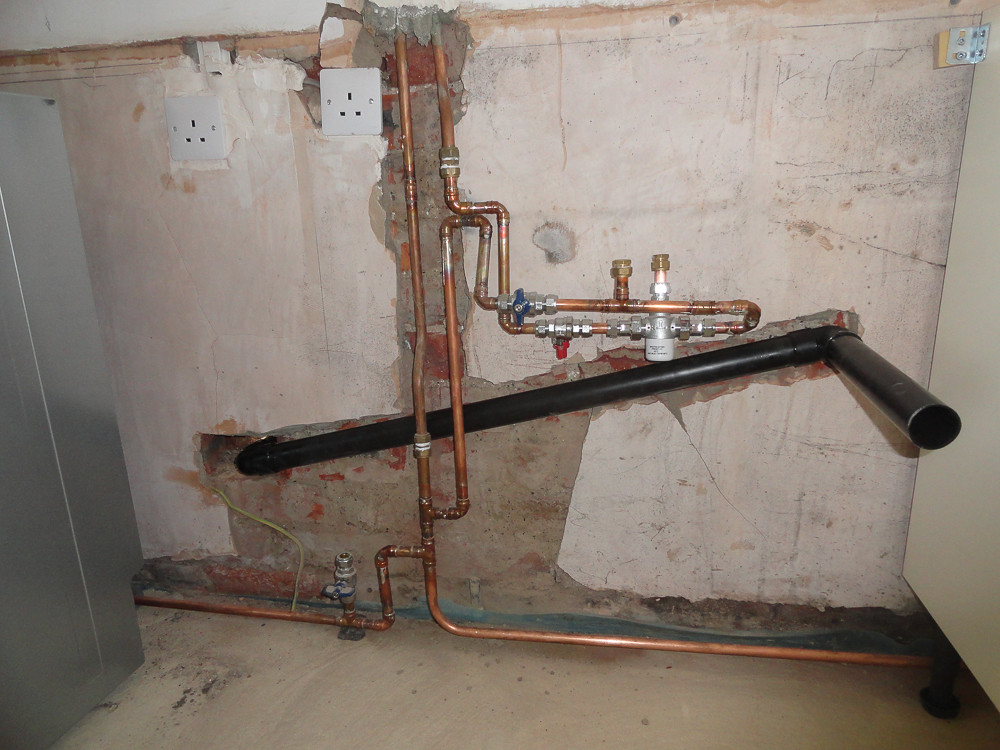 20140728-DSC00788.jpg by paulrockliffe, on Flickr
There's a thermostatic regulator for the hot water so I can set the hot to the right temp without having to dick about with a mixer ever time. The water is turned right up for the shower, so comes out far too hot as standard.
That was compounded by the wall not being square as it makes it impossible to check depths are consistent and that I'll be left with a consistent overhang on the worktops with no gaps at the back. I think I'm there now anyway.
Next problem was fixing the belfast sink unit to the bin unit, the heigh difference and narrow gap meant I couldn't clamp them together at the back, so I spent an hour scratching my head before coming up with this custom clamp, it's all screwed together in-situ:
 20140728-DSC00789.jpg by paulrockliffe, on Flickr
Next issue was getting the appliance doors on so that I could make sure everything will line up right at the front and be far enough back. This meant recessing some hinges with the router without any sort of guide. I surprised myself by getting them all perfect first time and ended up with this by the end of tonight:
 20140730-DSC00791.jpg by paulrockliffe, on Flickr
 20140730-DSC00793.jpg by paulrockliffe, on Flickr
Everything is plumbed apart from the wastes and the tap, everything is level too. I just need to check my worktop is going to be OK, then fix the appliances together/to the wall so they can't move about and mess up my door gaps. That'll be tricky, but I think I know what I'm doing now.
I'm reasonably confident the other side will be much easier as there's no plumbing to cock things up and the four units will all fix together nicely. Wall units will need some sockets recessing and there's an extractor flue to go through the wall, but nothing too complicated compared with what I've done so far. Hoping to get the lot finished by the end of August, but I'm sure something will come up!
Once that's done, inside we've just got the damp gable wall to finish decorating and the hallway to get coving in and decorated, then the entrance floor is to be removed and replaced. After that it's finishing off jobs and shelving, wardrobes etc. The end is vaguely in sight now, at least until we decide to tackle some of the other major projects we have planned.
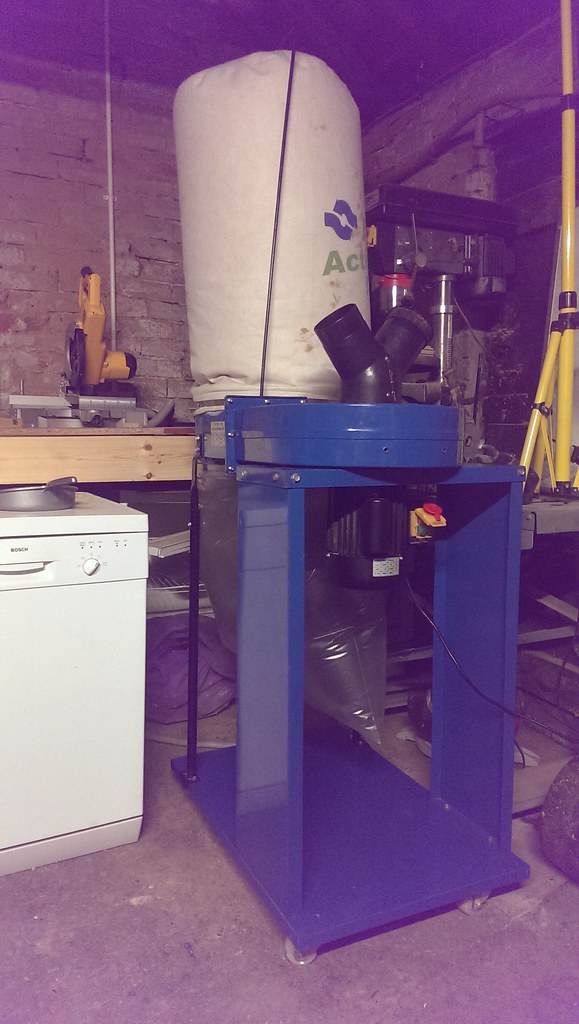
Last pic; collected this little eBay purchase tonight to replace my hoover that packed in at the weekend. Although I'm sure I can fix the hoover I took the opportunity to justify a new man-device:
 IMAG0184 by paulrockliffe, on Flickr
Total over-kill, but was a complete bargain. Need to find a hose adaptor for it and a length of hose so I can rig it up as a hoover, then keep my eye out for some cheap ducting going on eBay. Poor chap was selling because his neighbours keep complaining about the noise!
Grass continues to grow and has thickened up nicely, have been weeding most nights and not been able to get on top of them all, so I've treated the lawn tonight. Hopefully just the weeds will die!
IMAG0171 by paulrockliffe, on FlickrThe last of the carpets went in last Friday, which has made a huge difference to the house. I screwed the s
t out of the stairs the day before, so it's now completely solid and squeak-free:IMG-20140725-WA0024 by paulrockliffe, on FlickrIMG-20140725-WA0026 by paulrockliffe, on FlickrIMG-20140725-WA0028 by paulrockliffe, on FlickrAnd after 12 months of dialogue, changing specs and not being ready, we finally have a new kitchen...... in the conservatory:
IMAG0180 by paulrockliffe, on FlickrThat also arrived on Friday. It came via stabbedrat on here and we're really please with it, the quality appears to be exceptional, everything is rock solid and exactly as we wanted. We gutted the old kitchen on Sunday and made a start and then have been working in the evenings this week. I've mostly got one side of the room in now, it's taken a lot longer than I was hoping!
The first unit went in very quickly, once I'd worked out levels etc:
IMAG0182 by paulrockliffe, on FlickrThe problem I've had is that the walls aren't square and the plumbing is a nightmare because we put a kink in a pipe months ago bringing the hot water to the kitchen so that it would connect up to the existing plumbing. Unfortunately I couldn't remove the kink without hacking the wall to bits, so I had to do all sorts to get clearance on the dishwasher. And then the waste pipe had to be run behind the water pipes by recessing into the wall. By the time I was finished I was left with this:
20140728-DSC00788.jpg by paulrockliffe, on FlickrThere's a thermostatic regulator for the hot water so I can set the hot to the right temp without having to dick about with a mixer ever time. The water is turned right up for the shower, so comes out far too hot as standard.
That was compounded by the wall not being square as it makes it impossible to check depths are consistent and that I'll be left with a consistent overhang on the worktops with no gaps at the back. I think I'm there now anyway.
Next problem was fixing the belfast sink unit to the bin unit, the heigh difference and narrow gap meant I couldn't clamp them together at the back, so I spent an hour scratching my head before coming up with this custom clamp, it's all screwed together in-situ:
20140728-DSC00789.jpg by paulrockliffe, on FlickrNext issue was getting the appliance doors on so that I could make sure everything will line up right at the front and be far enough back. This meant recessing some hinges with the router without any sort of guide. I surprised myself by getting them all perfect first time and ended up with this by the end of tonight:
20140730-DSC00791.jpg by paulrockliffe, on Flickr20140730-DSC00793.jpg by paulrockliffe, on FlickrEverything is plumbed apart from the wastes and the tap, everything is level too. I just need to check my worktop is going to be OK, then fix the appliances together/to the wall so they can't move about and mess up my door gaps. That'll be tricky, but I think I know what I'm doing now.
I'm reasonably confident the other side will be much easier as there's no plumbing to cock things up and the four units will all fix together nicely. Wall units will need some sockets recessing and there's an extractor flue to go through the wall, but nothing too complicated compared with what I've done so far. Hoping to get the lot finished by the end of August, but I'm sure something will come up!
Once that's done, inside we've just got the damp gable wall to finish decorating and the hallway to get coving in and decorated, then the entrance floor is to be removed and replaced. After that it's finishing off jobs and shelving, wardrobes etc. The end is vaguely in sight now, at least until we decide to tackle some of the other major projects we have planned.
Last pic; collected this little eBay purchase tonight to replace my hoover that packed in at the weekend. Although I'm sure I can fix the hoover I took the opportunity to justify a new man-device:
IMAG0184 by paulrockliffe, on FlickrTotal over-kill, but was a complete bargain. Need to find a hose adaptor for it and a length of hose so I can rig it up as a hoover, then keep my eye out for some cheap ducting going on eBay. Poor chap was selling because his neighbours keep complaining about the noise!
Wow, 3 months without an update! How have you coped with not seeing the finished kitchen???
Just re-read the last couple of posts and remembered the lovely summer sunshine, it's properly dark and cold now, though the grass needs one last cut before winter next time it's dry enough...
Quite a lot has happened, though when I look at what I've not posted I wonder what I've been doing for the last three months!
Anyway, worktop on:
 IMAG0216 by paulrockliffe, on Flickr
Units all in on the opposite side:
 IMAG0199 by paulrockliffe, on Flickr
Wall units on and worktop cut:
 IMAG0208 by paulrockliffe, on Flickr
As you can see, fitting this worktop was a total pain in the arse! I routed out the cutout for the hob, three quarters depth in the conservatory, then lifted into place to finish off to minimise dust. The new dust extractor was brought into the house to help out! The top is jacked up and was raised and lowered several times while the top of the cabinets were adjusted to allow the ob to fit and holes were cut to allow me to bolt the two pieces together in situ:
 IMAG0224 by paulrockliffe, on Flickr
In and jointed:
 IMAG0229 by paulrockliffe, on Flickr
Wall tiles on:
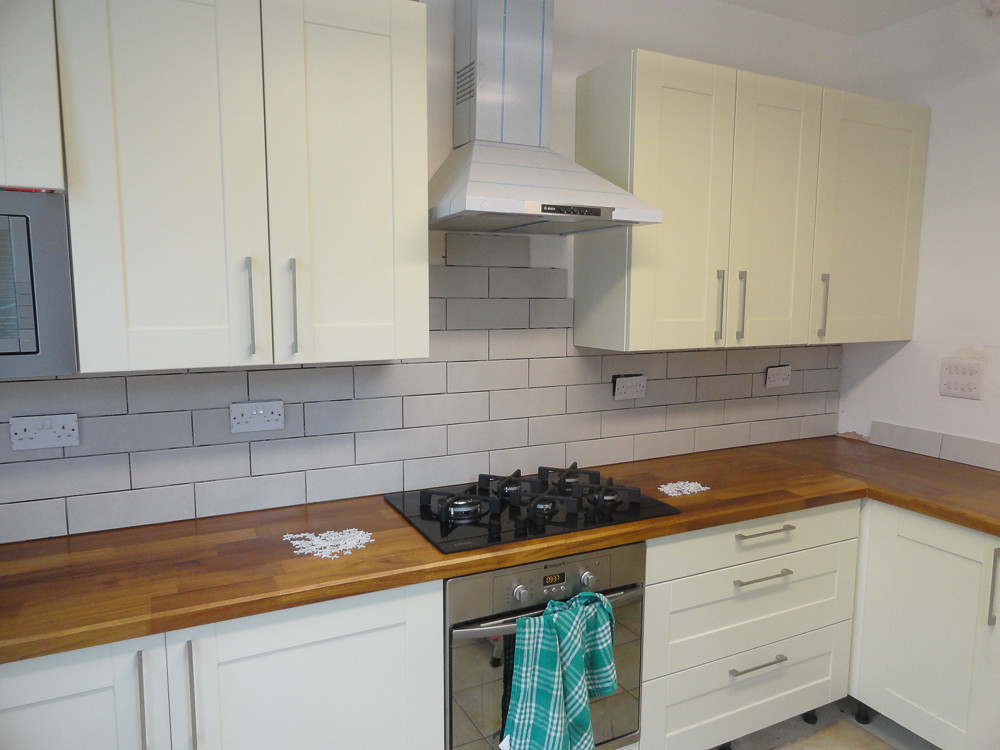 20140916-DSC00842.jpg by paulrockliffe, on Flickr
And grouted:
 20140917-DSC00844.jpg by paulrockliffe, on Flickr
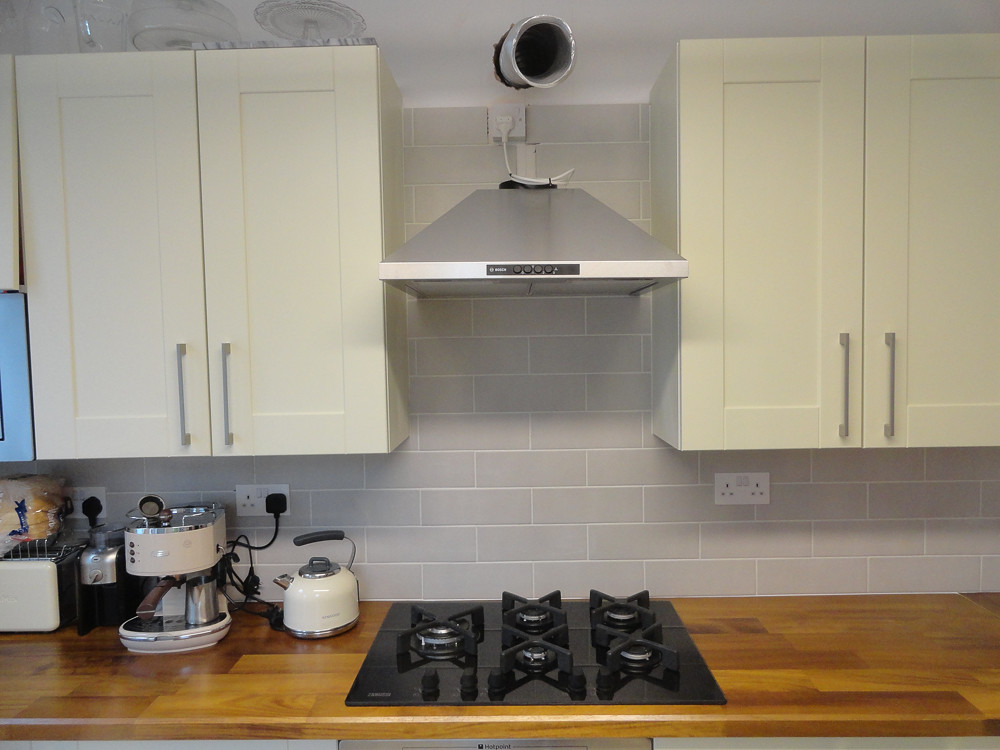
And the otherside:
 IMAG0254 by paulrockliffe, on Flickr
New floor tiles down:
 20141022-DSC00854.jpg by paulrockliffe, on Flickr
Finished:
 IMAG0253 by paulrockliffe, on Flickr
Well almost anyway, few little jobs to do and plinths and a few bits of skirting/architrave to do. I need to make and paint some MDF end panels and a couple of filler panels, but these aren't hugely important. There's a shelf to go in the gap next to the washing machine that matches the worktop and a couple of shelves for coffee etc to go next to the window, but they can wait as well.
When I fitted the hob I remembered that there's an odd pipe in the workshop, so I had the gas chap look at it while he was here:
 IMAG0231 by paulrockliffe, on Flickr
He thinks it's probably gas and I should open it to see if it still works. I had a look and there's been a replacement of the gas pipe going into the house at some point, so perhaps this was disconnected at the time, but certainly interesting to see if a gas heater could be fitted to warm me up in winter.
I'm working through cosmetic jobs, trying to get the place looking like a home in time for Christmas, so the next job was to cover up the boiler. I've had a pile of oak sat ready for ages, so started cutting lap joints with the router and got this screwed together:
 20140921-DSC00848.jpg by paulrockliffe, on Flickr
Everything is perfectly square as I've planed the bottom to match the slope of the floor. Lifted in place, packed out to the right place and screwed in place. Absolutely rock solid!
 20140922-DSC00849.jpg by paulrockliffe, on Flickr
Architraves on:
url=https://flic.kr/p/p9MgEn] [/url] IMAG0264 by paulrockliffe, on Flickr
Here's the system I made for alp jointing the door frames. The four outer bits are providing support for the router base and the cross piece is the stop. Depth is set and each piece was cut. Need a router table for this stuff in future to speed things up!
 IMAG0262 by paulrockliffe, on Flickr
Frame glued and clamped:
 IMAG0263 by paulrockliffe, on Flickr
Door panels are 12mm MDF with an oak veneer and the finished thing looks like this:
 IMAG0267 by paulrockliffe, on Flickr
I've since added handles and catches to the bottom doors and they work great. The top door just has a bolt in the bottom corner to hold it shut as it's only opened occasionally.
I know that the doors are overly big for the framing, but I learned that when the wood was already sat cut and paid for, so we'll see what happens.
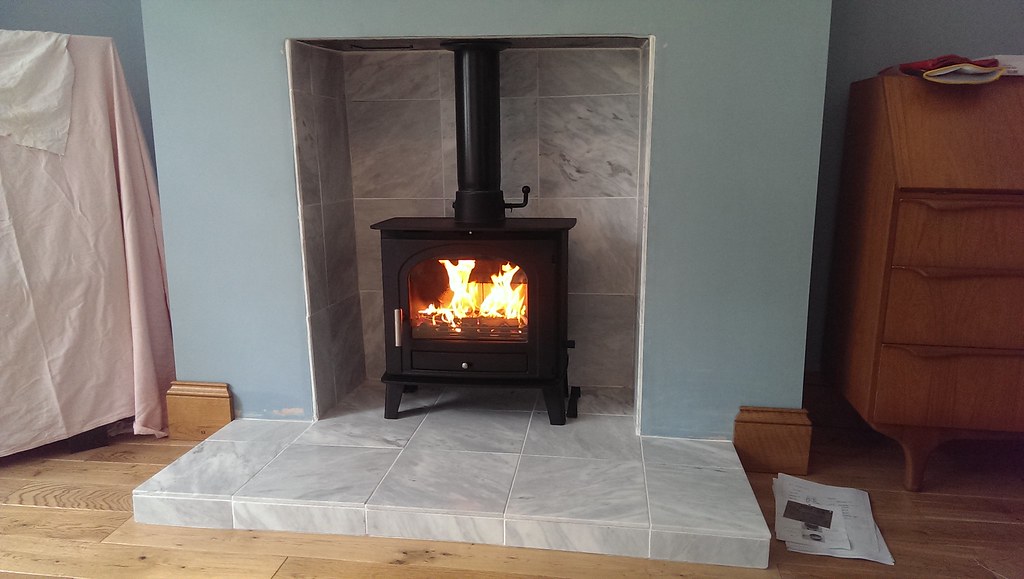
Woodburner was fitted in the living room too:
 IMAG0249 by paulrockliffe, on Flickr
Really pleased with this, keeps the room toasty and is happy burning smokeless or all the wood I've stripped from the house.
When this went in we had scaffold up the chimney, so I popped up for a look one evening:
 20140902-DSC00815.jpg by paulrockliffe, on Flickr
 20140902-DSC00818.jpg by paulrockliffe, on Flickr
 20140902-DSC00827.jpg by paulrockliffe, on Flickr
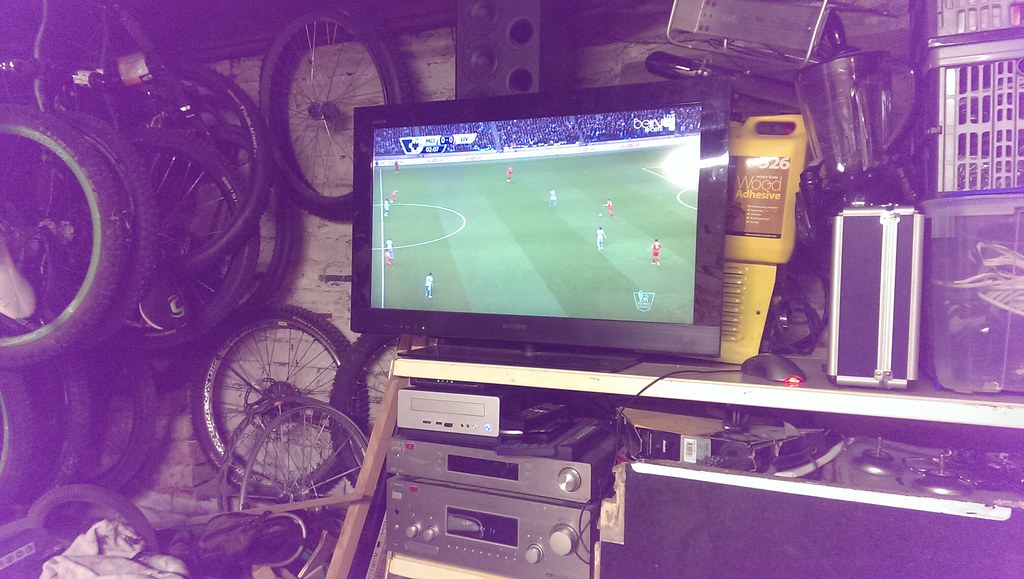
I got round to sorting out the wiring to the workshop, so I've got XBMC hooked up in there now, internet and tv signal, so access to New Yankee Workshop that's sat on my server and live sport outside!
 IMAG0237 by paulrockliffe, on Flickr
Made good progress on the alarm system, with it all wired up properly and working now. This was a massive pain in the arse. But I've got laptop access now and it should be fairly easy to fine-tune everything and I may even programme some outputs to some relays so I can put the outside lights on a timer and have the flood lights fire if the alarm goes off
I discovered that old floorboards burn very quickly and are far more valuable to me as kindling, so whenever the F1 or football is on I stand in front of the TV swinging my chopper. I've got 10 sacks full now, this was the result from the F1 at the weekend:
 IMAG0274_BURST002 by paulrockliffe, on Flickr
I've ordered more sacks and have started separating out the floorboards when I collect firewood from my pile, think there's going to be years worth when Iv'e worked right through it!
I've also made good progress on clearing my garage space that has been piled up with wood. I've got one last bit to saw up and stack and piles of crap for the tip, then I'll have it back. SHort term I'm going to move my dusty tools in there so the rest of my stuff is kept cleaner. Long term the dividing wall is coming down to give a much bigger space.
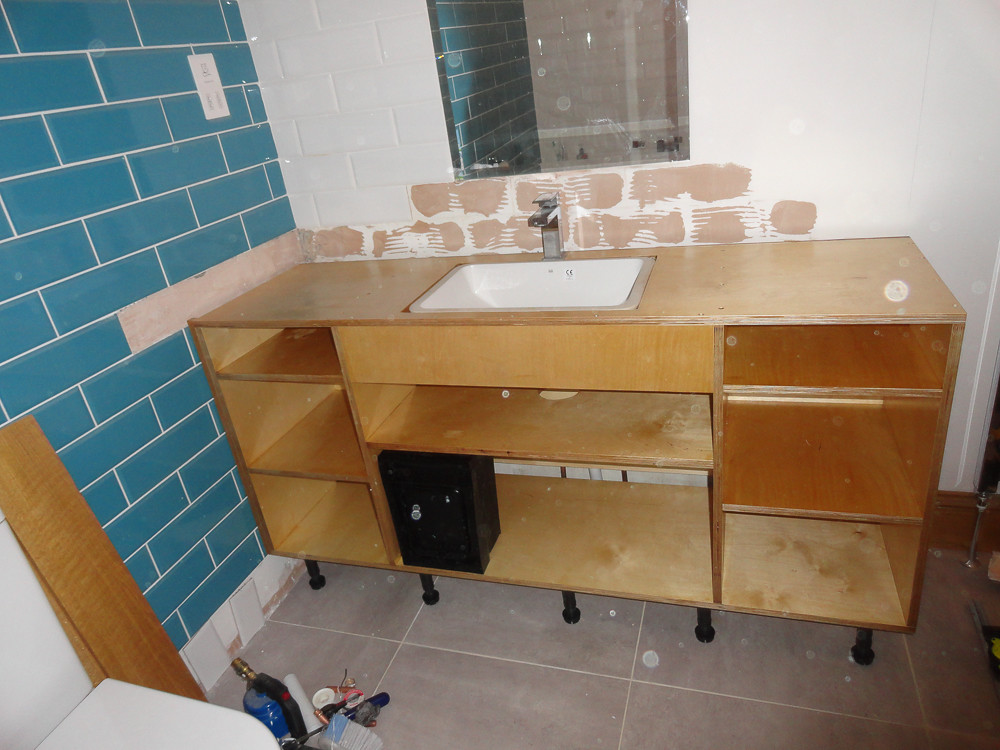
The doors for my bathroom cabinet finally arrived, so that's now one step closer to being finished:
 20141024-DSC00855.jpg by paulrockliffe, on Flickr
Plinth and an end panel to make to finish this off.
We've also sealed and repainted the damp walls, though some has come back through, especially downstairs. I've started clearing the cavity again, but think there's another weekends work at least on that one side. I think there's a row of tie bricks at first floor level, so they'll need clearing above too. And there's half of the other gable wall and the rear corner to do as well. Problem is that it rips my hands to shreds and it takes a fortnight for the cuts to heal enough to go again!
I've been instructed that there needs to be a mantlepiece in the lounge ready for Christmas, so I've got some more wood ordered and that'll be my next project. I've also got pantry shelving to do fairly soon, but I've a week off work at the end of the month, so hopefully I'll have more to report shortly. Hopefully I'll do a better job of keeping this up to date too!
Just re-read the last couple of posts and remembered the lovely summer sunshine, it's properly dark and cold now, though the grass needs one last cut before winter next time it's dry enough...
Quite a lot has happened, though when I look at what I've not posted I wonder what I've been doing for the last three months!
Anyway, worktop on:
IMAG0216 by paulrockliffe, on FlickrUnits all in on the opposite side:
IMAG0199 by paulrockliffe, on FlickrWall units on and worktop cut:
IMAG0208 by paulrockliffe, on FlickrAs you can see, fitting this worktop was a total pain in the arse! I routed out the cutout for the hob, three quarters depth in the conservatory, then lifted into place to finish off to minimise dust. The new dust extractor was brought into the house to help out! The top is jacked up and was raised and lowered several times while the top of the cabinets were adjusted to allow the ob to fit and holes were cut to allow me to bolt the two pieces together in situ:
IMAG0224 by paulrockliffe, on FlickrIn and jointed:
IMAG0229 by paulrockliffe, on FlickrWall tiles on:
20140916-DSC00842.jpg by paulrockliffe, on FlickrAnd grouted:
20140917-DSC00844.jpg by paulrockliffe, on FlickrAnd the otherside:
IMAG0254 by paulrockliffe, on FlickrNew floor tiles down:
20141022-DSC00854.jpg by paulrockliffe, on FlickrFinished:
IMAG0253 by paulrockliffe, on FlickrWell almost anyway, few little jobs to do and plinths and a few bits of skirting/architrave to do. I need to make and paint some MDF end panels and a couple of filler panels, but these aren't hugely important. There's a shelf to go in the gap next to the washing machine that matches the worktop and a couple of shelves for coffee etc to go next to the window, but they can wait as well.
When I fitted the hob I remembered that there's an odd pipe in the workshop, so I had the gas chap look at it while he was here:
IMAG0231 by paulrockliffe, on FlickrHe thinks it's probably gas and I should open it to see if it still works. I had a look and there's been a replacement of the gas pipe going into the house at some point, so perhaps this was disconnected at the time, but certainly interesting to see if a gas heater could be fitted to warm me up in winter.
I'm working through cosmetic jobs, trying to get the place looking like a home in time for Christmas, so the next job was to cover up the boiler. I've had a pile of oak sat ready for ages, so started cutting lap joints with the router and got this screwed together:
20140921-DSC00848.jpg by paulrockliffe, on FlickrEverything is perfectly square as I've planed the bottom to match the slope of the floor. Lifted in place, packed out to the right place and screwed in place. Absolutely rock solid!
20140922-DSC00849.jpg by paulrockliffe, on FlickrArchitraves on:
url=https://flic.kr/p/p9MgEn]
[/url] IMAG0264 by paulrockliffe, on FlickrHere's the system I made for alp jointing the door frames. The four outer bits are providing support for the router base and the cross piece is the stop. Depth is set and each piece was cut. Need a router table for this stuff in future to speed things up!
IMAG0262 by paulrockliffe, on FlickrFrame glued and clamped:
IMAG0263 by paulrockliffe, on FlickrDoor panels are 12mm MDF with an oak veneer and the finished thing looks like this:
IMAG0267 by paulrockliffe, on FlickrI've since added handles and catches to the bottom doors and they work great. The top door just has a bolt in the bottom corner to hold it shut as it's only opened occasionally.
I know that the doors are overly big for the framing, but I learned that when the wood was already sat cut and paid for, so we'll see what happens.
Woodburner was fitted in the living room too:
IMAG0249 by paulrockliffe, on FlickrReally pleased with this, keeps the room toasty and is happy burning smokeless or all the wood I've stripped from the house.
When this went in we had scaffold up the chimney, so I popped up for a look one evening:
20140902-DSC00815.jpg by paulrockliffe, on Flickr20140902-DSC00818.jpg by paulrockliffe, on Flickr20140902-DSC00827.jpg by paulrockliffe, on FlickrI got round to sorting out the wiring to the workshop, so I've got XBMC hooked up in there now, internet and tv signal, so access to New Yankee Workshop that's sat on my server and live sport outside!
IMAG0237 by paulrockliffe, on FlickrMade good progress on the alarm system, with it all wired up properly and working now. This was a massive pain in the arse. But I've got laptop access now and it should be fairly easy to fine-tune everything and I may even programme some outputs to some relays so I can put the outside lights on a timer and have the flood lights fire if the alarm goes off
I discovered that old floorboards burn very quickly and are far more valuable to me as kindling, so whenever the F1 or football is on I stand in front of the TV swinging my chopper. I've got 10 sacks full now, this was the result from the F1 at the weekend:
IMAG0274_BURST002 by paulrockliffe, on FlickrI've ordered more sacks and have started separating out the floorboards when I collect firewood from my pile, think there's going to be years worth when Iv'e worked right through it!
I've also made good progress on clearing my garage space that has been piled up with wood. I've got one last bit to saw up and stack and piles of crap for the tip, then I'll have it back. SHort term I'm going to move my dusty tools in there so the rest of my stuff is kept cleaner. Long term the dividing wall is coming down to give a much bigger space.
The doors for my bathroom cabinet finally arrived, so that's now one step closer to being finished:
20141024-DSC00855.jpg by paulrockliffe, on FlickrPlinth and an end panel to make to finish this off.
We've also sealed and repainted the damp walls, though some has come back through, especially downstairs. I've started clearing the cavity again, but think there's another weekends work at least on that one side. I think there's a row of tie bricks at first floor level, so they'll need clearing above too. And there's half of the other gable wall and the rear corner to do as well. Problem is that it rips my hands to shreds and it takes a fortnight for the cuts to heal enough to go again!
I've been instructed that there needs to be a mantlepiece in the lounge ready for Christmas, so I've got some more wood ordered and that'll be my next project. I've also got pantry shelving to do fairly soon, but I've a week off work at the end of the month, so hopefully I'll have more to report shortly. Hopefully I'll do a better job of keeping this up to date too!
Edited by paulrockliffe on Friday 7th November 13:22
Thanks chaps, it's starting to come together, but were at the point were there's hundreds of little jobs that I don't have a lot of enthusiasm for. Will have to force mysef to push past that this side of Christmas… I always find something more interesting to do, usually chopping up wood or moving things aroudn the workshop.
I think if I did the oak framing again I'd use some cross members on the doors. I always start out trying to keep things simple, then end up thinking I should have made things a bit more ornate! I can always redo them if they warp.
I need to buy some adapters for the extractor so I can use it with 'normal' tools. I tried a step-down adapter but it restricts the airflow so much that it ruins the efficiency. While it still works, the machine doesn't like it and it's barely better than the hoover I was using. I'll work out some sort of manifold so that where a machine has two or three pipes they don't get amalgamated before the vacuum hose and I'll make some stand-alone things I can position near the machine to pick up any extra bits. I did fix the original hoover, but it packed in again when we were working our way through the cavity wall. I've since established that it was the on-off switch that was broken, it had got dust in and worn the rocker away! Fortunately a switch from a computer PSU that tterminated itself 10 years ago fitted exactly, so that's back up and running ready for more cavity walls on Sunday.
The worktop looks good, but the joint has lifted a bit at the rear when screwing it down to the cabinets, so I will have to sand and varnish the joint again at some point.
I'd be very impressed if you managed to overtake me, your house must be getting on for 10 times the size! Your only advantage is that the scale of your projects means you must have the budget to get a lot of trades in to help things progress quickly. I'd get it properly in the neck if the house was much bigger as we're 18 months in now and still a good bit off being properly finished.
Yes it's Lanchester, are you local as well?
The tiles are from Topps, their Diamante range I think off the top of my head. They're good, btu I found the white ones were a mm shorter, which caused issues getting them to line up!
paulwirral said:
I had a house in one of the streets behind about 15 years ago , railway related , stand on the bridge on the track and it's the one extended out in second hand brick .
My in laws live up the road from you , I thought I recognised the area .
Small world! My in laws live up the road from you , I thought I recognised the area .
When you stand on that bridge there's a large patch of land that appears to be someone's garden, hugely disproportionate to the size of any of the houses and not directly attached to any, do you know anything about how that came about?
I've never seen a horse on there and it looks like it's been mown regularly these days. There's a couple of wooden sheds at one end, but there's no access from any house that I can see. it looks like someone's lawn, but it's odd that someone would want that without it being attached to the house. I've never seen anyone use the land, but I don't go past all that often really.
On Google Maps you can see a large house that's hidden from the railway and the road that's set in a decent sized garden to the south of that land, if I was in that house or either of the two to the side of it I'd want to buy the land to create a really nice garden, but it's strange as it is at the moment.
Incidentaly I've just noticed that there's a long strip of lawn behind Beck View, that looks as if one of the houses has acquired most of the back gardens there at some point too.
I don't know if it's the same all around the area, but our house was held under Copyhold and had some sort of link or ownership of the small park area to the north of our garden at some point - no real info on that came to light during the purchase. Maybe the Copyhold system led to some random owners of bits of land with restricted options for consolidation in the past.
If your inlaws know anything I'd be interseted to know, just out of interest as mucha s anything else.
Erm..... I just tiled what was there.
I've since learned that this was wrong and the heat is likely to destroy the adhesive. I've been using the living room fireplace for a few months now without any problems, the grout has survived and the whole thing only needs a tiny bit of adhesion to keep the tiles on the wall, so I'm not overly concerned abotu that one.
The dining room, although it looks finished, I only just did the last of the grouting at the weekend and last night was the first time it's been fired up since the tiles went on, so I'll have to see whether it's OK or not.
I'm not sure how you should do it 'properly' as I'm not going to redo it unless they all fall off! I suppose there must be a suitable adhesive, or a cement mortar instead?
The other thing that might be wrong is that I think the plasterer used a fire-proof board behind it, I now think it should have been something else as the fireboard is only to resist actual fire for a period of time, rather than constant heat. Again, I don't know what I should have used but I'm hoping the tiles provide sufficient protection that it all stays up.
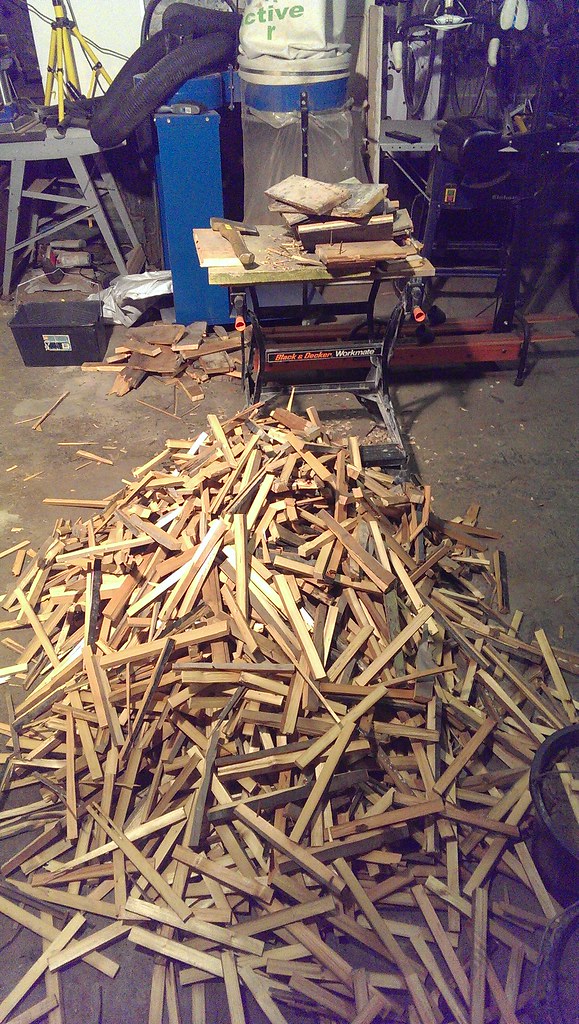
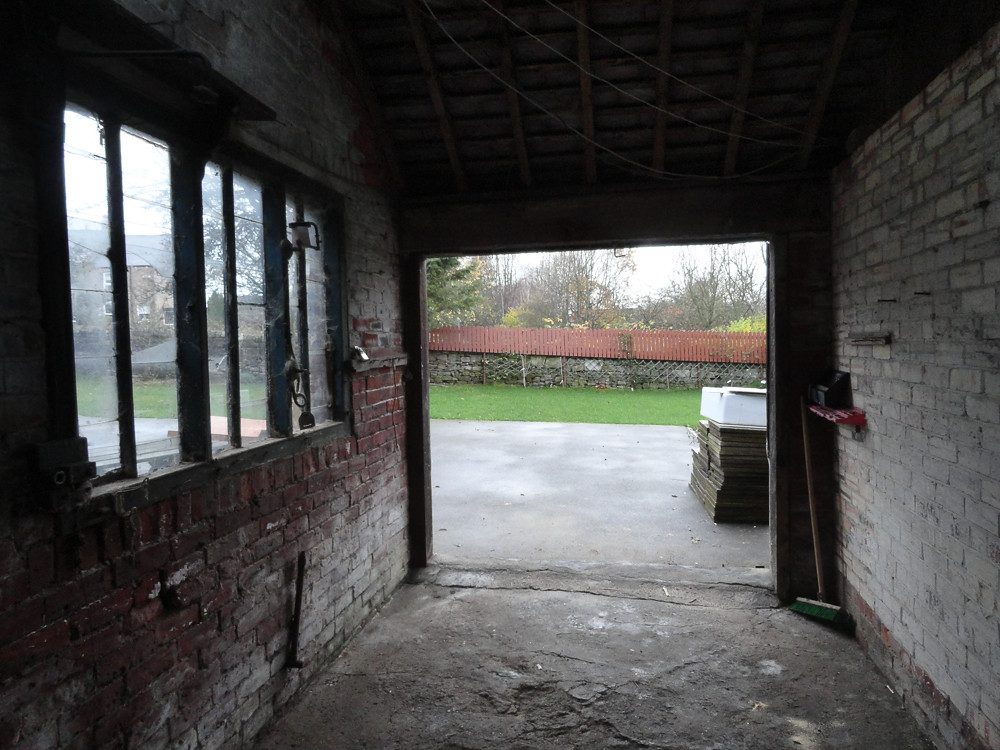
A few weeks ago I finished clearing out the garage, every piece of wood that was in the house when we bought it sawn up ready for the fire. I've not seen the inside of this for the best part of 18 months!
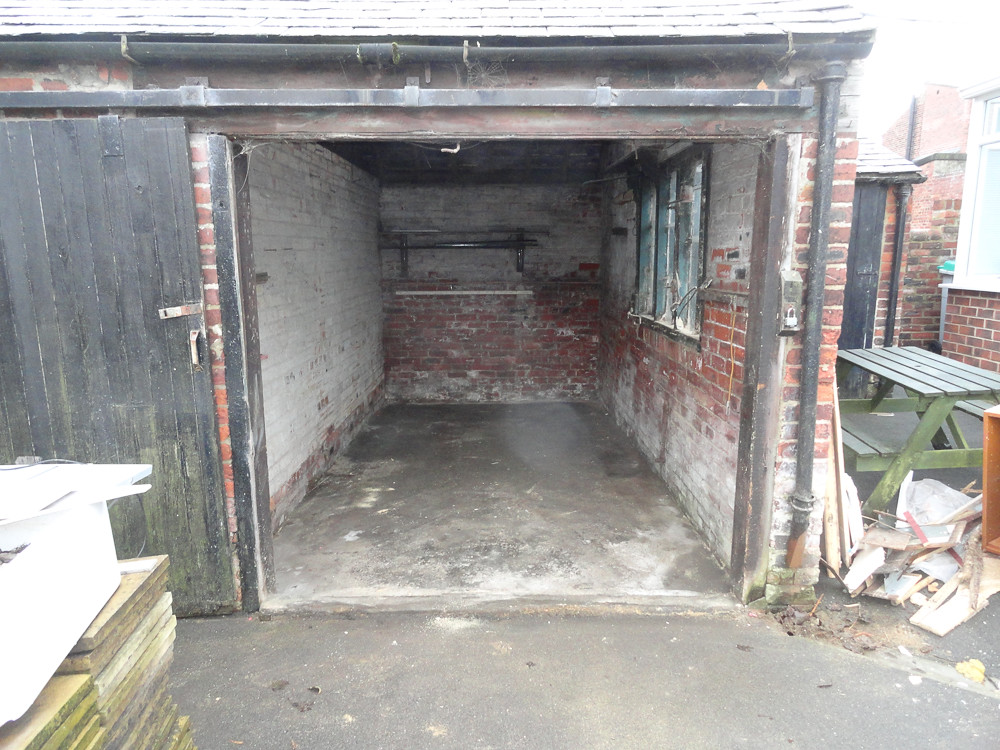 20141119-DSC00858.jpg by paulrockliffe, on Flickr
 20141119-DSC00860.jpg by paulrockliffe, on Flickr
And, despite my severe doubts, the car fits in!
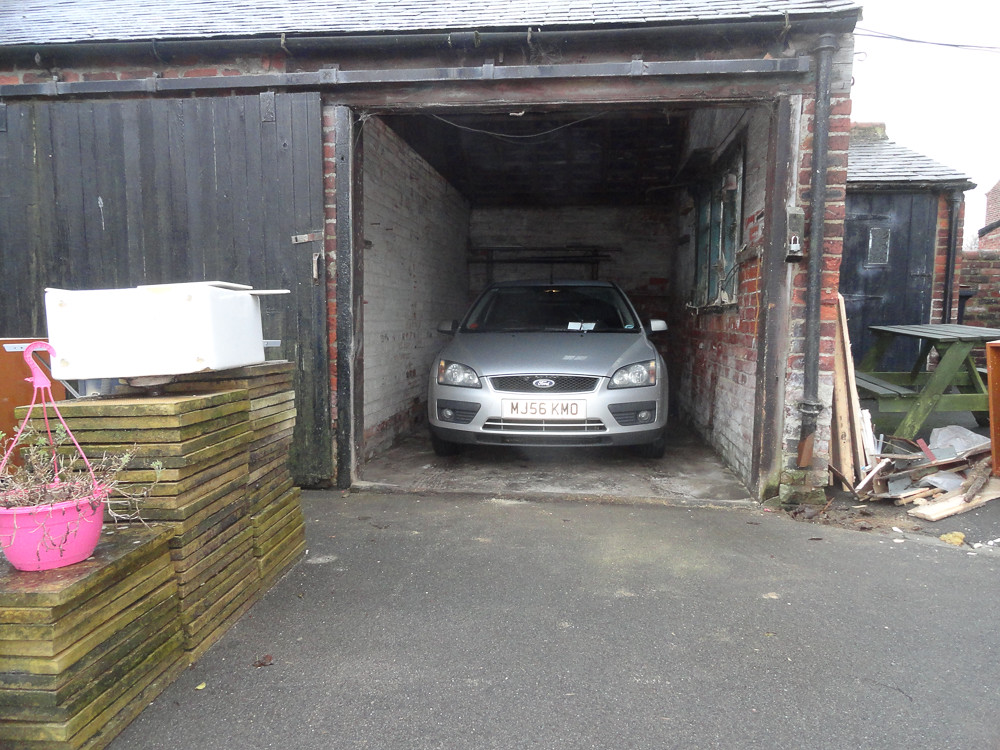 20141119-DSC00861.jpg by paulrockliffe, on Flickr
With loads of room to spare too. It'll never go back in though. I've already cleared a load of stuff out of the workshop into there out of the way. I've made a sheet rack on the left hand wall so all my 8' x 4' sheets are no longer leaned against my bench stopping me doing any work. And I've moved one of my sets of shelves into there to hold all my wood stock. Another set of shelves has gone as part of a de-clutter and the TV is on the wall too.
Next job is to build a mezzanine between two of the roof trusses to get my bikes out of the way, then I'm looking at options for tarting up the whole building and knocking the wall out between the two rooms. More on that later, though it's budget dependent at the moment.
Anyway, I also discovered a second gas (?) pipe coming in!
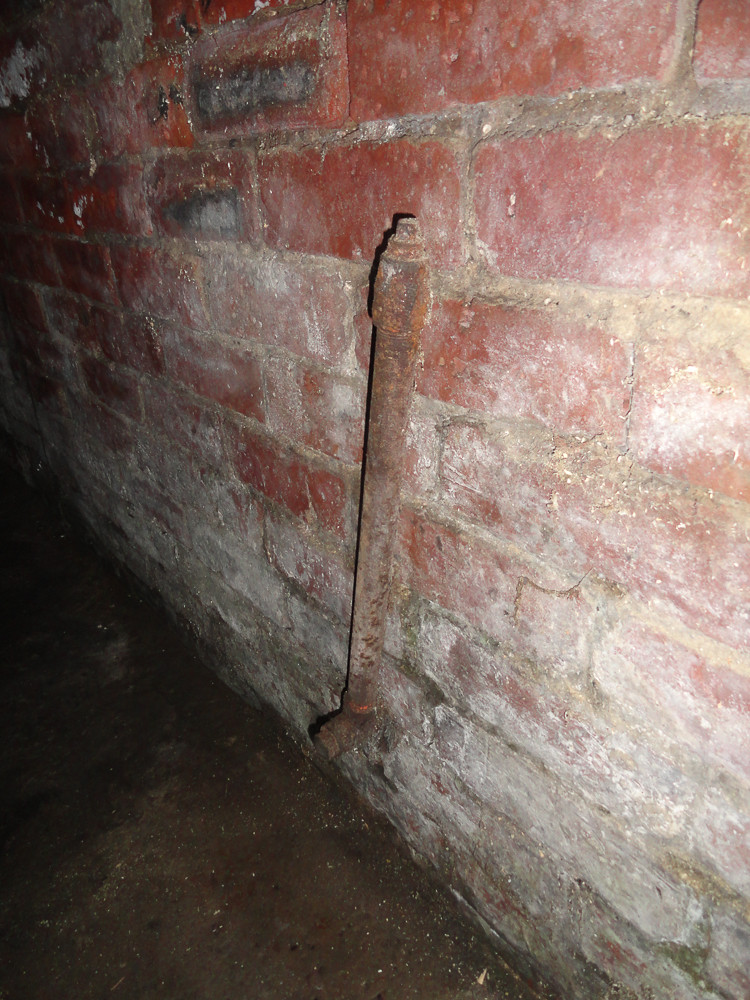 20141119-DSC00863.jpg by paulrockliffe, on Flickr
There's also the remnants of a gas light and the original electrics, which look proper dodgy!
20141119-DSC00858.jpg by paulrockliffe, on Flickr20141119-DSC00860.jpg by paulrockliffe, on FlickrAnd, despite my severe doubts, the car fits in!
20141119-DSC00861.jpg by paulrockliffe, on FlickrWith loads of room to spare too. It'll never go back in though. I've already cleared a load of stuff out of the workshop into there out of the way. I've made a sheet rack on the left hand wall so all my 8' x 4' sheets are no longer leaned against my bench stopping me doing any work. And I've moved one of my sets of shelves into there to hold all my wood stock. Another set of shelves has gone as part of a de-clutter and the TV is on the wall too.
Next job is to build a mezzanine between two of the roof trusses to get my bikes out of the way, then I'm looking at options for tarting up the whole building and knocking the wall out between the two rooms. More on that later, though it's budget dependent at the moment.
Anyway, I also discovered a second gas (?) pipe coming in!
20141119-DSC00863.jpg by paulrockliffe, on FlickrThere's also the remnants of a gas light and the original electrics, which look proper dodgy!
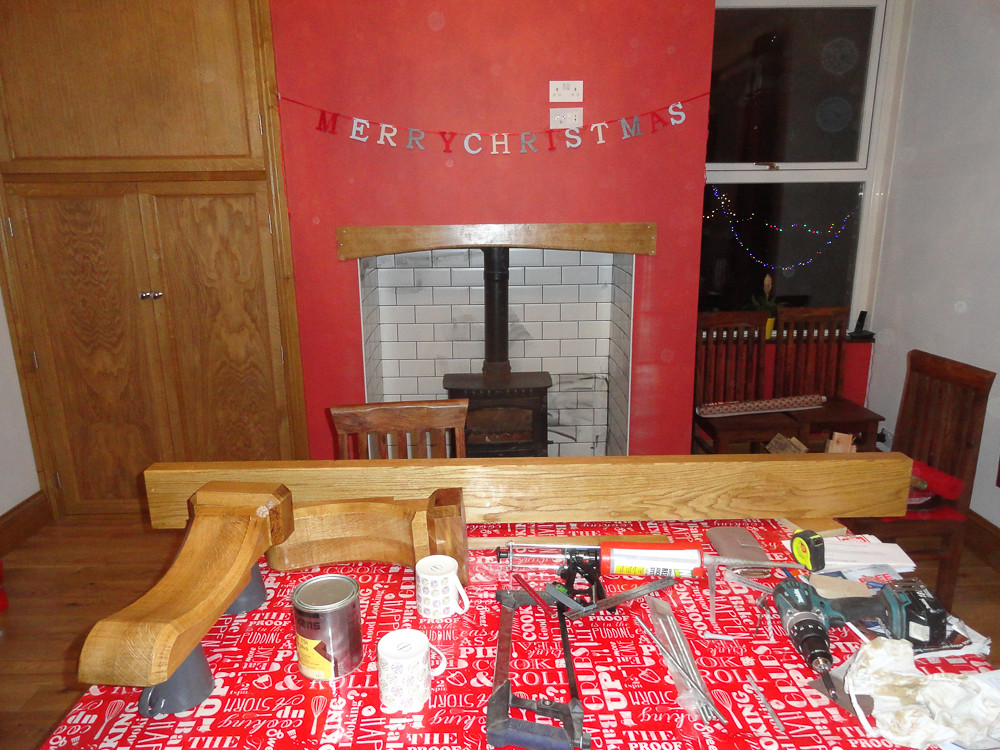
The last few weeks I've also been on a mission to get a couple of mantelpieces done in time for a Christmas party we're hosting this weekend. These things are never straightforward, first step was a drive up Weardale and over Hartside to collect a load of timber, then on to my parent's house to drop some stuff off for my Dad. So first day of my week off and nothing achieved. By the end of the week I was knee-deep in wood shavings, but I had everything cut and ready to finish and fit.
Timber:
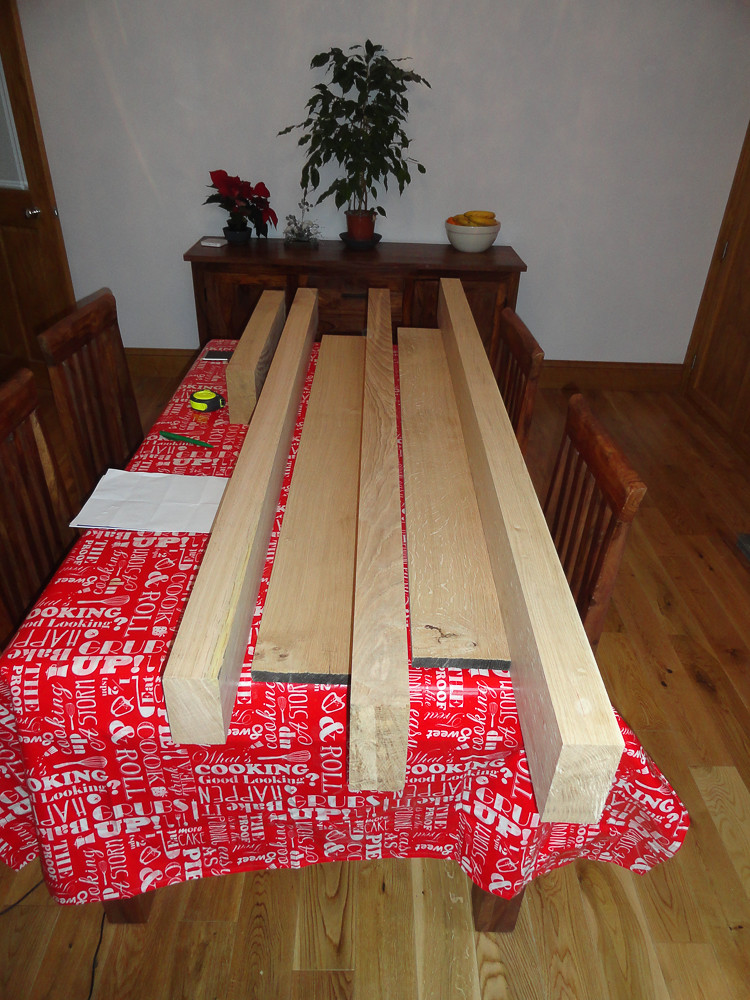 20141125-DSC00864.jpg by paulrockliffe, on Flickr
Every great design starts life as a fully dimensioned CAD plan:
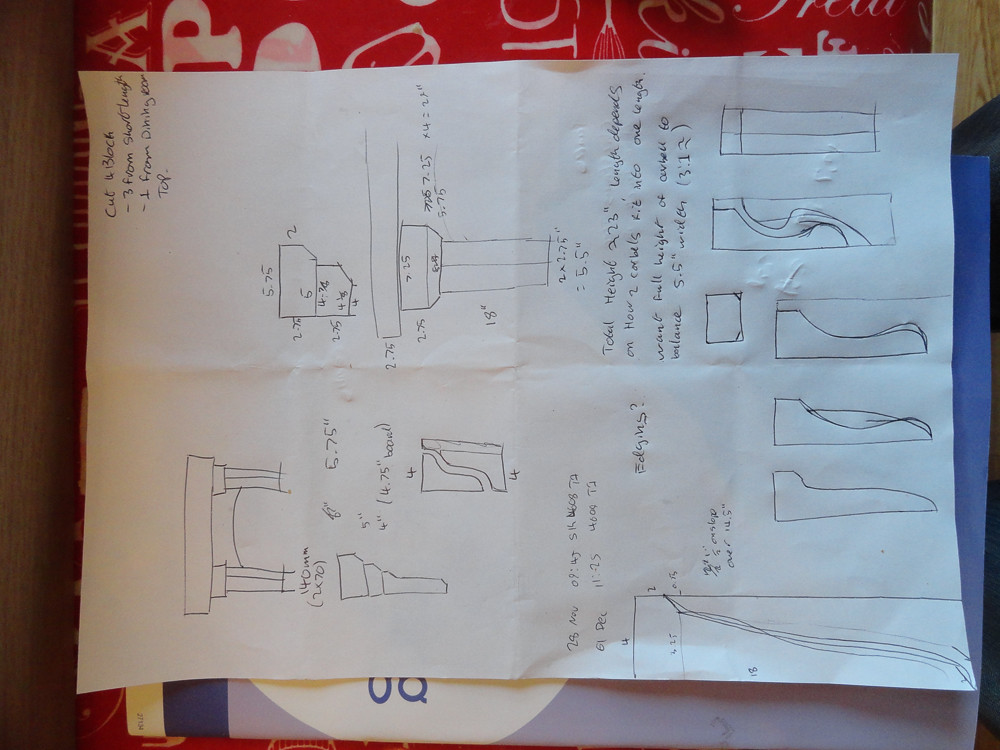 20141125-DSC00865.jpg by paulrockliffe, on Flickr
At this point I discovered that my Dad had authorised the timber to be supplied slightly thicker than requested. I'd specced the timber based on the maximum size I could cut neatly (I don't trust myself with a handsaw yet), but fortunately I'd taken a punt on a Radial Arm Saw the week before and this got me out of jail.
Corbels cut to length:
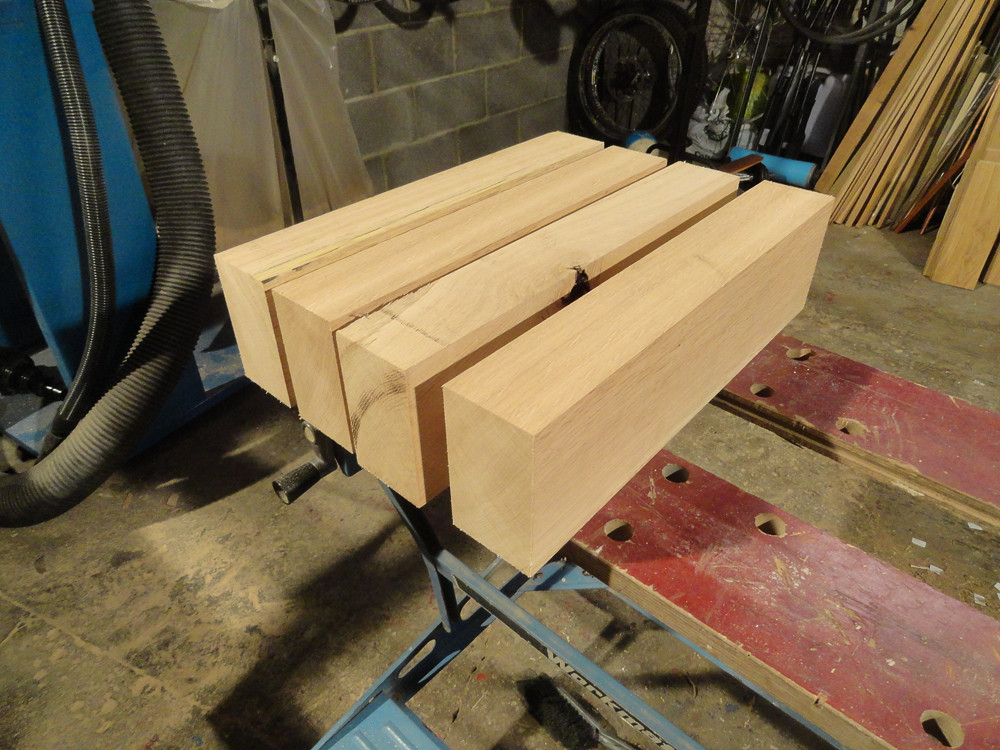 20141125-DSC00866.jpg by paulrockliffe, on Flickr
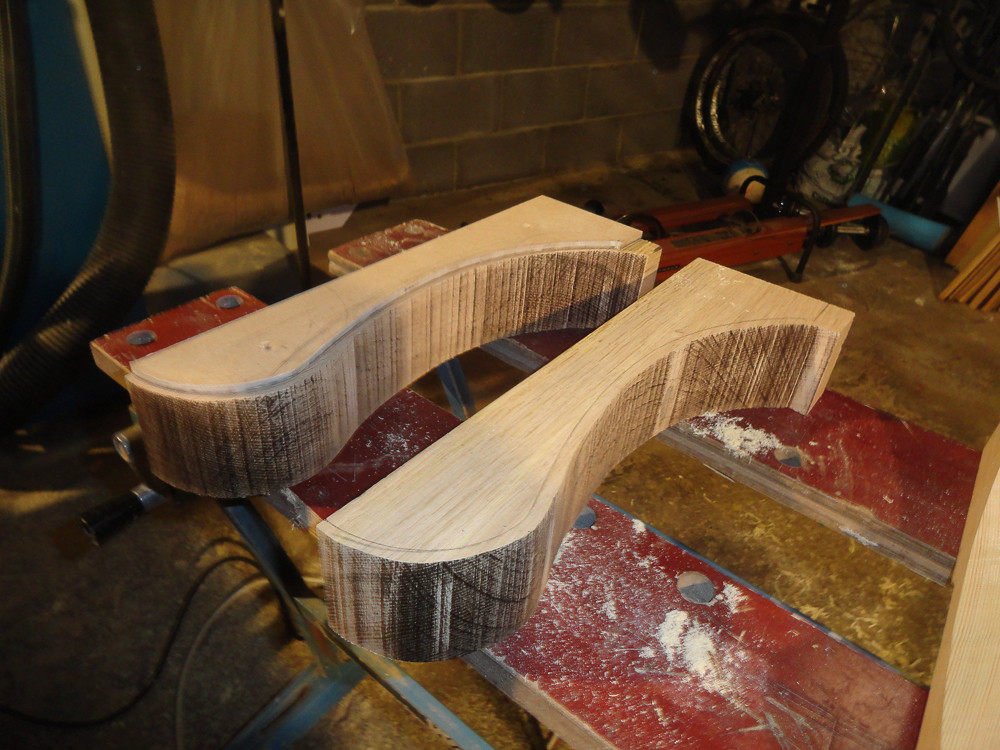
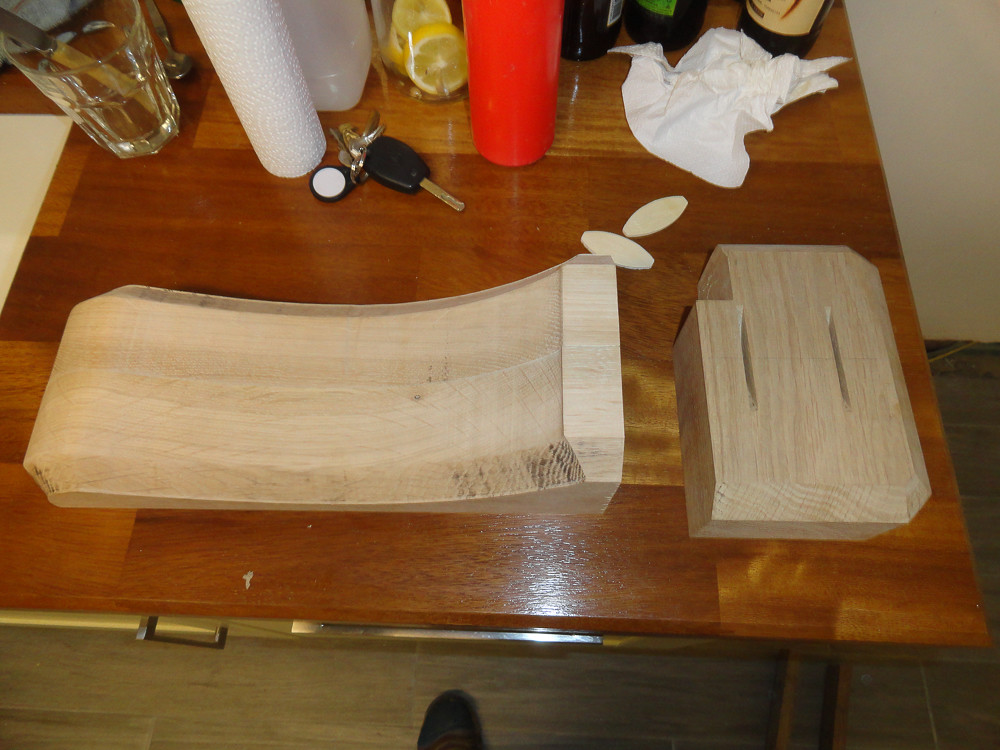
I then spent hours making a template for the profile of the corbels on a piece of MDF. This was transferred to the cut stock and these were then cut out with the bandsaw. I the design is such that two pieces came out of one length, the other two lengths are for the tops of the corbels.
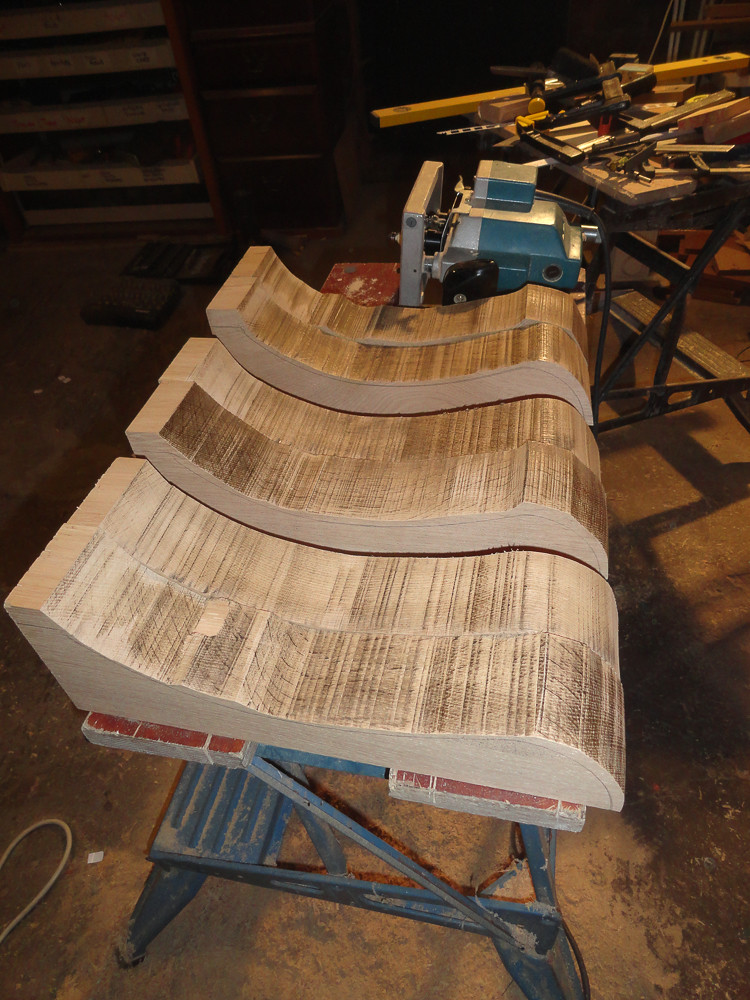 20141125-DSC00871.jpg by paulrockliffe, on Flickr
Believe it or not the wood is 2.75" thick and these were done on a very small bandsaw. Took ages and I honestly didn't think I'd get the last one out of the blade it was so blunt, but somehow it worked.
Template on:
 20141125-DSC00868.jpg by paulrockliffe, on Flickr
Used the router to trim back to the template and then put a .75" chamfer along the edges. A couple of dwell marks that I'm not overly happy about, though these aren't visible on the finished job. I've got a big new router that's going in a table that will hopefully help with these next time.
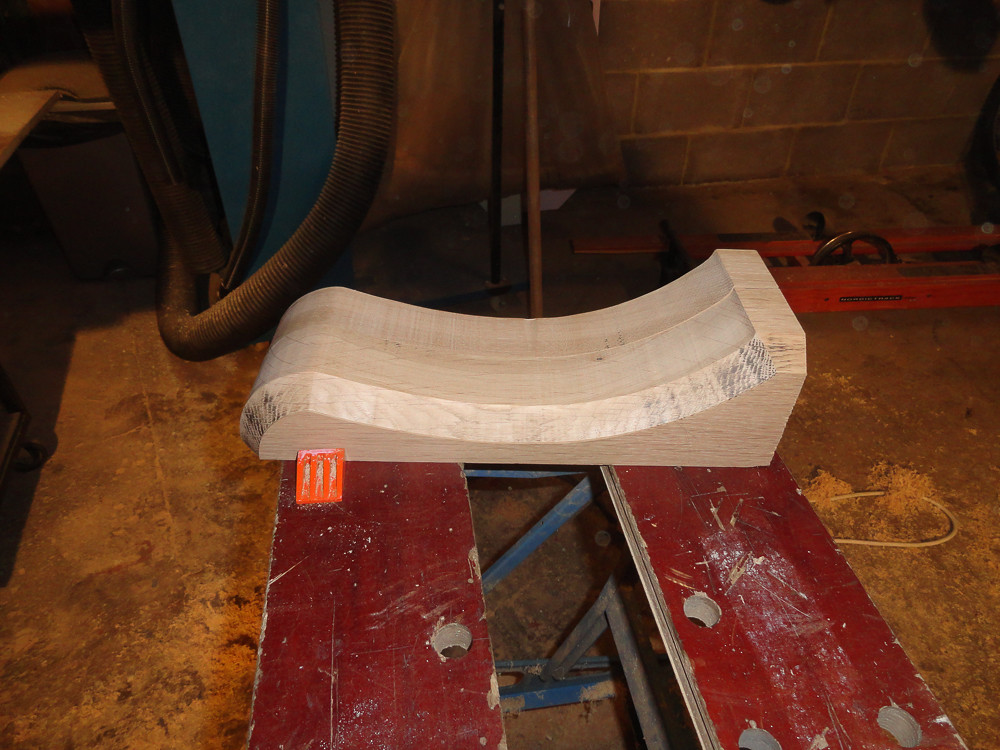 20141125-DSC00869.jpg by paulrockliffe, on Flickr
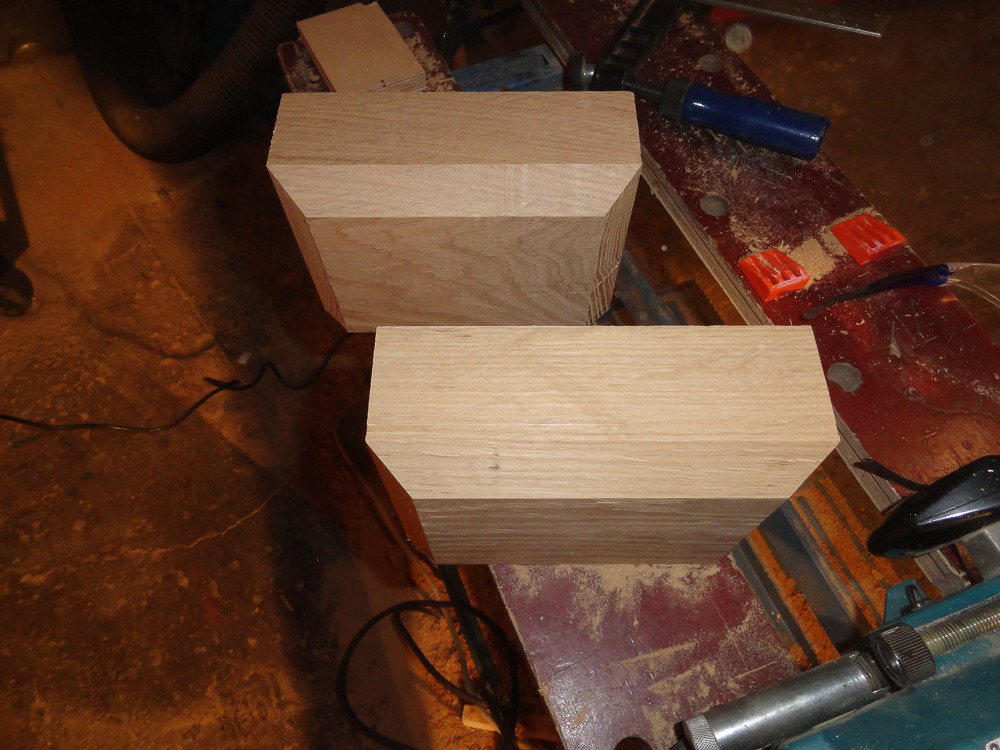
Chamfer on the corbel tops:
 20141125-DSC00872.jpg by paulrockliffe, on Flickr
Finally found a use for the £12 Axminster biscuit jointer I picked up a couple of years ago, as I keep telling the boss, these things always come in handy eventually:
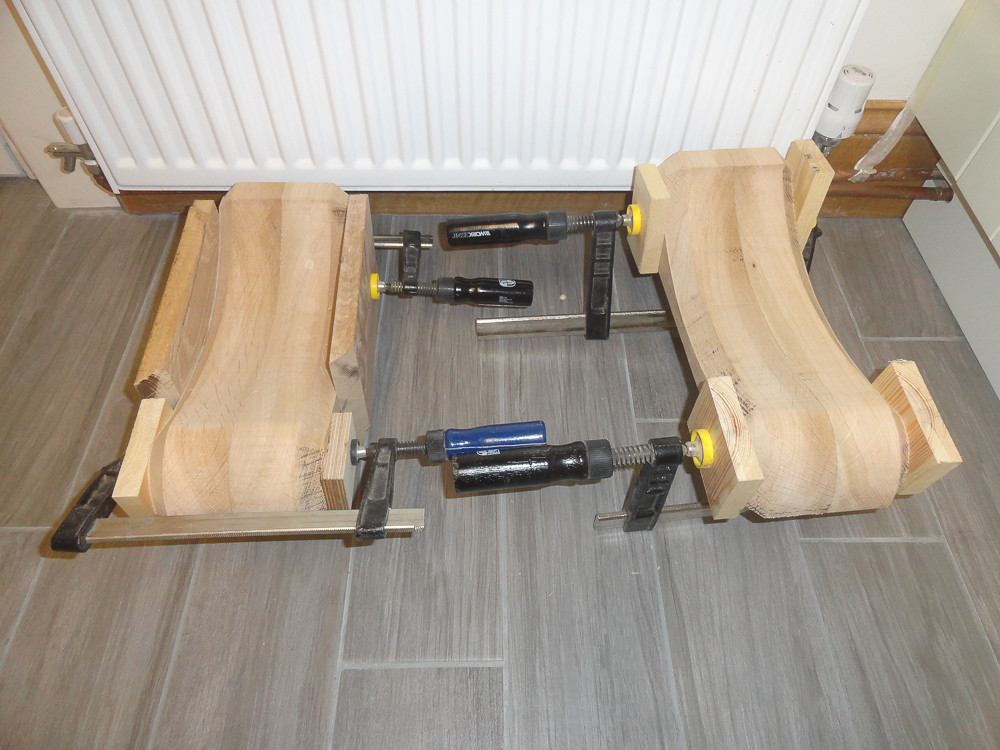 20141125-DSC00873.jpg by paulrockliffe, on Flickr
More biscuits:
 20141126-DSC00877.jpg by paulrockliffe, on Flickr
And more glue:
 20141126-DSC00878.jpg by paulrockliffe, on Flickr
My bottom board needed a gentle curve on it. The internet suggested some pins and a bit of thin ply:
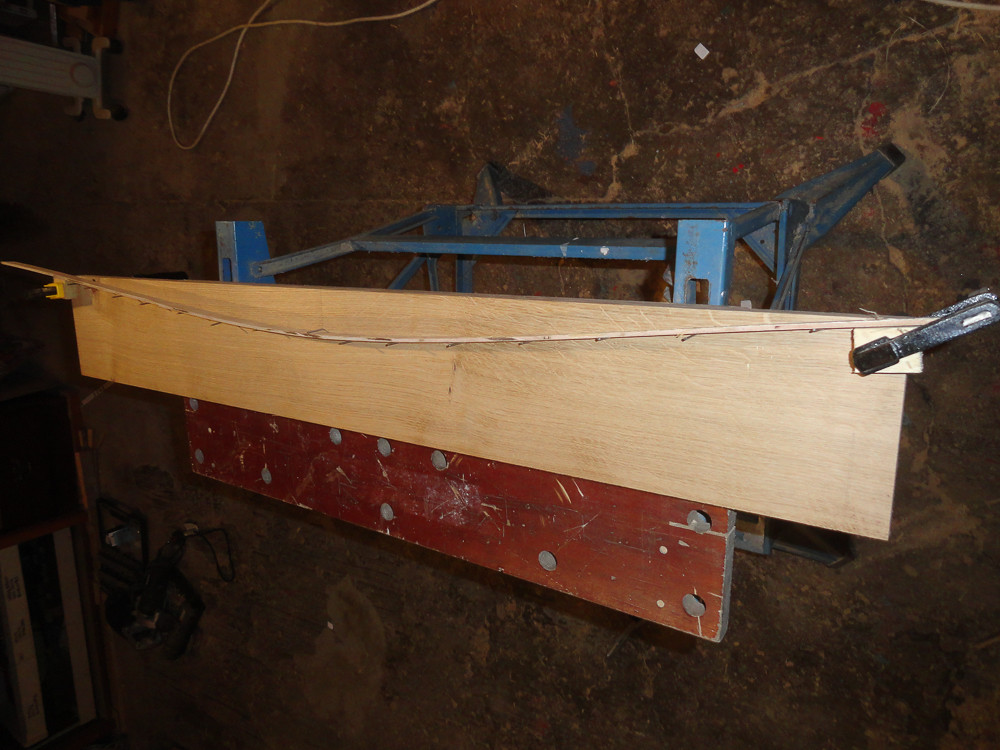 20141126-DSC00879.jpg by paulrockliffe, on Flickr
Marked and rough-cut on the band saw (still with blunt blade):
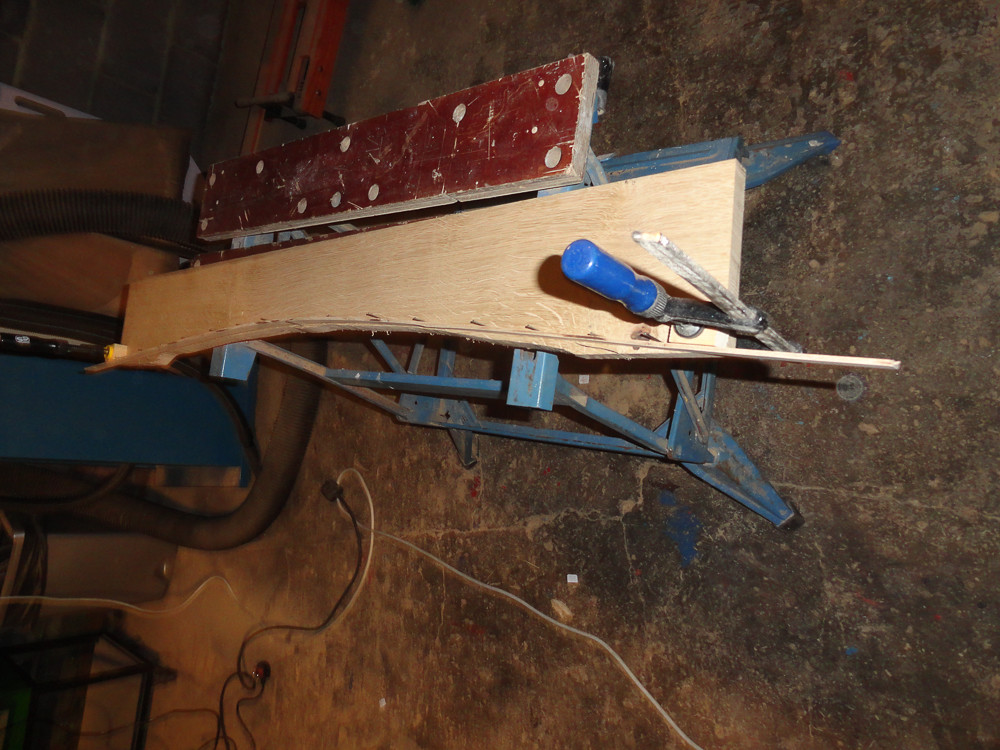 20141126-DSC00880.jpg by paulrockliffe, on Flickr
And finished:
 20141126-DSC00881.jpg by paulrockliffe, on Flickr
I deliberately didn't show you how I trimmed this back with the router because it was straight out of the book of what not to do for workshop safety; router clamped in a workmate and run the pilot bearing against the ply curve former. Be very gentle not to disturb the former. Won't be doing that again, but it worked.
The back board has a round-over routed on then is screwed to the wall in the right place and level:
 20141126-DSC00883.jpg by paulrockliffe, on Flickr
This way I can hang everything off this board and the whole thing goes on a lot easier as the screws will take the weight.
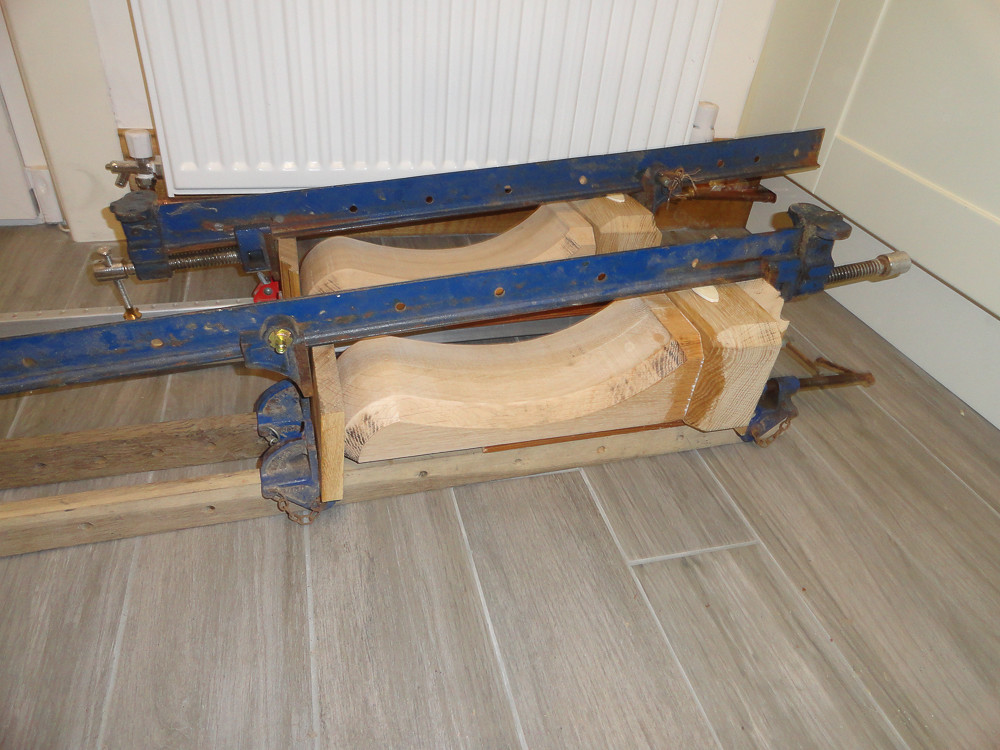
Corbels cantilevered off each other with a strip of ply to check they fit OK with the walls being bent:
 20141127-DSC00885.jpg by paulrockliffe, on Flickr
Then everything off to be finished:
 20141129-DSC00888.jpg by paulrockliffe, on Flickr
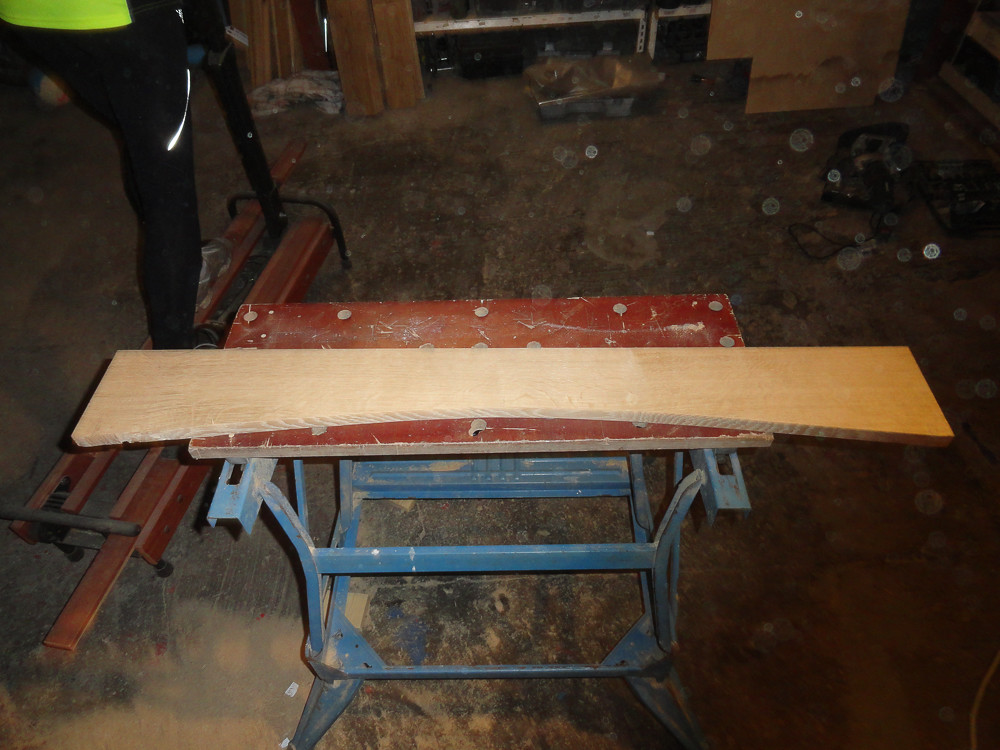
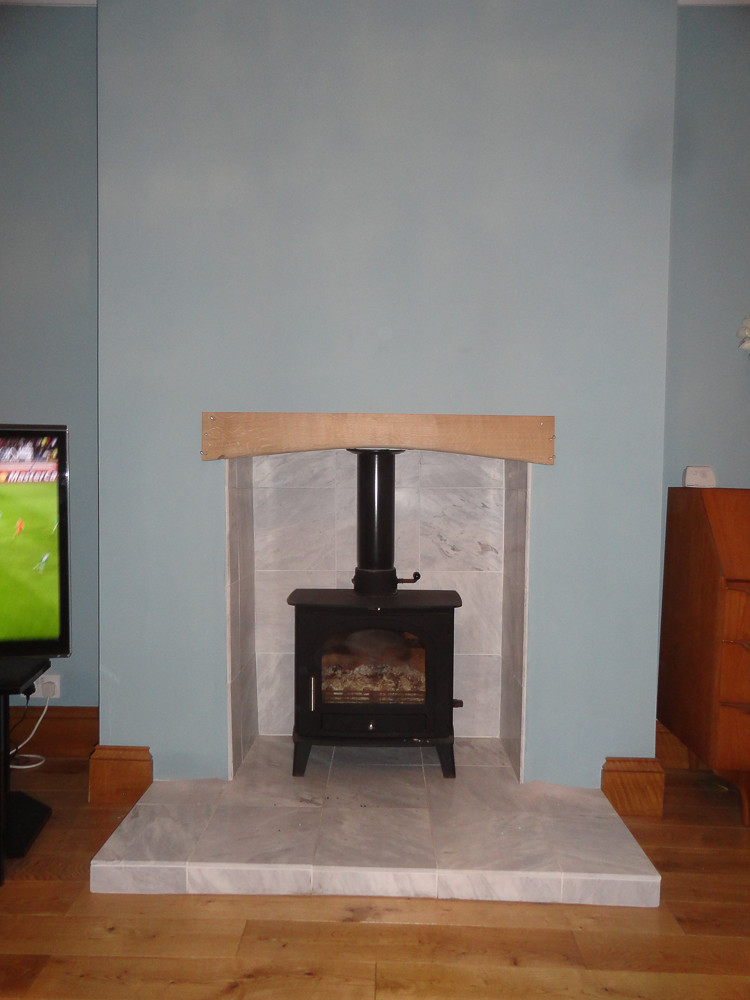
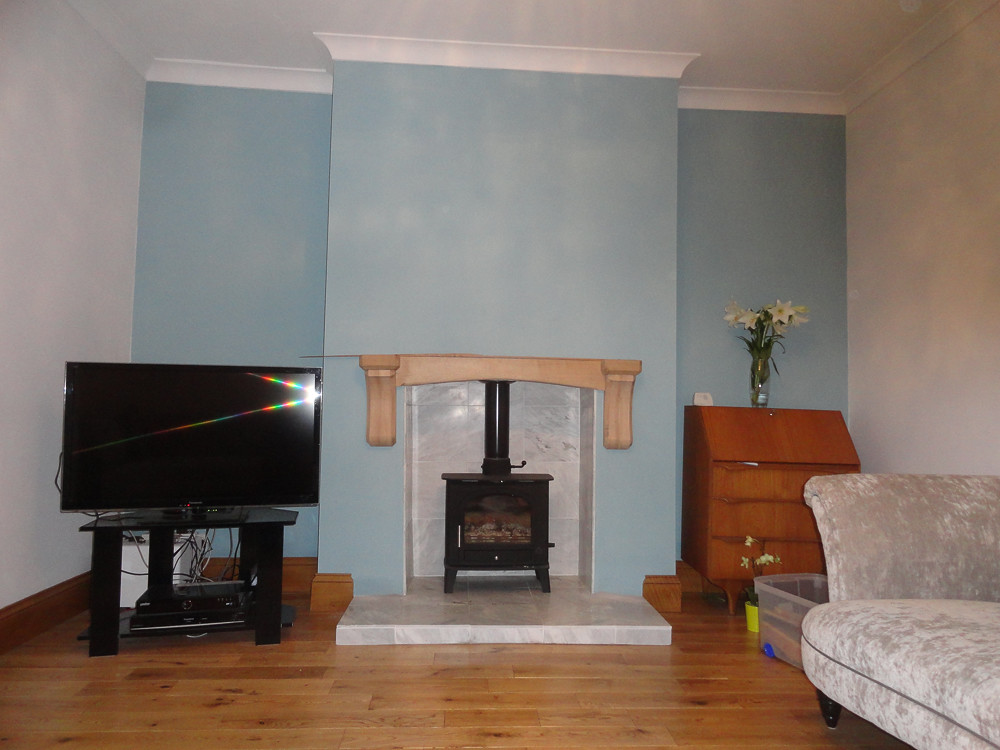
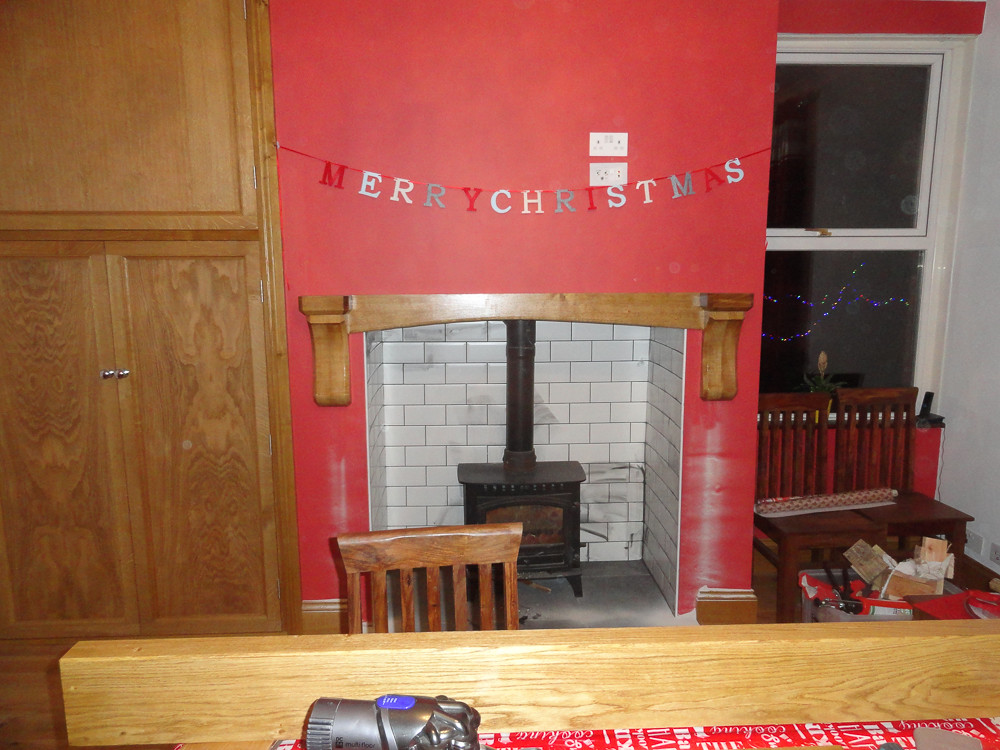
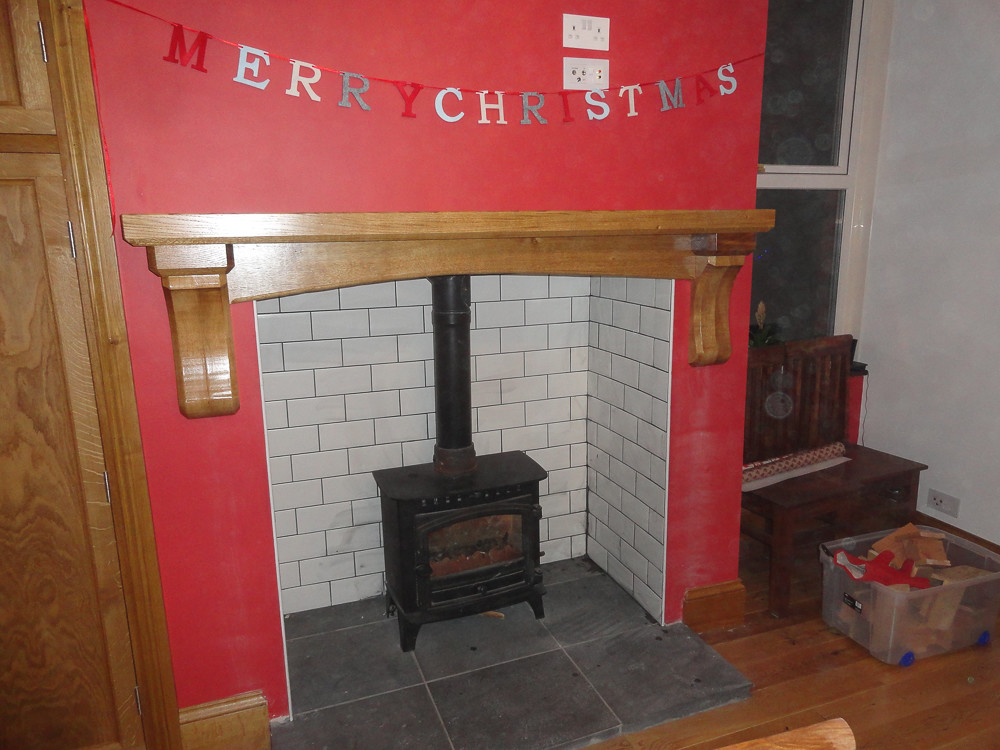
Screw board to wall again. Then I've marked the wall and the back of the corbels and the mantel and drilled some 12mm holes in each, 6mm threaded bar, some of that resin stuff in the holes, hold for a minute and it's all done and rock solid, add Christmas decorations and everyone is happy:
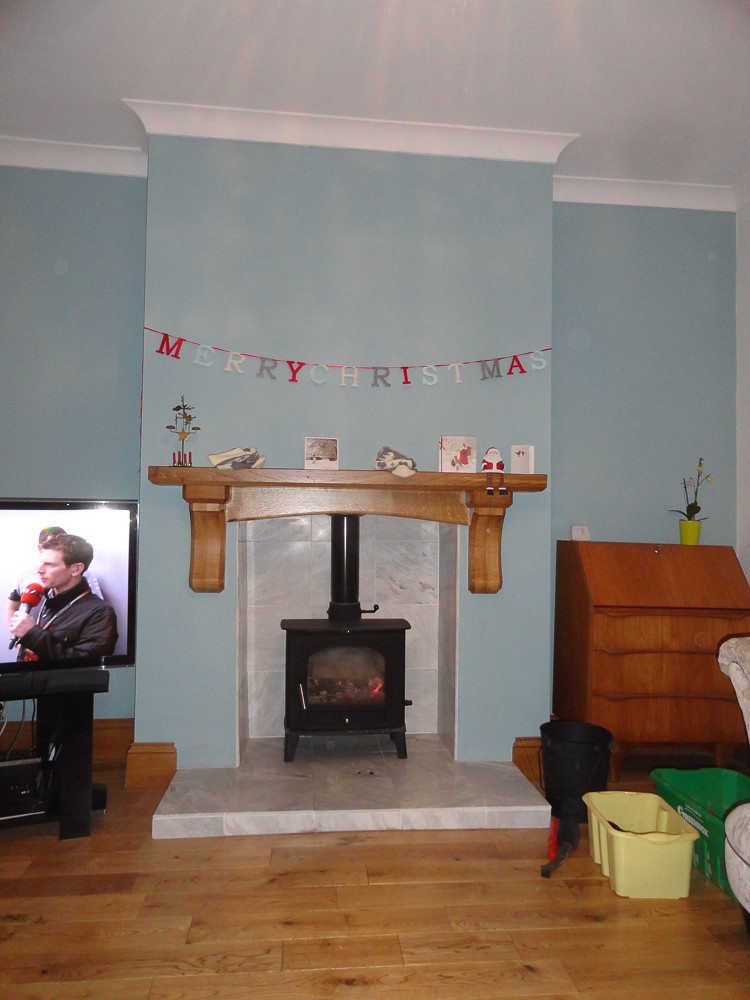 20141210-DSC00896.jpg by paulrockliffe, on Flickr
Then repeat in the dining room:
 20141210-DSC00898.jpg by paulrockliffe, on Flickr
 20141210-DSC00899.jpg by paulrockliffe, on Flickr
 20141210-DSC00900.jpg by paulrockliffe, on Flickr
 20141210-DSC00901.jpg by paulrockliffe, on Flickr
Timber:
20141125-DSC00864.jpg by paulrockliffe, on FlickrEvery great design starts life as a fully dimensioned CAD plan:
20141125-DSC00865.jpg by paulrockliffe, on FlickrAt this point I discovered that my Dad had authorised the timber to be supplied slightly thicker than requested. I'd specced the timber based on the maximum size I could cut neatly (I don't trust myself with a handsaw yet), but fortunately I'd taken a punt on a Radial Arm Saw the week before and this got me out of jail.
Corbels cut to length:
20141125-DSC00866.jpg by paulrockliffe, on FlickrI then spent hours making a template for the profile of the corbels on a piece of MDF. This was transferred to the cut stock and these were then cut out with the bandsaw. I the design is such that two pieces came out of one length, the other two lengths are for the tops of the corbels.
20141125-DSC00871.jpg by paulrockliffe, on FlickrBelieve it or not the wood is 2.75" thick and these were done on a very small bandsaw. Took ages and I honestly didn't think I'd get the last one out of the blade it was so blunt, but somehow it worked.
Template on:
20141125-DSC00868.jpg by paulrockliffe, on FlickrUsed the router to trim back to the template and then put a .75" chamfer along the edges. A couple of dwell marks that I'm not overly happy about, though these aren't visible on the finished job. I've got a big new router that's going in a table that will hopefully help with these next time.
20141125-DSC00869.jpg by paulrockliffe, on FlickrChamfer on the corbel tops:
20141125-DSC00872.jpg by paulrockliffe, on FlickrFinally found a use for the £12 Axminster biscuit jointer I picked up a couple of years ago, as I keep telling the boss, these things always come in handy eventually:
20141125-DSC00873.jpg by paulrockliffe, on FlickrMore biscuits:
20141126-DSC00877.jpg by paulrockliffe, on FlickrAnd more glue:
20141126-DSC00878.jpg by paulrockliffe, on FlickrMy bottom board needed a gentle curve on it. The internet suggested some pins and a bit of thin ply:
20141126-DSC00879.jpg by paulrockliffe, on FlickrMarked and rough-cut on the band saw (still with blunt blade):
20141126-DSC00880.jpg by paulrockliffe, on FlickrAnd finished:
20141126-DSC00881.jpg by paulrockliffe, on FlickrI deliberately didn't show you how I trimmed this back with the router because it was straight out of the book of what not to do for workshop safety; router clamped in a workmate and run the pilot bearing against the ply curve former. Be very gentle not to disturb the former. Won't be doing that again, but it worked.
The back board has a round-over routed on then is screwed to the wall in the right place and level:
20141126-DSC00883.jpg by paulrockliffe, on FlickrThis way I can hang everything off this board and the whole thing goes on a lot easier as the screws will take the weight.
Corbels cantilevered off each other with a strip of ply to check they fit OK with the walls being bent:
20141127-DSC00885.jpg by paulrockliffe, on FlickrThen everything off to be finished:
20141129-DSC00888.jpg by paulrockliffe, on FlickrScrew board to wall again. Then I've marked the wall and the back of the corbels and the mantel and drilled some 12mm holes in each, 6mm threaded bar, some of that resin stuff in the holes, hold for a minute and it's all done and rock solid, add Christmas decorations and everyone is happy:
20141210-DSC00896.jpg by paulrockliffe, on FlickrThen repeat in the dining room:
20141210-DSC00898.jpg by paulrockliffe, on Flickr20141210-DSC00899.jpg by paulrockliffe, on Flickr20141210-DSC00900.jpg by paulrockliffe, on Flickr20141210-DSC00901.jpg by paulrockliffe, on Flickrecotec said:
Firstly, great work the house is looking excellent.
I was interested in your bank of lepai amps and how you are using them to distribute sound - is it just one pi and are you streaming music from the HP server or is it via phone bluetooth?
cheers,
All of those things. Except the HP server as it's lunched itself and I haven't had time to fix it. I've removed the faulty hard-drive but it still isn't working. A job for another day.I was interested in your bank of lepai amps and how you are using them to distribute sound - is it just one pi and are you streaming music from the HP server or is it via phone bluetooth?
cheers,
Anyway. I've got 6 rooms with speakers in, each fired off one of those amplifiers. Each amp is connected to a 4-pole switch.
On one set of poles I have connected inputs from connections in each room and also a bank of inputs that are sat next to the server. That basically gives you local inputs to each room, eg a a TV or stereo in a bedroom coming over the speakers in that room.
On the other set of poles I have a distribution amplifier that takes one input and sends it to 6 outputs. That gives you the sound over all the speakers at once. Obviously you use the switches to control which rooms take the common feed and you can switch amplifiers off too. All the amps are powered by a single transformer, which is on a timer.
On the distribution amplifier there's another 4-pole switch which lets you select between two sets of inputs. I've got a bluetooth box plugged into that at the moment, so you can play from phone or laptop etc. The Raspberry Pi can go on the other input too, but I've been using it to fire some relays as I was messing about with putting the switches onto relays that can be controlled from my phone, but there are unresolved issues with that.
Eventually I'll get around to configuring it all 100%, then there'll be a RPi to cover the bathroom, one to cover the whole house and the bluetooth box. The whole house one will be linked to a touchscreen TV in the Kitchen that will double up as a music centre for the house and a TV for the kitchen.
All the RPis run XBMC (now Kodi), the OpenElec version and are setup with add-ons for a few things as well as connections to the server for music. Without a monitor connected you're normally stuck, but control is via the Yatse remote control on Android. This controller caches your libraries and can work with multiple installations at once. So basically you treat it as a music player on your phone and the RPi/Server does the rest. I believe it lets you bounce sources between devices too, though I've not tested that fully. Only thing complicated about the setup is that you really need to go in your router and give each device a static IP address so they don't get lost.
The system isn't perfect and things like Sonos will give you more flexibility and stuff, but those are mega bucks, like £200 a room just for the amplification. I'm lucky to be a bit tone deaf and use this mostly for listening to radio dramas anyway, so quality isn't a high priority, though I have to say the standard is very very good. Speakers were about £17 a pair, amplifiers were similar. Bluetooth box was £25 and the RPis are about £55. There might be a cheaper option on the RPis if you don't need to stream HD video, but I've not looked in a while.
So today is exactly two years since we bought the house! The 6 month quick project has morphed into a monster and we're still at it! I'll do a proper update in the week to get things properly up to speed, but basically nearly nearly finished. (obviously in 6 months time I'll still be doing finishing off jobs, but they don't count!)
I'm at the point now where the only big things left to do are to dig up the entrance hallway floor and re-do it with a DPC and to finish clearing cavities and get the bricks back in. That requires the use of a boroscope and some custom devices for getting at some stubborn blockages.
Then I have a load of improvement projects, especially outside, but we'll be able to call the house 'finished'.
I've not updated the thread since before Christmas, so quite a few things have been done. I'll get those updated and maybe put together some 'before' and 'after' pics.
smithyithy said:
Slow day today so had a read through the whole thread - what a great transformation, hats off to you!
I'll look forward to the update
Must have been a very slow day! Glad you enjoyed it and thanks!I'll look forward to the update
I've spent all night cutting ply and routing joints for some drawer boxes for the wardrobes, but I'll get some pics, probably on Thursday.........
UPDATE!
Finally got a spare few minutes to get this properly up to date. The last 5 months have been quite hectic, I've got through quite a lot of little jobs and a few big projects. When I look through the pictures I do wonder what I was doing for months of that, but I guess these things always take longer than you think.
Anyway, first big job after Christmas was the pantry; part of me discouraging the better half from wanting a kitchen extension any time soon is making the kitchen, dining room and under the stairs 'work' as a cooking/dining/storage space. That's why there's a sliding door that's never shut between the two rooms. It's worked quite well and I'm happy that the bigger kitchen will only happen when I'm ready now.
Floor down:
 20150309-DSC00919.jpg by paulrockliffe, on Flickr
Ash frame cut, with supports morticed in:
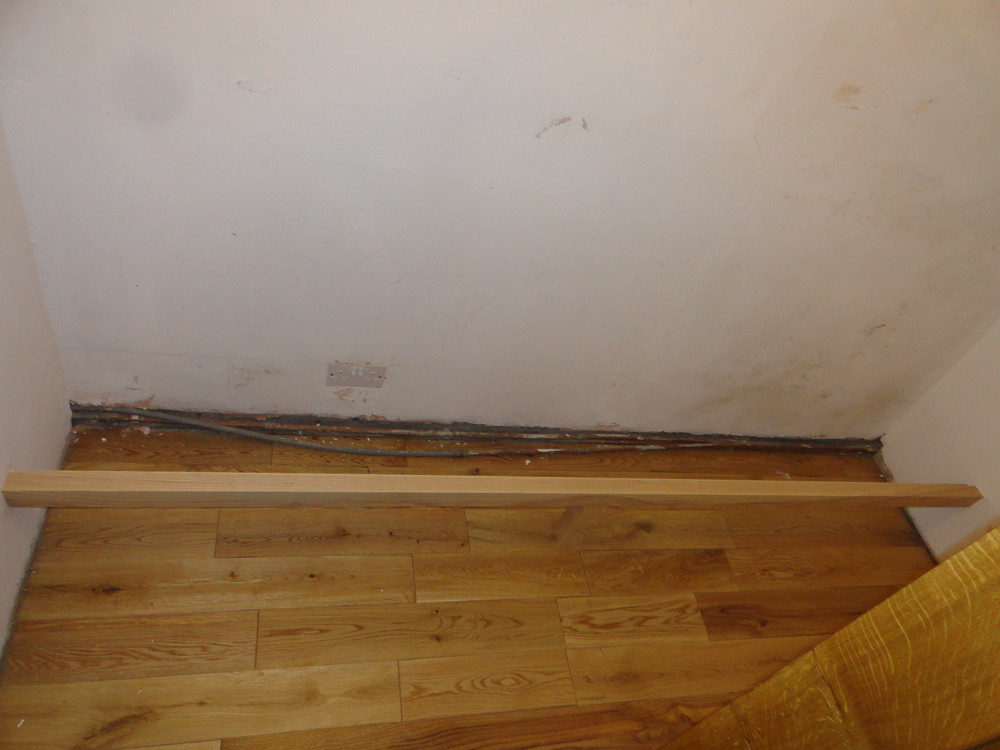 20150309-DSC00924.jpg by paulrockliffe, on Flickr
Frame in:
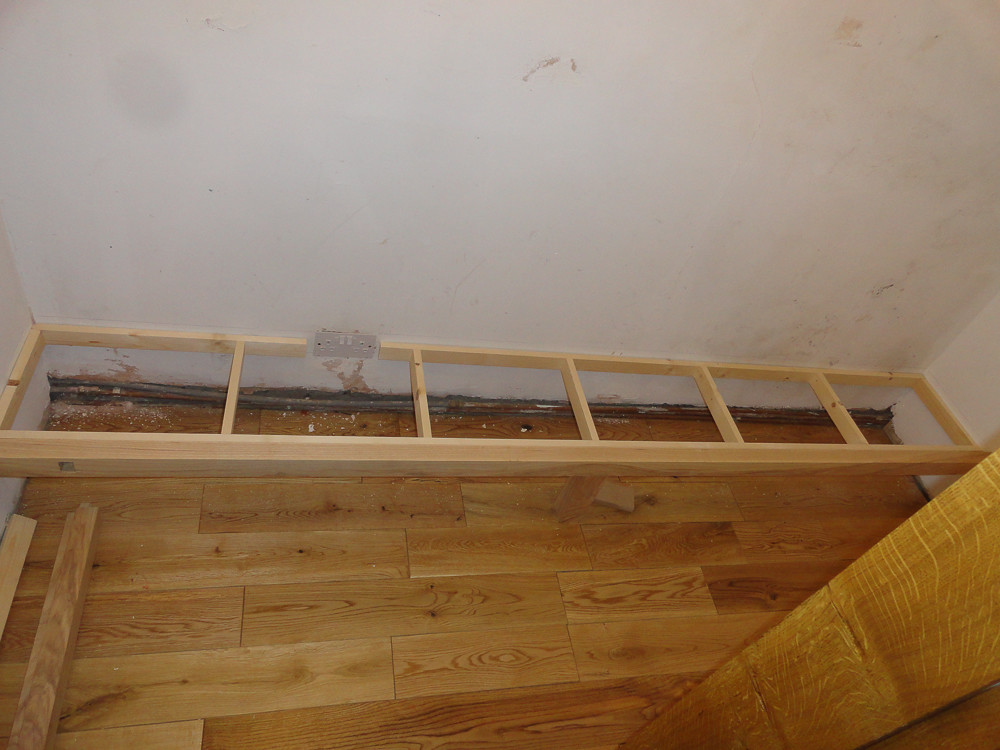 20150311-DSC00925.jpg by paulrockliffe, on Flickr
Post made:
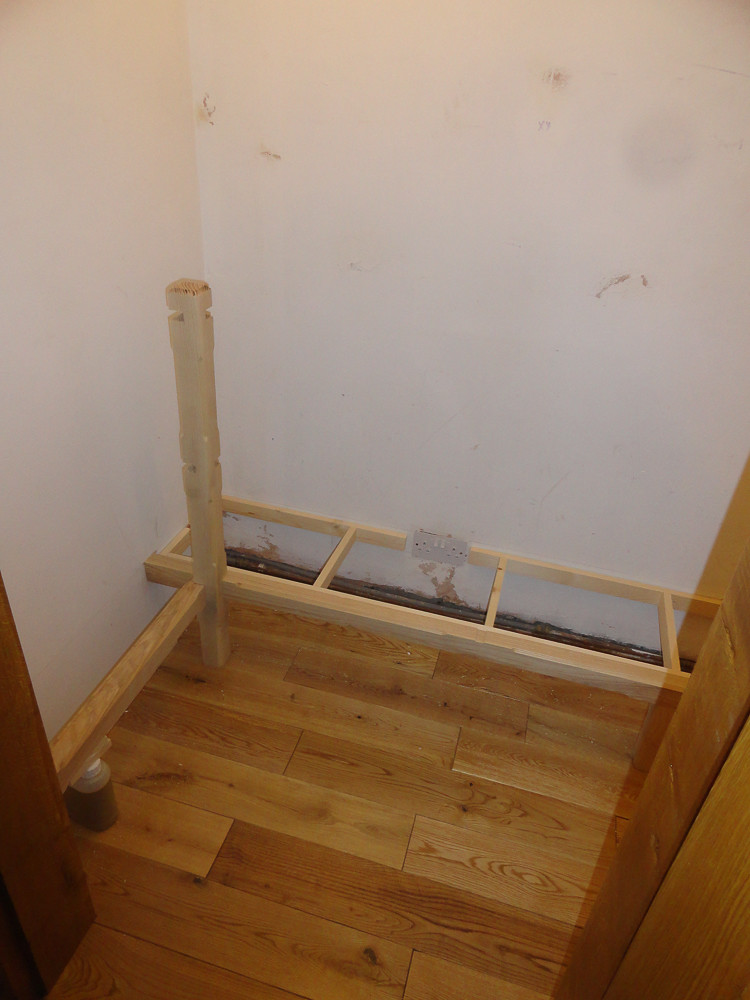 20150320-DSC00927.jpg by paulrockliffe, on Flickr
First shelf:
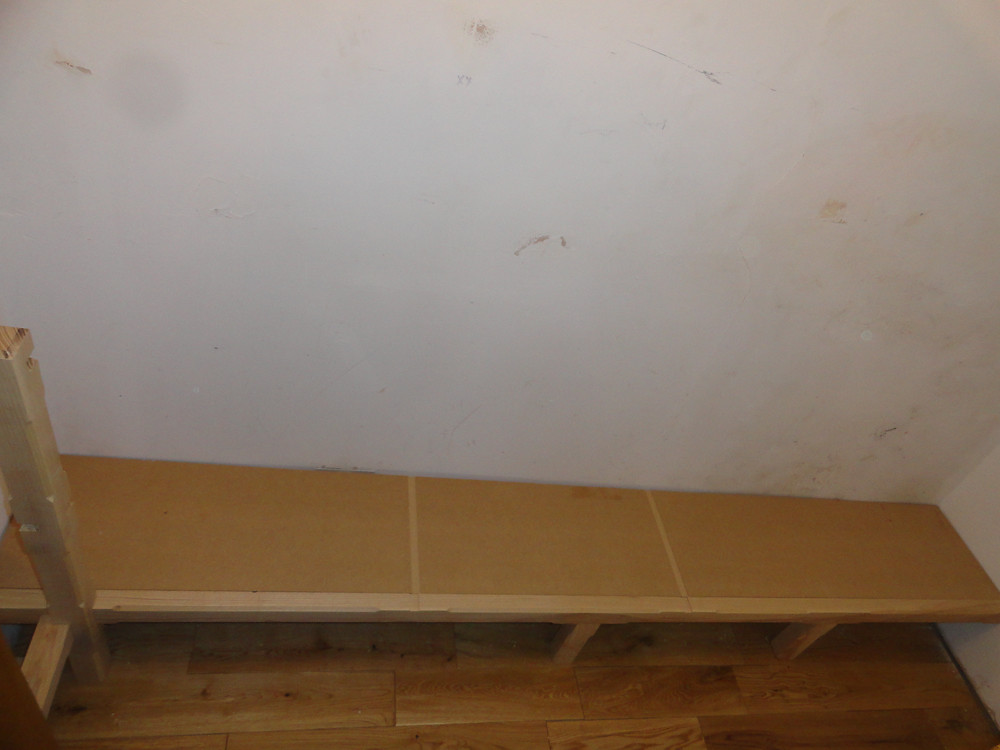 20150320-DSC00928.jpg by paulrockliffe, on Flickr
More shelves:
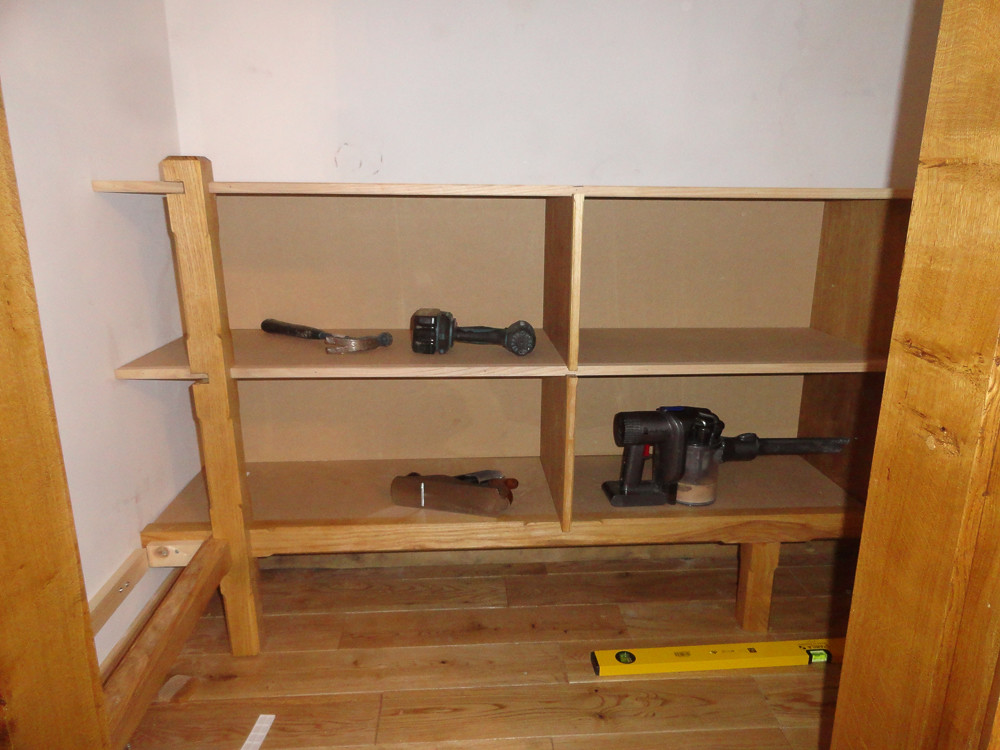 20150401-DSC00932.jpg by paulrockliffe, on Flickr
The shelves are all MDF, with an ash facing applied. The construction is basically two separate cabinets, one above each other, with shelves extending behind the sliding door. The compartments are designed to stop the MDF from sagging and transfer the load to the base frame, but they also help to keep everything nicely organised.
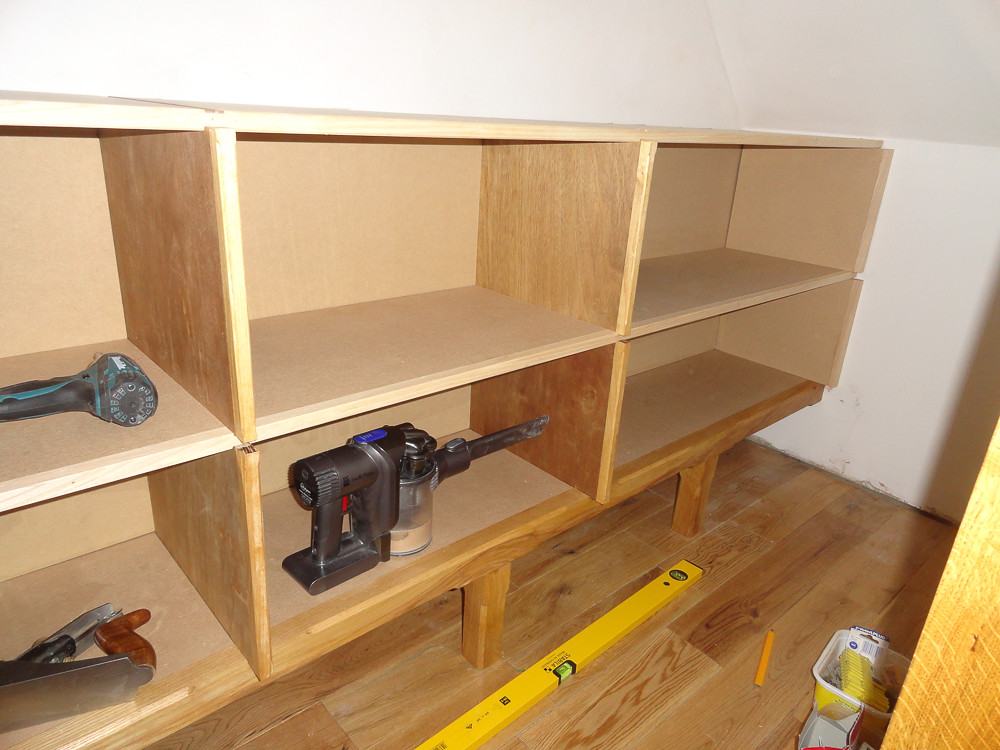 20150401-DSC00933.jpg by paulrockliffe, on Flickr
The top cabinet needed the back routing to accept the shelves and uprights, it was going to take ages, so I made up this jig to get everyting in the right place:
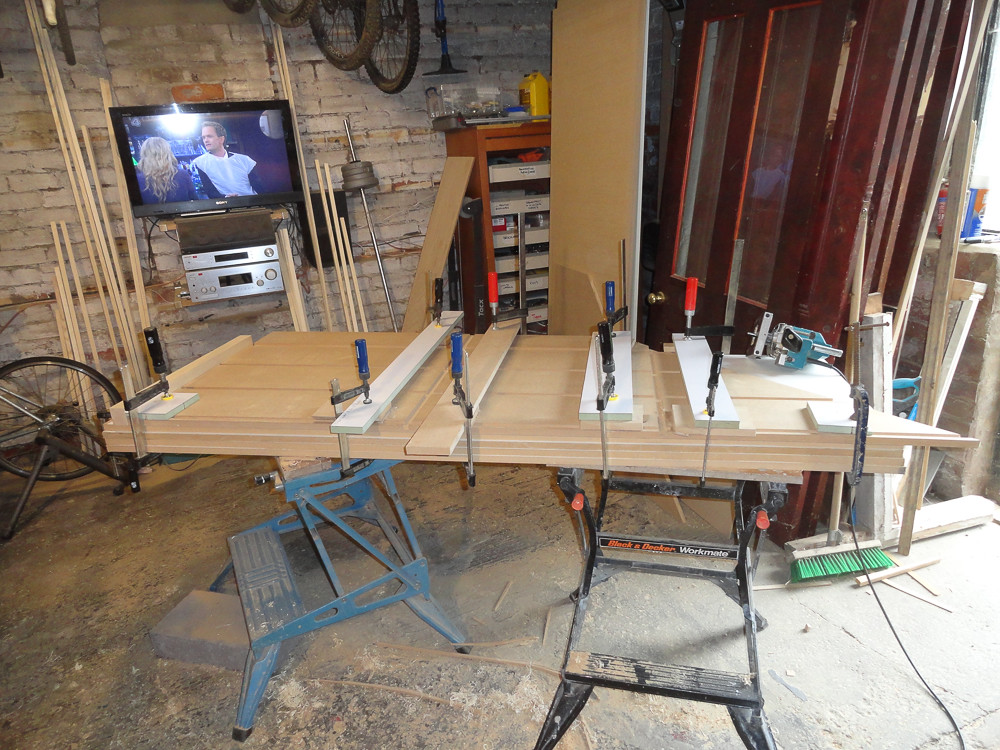 20150404-DSC00934.jpg by paulrockliffe, on Flickr
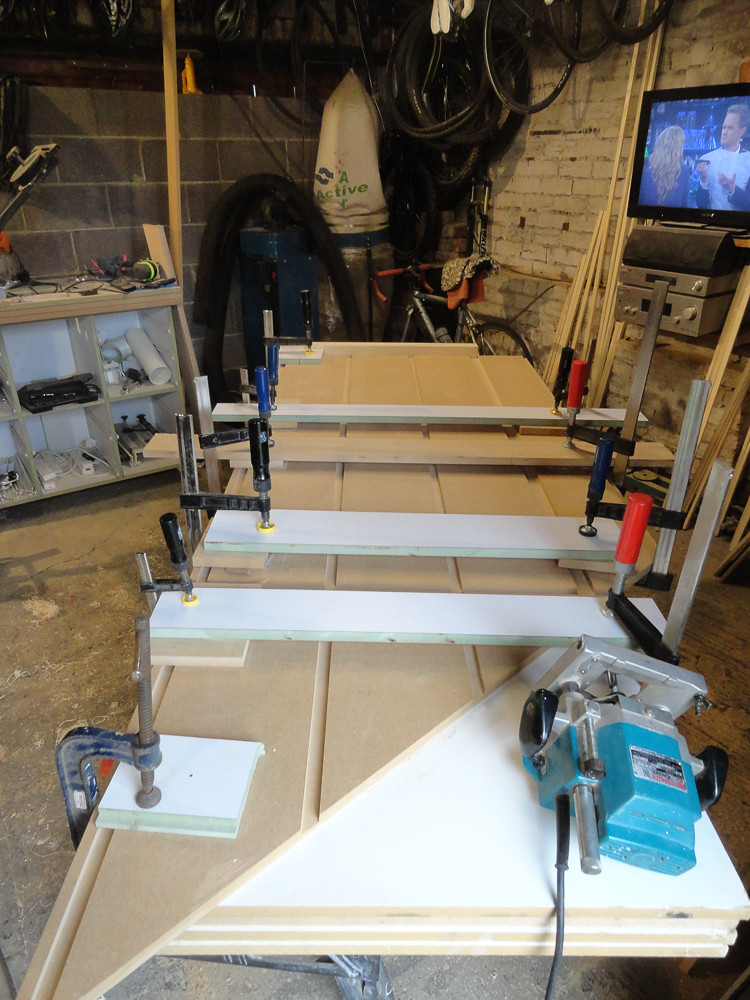 20150404-DSC00935.jpg by paulrockliffe, on Flickr
It's not the best space to get good pictures in, but here's the shelves all in:
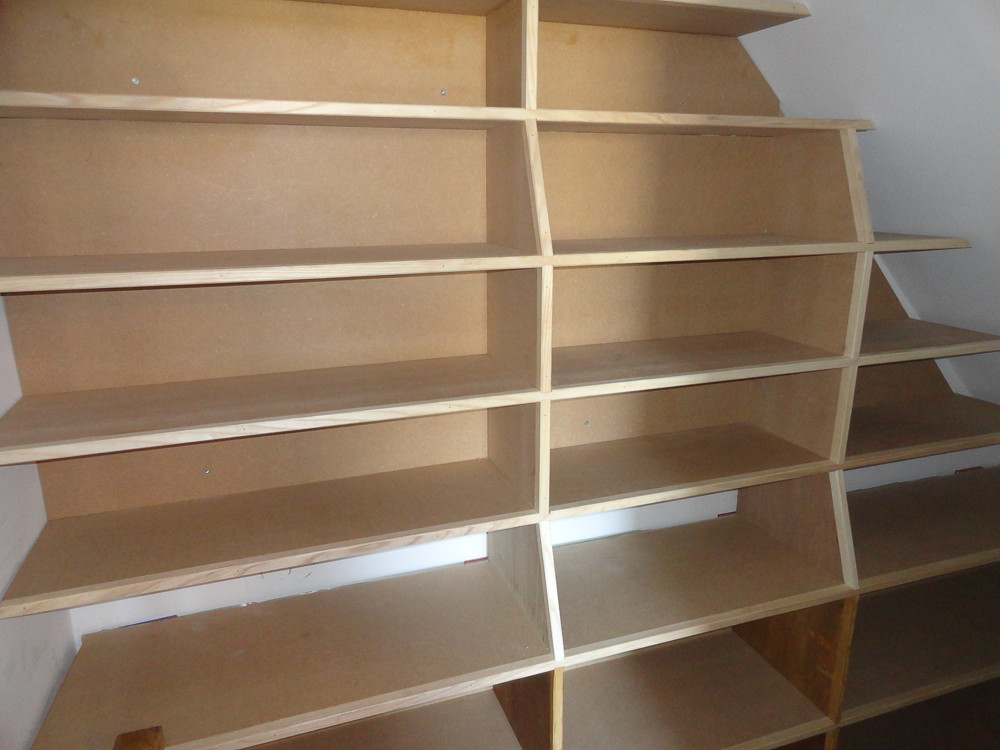 20150406-DSC00937.jpg by paulrockliffe, on Flickr
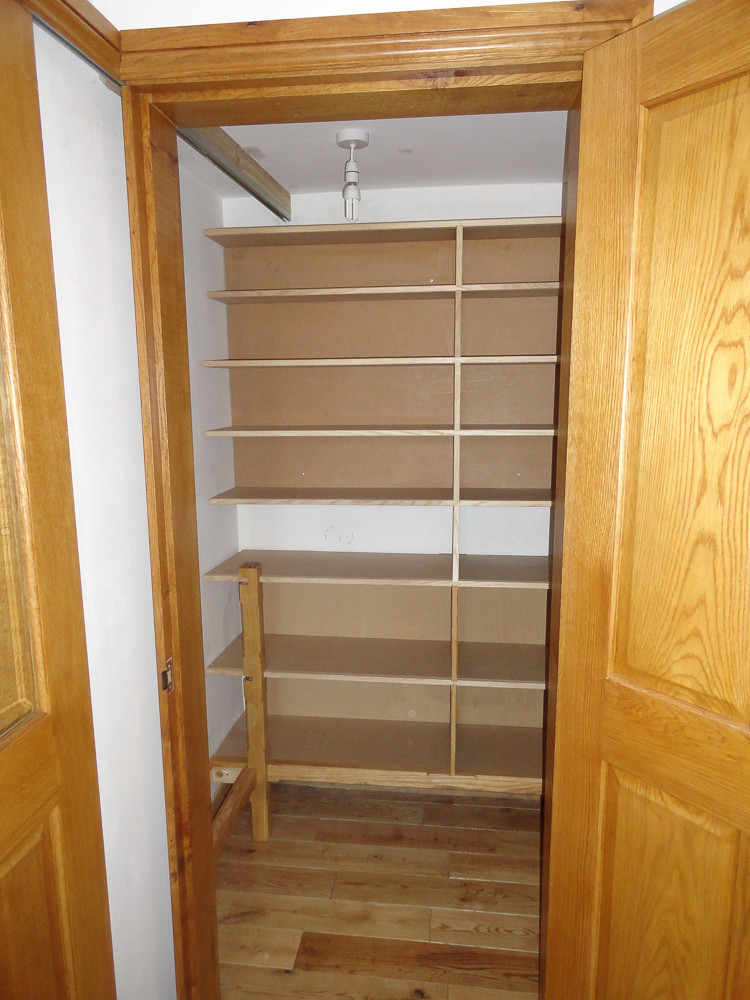 20150406-DSC00936.jpg by paulrockliffe, on Flickr
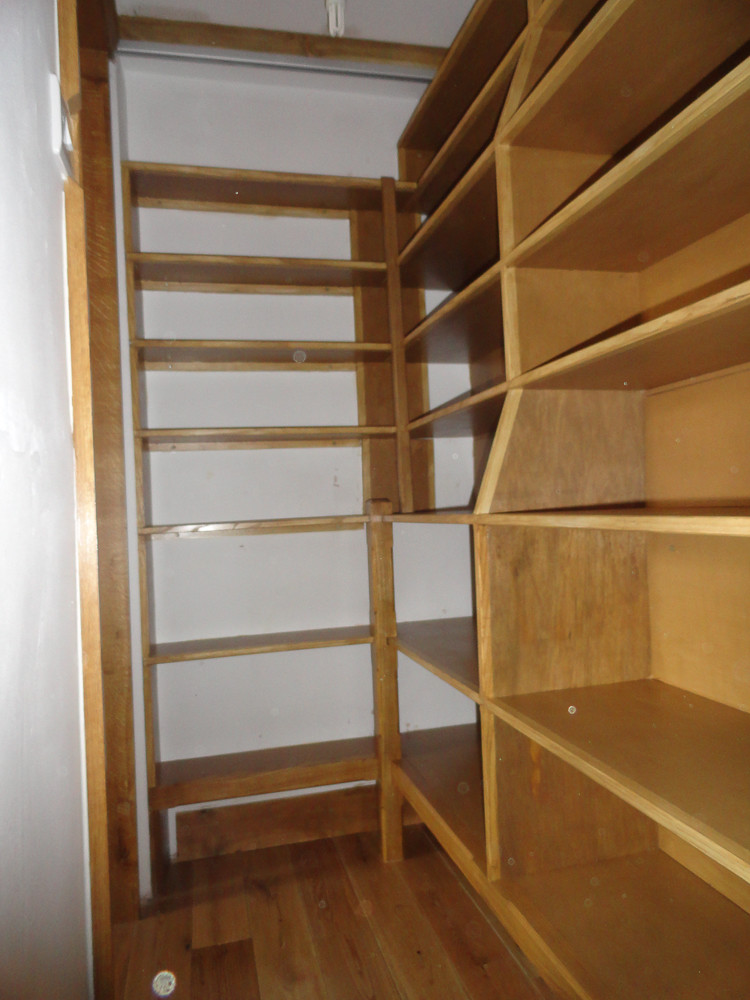 20150408-DSC00942.jpg by paulrockliffe, on Flickr
All the shelves are designed to just fit a range of common food product heights, eg cereal boxes, cans of beans etc, so that I could get the maximum number of shelves in the space.
Priorities:
 IMAG0035.jpg by paulrockliffe, on Flickr
really pleased with how this has come out, although the ash was completely unnecessary under the stairs, I think it adds something and helps to bring the three spaces together. It's incredibly practical and has swallowed the contents of the kitchen pretty comfortably!
Finally got a spare few minutes to get this properly up to date. The last 5 months have been quite hectic, I've got through quite a lot of little jobs and a few big projects. When I look through the pictures I do wonder what I was doing for months of that, but I guess these things always take longer than you think.
Anyway, first big job after Christmas was the pantry; part of me discouraging the better half from wanting a kitchen extension any time soon is making the kitchen, dining room and under the stairs 'work' as a cooking/dining/storage space. That's why there's a sliding door that's never shut between the two rooms. It's worked quite well and I'm happy that the bigger kitchen will only happen when I'm ready now.
Floor down:
20150309-DSC00919.jpg by paulrockliffe, on FlickrAsh frame cut, with supports morticed in:
20150309-DSC00924.jpg by paulrockliffe, on FlickrFrame in:
20150311-DSC00925.jpg by paulrockliffe, on FlickrPost made:
20150320-DSC00927.jpg by paulrockliffe, on FlickrFirst shelf:
20150320-DSC00928.jpg by paulrockliffe, on FlickrMore shelves:
20150401-DSC00932.jpg by paulrockliffe, on FlickrThe shelves are all MDF, with an ash facing applied. The construction is basically two separate cabinets, one above each other, with shelves extending behind the sliding door. The compartments are designed to stop the MDF from sagging and transfer the load to the base frame, but they also help to keep everything nicely organised.
20150401-DSC00933.jpg by paulrockliffe, on FlickrThe top cabinet needed the back routing to accept the shelves and uprights, it was going to take ages, so I made up this jig to get everyting in the right place:
20150404-DSC00934.jpg by paulrockliffe, on Flickr20150404-DSC00935.jpg by paulrockliffe, on FlickrIt's not the best space to get good pictures in, but here's the shelves all in:
20150406-DSC00937.jpg by paulrockliffe, on Flickr20150406-DSC00936.jpg by paulrockliffe, on Flickr20150408-DSC00942.jpg by paulrockliffe, on FlickrAll the shelves are designed to just fit a range of common food product heights, eg cereal boxes, cans of beans etc, so that I could get the maximum number of shelves in the space.
Priorities:
IMAG0035.jpg by paulrockliffe, on Flickrreally pleased with how this has come out, although the ash was completely unnecessary under the stairs, I think it adds something and helps to bring the three spaces together. It's incredibly practical and has swallowed the contents of the kitchen pretty comfortably!
Gassing Station | Homes, Gardens and DIY | Top of Page | What's New | My Stuff