Mac#1 Motorsport Worx Build
Discussion


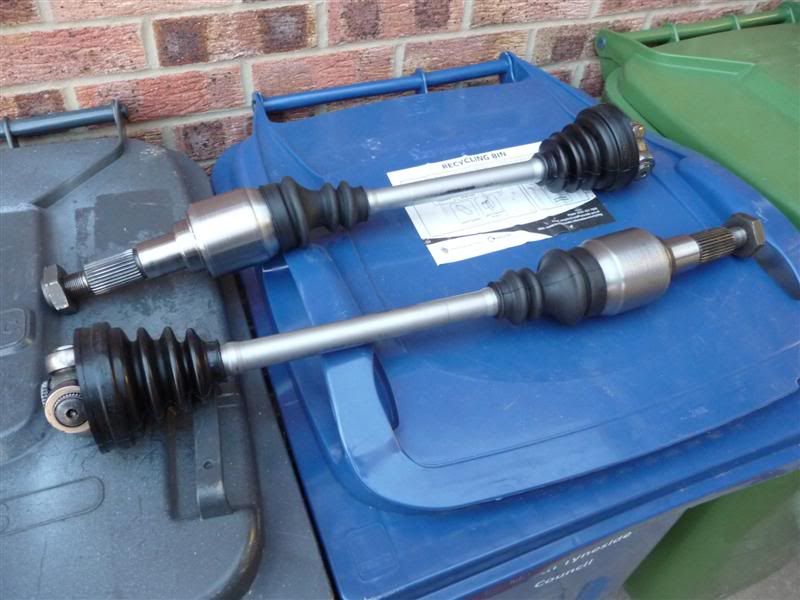
Some more new parts arrived today
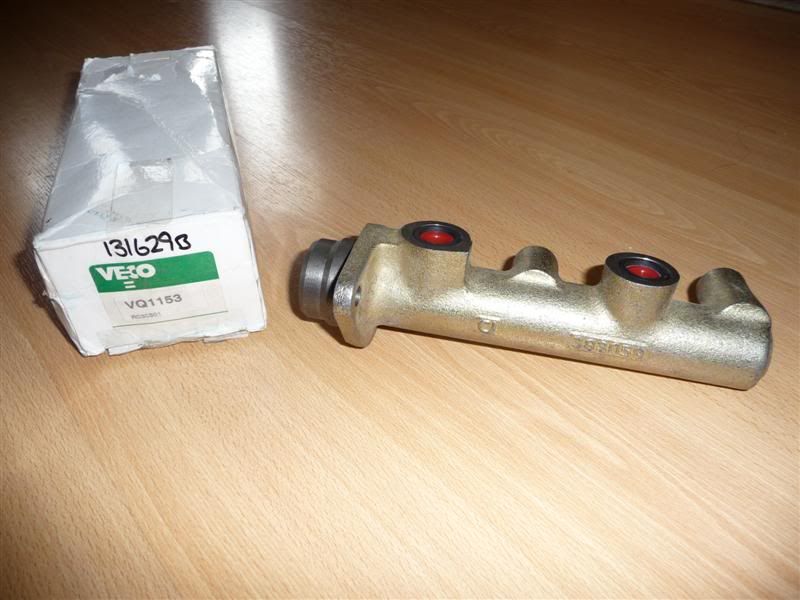
One Sierra master cylinder
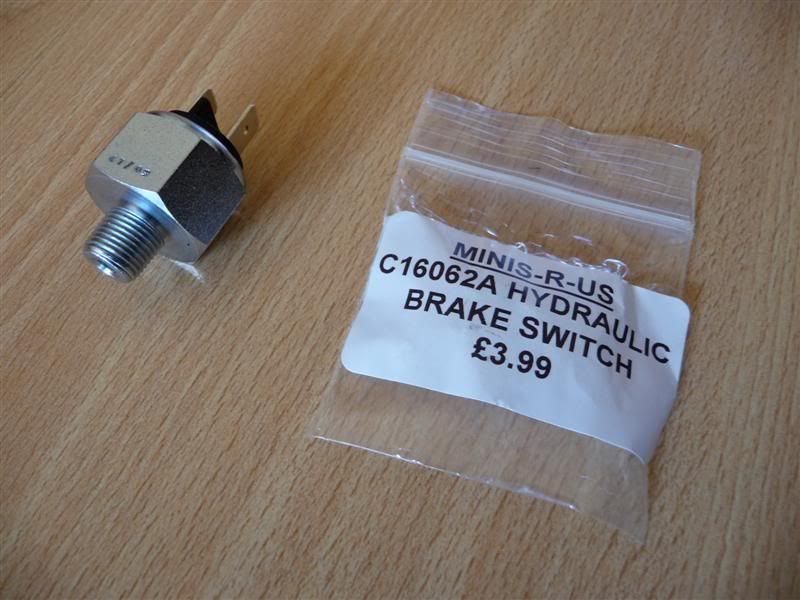
A hydraulic switch for the brake lights
A Freelander rear differential

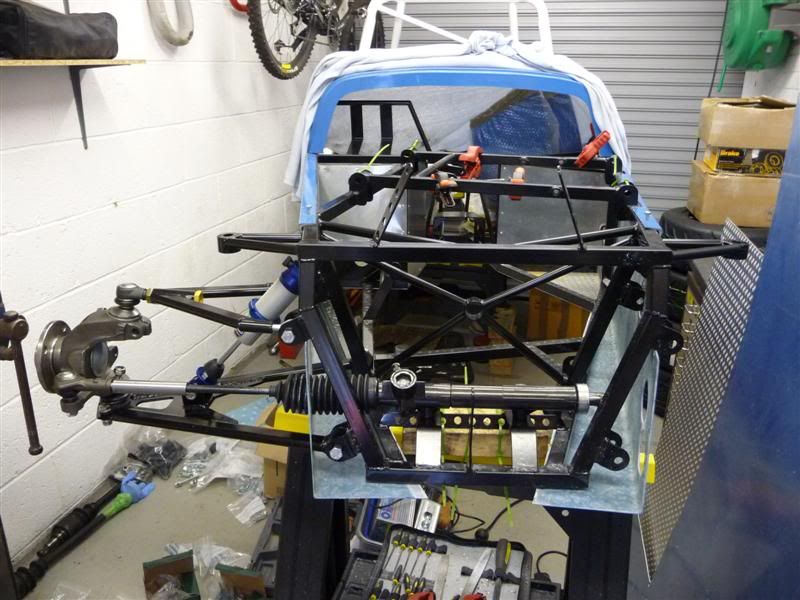
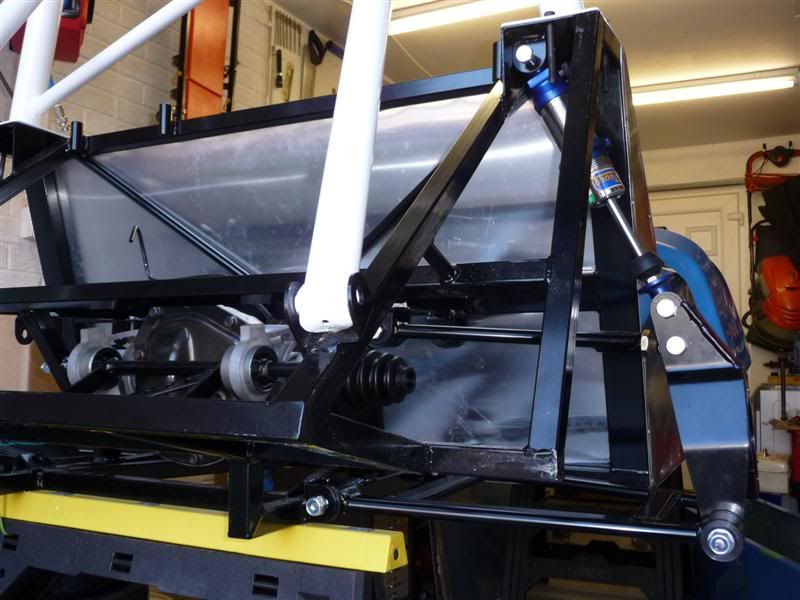
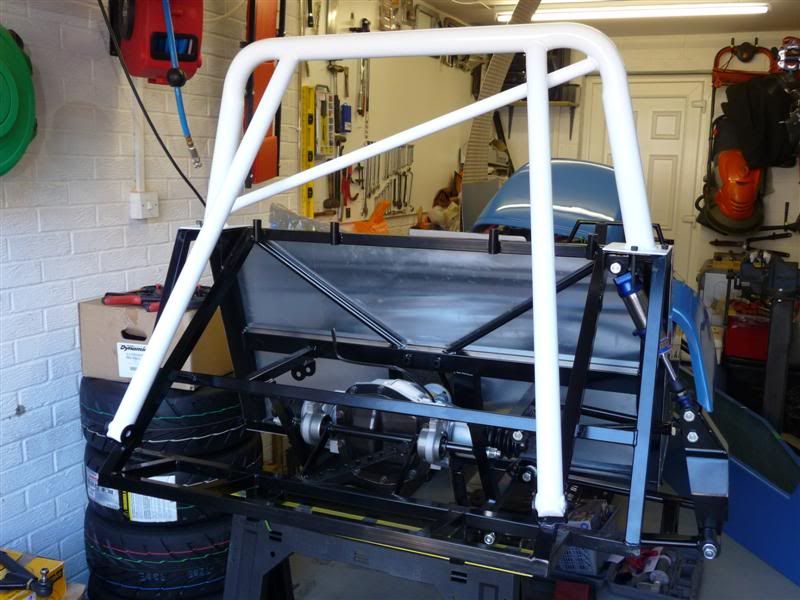
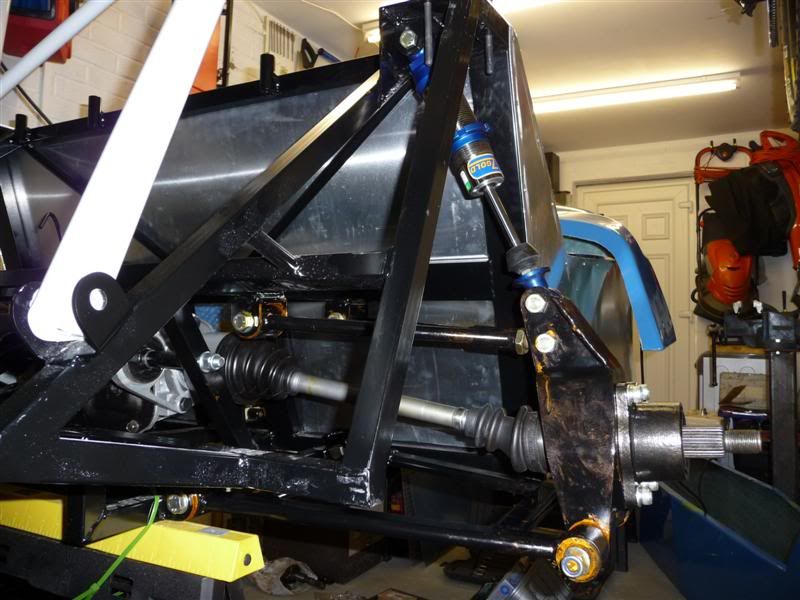
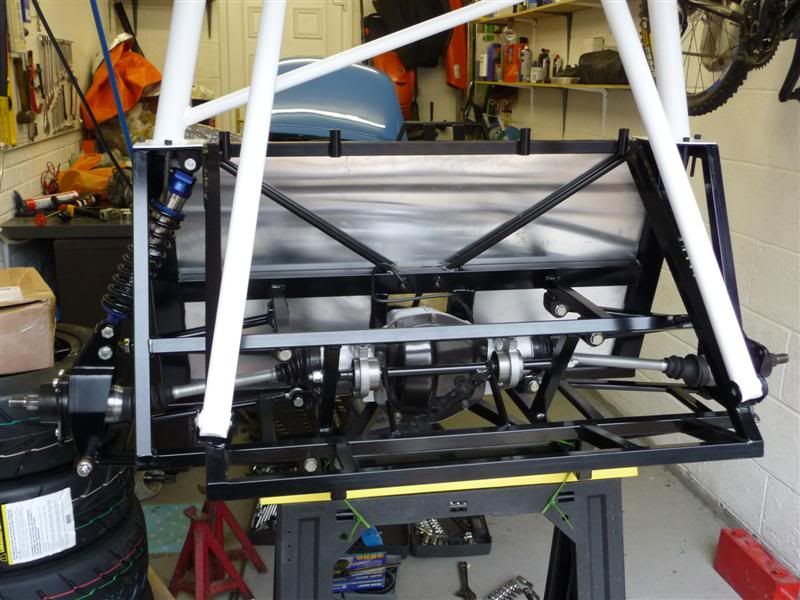
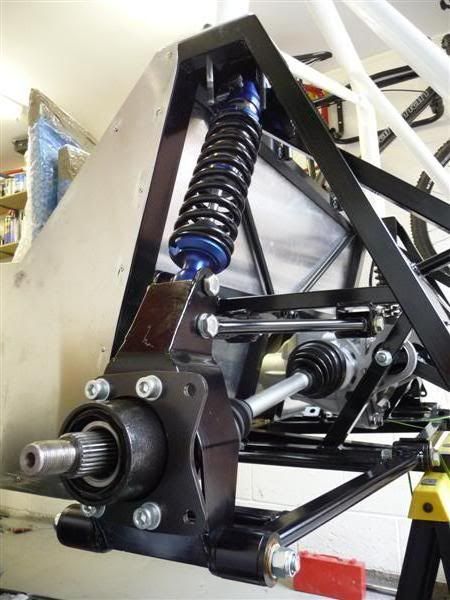
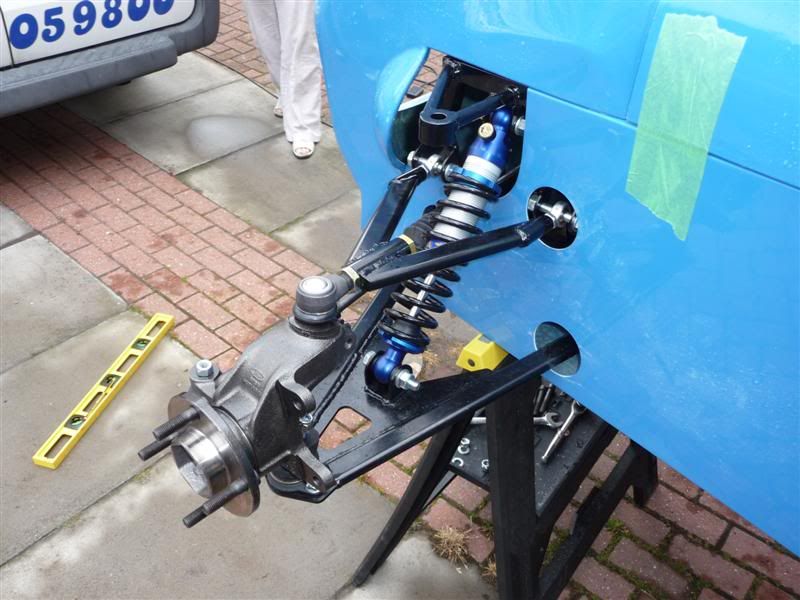
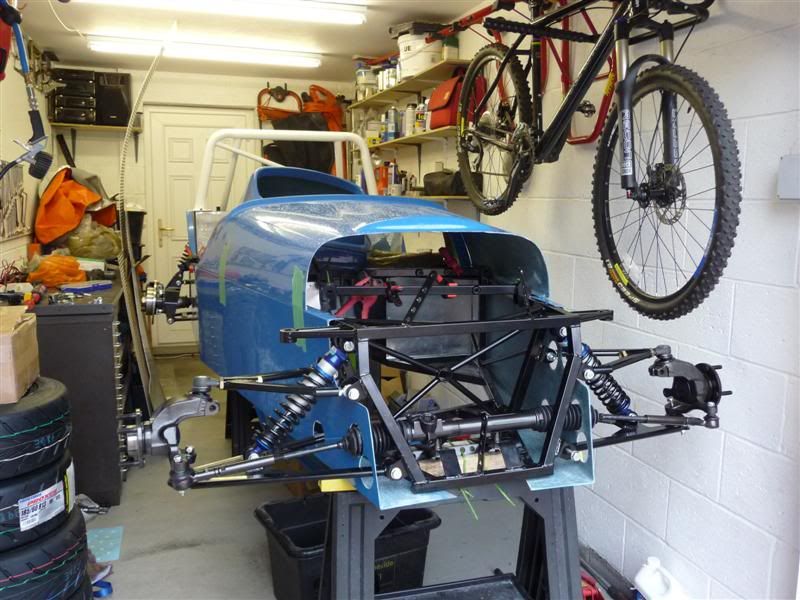
Finally got round to fitting the steering rack and quickly mocked up the suspension to see how it looks

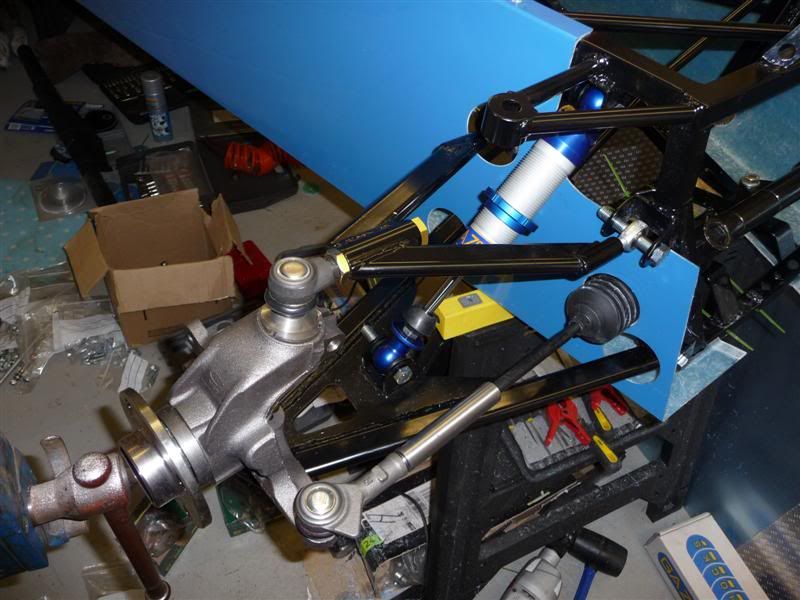
PS Yes I know the track rod end should mount underneath the upright not above like I had it, I only realised after I had taken the photos, doh!
No drama though as nothing is tightened up, and it all needs to come off so I can finish cutting the side panels.
Looking back through those photos really hits home how messy the garage has become, I'll be sorting that out tomorrow too!
One Sierra master cylinder
A hydraulic switch for the brake lights
A Freelander rear differential
Finally got round to fitting the steering rack and quickly mocked up the suspension to see how it looks
PS Yes I know the track rod end should mount underneath the upright not above like I had it, I only realised after I had taken the photos, doh!
No drama though as nothing is tightened up, and it all needs to come off so I can finish cutting the side panels.
Looking back through those photos really hits home how messy the garage has become, I'll be sorting that out tomorrow too!
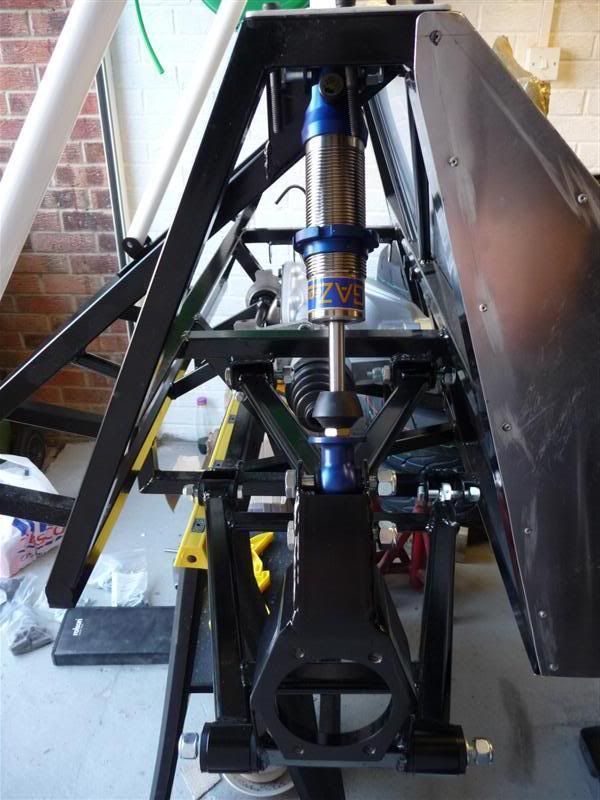
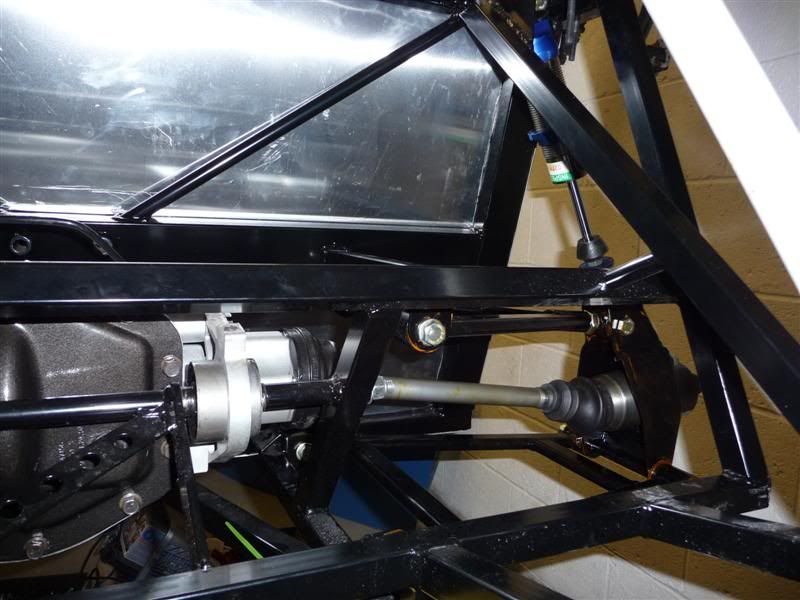
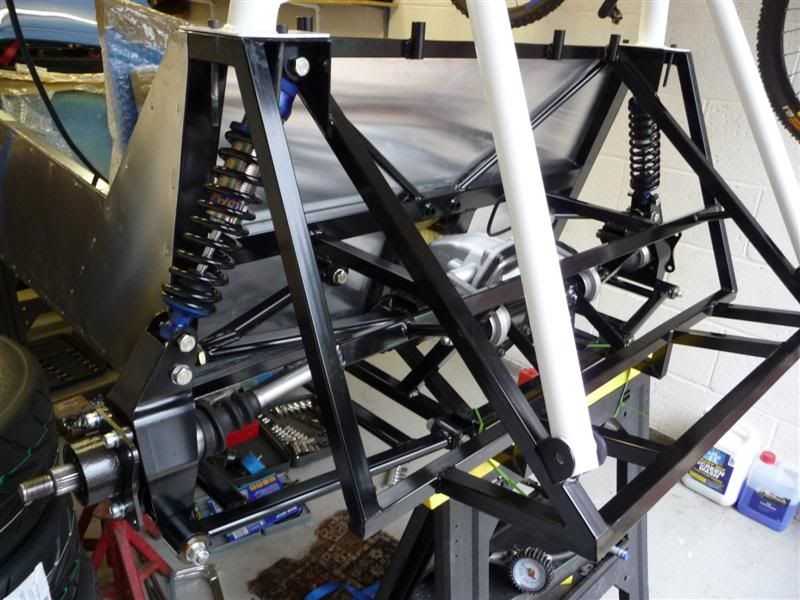
Tried to fit my Freelander rear diff yesterday but didnt realise until it was nearly in the car that the casing needed a little mod, doh!
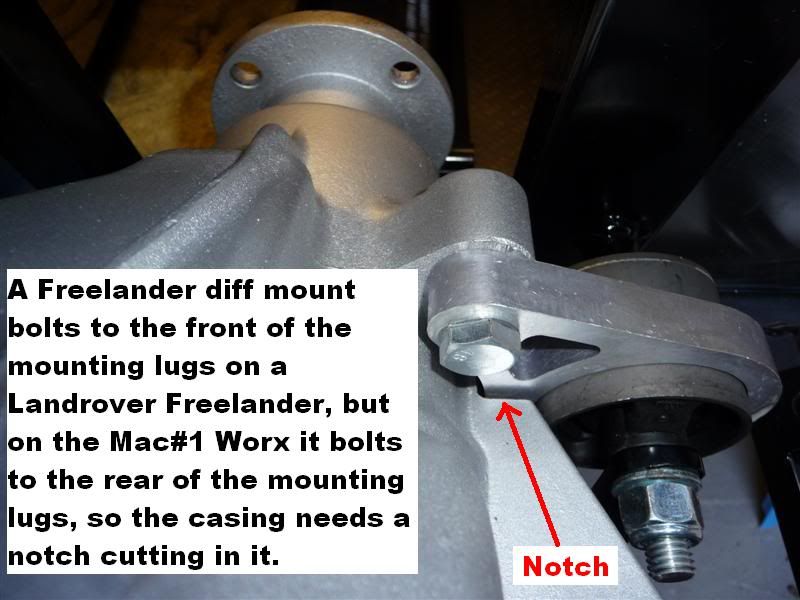
Once the notch was cut out of the casing, the diff bolted into the chassis easily.
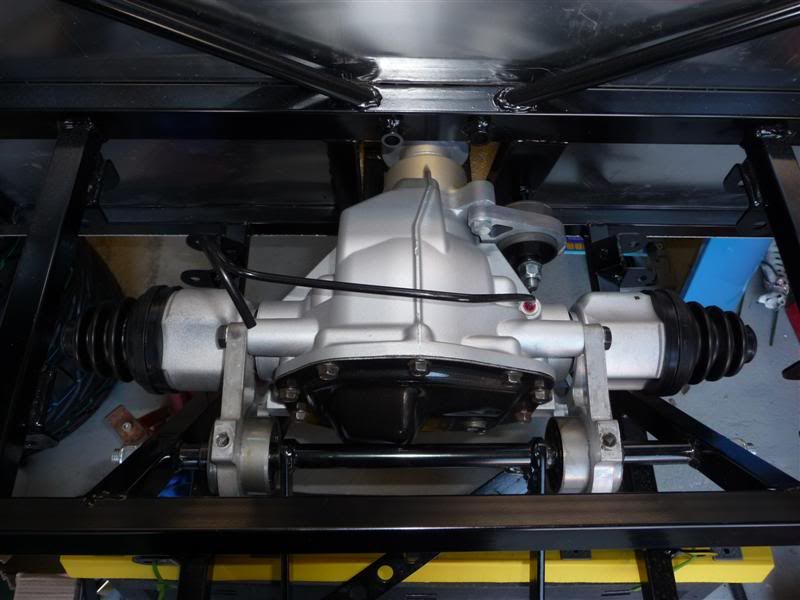
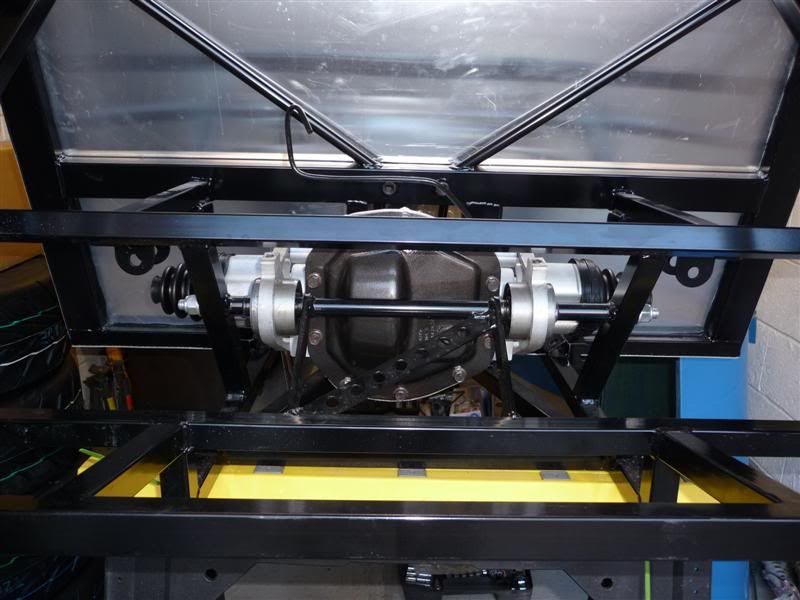
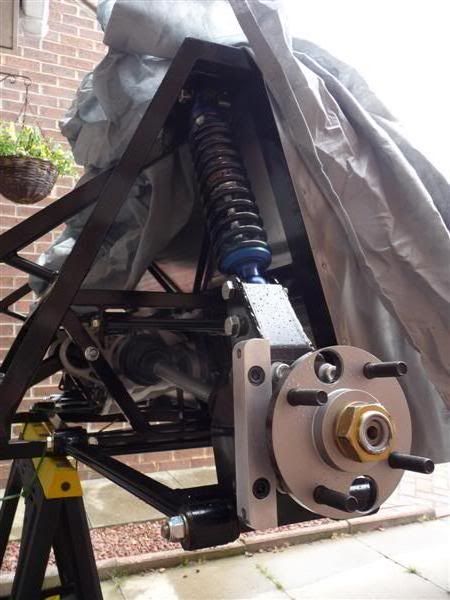
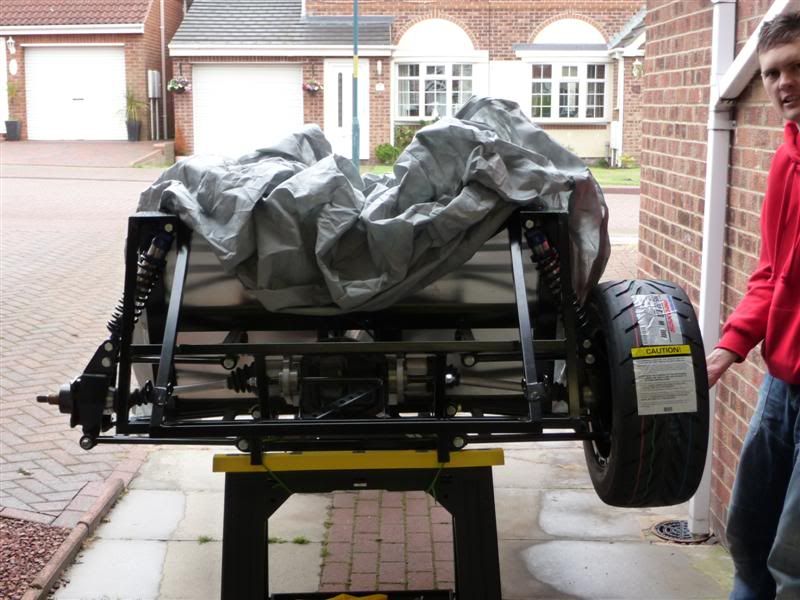
I then set about a quick mock up of the rear suspension, which looks something like this
Once the notch was cut out of the casing, the diff bolted into the chassis easily.
I then set about a quick mock up of the rear suspension, which looks something like this
Thanks for your concern mate, but no need to worry. This braking combination has been used on many Mac#1 customers cars and found to be trouble free, the front and rear calipers have different sized pistons in them and they work nicely together, with no need to fit a brake bias adjuster into the rear brake line.
singlecoil said:
Red16 said:
The pistons have diameters of 35.1mm in the front calipers and 25mm in the rear calipers.
Thanks, I'll make a note of that, it could crop up quite soon.Todays progress goes like this...
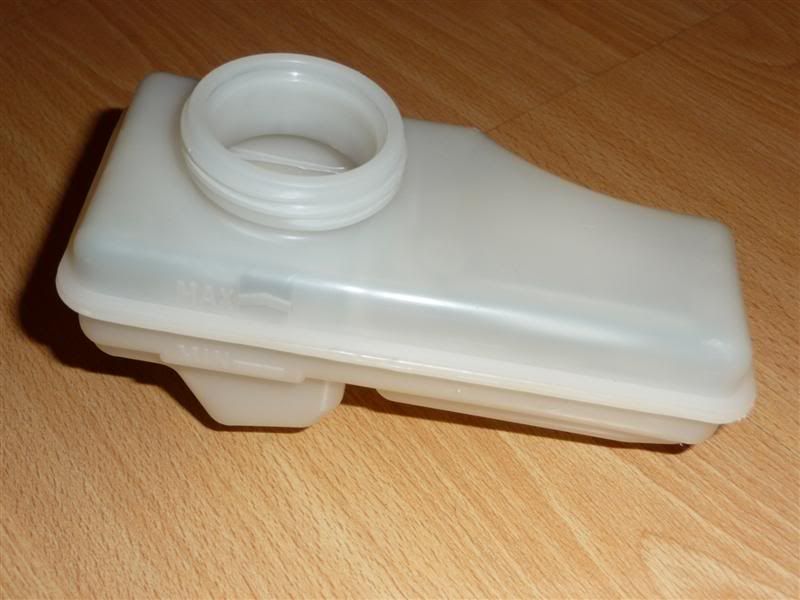
One new Sierra brake fluid reservoir
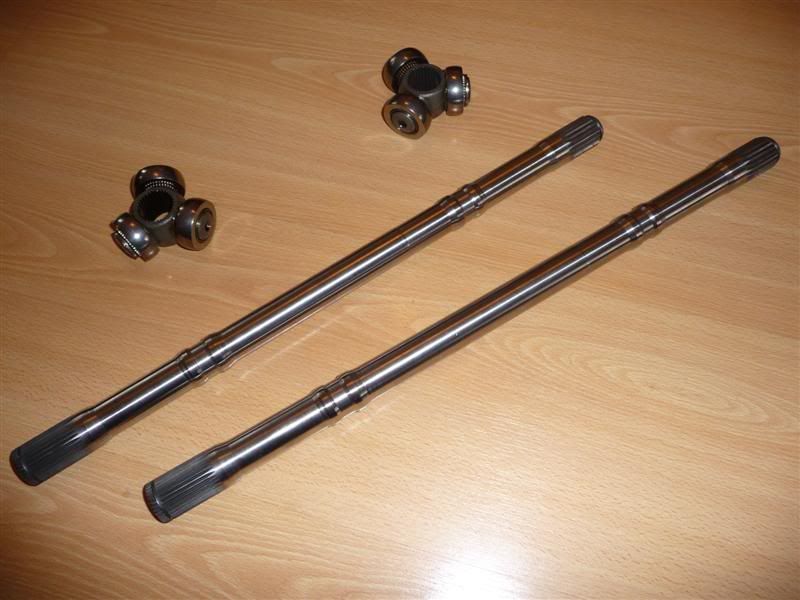
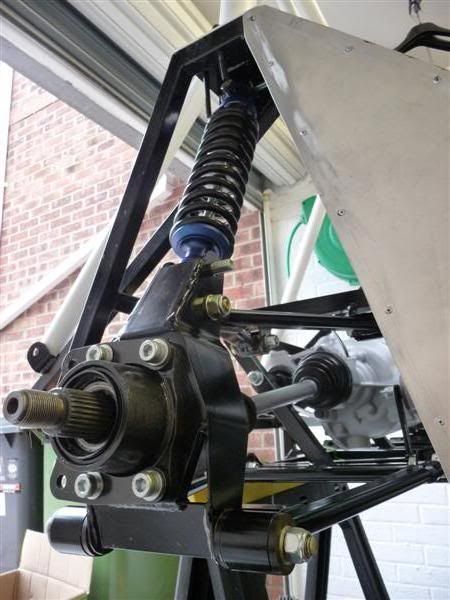
Driveshafts built up, but still requiring securing around each end of the cv boots
Drivers side driveshaft fitted, suspension assembled with upright, bushes fettled to rotate nice and easily, no squeeks

List of jobs for next time i venture out to the garage...
1. Brake caliper brackets to paint and fit.
2. Copper slip and other crap to wipe from the chassis, it looks filthy in the photos

3. Spring to fit to coilover strut.
4. Couple of nuts/bolts to torque up.
Then the other side can be assembled.
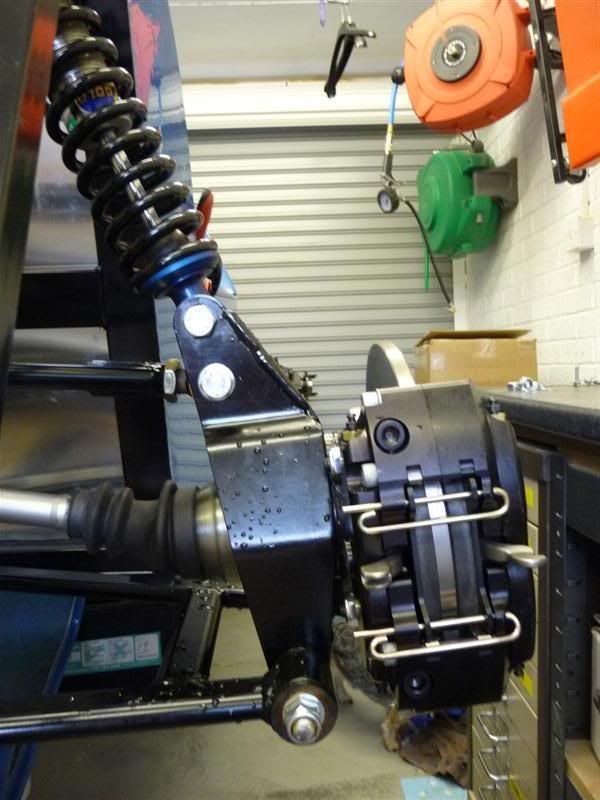
The rear hubs are away being machined to 134mm diameter to allow the rear brake discs to be fitted.
Edited by Red16 on Monday 5th July 23:35
Been assembling the rear end today
Fitted the brake caliper brackets to the uprights.
Drivers side
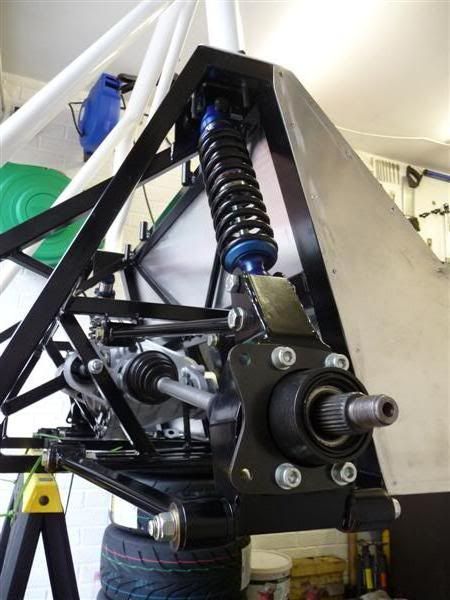
Passenger side
Then done a small amount of work to the front end, fitted the arms to the steering rod and secured the rubber boots.

Hoping to get my rear hubs back tomorrow, then the brakes can be fitted.
Fitted the brake caliper brackets to the uprights.
Drivers side
Passenger side
Then done a small amount of work to the front end, fitted the arms to the steering rod and secured the rubber boots.
Hoping to get my rear hubs back tomorrow, then the brakes can be fitted.
Rear hubs and brake caliper brackets fitted, driveshaft nuts need to be torqued up once the brakes are operational.
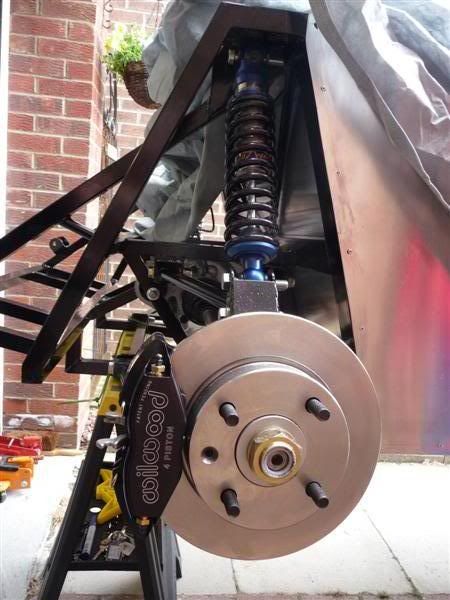
Rear brake discs and calipers fitted and it started to look like this
With my mate, Decka, acting as a temporary wheel nut a wheel was tried on the back, starting to look quite wide now
The side panels were trimmed for the final time, or so i thought, i now think i'll merge the steering rack hole with the front lower wishbone hole, as most people do.
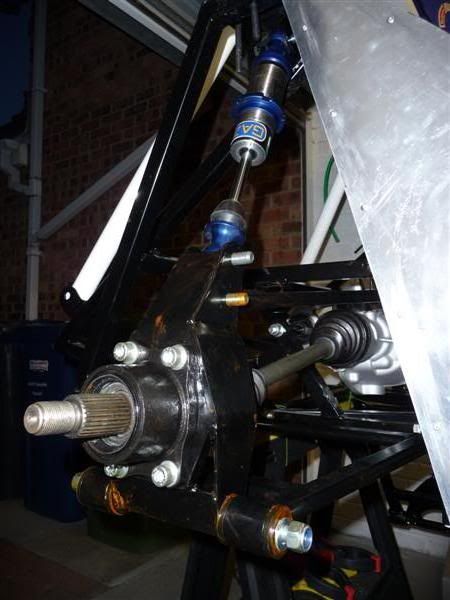
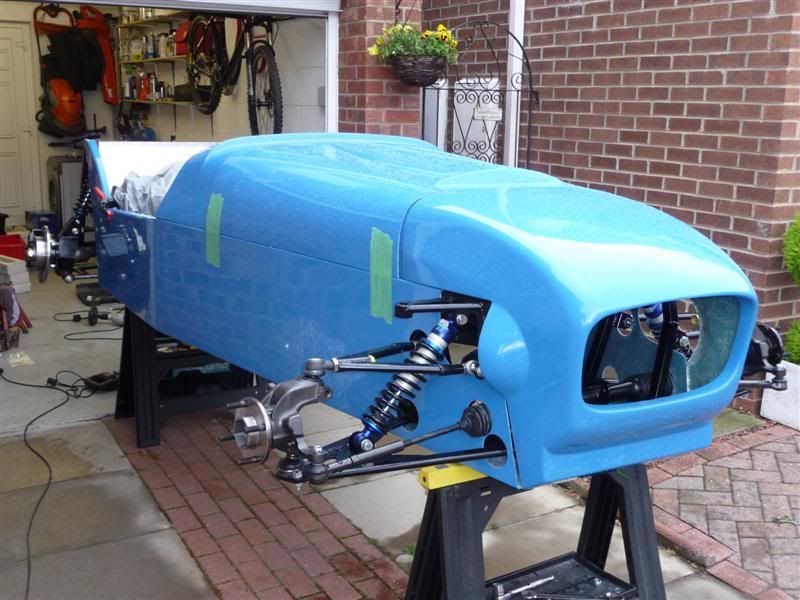
The passenger side front suspension was then built up

Drivers side
Took the nose cone off to fit it in the garage, need to move my vice stand to get the car further back... job for another day
Thanks to Decka for the assistance today, I'm dead happy with the kit, it's really starting to look like a car now
Rear brake discs and calipers fitted and it started to look like this
With my mate, Decka, acting as a temporary wheel nut a wheel was tried on the back, starting to look quite wide now
The side panels were trimmed for the final time, or so i thought, i now think i'll merge the steering rack hole with the front lower wishbone hole, as most people do.
The passenger side front suspension was then built up
Drivers side
Took the nose cone off to fit it in the garage, need to move my vice stand to get the car further back... job for another day
Thanks to Decka for the assistance today, I'm dead happy with the kit, it's really starting to look like a car now
This afternoon i took the suspension off the front of the car and decided to do the final trimming to the side panels
Before
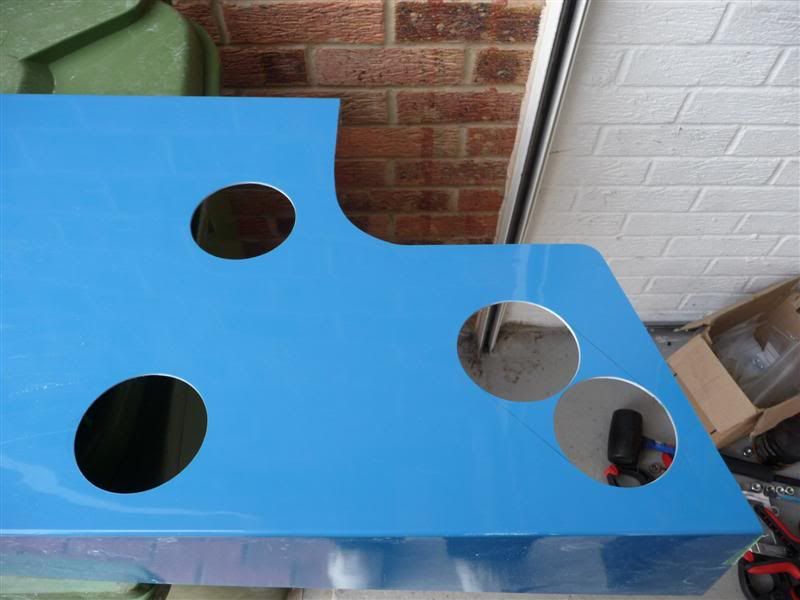
After

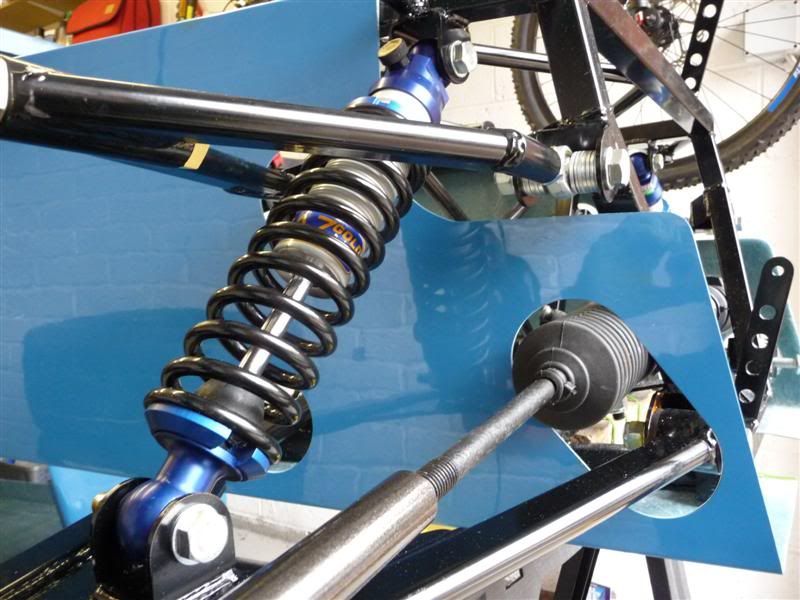
All the steering/suspension fitted back to the car again. The washers in the upper wishbone mounting brackets are temporary until i get some bushes knocked up.
I done a quick little job while the side panel was off and fitted the master cylinder.

Before
After
All the steering/suspension fitted back to the car again. The washers in the upper wishbone mounting brackets are temporary until i get some bushes knocked up.
I done a quick little job while the side panel was off and fitted the master cylinder.
rdodger said:
Before you make up the bushes. Is the space there to allow the adjustment of the caster angle?
Yes it is, the washers are being used until I decide on the dimensions of the bushes needed to achieve the caster angle I want/need, which at the moment I have no idea about... something else to learn and speak to Mac about.
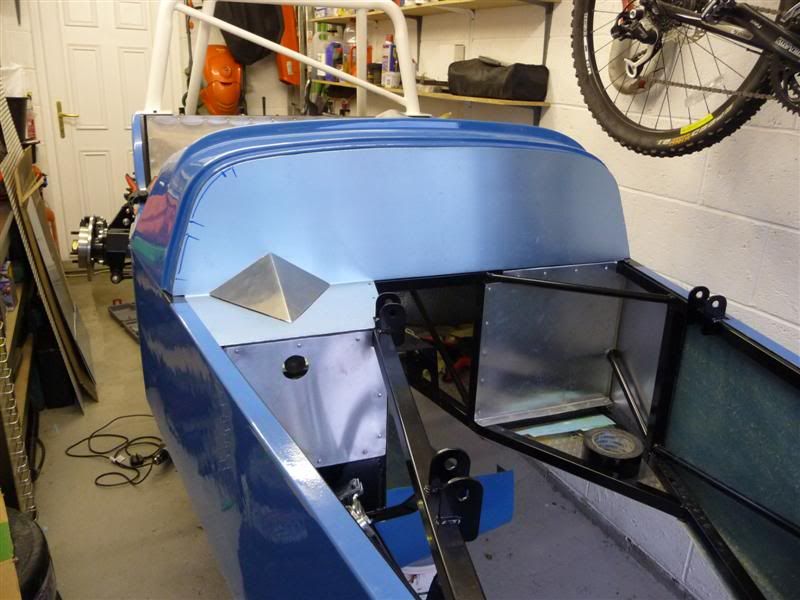
Well after ages of not doing much, I've been in the garage making progress today...
The beginning of the bulkhead/pedal cover panel
How it looks resting in position

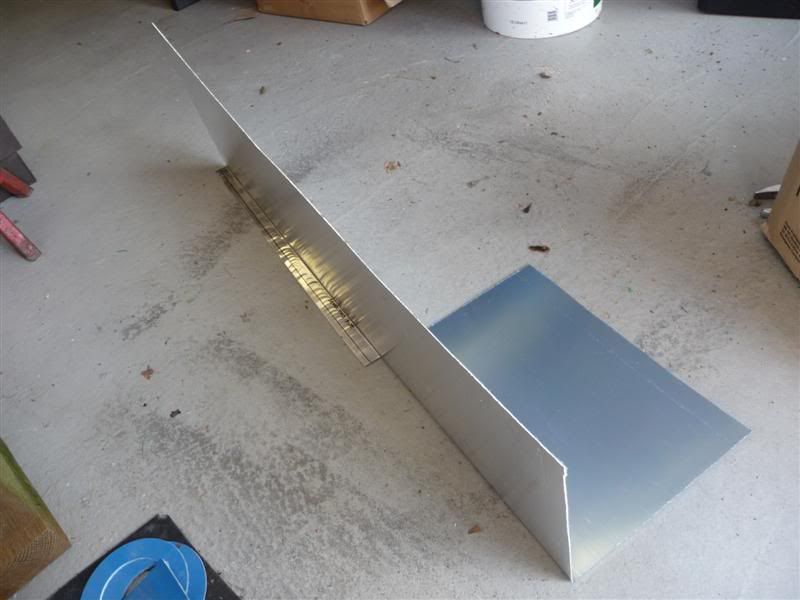
The steering column goes through the bulkhead/pedal cover panel, so I made this wedge to cover the steering column in instead of it being exposed, not sure if I'm going to use it or redesign and remake it though.

How it'd look if I used it as it is.
The beginning of the bulkhead/pedal cover panel
How it looks resting in position
The steering column goes through the bulkhead/pedal cover panel, so I made this wedge to cover the steering column in instead of it being exposed, not sure if I'm going to use it or redesign and remake it though.
How it'd look if I used it as it is.
Gassing Station | Kit Cars | Top of Page | What's New | My Stuff