Tuscan Challenge Road Car (at the moment) build project
Discussion


450Nick said:
My car design may help you...
I have a version of the John Reid roof, though the previous owners cut off the roll over hoop, and I've mounted the seat sufficiently low that this is ok from a rules perspective. My roof has several metal tabs glassed into the leading edge. These fit into corresponding slots in the top of the windscreen, and have a rubber/foam seal along the same edge to dissuade water from entering.
To secure the roof down, there are then several 'dzeus' fasteners around the base edge of the roof, locking into the rear clam with another weatherproof strip. The only gap remaining is therefore the windows, which could be sealed with a window and rubber or water channel. Simple, but the roof is very sturdy when fitted, and has waterproof seals to prevent water ingress. Seems a simple solution to me...
Hi mateI have a version of the John Reid roof, though the previous owners cut off the roll over hoop, and I've mounted the seat sufficiently low that this is ok from a rules perspective. My roof has several metal tabs glassed into the leading edge. These fit into corresponding slots in the top of the windscreen, and have a rubber/foam seal along the same edge to dissuade water from entering.
To secure the roof down, there are then several 'dzeus' fasteners around the base edge of the roof, locking into the rear clam with another weatherproof strip. The only gap remaining is therefore the windows, which could be sealed with a window and rubber or water channel. Simple, but the roof is very sturdy when fitted, and has waterproof seals to prevent water ingress. Seems a simple solution to me...
Hope things are progressing in the right direction...love the look of your car brill...your roof arrangement sounds good, you mention lugs in the top of the screen, are mine the same as yours?

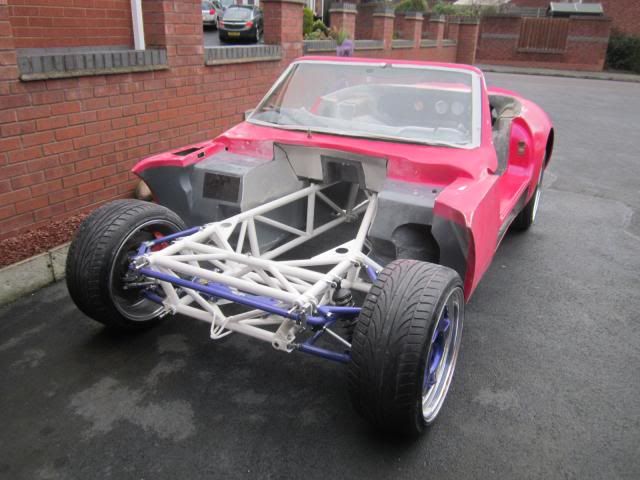
Bit more progress made recently ..
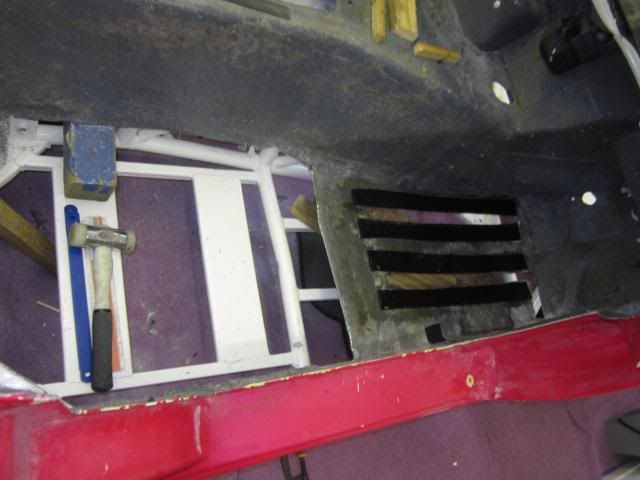
The drivers footwell has pedal box mounts on the chassis I am going to use floor mounted pedals, as the drivers side floor is relatively thin and flexible we decided to cut two sections out of the floor...
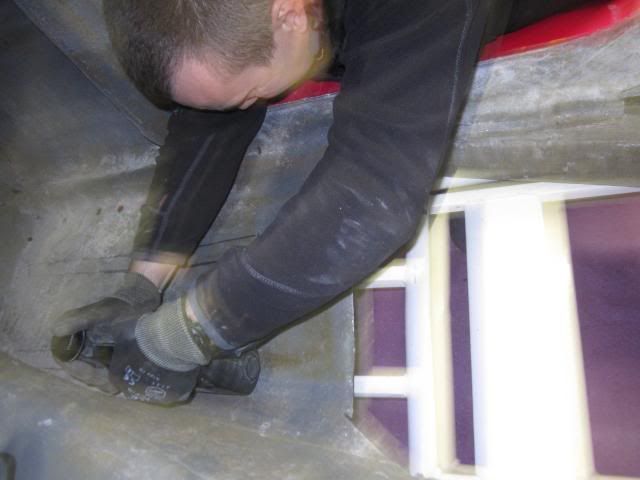
Karl did one side I did the other....now the body sits on the chassis, we put bolts through the floor to secure...they lined up with the chassis which is good....
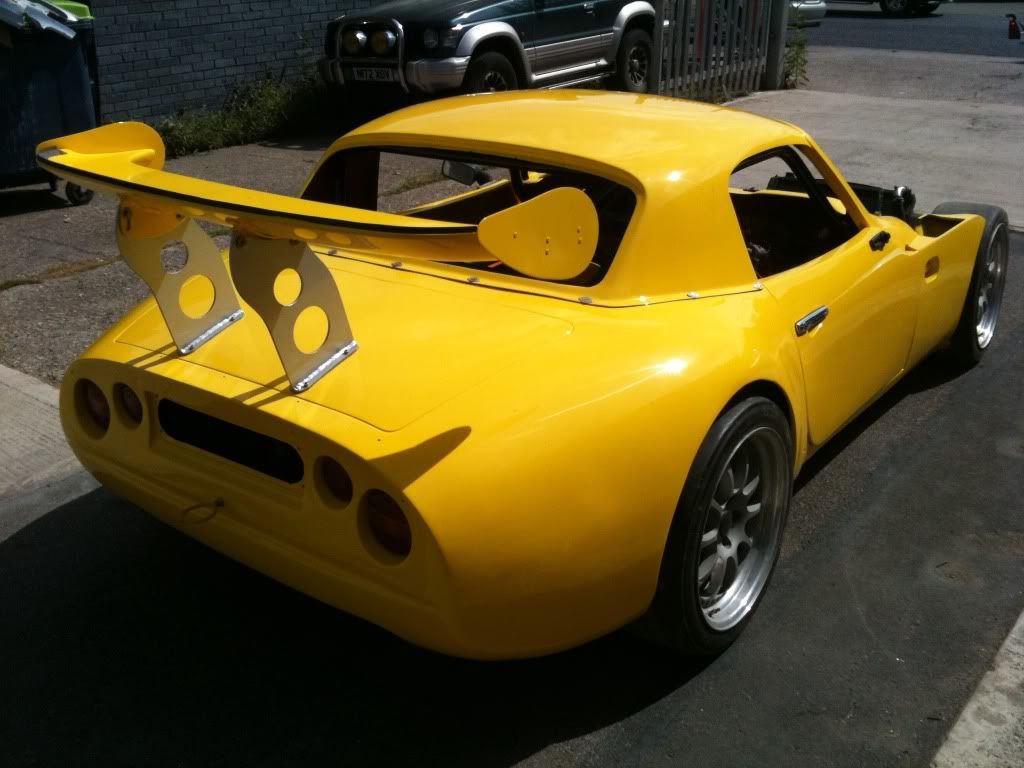
Almost looks like a car...
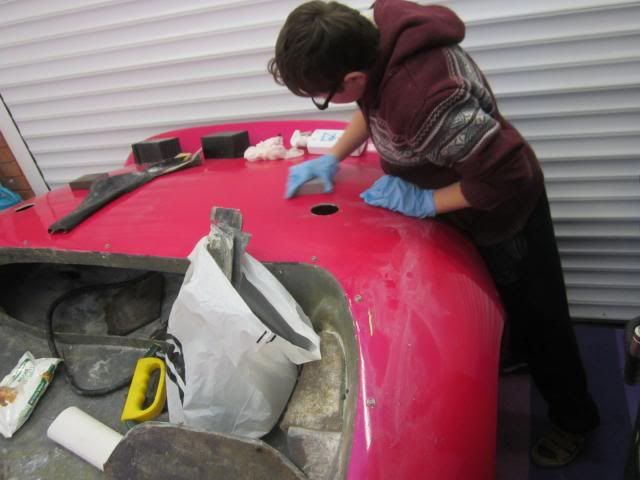
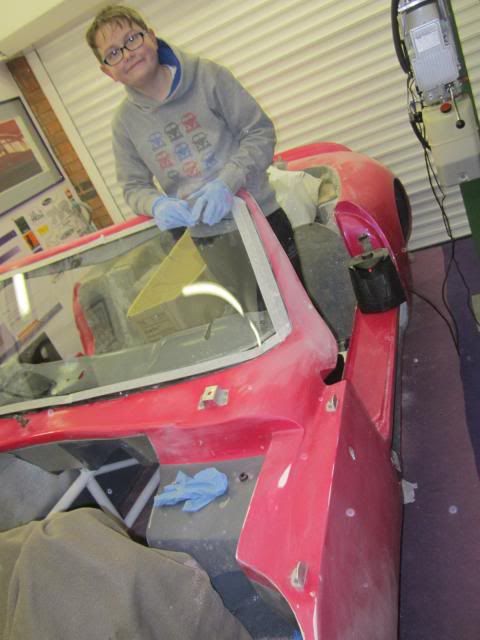
George was keen to start prepping the body for paint so I let him have a go...hasn't done a bad job in all fairness...much more prep required though but it's a start and keeps him happy..also removed all body fixings ..
Next thing was the roll cage ...
The drivers footwell has pedal box mounts on the chassis I am going to use floor mounted pedals, as the drivers side floor is relatively thin and flexible we decided to cut two sections out of the floor...

Karl did one side I did the other....now the body sits on the chassis, we put bolts through the floor to secure...they lined up with the chassis which is good....
Almost looks like a car...

George was keen to start prepping the body for paint so I let him have a go...hasn't done a bad job in all fairness...much more prep required though but it's a start and keeps him happy..also removed all body fixings ..


Next thing was the roll cage ...
450Nick said:
Thanks Steve! It seems like a bit of an uphill struggle at the moment, but I'll get there eventually! Yes my windscreen looks pretty similar to yours, the slots fit the lugs pretty tightly, and then the fasteners at the back lock it in nice and tight, though it comes off in a few seconds. If you were to integrate some windows or rain channels/deflectors into the A-pillars then you'd have something perfectly driveable in the wet I'd say...
Just read your reply yo Perry....sounds like you have been globe trotting! So doesn't sound like all doom and gloom regarding fitting roofs and sealing them... Griff and chimaera ones have a seal in the front that works but ours are obviously different ......toying with how to close off window area....plus how to secure car...locking aero catches and Newton filler is a start...
..at Race Retro Stoneliegh on Friday will see what there is ..going to keep an eye open for a pedal box.....JR will be there too ...got some on of the DTEC sail flags I borrowed for him
Cheers folks....been working on it when I get a moment......putting floor back took time....gonna spend the next hour painting the floor which I have now refabricated ....later we are off to John Eales for an AP Clutch and bearing.....
We will then get the engine and box back together .....take the body back off again ....borrow an engine hoist.....see how it sits within the engine bay.....see where to fab mounting points....obviously taking height etc into account.....weld it up....get a sump.....easy really!
Thanks for looking!
We will then get the engine and box back together .....take the body back off again ....borrow an engine hoist.....see how it sits within the engine bay.....see where to fab mounting points....obviously taking height etc into account.....weld it up....get a sump.....easy really!
Thanks for looking!
Right the floor...ended up cutting a lot of the floor away this was because I had welded in steel
cross section plates to accommodate the seats and additional seat belt and harness points ....on the passenger side and drivers side...
left me with big open areas...plus fresh air to bolt the body to the chassis....here is the driver side....in addition we cut the drivers footwell floor either side of the pedal box.....I then cut fibre glass strengthening strips and bonded them either side of the body where the pedal box mounts came through...these are the black strips of fibreglass ...
The floor sections I had cut out were about 13mm thick....there was no way I could re use them, so I made three aluminium supports for each seating area then riveted them to the tunnel section and sill section....
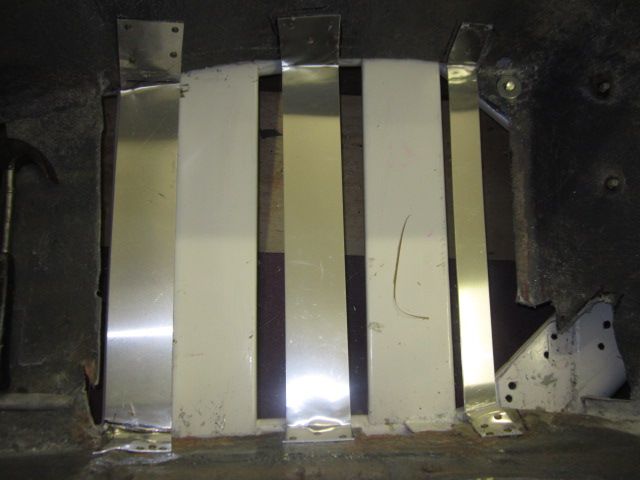
Then made a template of the area with an empty stella box....guess other brands would have done the trick though!
Then cut the flat fibreglass sheet that I had to shape....
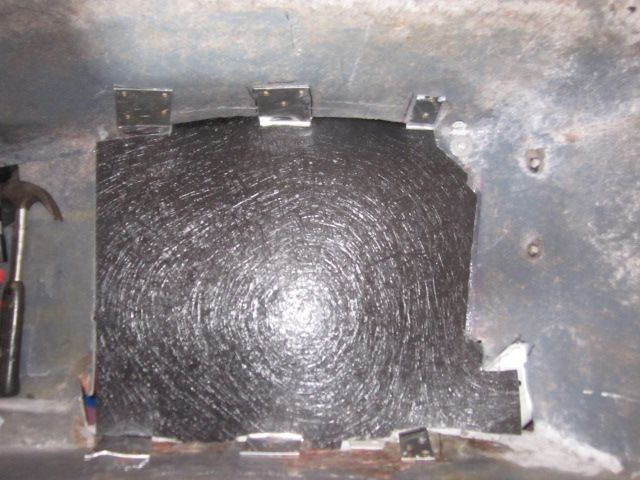
Riveted this to the aluminium....and bonded the edges with matting and resin...this was surprisingly strong and thin....making sure all the time that the floor I was trying to create was not going to come into contact with the chassis....sounds easy but it wasn't!
For extra strength I bonded another couple of layers of resin over the whole thing...leaving the ares where the body mounts free so that I could sort these areas out from underneath the car...
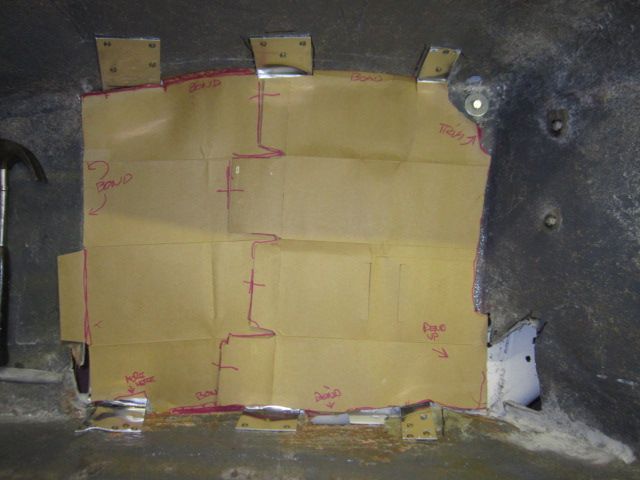
This is what it looked like sort of half way through....I got the paint colour matched to a brush-on grey...here I have done one side......

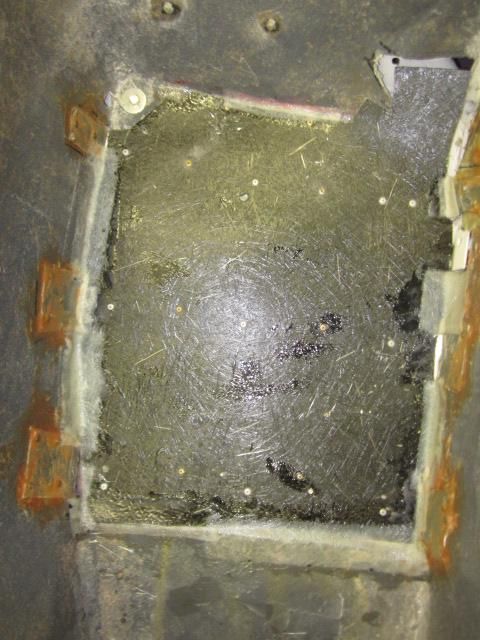
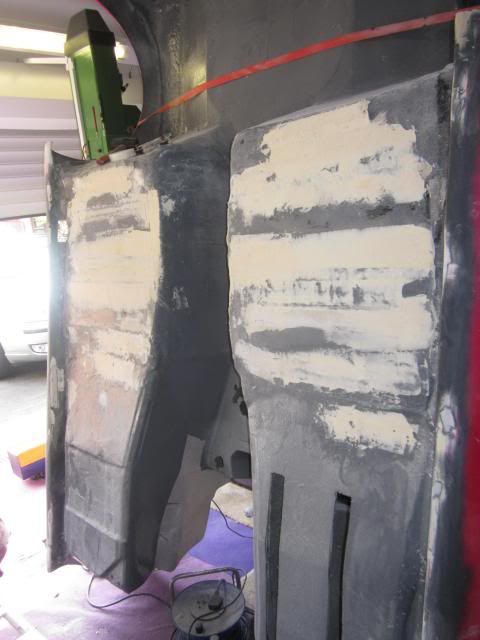
BUT I was unhappy with how uneven the floor looked from underneath....so smoothed out the whole area ....being mindful not to create a problem by having the body not clearing the chassis.....(are you still awake! lol)....thing is with this as that I will know that it is a bit rough underneath....I am in no rush I need to do it justice...being midful of keeping within budget and expertise...
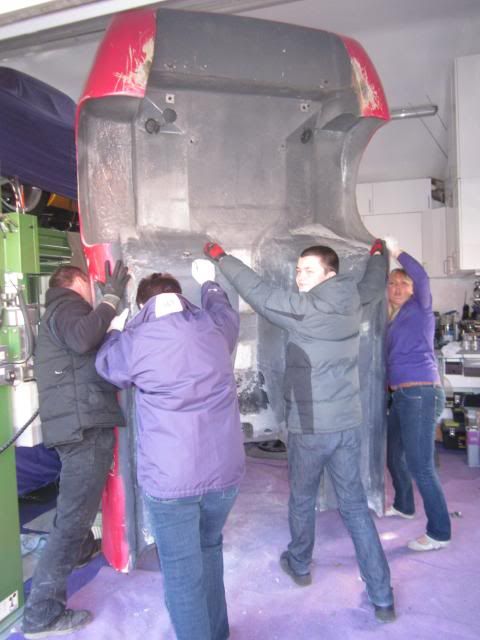
Then we released the body from the retaining straps....this time Liz, Ginny Karl and Ben moved the tub...whilst I took images...
cross section plates to accommodate the seats and additional seat belt and harness points ....on the passenger side and drivers side...
left me with big open areas...plus fresh air to bolt the body to the chassis....here is the driver side....in addition we cut the drivers footwell floor either side of the pedal box.....I then cut fibre glass strengthening strips and bonded them either side of the body where the pedal box mounts came through...these are the black strips of fibreglass ...

The floor sections I had cut out were about 13mm thick....there was no way I could re use them, so I made three aluminium supports for each seating area then riveted them to the tunnel section and sill section....

Then made a template of the area with an empty stella box....guess other brands would have done the trick though!

Then cut the flat fibreglass sheet that I had to shape....

Riveted this to the aluminium....and bonded the edges with matting and resin...this was surprisingly strong and thin....making sure all the time that the floor I was trying to create was not going to come into contact with the chassis....sounds easy but it wasn't!
For extra strength I bonded another couple of layers of resin over the whole thing...leaving the ares where the body mounts free so that I could sort these areas out from underneath the car...

This is what it looked like sort of half way through....I got the paint colour matched to a brush-on grey...here I have done one side......

BUT I was unhappy with how uneven the floor looked from underneath....so smoothed out the whole area ....being mindful not to create a problem by having the body not clearing the chassis.....(are you still awake! lol)....thing is with this as that I will know that it is a bit rough underneath....I am in no rush I need to do it justice...being midful of keeping within budget and expertise...

Then we released the body from the retaining straps....this time Liz, Ginny Karl and Ben moved the tub...whilst I took images...

Edited by schimg on Wednesday 26th March 18:44
Edited by schimg on Wednesday 26th March 19:12
Slowly does it....keep chipping away.... :-)
Called at Mr Eales's place a couple of weeks back (what a nice bloke and cracking set-up),
The second time we went there he had just started up a challenge car that had had an engine rebuild.....black car and was stunning, certainly puts mine to shame!
Anyway trip was useful got a proper AP friction and bearing, both the one's that were in my gearbox looked OK but just foolish not to replace at this stage....fitted the new bearing...
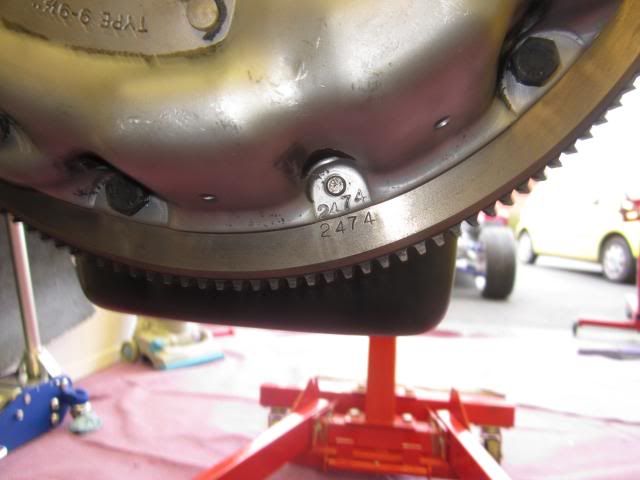
Good job we spoke with John as he pointed out the balance marks on the pressure plate which matches the rest of the engine...we would have probably noticed but good that he pointed this out to us...fitted the new AP racing friction plate too
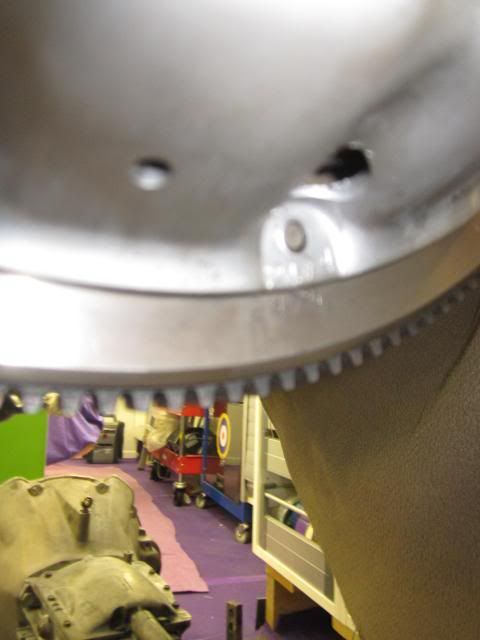
poor image that!
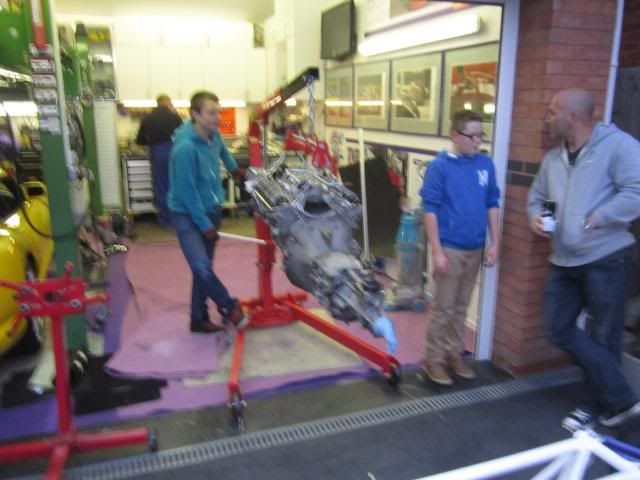
George and Ben attached the hoist chains..Ben will be an asset in years to come as Tim Hood is letting Ben help out on the race car...at the weekends which is cool for a budding mechanic
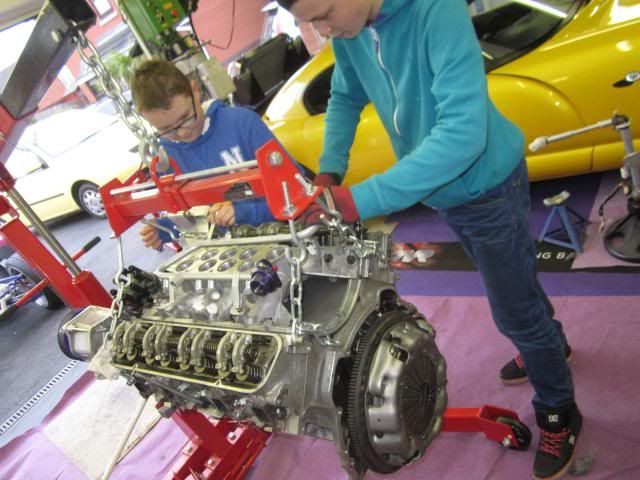
Then we put the engine and box together ...
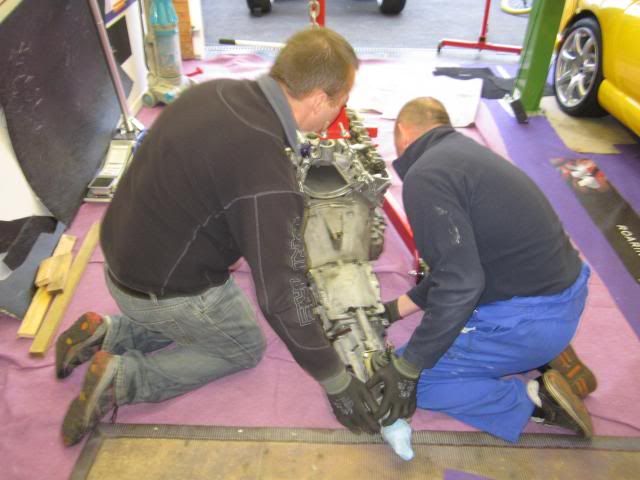
Whipped the body off...moved the engine and box over the chassis for the first "try-fit"
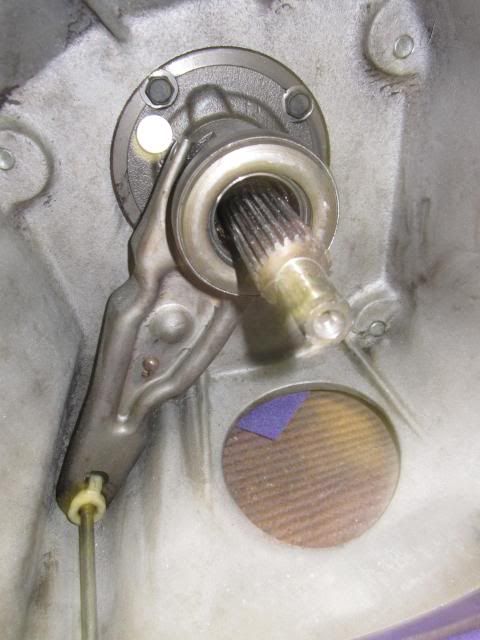
So have the "proper" rear gearbox cross member...
But not the rubber / link part to put on the cross member...
The gear stick appears to be there abouts....(probably wrong!)
But looks OK for a start...
then we dropped the body back on ...
Now to see how get the front engine mounts sorted....and the rear gearbox one for that matter!
Called at Mr Eales's place a couple of weeks back (what a nice bloke and cracking set-up),
The second time we went there he had just started up a challenge car that had had an engine rebuild.....black car and was stunning, certainly puts mine to shame!
Anyway trip was useful got a proper AP friction and bearing, both the one's that were in my gearbox looked OK but just foolish not to replace at this stage....fitted the new bearing...

Good job we spoke with John as he pointed out the balance marks on the pressure plate which matches the rest of the engine...we would have probably noticed but good that he pointed this out to us...fitted the new AP racing friction plate too

poor image that!
George and Ben attached the hoist chains..Ben will be an asset in years to come as Tim Hood is letting Ben help out on the race car...at the weekends which is cool for a budding mechanic


Then we put the engine and box together ...

Whipped the body off...moved the engine and box over the chassis for the first "try-fit"


So have the "proper" rear gearbox cross member...

But not the rubber / link part to put on the cross member...
The gear stick appears to be there abouts....(probably wrong!)

But looks OK for a start...
then we dropped the body back on ...


Now to see how get the front engine mounts sorted....and the rear gearbox one for that matter!
Graham said:
I dont think there is much of your old car left andy !!
Yes Andy your car previously.....this was a very tidy motor....lots of black going on....v.well put together by the look of things...engine sounded v.good .....they need to open the doors though when they run it!Was good to have another reference point for mine.....
G1ABB said:
Looking great Steve.
Thanks Graham,Slow progress but keep plugging away....picking up my pedal box later....will help me sort our reservoir positions...brake lines....drivers footwell...
Not spoke to you for ages....I see your red Speed 12 is in a safe place....how is number 2 coming along must be about there now?
Love to Jasmine, James, Amika ...but good to hook up at some point.....you are always welcome down this way!
Decided to go floor mounted pedal box....the chassis has the rails to support box and adjust it.....
Bought the one advertised by Glen on here....it came with his 5000m project...the stuff has never been used a couple of the cylinders are still in their packaging......
The box is OBP...took that all apart changing colour ....from black to the same colour as the cage " course silver" ....
I will mount the reservoirs on the top of the bulkhead....they have the following reference marks "TAS 380" and "17001"...being a bit blonde do these sound like they will be upto the job?
I also have a brake bia bar ......so (again never done this before, so input appreciated) was thinking need to split brakes lines to front and rear system.....right?
Then have a separate reservoir fro each system?
The third reservoir for the clutch system?
Then onto the slave cylinders..they are Girling with the following marking:
1. 625 (bs2 310360
2. 3/4 64667768
3. 700 ( this one is attached to the OBP handbrake......
Are they the right ones?
Which would you use for what?
.....
Next question I now have an OBP handbrake .....it's hydraulic ....sure I got told that you can't use these on road cars ?
Or am I loosing it (again lol)
Graham said:
Yep separate circuit for front and rear brakes one ciruit from each master cyl.
The other one is the clutch.
You will need a cable handbrake for mot
Thanks G,The other one is the clutch.
You will need a cable handbrake for mot
Any idea of the right size slave?
Looks like I have a spare OBP handbrake then....
Once I have positioned the engine and box I will get a prop made to the right length ...looks like it will be where I position the handbrake stuff....rather than a "spot" calliper on the rear uprights ...
schimg said:
Thanks Perry ....where did you position yours.then did you upright or prop?
Thinking about this I will go prop shaft route....But first we will get the engine in the ,correct position...the starter motor is v close to the chassis so we will be modding that area.....and strengthening the chassis to accommodate the engine mounts....we will use the standard engine mount bracket off the block and Terry (Tim Hoods team) will fabricate the mounts / chassis....once the engine is in...we can sort the rear gearbox mount.....then sort a prop which will have a disc and calliper just in front of the diff....
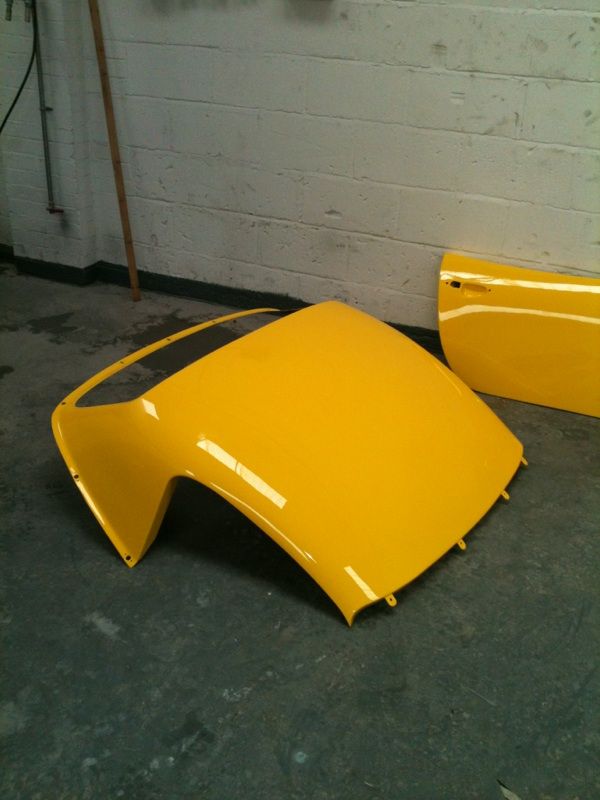
Terry Michael and Luke took measurements last night....plus we will be making the cage cross braces...to avoid clouting the dash ....this should be done in a week or so....started to seriously prep the bodywork now....will aim for the same standard as the passenger door that I had painted a while back...
I also need to decide how I am going to close off the inside of the doors....might be a chat with JR.....
Will also be sourcing brake and fuel lines ...and sourcing seats....want one's capable of acclimating 6point harness, Malcolm one of the new directors of TVR advised me off this route whilst the chassis was on the NEC stand in November....offered to give me some pointers re position of harness etc....didn't get his email address .....doh!
So moving forward....not stalling yet!
Edited by schimg on Thursday 17th April 08:44
Thanks for the couple of "Bumps" John and Terry 
Apologies for delay in replying....in all fairness the whole thing has moved forward in a very positive way, still try and do something to the car daily....final assembly now taking place and preparing bodywork for paint...and trimming....
I want to put an "cut-off" switch recess in the exterior bodywork thinking just behind the front wheel in the wing ...was thinking passenger side, but might go drivers side so I can use it in things go less than good ...
...
As ever open to input...it needs to look right ...ideally curved edges ....struggling to locate one....checked usual suspects Demon Tweaks etc ..what did the challenge cars use? ..anyone have ideas or an old one I could use?
Thanks in advance
Steve
Apologies for delay in replying....in all fairness the whole thing has moved forward in a very positive way, still try and do something to the car daily....final assembly now taking place and preparing bodywork for paint...and trimming....
I want to put an "cut-off" switch recess in the exterior bodywork thinking just behind the front wheel in the wing ...was thinking passenger side, but might go drivers side so I can use it in things go less than good
...As ever open to input...it needs to look right ...ideally curved edges ....struggling to locate one....checked usual suspects Demon Tweaks etc ..what did the challenge cars use? ..anyone have ideas or an old one I could use?
Thanks in advance
Steve
77racing said:
Hi Steve looking good in text you sent don't always get them.a quick call to terry should have the answer. if you get really stuck I have a carbon fibre one in the barn I think with cables etc but I not seen it for a year or two would have to look
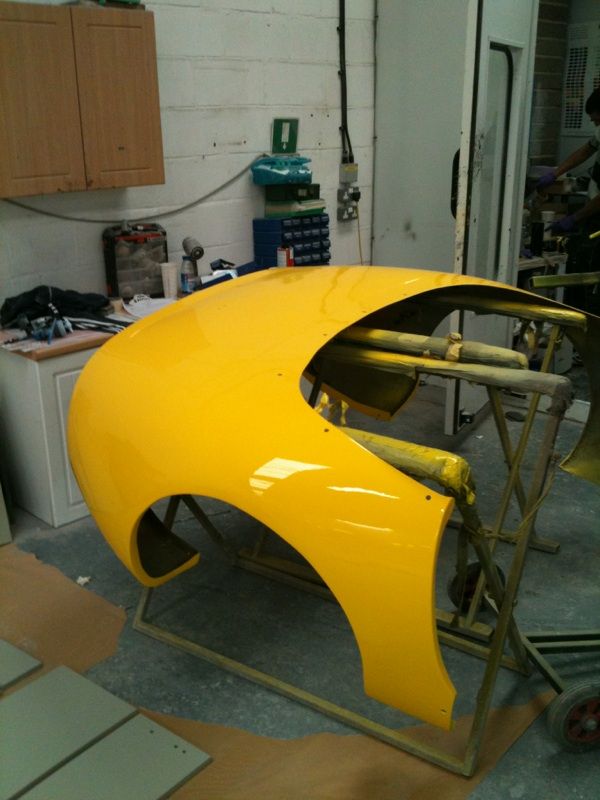
Thanks Perry,Spent a week filling the bonnet so far!
Never going to be the lightest .of things though used two and a half large tubs of u-pol easy on it so far....should finish that stage today then will cover the whole thing with "fantastic" ...then filler primer....then a coat of polyester ....then leave and move on to the tub!
Spoke with Terry he is struggling to recall what was used....perhaps JR might have an original...
Grant thanks for the reply ....want to do it original ...so will do what you suggest here passenger side behind wheel...probably under side repeaters which will be clear and oval....
Got new headlights, bowls, surrounds., new LED hamburgers, ...need front indicators and fog and reverse LED ...right better start walking to the garage!
Hi Perry,
Thanks for the info....will check them out later (just back in)
Hi Dave,
That is interesting doesn't look out of place ....carbon would match my rear diffuser,rad and oil cooler surrounds ...if you get chance to look it would be appreciated ...
Thanks for the info....will check them out later (just back in)
Hi Dave,
That is interesting doesn't look out of place ....carbon would match my rear diffuser,rad and oil cooler surrounds ...if you get chance to look it would be appreciated ...
Edited by schimg on Thursday 5th February 21:39
77racing said:
Hi Perry,Appreciate the response
Thanks
ctsdave said:
Hi Steve. If you want LED Landrover items give me a shout, sure one of my suppliers atarted to do them recently! Hope you didnt pay sully money for LED hamburgers etc either...
Dave
Hi Dave,Dave
Thanks for this Ivor gave me your mobile number when we had his challenge car on the stand at the NEC in November, I was looking for an LED rear fog and reverse, was thinking of going indicator ring on the outside to tie in with indicator on hamburger ans small LED fog and reverse in the middle couldn't find any suitable....
Tried calling you a couple of times....then sort of got distracted with assembly!
Terry had a set of LED hamburgers from Tim's Tuscan so there sorted....have nice clear ( not chavvy) mini headlight with a side light inside plastic bowls and nice chrome surrounds....
As I say need indicators for front, clear oval side repeaters and those LED rear bits if you have any thoughts?
Spent a week and a bit on prepping the bonnet so far!
Now ready for filler primer....then I start on the body again....that isn't too bad though...the bonnet had had damaged bad repair to the near side wing which we ground out and re matted ( thanks to Tim for the glass work and initial filler work!), we also cut the vents out and centralised them...the mould had them just over an inch off centre....again we cut them out Tim glassed them back in....waffling here!
Chuggaboom said:
I found a couple of 35mm pics from Combe in 98 Steve.....two different cars.
Although not close up, you can make out one of those carbon recess on the passenger side wing a couple of inches below the bonnet line and 3 to 4 inches fwd of the door, 90 degrees about to that pictured above.
Personally I'd go with in the dash....no little fingers pulling on things from outside the car when you are not around, but if you decide otherwise let me know if you'd like thes pics scanned and sent.
Thanks for the info Grant,Although not close up, you can make out one of those carbon recess on the passenger side wing a couple of inches below the bonnet line and 3 to 4 inches fwd of the door, 90 degrees about to that pictured above.
Personally I'd go with in the dash....no little fingers pulling on things from outside the car when you are not around, but if you decide otherwise let me know if you'd like thes pics scanned and sent.
This sounds right to me ...she needs to look right ..never going to please everyone on something like this but want to be sympathetic to what could have in this application....
I reckon rotating the surround by 90% would look more aesthetically pleasing ( not being unappreciative of Dave's car here...it's just how these cars got put together...not many the same) need to work around the side repeater location ..so will sit below this by the look of things ...
I have a duplicate of this thread on the wwm tvrcc forum, this is an extract from that thread, hope formatting works!
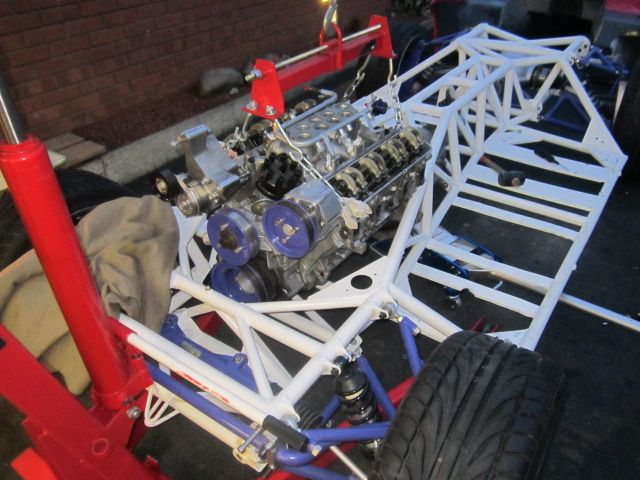
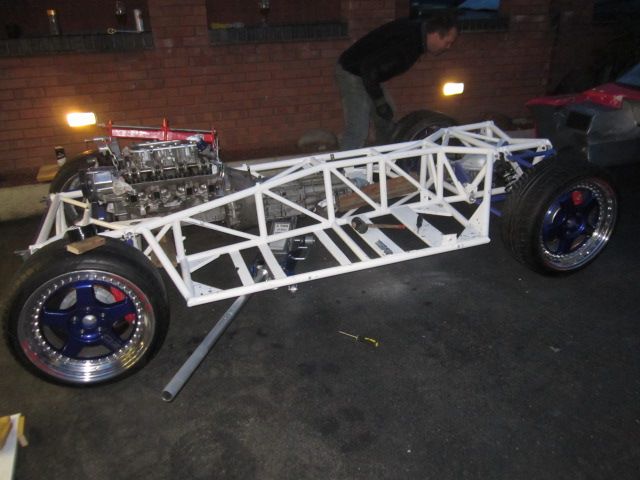
I left this thread at the stage where we were trying to get the correct position for the engine and gearbox getting the correct height to clear the chassis top tubes, not fouling with the bulhead and making sure the gear lever was in the correct position...the replacement chassis was one set up for an AJP engine ...I am running a TVR RV8 500 engine ..so new mounts were required ...
Terry cutting tube on my drive...

The replacement tube is noticeably thicker than the original tubes....


 You notice a green "cross" on one of the white tubes, I put this on so I knew which one I needed to cut out!
Bare in mind that I had already prepared this chassis....and this is it....I have lost count of the number of times I have prepared something on this car then ended up replacing it, damaging it or loosing it!
I made a concious decision to retain the AJP engine mounts....which are in the image above in the top left hand corner...
The engine now sits v.well within the chassis....and looks correct...the grea lever position is correct the starter motor clears the chassis....I did have to cut a corner off the back of the engine on the passenger side though...this part of the cylinder head is used to hold the head does for machining....and this still can be done as I only "shaved" the minimum off Tongue
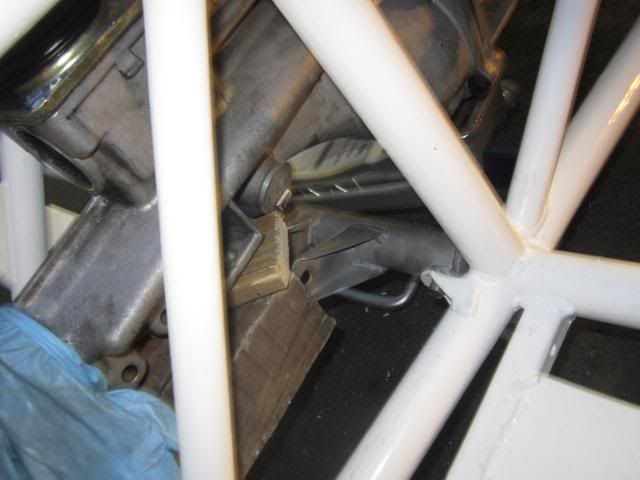
The rear gearbox mount was given to me by Tim Hood....it's off Tim's race Sagaris as he has gone a different route...
We then decided to take the whole think up to ACEL Metalworks (Terry's Business) ....
long story... but in summary I have known Terry and Tim since the Britcar 24Hrs stuff....in April 2014 they were entered in the GT Cup, they had paid all the entry and had blew two diffs on the Friday and Saturday....I got the call at 4pm on the Saturday afternoon to see if my diff was in the car...which it was....they said OK leave it then ...I sent them photographs of it so they knew what it was....turns out was the right one for the job...a "Cone" diff...Karl, Liz Ginny and myself ended up taking the body off my challenge car and dashing up to Donningtan.....at 7PM my diff was sat on the floor in the pit garage...
This was the moment....


They needed to change the back cover which I had sealed...hey ho!
.they fit it overnight....we would only know if was any good if he stayed out....he did and qualified 6Th!
He went on to come finish 4th in the first race and 5th in the second.....and this is against ferrari, maclaren and other big budget teams....
Since this time we have formed an even stronger friendship and help each other out which is nice..guess thats the TVR world.....hence Terry offered assistance over the welding...at a decent rate...as Crispian would say "on the money"
ACEL are in Nottingham near Trowel ...my 100 mile round trips had startedApprove...I could have asked Terry to "sort it" for me, but this is not what this project is about...I need to be involved in every step of the way...I did not possess the knowledge of how to do many aspects of this build, but I want to learn from it....and know ho this thing goes together...even though it is v.frustrating at times
Edited by schimg on Monday 9th February 14:32
Edited by schimg on Monday 9th February 14:50
RetroWheels said:

Two more here Steve , the blanking plate to the left of the recess on the red car was a factory mod when some cars had there Andesron connector sockets moved elesewhere.
And here's an Obscure Tuscan Fact..
The stainless/carbon look 'glass blanks were made by factory apprentices.
 .
.Looks like the route I will take....just need to locate one....missing the cover for the driverside engine bay...the shaped cover on the inner wing....
Gassing Station | General Motorsport | Top of Page | What's New | My Stuff