Tuscan Challenge Road Car (at the moment) build project
Discussion


Thanks for the positive comments appreciated....
Now got a steering rack...need to get 15 long wheel studs as the ones that came with the hubs were short ones!
Then I will fit the new rear wheel bearings and fit the hubs to the uprights....fit the diff and driveshafts....put the split rims back together...fit tyres ....fit the wheels.....think I will need shocks though :-)
Still heading in the right direction....I think!
Been doing a bit more...
Managed to source an unmolested steering rack..(hens teeth).
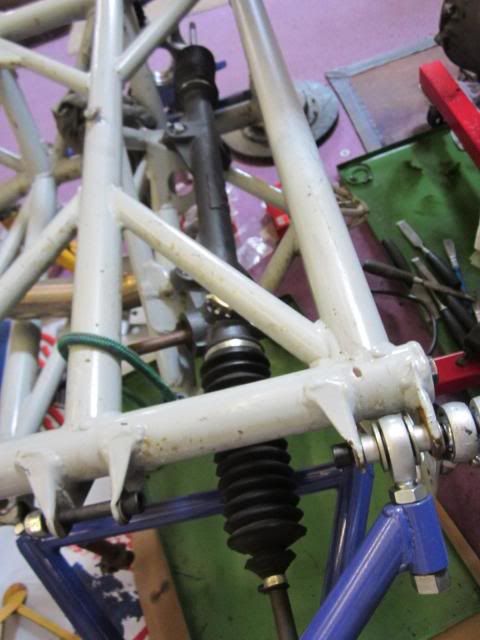

checked the gaiters out all appears well...plus it fits....

Need to find out what track rod ends are needed
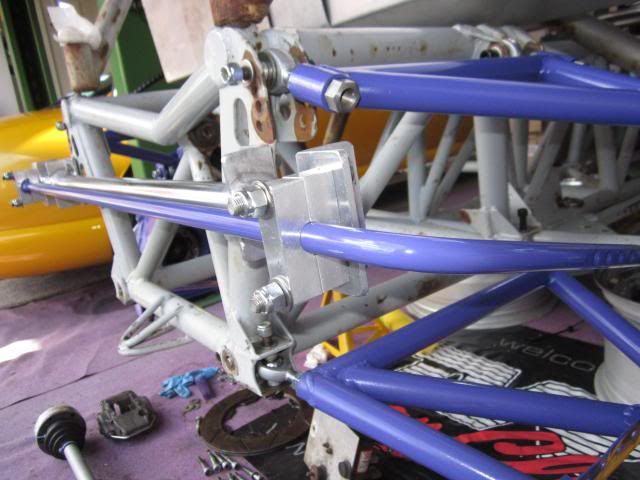
Plus the front ARB is ready for a pair of ali blocks and drop links...

The rear anti roll bar cleaned up wellI fitted it..I know the racer boys don't use them....but it is there if required...
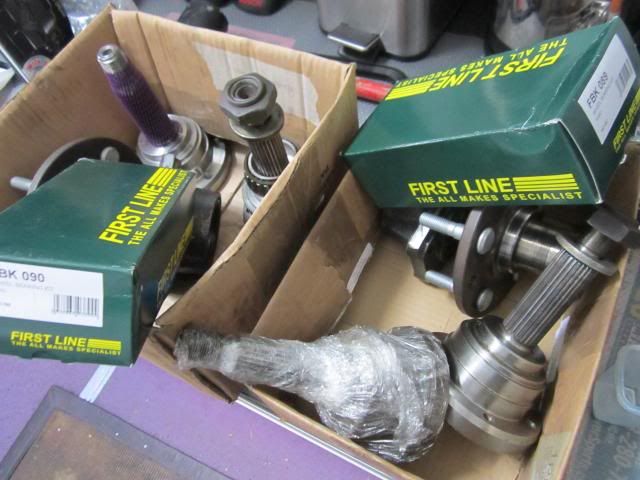
Plus changed one of the CV's ...missing a few bearings..the other three have been cleaned and re-packed and sealed with cling film.

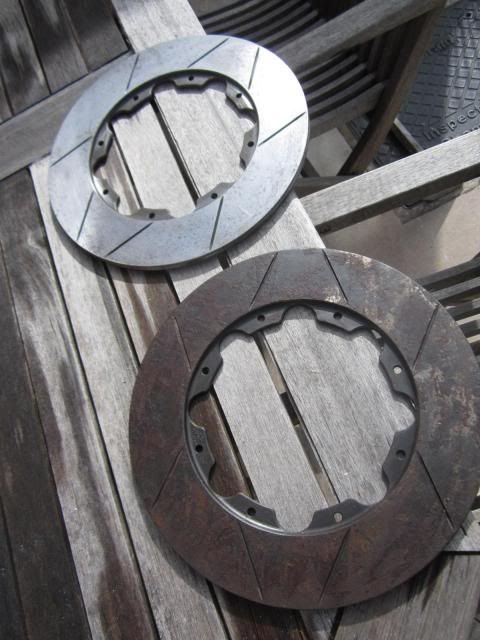
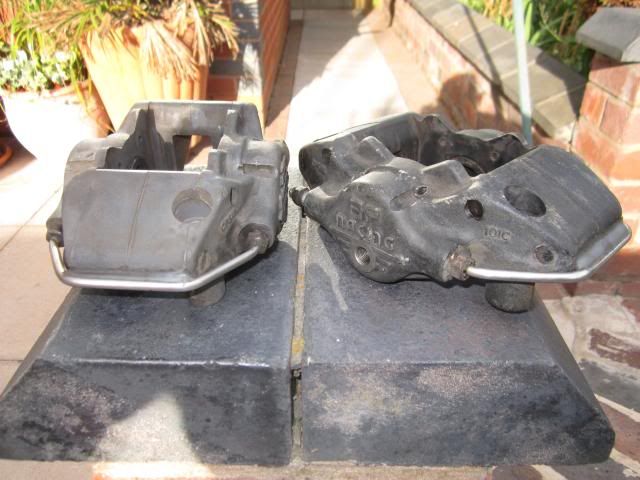
Cut the "ears" off the rear hubs after I confirmed they were the right ones...top one had the angle grinder treatment...the lower one is what they look like beforehand!

This because the challenge calipers are "radial" mount as opposed to "lug" mount...
I could have fitted chimaera rear calipers..(they have an handbrake mech and this was the sensible way to go) .but this would not have in keeping with the car...(but I ain't precious on this it was just that the proper stuff came my way...would have been silly not to take the opportunity...got a pair of brill cerbera rear calipers and discs surplus if anyone wants to talk!)
Then changed the wheel studs for the longer trani van one's...nothing straight forward..but learning all the time which is good
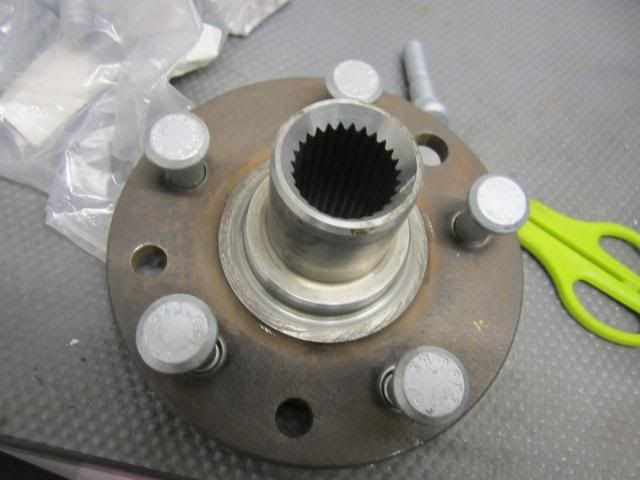
Purchased new bearings...
Fitted new rear wheel bearings....

Mounted them on the uprights....splines fit....just need to sort the diff mounts now....

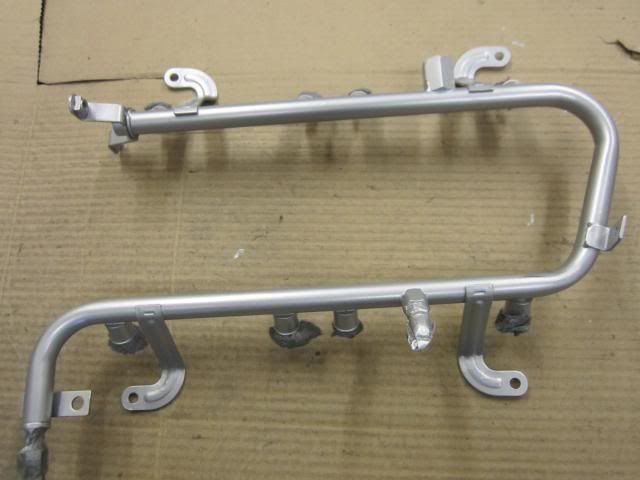
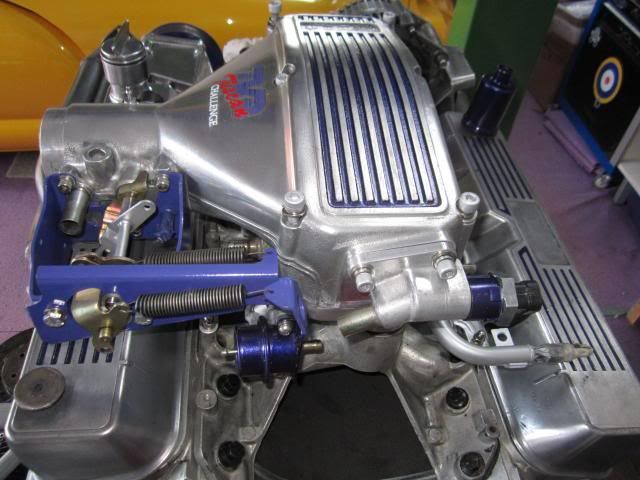
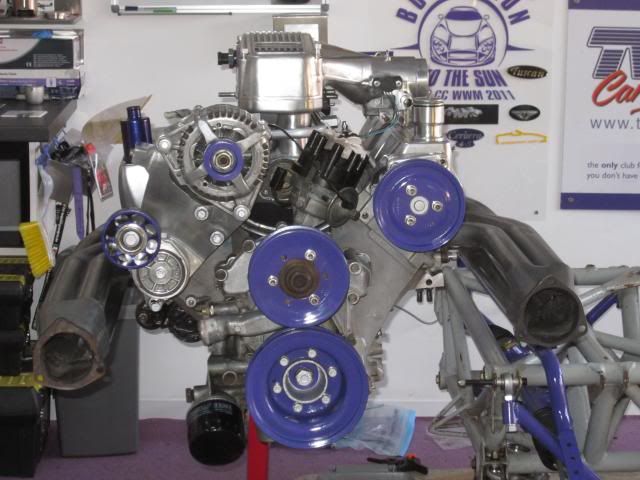
Sorted the fuel rail and throttle linkage and front pullys..plus lots of little detailing stuff...not worth listing!
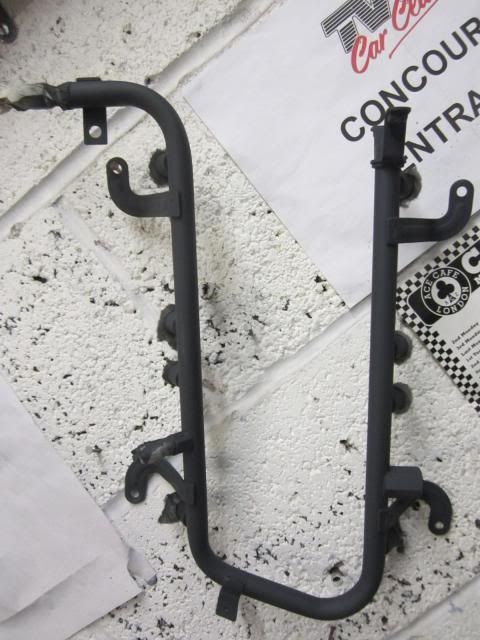
Painted them up...

Thanks for looking....front hubs next....need to remember what I need to get!
And buy some of the paint for the OZ wheel centers ...gonna do them like Darrens purple and red one#s and Johns "Gulf" car...
Managed to source an unmolested steering rack..(hens teeth).


checked the gaiters out all appears well...plus it fits....

Need to find out what track rod ends are needed
Plus the front ARB is ready for a pair of ali blocks and drop links...

The rear anti roll bar cleaned up wellI fitted it..I know the racer boys don't use them....but it is there if required...

Plus changed one of the CV's ...missing a few bearings..the other three have been cleaned and re-packed and sealed with cling film.

Cut the "ears" off the rear hubs after I confirmed they were the right ones...top one had the angle grinder treatment...the lower one is what they look like beforehand!

This because the challenge calipers are "radial" mount as opposed to "lug" mount...
I could have fitted chimaera rear calipers..(they have an handbrake mech and this was the sensible way to go) .but this would not have in keeping with the car...(but I ain't precious on this it was just that the proper stuff came my way...would have been silly not to take the opportunity...got a pair of brill cerbera rear calipers and discs surplus if anyone wants to talk!)
Then changed the wheel studs for the longer trani van one's...nothing straight forward..but learning all the time which is good

Purchased new bearings...

Fitted new rear wheel bearings....

Mounted them on the uprights....splines fit....just need to sort the diff mounts now....

Sorted the fuel rail and throttle linkage and front pullys..plus lots of little detailing stuff...not worth listing!

Painted them up...


Thanks for looking....front hubs next....need to remember what I need to get!
And buy some of the paint for the OZ wheel centers ...gonna do them like Darrens purple and red one#s and Johns "Gulf" car...
Edited by schimg on Tuesday 4th June 07:27
NTEL said:
Dont Forget to give me give front hub dimensions. I may have a couple.
Hi Dave...Thanks mate, have one good one and one cracked one...this is the next area for me to get together front hubs...gonna replace the bearings ...understand that they need "shimming" and having a load of lb age on the hub nut...know they were a right old pain to get off!
Will have a look and see which one I need ...

450Nick said:
Looking good Steve! Keep me posted on those diff mounts!
Sorry about delay Nick, Just back from Normandy ...stuff to do with my dad who passed away in Feb...and served as a para Bren gunner on D-day found the spot where he dug in ...
Moving on...picked up an email from my mate last night he has sent the images of the brackets over to his engineer contact...will be talking to him this week...suggested there might be demand for 6 sets ..if price is right..will keep you posted mate
CP COOKIE said:
Hey great build I'm doing the same at the moment... Need to get hold of a rear spline for the drive shaft as someone must have cross threaded the nut as the thread came off with the nut :-( having trouble finding one where did you get yours??
Thanks
Cheers Mate...had trouble sourcing mine, but managed to find a place in Coventry that supplies them brand new...evidently these folk supplied the factory too...they are selling single units on Ebay...say one last night actually...£50 plus the dreaded...when I get home from work I will post details of the supplier ...or drop me an email...no worriesThanks
Be interested to see what you are upto ...I am stuck for rear diff mounts still....the set I was using as a pattern are back on Graham Waldens race car this weekend as he needs them!
I want to get a shift on with this ..been too busy with TVRCC stuff of late ....stuck for
bonnet frame
front arb bushes
Bolts for the rear bells
1 x front steering arm for a manual rack...
Gonna paint my OZ split rims and get them back together
Edited by schimg on Tuesday 30th July 12:34
Been a while since I updated this thread...doesn't mean that I have dropped the ball though....been trying to do something most days...just soo much time prepping stuff...
Still stuck for those diff brackets so been doing other things that will need doing at some point.and take time.....the wheels were fun...three piece..OZ 18ins

.etched primed...then white base coat and purple lust (the colour of the car)...then lacquer...2-3 coats of each....plus filler in dinks..

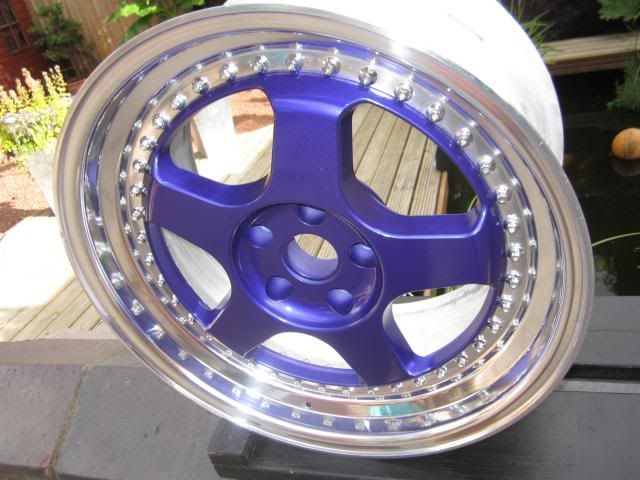
..then 40 bolts for each wheel ...sealing the two surfaces with black silicone...then flush fit valves..pics later
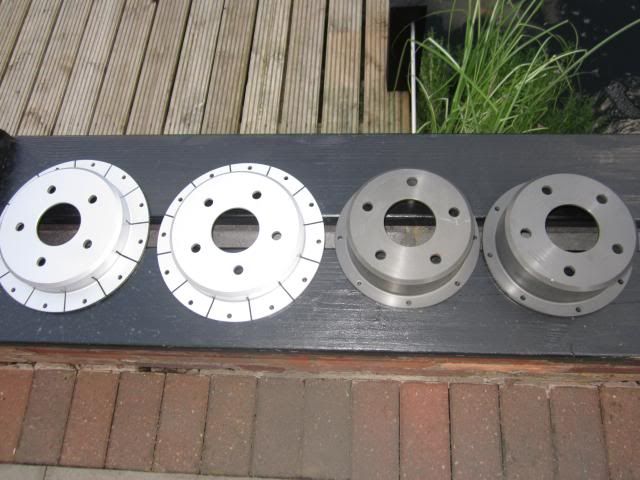
Then the discs and bells ....
getting surface rust of.....POR Stirling silver on non contact surfaces....nuts and bolts de-rusted...and prepped...
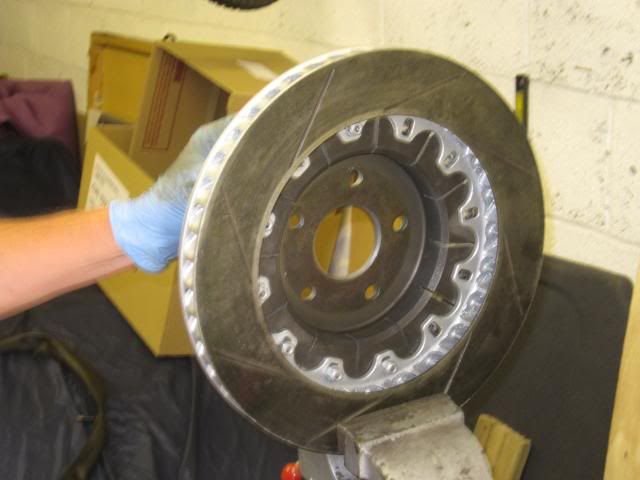
Discs now on....for a while anyway!

Including wheels....still no shockers....or diff in.....but not far off a rolling chassis before the welding starts!


Attention now turned to calipers...
Ginny has done a cracking job prepping the calipers which are red....the red is because the tuscan challenge logo has purple - red in it..thats why I have done the outer rim decals on the OZ's in red too....bit OTT but race cars are!
.so the car is purple....and it is purple even though the flash makes it look blue in these shote....same as the suspension parts...they are purple (factory suspension colour) The cage and other parts will be silver to work with the OZ's...but a course silver with heavy flake...
If you look at the relationship between the disc and calipr you will see that they do not line up....not good ...
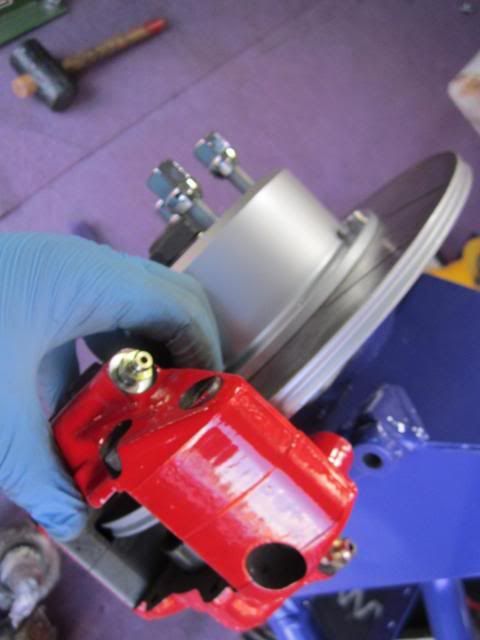
BUT the caliper is about 20mm shy of the discs what the flip have I done now!?
The roats are off one Mr Blowers cars as are the rear uprights....
The bells were new from JR...ok had to machine the rear hub down.....but these should just bolt on....spoke to graham and Tim Hood and Jonny Greenwood today ...bit unfair to ask when they can't see what I have done wrong here ....all part of the learning cycle for me I guess.....:-)
Thoughts would be appreciated....
Still stuck for those diff brackets so been doing other things that will need doing at some point.and take time.....the wheels were fun...three piece..OZ 18ins

.etched primed...then white base coat and purple lust (the colour of the car)...then lacquer...2-3 coats of each....plus filler in dinks..


..then 40 bolts for each wheel ...sealing the two surfaces with black silicone...then flush fit valves..pics later
Then the discs and bells ....
getting surface rust of.....POR Stirling silver on non contact surfaces....nuts and bolts de-rusted...and prepped...


Discs now on....for a while anyway!

Including wheels....still no shockers....or diff in.....but not far off a rolling chassis before the welding starts!


Attention now turned to calipers...

Ginny has done a cracking job prepping the calipers which are red....the red is because the tuscan challenge logo has purple - red in it..thats why I have done the outer rim decals on the OZ's in red too....bit OTT but race cars are!
.so the car is purple....and it is purple even though the flash makes it look blue in these shote....same as the suspension parts...they are purple (factory suspension colour) The cage and other parts will be silver to work with the OZ's...but a course silver with heavy flake...
If you look at the relationship between the disc and calipr you will see that they do not line up....not good ...

BUT the caliper is about 20mm shy of the discs what the flip have I done now!?
The roats are off one Mr Blowers cars as are the rear uprights....
The bells were new from JR...ok had to machine the rear hub down.....but these should just bolt on....spoke to graham and Tim Hood and Jonny Greenwood today ...bit unfair to ask when they can't see what I have done wrong here ....all part of the learning cycle for me I guess.....:-)
Thoughts would be appreciated....
Edited by schimg on Tuesday 3rd September 20:55
Edited by schimg on Tuesday 3rd September 21:03
Edited by schimg on Tuesday 3rd September 21:11
The wheels with decals and flush fit valves....


I know they won't be to everyone's taste but this will not be a shy car...
Studied a number of these wheels on other cars appears and placed each valve and decals in what appears to be the most common position...they are all the same! Sad I know but I don't get out much....probably got it wrong now!
Edited by schimg on Tuesday 3rd September 21:25
Edited by schimg on Tuesday 3rd September 21:48
RetroWheels said:
Purple O.Z with polished rims... I just need to visit the toilet for a couple of minutes.
Darren...you are the bloke to tell me if I got it wrong mate....god they are a PITA to put together ...Ginny and me spent the best part of a Sunday on the dining room table..(putting the whheels together)..we were both whacked at the end of it....glad they don't leak...took some effort to get the tyres to seal though....my lads at the local HI-Q started to loose the will to live...three leaked for a start...balance weights hidden as best they could too..RetroWheels said:
They were worth it, the whole project is going to look excellent.. see you at Back Home 
Cheers...fingers crossed..probably turn into a crock of poo!No Rockingham then?...be a shame if you don't...but suppose it is a hike for you mate..we are doing back home all booked ...you doing the evening do too?
 .
.Hi there,
Thinking ahead to after Christmas when I will start looking at the body...
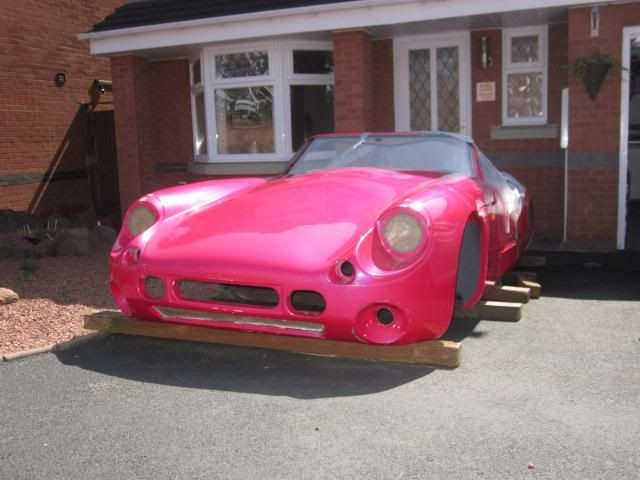
The bonnet has no holes cut out not even for headlights...
Talking of which what bowls and headlights do we think would be best....those round "lupo" ones can look good in Chimaera's...but I am not sure if this would ruin the job...
Have new headlight covers courtesey of G....
So what size do I need to get?
The inside diameter of the cut-out is circa 6ins...the outer edge is 7ins...thoughts?
Still no diff brackets...front steering arm...gonna get welding done next week..if I am mobile enough...
Edited by schimg on Saturday 21st September 17:12
Edited by schimg on Saturday 21st September 18:44
wadsapple said:
I'd defiantly stay with the fusia pink my favourite colour for a muscle car 
Cheeky bloke you are....this is TVR cerise purple reflex ....three stage candice ...Car will be the same as the oz's ....they are a Cadbury purple even though the images I posted on here show them as blue!
TiffsTuzzy said:
Steve,
Grant and Dave are both right. Yep Mini ones are the way to go, but plastic bowls stop all the muck that's going to get kicked up onto them, from rotting them out. I fitted Cibie lenses to mine with plastic bowls behind. Because you need to stop water getting behind the flared in lens covers (compliments of Graham Walden) the standard process seems to be to put a strip of helecopter tape over the joint between the lens covers and the bodywork. This means you can't get to the bulbs to change them, so I cut the rear 1/3 off the back of my plastic bowls and then re-attached the with brackets and a rubber seal.
After hours of sculpting the chrome surrounds a mini has, to fit under the plastic covers and thinking I'd done the best job ever, .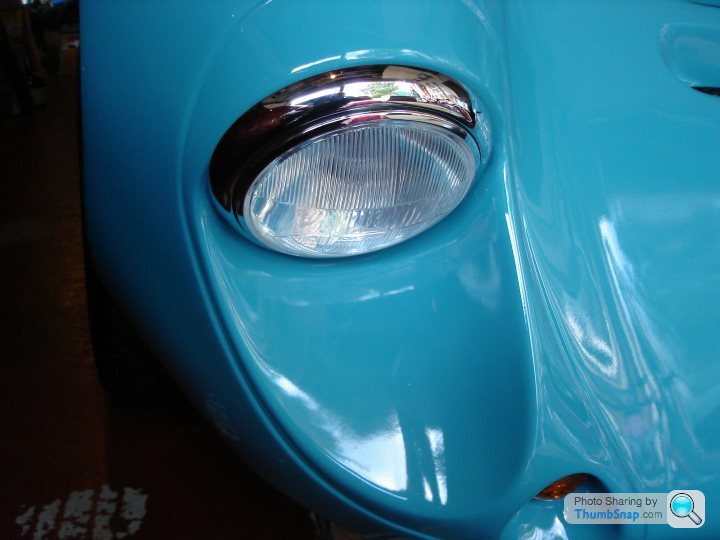 I stumbled across a photo of the Gulf painted car (see photo) where someone's done it properly
 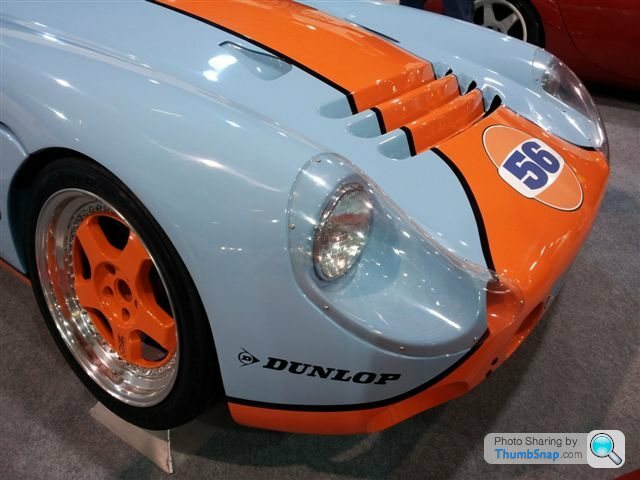 :
:
.....Rich
Hi Rich,Grant and Dave are both right. Yep Mini ones are the way to go, but plastic bowls stop all the muck that's going to get kicked up onto them, from rotting them out. I fitted Cibie lenses to mine with plastic bowls behind. Because you need to stop water getting behind the flared in lens covers (compliments of Graham Walden) the standard process seems to be to put a strip of helecopter tape over the joint between the lens covers and the bodywork. This means you can't get to the bulbs to change them, so I cut the rear 1/3 off the back of my plastic bowls and then re-attached the with brackets and a rubber seal.
After hours of sculpting the chrome surrounds a mini has, to fit under the plastic covers and thinking I'd done the best job ever, .
I stumbled across a photo of the Gulf painted car (see photo) where someone's done it properly :.....Rich
You've done a cracking job on yours v.tidy......sounds like a fair bit of fettling was required tho.....
The "gulf" car was done by JR wasn't it?
Wonder what he used in there....Itried calling him yesterday ...will try again today....will try and remember to ask!
Following on from our emails gonna weld in seatbelt fixings too....need to our the harness plates today.....
Will go with what suggested about the four point harness shoulder fixings on the cage too....thanks for the pointer..
Griffithy said:
Sorry Steve,
much confusion here - mea culpa.
Dia would be ca. 18 cm of course.
As recommended before, old Mini lights would be fine as do the Routemaster-Bus ones, because they are the same.
I promise to try keeping quiet from now.
Best regards,
Griffithy
Hey don't do that I need input here!much confusion here - mea culpa.
Dia would be ca. 18 cm of course.
As recommended before, old Mini lights would be fine as do the Routemaster-Bus ones, because they are the same.
I promise to try keeping quiet from now.
Best regards,
Griffithy
And it's appreciated....thanks for posting...spoke with JR earlier...they mounted the plastic bowl in the rear ...in fact they used a glasses fibre bowl that they made....they didn't use an adjuster mechanism...so that allowed a more flush appearance....guess race don't need them where in contrast we do!
So will prob go your route....hopefully sourced a bonnet frame today.....
RetroWheels said:
Steve,took these pics of the wet sump on the Rover , pm me your mobile number again (i didnt save it to my phone properly in all the Dony excitement).
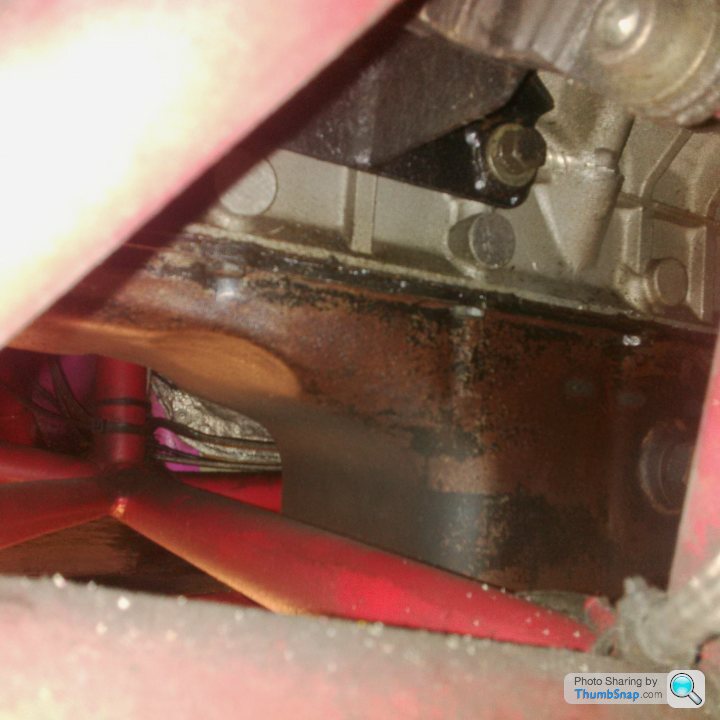

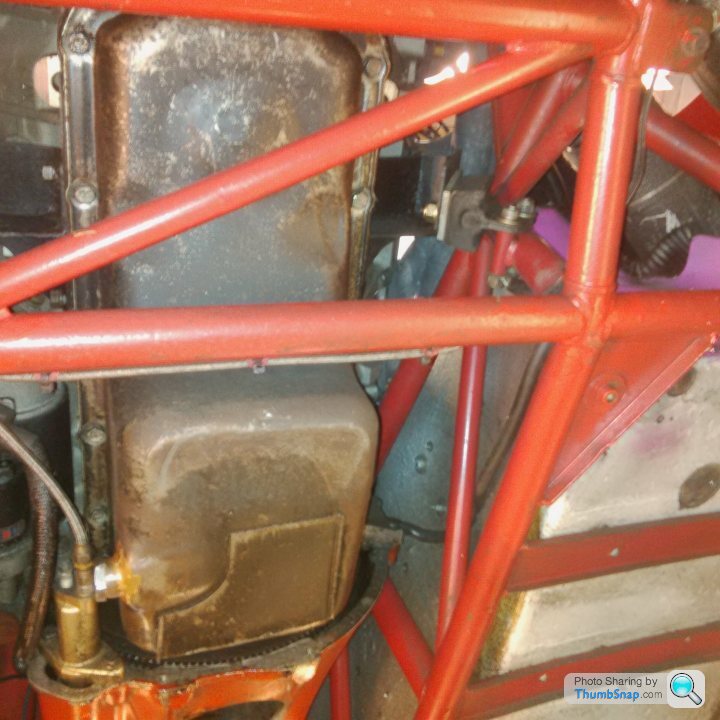
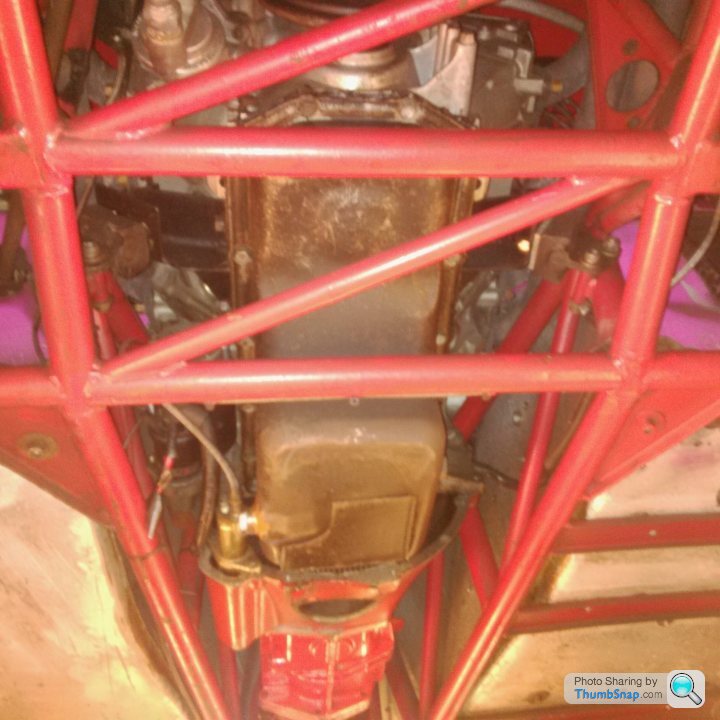
Hi Darren,Can't see how I missed this post until now!
Thanks for taking the time and trouble to post images.....appreciated

Will study and see how I can get mine to fit.....Ginny fitted the diff and driveshafts on Sunday, which was nice of her....
After the NEC classic car show in November I t will need to look at gearbox...new clutch etc then attach to engine and test fit...see what gap I have for a prop....
Hope things are good with you.....will drop you a text
Thanks again
Gassing Station | General Motorsport | Top of Page | What's New | My Stuff