Discussion


I got the Pi fitted in the car - not neatly but at least its in and working
http://www.youtube.com/watch?v=sogl1JDAv14
As i was using my phone to record i could not show it tethered to the phone for internet or the Android XBMC remote
http://www.youtube.com/watch?v=sogl1JDAv14
As i was using my phone to record i could not show it tethered to the phone for internet or the Android XBMC remote
that one went wrong anyway so i made it again with less textured paint (i will admit i went OTT on that one as i was not paying attention)
The reason for the textured paint was i did not want the doorcards to be glass smooth, i wanted them to be textured like OEm doorcards are
now ive not done a brilliant job of the doorcards i will admit but the doorcards, facia, and centre console were the first time i had ever touched filler so i was learning as i went along and i can tidy it all up a bit now
I just wanted everything working for this Saturday, after that i can go back and tidy things up
Close - Yorkshire accent thank you very much 
Ah well i got it all back together and now the clutch has started slipping pretty much right on the button of when it rolled 120thousand miles so its a case of nursing it to keep it going - its fine as long as i dont do revvie revvie dump clutchie redline changes
Glad to see that people see the madness of doing things like this, afterall if we all thought with our beige trousers on then the roads would have even more mk4golf diesels than it already does on the roads

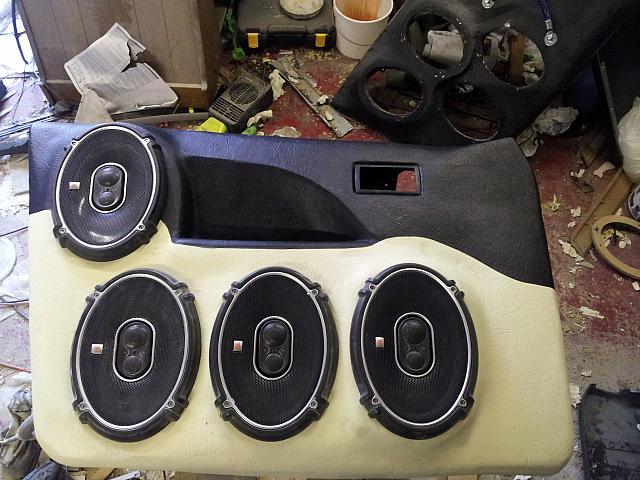
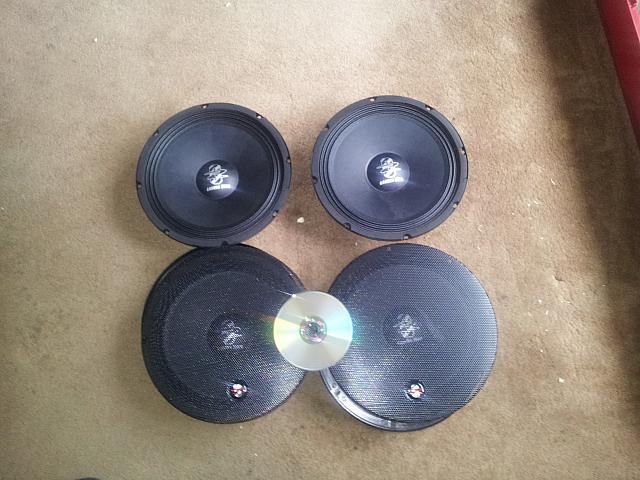
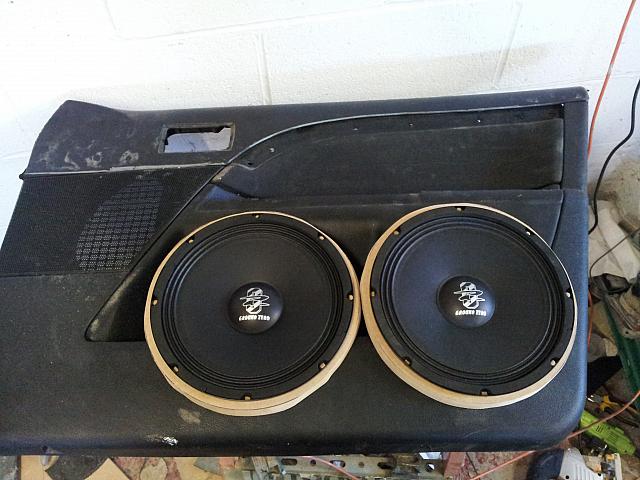
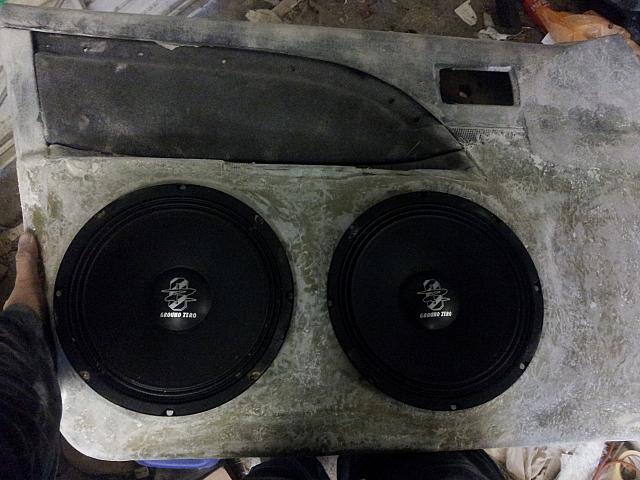
Right so having had the 6x9's in the doors for a few days I am impressed with the midbass to the point that its hard to tell where the doors stop and the woofers start
The only problem is that the metal tweeters are very harsh so a bit fatiguing, plus as they are very directional music sounds a bit odd and occasionally sounds like parts are missing so i need to get some midrange and tweeters upfront.
It appears my choice is either the Vibe Space3d midrange and tweeter, GZ 4inch component set, JL Audio Evolution Components, Phonocar 4inch coaxials or a pair of phonocar 2inch midrange/combined tweeter
God this is an expensive hobby
Yep utterly stupid
Well updates
I need to whip the doorcards off for a retrim and a bit more work as they were done in a hurry for the connors day meet
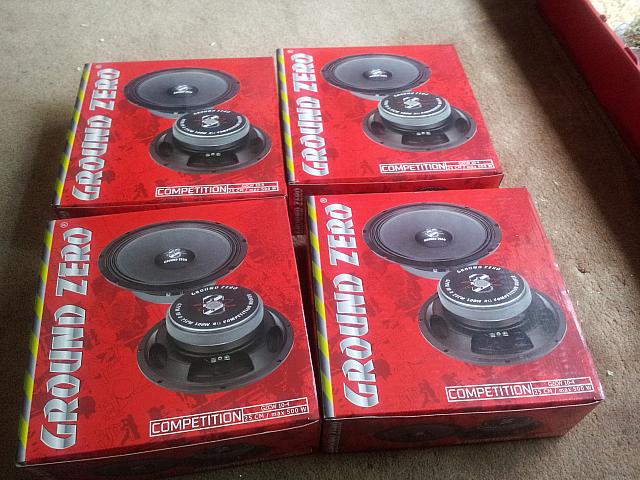
Also i have just picked up a sponsorship offer for new woofers so im swapping the 8 JL 12's in the 6th order wall for 4 15inch Ground Zero nucelear subs - http://www.ground-zero-audio.com/en/products/subwo... still in the 6th order enclosure
I have also picked up a 2nd 3kw (3000Watt RMS) mono amp so i should be running 6k next year.
Also I may be changing the front speakers and doing SQ a-pillar builds for daily driving
Also i need to work on the AV side of the car because i intend to offer it to charitys as a mobile PA system next year so i will be fitting screens in the boot and behind the rear windows
Well updates
I need to whip the doorcards off for a retrim and a bit more work as they were done in a hurry for the connors day meet
Also i have just picked up a sponsorship offer for new woofers so im swapping the 8 JL 12's in the 6th order wall for 4 15inch Ground Zero nucelear subs - http://www.ground-zero-audio.com/en/products/subwo... still in the 6th order enclosure
I have also picked up a 2nd 3kw (3000Watt RMS) mono amp so i should be running 6k next year.
Also I may be changing the front speakers and doing SQ a-pillar builds for daily driving
Also i need to work on the AV side of the car because i intend to offer it to charitys as a mobile PA system next year so i will be fitting screens in the boot and behind the rear windows
Right i have not done anything on the install as im waiting until the new year when i have the big expenses out of the way (insurance/xmas etc) so i have just been doing bits and pieces, one thing ive done is to respray bits of trim
From this OEM
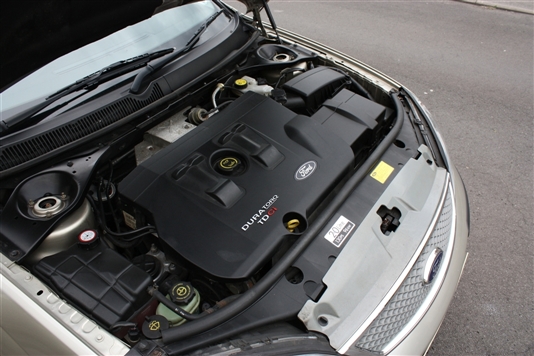
to this
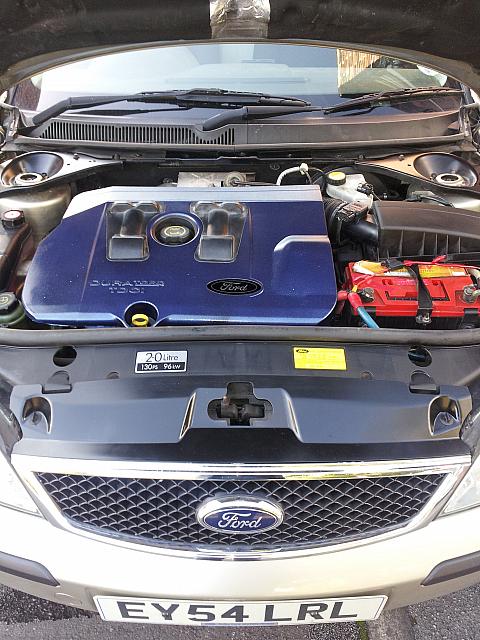
Grill sprayed black and the engine cover has been sprayed Ford ocean blue, just to make it zing a bit more i took a silver spray and sprayed it in the air above the trim panel so the paint would just dust the panel.
I still need to get a airbox and spray that at some point - just thought i would update to show that i have not given up on the project, just waiting for some more cash to be free
From this OEM
to this
Grill sprayed black and the engine cover has been sprayed Ford ocean blue, just to make it zing a bit more i took a silver spray and sprayed it in the air above the trim panel so the paint would just dust the panel.
I still need to get a airbox and spray that at some point - just thought i would update to show that i have not given up on the project, just waiting for some more cash to be free
Right time to update the thread
2013 - time for a new install in the mong-deo
The 8 12inch JL woofers are going and being replaced by four of these 15's - http://www.caraudiodirect.co.uk/gro-gznw15x-ground... in the same style of enclosure i currently have (6th order bandpass)
Now in regards to amplifier power i am going from 3KW of sub amplifiers to 6KW of sub amplifiers
In regards to the front end due to my other half having problems with the the previous doorcards i am making new doorcards to house the 4 6x9's for midbass, agian each door will use the existing two 1KW amps to power the doors (1kw poer door)
Now to improve the sound quality this time round i will be running a set of these ( http://www.caraudiodirect.co.uk/ground-zero-gzrc10... ) components in the a-pillars acting as high frequency and mid-range drivers to improve the SQ
So updates, updates, updates
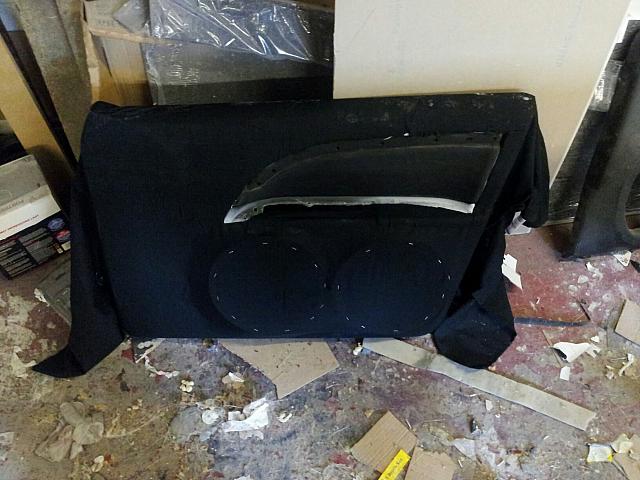
I built the following doorcards for it but due to some cock-ups the fibreglass warped the panel making it so they would not fit

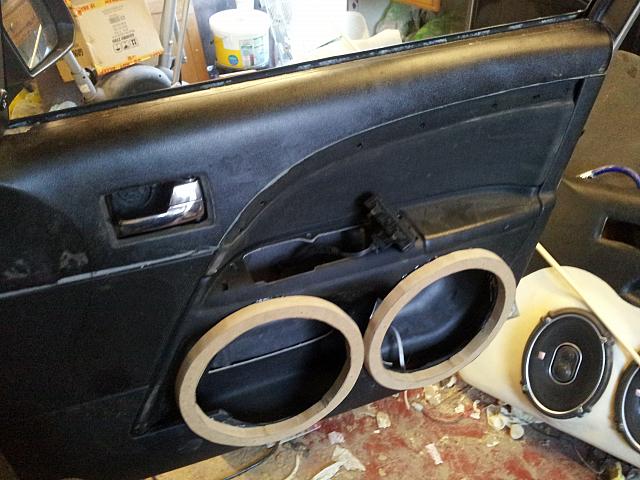
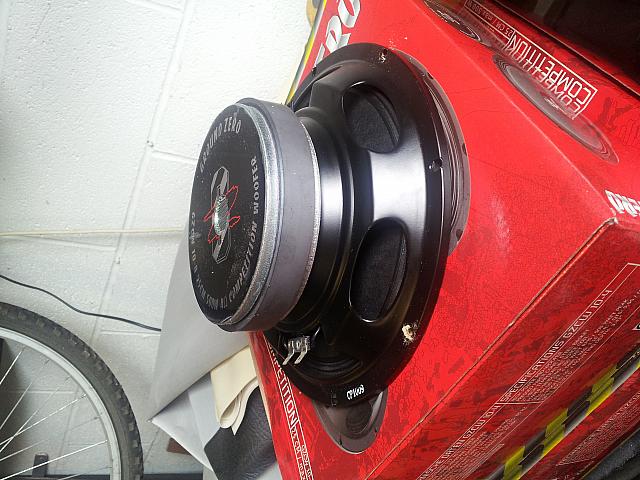
So change of plan - say hello to the new midbass drivers for the doors
They are 10inch drivers - 2 per door
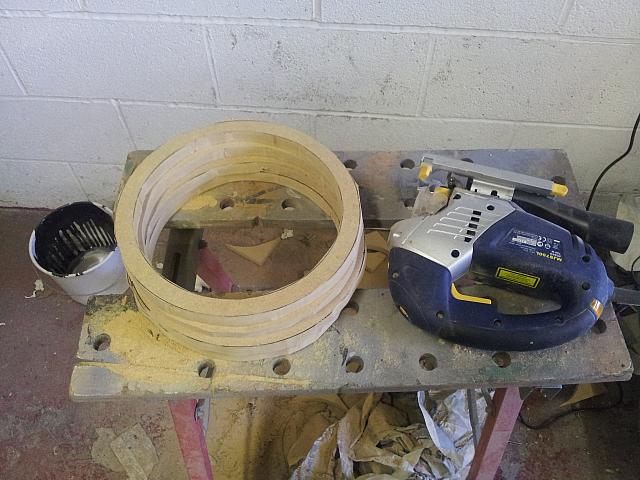
So 4 speaker rings cut out of MDF
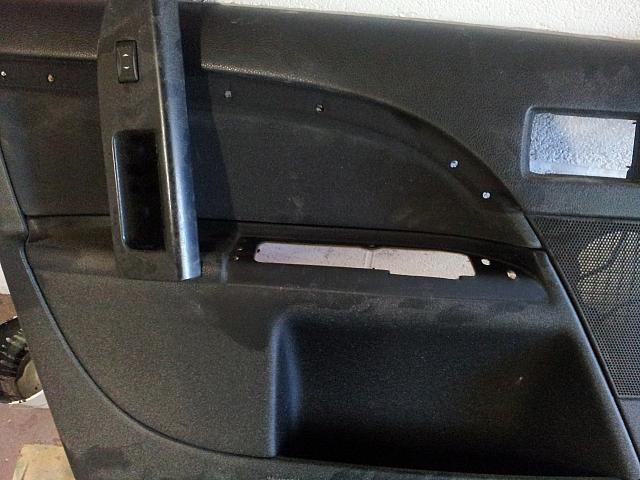
Nasty painted fake wood trim and door pull removed from door
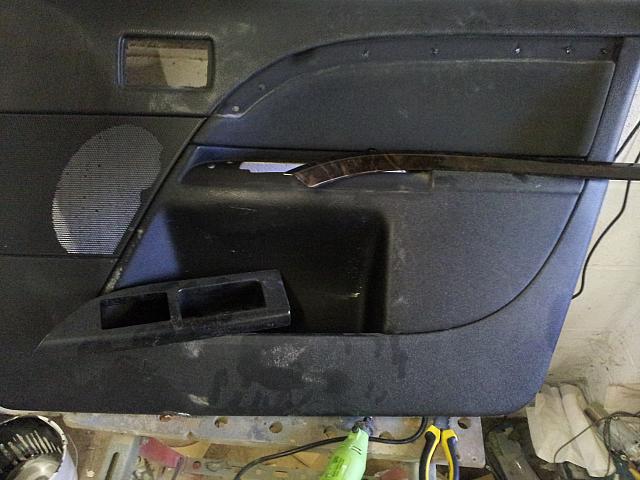
Same on the other door
Remove the soft touch padding Ford put on the doors from both doors
Then a bit of chopping to make room for the speaker magnets
Door card mounted to check the magnets wont hit the metal of the door, once confirmed the rings were hot glued in place
Same on the passenger side
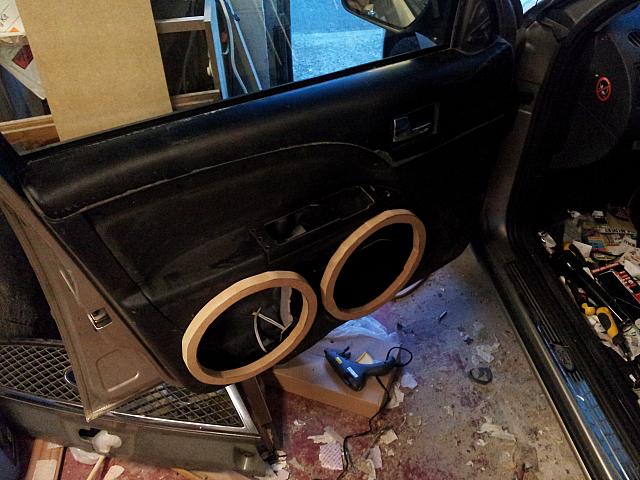
Now to wait for my fibreglass resin to arrive, once it has plastic primer the cards, pull some fabric over it right and soak in resin to take the shape
Then i can work on strengthening and trimming the card
I built the following doorcards for it but due to some cock-ups the fibreglass warped the panel making it so they would not fit
So change of plan - say hello to the new midbass drivers for the doors
They are 10inch drivers - 2 per door
So 4 speaker rings cut out of MDF
Nasty painted fake wood trim and door pull removed from door
Same on the other door
Remove the soft touch padding Ford put on the doors from both doors
Then a bit of chopping to make room for the speaker magnets
Door card mounted to check the magnets wont hit the metal of the door, once confirmed the rings were hot glued in place
Same on the passenger side
Now to wait for my fibreglass resin to arrive, once it has plastic primer the cards, pull some fabric over it right and soak in resin to take the shape
Then i can work on strengthening and trimming the card
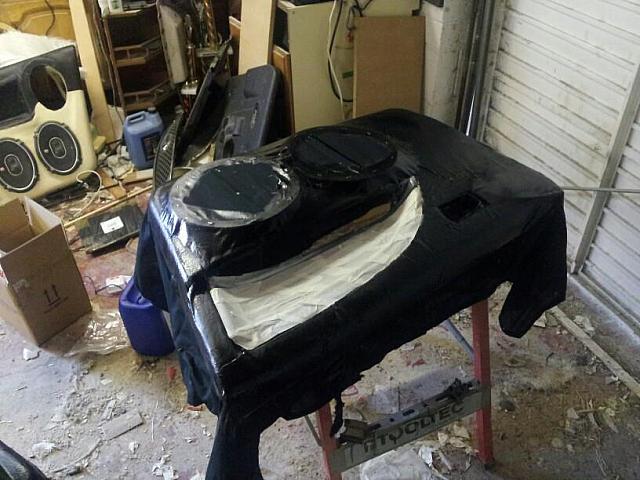
So i have done a bit more
stuck fabric to the doorcard ready for glassing
And resined it
The problem is the resin was not mixed hot enough so it ate the glue holding the fabric before it set so
re do it and mix the resin hotter
Layer of resin and matting on the back of both cards

Now a layer on the front of the card

So now leave that to dry overnight and do the same to the other doorcard so i can get on with sanding and filling
stuck fabric to the doorcard ready for glassing
And resined it
The problem is the resin was not mixed hot enough so it ate the glue holding the fabric before it set so
re do it and mix the resin hotter
Layer of resin and matting on the back of both cards
Now a layer on the front of the card
So now leave that to dry overnight and do the same to the other doorcard so i can get on with sanding and filling
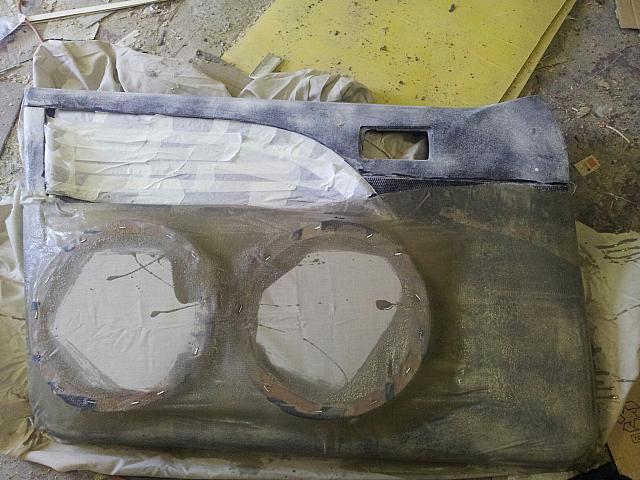
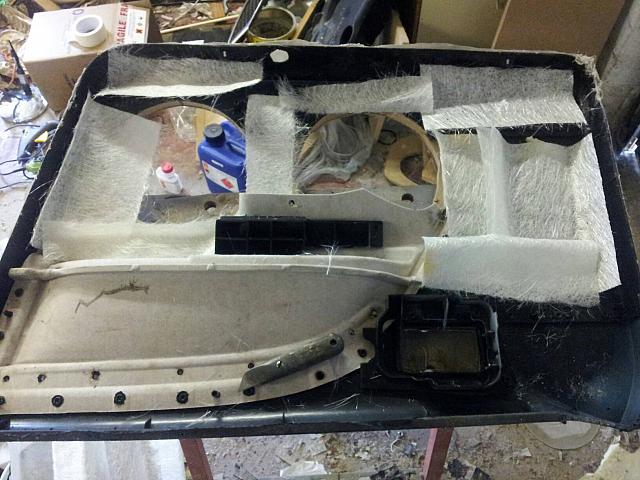
So since the last update
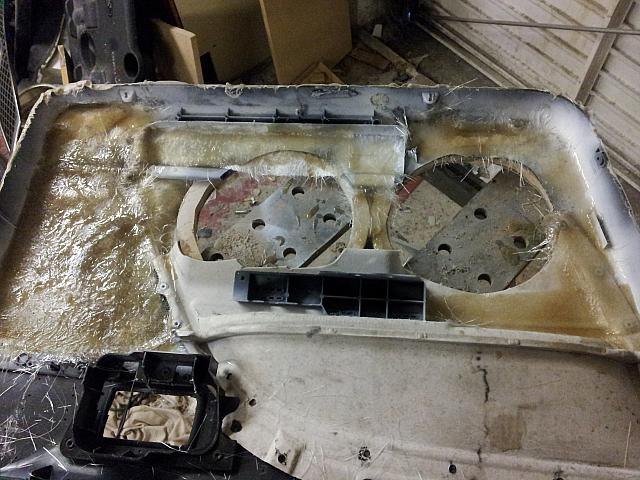
More fibreglass on the back of the cards

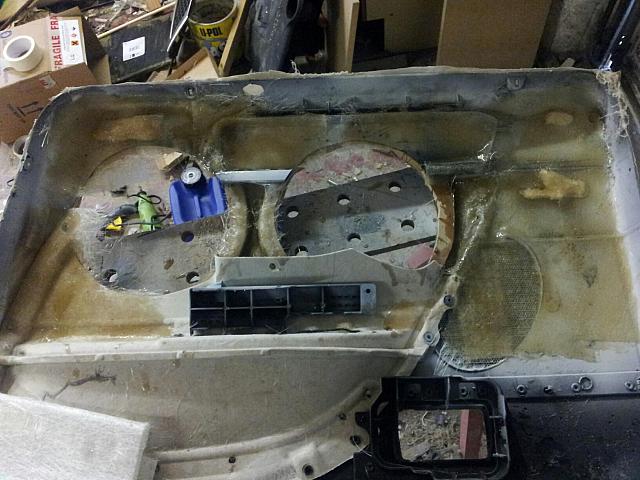
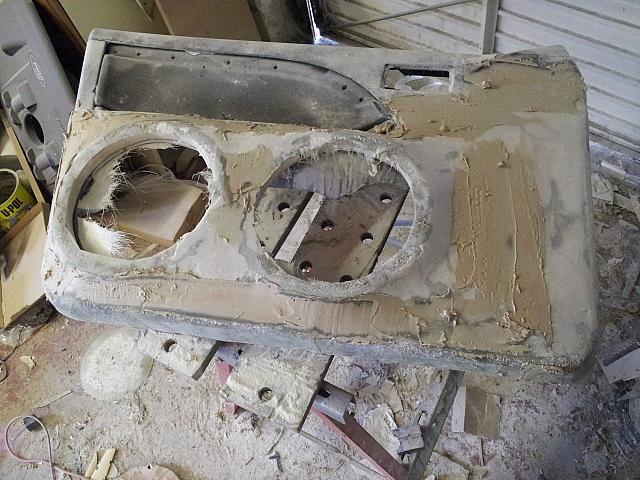
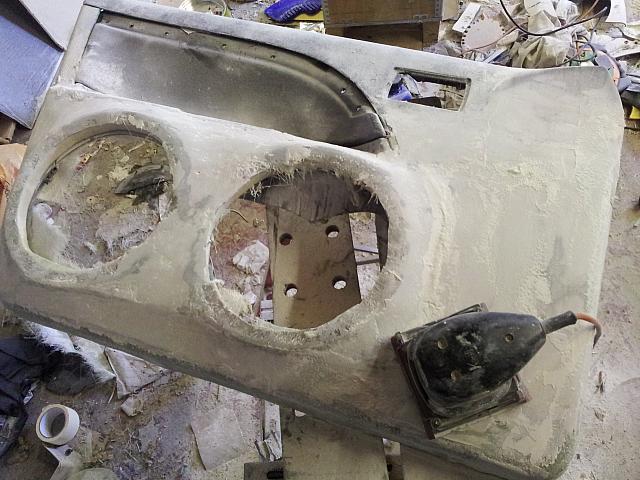
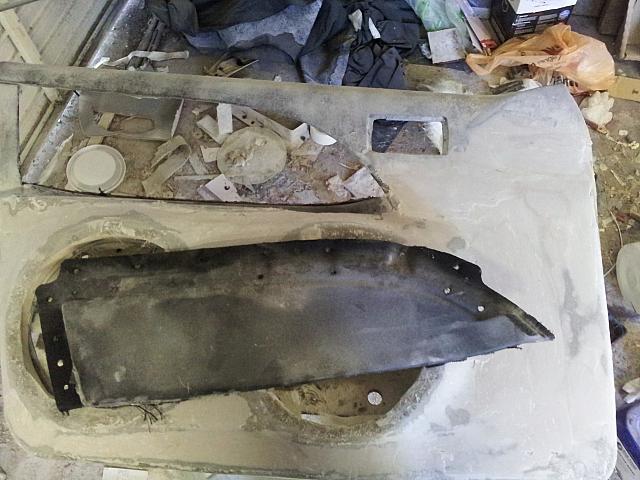
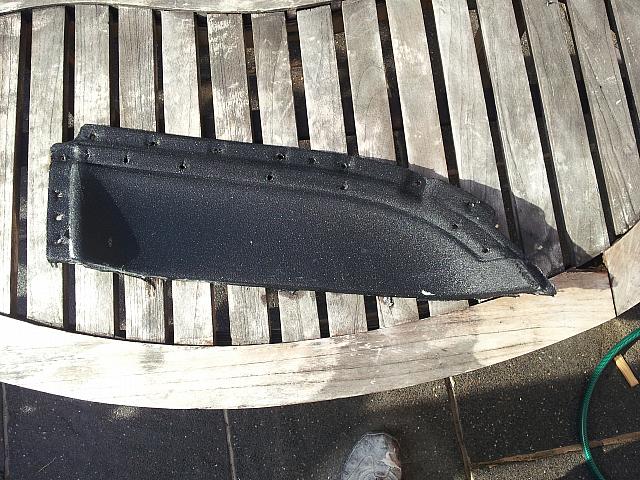
So to give you an idea of depth needed this is the back of one of the mids
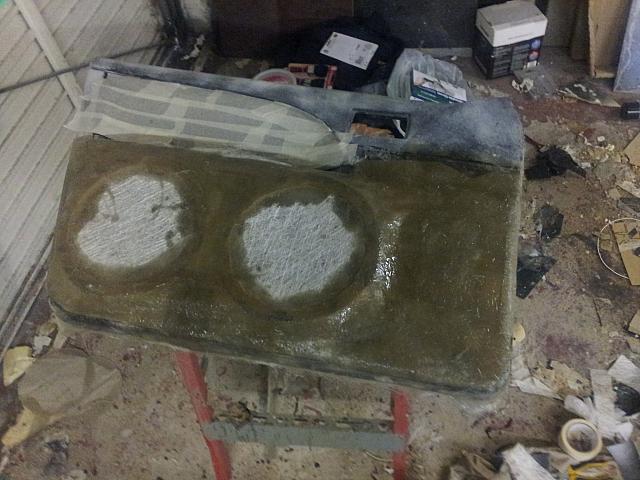
Both of the doorcards got a layer of matting and resin on the front of them
Once that was dry then a trim and then filling work
quick test to see what the speakers will look like
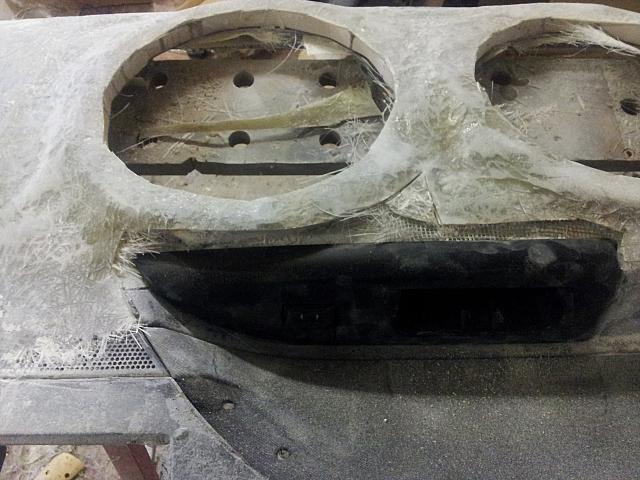
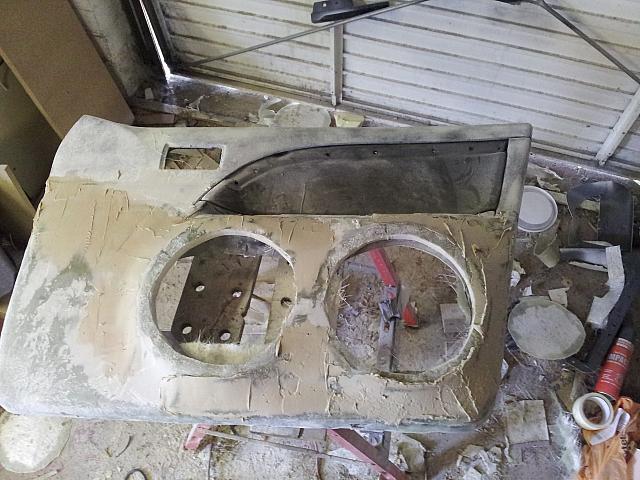
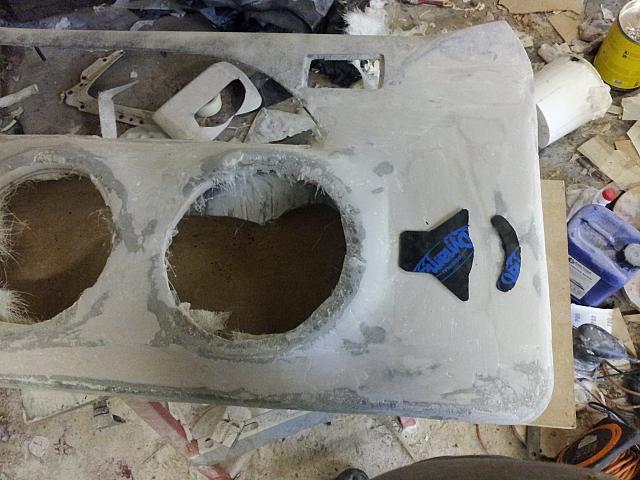
Filling and sanding
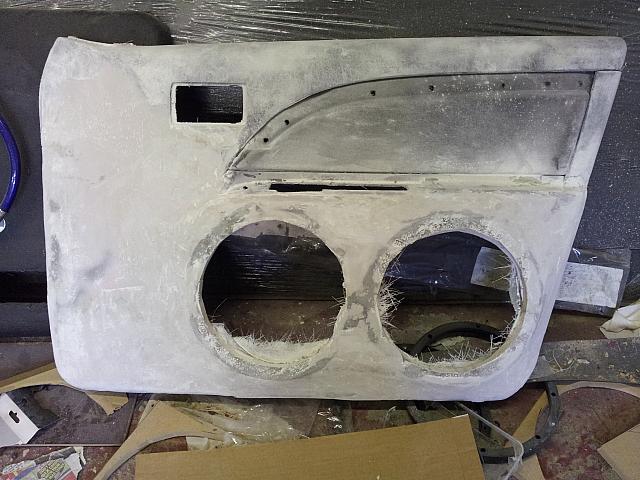
Now cut out the fabric part of the doorcard and clean it up ready for trimming
Now once the card is covered the sound deadening you can see below should leave that outline embossed - nice effect i think
So that is where i am up to so far
More fibreglass on the back of the cards
So to give you an idea of depth needed this is the back of one of the mids
Both of the doorcards got a layer of matting and resin on the front of them
Once that was dry then a trim and then filling work
quick test to see what the speakers will look like
Filling and sanding
Now cut out the fabric part of the doorcard and clean it up ready for trimming
Now once the card is covered the sound deadening you can see below should leave that outline embossed - nice effect i think
So that is where i am up to so far
So todays work
First off pick up the material and glue for trimming
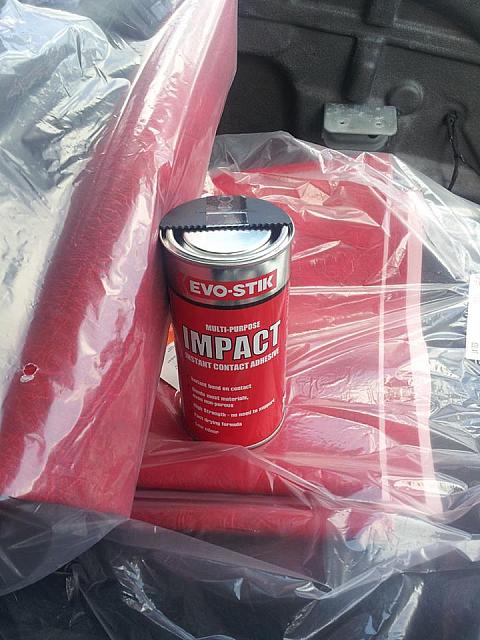
You can keep your solvent free spray glue, this stuff actually works
fabric part i cut out of the door trimmed in red leatherette
Offering it up to the door with an offcut of red to see what it looks like on the part of the door pull is attatched to
so trimming the bottom of the door, remember the deadening i put on the door in the shape of a speaker - this is what it looks like now it is trimmed

Bottom of door trimmed in white leatherette with the red held in to see what it looks like
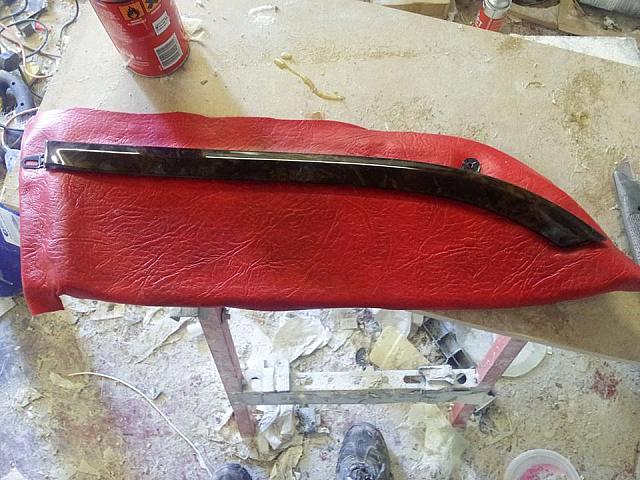
Now the top of the door trimmed with black leatherette

Bit of tidying up to do - that is tomorrows job
First off pick up the material and glue for trimming
You can keep your solvent free spray glue, this stuff actually works
fabric part i cut out of the door trimmed in red leatherette
Offering it up to the door with an offcut of red to see what it looks like on the part of the door pull is attatched to
so trimming the bottom of the door, remember the deadening i put on the door in the shape of a speaker - this is what it looks like now it is trimmed
Bottom of door trimmed in white leatherette with the red held in to see what it looks like
Now the top of the door trimmed with black leatherette
Bit of tidying up to do - that is tomorrows job
Time to start getting this doorcard together
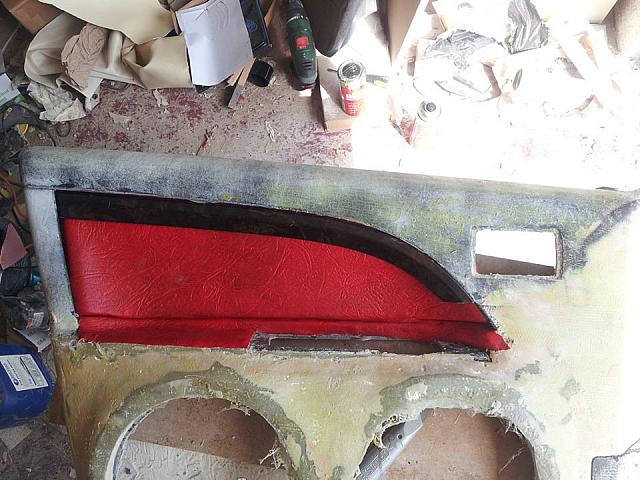
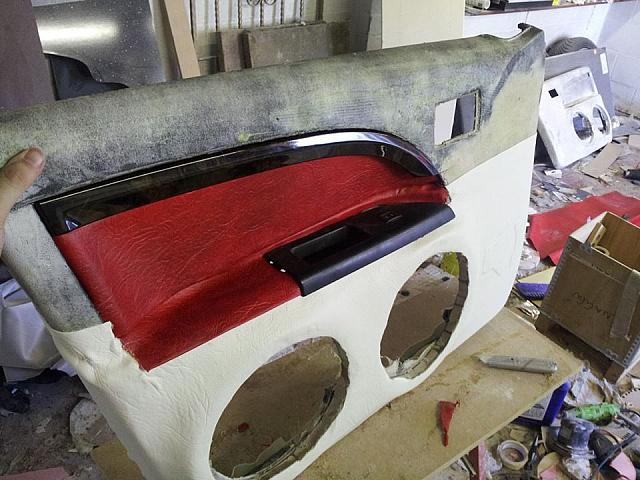
still got to re-attached the piece trimmed in red with the ever so lovely fake wood but as i finished neatinign up the trim i thought i would see what it looks like together
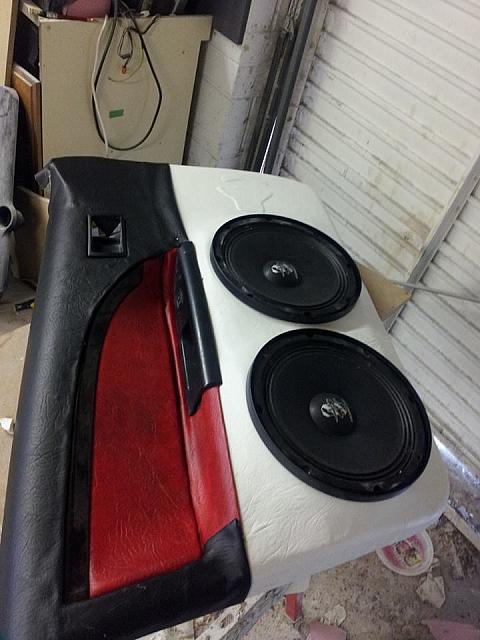
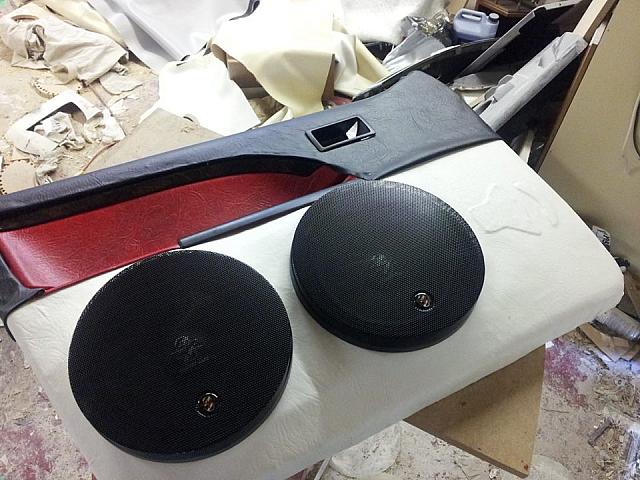
Couple of bits im not really thrilled with but hey for my first time playing with trimming its not turned out too bad
Just to finish off the bits on this door, then get to work on the other door and once they are both done throw some fibreglass matting and resin on the backs of them
still got to re-attached the piece trimmed in red with the ever so lovely fake wood but as i finished neatinign up the trim i thought i would see what it looks like together
Couple of bits im not really thrilled with but hey for my first time playing with trimming its not turned out too bad
Just to finish off the bits on this door, then get to work on the other door and once they are both done throw some fibreglass matting and resin on the backs of them
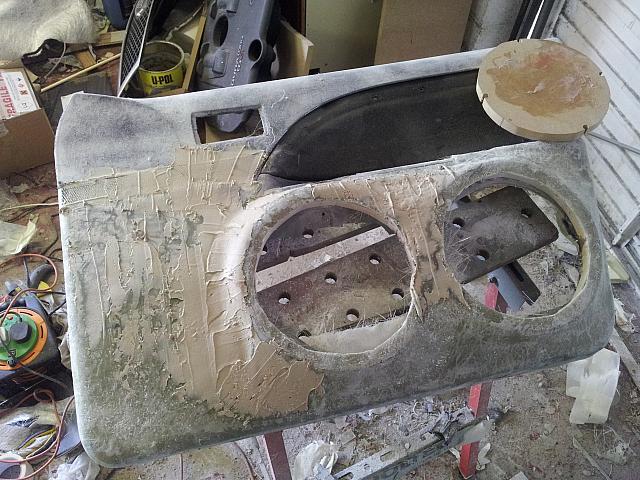
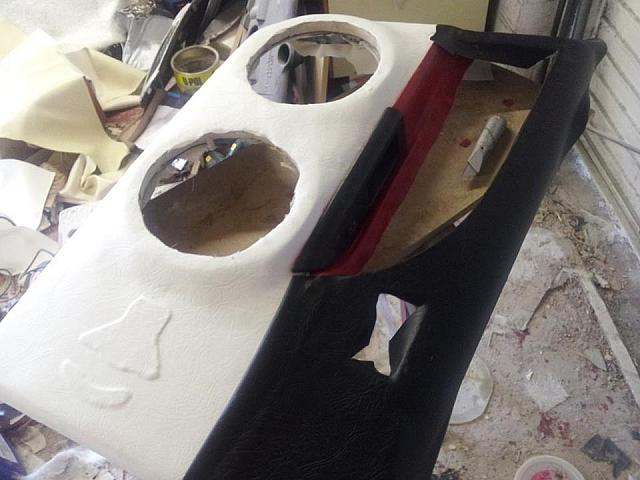
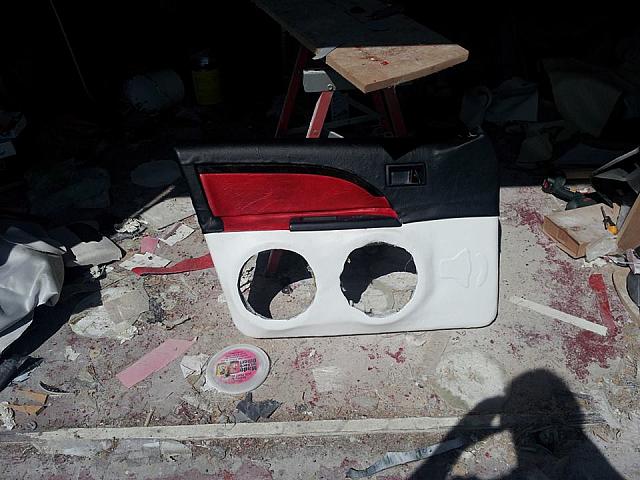
ok so the trimming was not all that good and had a few issues when you looked close.
So off to a friends i went to get some trimming advice and though i will start again so this is what i have so far

Still got some more to do on the card before this one is done and i have to admit i have used a HELL of a lot of glue, it does not go as far as you would think
So off to a friends i went to get some trimming advice and though i will start again so this is what i have so far
Still got some more to do on the card before this one is done and i have to admit i have used a HELL of a lot of glue, it does not go as far as you would think
ok so what i have been up to recently on the mong-deo
first off my new full range drivers for the a-pillars arrived, 2 of these per a-pillar. As they are fullrange it means i dont need a tweeter, these do it all and as they are from the GZ SQ line they should sound good as well, I may be mistaken but i think im the only person running these in the UK at the moment

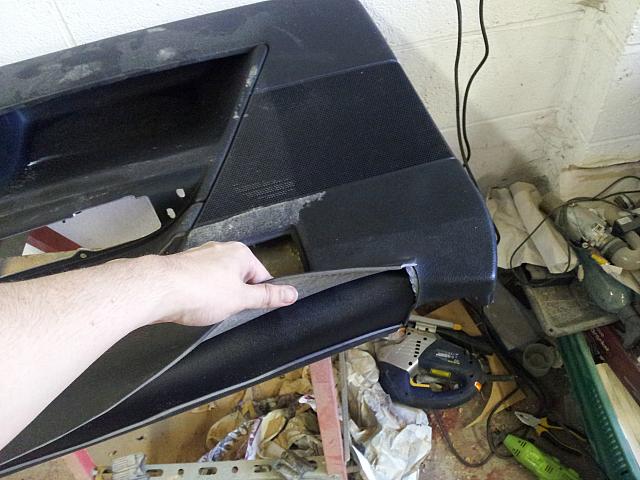
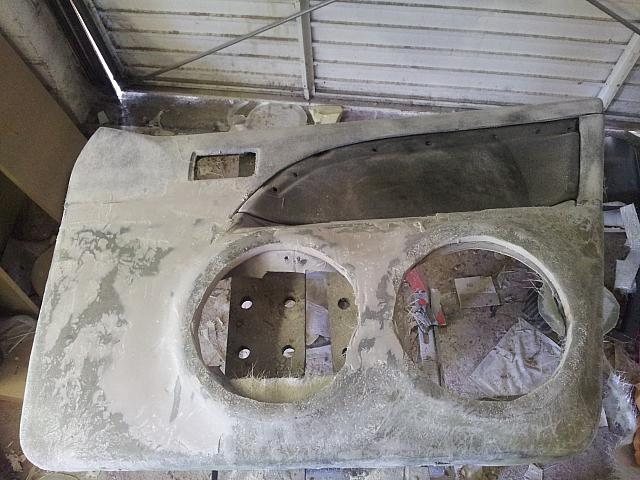
so the doorcard i had nearly finished, when trimming for the door handle i slipped and took a chunk out. After much swearing and cursing i trimmed the area back a bit as you can see in this pic

The idea is to make a piece of trimming that goes over that area to frame the door handle - the same way the blue trim has been done around the doorpull/window switches. Once that has been done i will be sikaflexing the door back together
But as that will take time i thought i may as well get on with the other door
Firstly - more glue, i am going through so much of this stuff

part 1

Measuring up and aligning the black

taaaa daaaaa

still got a bit more to do but that is where i am up to
first off my new full range drivers for the a-pillars arrived, 2 of these per a-pillar. As they are fullrange it means i dont need a tweeter, these do it all and as they are from the GZ SQ line they should sound good as well, I may be mistaken but i think im the only person running these in the UK at the moment
so the doorcard i had nearly finished, when trimming for the door handle i slipped and took a chunk out. After much swearing and cursing i trimmed the area back a bit as you can see in this pic
The idea is to make a piece of trimming that goes over that area to frame the door handle - the same way the blue trim has been done around the doorpull/window switches. Once that has been done i will be sikaflexing the door back together
But as that will take time i thought i may as well get on with the other door
Firstly - more glue, i am going through so much of this stuff
part 1
Measuring up and aligning the black
taaaa daaaaa
still got a bit more to do but that is where i am up to
schuey said:
Have been warming up the material before laying on the door card? Makes is a bit easier to get round the tighter corners,I spent many a day swearing in the garage at similar projects!
Tidy garage by the way
thanks, i keep meaning to tidy it up but never get round to it, its only recently i cleared it out so i could get back into it.Tidy garage by the way
The fabric tbh is actually pretty stretchy and nice to work with, fake leather from dunelm mills - reasonbly priced as well.
I did think about heating it but the contact adhesive is vicious enough as is it is so i did not want to make it go off any quicker, literally as soon as the fabric touches it sets 80% solid so the time i have to play with is not a massive amount
TBH i am not too happy with some of the bits of trimming but now the glue is set it is on for good but nothing to stop me making another set next year and if i am honest that is me being picky, for someone who is still learning how to trim they are alright-ish.
Ive always maintained the only way to learn something is to get stuck in and try it so I did, doorcards, material and glue are reasonably cheap (thank god for the pound shop and 5paint brushes for a quid) so its not mega expensive to give it a go
BTW the yorkshire rose idea is something i am toying with to project out of the boot
Gassing Station | Readers' Cars | Top of Page | What's New | My Stuff