Porsche 944 project car - £free!
Discussion


MadRob6 said:
It's surprising how well these old abandoned white Porsches can scrub up. Although not as filthy as yours mine had black spots all over it and had absolutely no shine whatsoever but I've managed to get it looking like this.

I wanted to get the paint protected a bit since it's going to be living outside for quite a while and didn't want the paint to deteriorate any more than it had done but it came up much better than I expected.
How long do you reckon until you'll have it up and running?
Comedy number plate! I wanted to get the paint protected a bit since it's going to be living outside for quite a while and didn't want the paint to deteriorate any more than it had done but it came up much better than I expected.
How long do you reckon until you'll have it up and running?

I swapped the takeoff tonight, fitting the one from the original engine which had the cam tensioner problem. When I took out the oil pressure valve I found, you guessed it, another problem! A tiny piece of swarf had become stuck in it, holding the valve open. This would have caused low (maybe no) oil pressure & could well be the reason the engine was stripped - its not the first time I've seen the exact same thing.
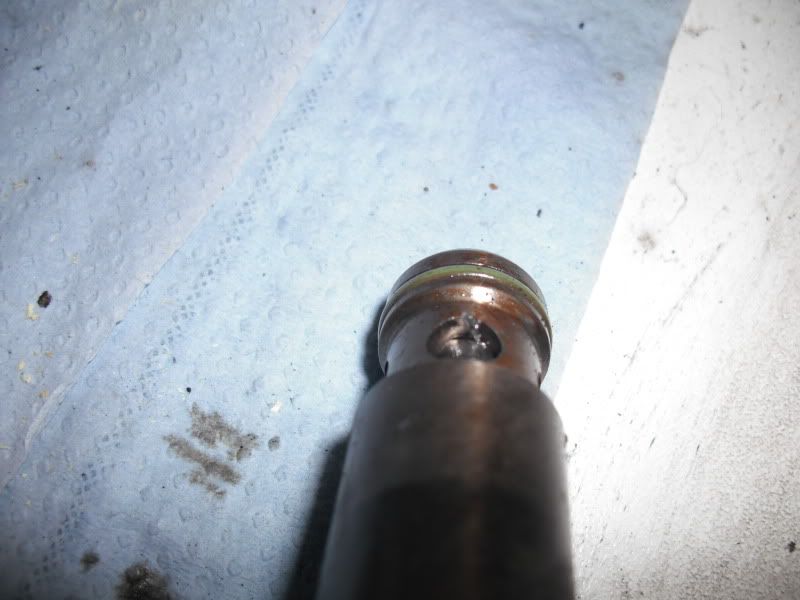
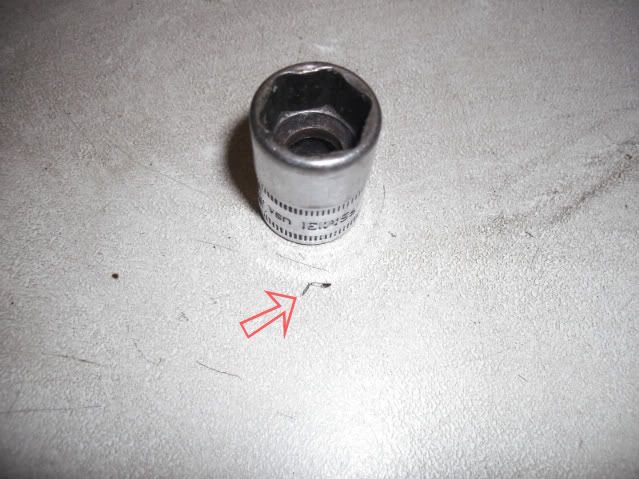
And here is a pic of the swarf next to a 13mm socket for comparison. It doesn't take a lot to ruin an engine.....
And here is a pic of the swarf next to a 13mm socket for comparison. It doesn't take a lot to ruin an engine.....
olly22n said:
MrMoonyMan said:
MadRob6 said:
It's surprising how well these old abandoned white Porsches can scrub up. Although not as filthy as yours mine had black spots all over it and had absolutely no shine whatsoever but I've managed to get it looking like this.
I wanted to get the paint protected a bit since it's going to be living outside for quite a while and didn't want the paint to deteriorate any more than it had done but it came up much better than I expected.
How long do you reckon until you'll have it up and running?
Comedy number plate! I wanted to get the paint protected a bit since it's going to be living outside for quite a while and didn't want the paint to deteriorate any more than it had done but it came up much better than I expected.
How long do you reckon until you'll have it up and running?

MadRob6 said:
With it being that easy to kill all oil pressure I wonder if that's what caused the big end from my S (the one with the comedy plate) to eject itself through the sump?
Where is the oil pressure valve located? I might whip it off next time I'm there and have a look.
Its on the oil filter housing, next to the oil pressure switch. You will see a 24mm bolt, remove this & the pressure valve is inside. If the 'S' has the early style valve it will have a plunger, spring & ball bearing (which will try and eject itself across the workshop when you undo the bolt - beware!). The early type don't fail in the same manner, usually the plunger wears & sticks in the housing (there will be marks indicating this).Where is the oil pressure valve located? I might whip it off next time I'm there and have a look.
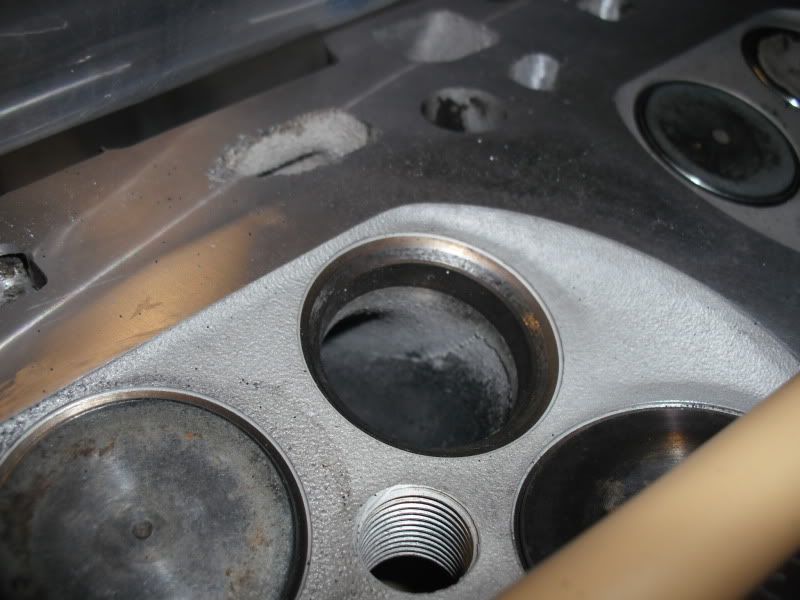
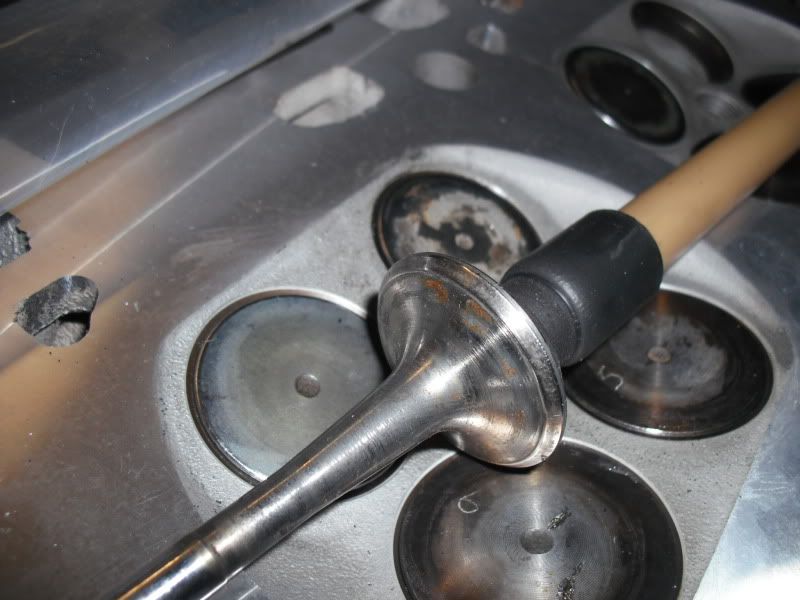
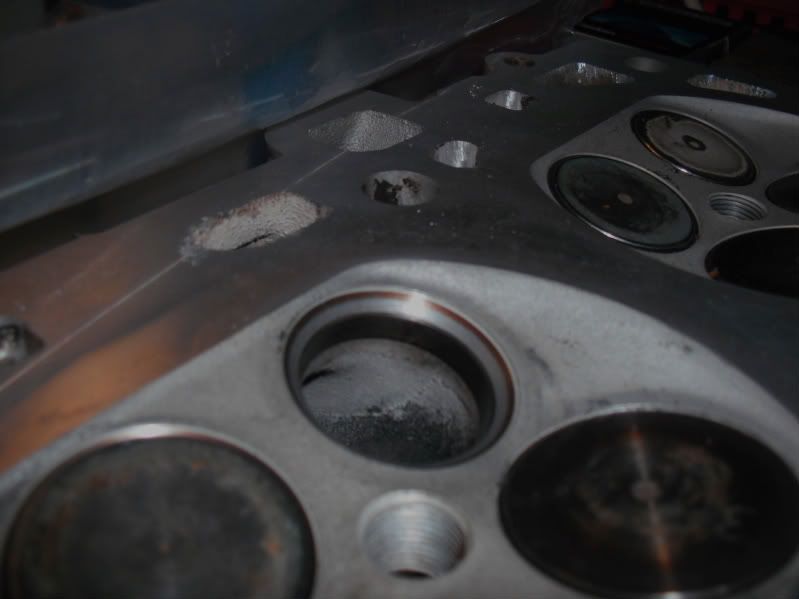
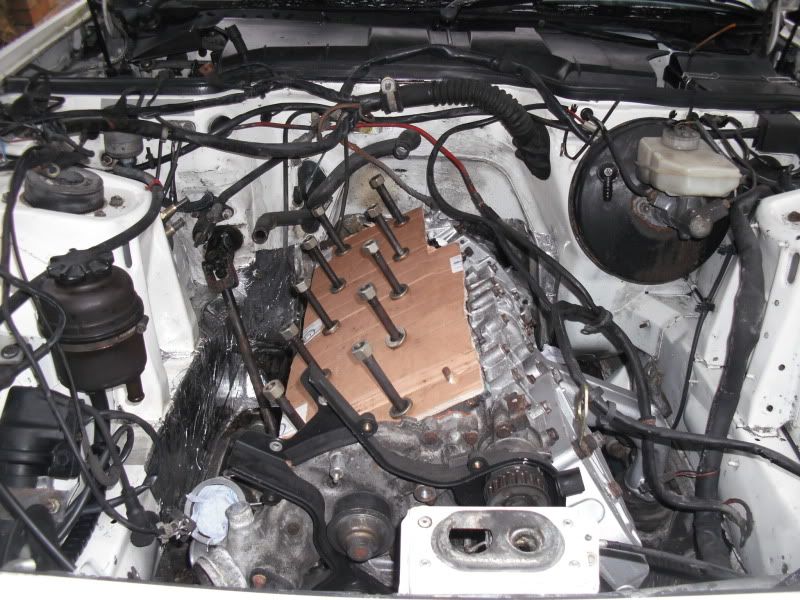
Time for an update now all the snow is gone - it was (below) freezing in the garage! The cylinder head is finally assembled, here are some pics of the pitting on the valves & seats before grinding -
And lovely smooth (and out of focus) finish afterwards -

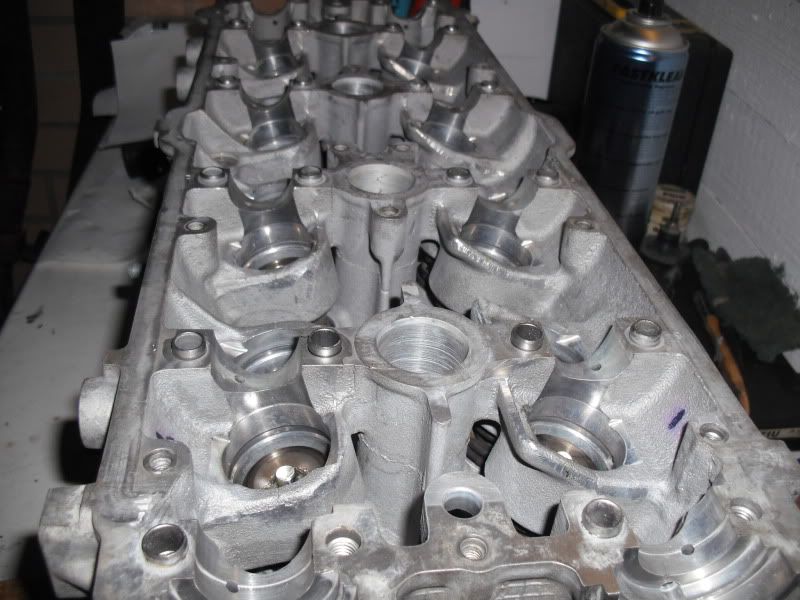
The amount of time it takes to refurbish a head cannot be underestimated,I reckon I spent more time cleaning than actually assembling. Fortunately I don't charge myself labour. Once the valves & seats were done I could temporarily assemble the head in order to measure the valve spring lengths, then determine where each shim should be fitted (the shims had all been mixed up when it was stripped). Then it was all taken apart again, cleaned again before final assembly. The finished head -
Thats another big step forwards, next up is actually getting the engine in the bloody car.
And lovely smooth (and out of focus) finish afterwards -
The amount of time it takes to refurbish a head cannot be underestimated,I reckon I spent more time cleaning than actually assembling. Fortunately I don't charge myself labour. Once the valves & seats were done I could temporarily assemble the head in order to measure the valve spring lengths, then determine where each shim should be fitted (the shims had all been mixed up when it was stripped). Then it was all taken apart again, cleaned again before final assembly. The finished head -
Thats another big step forwards, next up is actually getting the engine in the bloody car.
bertelli_1 said:
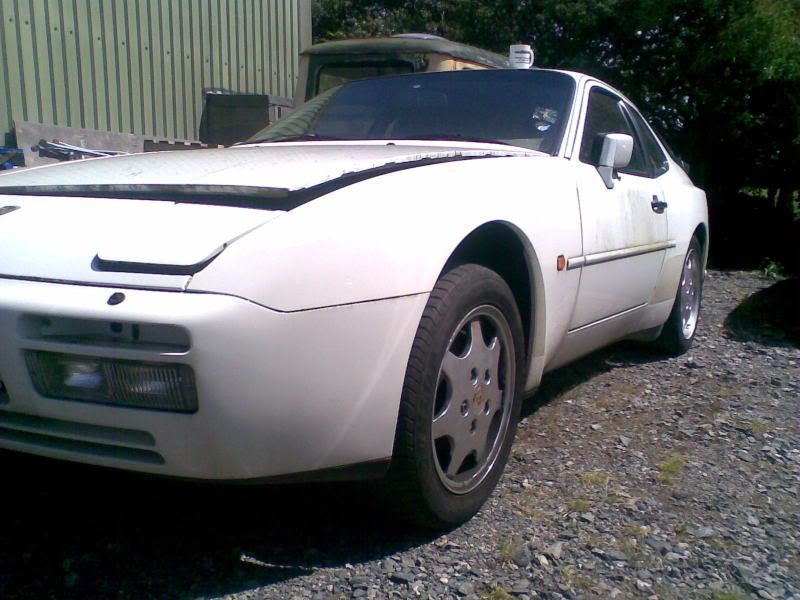
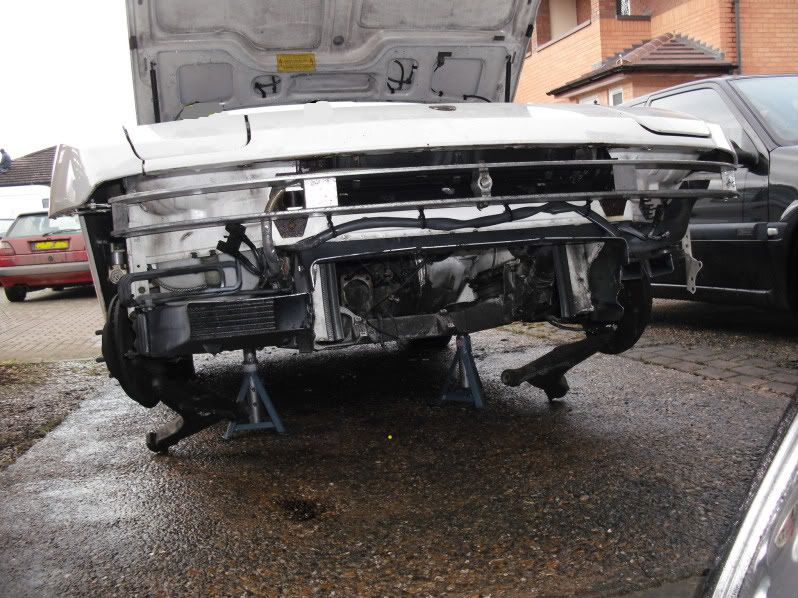
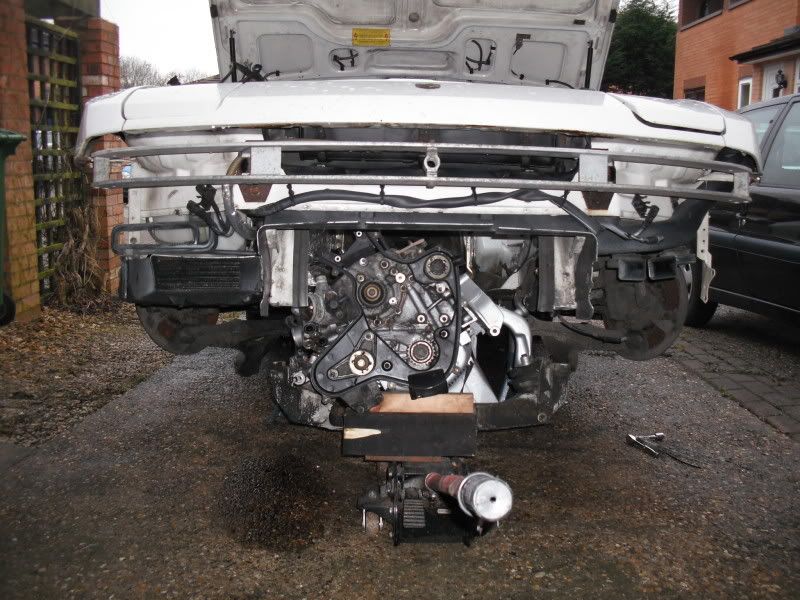
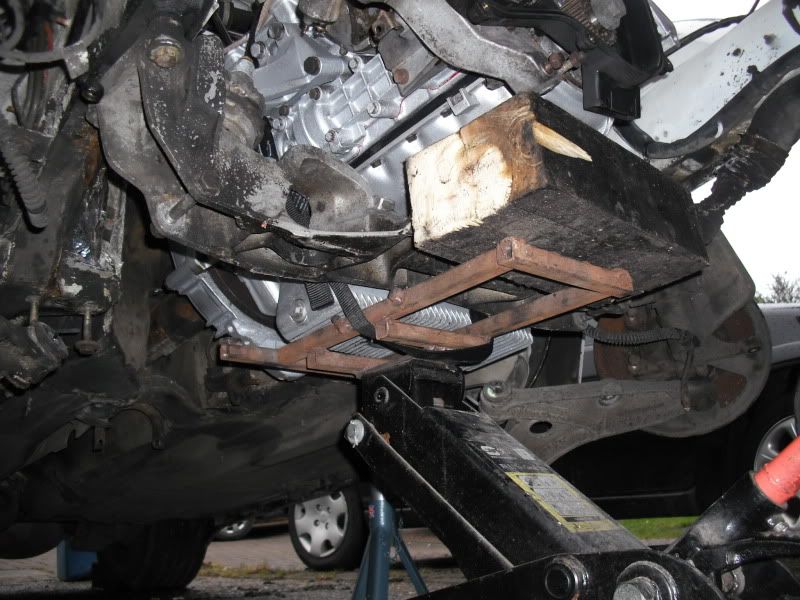
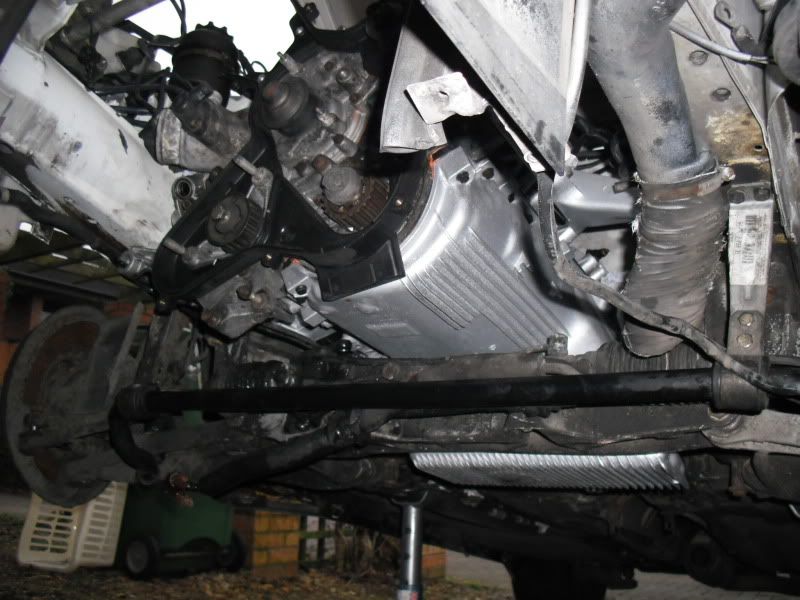
Not exactly free, I did 5 days work for it but still a bargain. It is a 1991 S2 and has been standing outside for a couple of years, the catch being the engine is dismantled & sitting in the boot.
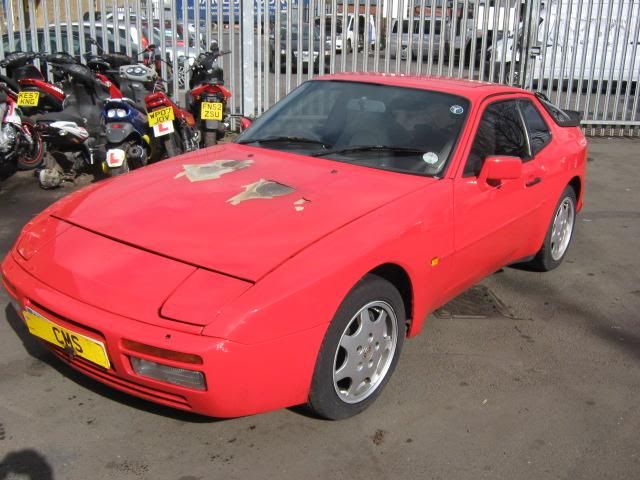
An engine rebuild on one of these can be megabucks I looked around for a replacement and found this fire damaged example.
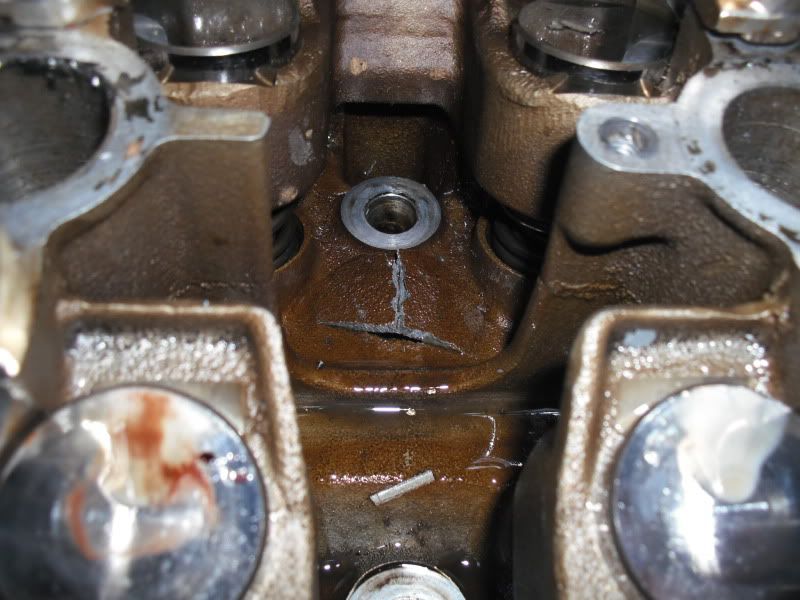
I have now removed the engine, stripped the car & started stripping the engine. I found a big problem with the cylinder head - a large crack, into the waterway. This must have shown some severe headgasket type symptoms as the oil and water would have been mixing on a huge scale!
Fortunately the head from the other car looks useable. The cylinder bores and big end bearings of the donor engine look in good shape. The next step is to clean the motor and fit new gaskets everywhere (some have been damaged by the fire) before rebuilding it & fitting it to the white car. BTW, the S2 has a 3 litre 16v 4 cylinder normally aspirated engine - the largest 4 pot engine of recent times.
I recognise that atlas near the scrap pile An engine rebuild on one of these can be megabucks I looked around for a replacement and found this fire damaged example.
I have now removed the engine, stripped the car & started stripping the engine. I found a big problem with the cylinder head - a large crack, into the waterway. This must have shown some severe headgasket type symptoms as the oil and water would have been mixing on a huge scale!
Fortunately the head from the other car looks useable. The cylinder bores and big end bearings of the donor engine look in good shape. The next step is to clean the motor and fit new gaskets everywhere (some have been damaged by the fire) before rebuilding it & fitting it to the white car. BTW, the S2 has a 3 litre 16v 4 cylinder normally aspirated engine - the largest 4 pot engine of recent times.

Look forward to the updates
MadRob6 said:
Good to see some more progress. The head's looking really good, is there much more to do before the engine can go into the car?
Currently got the engine out my mine at the moment to change a few things like the oil cooler seals, sump gasket, clutch and belts.
Not much more to do really - just cleaning, cleaning & a bit more cleaning! Did you sort your oil blockage? Currently got the engine out my mine at the moment to change a few things like the oil cooler seals, sump gasket, clutch and belts.
Looking good will definately favourite this thread for a little peak when work gets boring!
Heres a little bit of inspiration from Detailing World this chap did an incredible job on his MK1 Golf with minimal prior knowledge...
http://www.detailingworld.co.uk/forum/showthread.p...
Heres a little bit of inspiration from Detailing World this chap did an incredible job on his MK1 Golf with minimal prior knowledge...
http://www.detailingworld.co.uk/forum/showthread.p...
bertelli_1 said:
Not much more to do really - just cleaning, cleaning & a bit more cleaning! Did you sort your oil blockage?
Yeah the blockage is sorted now. Had to remove the sump to get the small pipe off then jam a metal rod down it until the blockage finally let go, which it kindly did all over my foot.


Gassing Station | Readers' Cars | Top of Page | What's New | My Stuff