Rover 200 BRM - 1.8 K-Series turbo project
Discussion


Max_Torque said:
It would be an interesting exercise to understand the load paths with that conversion, ie where the head fastening loads are resolved?
The std K has the through bolts, that pull the head to the block face, and take the majority of the load into the liners (to seal the fire face interface) and that load is passed down the liners, and into the lower zone of the block, through the main bearing webs, up against which the lower bedplate (with the other half of the main webs) is pulled by the head bolts.
The "liner sinking" is caused, iirc, by the liners fretting and expanding (thermal expansion difference to the ally block) and i think, wearing down into the supporting block material, but it also could be that the liners actual are yielding the block at that high load interface? Has anyone measured a "sagged" block and worked out where the sag actually occurred? Without being able to carry a higher load reliably in this area, then that prohibits the use of a higher head clamp load, which means forced induction or high CR engines are always going to suffer from top end sealing issues....
We have generally found that the liner sinking issue is running the coolant at a temperature beyond which the block can deal with long term, alot of time running them beyond 100c while it doesnt seem all that hot does seem to cause liner drop or head annealing and indentation of the fire ring into the head.The std K has the through bolts, that pull the head to the block face, and take the majority of the load into the liners (to seal the fire face interface) and that load is passed down the liners, and into the lower zone of the block, through the main bearing webs, up against which the lower bedplate (with the other half of the main webs) is pulled by the head bolts.
The "liner sinking" is caused, iirc, by the liners fretting and expanding (thermal expansion difference to the ally block) and i think, wearing down into the supporting block material, but it also could be that the liners actual are yielding the block at that high load interface? Has anyone measured a "sagged" block and worked out where the sag actually occurred? Without being able to carry a higher load reliably in this area, then that prohibits the use of a higher head clamp load, which means forced induction or high CR engines are always going to suffer from top end sealing issues....
By running them in the 80c-85c range as a max temperature I havent seen that issue occur from a power point of view.
Up to yet I have been working to see what the actual limit of the 10.9 stretch bolts and MLS from cylinder pressure, since i monitor coolant pressure via the ecu
I think we finally found it on the dyno, running 36psi of boost we could see the normal rise and fall with rpm(mechanical water pump), but when we pushed to 40psi of boost we could see the rise and then maintaining the high pressure and hence the breach.
For reference the 36psi was mid 600s bhp
8.8:1 compression, 280 degree cams and 6767 turbo
Over winter im going to test the ARP studs to see if they have a slightly larger window, we tested on a spare block to see how much torque we could apply before the mains went out of round and 50ftlbs was the limit(which was recommended by ARP)
We could of course line bore an engine but the other issue on the head is the platforms the bolt/nut sits on crushing from high torque, you could of course machine the block from underneath and insert sleeves but you then block alot of the oil returns from the head and crankcase breathing.
AER said:
The liners on the K are pretty slim so pressing them into a wobbly block isn't going to make for maintaining a round bore under thermal and mechanical loads. I'd suspect the K assembly needs to be kept loose aside from cylinder head to liner clamp loads which need to stay tight for obvious reasons.
IMO it's a bit of a silly engine to attempt to boost beyond its known power and pressure limitations because the structural limitations are flaming obvious. That and the piston crown height and rod length that has been pushed to slightly beyond ridiculous.
As an S1 Elise owner I browse for K pictures on the web from time to time with ambitions to up-engineer it. The reality is though, there are other engines out there now that are much more robust and very nearly as light these days - the Duratec, for example - with headroom for spectacular power upgrades due to better bore-stroke ratios, bigger valves and sensible conrod lengths. It just doesn't make any sense to thrown effort at the K . It's old technology - useful still, but old and limited.
I agree there are better engines out there, primarily the honda k24/20 as 1000bhp+ can be achievedIMO it's a bit of a silly engine to attempt to boost beyond its known power and pressure limitations because the structural limitations are flaming obvious. That and the piston crown height and rod length that has been pushed to slightly beyond ridiculous.
As an S1 Elise owner I browse for K pictures on the web from time to time with ambitions to up-engineer it. The reality is though, there are other engines out there now that are much more robust and very nearly as light these days - the Duratec, for example - with headroom for spectacular power upgrades due to better bore-stroke ratios, bigger valves and sensible conrod lengths. It just doesn't make any sense to thrown effort at the K . It's old technology - useful still, but old and limited.
The one benefit of the rover k series is its overall weight, if your aiming around 400bhp then it does require a change of pistons/rods/liners to ensure reliability, if you are aiming for 600bhp+ then as you say I would look at other options
227bhp said:
Those pistons look like they were too tight in the bore.
The aforementioned Mazda Duratec block is also alloy with cast iron liners, but they cast them in situ so the whole of the liner (including top and sides) is encased in alloy.
I think from memory the duratec isnt that much heavier than the K so it would be a potential good option, all depends on the cost and whether you want to push the engine past the point that can be achieved by the K seriesThe aforementioned Mazda Duratec block is also alloy with cast iron liners, but they cast them in situ so the whole of the liner (including top and sides) is encased in alloy.
Build is progressing now that I've had a bit of time off work to focus on the important things! I would share pictures but photobucket are having issues yet again. There are some pictures on my Facebook page if you're interested...
https://www.facebook.com/RoverBRM/
Plastigauged the main and big end bearings and all checked out. The excessive piston/liner wear on the last engine left some crap in the oil that lightly scored the crank journals which I had to have polished out. Rover K-series cranks use different sized bearing options (which you usually select based on a code stamped on the crank and block) so I went with the thickest bearings. Happily, this brings things within tolerance by a nice margin.
Gapped the piston rings and went fairly wide. 0.5mm top ring and 0.6mm second ring. The turbo I'll be running is capable of 400bhp (although my fuel system probably isn't) so whilst I'll probably get a bit more blow-by I'll never have to worry about things being too tight. Crankcase will be well ventilated.
Fitting the pistons was going well until I was in the process of fitting the second piston and my ring compressor broke and unravelled. I didn't have a spare so that put an end to the fun!
While I wait for a replacement from Amazon, I might get started on the head. I'm keeping the Vvc and not doing a full port job on it this time, but as its a brand new unused head from at least 15 years ago I'm going to replace the valve stem oil seals and rear vvc belt.
While the head's apart I'll probably also fit stiffer valve springs on the exhaust side. The vvc runs the weakest of valve springs used in the K-series and they were never intended to see the kind of exhaust back pressure a turbo setup produces, so stiffer springs will help prevent the exhaust back pressure holding the valves open. Whilst I don't expect my pre-turbine pressure to be excessive with my new turbo (effectively a gtx2867) there's no downside to running stiffer springs and I have them sitting there so may as well use them. The vvc mechs on the inlet probably wouldn't cope with stiffer springs, so they will stay as they are.
More updates soon.
I wouldn't have said the springs are needed, uprated springs are for higher cam lifts (to prevent coilbind) and higher rpm use only.
There are downsides to fitting stiffer springs which aren't needed:
They take more power to open them.
Increased wear & tear on the cam and bucket/shim.
Increased wear on the valve seats.
There are downsides to fitting stiffer springs which aren't needed:
They take more power to open them.
Increased wear & tear on the cam and bucket/shim.
Increased wear on the valve seats.
Now that photobucket is finally working again, thought I'd share some pics:
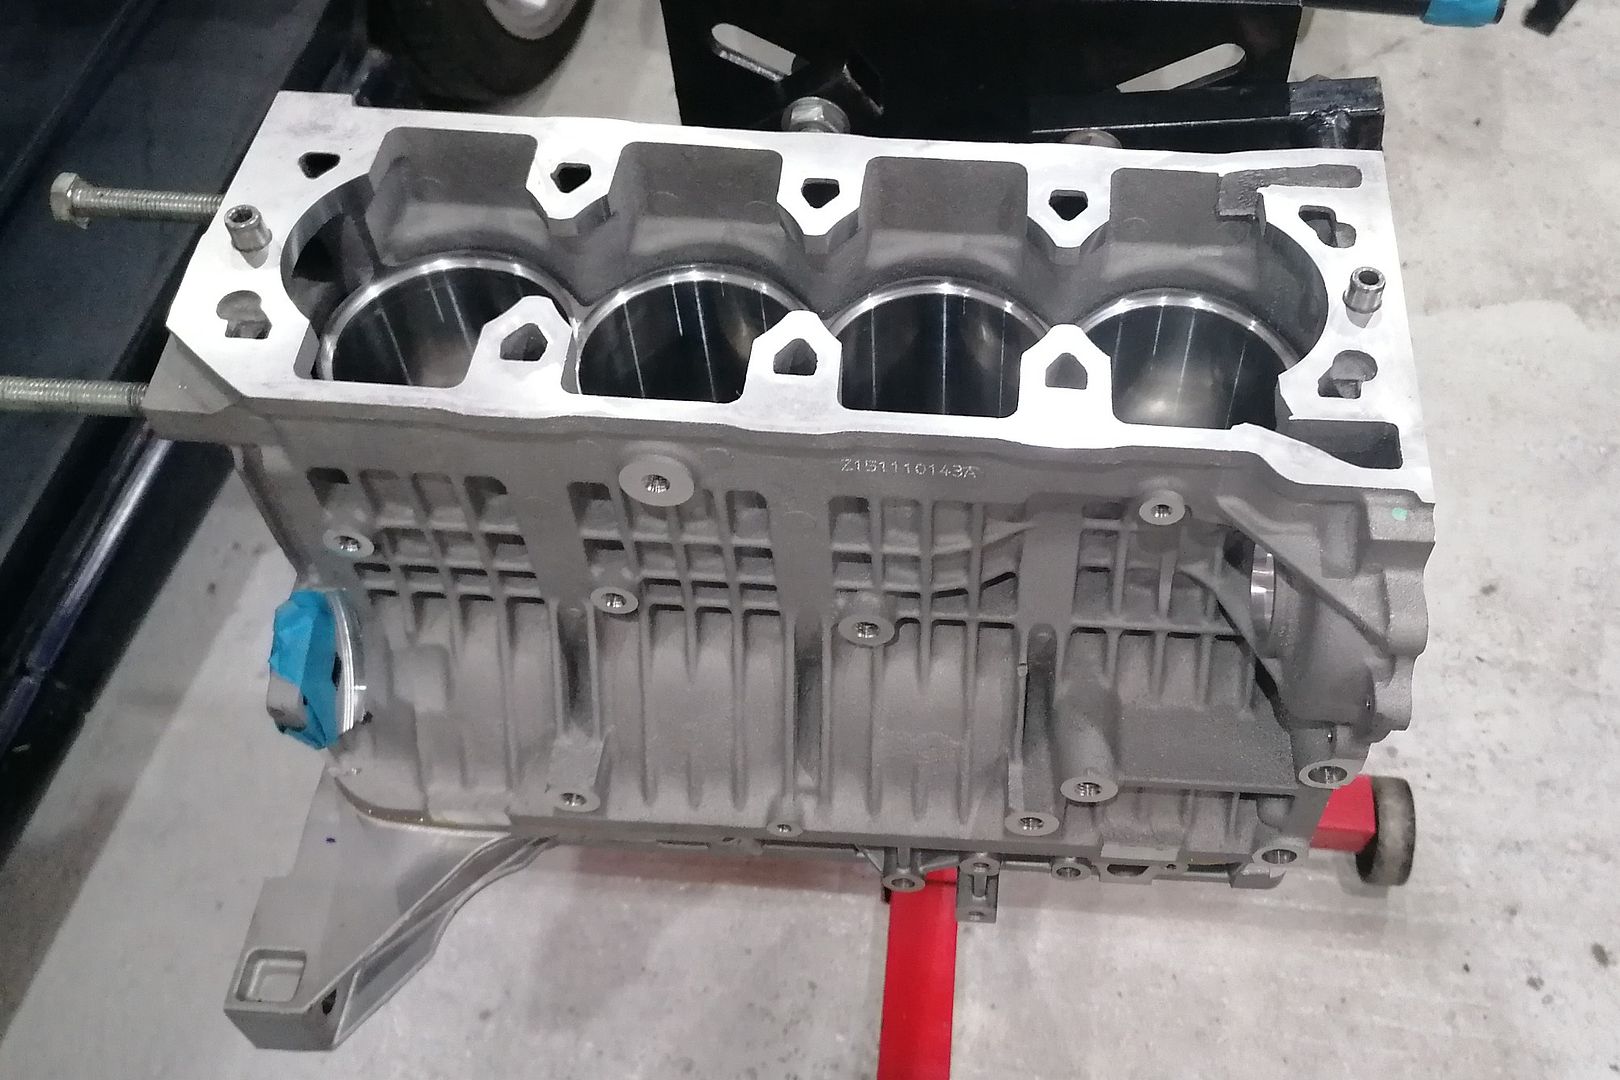
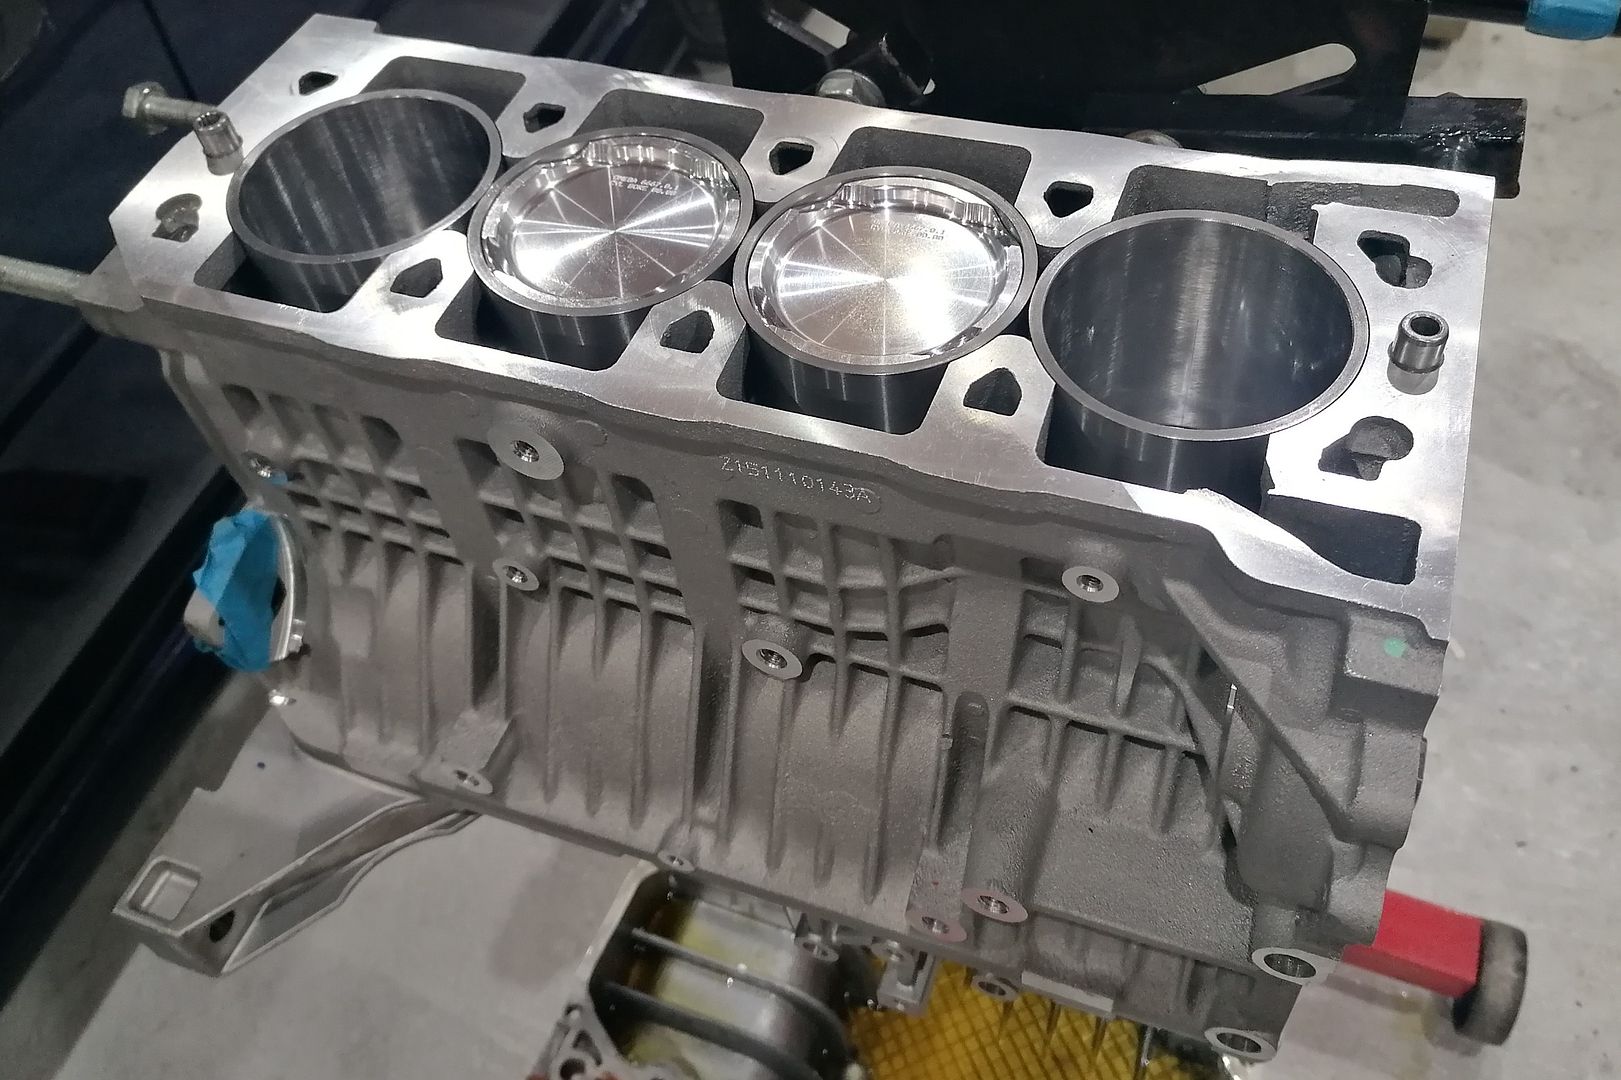
New block
Reground and balanced crank going in.
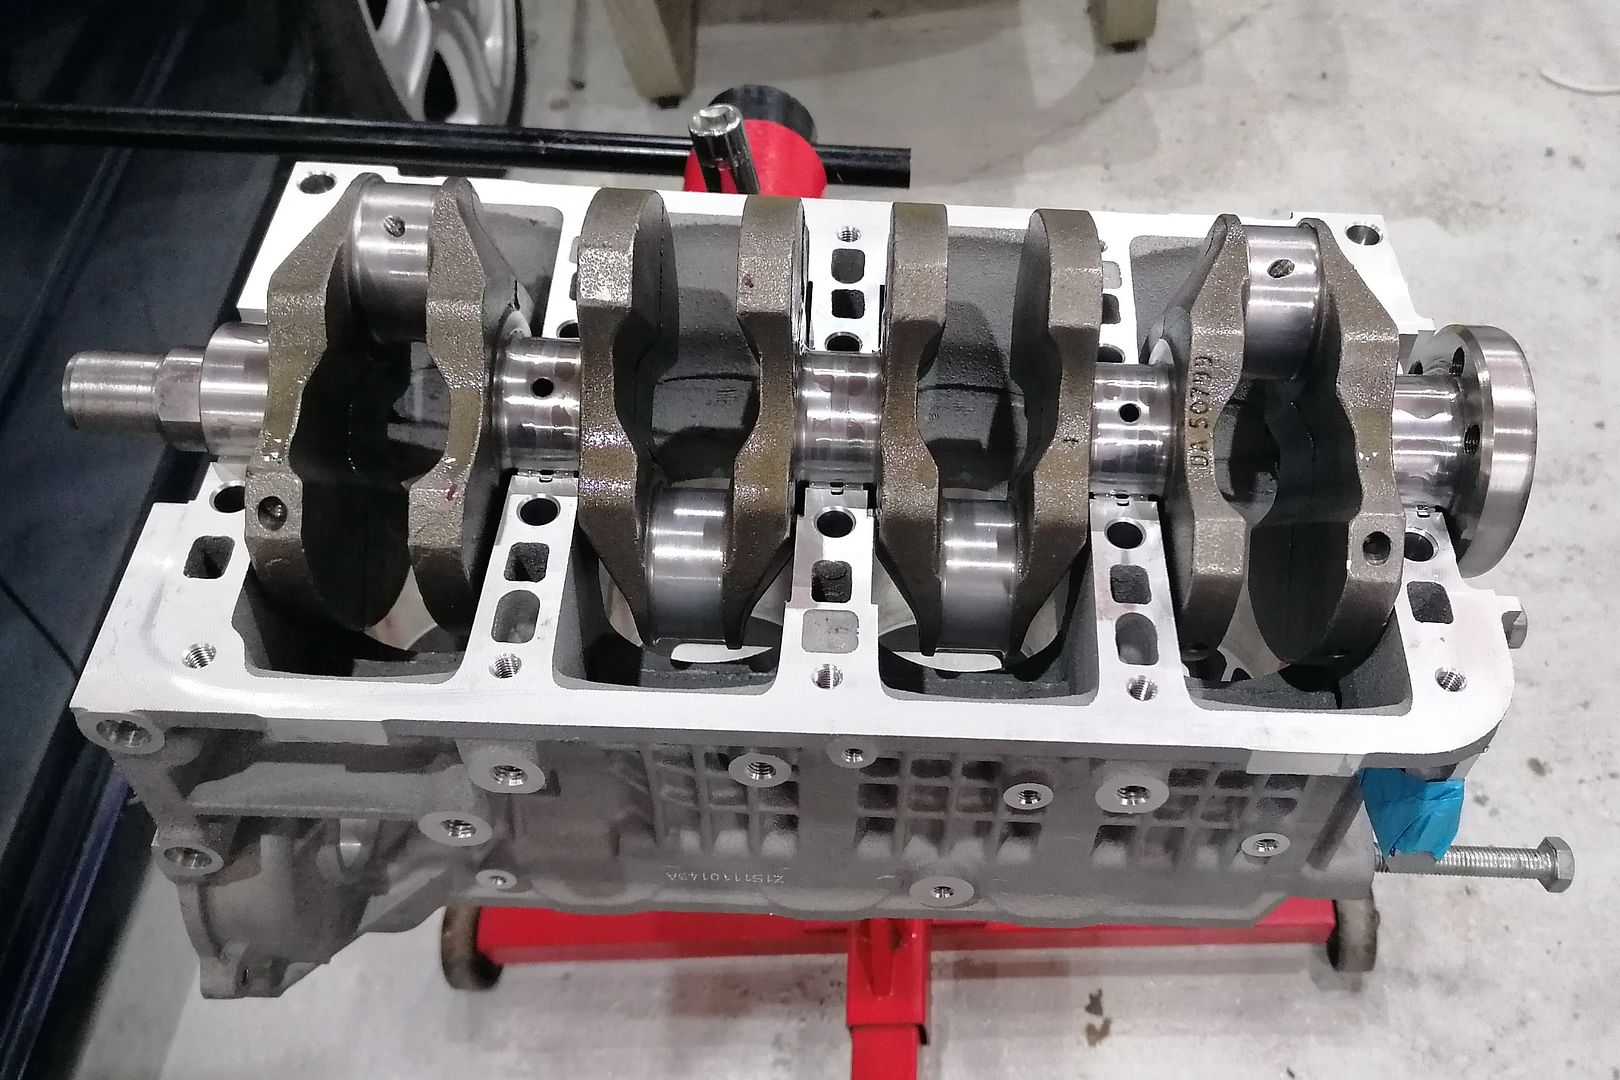
Westwood ductile iron liners for a bit more strength

Pistions and rods all balanced too:
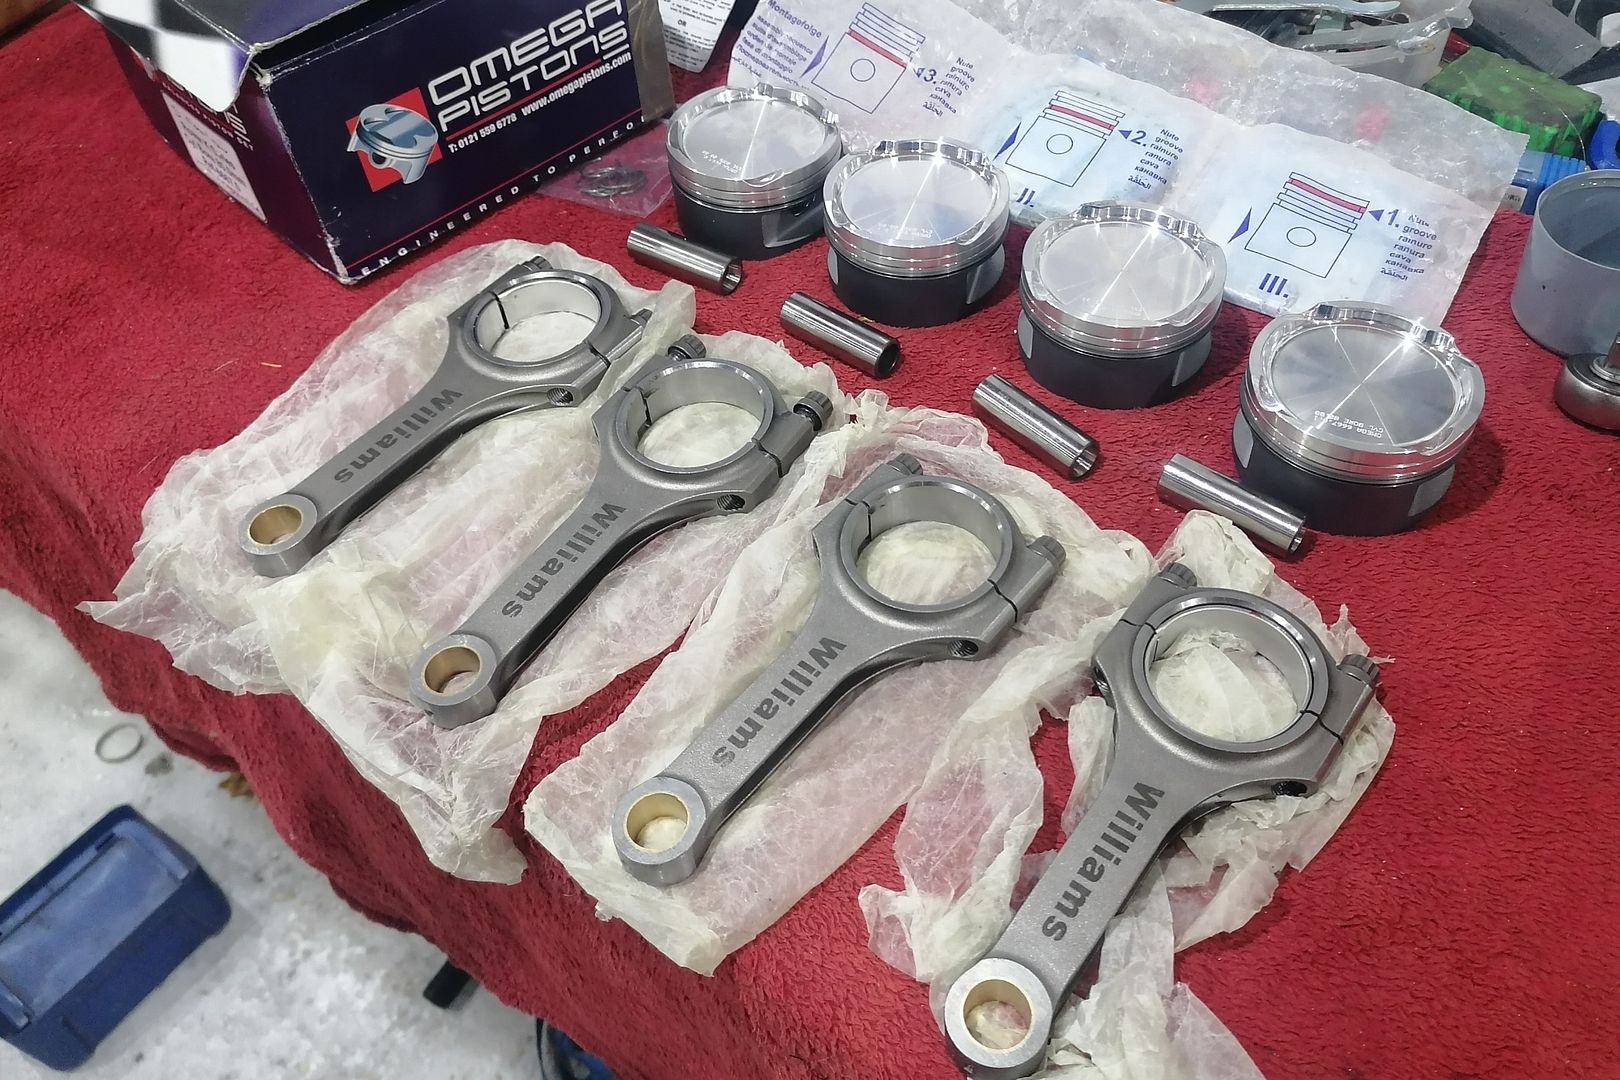
Omega pistons have a nice big dish for just under 9:1 CR. Much better design than the wossner I used (and destroyed) before.
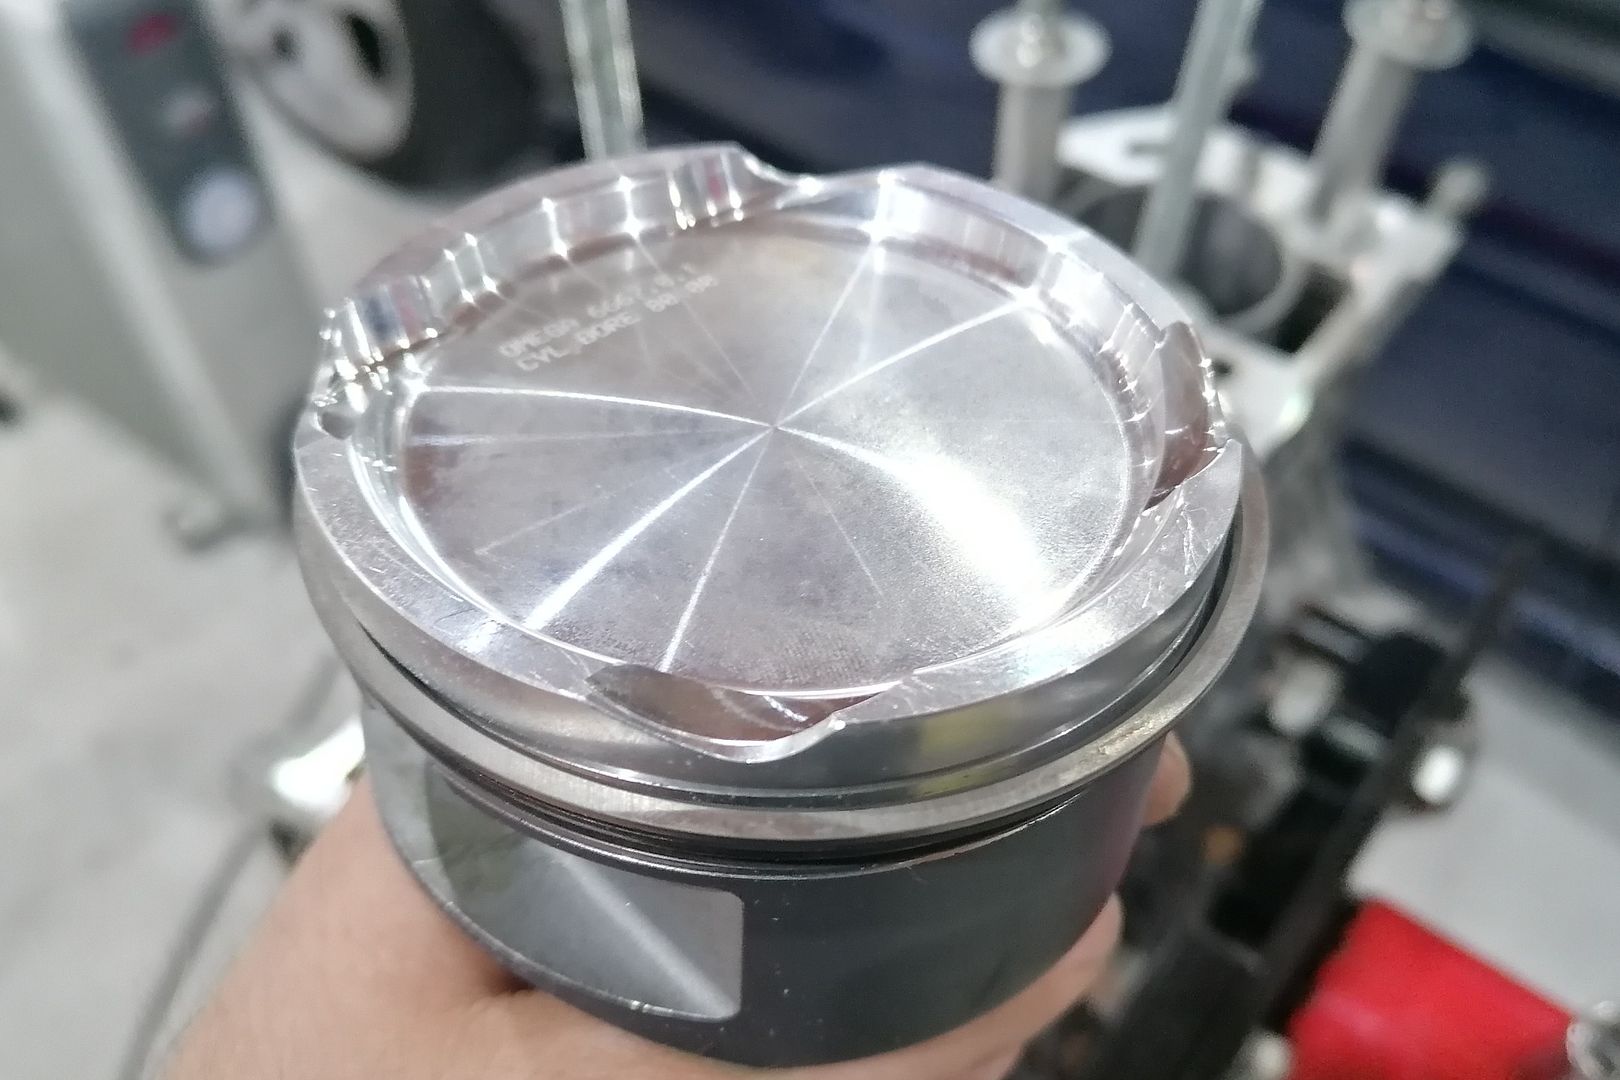
Ready to go in

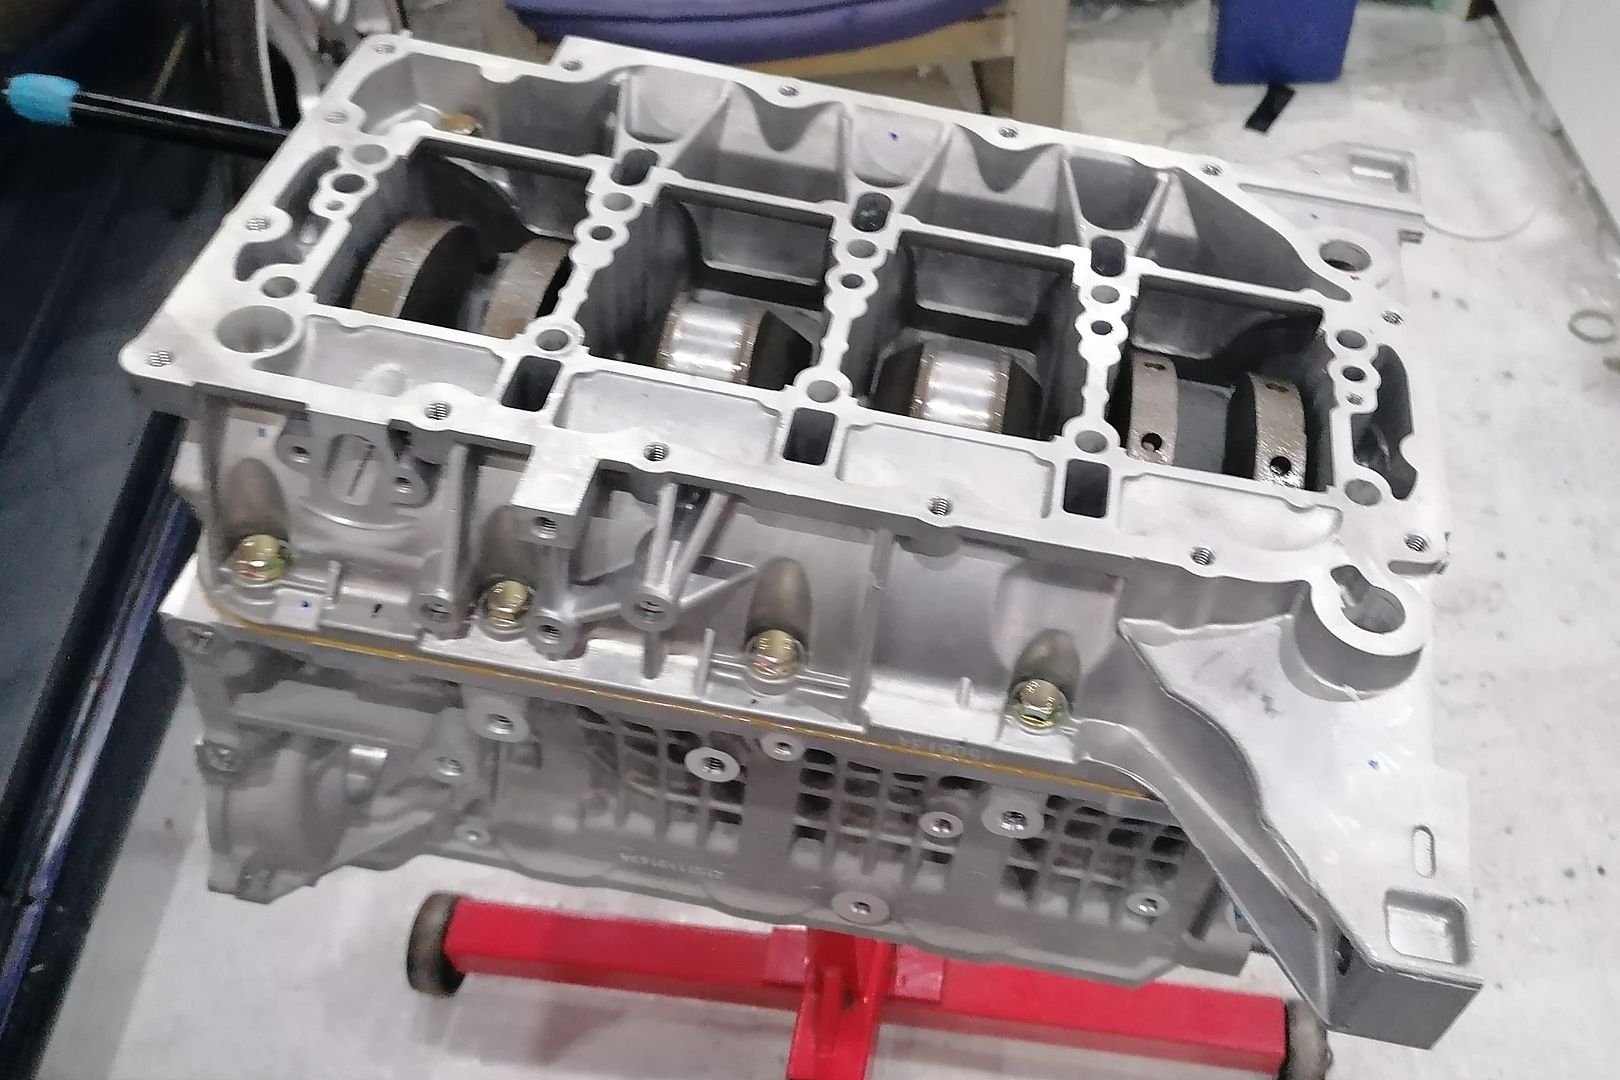
Bottom end built:
Just waiting on parts now to finish getting the engine together and sort the head out. Stripping a VVC head is not for the faint-hearted (if you want to put it back together and keep the vvc).
New block

Reground and balanced crank going in.


Westwood ductile iron liners for a bit more strength

Pistions and rods all balanced too:

Omega pistons have a nice big dish for just under 9:1 CR. Much better design than the wossner I used (and destroyed) before.

Ready to go in

Bottom end built:

Just waiting on parts now to finish getting the engine together and sort the head out. Stripping a VVC head is not for the faint-hearted (if you want to put it back together and keep the vvc).

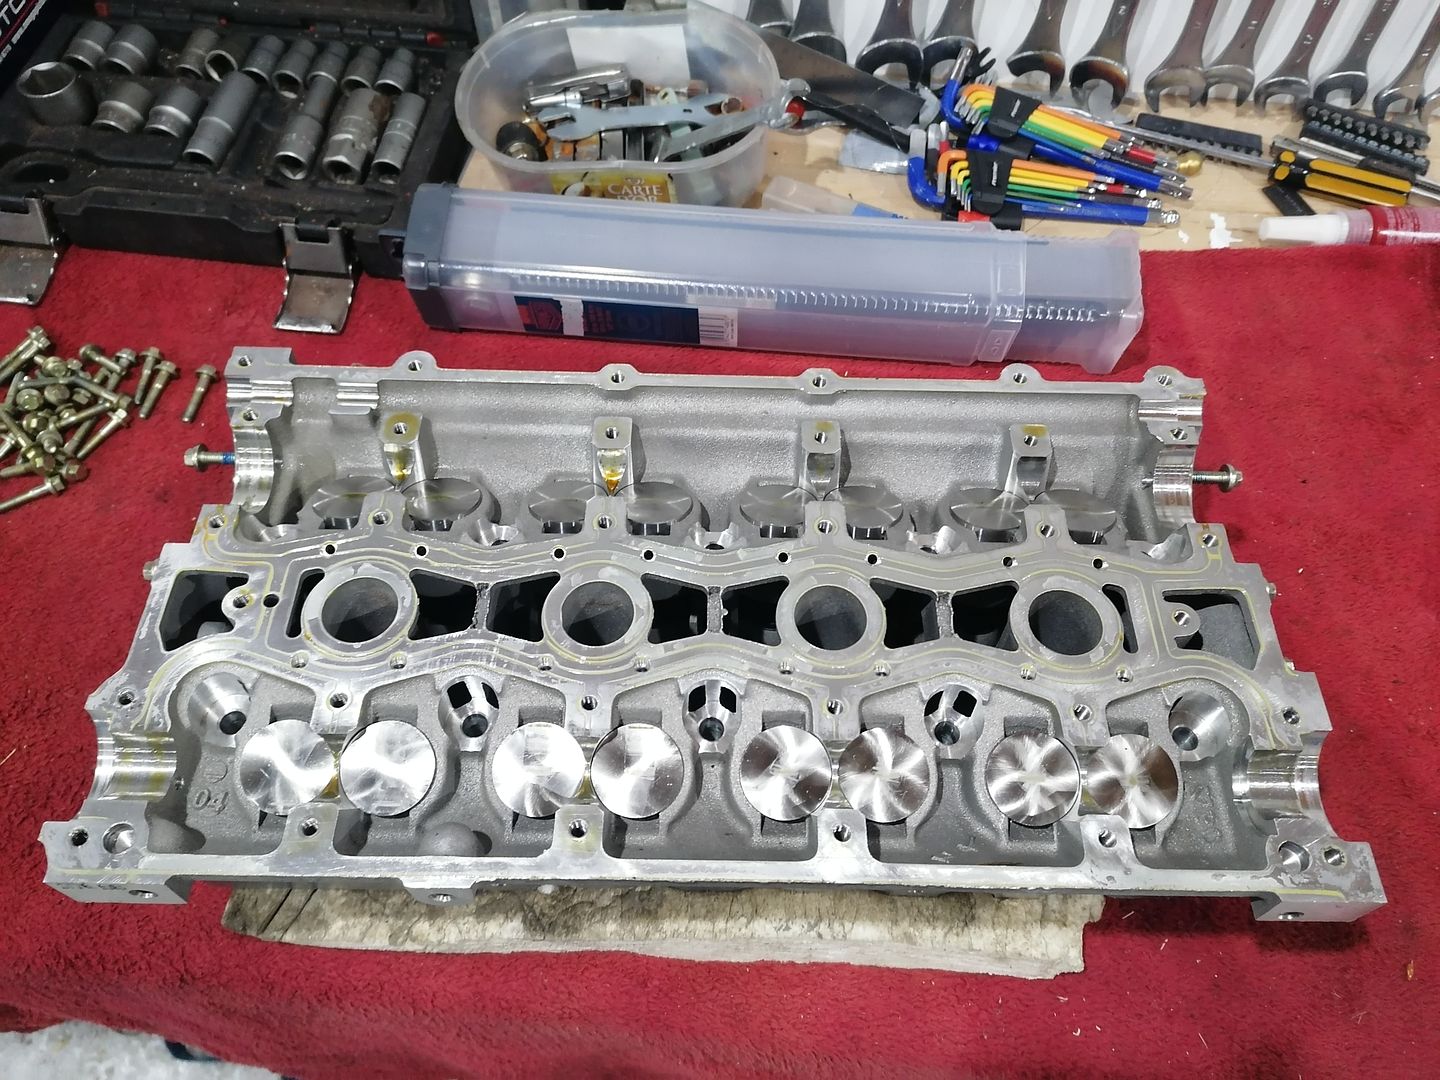
Little bit more progress.
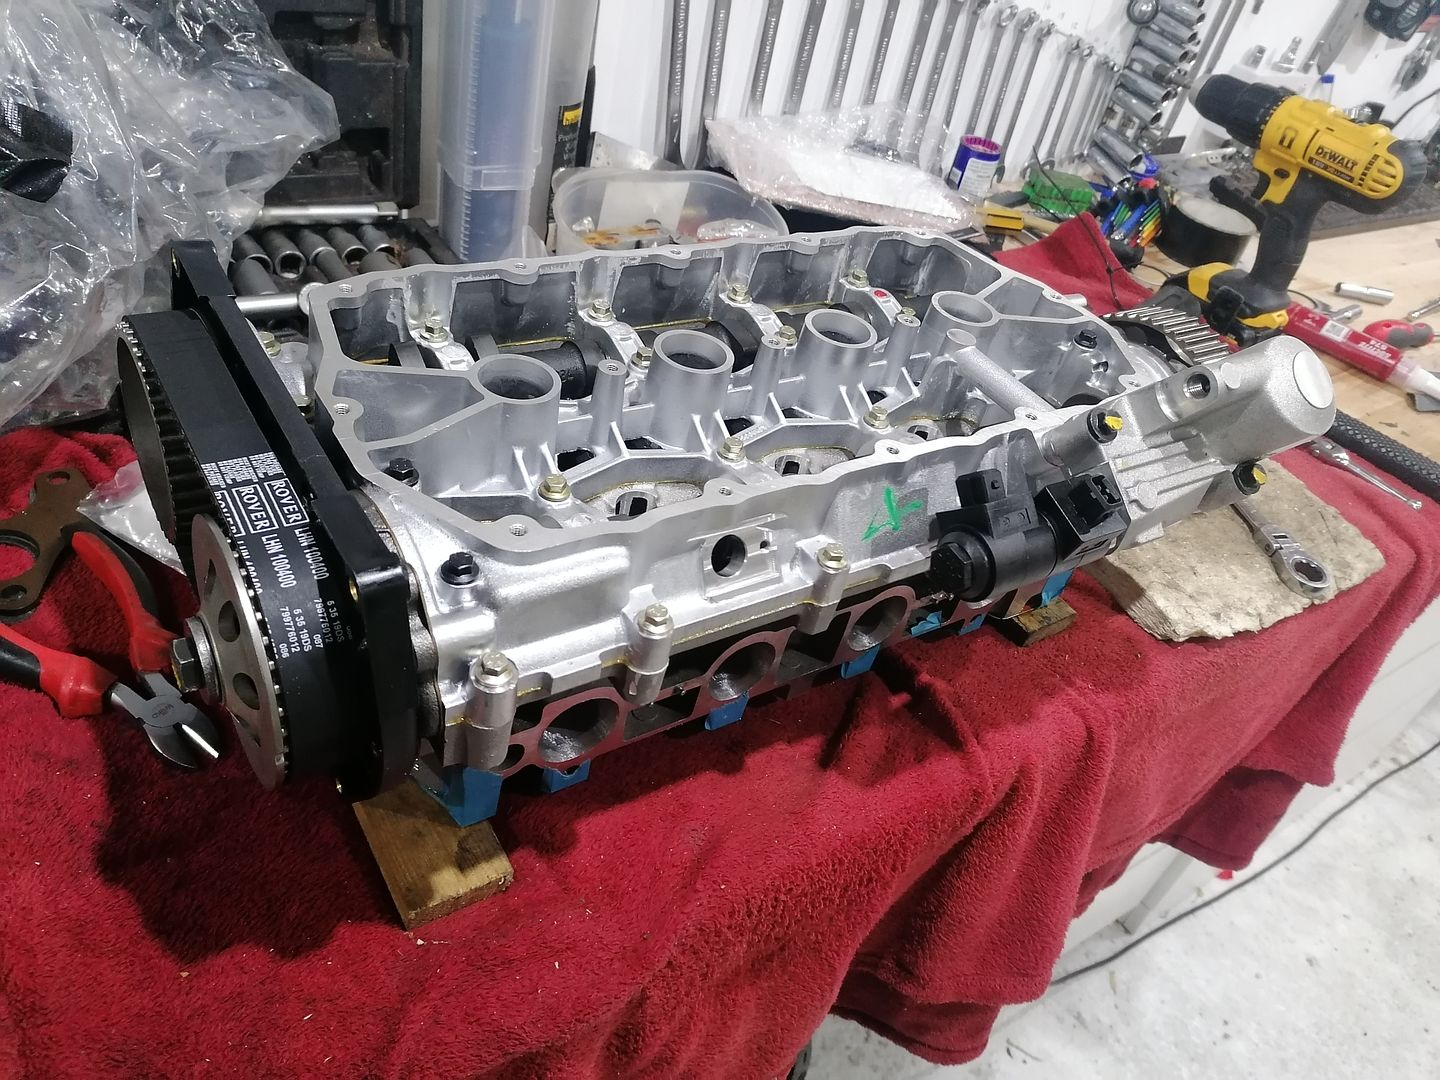
A white ago I managed to source a brand new in box vvc cylinder head:

The vvc head is preferred over the non-vvc (mpi) head that normally lives in the K-series turbo because it flows better. Most people would swap the variable valve gear out for solid cams. I've tried both on previous iterations. The first time I ran vvc turbo I ditched the vvc as the mechanisms were very rattly (a common problem) and I had a valve spring cap crack and partially sick a valve open! In this build I wanted to keep vvc for the added flexibility.
Obviously the head's been sitting around for a few years so I decided to change the valve stem oil seals and rear vvc belt. Seeing as I had to strip the head completely to do this, I thought I would fettle things slightly. Just for fun really - I doubt anything I've done will make much difference!
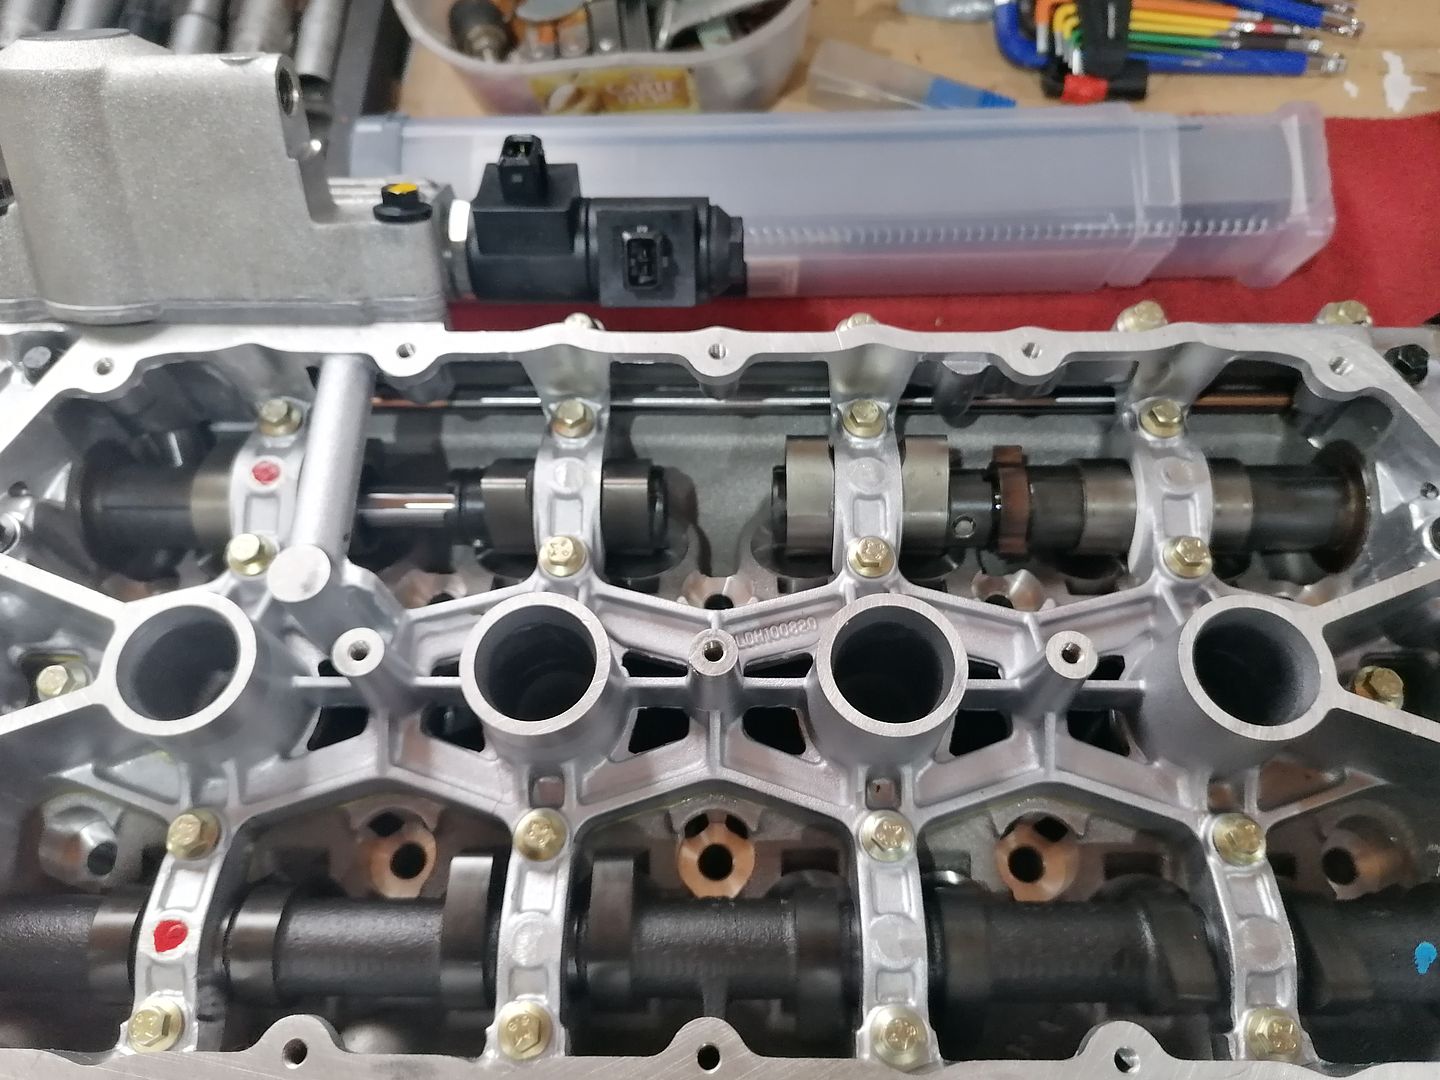
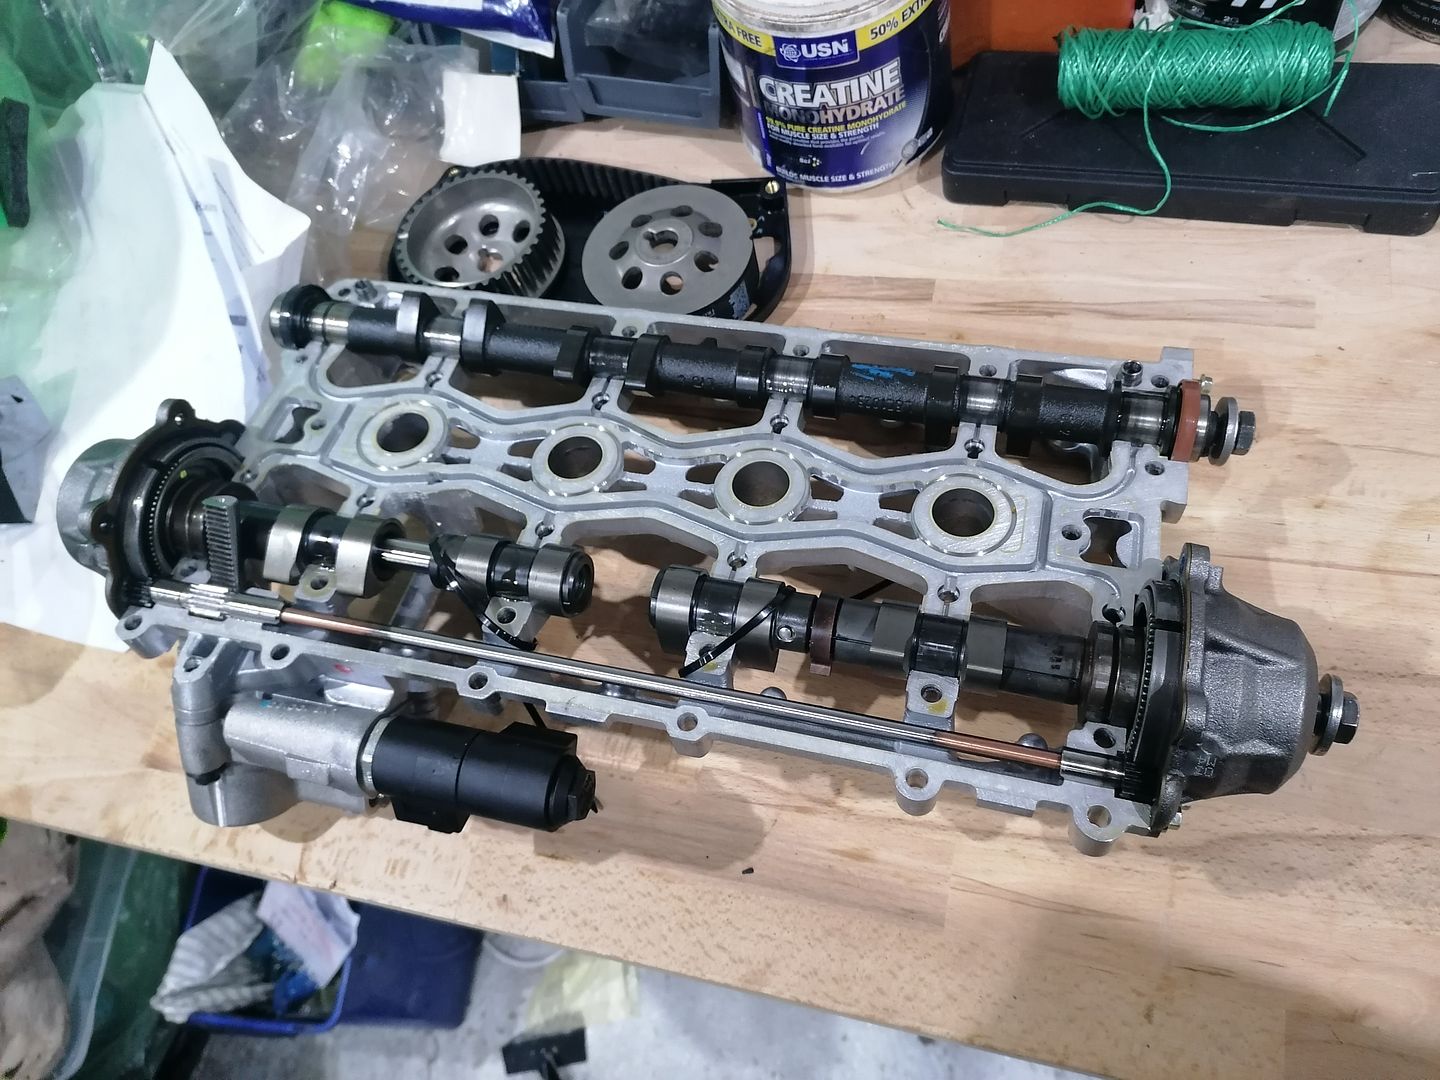
The Rover VVC is a fairly complicated bit of kit. The inlet camshaft is actually two separate camshafts. A piston driven by oil pressure moves a gear which in turn moves the position of an eccentric drive in each vvc housing. The effect is that the rotation speed of the camshaft can be varied. At minimum, the duration of the inlet can is only 220 degrees, and at maximum duration is 295 degrees. I've taken one apart before and it's not fun putting them back together! Fortunately, it's possible to keep the cams in the cam ladder and just lift the whole lot off the head in one piece...
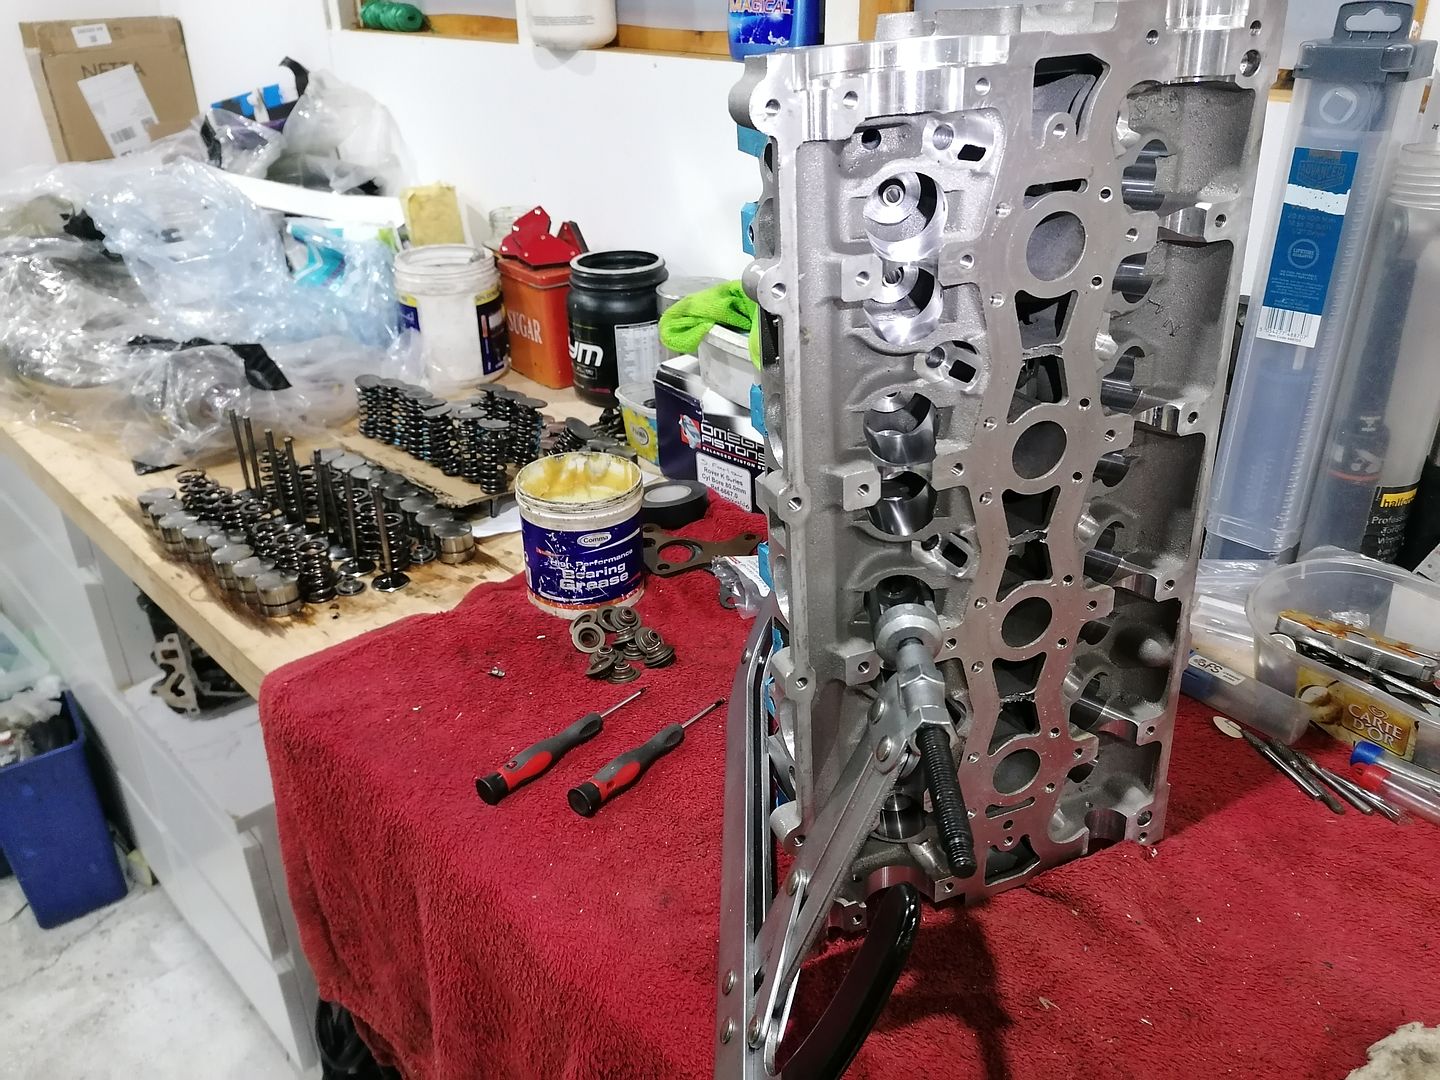
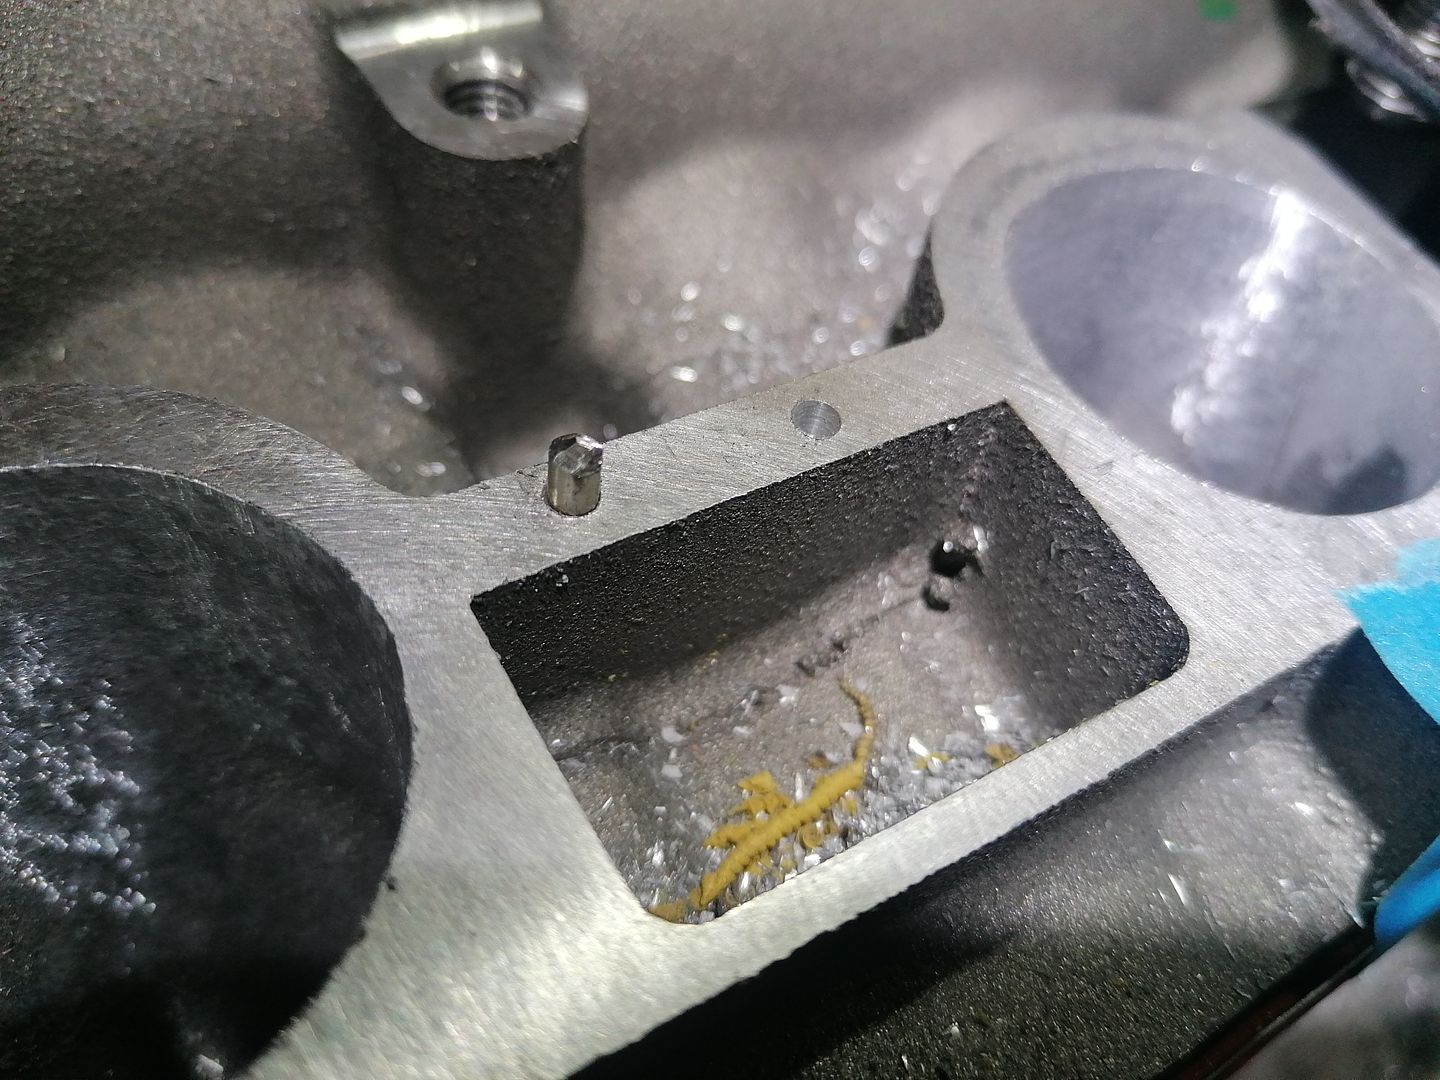
I didn't want to splash out on a full port job, and didn't fancy doing it myself on a brand new head, so I just opened up the inlets slightly and port matched to the inlet manifold to remove the step. I run a ferriday inlet gasket, which helps prevent heat transferring from the head into the intake manifold. There's quite a lot of play over the manifold studs, so I port matched the spacer to the head and positioned it with dowels. Worked out well.

Time to get the head back together. There's a real knack to getting the collets in place on the valve stems but once you've done a few it's easy.
All back together and ready to go on.
New head gasket
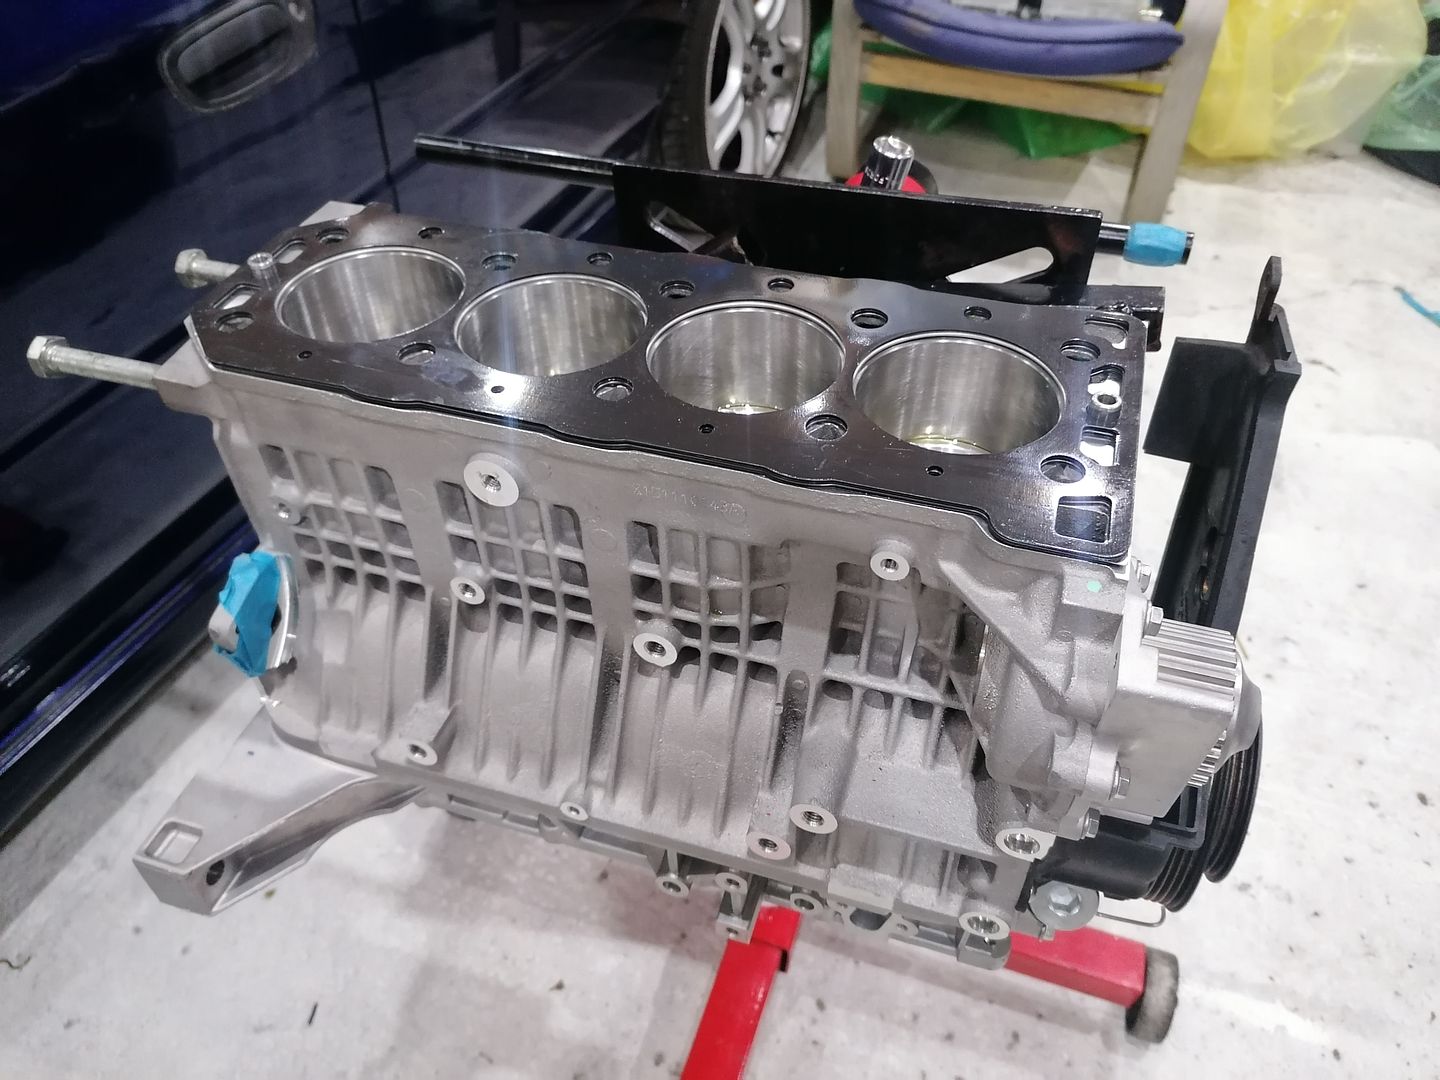
And head is all bolted down.

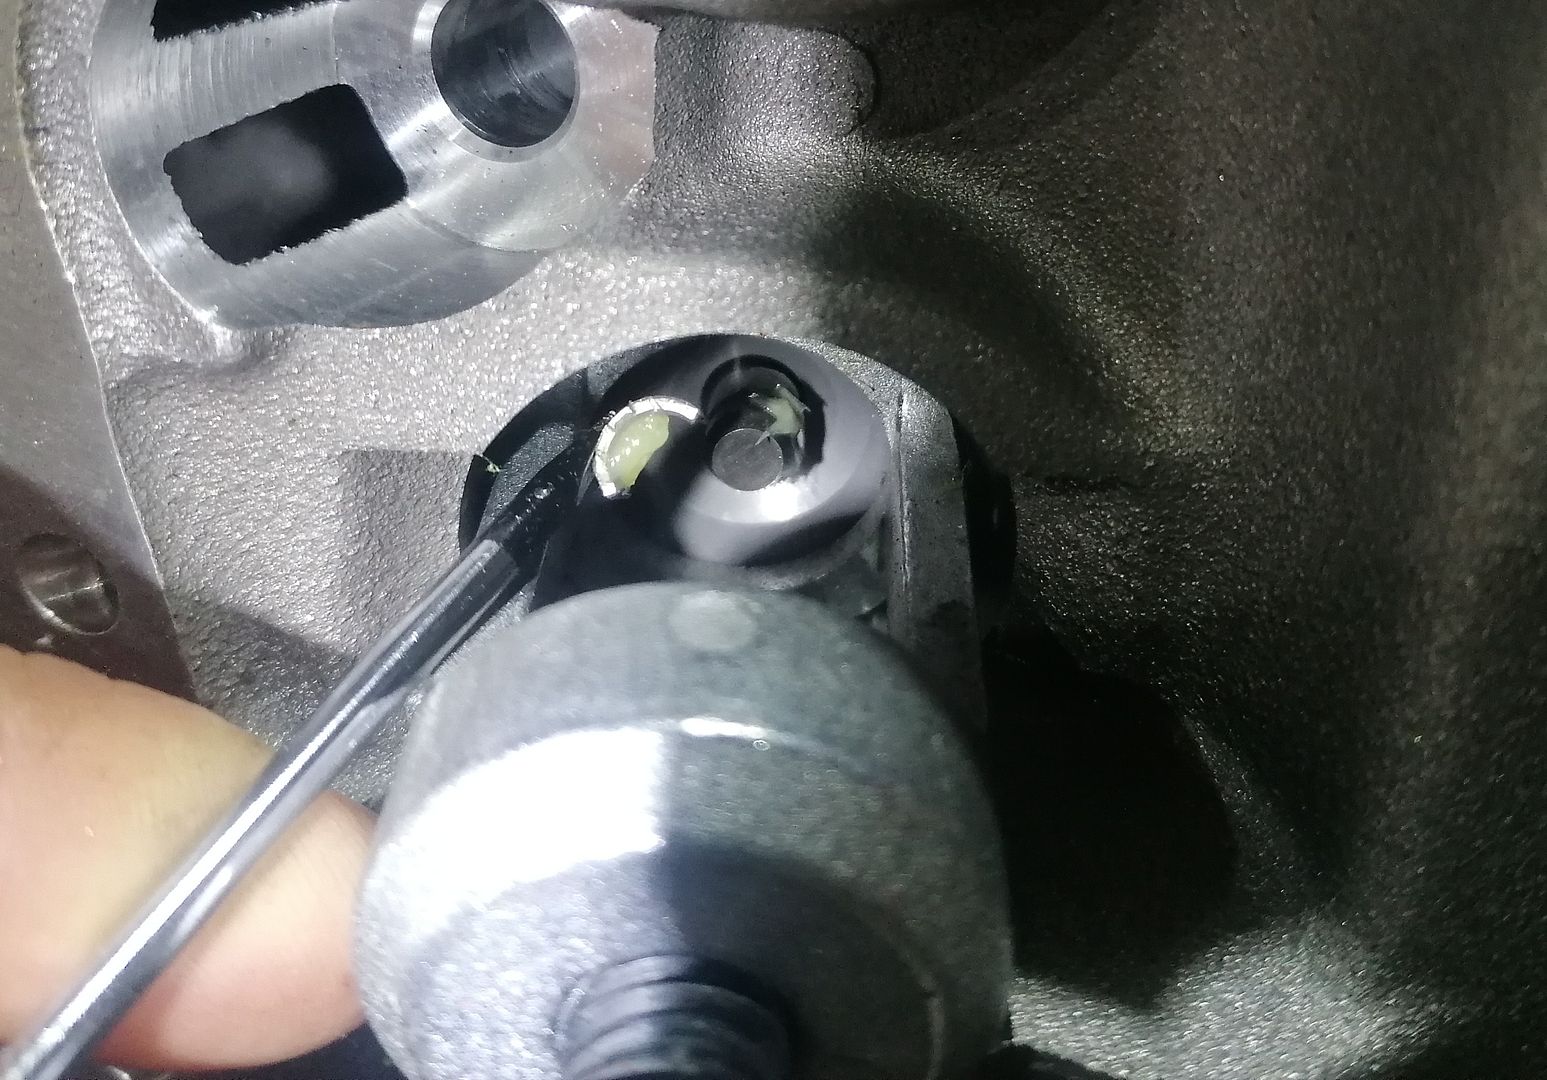
Fitting a new oil pump so fettled that to flow a bit better. Just a case of radiusing some of the edges.
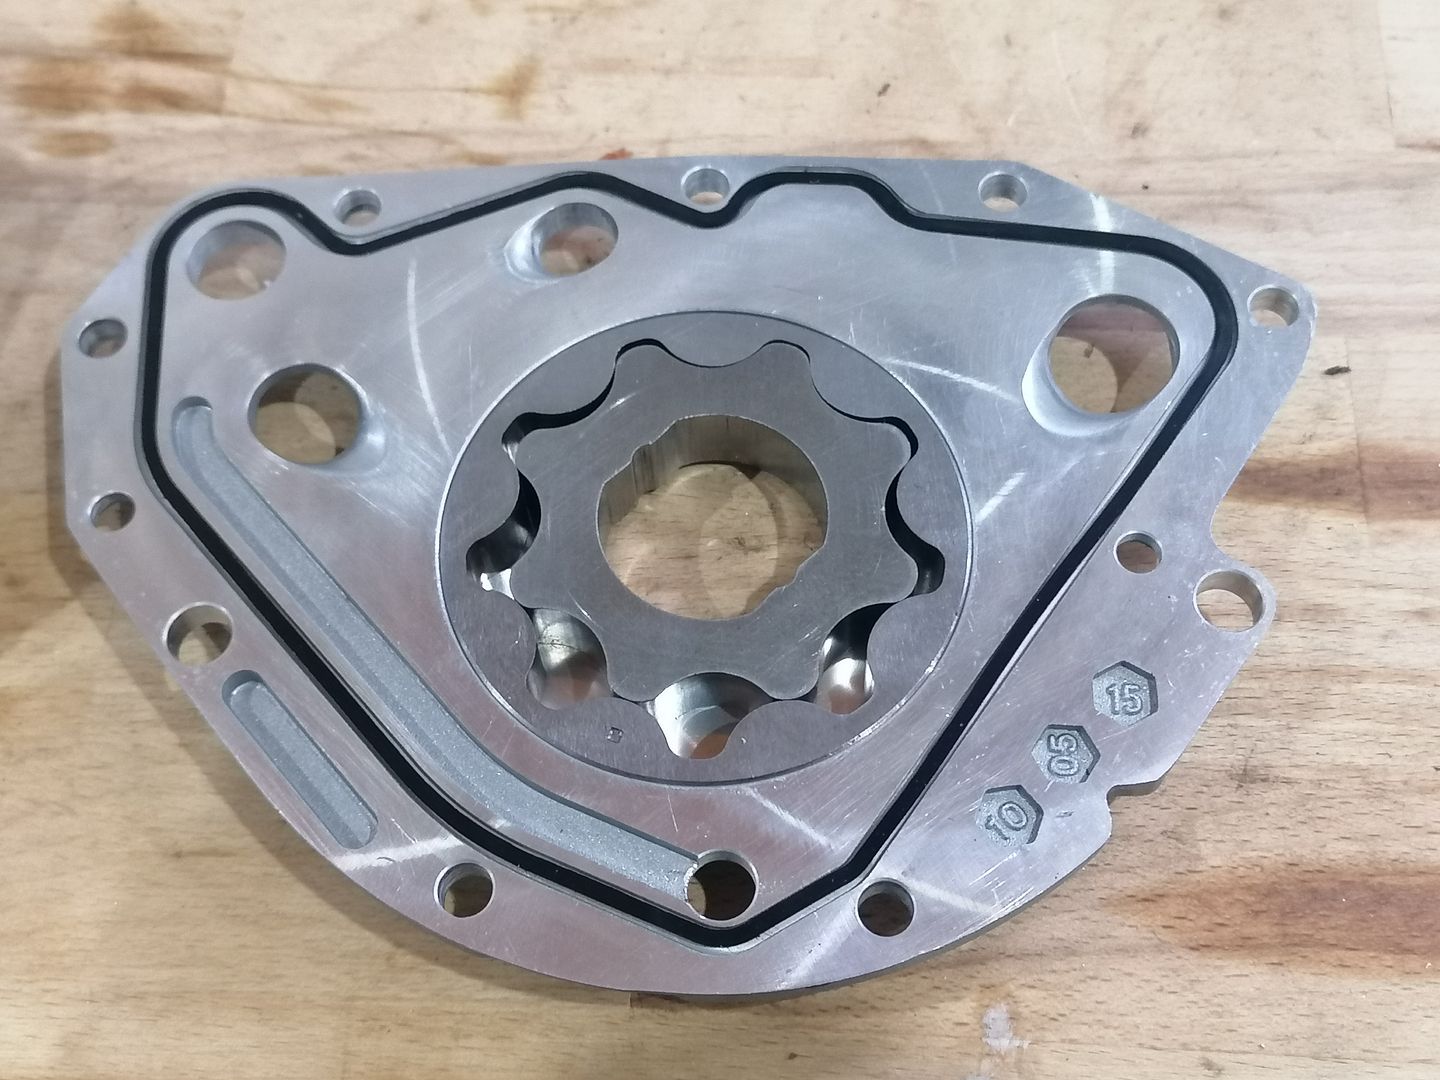
Intetestingly this is a pattern oil pump made by BGA. The uprated pump rotor on later K-series is 11.5mm (up from 10.5mm). This one is 12mm.
Now I just have to fit the cambelt and the ancillaries then it's ready to go in the car.
A white ago I managed to source a brand new in box vvc cylinder head:

The vvc head is preferred over the non-vvc (mpi) head that normally lives in the K-series turbo because it flows better. Most people would swap the variable valve gear out for solid cams. I've tried both on previous iterations. The first time I ran vvc turbo I ditched the vvc as the mechanisms were very rattly (a common problem) and I had a valve spring cap crack and partially sick a valve open! In this build I wanted to keep vvc for the added flexibility.
Obviously the head's been sitting around for a few years so I decided to change the valve stem oil seals and rear vvc belt. Seeing as I had to strip the head completely to do this, I thought I would fettle things slightly. Just for fun really - I doubt anything I've done will make much difference!
The Rover VVC is a fairly complicated bit of kit. The inlet camshaft is actually two separate camshafts. A piston driven by oil pressure moves a gear which in turn moves the position of an eccentric drive in each vvc housing. The effect is that the rotation speed of the camshaft can be varied. At minimum, the duration of the inlet can is only 220 degrees, and at maximum duration is 295 degrees. I've taken one apart before and it's not fun putting them back together! Fortunately, it's possible to keep the cams in the cam ladder and just lift the whole lot off the head in one piece...


I didn't want to splash out on a full port job, and didn't fancy doing it myself on a brand new head, so I just opened up the inlets slightly and port matched to the inlet manifold to remove the step. I run a ferriday inlet gasket, which helps prevent heat transferring from the head into the intake manifold. There's quite a lot of play over the manifold studs, so I port matched the spacer to the head and positioned it with dowels. Worked out well.


Time to get the head back together. There's a real knack to getting the collets in place on the valve stems but once you've done a few it's easy.

All back together and ready to go on.

New head gasket

And head is all bolted down.

Fitting a new oil pump so fettled that to flow a bit better. Just a case of radiusing some of the edges.

Intetestingly this is a pattern oil pump made by BGA. The uprated pump rotor on later K-series is 11.5mm (up from 10.5mm). This one is 12mm.
Now I just have to fit the cambelt and the ancillaries then it's ready to go in the car.
Stick Legs said:
I have just read this from start t finish, your dedication to this project is astounding!
I love to see something like this come together and can't wait for the next update!
Blimey that must have taken you a while! Welcome to the roller-coaster!I love to see something like this come together and can't wait for the next update!
As long as I'm still enjoying the tinkering, I'll keep going. I do need to get this done though as I have a classic impreza in need of attention before the summer and my daily 535d wagon needs some bits doing too.
Stuballs said:
Stick Legs said:
I have just read this from start t finish, your dedication to this project is astounding!
I love to see something like this come together and can't wait for the next update!
Blimey that must have taken you a while! Welcome to the roller-coaster!I love to see something like this come together and can't wait for the next update!
As long as I'm still enjoying the tinkering, I'll keep going. I do need to get this done though as I have a classic impreza in need of attention before the summer and my daily 535d wagon needs some bits doing too.
Hats off to you for your dedication, keep it up.
I too have just been absorbed in a start to finish read of this thread. I can relate to the position you've been in, having done a few upgrades in the past that have seemed initially doable then demanded way more time and money than originally envisioned. Thanks for sharing your journey. I just can't believe you chucked your old engine in a skip! It represented so much time and money, I'd have slapped a piece of glass on it and called it a coffee table.
Megaflow said:
That variable inlet cam system is the strangest thing I have ever seen, what on earth does it need two cams for?
There are actually four intake camshafts. One per valve. 2&3 run inside 1&4. It allows the duration to be varied continuously, hence the really flat torque curve.Stuballs (op), just stumbled across this thread and thought you might find it interesting as it’s based on a k-series 1.8 with boost. Making 600bhp at 40psi. If you have any more issues or questions then I suspect he may be able to help you out or you Might just find it interesting.
https://www.pistonheads.com/gassing/topic.asp?h=0&...
https://www.pistonheads.com/gassing/topic.asp?h=0&...
Link appears dead but I'm guessing from the description that's Turbotoaster's car. I know Lee. He actually worked with Omega to design the pistons I'm using (and several other guys).
Thanks for the comments all (hadn't realised they were there hence delay responding).
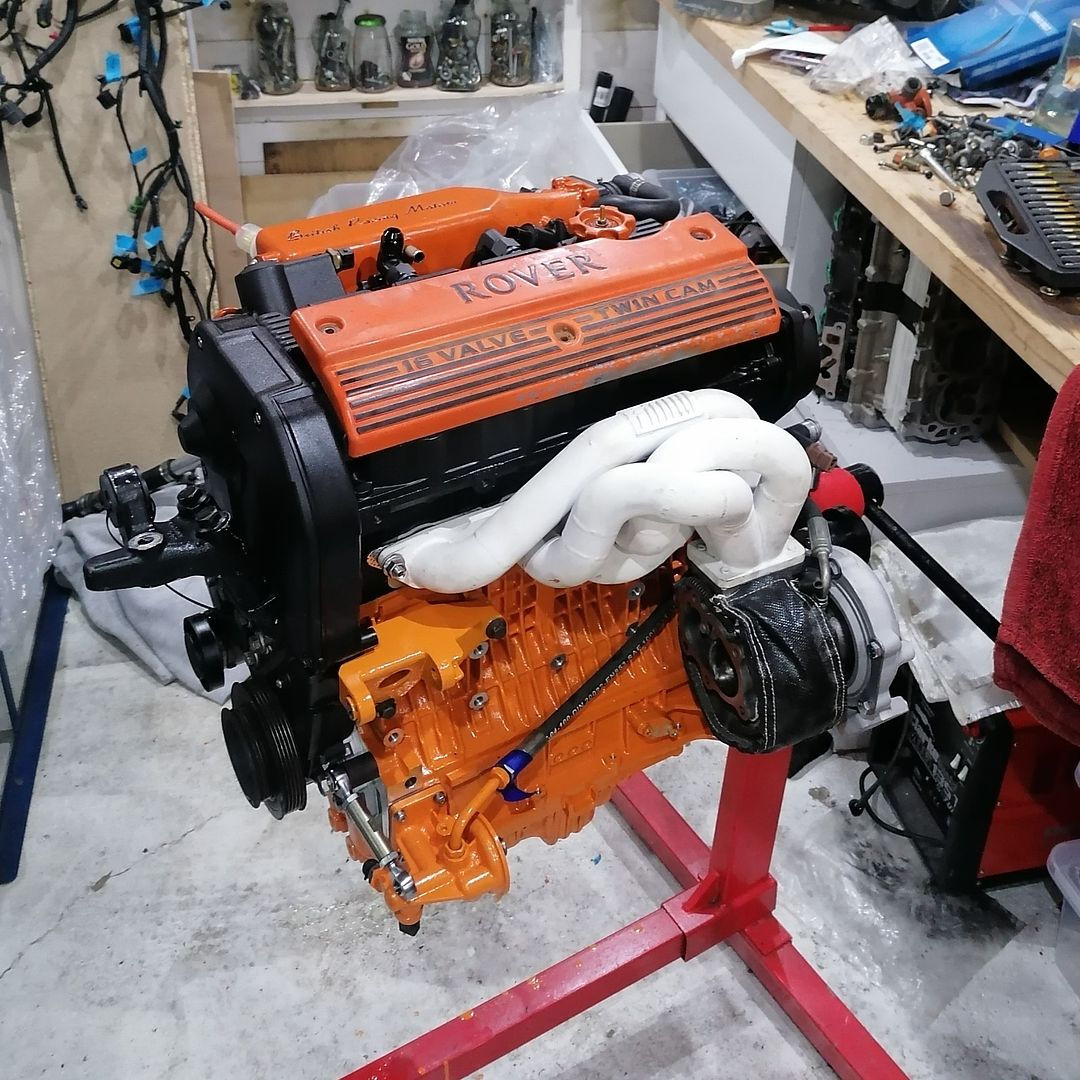
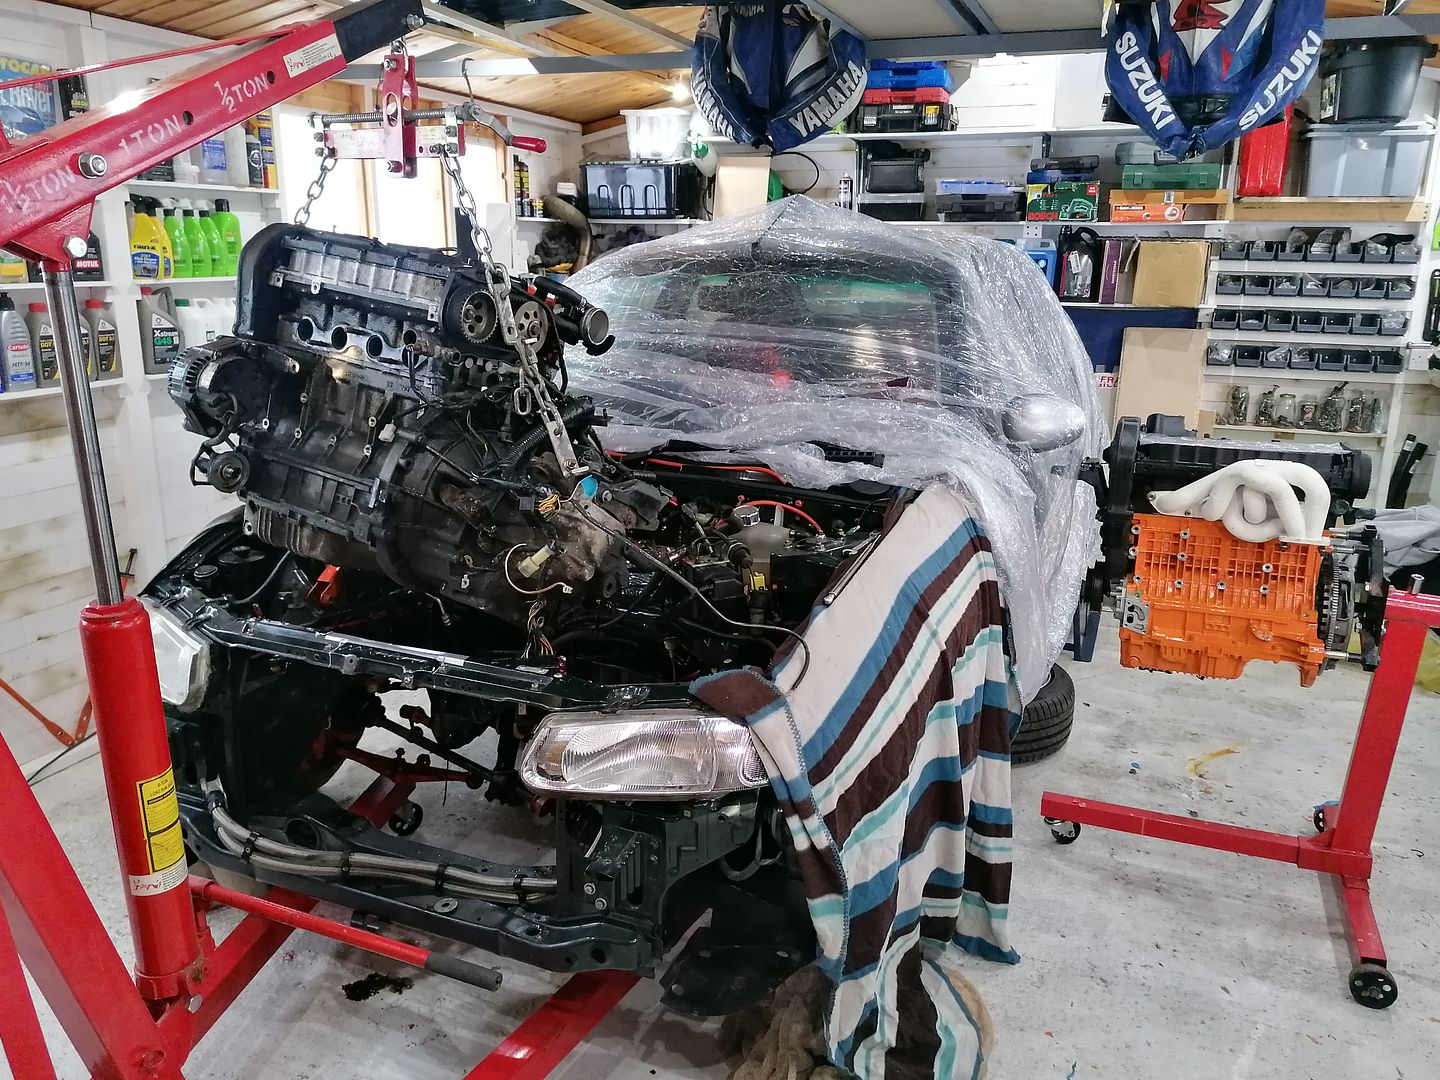
I picked the car up from the storage lockup and have been working hard to get the engine finished so I can get it in the car. I've also been tidying up the engine bay and just trying to get things a bit neater. This weekend I'll be slotting the engine in and will hopefully get it started.
In homage to previous skip-destined iterations of this build, I went mad with the orange paint again.
Thanks for the comments all (hadn't realised they were there hence delay responding).
I picked the car up from the storage lockup and have been working hard to get the engine finished so I can get it in the car. I've also been tidying up the engine bay and just trying to get things a bit neater. This weekend I'll be slotting the engine in and will hopefully get it started.
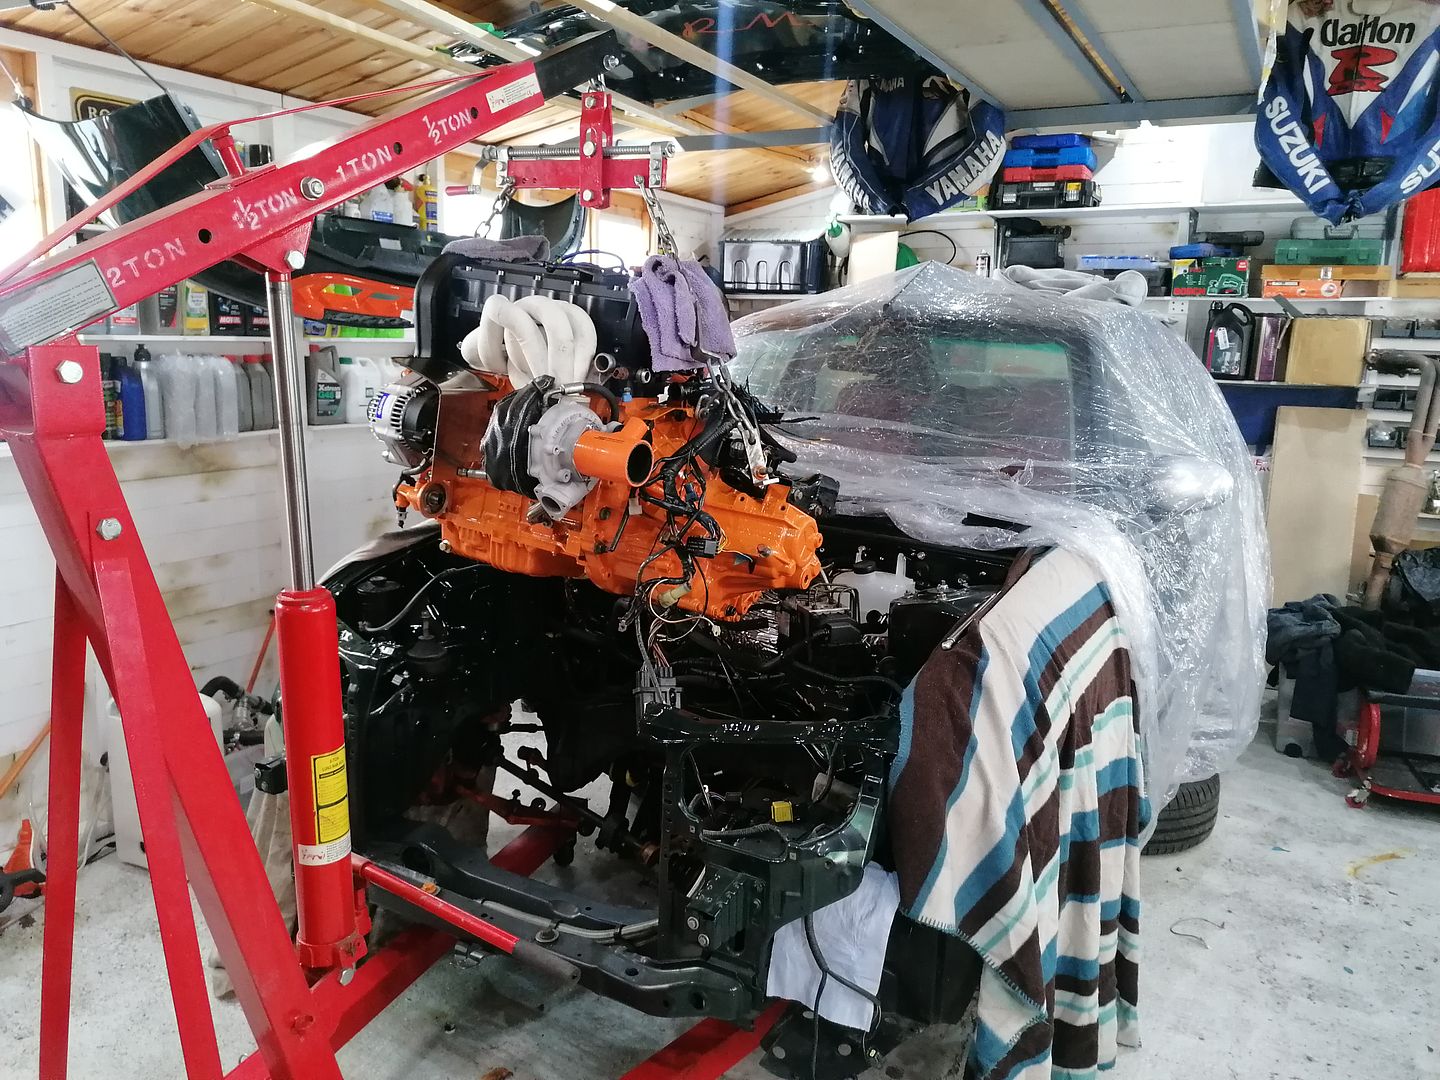
In homage to previous skip-destined iterations of this build, I went mad with the orange paint again.

Out with the old (temporary leaky af nasp 1.8vvc):
In with the new :
And sitting on the mounts:
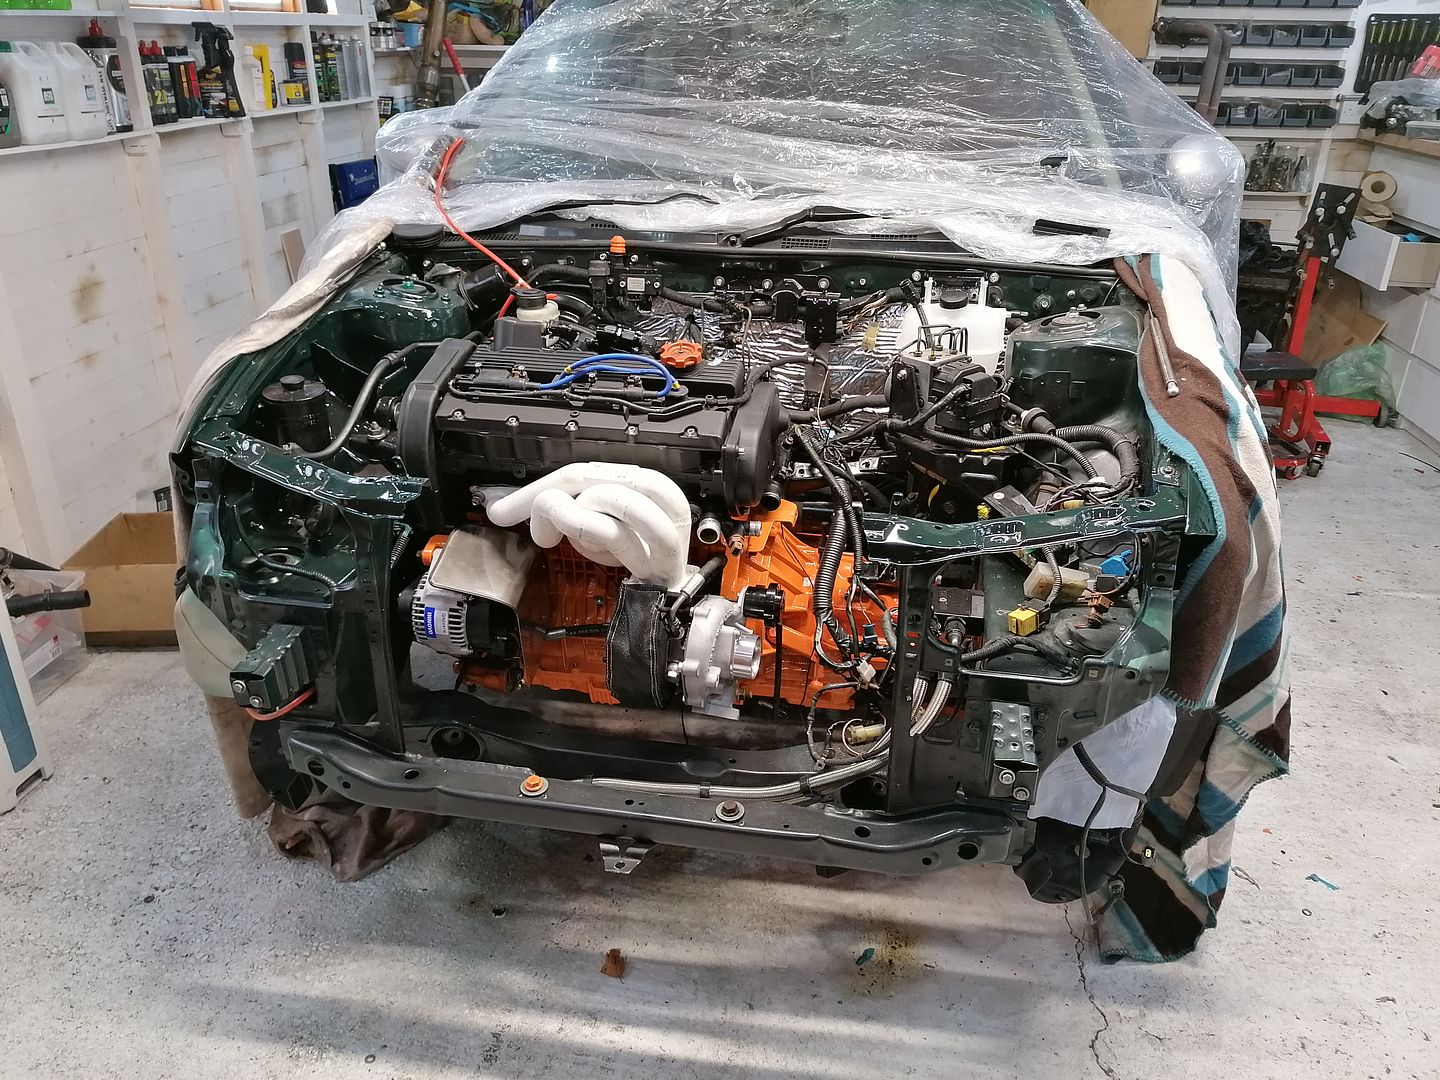
Its taken a lot longer than I expected to get to this point as I keep finding little jobs to do (tidy the paintwork in the engine bay, sort out the wiring, etc). Very happy with how it's coming together though.

In with the new :

And sitting on the mounts:

Its taken a lot longer than I expected to get to this point as I keep finding little jobs to do (tidy the paintwork in the engine bay, sort out the wiring, etc). Very happy with how it's coming together though.
Gassing Station | Readers' Cars | Top of Page | What's New | My Stuff