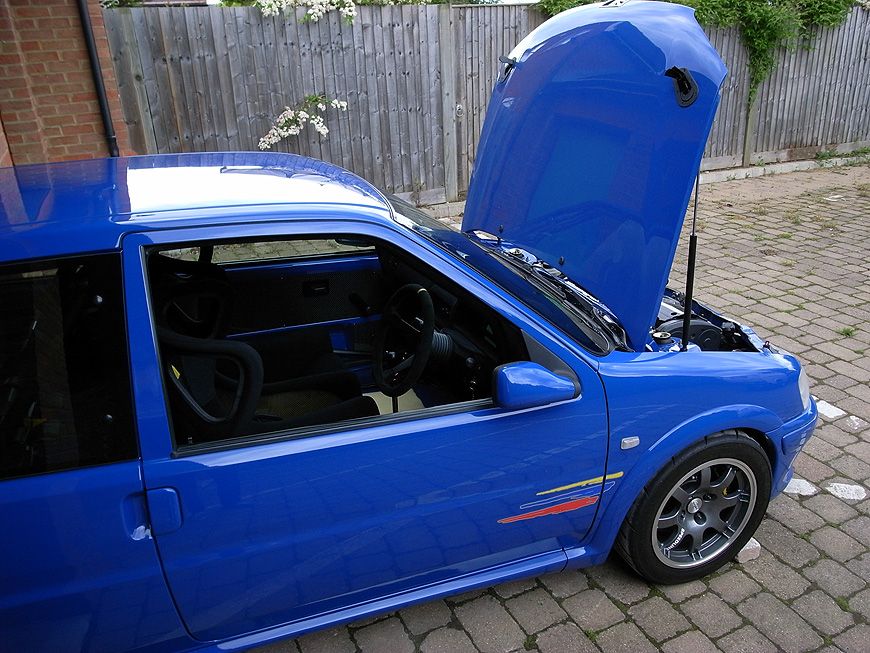
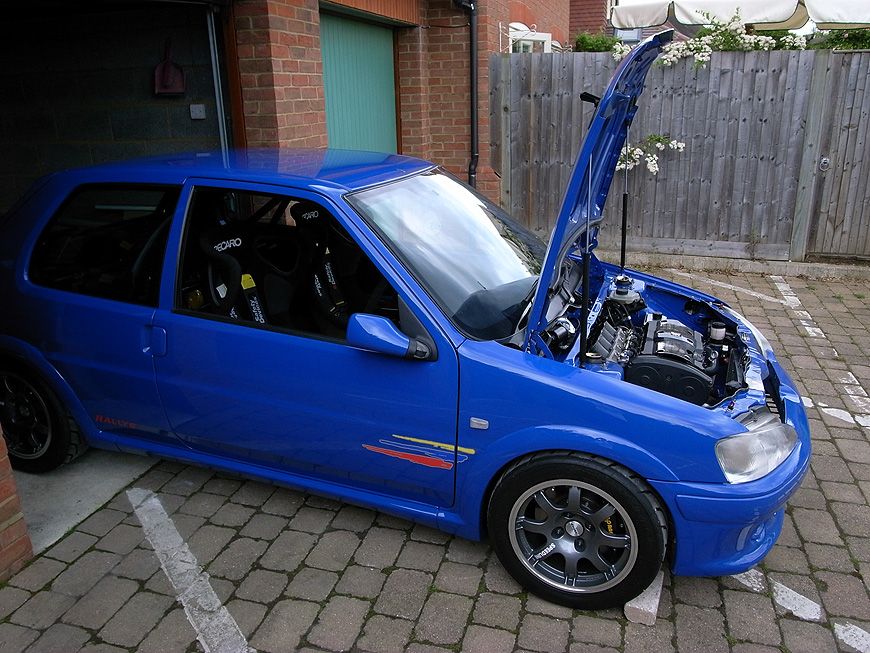
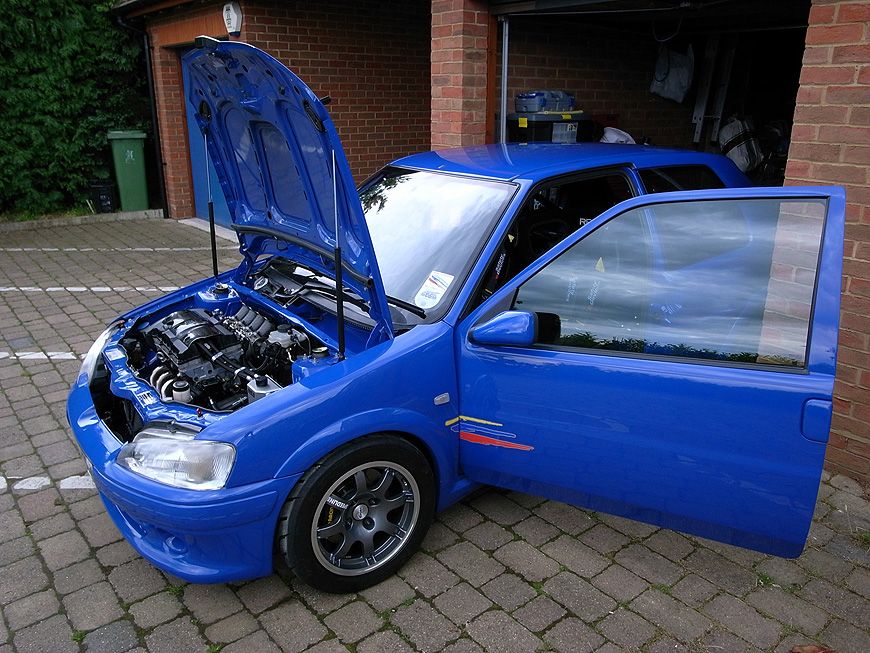
My Indigo Blue Throttle Bodied 106 Rallye
Discussion


thanks again guys.
Right update tonight. I've spent all f king night in the garage so far trying to fit my pugsport to my maxi manfold. I've just about sorted a solution I think. I will get some pics up tomorrow. It's not the mintest fix ever but it's fairly tidy all things considered. Should get me rollin' at least!
  Also I ordered another battery today so once that arrives I should have life in the old girl again. I'm excited thinking about it now!
So all I need now is to do:
[U]Long finger jobs:[/U]

Right update tonight. I've spent all f
king night in the garage so far trying to fit my pugsport to my maxi manfold. I've just about sorted a solution I think. I will get some pics up tomorrow. It's not the mintest fix ever but it's fairly tidy all things considered. Should get me rollin' at least! Also I ordered another battery today so once that arrives I should have life in the old girl again. I'm excited thinking about it now!So all I need now is to do:
- Bleed brakes and re-check for that leaky caliper
- Fix CV joint (gonna be an arseahce, not looking forward to that)
- Get an MOT
- Drive it somewhere to get a proper exhaust made
[U]Long finger jobs:[/U]
- Fir a swirl pot and auxillary pump
- Fit a lambda guage
JayK12 said:
Awesome read. Bet you cant wait to give it some abuse.
Seen some references to SSC.....i used to be one there back in 2001 onwards......jvtrman
I remember you dude - I had a black VTR and bought a green air filter off you remember, then the bSeen some references to SSC.....i used to be one there back in 2001 onwards......jvtrman
d couriers broke it and it took about a year to get a replacement!  What you diving these days dude? I've come on a long way since my black VTR..
I'm Lewis mate - god you've moved a long way since the two tone cammed VTR! Awesome! Hopefully soon, she's akive again now:
Update tonight. I went to powerflow today (I know I know) just to get them to put a sleeve on my exhaust so I could fit it to the maxi manifold, and in fairness to them the dude did a decent job and it fits spot on, so the pugsport is now on, and I fitted my new battery tonight and got her fired up again. GOD it's so loud, and the plated clutch and tick over makes it sound like a proper touring car engine, man does she rev! It's nuts! I think my neighbours rabbits in the garden must've been terrified muwhaha!
So this week I want to try and get the brakes bled, and fit the CV boot if I get a chance. I may just tape it up for now as I need to get it MOT'd too before FCS, but then I may have to fix it for the MOT....meh we'll see. I just want to drive now! I did have a hefty headahce after it'd been running for a while as my garage was stinking with fumes/petrol vapours - why is it that all nice smells are deadly?
Will try and get some vids tomorrow but my chick seems to have hidden the charger for my camera battery - damn women!
Awesome! Hopefully soon, she's akive again now:Update tonight. I went to powerflow today (I know I know) just to get them to put a sleeve on my exhaust so I could fit it to the maxi manifold, and in fairness to them the dude did a decent job and it fits spot on, so the pugsport is now on, and I fitted my new battery tonight and got her fired up again. GOD it's so loud, and the plated clutch and tick over makes it sound like a proper touring car engine, man does she rev!
It's nuts! I think my neighbours rabbits in the garden must've been terrified muwhaha! So this week I want to try and get the brakes bled, and fit the CV boot if I get a chance. I may just tape it up for now as I need to get it MOT'd too before FCS, but then I may have to fix it for the MOT....meh we'll see. I just want to drive now! I did have a hefty headahce after it'd been running for a while as my garage was stinking with fumes/petrol vapours - why is it that all nice smells are deadly?
Will try and get some vids tomorrow but my chick seems to have hidden the charger for my camera battery - damn women!
Yep mine rattles like a good 'un - sounds like a bag of nails on tick over! Touring car-esque though I love it!
Right more updates tonight! I spent all evening buggering around bleeding the brakes, part in part out of the garage, fearful of the impending rain. She's all good to go now though. I bled the brakes (arse of a job but I think they're ok now), fitted my new battery in the battery cage (another fiddly arse of a job), swapped the bolts for black one's holding said battery cage in (ANOTHER arse of a job as they had to be cut to length) and I also fitted my driver seat again on the current mounts (new one's en route). So TOMORROW will be my first test drive in the Rallye, i'm so excited! The CV boot leak is from two tiny pinhole sized holes near the top of the boot, so as a quick fix i've temporarily bodged it with some silicon just to stop it leaking any further. I picked up the new boot from Peugeot after work today also, and it's so stiff! Didn't realise how plasticy they are - that's going to be another pain in the back side but meh! SO, I will get some vids up of her running tomorrow...wish me luck, i'm already scared! Lets hope she doesn't explode eh, or my brakes fail and it end in a tangled wreck of metal and fleshly plasma!
Touring car-esque though I love it! Right more updates tonight! I spent all evening buggering around bleeding the brakes, part in part out of the garage, fearful of the impending rain. She's all good to go now though. I bled the brakes (arse of a job but I think they're ok now), fitted my new battery in the battery cage (another fiddly arse of a job), swapped the bolts for black one's holding said battery cage in (ANOTHER arse of a job as they had to be cut to length) and I also fitted my driver seat again on the current mounts (new one's en route). So TOMORROW will be my first test drive in the Rallye, i'm so excited!
The CV boot leak is from two tiny pinhole sized holes near the top of the boot, so as a quick fix i've temporarily bodged it with some silicon just to stop it leaking any further. I picked up the new boot from Peugeot after work today also, and it's so stiff! Didn't realise how plasticy they are - that's going to be another pain in the back side but meh! SO, I will get some vids up of her running tomorrow...wish me luck, i'm already scared! Lets hope she doesn't explode eh, or my brakes fail and it end in a tangled wreck of metal and fleshly plasma! Well what an evening. Heinous windy rainy weather, but it had to be driven nonetheless. She got a shock coming out of a warm garage into the haggard English misty rain!
All I can say is that the car is pretty overwhelming...what a machine. I was totally shatting myself before driving it, mixture of nerves, excitement, worry about something breaking etc etc but I fired her up and took her for a quick blast.
The gearbox and engine are SO noisy I cannot describe it. I knew the gearbox would whine but I wasn't prepared for the noise at all, it's truly fking insane. I took it a mile up the road, then back, then Pete came over in his Rallye and we went to fill it with fuel. I tried not to gun it but at certain points I couldn't resist! The noise and speed of the thing is savage, and you can feel the diff pulling you about too - totally overwhelmed. The sensation is unreal!
Wasn't without problems though. Firstly my wipers locked up when I put them on up the road. This turned out to be the mechanism getting trapped in my neatly hidden, but completely in the way cable. So we sorted that (Pete helped!) Then my LED's on the dash to indicate the lights being on, well they're not working. They were last night, so will check fuses when I get a chance. Filled it with fuel too and it still says 4L so that needs looking at. And there are red warning lights coming on occasionally on the STACK, but the fuel pressure and oil pressure and everything seemed ok, so i need to get Bob to take a look when he has time, as he's balls deep in Dan's car at the moment!
Because it's such a high revving engine it really bogs down in low gears if you don't keep the revs up, and it seemed to get worse as I drove it. Like there's no power, or you're running out of petrol is the best way I can describe it. I really think it needs mapping again and properly setting up. I did gun it a bit and once it picked up it went like a rocket, and it's complete armagedon when she opens up! Coming into my village at 8k with gearbox squealing (even though I was doing 30 or so) sounds like you're going 130 instead - nuts!
But the conclusion is it's running damn rich, smoke from the back etc when you put the foot down, and is in desperate need of setting up properly. In light of this I won't be bringing it to the show as I simply can't risk buggering the engine. I'm also unsure as to whether it requires running in. As Bic had it for a year and drove it, then I had it rebuilt, but as the internals are the same I don't know if it's in need of some sort of running in procedure?? It's running so rich that I think it could be fouling plugs which exacerbates the rough running. Bob did mention that it used to go through plugs when Bic owned it.
Apart from that it's fine, brakes work (phew), my CV joint and sump seal are holding up and my brake lines that I installed are all spot on, so it's all good there. The suspension feels nice too, quite a good ride actually not crashy or anything so that's cool.
I got a phew vids anyway, nothing too fancy as it was raining and we had no proper test area, but these will whet your appetite!
http://www.youtube.com/watch?v=QMkD_i4iI4A
http://www.youtube.com/watch?v=inis-DmJwoY
http://www.youtube.com/watch?v=pk0ZNXjQ5WY
http://www.youtube.com/watch?v=6noRwv6OYF4
That's all for now! I'll be going to the French Car on Sunday in something french still.....in my Berlingo!
All I can say is that the car is pretty overwhelming...what a machine. I was totally shatting myself before driving it, mixture of nerves, excitement, worry about something breaking etc etc but I fired her up and took her for a quick blast.
The gearbox and engine are SO noisy I cannot describe it. I knew the gearbox would whine but I wasn't prepared for the noise at all, it's truly f
king insane. I took it a mile up the road, then back, then Pete came over in his Rallye and we went to fill it with fuel. I tried not to gun it but at certain points I couldn't resist! The noise and speed of the thing is savage, and you can feel the diff pulling you about too - totally overwhelmed. The sensation is unreal! Wasn't without problems though. Firstly my wipers locked up when I put them on up the road. This turned out to be the mechanism getting trapped in my neatly hidden, but completely in the way cable. So we sorted that (Pete helped!) Then my LED's on the dash to indicate the lights being on, well they're not working. They were last night, so will check fuses when I get a chance. Filled it with fuel too and it still says 4L so that needs looking at. And there are red warning lights coming on occasionally on the STACK, but the fuel pressure and oil pressure and everything seemed ok, so i need to get Bob to take a look when he has time, as he's balls deep in Dan's car at the moment!
Because it's such a high revving engine it really bogs down in low gears if you don't keep the revs up, and it seemed to get worse as I drove it. Like there's no power, or you're running out of petrol is the best way I can describe it. I really think it needs mapping again and properly setting up. I did gun it a bit and once it picked up it went like a rocket, and it's complete armagedon when she opens up! Coming into my village at 8k with gearbox squealing (even though I was doing 30 or so) sounds like you're going 130 instead - nuts!
But the conclusion is it's running damn rich, smoke from the back etc when you put the foot down, and is in desperate need of setting up properly. In light of this I won't be bringing it to the show as I simply can't risk buggering the engine. I'm also unsure as to whether it requires running in. As Bic had it for a year and drove it, then I had it rebuilt, but as the internals are the same I don't know if it's in need of some sort of running in procedure?? It's running so rich that I think it could be fouling plugs which exacerbates the rough running. Bob did mention that it used to go through plugs when Bic owned it.
Apart from that it's fine, brakes work (phew), my CV joint and sump seal are holding up and my brake lines that I installed are all spot on, so it's all good there. The suspension feels nice too, quite a good ride actually not crashy or anything so that's cool.
I got a phew vids anyway, nothing too fancy as it was raining and we had no proper test area, but these will whet your appetite!
http://www.youtube.com/watch?v=QMkD_i4iI4A
http://www.youtube.com/watch?v=inis-DmJwoY
http://www.youtube.com/watch?v=pk0ZNXjQ5WY
http://www.youtube.com/watch?v=6noRwv6OYF4
That's all for now! I'll be going to the French Car on Sunday in something french still.....in my Berlingo!
Edited by Track_Cit on Thursday 10th June 23:32
Edited by Track_Cit on Thursday 10th June 23:34
Thanks guys - she's certainly a complete savage! The gearbox whine is almost ear splitting in second gear, I love it!
You know what, the clutch and gearchange are actually really smooth i'm quite surprised. It's quite a sharp bite on the clutch but it's not that hard to get used to, dead pleased with it. Now all it needs is the proper exhaust and mapping before I bore wash it.
You know what, the clutch and gearchange are actually really smooth i'm quite surprised. It's quite a sharp bite on the clutch but it's not that hard to get used to, dead pleased with it. Now all it needs is the proper exhaust and mapping before I bore wash it.
Thanks guys!
Few updates tonight. Decided not to drive the car until further notice as it's running so rough at the moment. My plan is to get the correct bore exhaust made, take it to Matt at TDF for mapping and get a compression and leak down test done too. Worringly I also found some white residue in the oil cap tonight when exploring since the drive the other day. The fact it was getting worse to drive made me worry more about this residue! Most people I have asked so far said not to worry too much and that it could be condensation but i'm still worried! Matt at TDF also recommended not to drive it until mapping, or bad things will happen! God I hope I haven't broken it! There's also a fair bit of water/blow by in the catch tank. I took pics to show this evening (after the french car show incidentally!)


Also polished up my Bias Valve bracket (in vain if the engine is broken lol) and sorted my battery again - had to replace it as the other one was dead as hell. And I took off my suspected leaky caliper too - to post back to AP for a check over!


Man I need some good luck now.........
Few updates tonight. Decided not to drive the car until further notice as it's running so rough at the moment. My plan is to get the correct bore exhaust made, take it to Matt at TDF for mapping and get a compression and leak down test done too. Worringly I also found some white residue in the oil cap tonight when exploring since the drive the other day. The fact it was getting worse to drive made me worry more about this residue! Most people I have asked so far said not to worry too much and that it could be condensation but i'm still worried! Matt at TDF also recommended not to drive it until mapping, or bad things will happen! God I hope I haven't broken it!
There's also a fair bit of water/blow by in the catch tank. I took pics to show this evening (after the french car show incidentally!)Also polished up my Bias Valve bracket (in vain if the engine is broken lol) and sorted my battery again - had to replace it as the other one was dead as hell. And I took off my suspected leaky caliper too - to post back to AP for a check over!
Man I need some good luck now.........
Putting aside my possible engine woes for a moment, I cracked on with my seats on saturday and got them mounted in properly. The holes weren't lining up with my seats as obviously Hank had them measured and drilled for his seat, so I sent the mounts to Stu (Slammed106) and he very kindly made the sides of them longer so I had more room to play with to line up the holes. Top job as usual, and they now fir spot on, so a big thanks to him for that
Here are the photo's anyway:
Sidemounts:


Drilled:

Some Extra Cut off the side to reduce weight:

Painted and Mounted:


Both Seats in properly:


General:
That is all!
Thanks for all the comments guys...it's been a while!
Right, small update today. I did this a while ago but didn't get a chance to take any pics. I bought a STACK AFR to monitor the Air/Fuel ratio as it is currently running rich as hell. I'm hoping this will be sorted when it gets mapped, but this is an essential tool to monitor the engine while running it (eventually....ha!) This is a trial piece of carbon to see if I liked the fitment central, as per the pic. In my previous pics you'll notice the switches are closer to the driver, but I think the guage looks better centralised rather than offset to the right as it would have to be if I left the switches in the original position. I am also selling some bits to buy a Satchshift, so hopefully in a week or so I will have one. I am hoping to get the car transported over to the new place sometime next week (if my work colleague doesn't let me down) so I can finally start cracking on with it and sorting these niggles out, with a view to finishing it and having it on the road ready for the summer.
Oh, I also forgot to say, when I finalise this carbon centre AFR, the weave on the carbon will of COURSE be matching the direction of the weave on the drivers STACK
Here's a snap of the AFR anyway:

Right, update again today. Been pimping up my garage ready to get cracking on the car. Nearly finished painting it too now and it's looking good.
On another tip, my Satchshift turned up, what a suspicious looking parcel that was! Does look VERY nice though I will say. Big thanks to Sandy and the Sacthmeister
Here are some pics to whet the appetite. Unfortunately I can't start fitting it until I get the lighting in my garage sorted out, as I can't see st at the moment in there...


Hopefully I will get around to fitting it the weekend. More pics then! I am actually most apprehensive about cutting the dash actually, i HATE dash related antics... There is a bracket where the dash bolts to the car which may need to come out too, although I won't know for sure until I get stuck into it.
On another tip, my Satchshift turned up, what a suspicious looking parcel that was!
Does look VERY nice though I will say. Big thanks to Sandy and the Sacthmeister Here are some pics to whet the appetite. Unfortunately I can't start fitting it until I get the lighting in my garage sorted out, as I can't see s
t at the moment in there...Hopefully I will get around to fitting it the weekend. More pics then! I am actually most apprehensive about cutting the dash actually, i HATE dash related antics... There is a bracket where the dash bolts to the car which may need to come out too, although I won't know for sure until I get stuck into it.
Few more updates today. spent most of the weekend in between sorting my garage, fitting the Satchshift. It's a lot of work, and mine is an unconcioanble ball breaker of a job as the engine is in place so it's tight like a tiger to work and fit everything up etc. I got most of it in today, I just have to drill a few more holes tomorrow, and drill the bulkhead hole (worried about that one!). Looks damn nice though and is very well designed I will say. I am slightly worried the through rod will foul the standard front brake lines but we'll see. I haven't really got that far yet. I also removed the studs and will fit rivnuts to secure the base plate. I actually have an idea to smarten the base plate, but I will do that in a few weeks. Cutting a freshly flocked dash is pretty nerve racking too I will say! I think I managed to make it look pretty tidy so i'm pleased. Quite excited about getting it all bolted in and fully working now too.
Here are the shots of the work:
Hole drilled for both the gear stick and the rear retaining bolt:

Base plate offered up after removing some studs (it needs a good clean once it's in too, grubby business fitting stuff!)

All studs removed:

Getting there:

Dash chopping commences....


Now we get to the chassis strengthening bar. I had to modify this as Hank had welded one of the bars on to make fitment easier. He had also welded the bolts in which worked in my favour, so I was stoked with that. Meanwhile I had to cut this away and profile the top to match the other. They are both repainted now and look neat but I didn't take any pics of that.


Lastly I decided to profile the top corners of the linkage plate as I wasn't keen on how it looked.
Before:
After:

That's it for now. I will take some more pics of the rest when it's finished.
Lewis
Here are the shots of the work:
Hole drilled for both the gear stick and the rear retaining bolt:
Base plate offered up after removing some studs (it needs a good clean once it's in too, grubby business fitting stuff!)
All studs removed:
Getting there:
Dash chopping commences....
Now we get to the chassis strengthening bar. I had to modify this as Hank had welded one of the bars on to make fitment easier. He had also welded the bolts in which worked in my favour, so I was stoked with that. Meanwhile I had to cut this away and profile the top to match the other. They are both repainted now and look neat but I didn't take any pics of that.
Lastly I decided to profile the top corners of the linkage plate as I wasn't keen on how it looked.
Before:
After:
That's it for now. I will take some more pics of the rest when it's finished.
Lewis
Cheers guys - appreciate the kind words as always
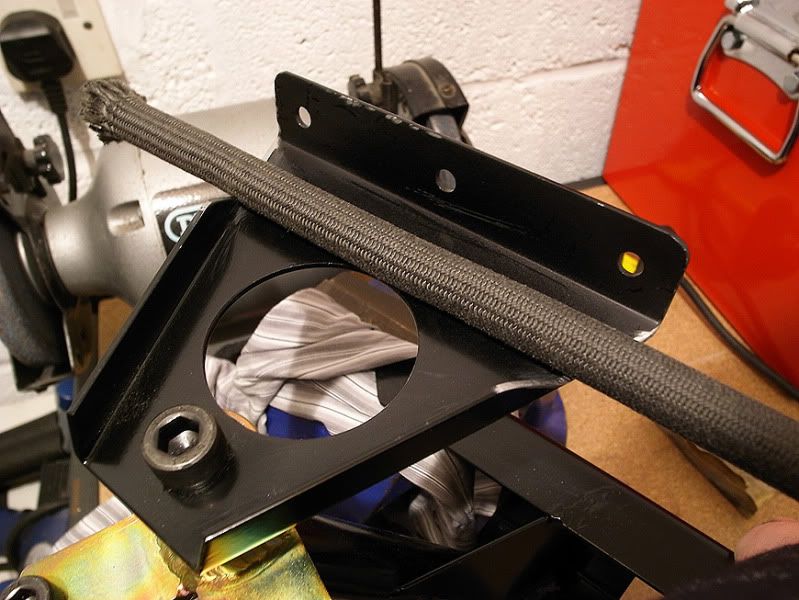
Few more updates on the Satchshifter tonight. I run my return fuel line as well as the clutch cable along the bulkhead, and the linkage bracket was fouling it and causing it not to sit properly. As well as looking gash the fuel line needs to be properly secure. Vibration = wear, and that's not what I want, so I set about sorting the side of the bracket to accommodate the fuel line and clutch cable nicely. I am going to get the top part of the bracket re powder coated along with the chassis brace bars, so fear not!
So, the fuel line runs along here:

So it was necessary to modify the linkage bracket comme ca (only one side done in the pic). Here is how the rear edge looked before:

Here is the front side complete:

And you can see it gives the right amount of space for the fuel line and clutch cable to sit nicely, along with the large headed socket cap bolt that secures it to the bulkhead too:


Have a few more ideas up my sleeve too, which i'll stick some pics up of once i'm all done
Few more updates on the Satchshifter tonight. I run my return fuel line as well as the clutch cable along the bulkhead, and the linkage bracket was fouling it and causing it not to sit properly. As well as looking gash the fuel line needs to be properly secure. Vibration = wear, and that's not what I want, so I set about sorting the side of the bracket to accommodate the fuel line and clutch cable nicely. I am going to get the top part of the bracket re powder coated along with the chassis brace bars, so fear not!
So, the fuel line runs along here:
So it was necessary to modify the linkage bracket comme ca (only one side done in the pic). Here is how the rear edge looked before:
Here is the front side complete:
And you can see it gives the right amount of space for the fuel line and clutch cable to sit nicely, along with the large headed socket cap bolt that secures it to the bulkhead too:
Have a few more ideas up my sleeve too, which i'll stick some pics up of once i'm all done


More work tonight. Front plate now fitted with the help of a dremmel for the holes. Extremely invaluable tool it is, when using the flexishaft you can access really tight areas like this:


I have another tool on the way to do a decent job of the 38mm hole in the bulkhead, so hopefully everything will be mock fitted by the weekend, then I can get the parts that I have gashed up, re-powdercoated again for protection.
I have another tool on the way to do a decent job of the 38mm hole in the bulkhead, so hopefully everything will be mock fitted by the weekend, then I can get the parts that I have gashed up, re-powdercoated again for protection.
Cheers buddy, appreciate that!
More updates today. Finally got the rest of the Satchshift in - just waiting for the linkage bracket to come back from powder coating then it will be fully complete. Also got a nice piece of Carbon from Streamline to make a new base for the Satchshift. I bought some M10 nut covers from Safety Devices to cover the nuts on the cage, looks much tidier now but didn't get any pics.
Here's what I did take photo's of:
Nut Caps:

Cut the Satchshift base up and bonded it into my carbon base. Also curved off the back of it so it sits better on the floor pan. I may perfect this further so it follows the profile of the main hole, but I will do that at a later date! I didn't want to remove too much of the rear of the base as the bolt for the rose joint needs a strong part to bolt through.


Rear edge trimmed up:

Finito:

And finally fitted. I am pretty pleased with it - not only is it heaps lighter but it looks better also:


More updates soon I hope!
Lewis
More updates today. Finally got the rest of the Satchshift in - just waiting for the linkage bracket to come back from powder coating then it will be fully complete. Also got a nice piece of Carbon from Streamline to make a new base for the Satchshift. I bought some M10 nut covers from Safety Devices to cover the nuts on the cage, looks much tidier now but didn't get any pics.
Here's what I did take photo's of:
Nut Caps:
Cut the Satchshift base up and bonded it into my carbon base. Also curved off the back of it so it sits better on the floor pan. I may perfect this further so it follows the profile of the main hole, but I will do that at a later date! I didn't want to remove too much of the rear of the base as the bolt for the rose joint needs a strong part to bolt through.
Rear edge trimmed up:
Finito:
And finally fitted. I am pretty pleased with it - not only is it heaps lighter but it looks better also:
More updates soon I hope!
Lewis
Cheers buddy - I will use it when it's finished!
Few more updates tonight, and i'm sorry to say another unnecessary (albeit cheaper than usual) purchase - more bolts I need help  Anyway, I got some black alloy ones to replace all the ones' in the doorcards as the steel ones were all going rusty and looked turd. Can't be having rusty bolts! So sorted that, still need more to do the rest of the car but the front is done for now. Also an essential purchase for any 'bolt-eophile', a 'pro measuring tool' Actually it's damn useful as I kept buying the wrong sizes so this will save a lot of uncertainty.
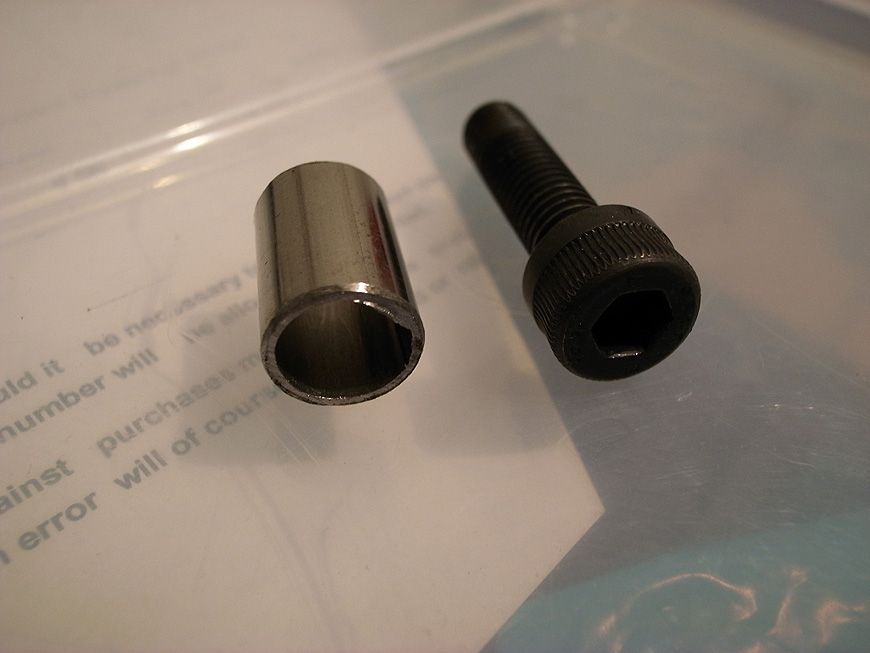
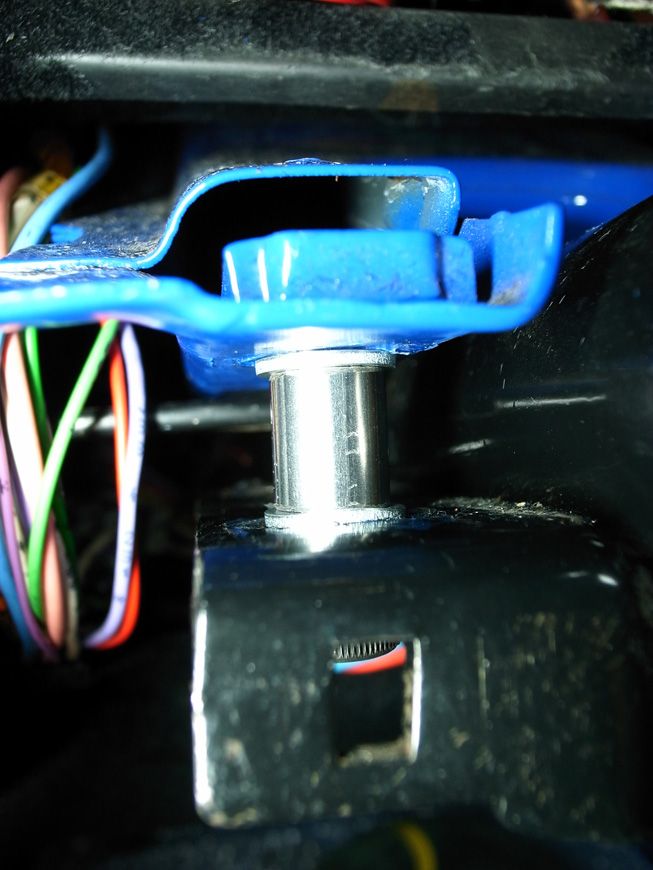
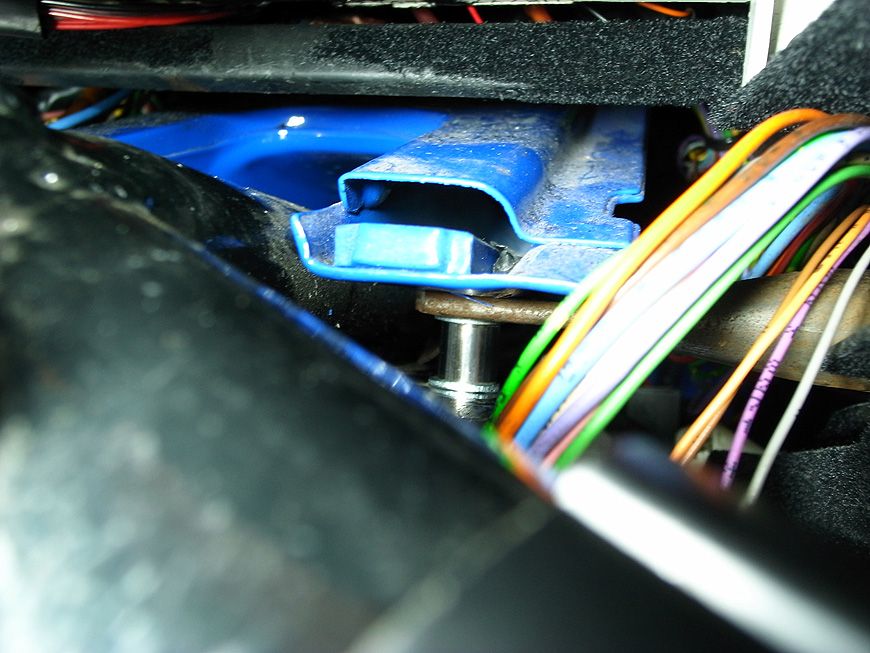
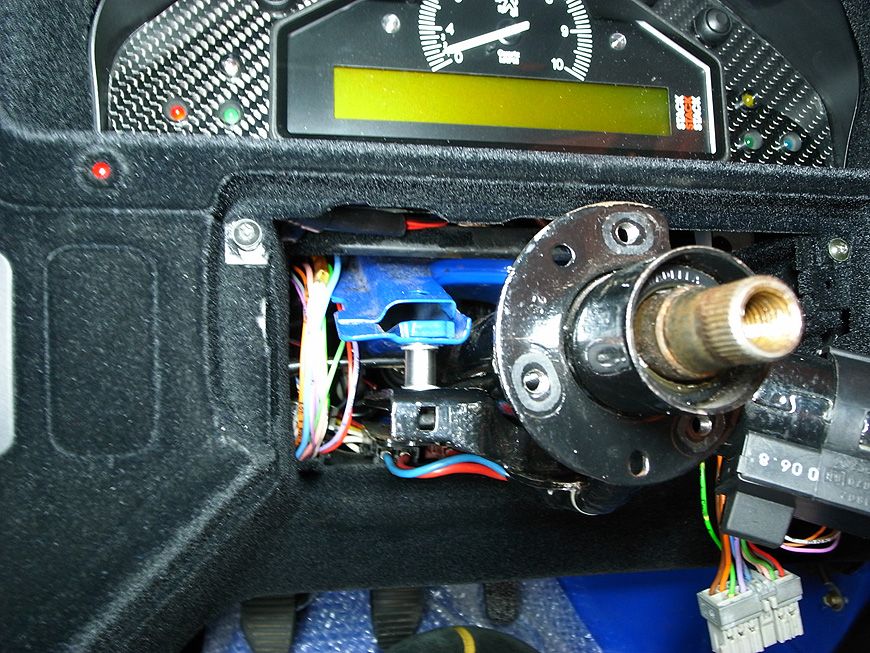
Finally I started to lower the steering column last night. Fiddly ass job but it's getting there. I have made two spacers, just one more to go and it's done. Going to make a little carbon cover to cover the gap that's there as a result of the lower column. Anyway here are the pics:
Shiny bolts - NOM NOM NOM NOM NOM!

Before:

After:

Measuring Tool:

This is also an essential tool:

Spacers made up:
Fitted Up:
I will finish the rest tomorrow, but it feels a lot better now. The seat was too low for the steering wheel before, but now it's about right Woo!
Lewis
Few more updates tonight, and i'm sorry to say another unnecessary (albeit cheaper than usual) purchase - more bolts
I need help Anyway, I got some black alloy ones to replace all the ones' in the doorcards as the steel ones were all going rusty and looked turd. Can't be having rusty bolts! So sorted that, still need more to do the rest of the car but the front is done for now. Also an essential purchase for any 'bolt-eophile', a 'pro measuring tool' Actually it's damn useful as I kept buying the wrong sizes so this will save a lot of uncertainty. Finally I started to lower the steering column last night. Fiddly ass job but it's getting there. I have made two spacers, just one more to go and it's done. Going to make a little carbon cover to cover the gap that's there as a result of the lower column. Anyway here are the pics:
Shiny bolts - NOM NOM NOM NOM NOM!
Before:
After:
Measuring Tool:
This is also an essential tool:
Spacers made up:
Fitted Up:
I will finish the rest tomorrow, but it feels a lot better now. The seat was too low for the steering wheel before, but now it's about right
Woo! Lewis
Edited by Track_Cit on Friday 18th February 00:20
Gassing Station | Readers' Cars | Top of Page | What's New | My Stuff