WRX RA powered VW 1303 beetle cabrio with a bit of Porsche
Discussion


Time for an update! There's been a lot done and most is in the details now it's coming together. We are due to move mid January so I'll finally have a double garage so I want to assemble as much to the car as possible to make it easier to move...
A hell of a lot of pipework has been completed and the chargecooler repainted and fitted.
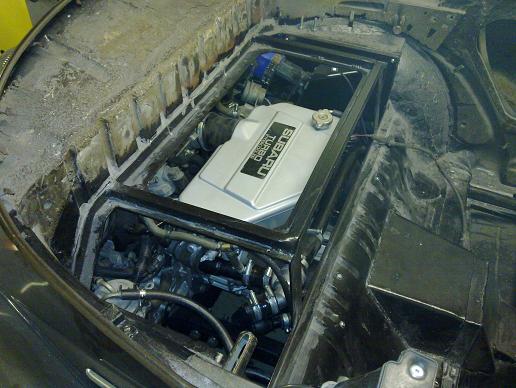
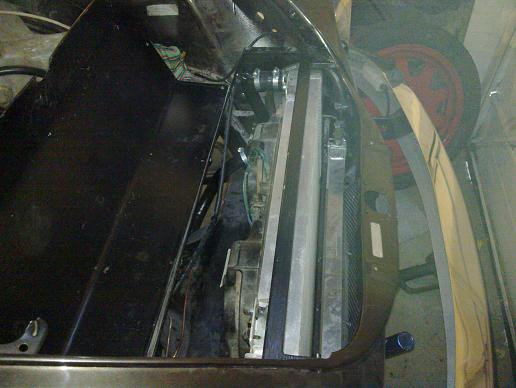
Radiators in and piped up, you can just about make out a steel pipe I made which incorporates a bleed point at the top which connects to the header tank at the back via the original fuel line.
I welded on a heater return pipe and also connected up the fuel lines
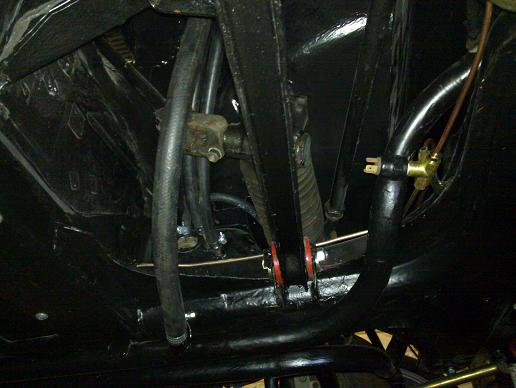
Brake reservoir (911) fitted under bonnet and supply lines pipes down to the master cylinders. The system is now all bled and seems to work OK with no leaks...
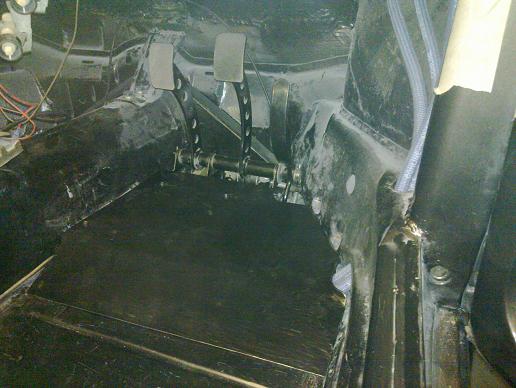
New false floor...
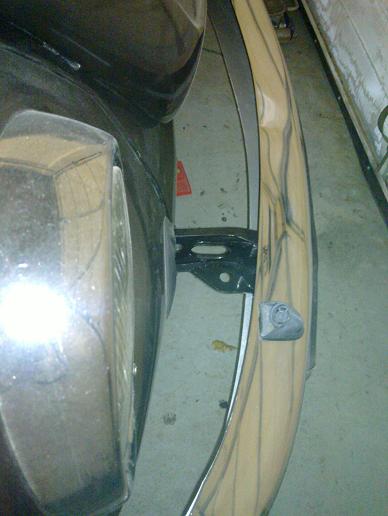
I modified one of the front bumper brackets to take a removable towing eye.
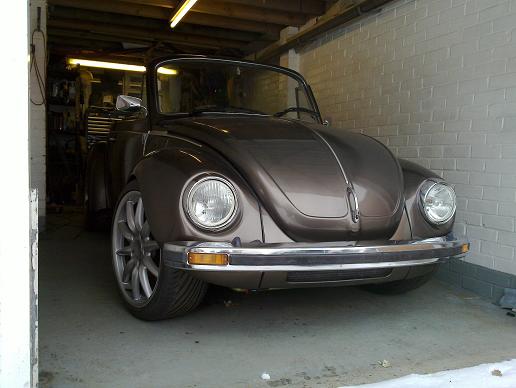
All body trim now fitted, you can just about make out mesh in the radiator opening, I'll sort out the airdam later..
Just to give an idea of how the intake looks.

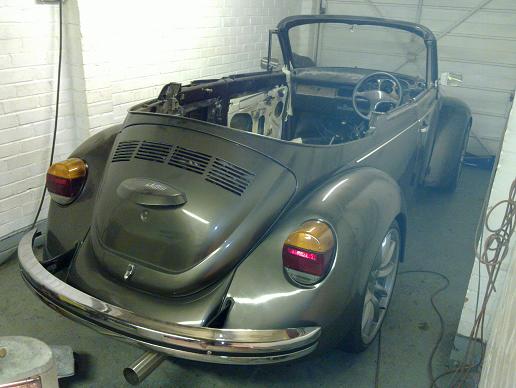
I painted the rear light housings satin black which I think gives the lights a slightly darker look without looking aftermarket..
A hell of a lot of pipework has been completed and the chargecooler repainted and fitted.
Radiators in and piped up, you can just about make out a steel pipe I made which incorporates a bleed point at the top which connects to the header tank at the back via the original fuel line.
I welded on a heater return pipe and also connected up the fuel lines
Brake reservoir (911) fitted under bonnet and supply lines pipes down to the master cylinders. The system is now all bled and seems to work OK with no leaks...
New false floor...
I modified one of the front bumper brackets to take a removable towing eye.
All body trim now fitted, you can just about make out mesh in the radiator opening, I'll sort out the airdam later..
Just to give an idea of how the intake looks.
I painted the rear light housings satin black which I think gives the lights a slightly darker look without looking aftermarket..
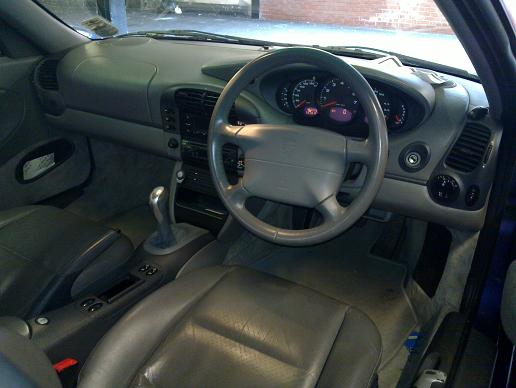
The plan for the interior is to either finish it to match the seats I´ve already sourced (Porsche savannah beige) or retrim the lot in a chocolate brown leather kinda like the new Porsche 997 classic..
I´m not a fan of fuchs detailed like that, bit too ´80s. I could be tempted by some 17"/18" fuchs style wheels but detailed like the old ones were
I´m not a fan of fuchs detailed like that, bit too ´80s. I could be tempted by some 17"/18" fuchs style wheels but detailed like the old ones were
Here are a couple of update pics for the time being, I'm concentrating on the move for the and the cab is stuffed full of parts/tools ready!
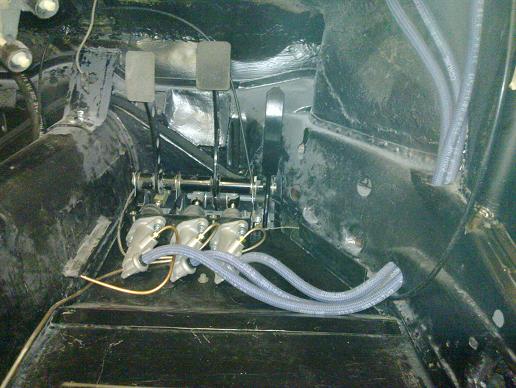
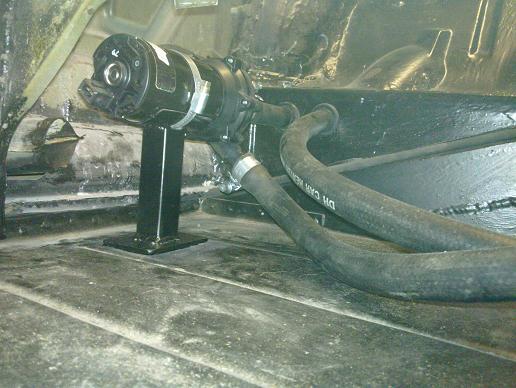
Chargecooler pump is a bosch one and is said to be very quiet and efficient, I think it's the same one as used in the Ford Focus RS. It fits with plenty of space under the back seat. Luckily the 16mm heater hose just stretched over the pipe fittings (which are 17mm on the chargecooelr and 19mm on the pump) with the heat gun and a bit of lubrication.
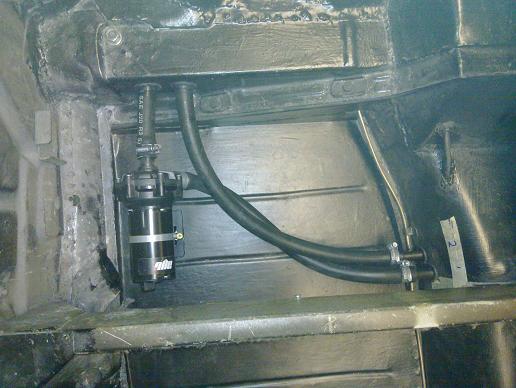
I made a small stand for the pump which is bonded on to the floor, depending on how noisey it turns out to be I may wrap some rubber around the pump for better isolation.
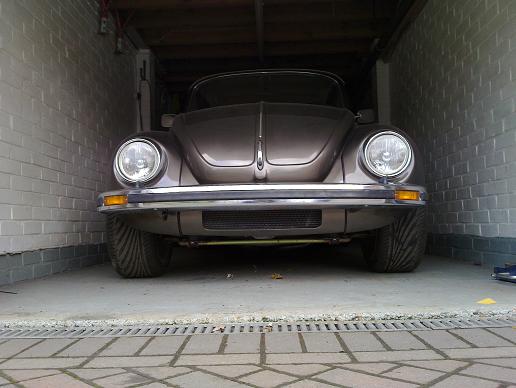
Ground level view shows that there is a decent direct flow area available for the radiator.
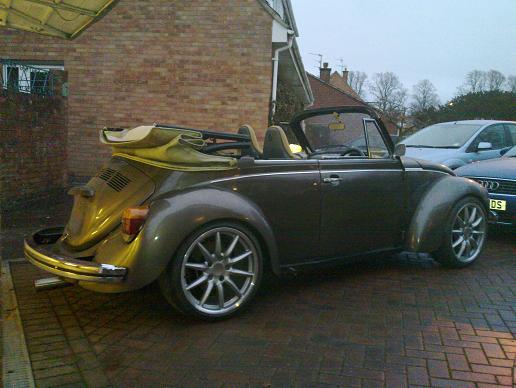
Roof and interior loosely fitted for the house move. The outer roof will get replaced by a nice mohair one later on..
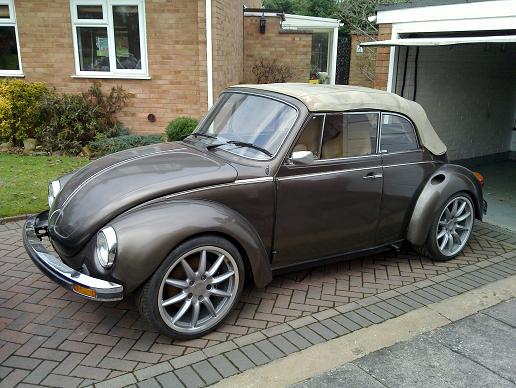
Just the running boards and front air dam to finish off the look...
Chargecooler pump is a bosch one and is said to be very quiet and efficient, I think it's the same one as used in the Ford Focus RS. It fits with plenty of space under the back seat. Luckily the 16mm heater hose just stretched over the pipe fittings (which are 17mm on the chargecooelr and 19mm on the pump) with the heat gun and a bit of lubrication.
I made a small stand for the pump which is bonded on to the floor, depending on how noisey it turns out to be I may wrap some rubber around the pump for better isolation.
Ground level view shows that there is a decent direct flow area available for the radiator.
Roof and interior loosely fitted for the house move. The outer roof will get replaced by a nice mohair one later on..
Just the running boards and front air dam to finish off the look...
I've just finished building some outside stores for bikes and usual garden stuff so the new double garage can be used for what is is meant for! The garage has had all walls and floors painted, I mounted the compressor up on a wall out of the way on a steel frame I welded up and I've made a workbench. I think after this weekend I'll be about ready to get back to the bug...
Rich
Rich
The workshop/garage will develop over time but I've got it into a state I can use it now...
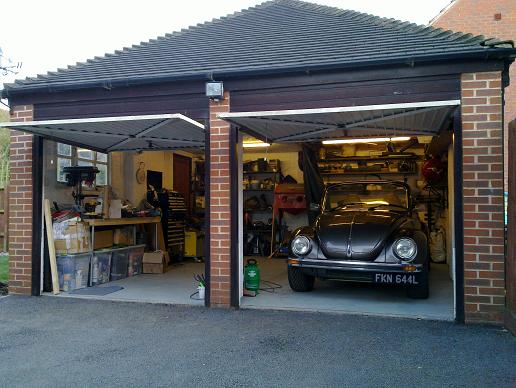
The bug's new home and my new workshop! Finally got a double garage... I have lost a lot of alternate storage though so I've had a bit of a clearout. All walls and floors have been painted, I've welded up a frame to mount the compressor up on the walls and made a new workbench.
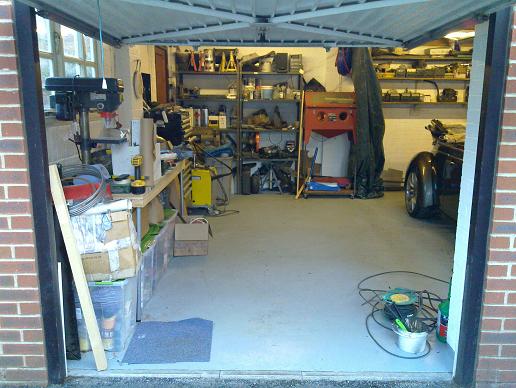
Sandblasting cabinet has a new set of wheels to make best use of space.
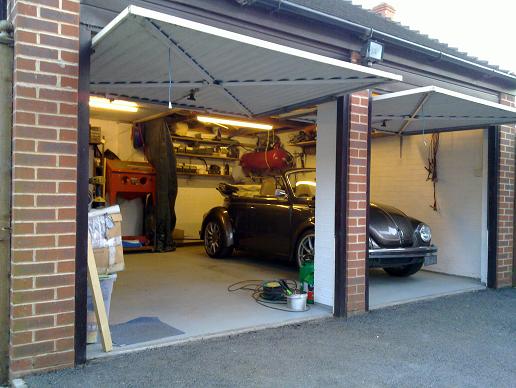
You can see the compressor mounted up out of the way. Also, I've put up some hooks so I can hang a tarpualin down the middle to protect the car when I'm grinding etc etc

I bought a couple of 7'x4' bike stores for outside storage, the drive isn't really full double width so it's no big loss of space.
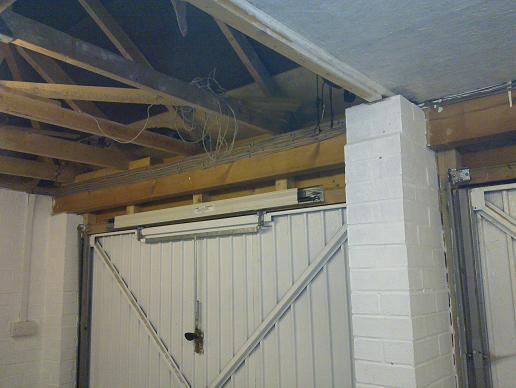
I'm pondering over whether to get a single full width roller shutter door or not as it would be fairly pricey. I'm also not sure whether I'd have to replace this wooden lintel, it's full width and 4" x 8". Can anybody advise? Could I bolt on some metal strengtheners and leave it in place?
The bug's new home and my new workshop! Finally got a double garage... I have lost a lot of alternate storage though so I've had a bit of a clearout. All walls and floors have been painted, I've welded up a frame to mount the compressor up on the walls and made a new workbench.
Sandblasting cabinet has a new set of wheels to make best use of space.
You can see the compressor mounted up out of the way. Also, I've put up some hooks so I can hang a tarpualin down the middle to protect the car when I'm grinding etc etc
I bought a couple of 7'x4' bike stores for outside storage, the drive isn't really full double width so it's no big loss of space.
I'm pondering over whether to get a single full width roller shutter door or not as it would be fairly pricey. I'm also not sure whether I'd have to replace this wooden lintel, it's full width and 4" x 8". Can anybody advise? Could I bolt on some metal strengtheners and leave it in place?
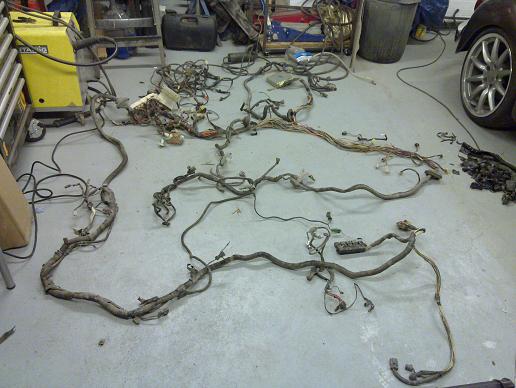
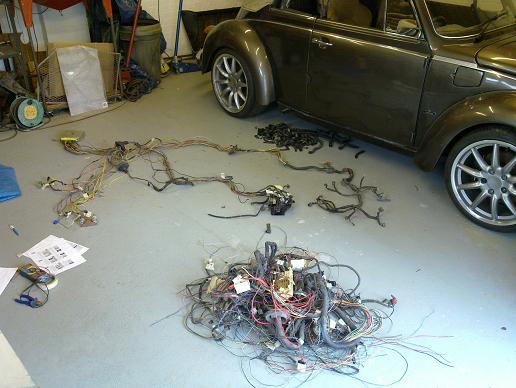
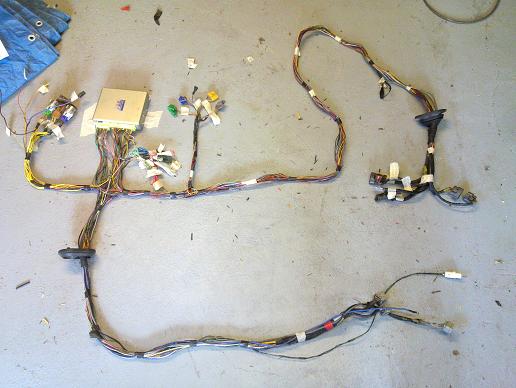
Subaru loom stripped to it's basics now and all sections shortened to the correct lengths. It is laid out in 5 main groups: boost pack, engine, relays, diagnostics and dash feeds. Next is to put it in the car and add a few other rear end related items. I'm waiting for a large order of wire/relays/fuseboxes etc to re-make the rest of the loom.
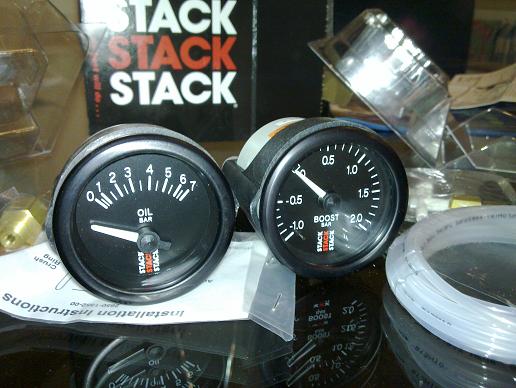
I thought it would be a good idea to better monitor the engine so got a couple of stack gauges, due to their reputed accuracy.
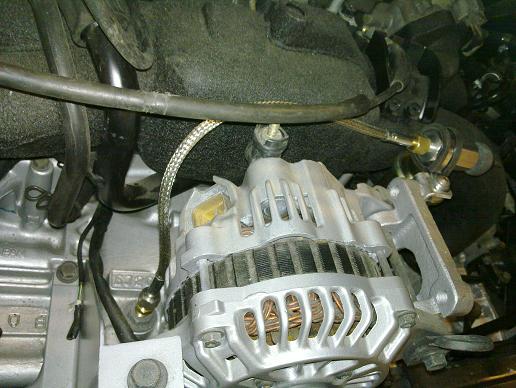
The oil pressure sender required a T piece to keep the stock pressure switch, as there isn't enough room under the alternator this short extension places them both remotely.
Time to modify the stock fuel tank for fuel injection, I was surprise to see that the stock tank incorporates a baffle across it.
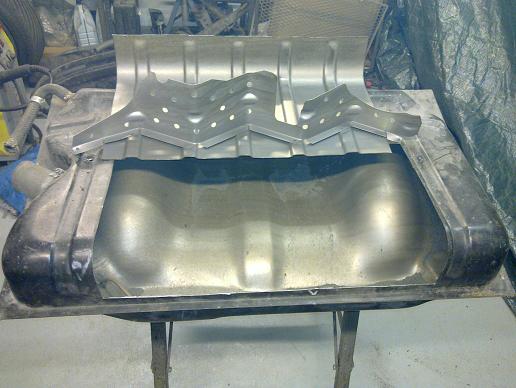
The tank is shallower than the subaru one so I shortened the subaru fuel pump mounting assembly and removed the stock level sender.
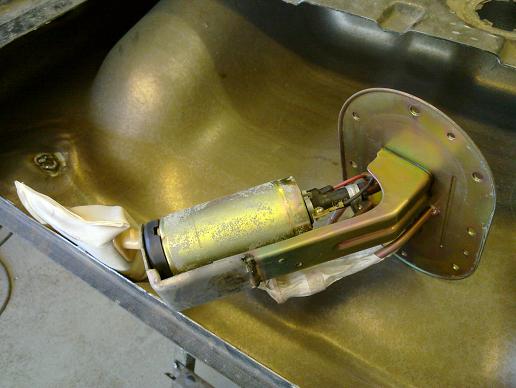
I made up a baffle to hold fuel around the pump as the last thing you want is to lose fuel pressure on boost in a turbo engine! I drilled some holes through the plates to allow fuel to flow through it.
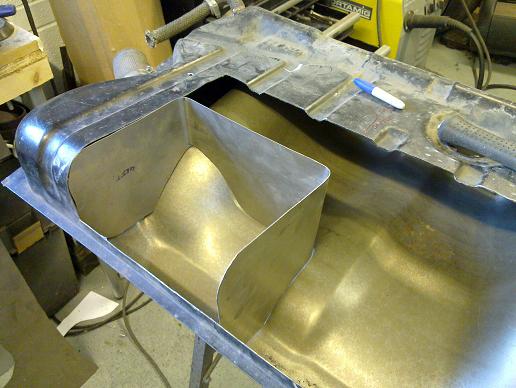
I also increased the fuel tank volume by filling in the LHD steering column recess. I left the metalwork in place so it acts like a baffled volume.
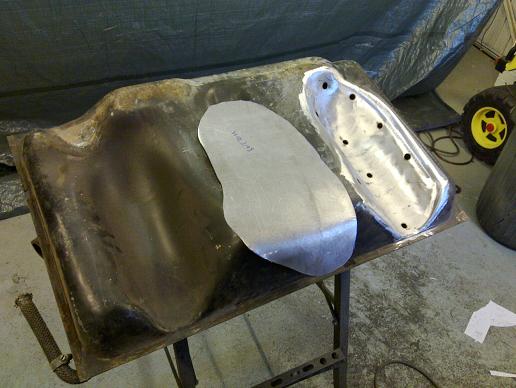
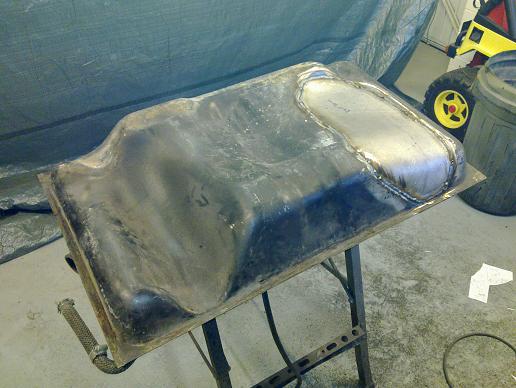
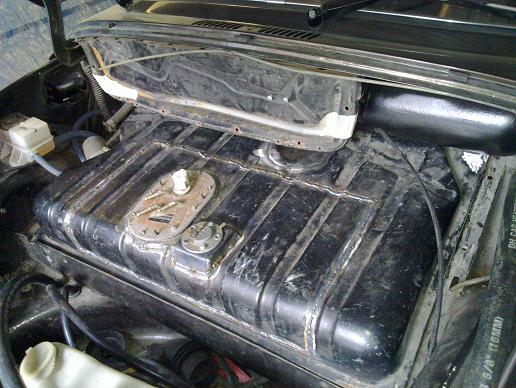
Topside done! I welded up the stock level sender hole and made up a new one for the Porsche dip tube type to match my gauges. The fuel pump section from the subaru tank was welded in to the top of the tank.
I thought it would be a good idea to better monitor the engine so got a couple of stack gauges, due to their reputed accuracy.
The oil pressure sender required a T piece to keep the stock pressure switch, as there isn't enough room under the alternator this short extension places them both remotely.
Time to modify the stock fuel tank for fuel injection, I was surprise to see that the stock tank incorporates a baffle across it.
The tank is shallower than the subaru one so I shortened the subaru fuel pump mounting assembly and removed the stock level sender.
I made up a baffle to hold fuel around the pump as the last thing you want is to lose fuel pressure on boost in a turbo engine! I drilled some holes through the plates to allow fuel to flow through it.
I also increased the fuel tank volume by filling in the LHD steering column recess. I left the metalwork in place so it acts like a baffled volume.
Topside done! I welded up the stock level sender hole and made up a new one for the Porsche dip tube type to match my gauges. The fuel pump section from the subaru tank was welded in to the top of the tank.
It's alive!!!
I haven't had it running for long as I don't have any gauges hooked up yet and just wanted to make sure my engine section works and it seems to be fine. No coolant in the system either, so I will now wait until the rest of the wiring is done before. It took a bit of coughing and spluttering before it ran properly but now it turns on the first crank every time so very happy! The internal fuel pump is inaudible when the engine's running so well worth the extra effort.
I haven't had it running for long as I don't have any gauges hooked up yet and just wanted to make sure my engine section works and it seems to be fine. No coolant in the system either, so I will now wait until the rest of the wiring is done before. It took a bit of coughing and spluttering before it ran properly but now it turns on the first crank every time so very happy! The internal fuel pump is inaudible when the engine's running so well worth the extra effort.
I've sorted out the axles now and it can finally drive under its own power!
http://youtu.be/glKyVl7FSd4
http://youtu.be/glKyVl7FSd4
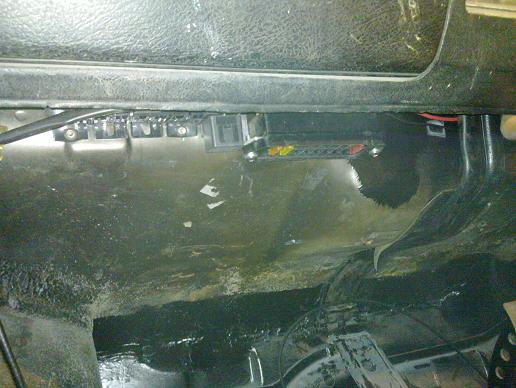
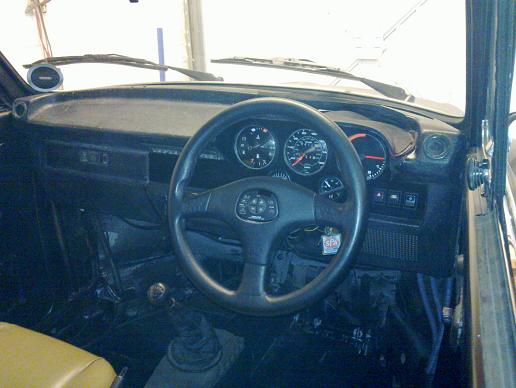
Here's the main section of the wiring, bank of 20 blade fuses and 5 relay sockets, when you are sitting in the car they aren't visible, they sit flush with the bottom of the dash.
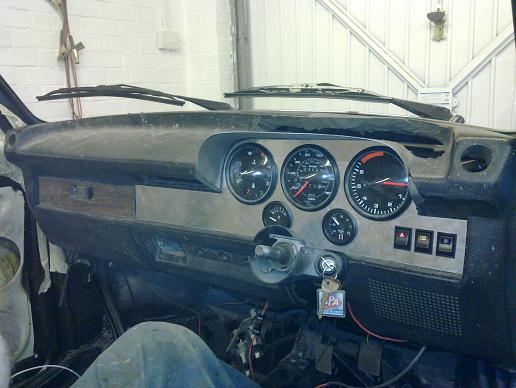
New dash finishing panel and the stack oil pressure and boost pressure gauges fitted in place. As I'm re-doing all the wiring I decided to source some switches that took a proper plug on the back rather than the VW ones that are separate lucar connections. I ended up with classic mini ones as they are cheap to source and in keeping with the rest of the car.
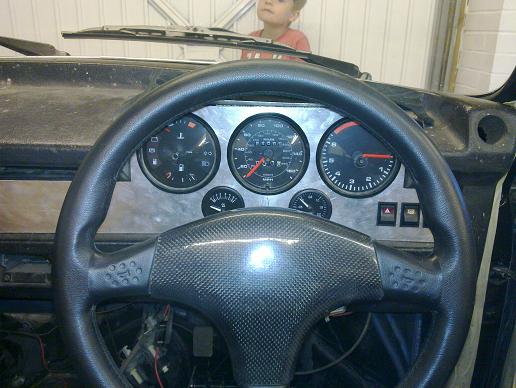
View through the steering wheel shows that everything is nicely visible
New dash finishing panel and the stack oil pressure and boost pressure gauges fitted in place. As I'm re-doing all the wiring I decided to source some switches that took a proper plug on the back rather than the VW ones that are separate lucar connections. I ended up with classic mini ones as they are cheap to source and in keeping with the rest of the car.
View through the steering wheel shows that everything is nicely visible
This is how the interior looks at the moment and gives a better idea of how it will look when finished. I have to reshape the foam area over the gauges properly before it can be trimmed.
The running boards have now been pie-cut and widened at the rear to match the new width of the rear wings. I've bought some ribbed rubber sheet so they will be re-covered to look stock and help disguise the rear wing width.
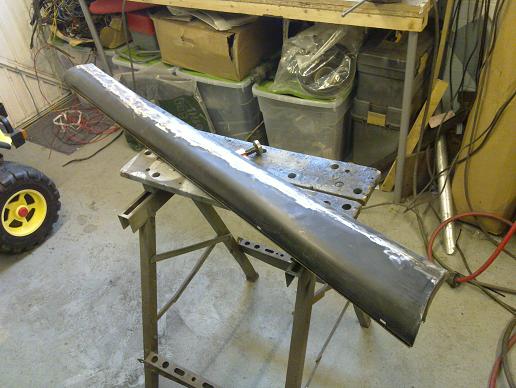
The running boards have now been pie-cut and widened at the rear to match the new width of the rear wings. I've bought some ribbed rubber sheet so they will be re-covered to look stock and help disguise the rear wing width.
Gassing Station | Readers' Cars | Top of Page | What's New | My Stuff