Discussion


Right well i thought i would update the thread before i go and do some work on the car today
I have put nearly 10thousand miles on the car with the wall and it went through its MOT with just a suspension bush needing replacing and i think that bush has been on the car since it left the factory so i cant really moan
I had a target of 150db this year - sadly i did not get it, got close with 149.8 but the install has done the following
-Played pretty much everything i have thrown at it
-Played pretty much flat out all day on just engine tickover at the shows/meets ive been to
-The woofers have not really got all that smelly
-The only equiptment failure i have had is an 8inch mid dying
As i have said before this year was just about finding weaknesses in the install, not that many but they are
-Lack of midbass upfront (At the moment i only reallyhave a pair of 6.5inch comps against the wall so itsnot too bad)
-Does not really throw sound when demo-ing with doors open
-A bit of flex on the woofer baffle
-Tightening nuts digging into the rear wall
-Continually pushing the sub amp into the last 10% of its power so it is sucking current
-It does not look pretty
So for the work i need to do on it
-Lack of Midbass/Does not throw sound
-This i think i have solved, as i have two seperate amps (one for the comps and one for the 8inch midbass drivers buth amps with fantastic built in crossovers) i am going to replace the single 8inch midbasss per door with four 6X9's per door - it looks easier to get four 6X9's in rather than 4 8inch cone sand i should not loose out on much cone area. For the daily drive the crossover on the amp running them will be lowpassed so they only do midbass duties but when it goes to a show i can turn that crossover off so they play fullrange - this will give me tweeters in the door to throw sound. I will probably use these - http://www.caraudiodirect.co.uk/jbl-gto938.html as they are 2ohm coils so i can wire four up to show a final load of 2ohms, perfect as my amps do the most power in stereo mode @2ohms per channel
-Bit of flex
-This should be sorted once i build a port for the rear chamber as that will give more support to the existing edge that is flexing
-Tightening nuts digging in
-Thankfully i went and bothered RichW yesterday and he drilled out some square washers i had so i can put them behind the nutss to spread the load
-Continually pushing the amp
-Nothing i can really do on this front as the amp is a very good amp (Massive 3000.1) but it is notthe most efficient so what i am going to do when i have the cash is look at replacing it with two other amps to bring the sub amp RMS up from 3k to 6k - the reason for this is then i will have far more power than the woofers can take - this will keep me in the area where classD amps are lovely and efficient
-It does not look pretty
-When i can afford it i will be taking the car back to RichW to have some fibreglass trim panels made up for behind the rear windows but as the boot has to remain practical it will just be MDF and carpet, in regards to the bodywork when the winter tyres go on and my OEM alloys come off i am toying with getting them sprayed a different colour and when i eventually have the cash the scrape on the side will be repaired and potentially the entire car will be given a blow-over
Coming into the it does not look pretty the dash is a bit of a mess but im going to try a couple of things over the winter to make it look good-this is being kept under my hat though
Also i will need to do some work on the front and rear chamber as it is the general belief that moving the loading wall closer to the woofers will really transform it
Still it did its job this year - been everywhere from Single Make shows, to pistonhead events and through to modified car shows and it ahs made people smile and laugh at each and every one so i cant moan
Right i got a delivery today

four pairs of 6x9's for my frontend, four per door
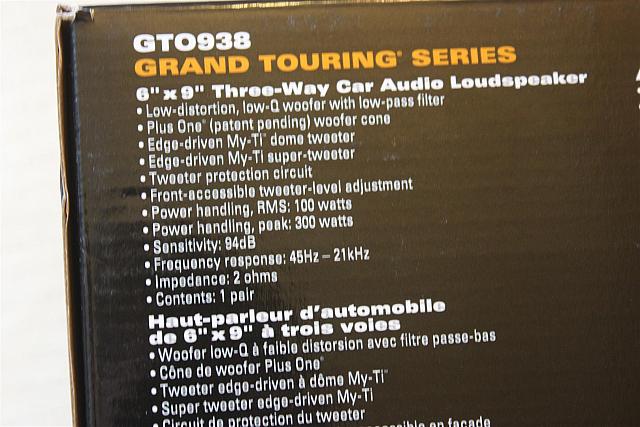
2ohm load so i can wire four of them up to show a final load of 2ohm to get the power out of the amps
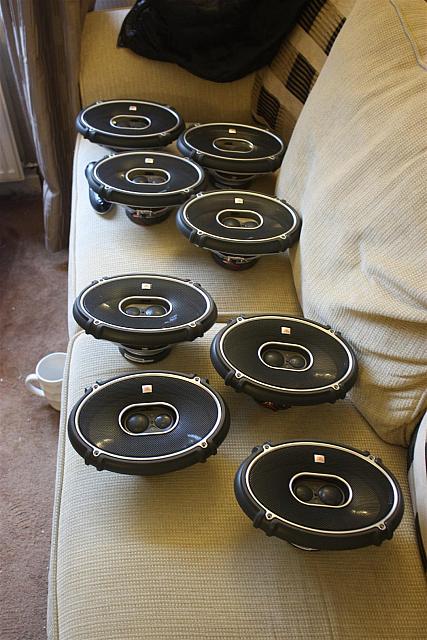
A fair whack of cone area
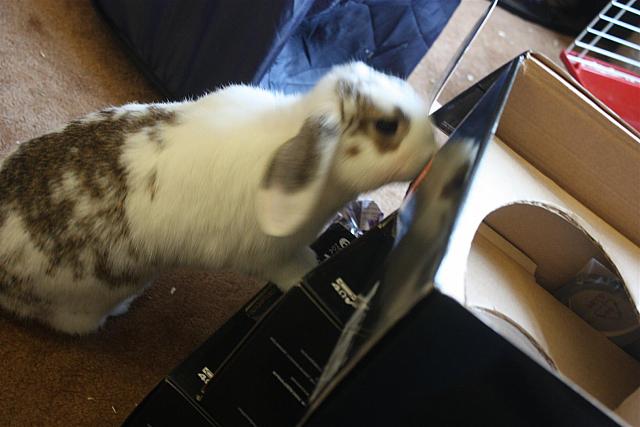
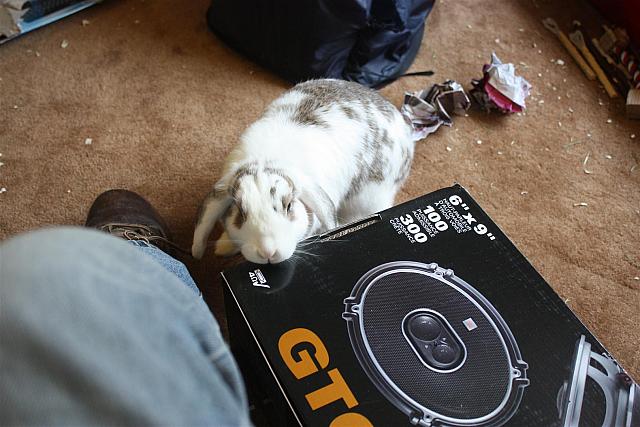
And some random bunnys being nosey
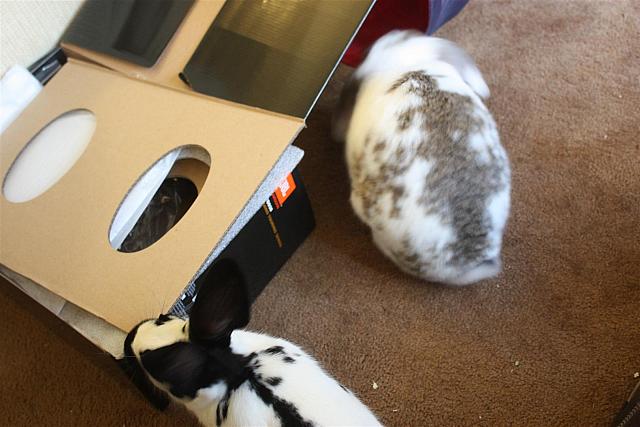
I want this box when your done
For daily driving i will have the tweeters turned off so they will be purely midbass (the existing 6.5 component midrange in the doors will be purely midrange and the tweeters for daily use will be the existing tweeters in my A-pillar build)
For show use though the 6x9's will have the tweeters playing so i have tweeters broadcasting out of the doors and i dont need to be too hard on my nice sq-ish tweeters in my a-pillars
four pairs of 6x9's for my frontend, four per door
2ohm load so i can wire four of them up to show a final load of 2ohm to get the power out of the amps
A fair whack of cone area
And some random bunnys being nosey
I want this box when your done
For daily driving i will have the tweeters turned off so they will be purely midbass (the existing 6.5 component midrange in the doors will be purely midrange and the tweeters for daily use will be the existing tweeters in my A-pillar build)
For show use though the 6x9's will have the tweeters playing so i have tweeters broadcasting out of the doors and i dont need to be too hard on my nice sq-ish tweeters in my a-pillars
So i got some more work done on it
As people know i had mentioned i had a tiny split on the baffle that i reapred temporarely with fibreglass so i could keep using it through the year
Well today i thought i would sort that out
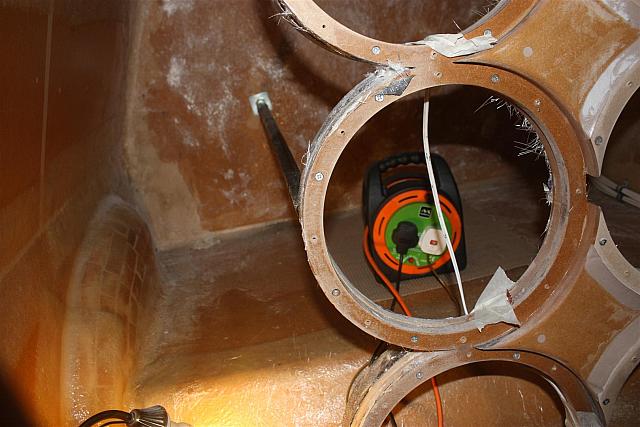
So out come the woofers
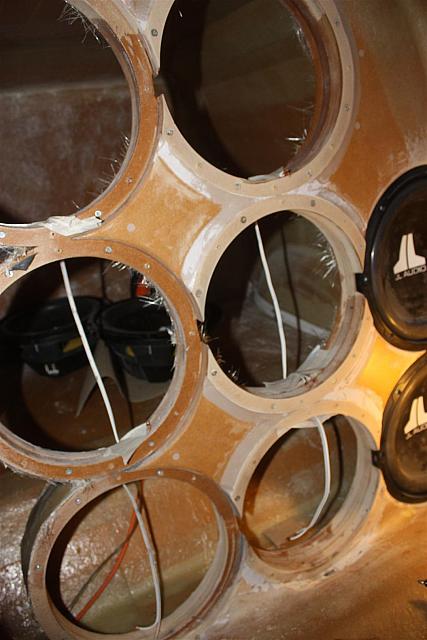
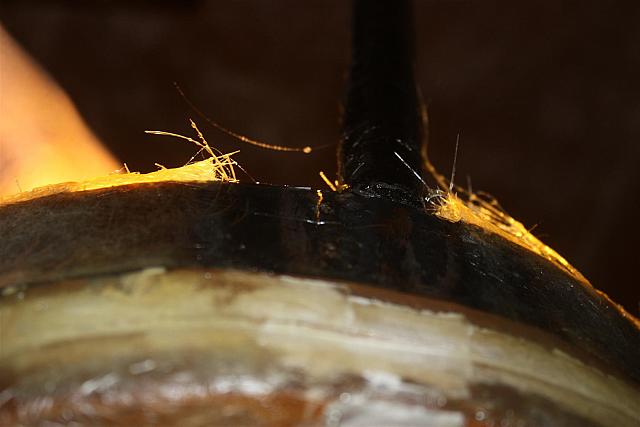
Looks empty doesnt it - and they were that tight in the holes i smacked myself in the head a few times when the woofers finally came out
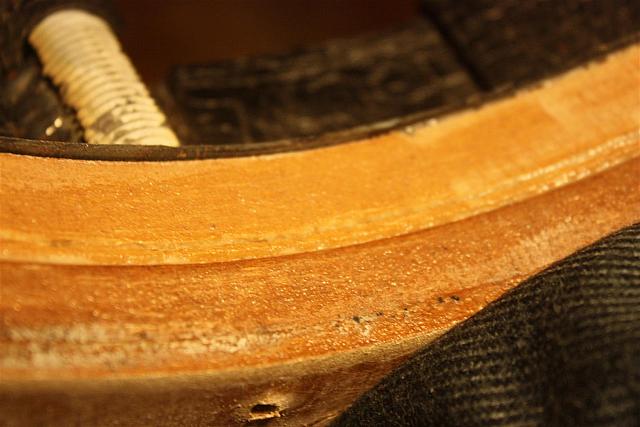
Once i got woofer number2 out i saw this
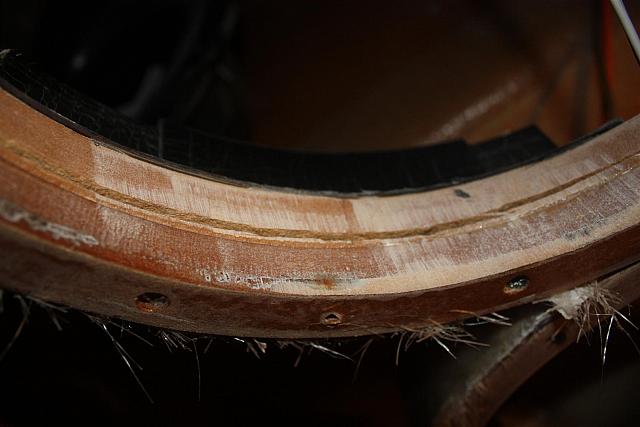 ohhh a big split in the MDF
Chipped off the fibreglass around the edge of the port so i could get to the wood
I could now see the split better
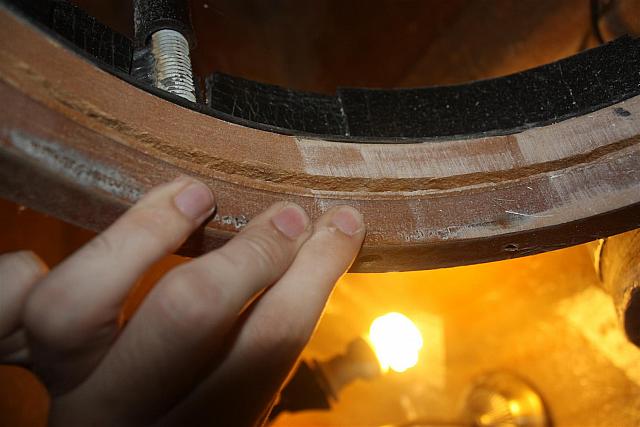
otherside

So its not the end of the world - next step was to take as much strain of the baffle as i could so i unwound the tension on the threaded rod going from the back of the enclosure to the woofer baffle
Now to fill the crack with good old fashioned wood glue and then clamp the sides togehter

So give it 24hrs to cure now and then see about some fibreglass work to make it even stonger/twist Richs arm for more steel
As people know i had mentioned i had a tiny split on the baffle that i reapred temporarely with fibreglass so i could keep using it through the year
Well today i thought i would sort that out
So out come the woofers
Looks empty doesnt it - and they were that tight in the holes i smacked myself in the head a few times when the woofers finally came out
Once i got woofer number2 out i saw this
ohhh a big split in the MDFChipped off the fibreglass around the edge of the port so i could get to the wood
I could now see the split better
otherside
So its not the end of the world - next step was to take as much strain of the baffle as i could so i unwound the tension on the threaded rod going from the back of the enclosure to the woofer baffle
Now to fill the crack with good old fashioned wood glue and then clamp the sides togehter
So give it 24hrs to cure now and then see about some fibreglass work to make it even stonger/twist Richs arm for more steel
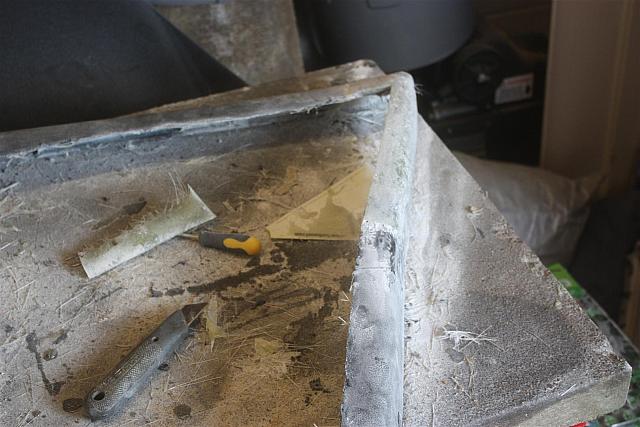
Well i got some work done on the box today but it was more fail than win
As you can see the wood glue has repaired the split in the baffle fine
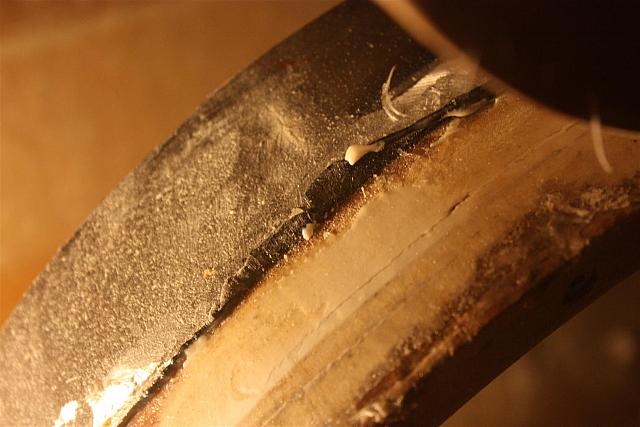
So start the fibreglassing - the fibreglass was supposed to loop over the front of the baffle and over the back to act almost like a clamp
tape up the holes for the woofer screws
get the pieces cut and test fitted before mixing the fibreglass
Start fibreglassing - this is where it all went wrong - i could not get the fibreglass to stay inplace and adhere to the wood so it has dried with aribubbles in it
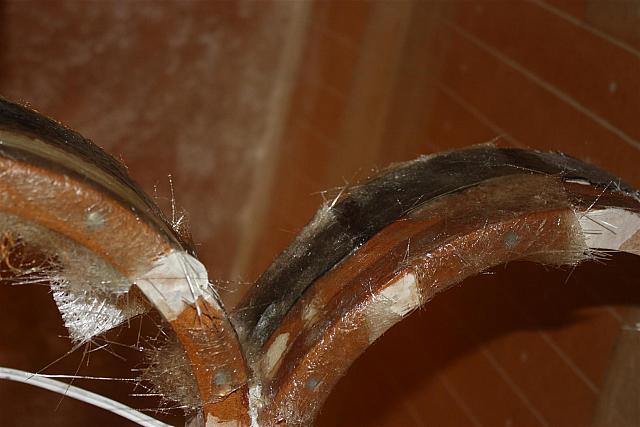

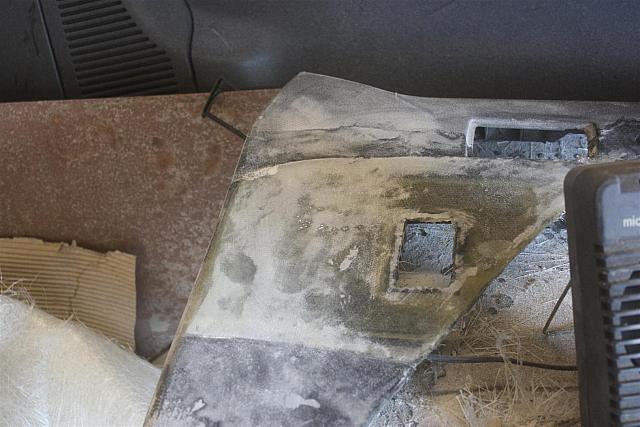
Hang on whats that by the weld for the threaded bar - lets stick a light behind it and see
Oh - crack in the steel on the baffle
Well im off up to my friends tomorrow to see what can be done/have a thunk about gettng rid of the existing baffle and trying a different style
As you can see the wood glue has repaired the split in the baffle fine
So start the fibreglassing - the fibreglass was supposed to loop over the front of the baffle and over the back to act almost like a clamp
tape up the holes for the woofer screws
get the pieces cut and test fitted before mixing the fibreglass
Start fibreglassing - this is where it all went wrong - i could not get the fibreglass to stay inplace and adhere to the wood so it has dried with aribubbles in it
Hang on whats that by the weld for the threaded bar - lets stick a light behind it and see
Oh - crack in the steel on the baffle
Well im off up to my friends tomorrow to see what can be done/have a thunk about gettng rid of the existing baffle and trying a different style
Right so next to nothing has happened but here are the following updates
The car has been up to Rich's with the subs removed and we have a plan of action on the existing baffle to make it stronger so that is sorted
Still need to work out tuning frequencys and box sizes - this will be done over the winter once the baffle has been sorted
In regards to the front end I have decided the best way to do it
At the moment I have two 2channel amps - one powering the components, one powering the midbass. I was going to keep this the same when i put the 6x9's in the doors, one for components, one for the 4 6x9's per door
But
i got thinking, the two amps will do 300ish watts per channel at 2ohms - this is what the 4 6x9's loads to BUT they will do over 1kw when bridged at 2ohms
So the plan is
-Remove the components
-Put an extra run of speaker cable to the doors from the amps (not really needed but i just like extra cable when playing with power)
-Sort the doorcards out to take the 4 6x9's, this will be done by cutting the door pocket out - piece of carpeted MDF will replace the pocket and the 6x9's will mount to that, should look reasonable OEM-ish, then the rear of the doorcard will be covered in fibreglass to make it extra strong and the existing speaker grill will be covered from behind. I did think about using bodyfiller to cover the old grill and smooth it off but that would make it look less OEM and it would be a lot of work to get it looking right
-Wire up and setup the amps so they are bridged to the doors
My main worry is that as the JBL 6x9's have a metal tweeter and my current components have a silk tweeter it may sound way too harsh and as they are mounted down in the doors ruin the soundstage, if this is the case then i have a spare 4ch amp in my garage that I have never used that can be brought in to power a set of 5inch comps for the a-pillars and turn the 6x9's into pure midbass drivers for day to day driving
And if i get chance we may even get it looking pretty this year and get rid of the bare MDF look
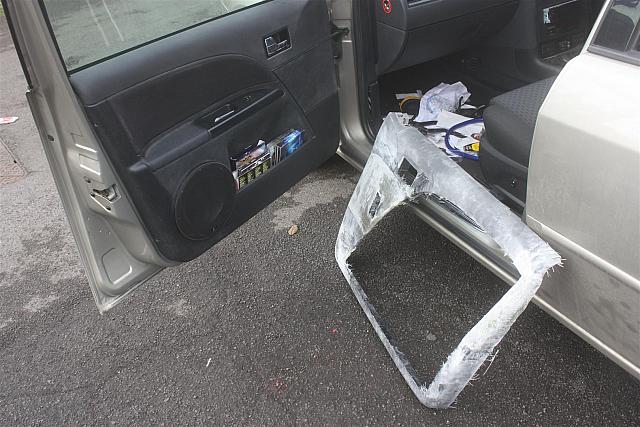
So i got a bit more work done and it looks like ive hit a bit of a snag
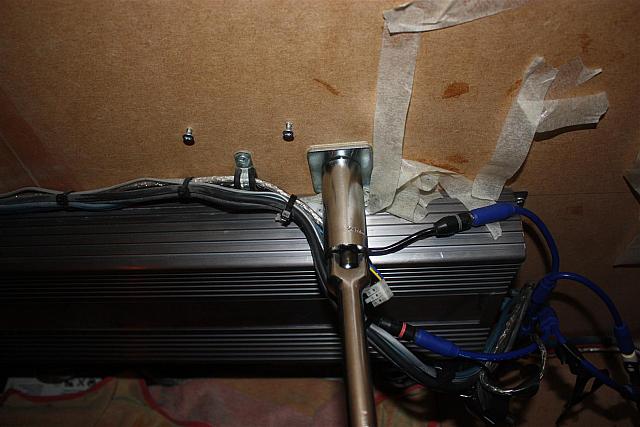
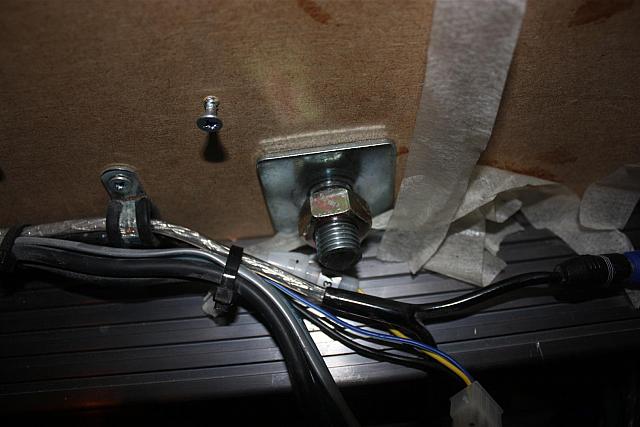
First off - pull the remote out of the amp running the 8inch mids
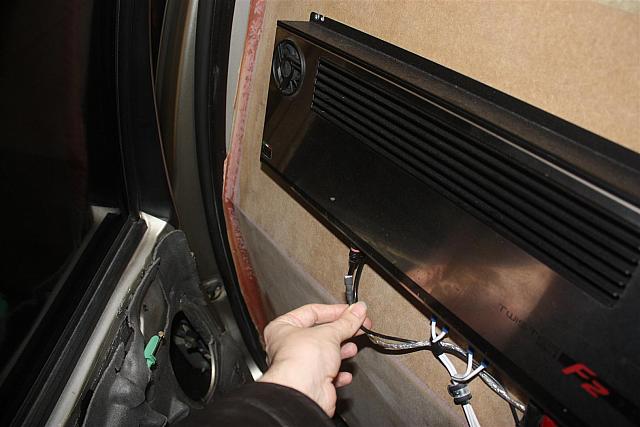
Then get the doorcard off
Fords Doorcard we all know and tollerate
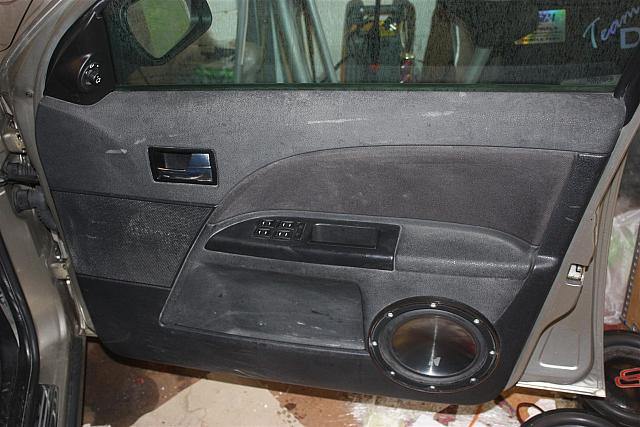
now if your anything like me and have a bad habit of not cleaning the pockets out you could end up with some cash - i found 4quid in change in my doorpockets
So undo all the screws including the one behind the trim for the electric mirror switch, all for philips head apart from the one behind the handle that is a star head
Now on my door i had to remove the 8inch mid so thats now done
Pull the electric mirror panel off
Now simply lift the doorcard up and off it comes
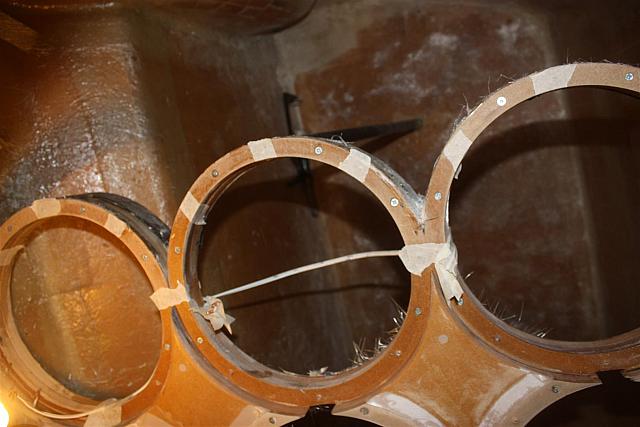
A few people asked how Rich got an 8inch mid in the door to begin with - well he built and enclosure for it as you can see
Now unclip the electic mirror control from the doorcard and thats it doorcard off
I would reccomend putting all the screws you took out of the door back in so you dont loose them - this is how i will be driving round until the doorcard is done
So now i hit the snag - it looks like from the bits i can cut away i cant fit all4 mids on the bottom of the door

So the choice is either 3 at the bottom and one at the top but due to how the doorcard curves it will stuck out like a sore thumb OR three at the bottom and one in the door itself where the 6inch mid is at the moment (you can get a 6x9 into the OEM hole in the door of a mundane iirc - if not some MDF will make it fit) but that will mean the ones on the door will need boxing in and then venting behind the waterproof membrane to stop the speakers potentially fighting - i think its time ti sit down and have a thunk about it
Edit : i think i may have cracked it idea wise - chop the bottom out of the door and the OEM grill to replace with MDF - the three at the bottom mounted ontop of the MDF behind the JBL grills, the 4th mounted behind the MDF with no grill so the magnet should back into the OEM hole for the speaker - that means that speaker will not have a grill but it will mean that all4 are in the same airspace
May still need more thinking about but it would in theory work
First off - pull the remote out of the amp running the 8inch mids
Then get the doorcard off
Fords Doorcard we all know and tollerate
now if your anything like me and have a bad habit of not cleaning the pockets out you could end up with some cash - i found 4quid in change in my doorpockets
So undo all the screws including the one behind the trim for the electric mirror switch, all for philips head apart from the one behind the handle that is a star head
Now on my door i had to remove the 8inch mid so thats now done
Pull the electric mirror panel off
Now simply lift the doorcard up and off it comes
A few people asked how Rich got an 8inch mid in the door to begin with - well he built and enclosure for it as you can see
Now unclip the electic mirror control from the doorcard and thats it doorcard off
I would reccomend putting all the screws you took out of the door back in so you dont loose them - this is how i will be driving round until the doorcard is done
So now i hit the snag - it looks like from the bits i can cut away i cant fit all4 mids on the bottom of the door
So the choice is either 3 at the bottom and one at the top but due to how the doorcard curves it will stuck out like a sore thumb OR three at the bottom and one in the door itself where the 6inch mid is at the moment (you can get a 6x9 into the OEM hole in the door of a mundane iirc - if not some MDF will make it fit) but that will mean the ones on the door will need boxing in and then venting behind the waterproof membrane to stop the speakers potentially fighting - i think its time ti sit down and have a thunk about it
Edit : i think i may have cracked it idea wise - chop the bottom out of the door and the OEM grill to replace with MDF - the three at the bottom mounted ontop of the MDF behind the JBL grills, the 4th mounted behind the MDF with no grill so the magnet should back into the OEM hole for the speaker - that means that speaker will not have a grill but it will mean that all4 are in the same airspace
May still need more thinking about but it would in theory work
Edited by samuelellis on Wednesday 21st December 13:51
richtea78 said:
Change in your door pockets? The rattling of even a single coin in my ash tray pisses me off and I only run a 13W5!
I have got used to tuning rattles out after the install i had in my old mk3 golf made the entire sunroof mech rattle like crazyThat and the door pockets also had tons of old receipts and un-used mcDonalds napkins (hey our lass works there so i get cheap food when i drop her off)and the napkins come in handy for cleaning door mirrors/lights in bad wather) so that dampled the rattling of loose change
tbc said:
i like to see people experimenting with rep mobiles
how much do you reckon you've spent so far?
honest answer is not the foggyist as I have been buying the gear over a few years/re-used gear from previous installs but I know its not been cheap as I also have to include the cost of the car as it was bought just for this purposehow much do you reckon you've spent so far?
and is utterly pointless but it gives me a giggle every time I drive it
So time for a long overdue bump to this, the sub box still is not playing as it needs to go to Rich's bodyshop, this will happen soon as im finally getting the scrape on my rear arch sorted at the same time but i thought i may as well crack on a bit with the door cards
Below is a quick vid i took explaining my plans for the doors and showing the work i have done so far, as you can see not a huge amount of Ford left in the doorcards anymore
http://www.youtube.com/watch?v=GL2PFlUxgVs
Below is a quick vid i took explaining my plans for the doors and showing the work i have done so far, as you can see not a huge amount of Ford left in the doorcards anymore
http://www.youtube.com/watch?v=GL2PFlUxgVs
So unfortunatly i have hit a big stumbling block but first the work leading up to the block
As you saw from the youtube video i had to chop a lot away to make space and on the bit that goes next to the b-pillar practically build it from scratch so the doorcard was fibreglassed where needed
this is the bit that was basically rebuilt
And this is the OEM speaker location that i was relocating my window switches to
As you can see comparing it to an OEM-ish doorcard a lot was removed from the card so the back was fibreglassed as well
The doorcard slips onto the door as it should as can be seen here
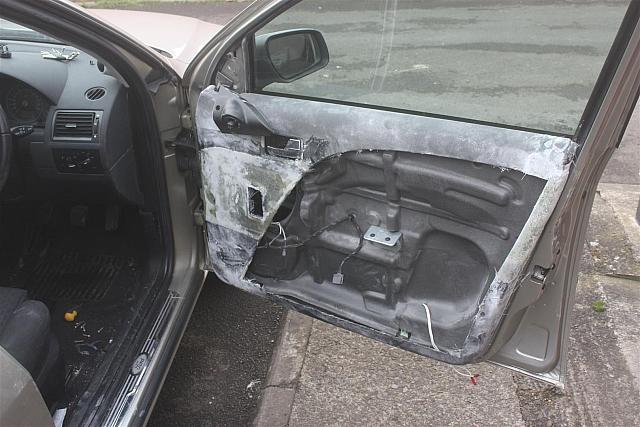
and the door closes without fowling the relocated position of the window switches
BUT during some point in fibreglassing the doorcard to rebuild the bit of it and fibreglassing the back of the card to give it a bit more strength it has shifted so the screw holes dont line up properly anymore so i wont be able to get the doorcard to fit correctly at all so it looks like its back to the drawing board - shame really as some more sanding and this part of the card would be ready for its carpeting but hey ho - one of those things
As you saw from the youtube video i had to chop a lot away to make space and on the bit that goes next to the b-pillar practically build it from scratch so the doorcard was fibreglassed where needed
this is the bit that was basically rebuilt
And this is the OEM speaker location that i was relocating my window switches to
As you can see comparing it to an OEM-ish doorcard a lot was removed from the card so the back was fibreglassed as well
The doorcard slips onto the door as it should as can be seen here
and the door closes without fowling the relocated position of the window switches
BUT during some point in fibreglassing the doorcard to rebuild the bit of it and fibreglassing the back of the card to give it a bit more strength it has shifted so the screw holes dont line up properly anymore so i wont be able to get the doorcard to fit correctly at all so it looks like its back to the drawing board - shame really as some more sanding and this part of the card would be ready for its carpeting but hey ho - one of those things
Ok so i attempted to repair where the doorcard had warped by cutting it out - bolting it to the door and re-doing it but no joy
So onto a new plan with the doors, the doorcard is currently cut to the extreme so it is just a frame basically, the only bit of plastic surviving is where the doorhandle goes. What i intend to do is use a solid run of MDF to fill that gap giving me a nice smooth strong surface to work on, then it will be tidied up with fibreglass/bodyfiller before being covered in carpet. I lost the nice swooping curve on the door unfortunatly but ah well - when your going OTT sometimes you just have to go OTT
However - I did have one problem that needed some thunking, for Mong-deo owners you will know that under the doorhandle is where the card bolts to the door, this is actually a piece of metal screwed to the door but as i have lost that entire area i had no way to secure it in the centre of the door. That was until i walked arounds B&Q after getting my wood cut for the doors.
What i have done is bought some fixing washers and a run of PVC pipe, i will remove the metal lip on the door that the doorcard originally bolted to and using the fixing washers/PVC pipe i will be able to secure the card to the OEM location. I will update the thread tomorrow with pics
Well i thought i would update this thread with what’s happening on the car so far.
Absolutely nothing, i took the decision to keep it out of competition this year and throw some money at it.
The reason for this is just so i can have the time and spare money to refresh it, I am planning the following
-Replace the OEM self levelling shocks with new OEM self levelling shocks
-Replace the front springs and dampers with new OEM springs and dampers
-visual check of suspension bushes and replacement if needed
The reason is because as far as i can tell the dampers at least are the ones that were fitted to the car back when it rolled out of the factory
-Replace aux belt, aux belt tensioner, aux belt camshaft pulley
This is a known weak point on these cars and again its just a precaution due to the stress i put on the aux belt
-Full service
Needs no explanation
-Respray
This is just to sort the paintwork out, its got 115thousand miles of stonechips - a bad scrape that i did and some rust on the rear door where the previous owner had the door re-skinned on the cheap. Im not changing the colour of the car as i quite like it but it will be easier just to get the enire thing resprayed - plus that way it means that the paint is the same colour (it currently isnt - you can see where previous paintjobs have been as it is a different shade)
-Graphics
Nothing daft, just a couple of black lines at the bottom of the doors fading out as they approach the rear wheels with a DB Drag racing logo just behind the front wheel, advert for the bodyshop on the rear window and when its finished im going to try and blag sponsorship so that will go on the rear side windows
-Wheels
Again just the OEM 16's the car came on but they will be refurbished and resprayed, im thinking either Antracite or black to contrast against the light paintwork
-Carbon fibre
My friend with the bodyshop is bloody good at wrapping things in propper carbon fibre so im thinking of getting the door handles, kick-strips and wing mirrors wrapped, this is only a thought at the moment as i dont want it looking stupid, Im trying to make the exterior of the car look like Ford could have done it
-Install
This is where it will be all change, i currently have 8 12's in a 6th order bandpass box but this is changing. I have two designs in mine, one is a 6th order bandpass with 2 18inch speakers
Or a 4th order with 16 12inch speakers
Now those sketchup designs are actually to scale so i have space for both, i just need to weigh up the pro's and cons of both designs as they both have positives and negatives
pistonpie said:
brilliant thread to show others how to piss your money away 
why not just buy a half decent car? no doubt i'll get responses saying 'good on him for being different' 'it's his money' etc etc...just seems utterly pointless to me.
Ok so - what do you drive? I noticed that your garage is currently emptywhy not just buy a half decent car? no doubt i'll get responses saying 'good on him for being different' 'it's his money' etc etc...just seems utterly pointless to me.
And as it has been previously mentioned in this thread a slightly oddball mondeo is a good thing to see in a sea of boring repmobiles. Besides whats wrong with a Mondeo - it is a decent car
Now in regards to utterly pointless I regard golf as being utterly pointless but would not comment on someone if they enjoyed golf
TomTheTyke said:
indeed in the world of cars anything other than a golf diesel could be called utterly pointless but then PH would be pretty dull. All that i.c.e. isn't my cup of tea either but it's the OP's money, he's clearly slightly mental but fair play!
i take offence to that, im not slightly mental - im completely mentalRight well due to ill health ive not been able to do much to the car until recently so this is what ive been up to
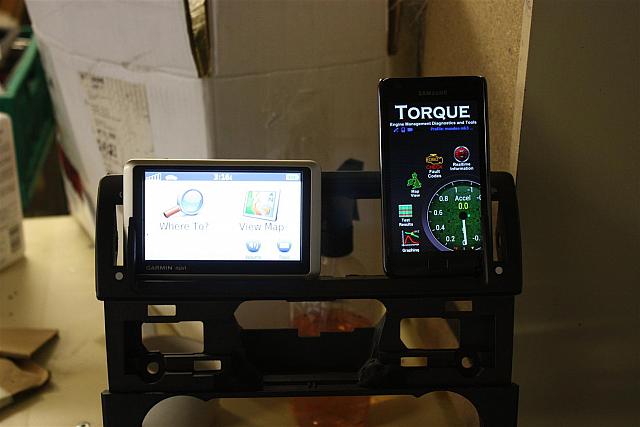
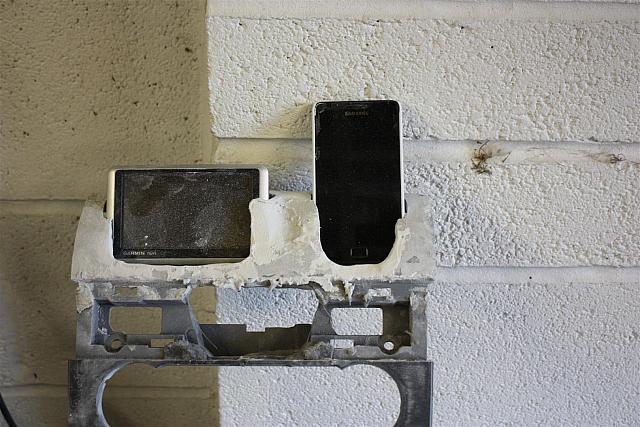
I just got a ODB2 bluetooth dongle and the torque application on my android phone so i can pull allsorts of data from the ECU and have it show a ton of extra stuff but the car has nowhere to hold the phone
this was my idea

So i got a spare centre console and got the vents out of it and took the metal trim piece off where the heater controls would be
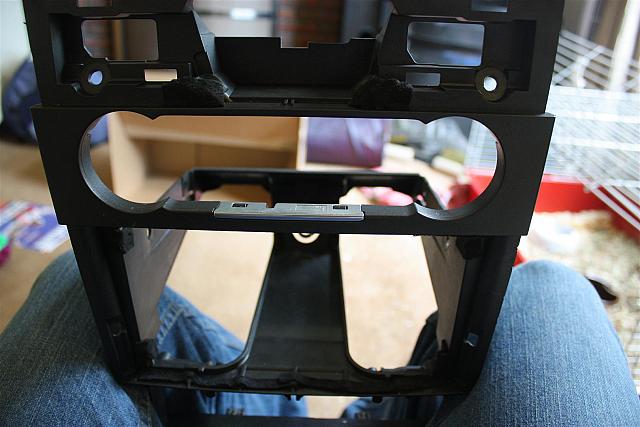
So a bit of chopping about and i have a nice slid-in mount for the phone and slag-nav
So to give it some strenght i fibreglassed the front up

and as you can see i the phone and nav slide down

So then use some spare cable trunking to make centre mounts for the nav and phone
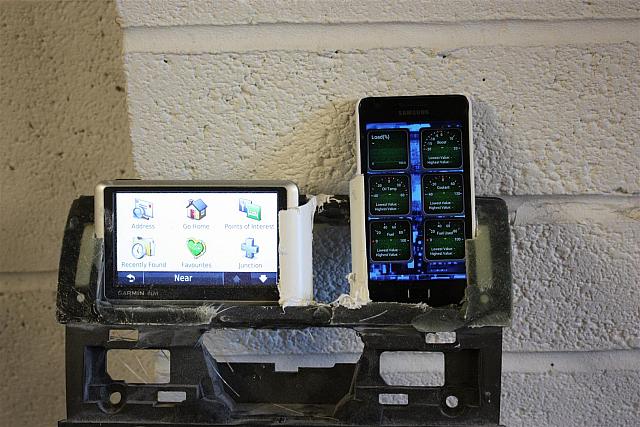
block off the back of the hole and re-inforce the centre mounts
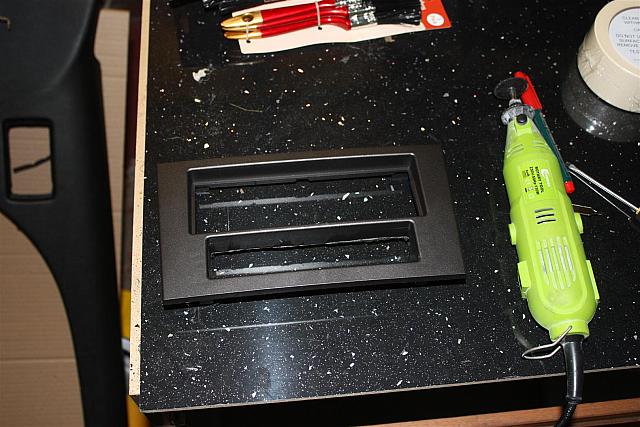
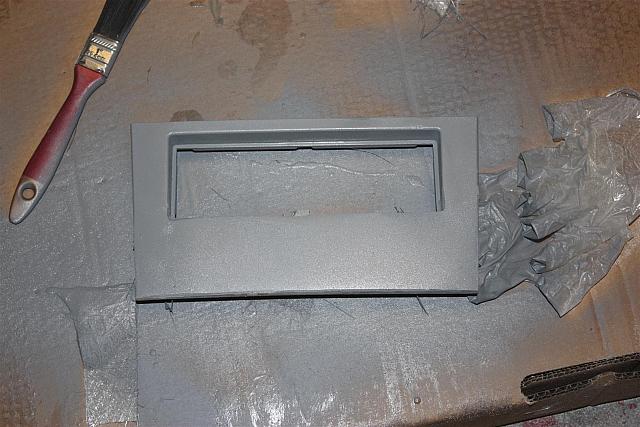
The other thing ive been working on is the headunit fascia adapter, as the Mundane comes with a double-din unit and i have a single DIN headunit the manufacturers put a pocket in the adapater, i needed this blank to mount my voltmeter and epicentre control so
Chop the pocket off
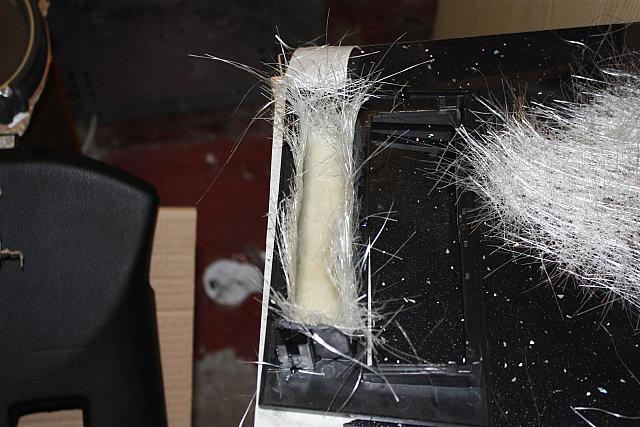
Then fill the hole with fibreglass
And then when that is dry get the front fibreglassed and sanded down flat-ish
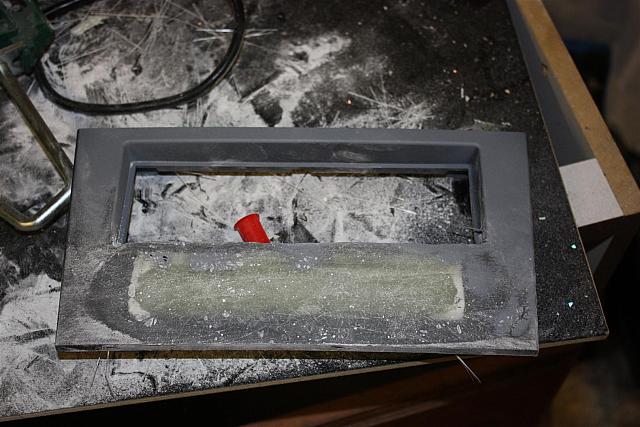
then some bodyfiller
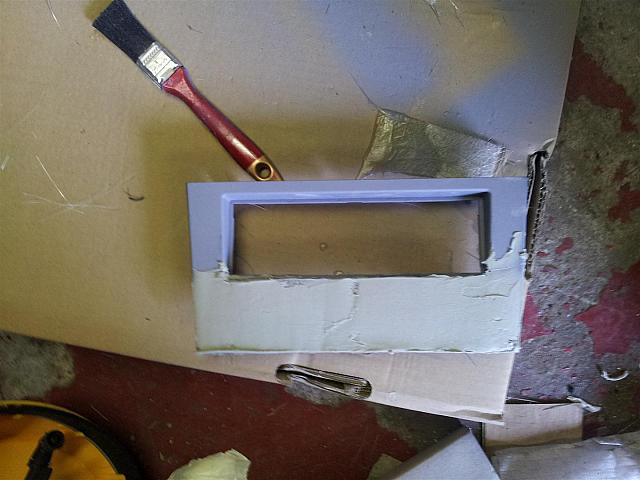
Once that is dry a quick sand down to make it smooth and flat, then prime the fascia adapater
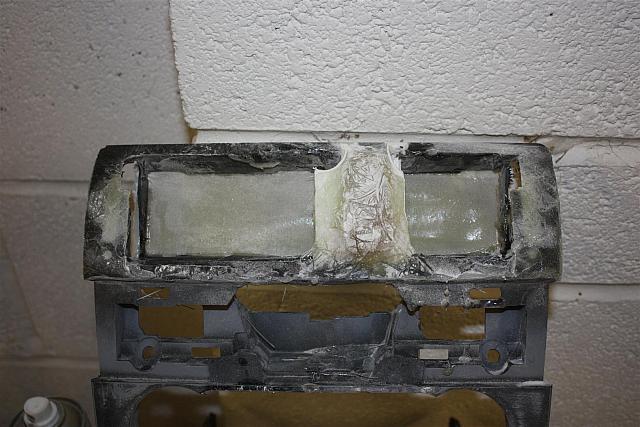
So now im just waiting for the fibreglass that holds the satnav and phone to dry before fillering it smooth
After that i need to sort out hard-wiring the power adapters for the phone and nav
I just got a ODB2 bluetooth dongle and the torque application on my android phone so i can pull allsorts of data from the ECU and have it show a ton of extra stuff but the car has nowhere to hold the phone
this was my idea
So i got a spare centre console and got the vents out of it and took the metal trim piece off where the heater controls would be
So a bit of chopping about and i have a nice slid-in mount for the phone and slag-nav
So to give it some strenght i fibreglassed the front up
and as you can see i the phone and nav slide down
So then use some spare cable trunking to make centre mounts for the nav and phone
block off the back of the hole and re-inforce the centre mounts
The other thing ive been working on is the headunit fascia adapter, as the Mundane comes with a double-din unit and i have a single DIN headunit the manufacturers put a pocket in the adapater, i needed this blank to mount my voltmeter and epicentre control so
Chop the pocket off
Then fill the hole with fibreglass
And then when that is dry get the front fibreglassed and sanded down flat-ish
then some bodyfiller
Once that is dry a quick sand down to make it smooth and flat, then prime the fascia adapater
So now im just waiting for the fibreglass that holds the satnav and phone to dry before fillering it smooth
After that i need to sort out hard-wiring the power adapters for the phone and nav
So todays updates so far
Head-unit adapter has had a few coats of black spraypaint
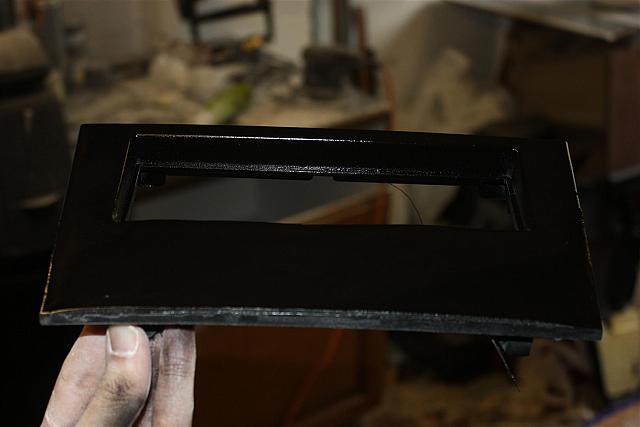
Going to do a couple more, once that is done i can work out where the voltmeter and epicentre dials are going on it
Sat-nav/phone mount has been fillered and sanded a bit
Currently waiting for it to dry fully so i can put another thin layer on to smooth off the bits that need it (IE under satnav and phone and middle section)
Then i can mount the power button for the nav and phone chargers on that raised panel inbetween the phone and nav
A rear view of the panel

and i just want to say this
I bloody HATE filler dust - this shirt and pair of yeans only went through the washer last night

Head-unit adapter has had a few coats of black spraypaint
Going to do a couple more, once that is done i can work out where the voltmeter and epicentre dials are going on it
Sat-nav/phone mount has been fillered and sanded a bit
Currently waiting for it to dry fully so i can put another thin layer on to smooth off the bits that need it (IE under satnav and phone and middle section)
Then i can mount the power button for the nav and phone chargers on that raised panel inbetween the phone and nav
A rear view of the panel
and i just want to say this
I bloody HATE filler dust - this shirt and pair of yeans only went through the washer last night
Gassing Station | Readers' Cars | Top of Page | What's New | My Stuff