Scratch built car
Discussion


Sorry about that thumbsnap was not working
Update
I got the sheet metal for the floor welded in and then started on the tunnel. After finishing the tunnel I sealed the joints and got some paint on the metal. I ordered a length of CDS tube for the role bar and had the local shop put a couple of bends in it and then welded it to the support beam.
bonechuka said:
Absolutely fantastic, my only question is when the build is complete can you get it out of the garage because from the pictures it looks almost same size as the doors. This is still like a massive inspiration for me nonetheless  in fact cloud 9 is not enough
Thanks very much, a picture with rolling chassis outside. The wheels/tyres are just for moving it around and they will be replaced next year which will reduce the width to 1920mm. (The garage doors are 2100mm) in fact cloud 9 is not enough 


Storer said:
I admire your ambition and skill No Sound.
The biggest problem with building your own chassis/car is SVA.
My plan is to avoid SVA and MOT's. Too much bureaucracy.
I am building something that will generate smiles per mile, make someone's day, inspire others to be different.
Paul
Hi Paul your project looks good and I understand about wanting to avoid the BIVA test. But the point of the project was to build a car from scratch a one off, one in the world sort of thing. So yes problems with glass and other specifications but can it be done? and I think yes. The test is hard but at least you know the car is up to it and its safe and well made. AndyThe biggest problem with building your own chassis/car is SVA.
My plan is to avoid SVA and MOT's. Too much bureaucracy.
I am building something that will generate smiles per mile, make someone's day, inspire others to be different.
Paul
Edited by No Sound on Saturday 27th July 22:30


The plan was to buy an XJS windscreen and seal, fit the seal to the windscreen and then build a frame to fit the profile of the windscreen/seal.
Anyway the aftermarket seal was too big for the windscreen so I checked the seal specification with the supplier who told me the seal is normally big on the glass (50mm) but not on the frame, two piece seal you see (I got a refund)
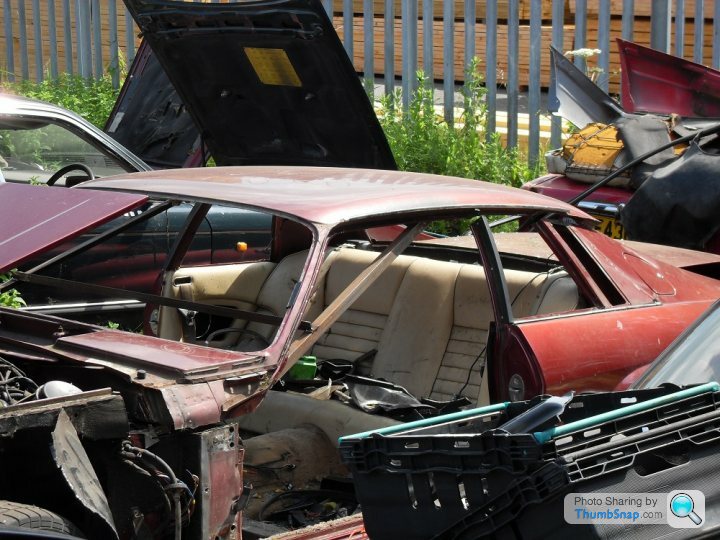
So I went to the scrappy to get a frame, once at the scrappy I found out that the windscreen wiper mechanism is a lift out unit that fits into the front valance (great stuff) so why not just cut out the windscreen frame and quarter of the bulk head. Then I look at the roof and thought why not. The scrappy man was a bit confused.


Anyway the aftermarket seal was too big for the windscreen so I checked the seal specification with the supplier who told me the seal is normally big on the glass (50mm) but not on the frame, two piece seal you see (I got a refund)
So I went to the scrappy to get a frame, once at the scrappy I found out that the windscreen wiper mechanism is a lift out unit that fits into the front valance (great stuff) so why not just cut out the windscreen frame and quarter of the bulk head. Then I look at the roof and thought why not. The scrappy man was a bit confused.
andygtt said:
Aha you welded a steel sheet under the seats, this is what i've done on mine for safety :-) I also have a scratch build so understand you desire for a total 1 off as that's the reason I have gone the same route.
I'm very keen to see what you plan for the body as you must have an idea as you've already made the frame for the doors lol.
Safety has been a major factor with the design, including a steel floor, front and rear fire walls, side impact protection, roll bar and a front energy absorbing crash beam. I am just getting around to the door design over the next few weeks. I'm very keen to see what you plan for the body as you must have an idea as you've already made the frame for the doors lol.
Do you have a build thread? I would like to see some pictures, not many scratch built cars around.
Trial fit of the roof. Always intended changing the intake and twin carbs setup for a lower intake and a single carb. But with roof on the position of the bulkhead is to far back in relation to the door openings and were the door seal edges need to be extended from the chassis onto the Jag frame/roof. So I need to change the distributor and make a new bulkhead so the bulkhead can be moved forward and sit over the distributor and up against the single carb.


Gassing Station | Readers' Cars | Top of Page | What's New | My Stuff