Discussion


So update
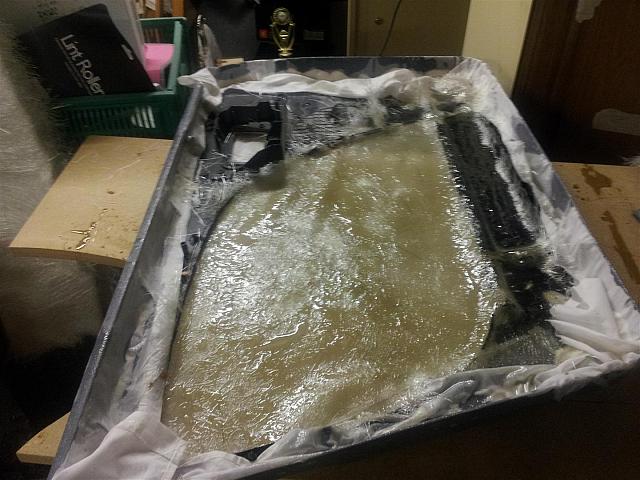
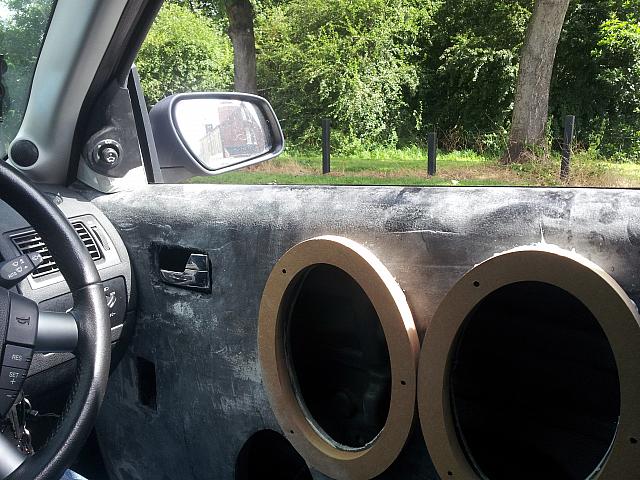
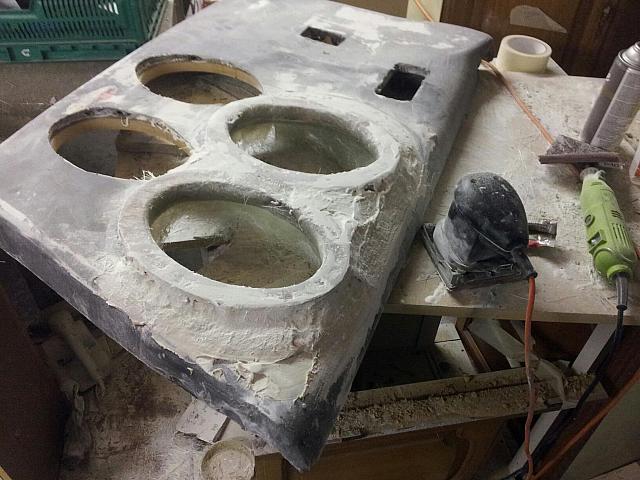
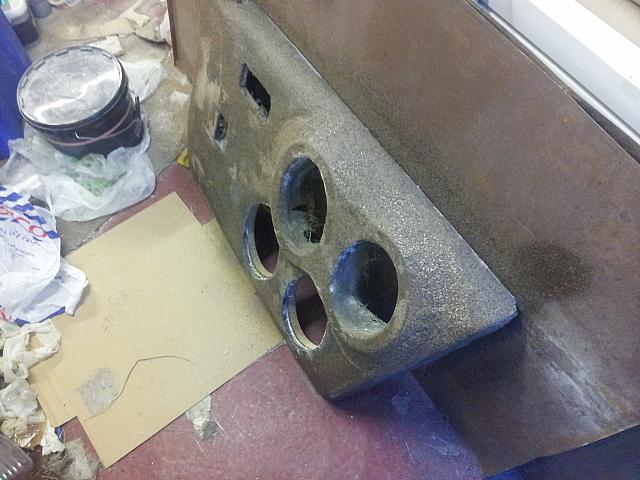
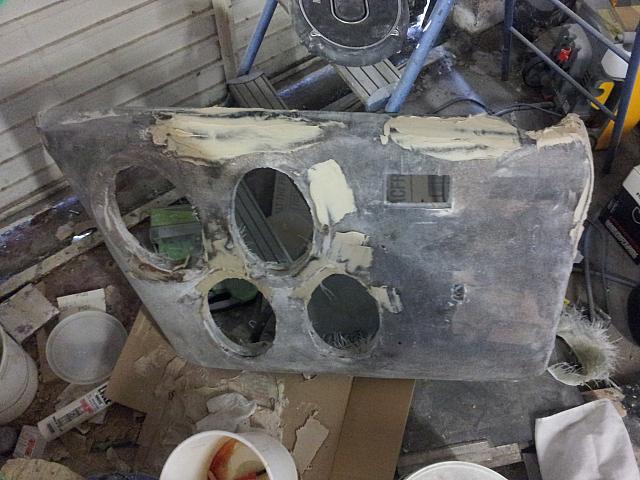
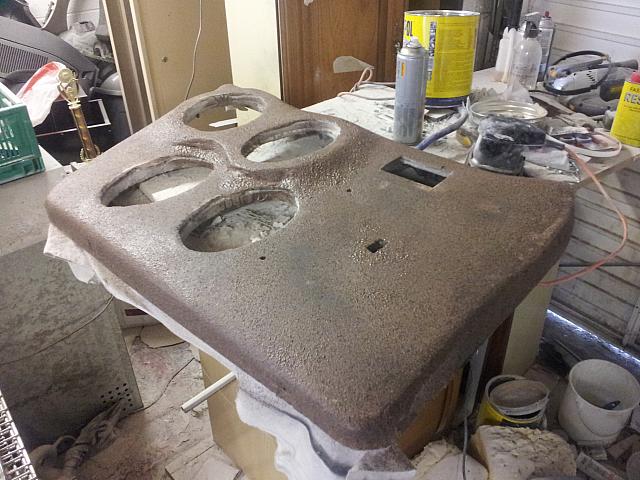
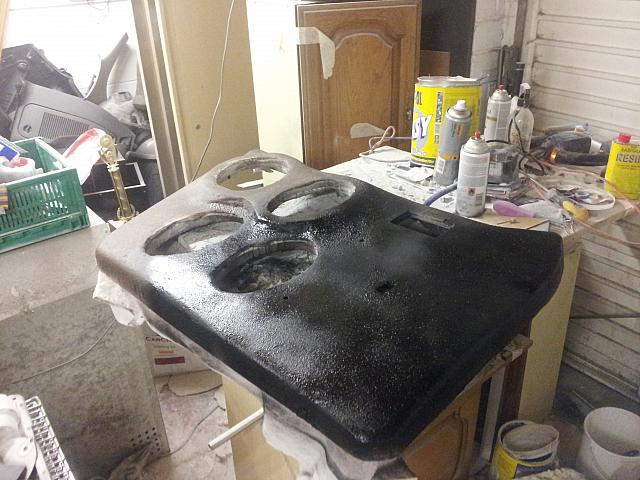
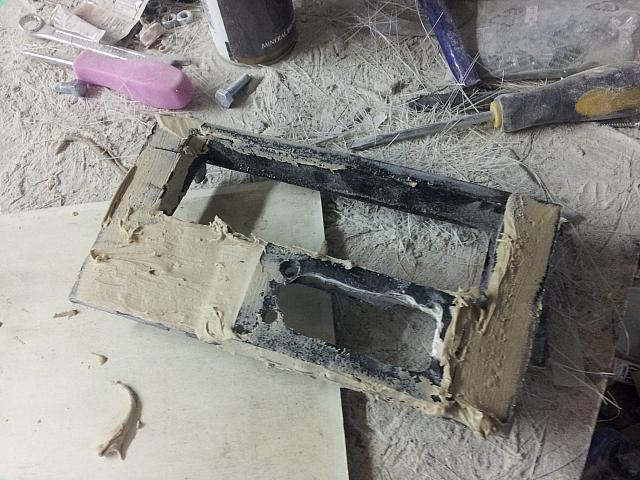
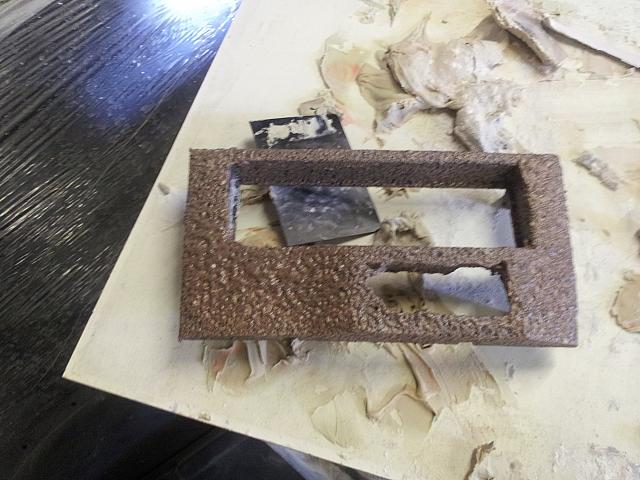
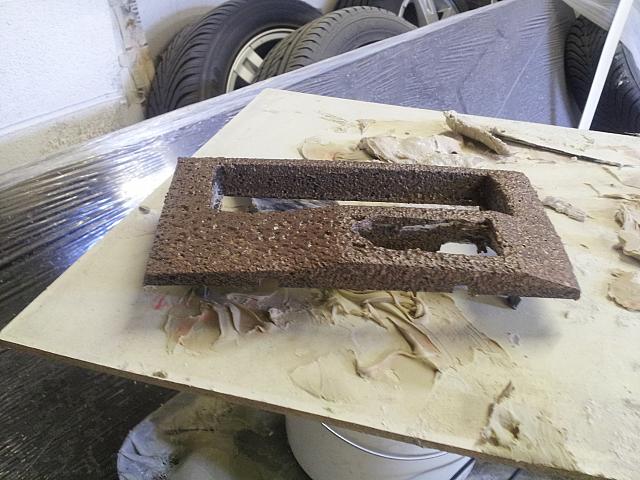
I found a stone effect paint in B&Q that gave a nice texture so primed the panel, sprayed it with the stone effect and then left it overnight before a coat of matt black was sprayed on
TBH the panel is not what you would call brilliant at this point in time BUT its the first time i used bodyfiller and first successful use of fibreglass so im going to use the panel and when my skills are better i will make another one
So onto the power for the phone/satnav - the problem i have had is the phone and satnav are immensely picky about chargers, if the phone is not happy it either does not charge or reports voltage too high Charging stopped and the satnav just goes into PC connect mode, this means that you cant actually use it
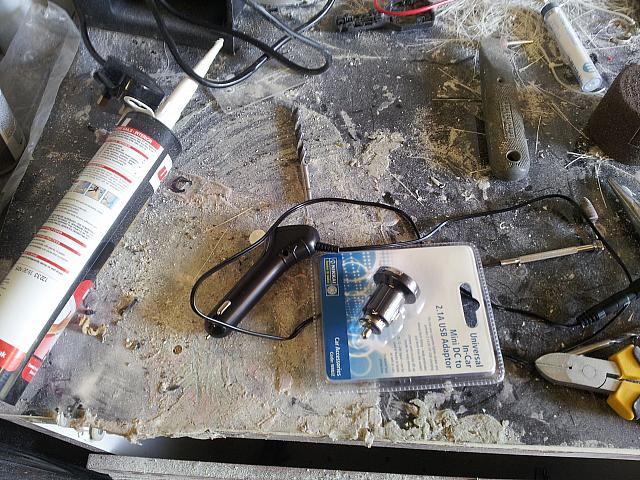
So i found a cig lighter adapter that charges the phone and i am using a garmin original charger for the nav
Next step was to buy a cigarette lighter splitter to make life easy for myself (Ie use that to run the two cigratette lighter PSU's) BUT i found that the phone charger even though it works plugged into the cigarette lighter it does not work when plugged into the cigarette lighter splitter, why it does not work i cannot workout but the USB charge port on the splitter charges the phone
So the plan now is as follows
Feed from the front battery (live and ground to the cabin) fused at 5-8amp
Plug from Cigarette lighter splitter removed
Wire switch between the power feed from the front batt to the cigarette lighter splitter
Mount splitter behind glovebox for easy access if needed in future
Run Satnav charging cable and phone USB charging cable to dash
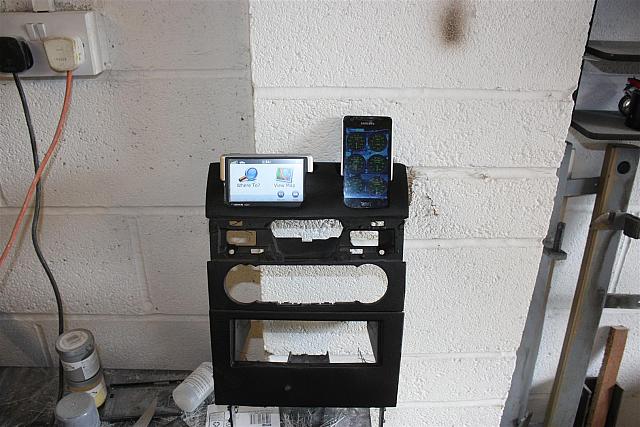
Fit the custom centre console i made
I found a stone effect paint in B&Q that gave a nice texture so primed the panel, sprayed it with the stone effect and then left it overnight before a coat of matt black was sprayed on
TBH the panel is not what you would call brilliant at this point in time BUT its the first time i used bodyfiller and first successful use of fibreglass so im going to use the panel and when my skills are better i will make another one
So onto the power for the phone/satnav - the problem i have had is the phone and satnav are immensely picky about chargers, if the phone is not happy it either does not charge or reports voltage too high Charging stopped and the satnav just goes into PC connect mode, this means that you cant actually use it
So i found a cig lighter adapter that charges the phone and i am using a garmin original charger for the nav
Next step was to buy a cigarette lighter splitter to make life easy for myself (Ie use that to run the two cigratette lighter PSU's) BUT i found that the phone charger even though it works plugged into the cigarette lighter it does not work when plugged into the cigarette lighter splitter, why it does not work i cannot workout but the USB charge port on the splitter charges the phone
So the plan now is as follows
Feed from the front battery (live and ground to the cabin) fused at 5-8amp
Plug from Cigarette lighter splitter removed
Wire switch between the power feed from the front batt to the cigarette lighter splitter
Mount splitter behind glovebox for easy access if needed in future
Run Satnav charging cable and phone USB charging cable to dash
Fit the custom centre console i made
Yea my thoughts are it looks better and is more ergonomic than having cradles for the phone/nav jutting out of the windscreen at all angles and safer than having charging cables allover the place
I just need to get it finished so i can start considering the doorcards as that will be a very big difficult job
I just need to get it finished so i can start considering the doorcards as that will be a very big difficult job
Ok so i had some time to think about how to intergrate the RaspberryPi board running RaspBMC into the install and this is about as far as i have got
This is the list of goals i have for the Pi
Connect to my Android Phone when it is setup as a wifi hotspot for internet access
Controllable from my Android phone using XBMCRemote
Have access to a hard drive storing music videos
Output video to composite
Composite video split to 6 to 8 screens
Infra red controlable
So the first step is power
I have plenty of battery power in the car (im fused at 300amp to the rear battery rack) but its making a nice hard wired way to power the Pi
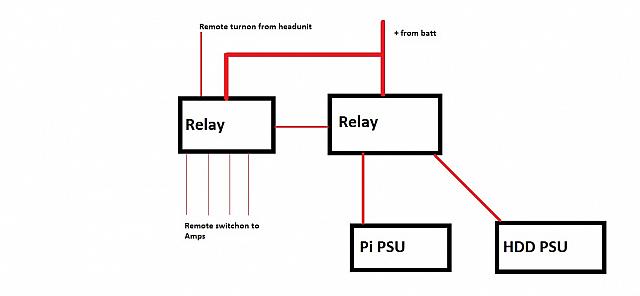
On the back of aftermarket headunits they have what is called a remote out so when the headunit is turned on it sends voltage down this cable to trigger amps/processors to turn on, i already have a relay off this feed to switch on the amplifiers in the car. The relay has a spare output so im going to use that to fire a 2nd relay
This 2nd relay will be connected to a butchered USB Cigarette lighter charger, this should also allow me to power a USB hard drive as well, below is a very bad MSPaint of the wiring for it
Now the video and audio
My headunit has a screen built in and that feeds the rear view camera, on its Aux in it has a feed for video as well so that is two screens dealt with. In order to avoid picture quality degredation of composite i will be using a video signal booster to help it out
Below is the planned wiring for the video - the audio will also feed from the Pi to the headunit and from there the wiring for the rest of the car will stay the same

Now i have tested my phone and i know it can work as a Wifi hotspot so that is one less thing to worry about, im just waiting for RC4 to be released with known working wifi adapters to make life easier
Things that i have not got working
As i have an aftermarket headunit that has its own IR remote and when the headunit is in Aux mode it ignores most of the buttons, i was hoping to get RaspBMC to work with this remote but after trying multiple IR recievers it does not work, its not a fault with the Pi or RaspBMC - its just that the recivers ignore the remote (i have tested this by running IRW on a SSH session and firing commands from the headunit remote and my Media centre remote - i get responses from the media centre remote but not the headunit remote) so i either need to think about having a media centre remote in the car as well or hacking up a keyboard and making a control panel
This is the list of goals i have for the Pi
Connect to my Android Phone when it is setup as a wifi hotspot for internet access
Controllable from my Android phone using XBMCRemote
Have access to a hard drive storing music videos
Output video to composite
Composite video split to 6 to 8 screens
Infra red controlable
So the first step is power
I have plenty of battery power in the car (im fused at 300amp to the rear battery rack) but its making a nice hard wired way to power the Pi
On the back of aftermarket headunits they have what is called a remote out so when the headunit is turned on it sends voltage down this cable to trigger amps/processors to turn on, i already have a relay off this feed to switch on the amplifiers in the car. The relay has a spare output so im going to use that to fire a 2nd relay
This 2nd relay will be connected to a butchered USB Cigarette lighter charger, this should also allow me to power a USB hard drive as well, below is a very bad MSPaint of the wiring for it
Now the video and audio
My headunit has a screen built in and that feeds the rear view camera, on its Aux in it has a feed for video as well so that is two screens dealt with. In order to avoid picture quality degredation of composite i will be using a video signal booster to help it out
Below is the planned wiring for the video - the audio will also feed from the Pi to the headunit and from there the wiring for the rest of the car will stay the same
Now i have tested my phone and i know it can work as a Wifi hotspot so that is one less thing to worry about, im just waiting for RC4 to be released with known working wifi adapters to make life easier
Things that i have not got working
As i have an aftermarket headunit that has its own IR remote and when the headunit is in Aux mode it ignores most of the buttons, i was hoping to get RaspBMC to work with this remote but after trying multiple IR recievers it does not work, its not a fault with the Pi or RaspBMC - its just that the recivers ignore the remote (i have tested this by running IRW on a SSH session and firing commands from the headunit remote and my Media centre remote - i get responses from the media centre remote but not the headunit remote) so i either need to think about having a media centre remote in the car as well or hacking up a keyboard and making a control panel
Ok so i had chance to play with the RaspberryPi board and get it working sucesfully off a dc power supply with a external HDD so its now on a burn-in test
here is a quick video of it in test mode
http://www.youtube.com/watch?v=mVPA7i3-VUA
If it works fine for the next few hours i will be setting up Wifi on it so it will see my phone as an access point
here is a quick video of it in test mode
http://www.youtube.com/watch?v=mVPA7i3-VUA
If it works fine for the next few hours i will be setting up Wifi on it so it will see my phone as an access point
So a bit more config done with the RaspberryPi board for incar use
http://www.youtube.com/watch?v=vRqX5_9YcyE
As you can see by the vid it is not far off ready to be fitted
http://www.youtube.com/watch?v=vRqX5_9YcyE
As you can see by the vid it is not far off ready to be fitted
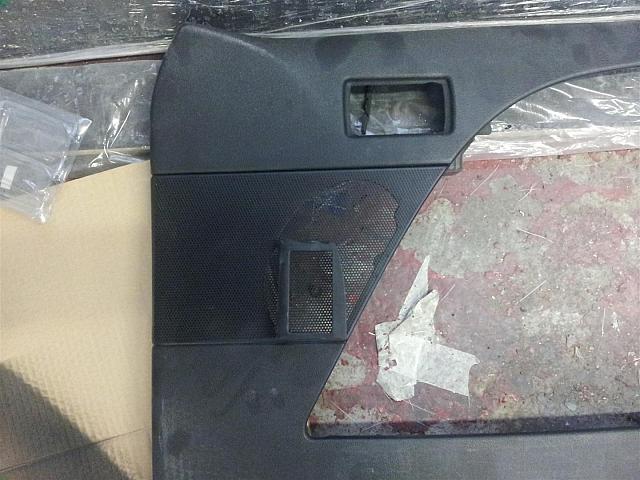
So a bit of work on the doorcards
As the place where the windows switch does not exist anymore it needed moving
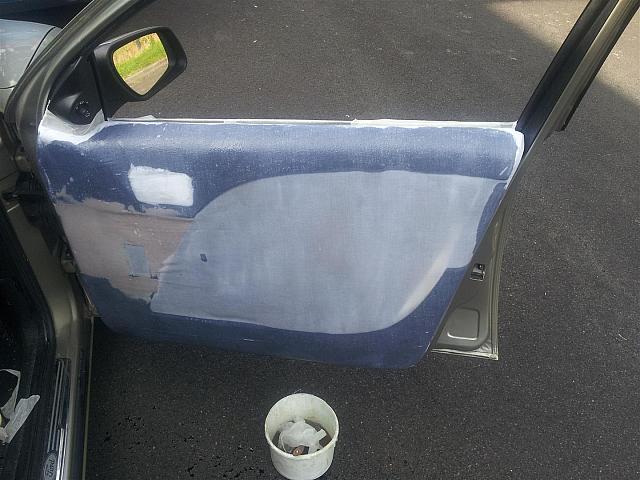
Some filler over to level it out

Then cover the doorcard in fabric tightly

Tape up the important bits of the door

Put the doorcard on the door and screw it inplace

Resin the door and allow it to dry so it should keep its shape
Removed doorcard and put it in the garage, add some more resin and matting to give it strength
now to leave it to dry and then once it is dry back into the door to make sure it has not moved about when drying
As the place where the windows switch does not exist anymore it needed moving
Some filler over to level it out
Then cover the doorcard in fabric tightly
Tape up the important bits of the door
Put the doorcard on the door and screw it inplace
Resin the door and allow it to dry so it should keep its shape
Removed doorcard and put it in the garage, add some more resin and matting to give it strength
now to leave it to dry and then once it is dry back into the door to make sure it has not moved about when drying
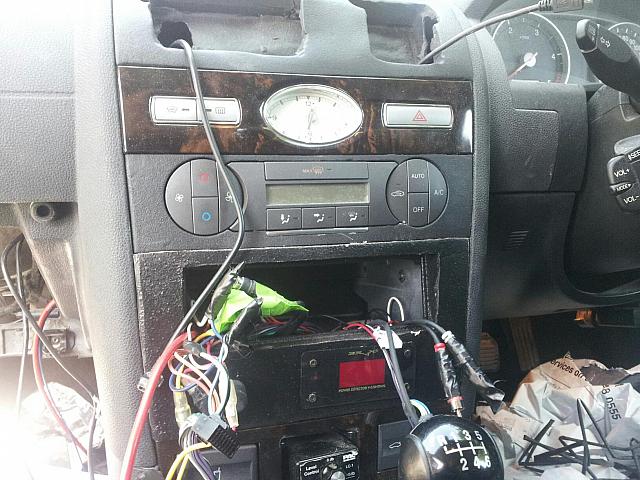
ok so quick update
I got the centre console in
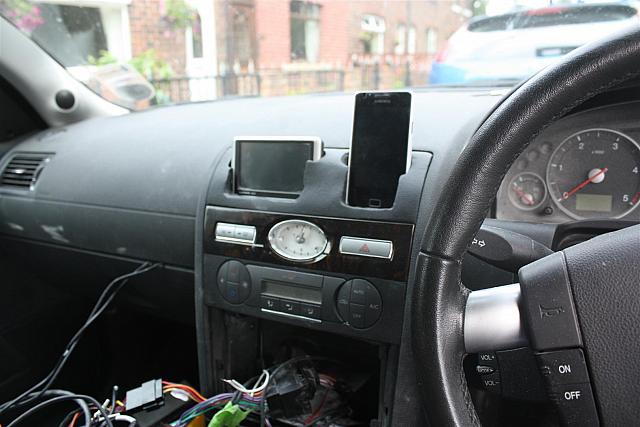
Still to wire up the power supplys for the phone/nav and fit the headunit
Unfortunately i did kill to death my Brax Voltmeter so i need to get another one of them
The next step is to get the glovebox out to mount the Pi in it and then to attack the wiring for the Pi, nav and phone
I got the centre console in
Still to wire up the power supplys for the phone/nav and fit the headunit
Unfortunately i did kill to death my Brax Voltmeter so i need to get another one of them
The next step is to get the glovebox out to mount the Pi in it and then to attack the wiring for the Pi, nav and phone
Cheers for the link - it was interesting
So a bit more of an update
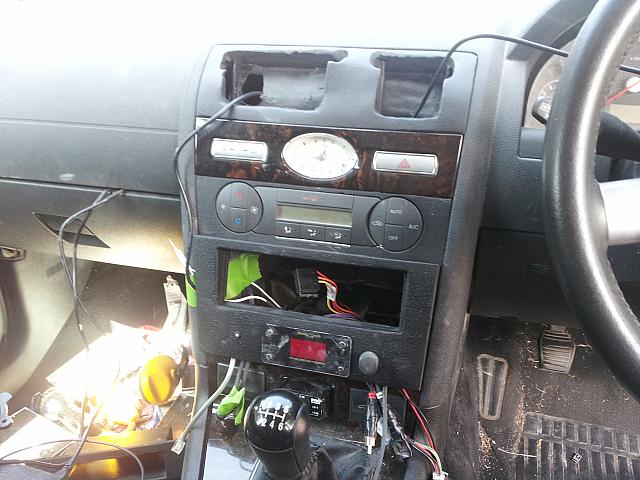
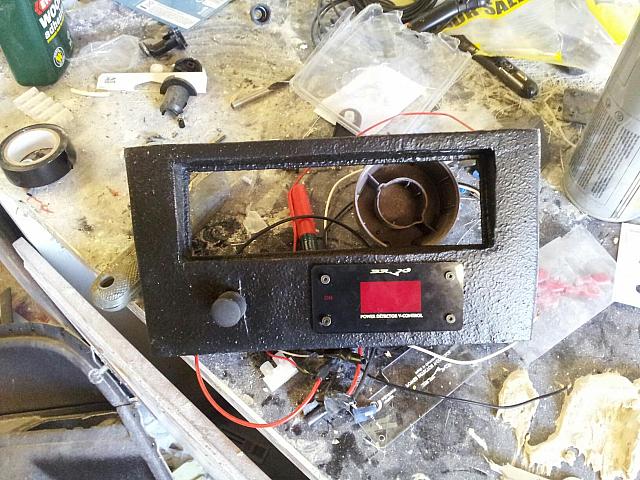
The Brax is utterly 100% dead but as im going to replace it with another Brax i can use this as a template so this is the facia adapter for the headunit as it stands now

On the left hand side is the Epicentre LED status - inbetween is the Brax voltmeter and on the far side is the epicentre dial. I am currently just waiting for the coat of paint i put on the dry, it may need sanding off and a layer of the textured stuff putting down and then a layer of the black matt paint
So the doorcards
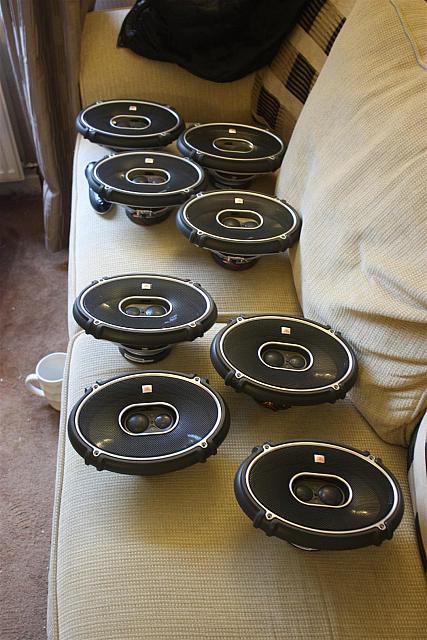
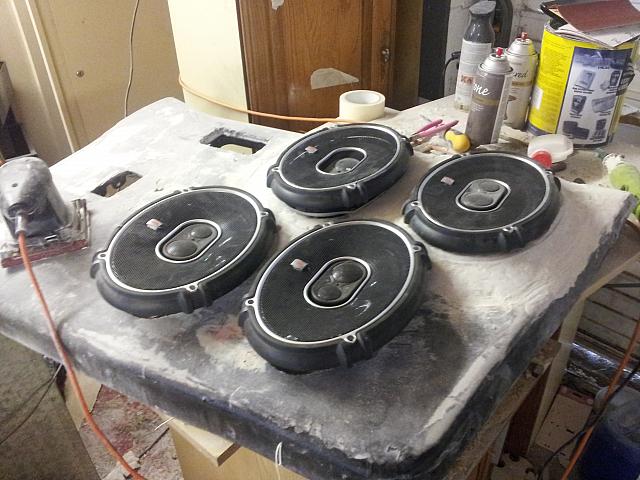
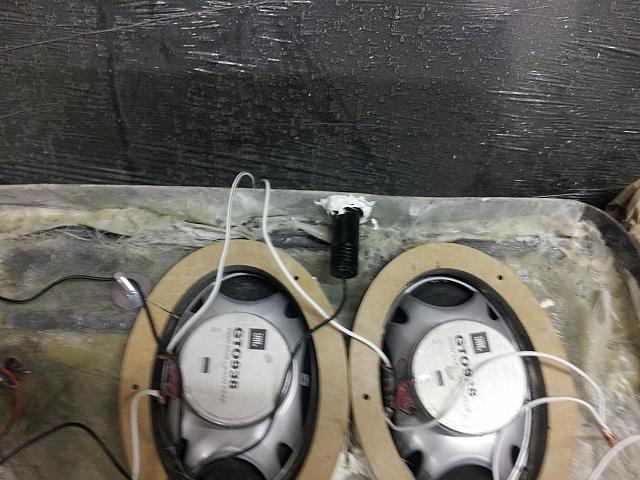
Today i got the delivery of the 6x9 baffles i ordered so i can start looking at how to lay them out, i came up with the ideas below
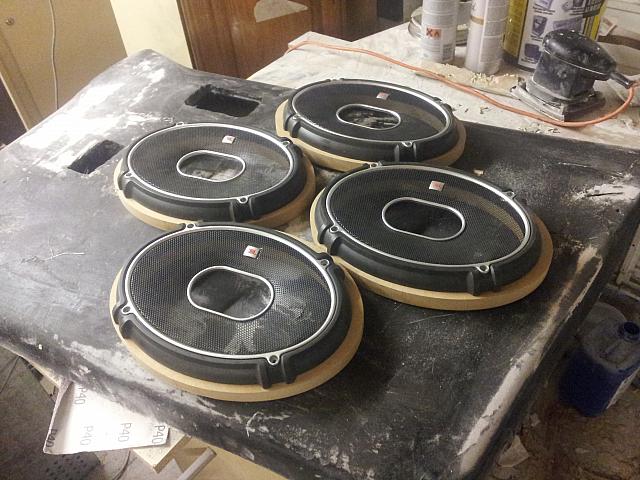
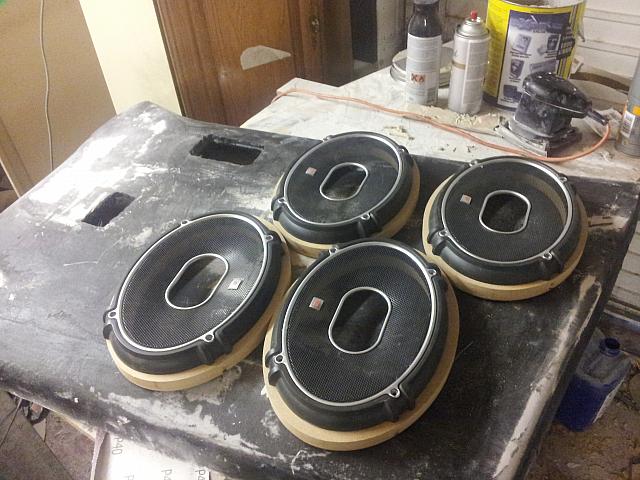
So i was going to take them to the doorcard and try it on the car to make sure nothing fowls but the heavans have opened so i cant do that - i intend to do it tomorrow, most of the baffes will go behind the doorcard but i think the speaker(s) at the top of the card will need the baffle ontop of the card due to depth but we shall see tomorrow
So a bit more of an update
The Brax is utterly 100% dead but as im going to replace it with another Brax i can use this as a template so this is the facia adapter for the headunit as it stands now
On the left hand side is the Epicentre LED status - inbetween is the Brax voltmeter and on the far side is the epicentre dial. I am currently just waiting for the coat of paint i put on the dry, it may need sanding off and a layer of the textured stuff putting down and then a layer of the black matt paint
So the doorcards
Today i got the delivery of the 6x9 baffles i ordered so i can start looking at how to lay them out, i came up with the ideas below
So i was going to take them to the doorcard and try it on the car to make sure nothing fowls but the heavans have opened so i cant do that - i intend to do it tomorrow, most of the baffes will go behind the doorcard but i think the speaker(s) at the top of the card will need the baffle ontop of the card due to depth but we shall see tomorrow
So todays update
resprayed the head unit adapater so it now looks better - just waiting on my replacement BRAX to arrive before i fit it
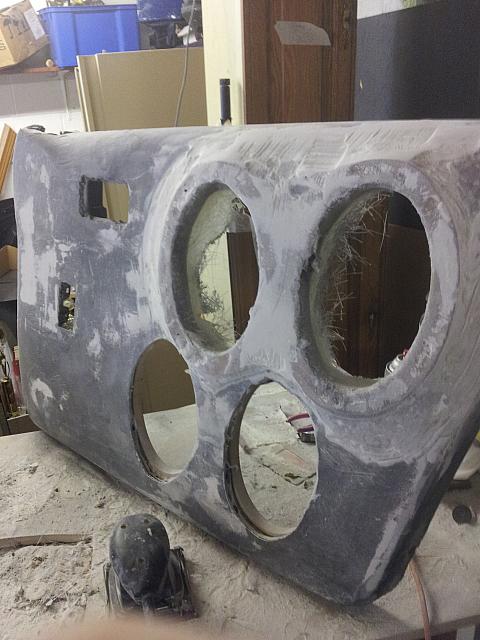
Cut the holes for the speakers in the doorcards and mounted the card to the door
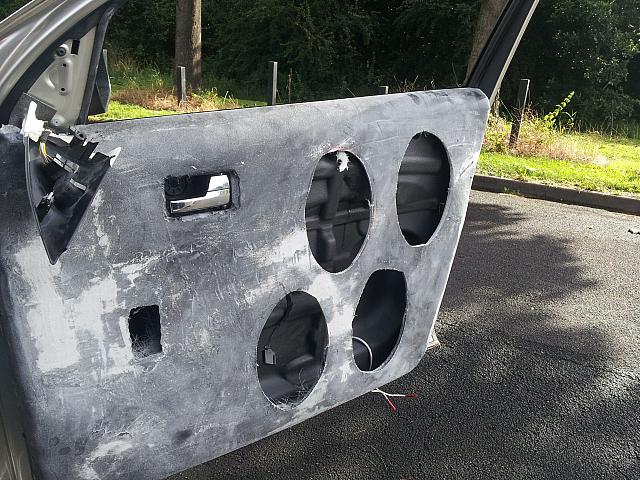
This was so i could check that i had enough mounting depth, unfortunatly due to how the door curves i do on the bottom but not on the top so on the bottom the MDF rings have gone behind the door and on the top of the door they need to go onto of the door
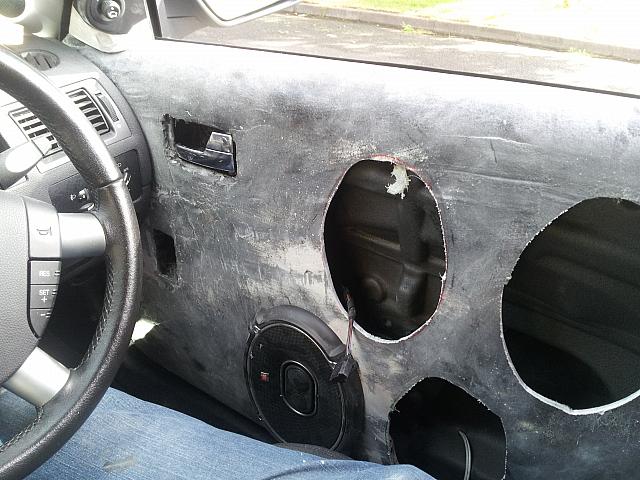
This means i will need to break out the filler to make it look decent but on a quick test they do not get in the way when driving
Now i also sorted out hard wiring the RaspberryPi power supply as well, this is what i started with
get the cases off
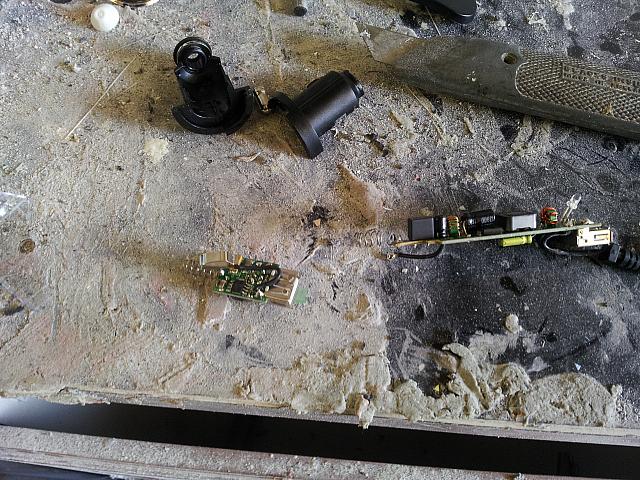
Now solder them together and put a fuse in
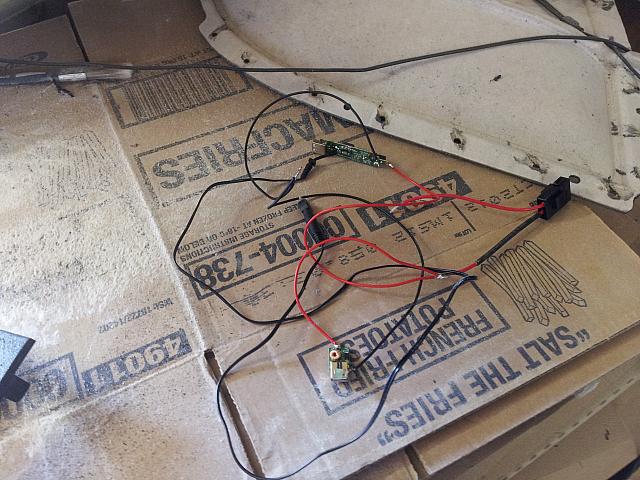
And as you can see the hard wired PSU is working fine in this test
http://www.youtube.com/watch?v=3xm8zL0d40k
resprayed the head unit adapater so it now looks better - just waiting on my replacement BRAX to arrive before i fit it
Cut the holes for the speakers in the doorcards and mounted the card to the door
This was so i could check that i had enough mounting depth, unfortunatly due to how the door curves i do on the bottom but not on the top so on the bottom the MDF rings have gone behind the door and on the top of the door they need to go onto of the door
This means i will need to break out the filler to make it look decent but on a quick test they do not get in the way when driving
Now i also sorted out hard wiring the RaspberryPi power supply as well, this is what i started with
get the cases off
Now solder them together and put a fuse in
And as you can see the hard wired PSU is working fine in this test
http://www.youtube.com/watch?v=3xm8zL0d40k
Ok so a bit more of an update, i got the drivers doorcard pretty much done


So now im onto the passenger door - agian that was covered in fabric, a layer of resin put over it, holes then cut for the speakers and the rings mounted
Currently waiting for fibreglass and resin to dry on the passenger doorcard
So now im onto the passenger door - agian that was covered in fabric, a layer of resin put over it, holes then cut for the speakers and the rings mounted
Currently waiting for fibreglass and resin to dry on the passenger doorcard
So updates
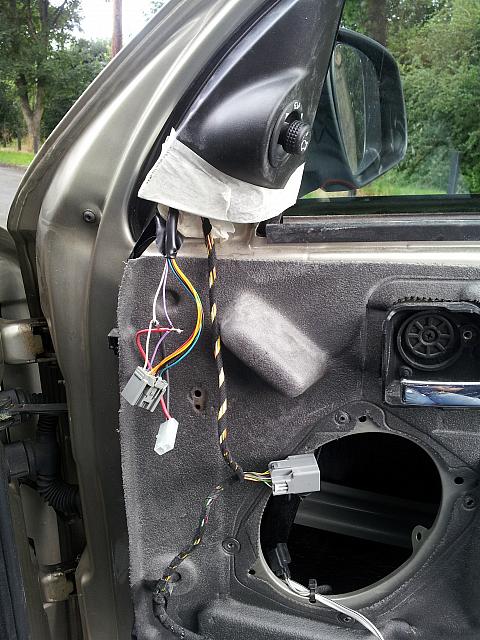
On my doors i have puddle lights in the wing mirrors - these are a bit weedy so i wanted to add a bit of a trick with them
So find the wires in the door loom, cut into them and solder on my own extra plug
Then solder the other plug onto the LED projector
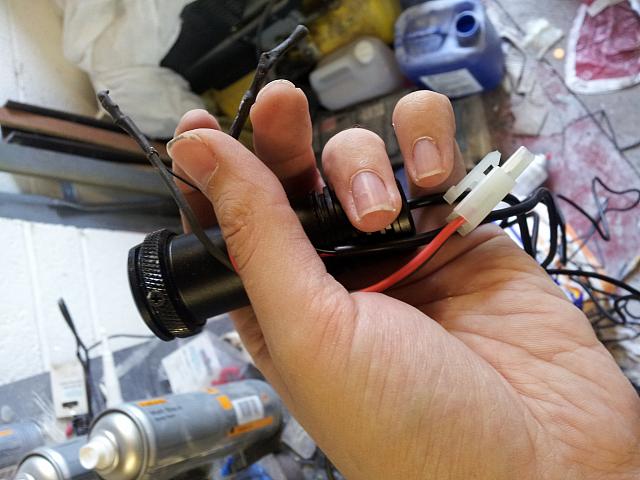
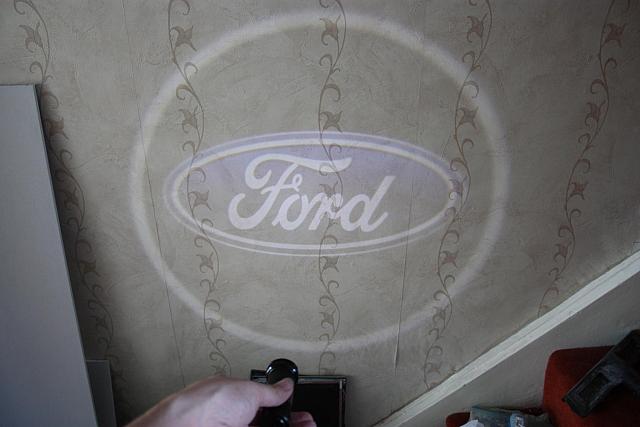
This is an LED projector that will do the following on the ground when the door is opened
So then mount the projector in the doorcard
now the drivers doorcard is pretty much done - just need to tidy the wiring up a bit
Onto the passenger doorcard
Final bits of sanding
Coat of the textured paint
Started to spray the doorcard black but ran out of paint - will have to finish tomorrow
So the centre console
The headunit facia adapter i made did not really work so i had another attempt at it
build up layers of bodyfiller to make the brax stand proud
Then once sanded smooth spray with textured paint and let dry
Just waiting for the black paint to dry then in the morning i can unblock the epicentre dial hole and make some adjustments if needed
On my doors i have puddle lights in the wing mirrors - these are a bit weedy so i wanted to add a bit of a trick with them
So find the wires in the door loom, cut into them and solder on my own extra plug
Then solder the other plug onto the LED projector
This is an LED projector that will do the following on the ground when the door is opened
So then mount the projector in the doorcard
now the drivers doorcard is pretty much done - just need to tidy the wiring up a bit
Onto the passenger doorcard
Final bits of sanding
Coat of the textured paint
Started to spray the doorcard black but ran out of paint - will have to finish tomorrow
So the centre console
The headunit facia adapter i made did not really work so i had another attempt at it
build up layers of bodyfiller to make the brax stand proud
Then once sanded smooth spray with textured paint and let dry
Just waiting for the black paint to dry then in the morning i can unblock the epicentre dial hole and make some adjustments if needed
So the drivers door has been fitted and quickly hooked up to an amp as a test
lowest gain setting and using an ipod as a source
http://www.youtube.com/watch?v=qKNgY2W9e0Q
Hey ive not had a drivers doorcard for over a year im pretty chuffed
lowest gain setting and using an ipod as a source
http://www.youtube.com/watch?v=qKNgY2W9e0Q
Hey ive not had a drivers doorcard for over a year im pretty chuffed

I got the projectors from here - http://britelightleds.co.uk/onlineshop/index.php?r...
In regards to the clock i really dont notice it
In regards to the clock i really dont notice it
So the headunit facia adapter did not work so i made it again
And after a bit of a fight i got it fitted
And i got the passenger door finished and fitted - quick video of the doors
http://www.youtube.com/watch?v=hD1h6zqcSVk
Still more to come one i get them turned up and setup as the amp gain is set to the minimum
And after a bit of a fight i got it fitted
And i got the passenger door finished and fitted - quick video of the doors
http://www.youtube.com/watch?v=hD1h6zqcSVk
Still more to come one i get them turned up and setup as the amp gain is set to the minimum
Gassing Station | Readers' Cars | Top of Page | What's New | My Stuff