Project: BMW E21
Discussion


First off, I'm new to the forum, so hello all 
This is a bit of a catch up post really, as I've already done some work on the BMW over the last couple of months.
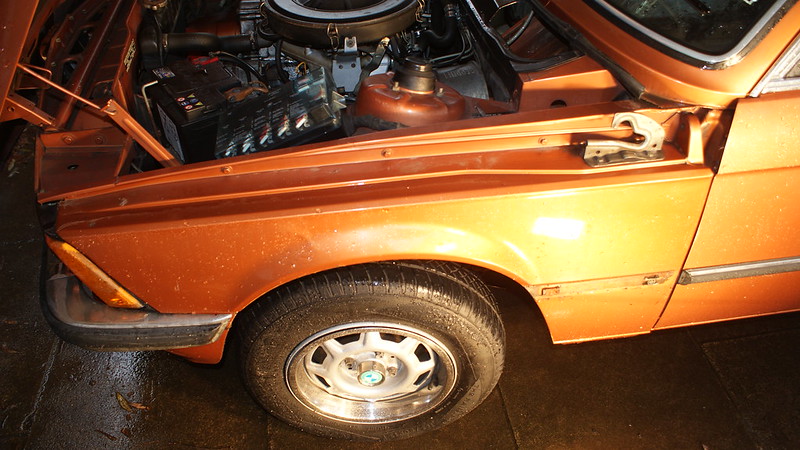
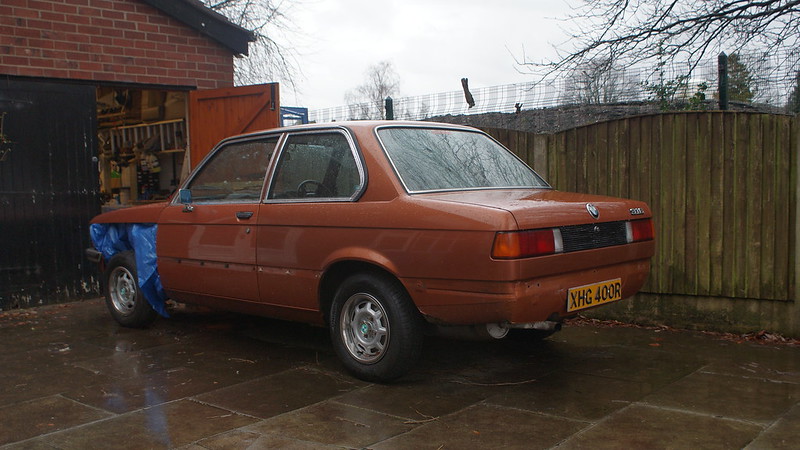
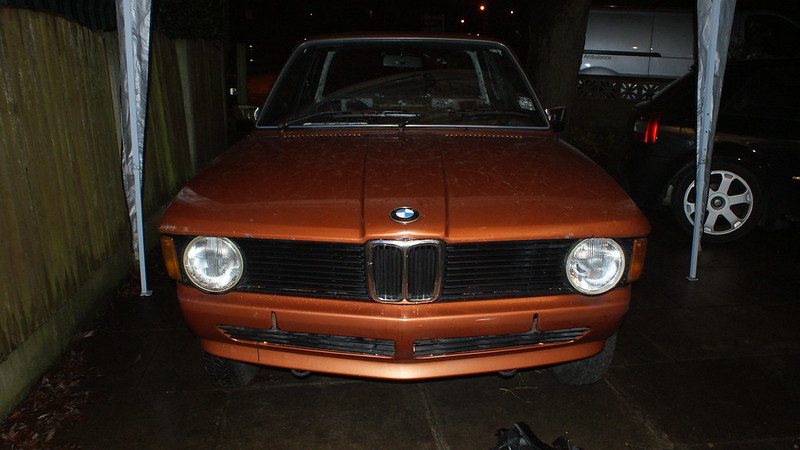
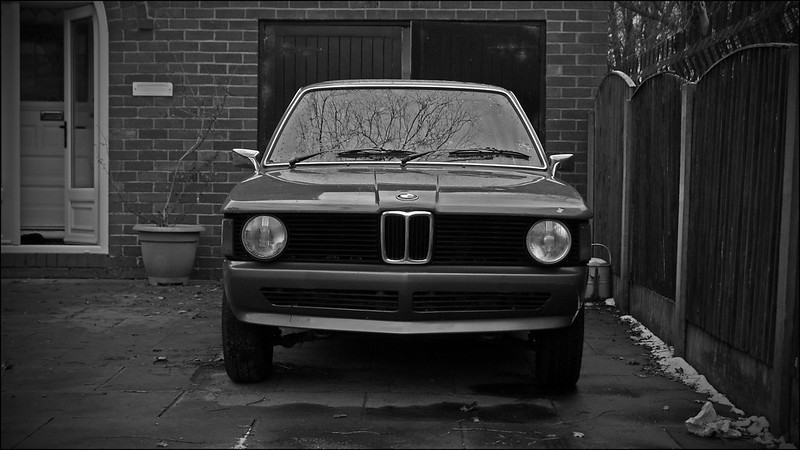
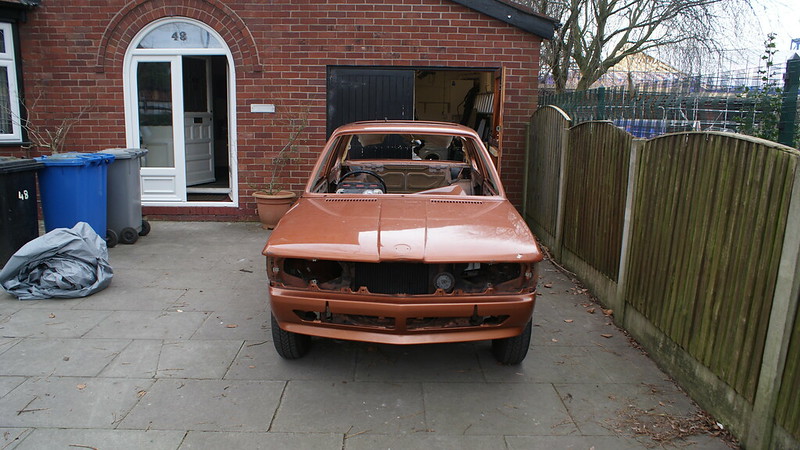
So, the car is a 1977 (E21) BMW 316. Being from the earlier of the production years, it has the 1.6 engine, as opposed to the 1.8 that was later introduced.
I bought it from a guy not too far away from me, when I was looking for an E30. When I saw this, I fell in love with it and simply had to buy it.

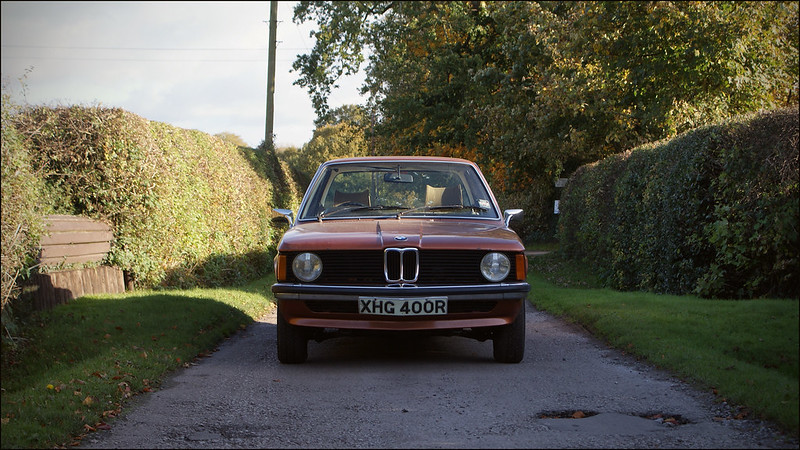


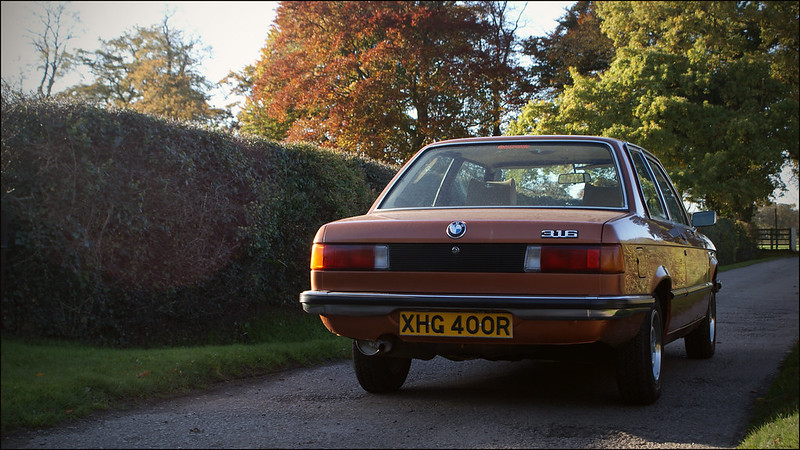
Love it or hate it, I quite like the "stanced" scene, and this will be the direction the car will be headed. Having said that, it will also be undergoing a thorough restoration process.
I'm aware they're not strictly legal, but I fancied some black and silver plates, so grabbed these from eBay:

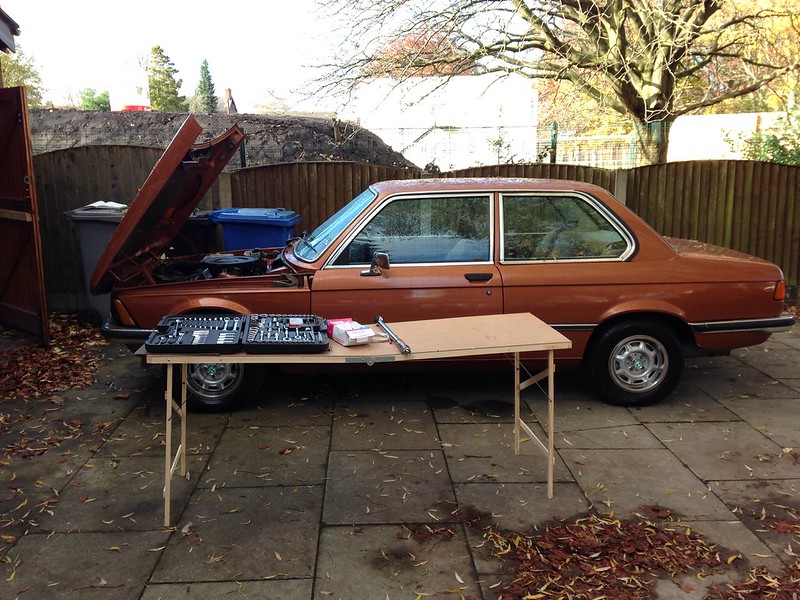
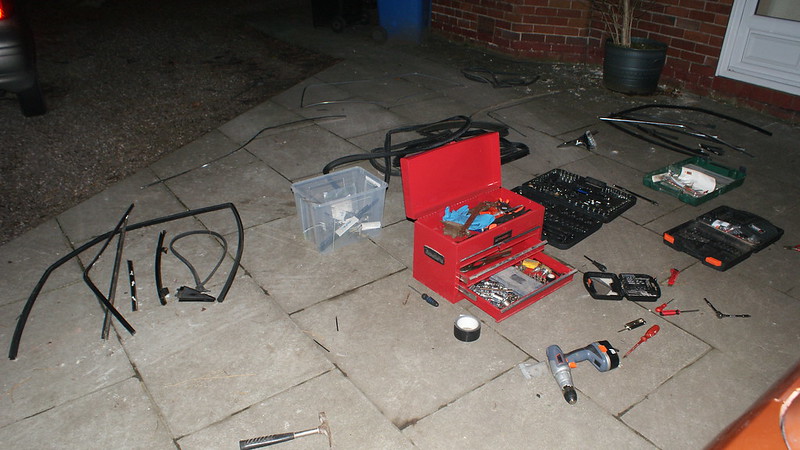
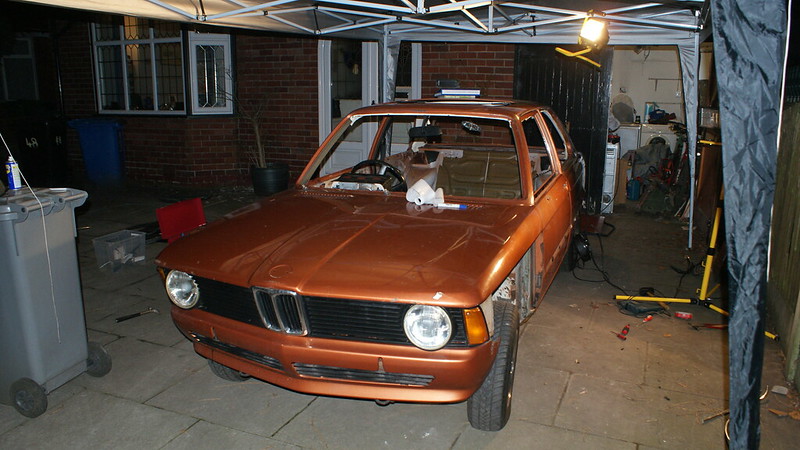
Most of the work will be done on my driveway:
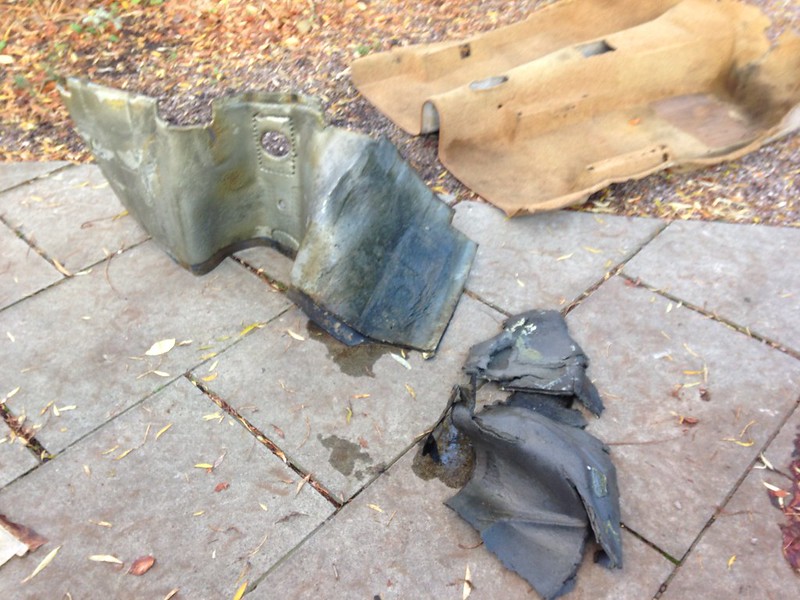
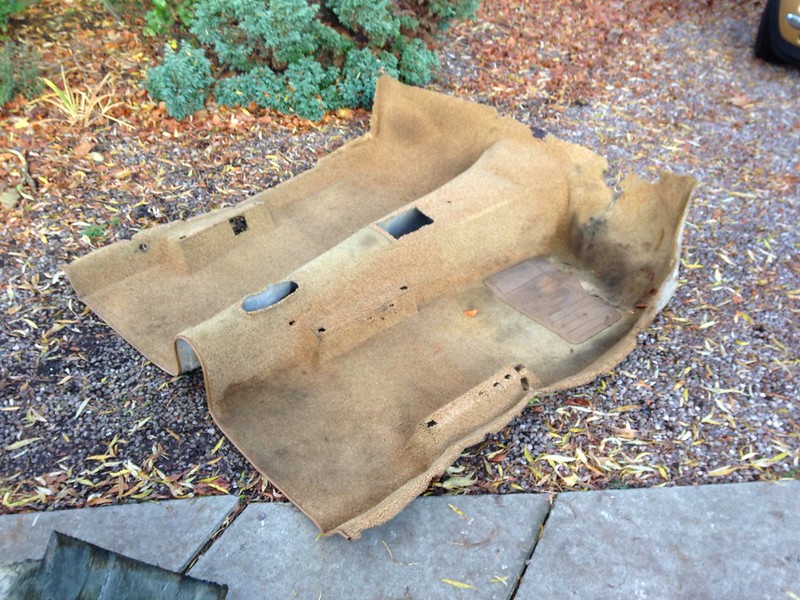
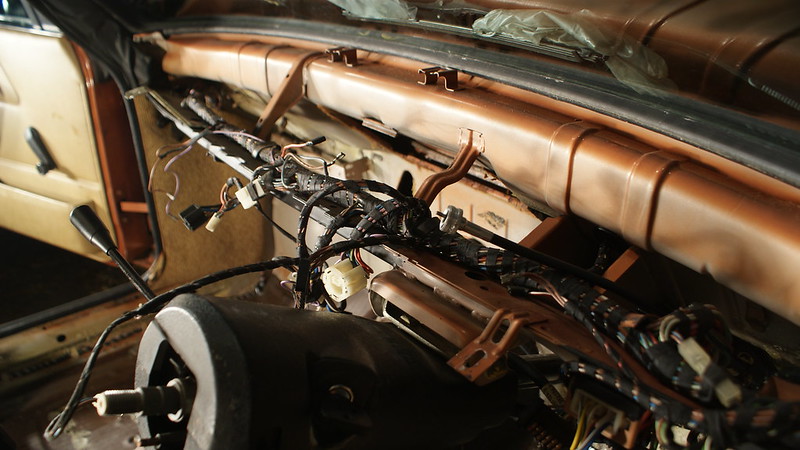
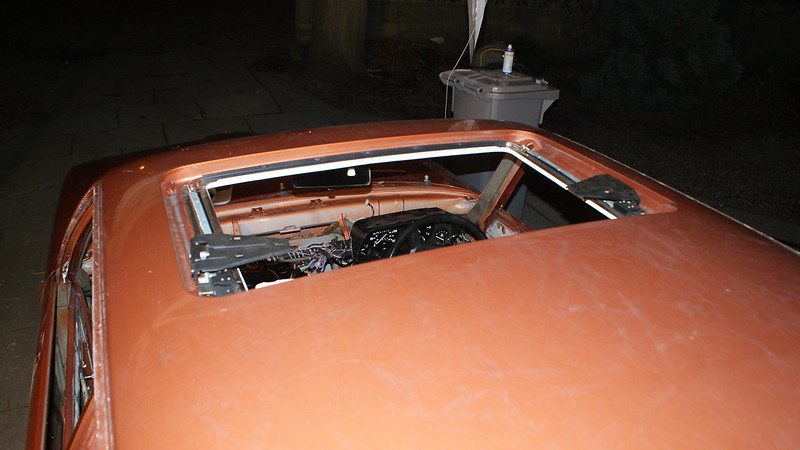
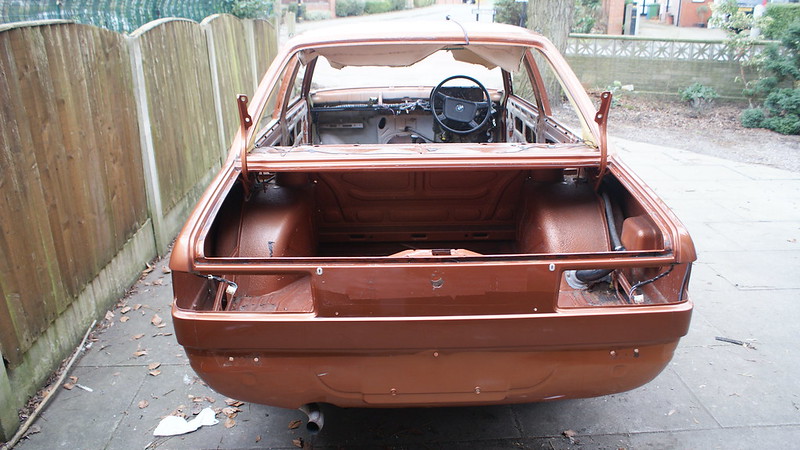
The carpet under the drivers seat was very wet, and I wanted to ensure the entire cabin was 100% waterproof, of course this means stripping the lot of it out, so I could find any holes/points of leakage. Sorry for the hideous camera phone quality on these:
Wet underlay and carpet:
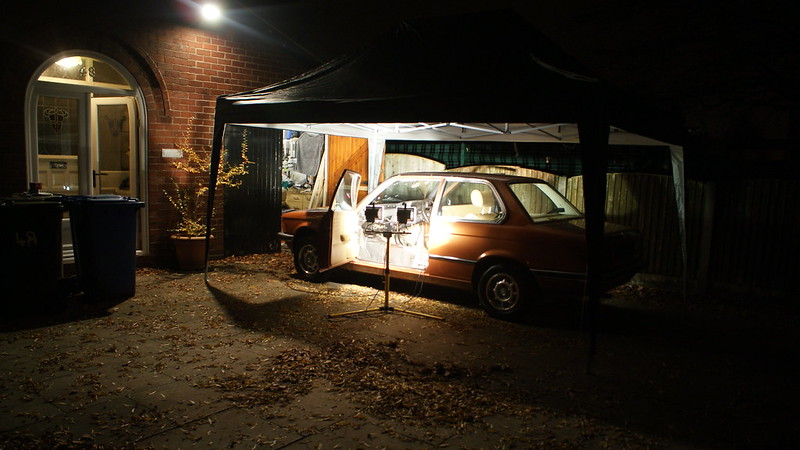
The engine then started to play up a little, struggling to start. We checked the plugs and the fuel lines and both 'seemed' fine. So out came the gazebo and a mate popped over:

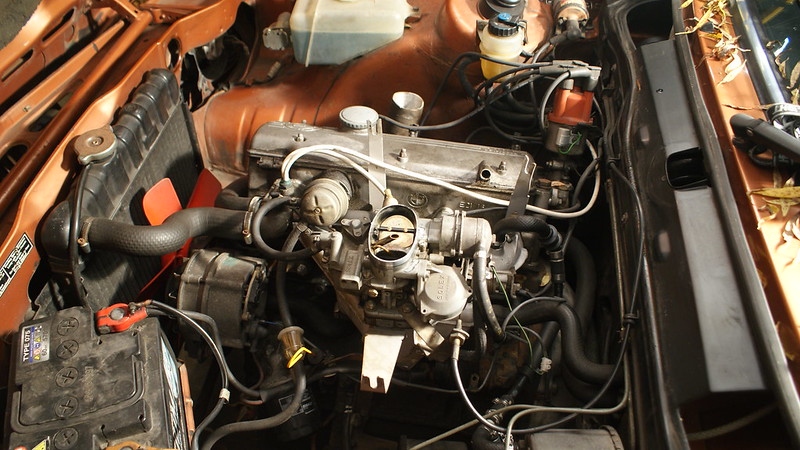

Turned out to be the battery, it had enough power to make a spark in the spark plug, but possibly not enough to start the car. Little annoying, but at least it's an easy fix.
Another night of stripping:
Then I found the main culprit for the water ingress on the drivers side. This is behind the pedals, in the day, you can see the tread of the tyre on the other side!


Super simple loom:
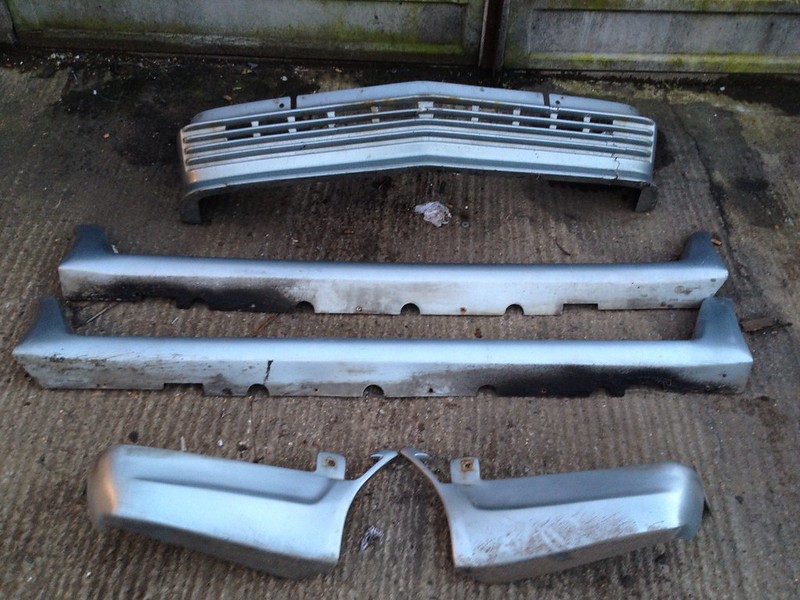
A genuine BBS bodykit came up for sale at a pretty good price, so I snapped it up. I'll probably only be using the front end though.
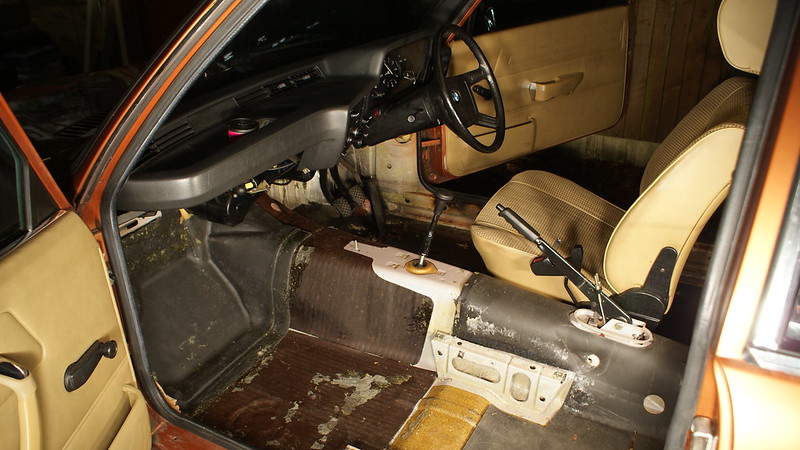
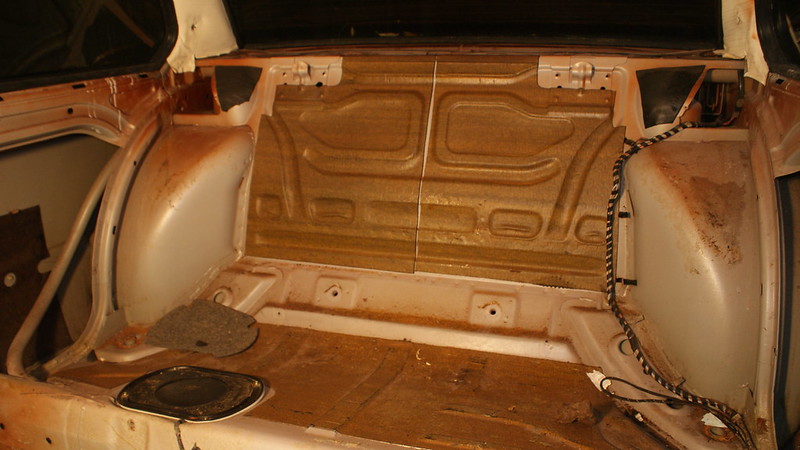
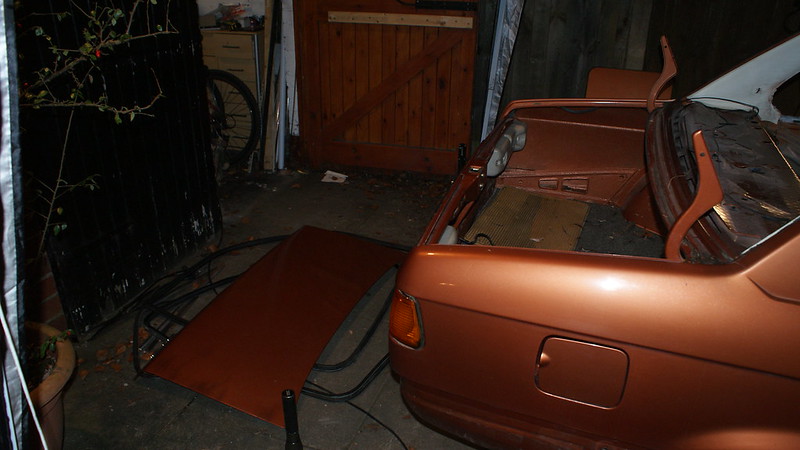
Took the rear of the interior out too:
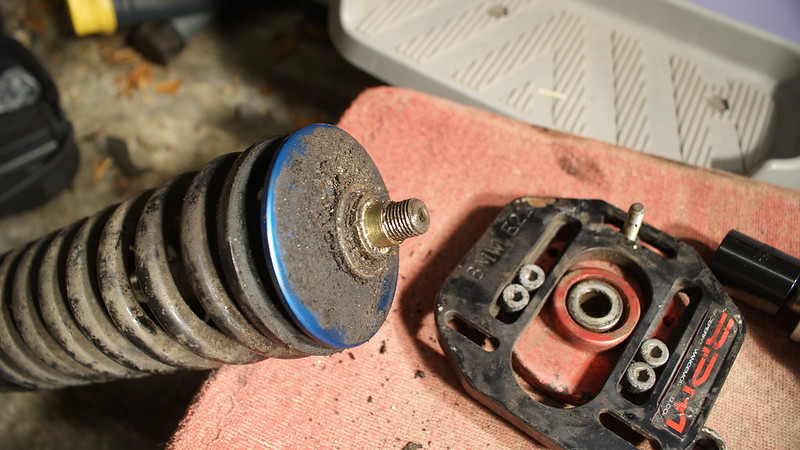
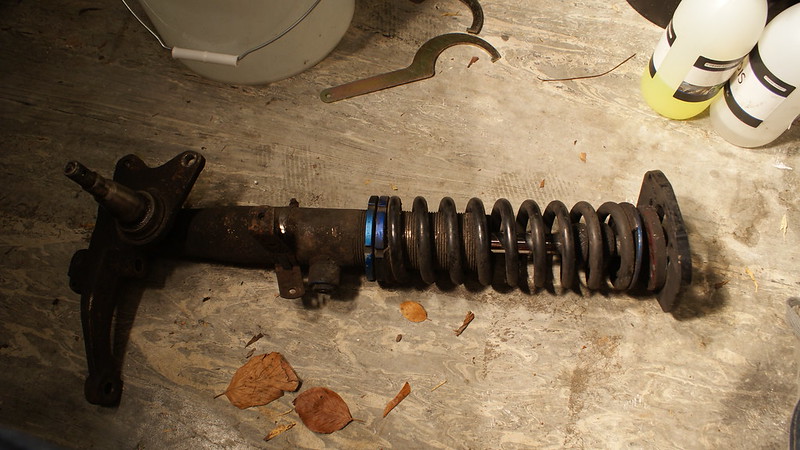
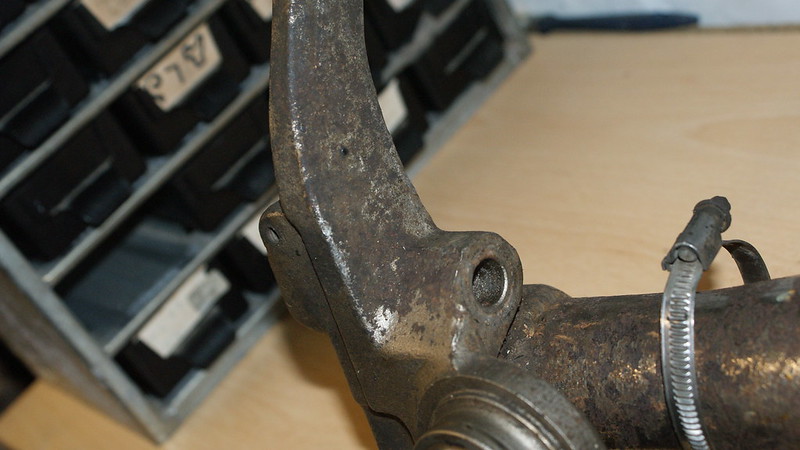
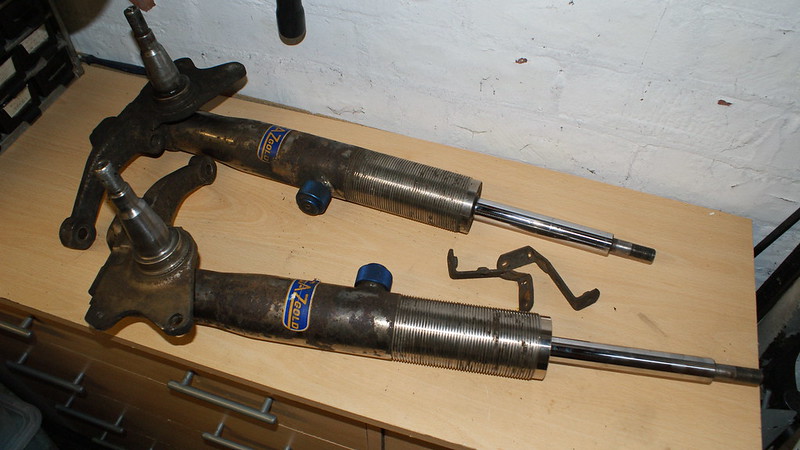
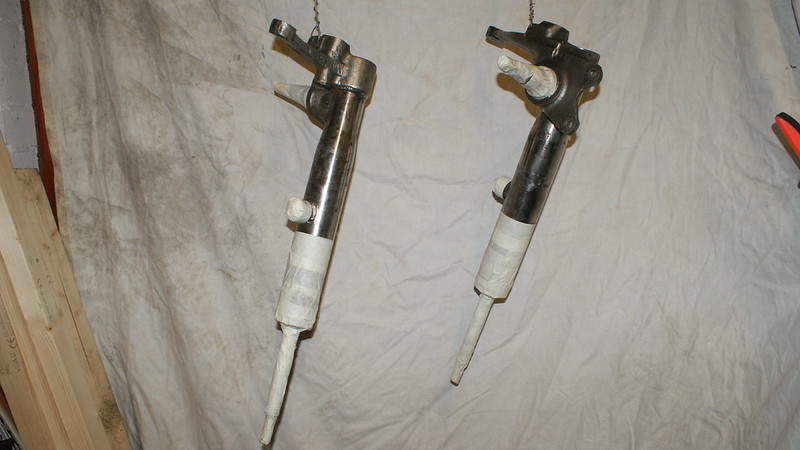
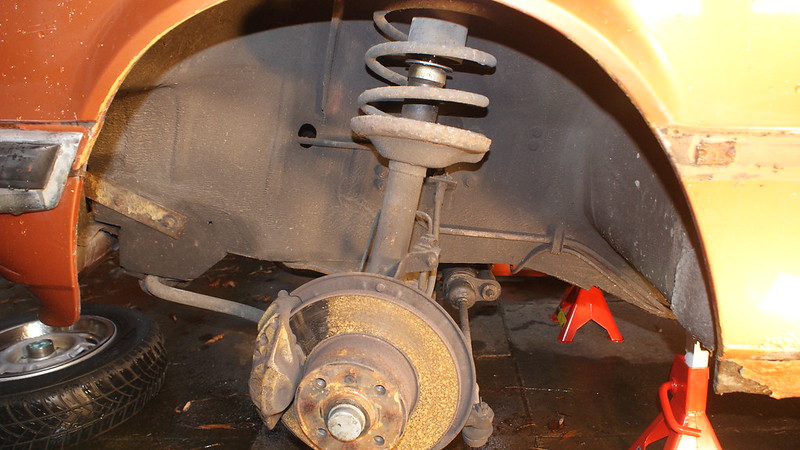
And my coilovers have arrived
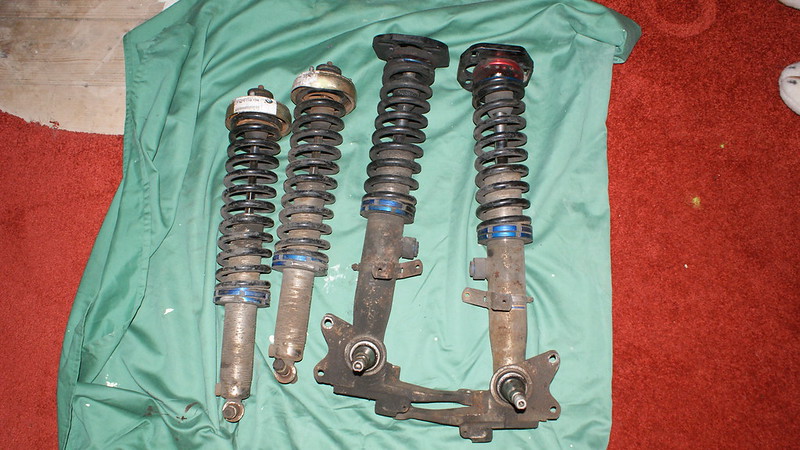
They're Gaz Golds, fitted to 323 struts and have RPM adjustable top mounts. Just need a clean up and they will be good to go.
Also, got an email from one of the previous owners, this is how it was found in 2009, after being left in a garage for 12 years!
Anyway, that's it for now, next job is to get the final bits of the interior out so I can be sure there are no more water leaks. Then get under the car and strip back the many layers of Waxoyl, what a hideous job that will be
This is a bit of a catch up post really, as I've already done some work on the BMW over the last couple of months.
So, the car is a 1977 (E21) BMW 316. Being from the earlier of the production years, it has the 1.6 engine, as opposed to the 1.8 that was later introduced.
I bought it from a guy not too far away from me, when I was looking for an E30. When I saw this, I fell in love with it and simply had to buy it.
Love it or hate it, I quite like the "stanced" scene, and this will be the direction the car will be headed. Having said that, it will also be undergoing a thorough restoration process.
I'm aware they're not strictly legal, but I fancied some black and silver plates, so grabbed these from eBay:
Most of the work will be done on my driveway:
The carpet under the drivers seat was very wet, and I wanted to ensure the entire cabin was 100% waterproof, of course this means stripping the lot of it out, so I could find any holes/points of leakage. Sorry for the hideous camera phone quality on these:
Wet underlay and carpet:
The engine then started to play up a little, struggling to start. We checked the plugs and the fuel lines and both 'seemed' fine. So out came the gazebo and a mate popped over:
Turned out to be the battery, it had enough power to make a spark in the spark plug, but possibly not enough to start the car. Little annoying, but at least it's an easy fix.
Another night of stripping:
Then I found the main culprit for the water ingress on the drivers side. This is behind the pedals, in the day, you can see the tread of the tyre on the other side!
Super simple loom:
A genuine BBS bodykit came up for sale at a pretty good price, so I snapped it up. I'll probably only be using the front end though.
Took the rear of the interior out too:
And my coilovers have arrived
They're Gaz Golds, fitted to 323 struts and have RPM adjustable top mounts. Just need a clean up and they will be good to go.
Also, got an email from one of the previous owners, this is how it was found in 2009, after being left in a garage for 12 years!
Anyway, that's it for now, next job is to get the final bits of the interior out so I can be sure there are no more water leaks. Then get under the car and strip back the many layers of Waxoyl, what a hideous job that will be
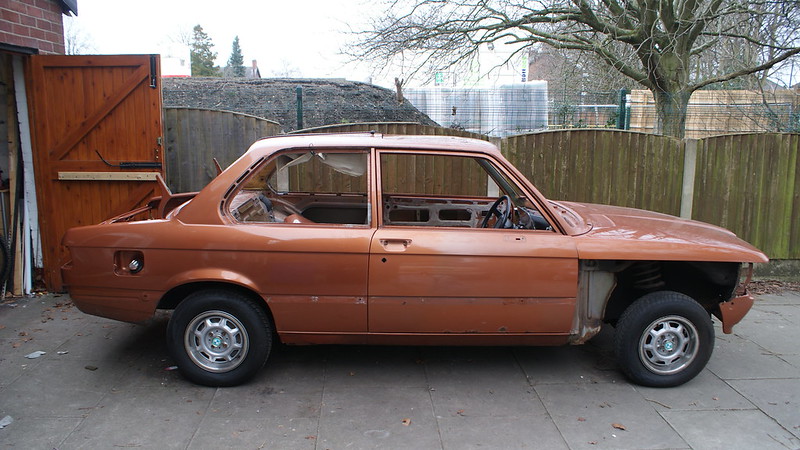
The previous 3 owners before me, between them, restored the back of the car (rear of the doors and backwards).
The restoration work done, is for the most part of a very high standard, but I've found some evidence of rust that has been simply plated over, so that will be cut out and new metal welded in it's place.
The restoration work done, is for the most part of a very high standard, but I've found some evidence of rust that has been simply plated over, so that will be cut out and new metal welded in it's place.
tbc said:
the numberplates are legal on a car of that age
Pre 73 is legal, this is a 77. falkster said:
It looks too light, must be the picture/crappy iPhone screen.
Looks awesome either way.
It's had a respray at the back, and the front end has awful paint fade.Looks awesome either way.
It'll be getting resprayed in the new year hopefully
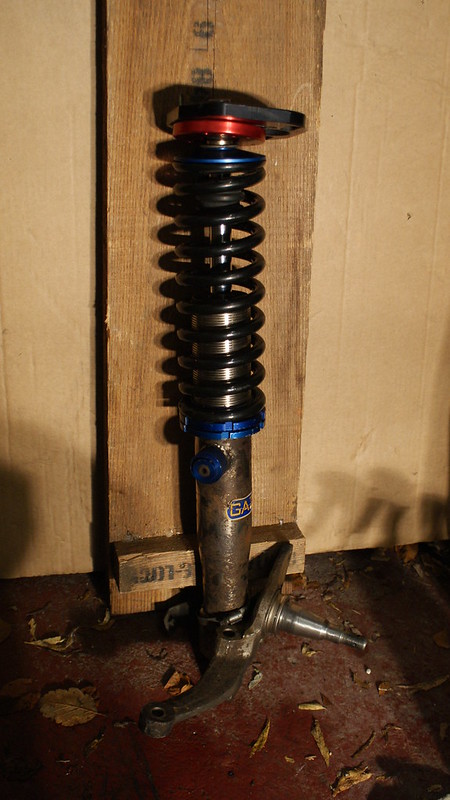
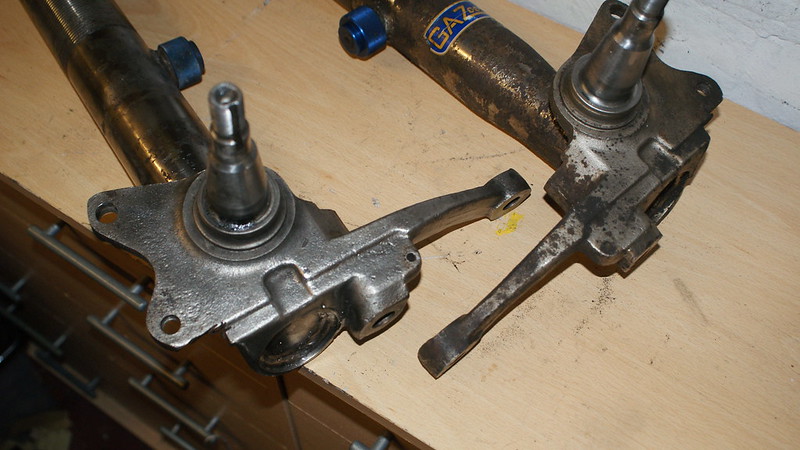
Last night I wanted to clean up the coilovers. This was unfortunately stopped when the top nut, holding the top mount and subsequently the coil on, was stuck solid. I couldn't move it.
So tonight I went and bought an impact gun, which simply laughed at the nut and it was off in seconds. The right tool for the job...
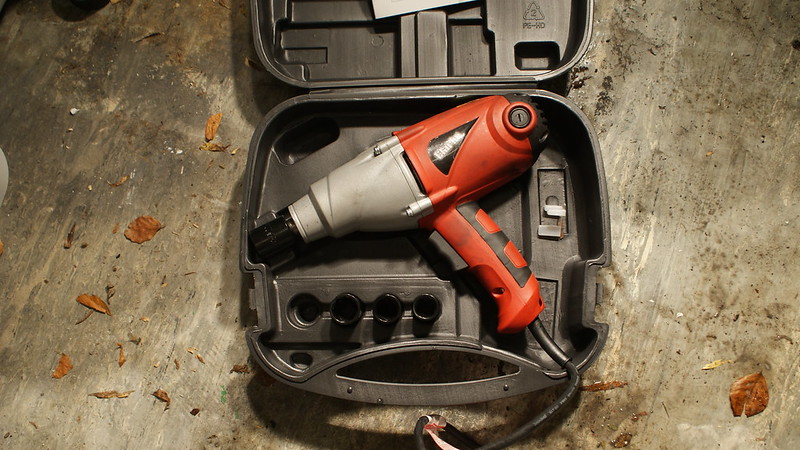
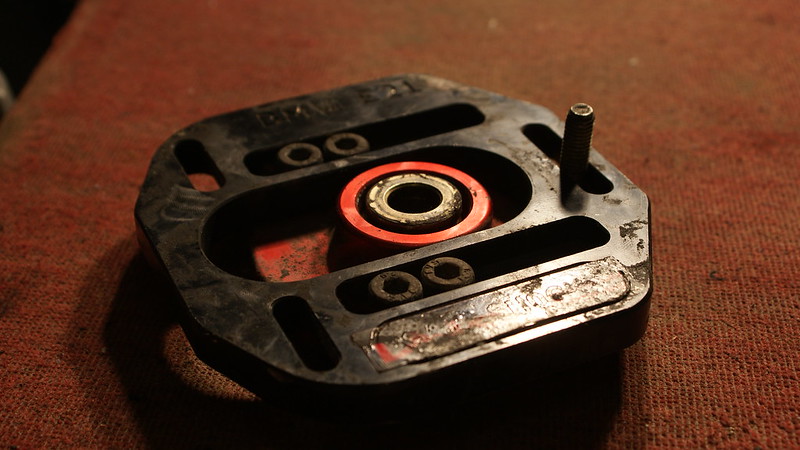
Also, the four adjusting bolts on the top mounts were also stuck solid, and due to the shape and size of the top mounts, I couldn't free them up. So I made a little vice/jig thing which stopped the top mount from rotating, and did the job perfectly
Perfect
So out came a couple of buckets of piping hot soapy water, and a load of Tardis & G101. Some elbow grease later, and they went from this:
To this:
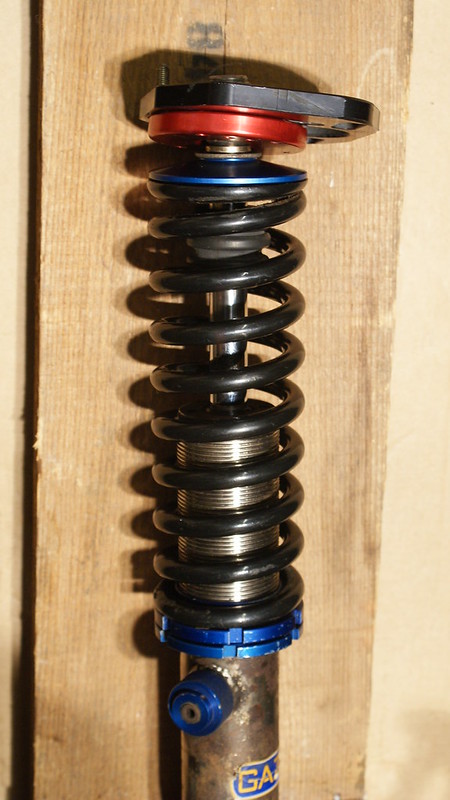

The lowers (bottom of the thread and down) need some paint, as they've got some surface rust. Probably a couple of coats of black will sharpen them up.
I've only done the front, as I got hungry and didn't fancy starting the rears. Plenty of time though
So tonight I went and bought an impact gun, which simply laughed at the nut and it was off in seconds. The right tool for the job...
Also, the four adjusting bolts on the top mounts were also stuck solid, and due to the shape and size of the top mounts, I couldn't free them up. So I made a little vice/jig thing which stopped the top mount from rotating, and did the job perfectly
Perfect
So out came a couple of buckets of piping hot soapy water, and a load of Tardis & G101. Some elbow grease later, and they went from this:
To this:
The lowers (bottom of the thread and down) need some paint, as they've got some surface rust. Probably a couple of coats of black will sharpen them up.
I've only done the front, as I got hungry and didn't fancy starting the rears. Plenty of time though
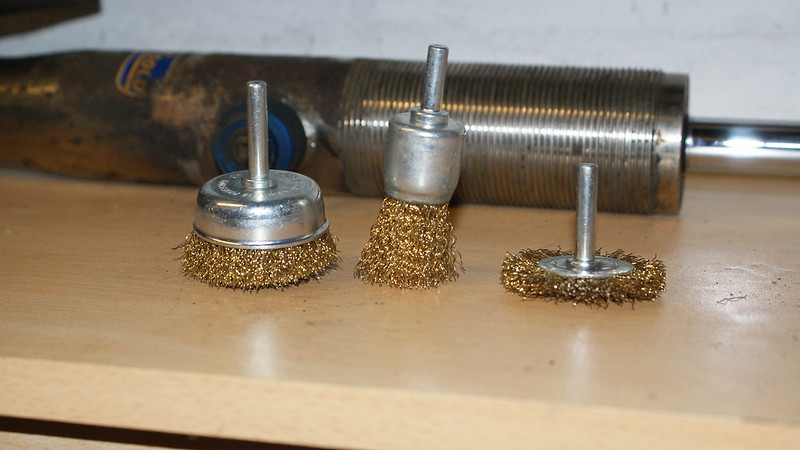
My boss told me I could finish early for Xmas so I decided to get some work done on the coilovers. Probably not the most important thing that needs doing, but oh well
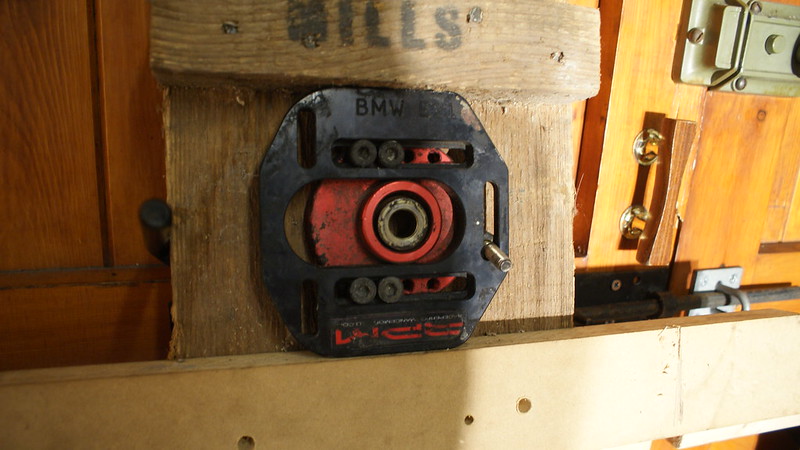
They had loads of surface rust and I wanted rid of that horrible mottled surface.
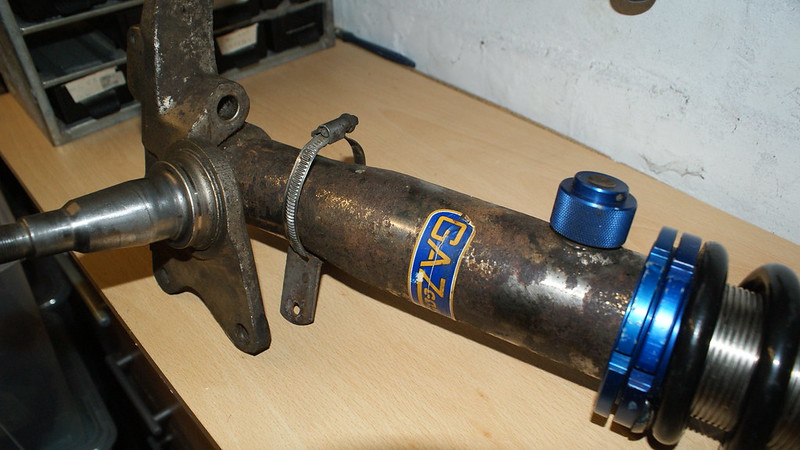
So I popped over to Screwfix and picked a 3 pack of wire brush drill bits, for just £4! Better than £8 for one at B&Q!
The one on the left is done, the one on the right isn't
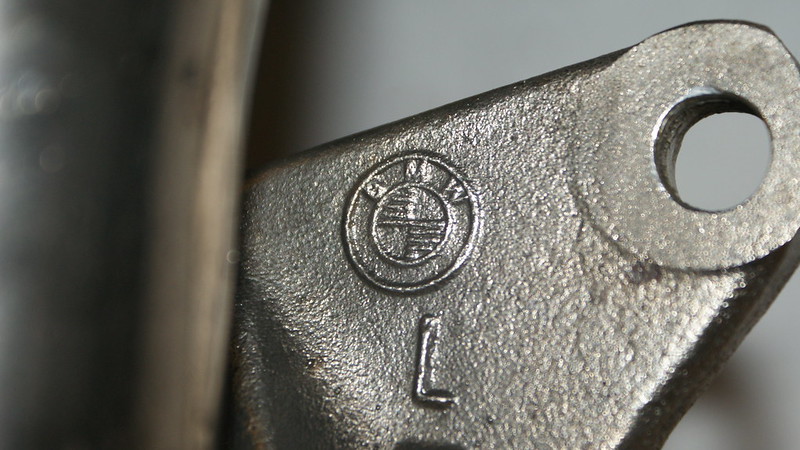
I also uncovered the BMW stamp that was covered in crap! Nice little details make me happy
Both cleaned up and masked, ready for paint in my rig up paint booth
First of two coats of Gloss Black applied:
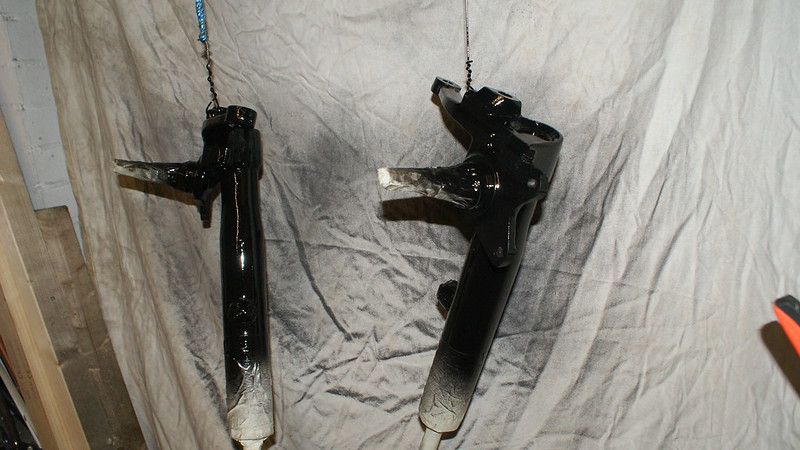
I'll get some more photos when they're dry tomorrow and I can take the masking tape off
They had loads of surface rust and I wanted rid of that horrible mottled surface.
So I popped over to Screwfix and picked a 3 pack of wire brush drill bits, for just £4! Better than £8 for one at B&Q!
The one on the left is done, the one on the right isn't
I also uncovered the BMW stamp that was covered in crap! Nice little details make me happy
Both cleaned up and masked, ready for paint in my rig up paint booth
First of two coats of Gloss Black applied:
I'll get some more photos when they're dry tomorrow and I can take the masking tape off
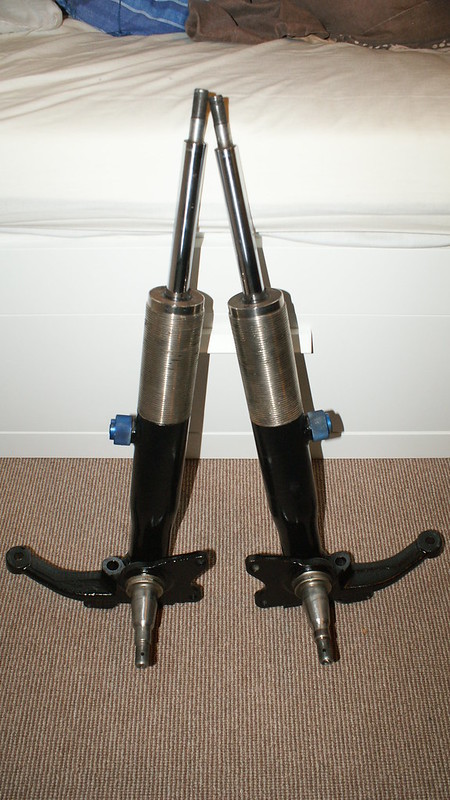
Coilovers are basically finished now, ready to be fitted (a while off, before anyone gets giddy  )
)
DSC03575 by Eddie the Kid, on Flickr
And built up (poor focus, I know)

DSC03576 by Eddie the Kid, on Flickr
Hopefully going to take the front wings off tomorrow so I can do some inspection on the inner arches ect.
)DSC03575 by Eddie the Kid, on Flickr
And built up (poor focus, I know
)DSC03576 by Eddie the Kid, on Flickr
Hopefully going to take the front wings off tomorrow so I can do some inspection on the inner arches ect.
Today was a reasonably productive day, I wanted to get the wings off to inspect the inner arches and the chassis behind the wings.
Gazebo was out in force, due to some pretty minging weather!
Bonnet roller guides had to come off too:
Impact gun had the wheels off in seconds, love that thing
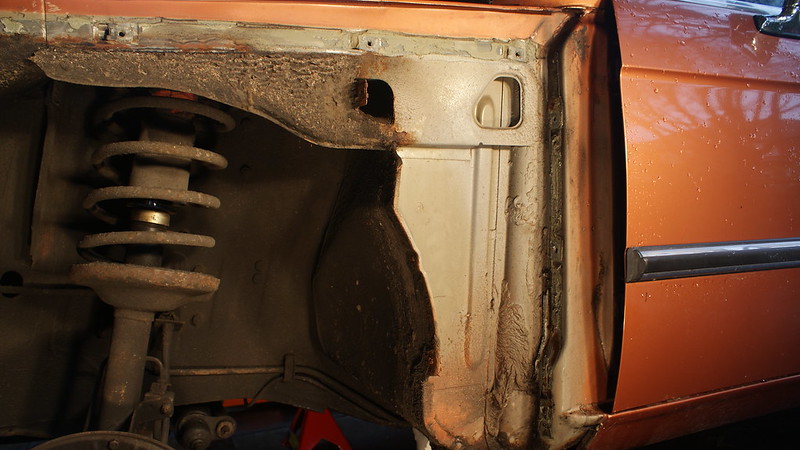
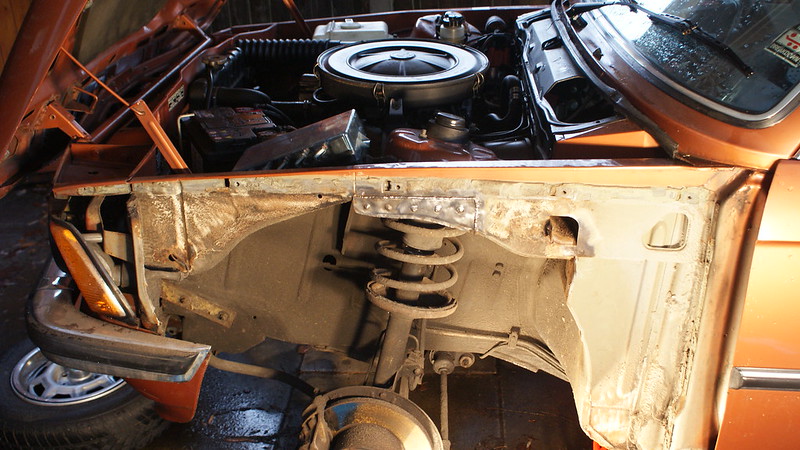
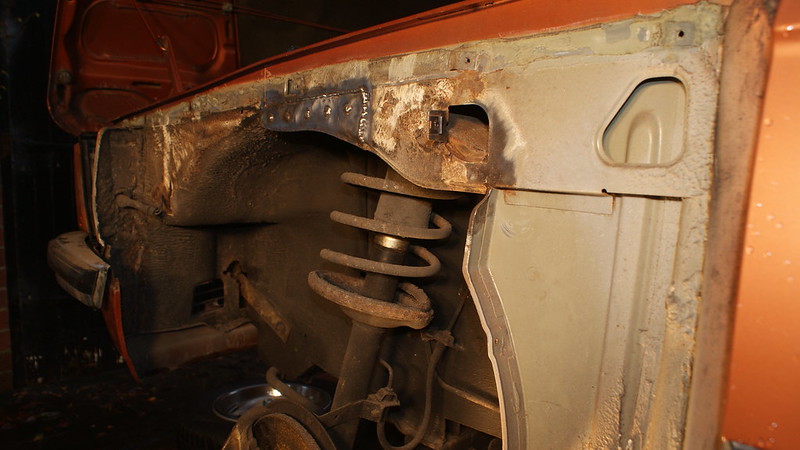
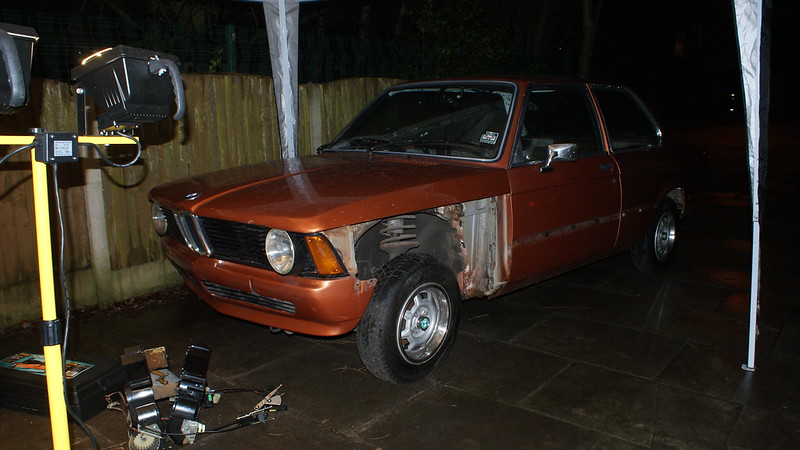
The wings themselves are held on by a fair few bolts, BMW were on the ball making them all 10mm too. Got to love a decent bit of efficiency. Got the wings off and wonderful news, the inner arches/chassis is lovely. It's had some repair work done on the passenger side, but not much
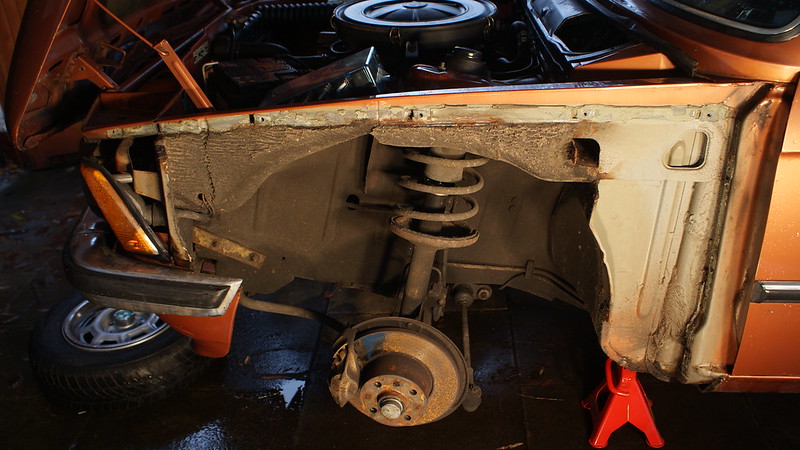
The wings themselves are ruined, which I knew. They will need replacing before respray day.
Cleaned up some of the inner arch to check the metal was decent, which it certainly seems to be


Very happy tbh!
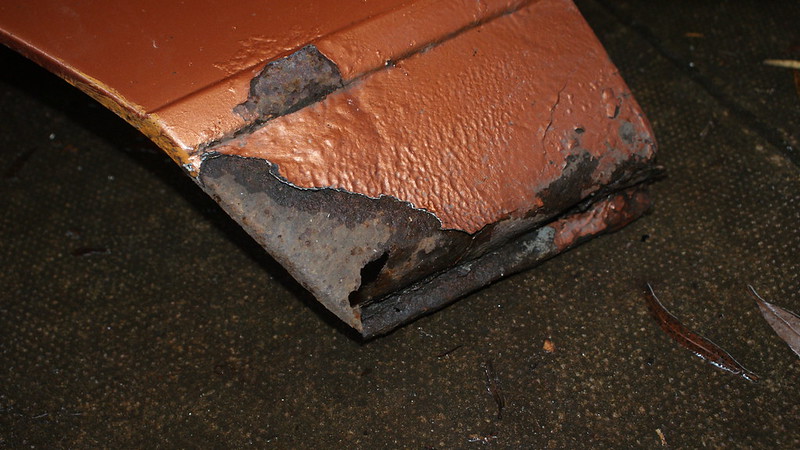
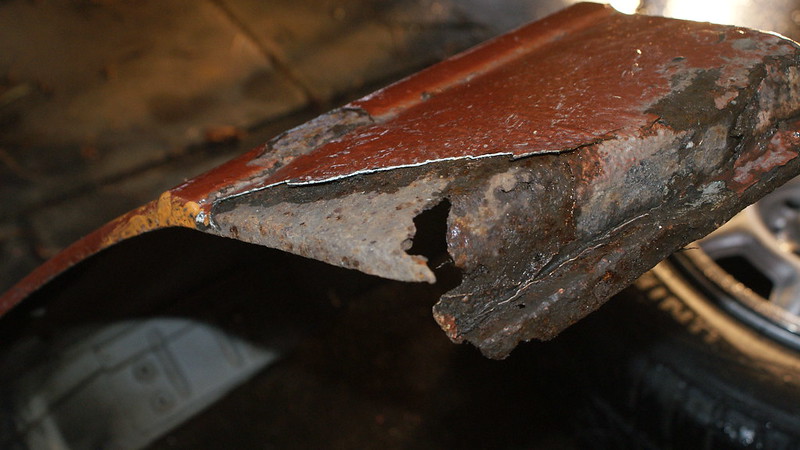
I lolled when I saw the extent of the hole through to the cabin from the arch!
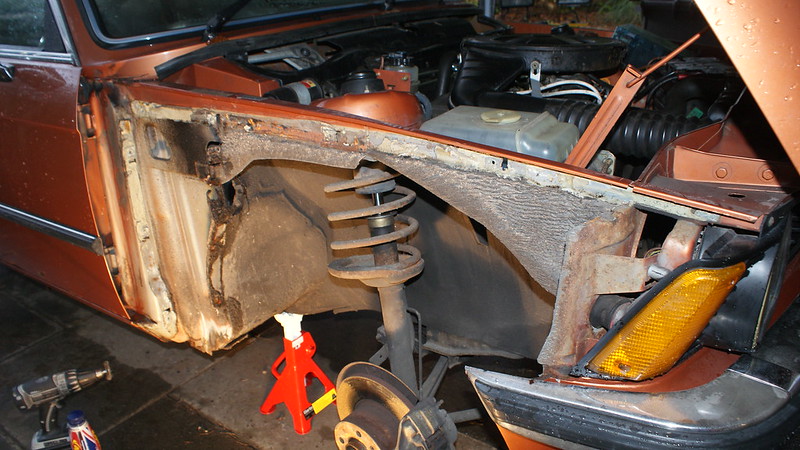
The inner arch has a natural 'cavity' which would be a place for years of dirt and moisture to collect, it sits behind the arch and in front of the door. To prevent this buildup, there is a sort of blanking panel that sits at 90° to the wing. It's certainly done it's job, as the 'blanking panel' has severely rotten away, suggesting that if it wasn't for this piece, there would be some pretty awful damage to the shell of the car. These will be replaced for new items, as they are both beyond repair.
Exciting times!....
Gazebo was out in force, due to some pretty minging weather!
Bonnet roller guides had to come off too:
Impact gun had the wheels off in seconds, love that thing
The wings themselves are held on by a fair few bolts, BMW were on the ball making them all 10mm too. Got to love a decent bit of efficiency. Got the wings off and wonderful news, the inner arches/chassis is lovely. It's had some repair work done on the passenger side, but not much
The wings themselves are ruined, which I knew. They will need replacing before respray day.
Cleaned up some of the inner arch to check the metal was decent, which it certainly seems to be
Very happy tbh!
I lolled when I saw the extent of the hole through to the cabin from the arch!
The inner arch has a natural 'cavity' which would be a place for years of dirt and moisture to collect, it sits behind the arch and in front of the door. To prevent this buildup, there is a sort of blanking panel that sits at 90° to the wing. It's certainly done it's job, as the 'blanking panel' has severely rotten away, suggesting that if it wasn't for this piece, there would be some pretty awful damage to the shell of the car. These will be replaced for new items, as they are both beyond repair.
Exciting times!....
Did some more work today, and uncovered some bad news
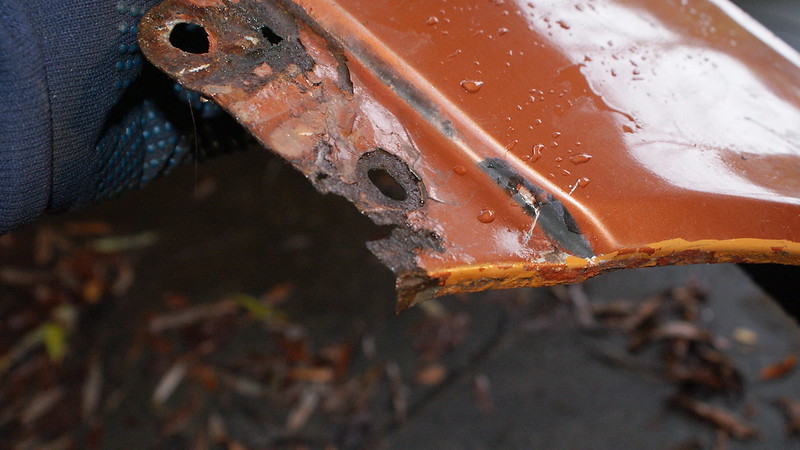
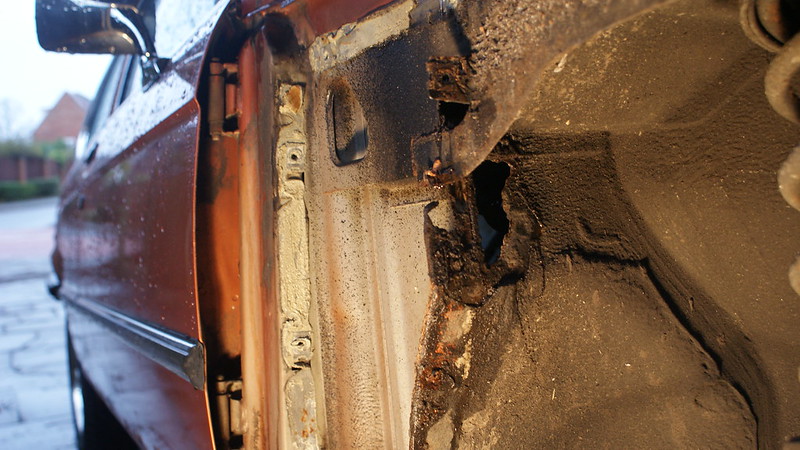
The passenger side jacking point and inner sill has got some extensive rust to it:
A bit gutted tbh, hoped not to find anything like this, but it's all part of the challenge I suppose. I'll be looking to get a quote for welding and respray over the next month, here's hoping it won't be too much!
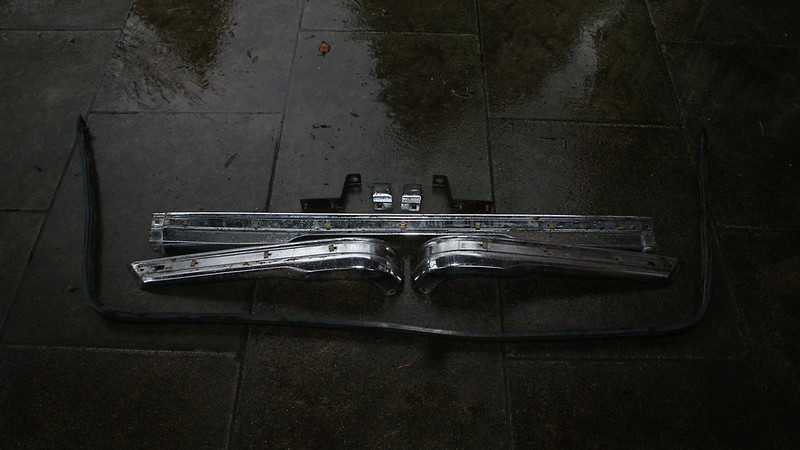
I also removed the chrome trim from the rear and the sides of the vehicle:
Good progress for the end of the year. Roll on 2013 and the rebuilding stage
The passenger side jacking point and inner sill has got some extensive rust to it:
A bit gutted tbh, hoped not to find anything like this, but it's all part of the challenge I suppose. I'll be looking to get a quote for welding and respray over the next month, here's hoping it won't be too much!
I also removed the chrome trim from the rear and the sides of the vehicle:
Good progress for the end of the year. Roll on 2013 and the rebuilding stage
Edited by eddiethekid on Monday 31st December 17:28
Took the last of the trim off last night, personally think it looks awesome without the front bumper!
DSC03609
DSC03610
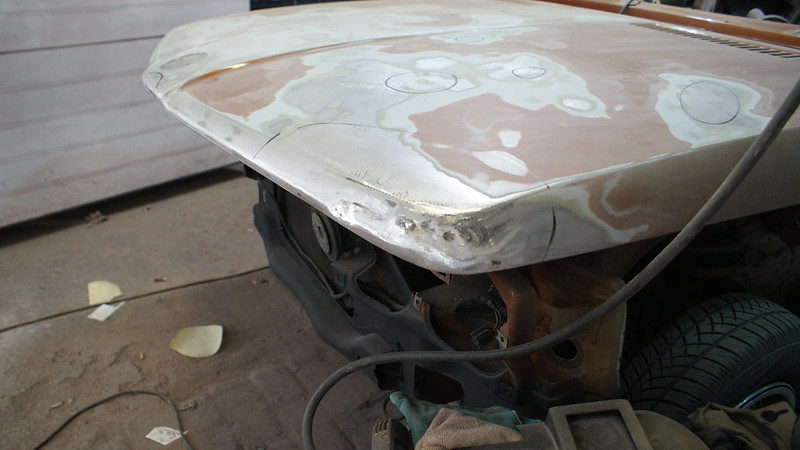
Also, there's a bit of a dent on the front corner of the bonnet, it's been repaired with a fair amount of filler.
DSC03613
Welding quotes still need to be sourced, and then paint.
In the meantime, I'll be getting most of the underseal off and reapplied with fresh stuff.
DSC03609
DSC03610
Also, there's a bit of a dent on the front corner of the bonnet, it's been repaired with a fair amount of filler.
DSC03613
Welding quotes still need to be sourced, and then paint.
In the meantime, I'll be getting most of the underseal off and reapplied with fresh stuff.

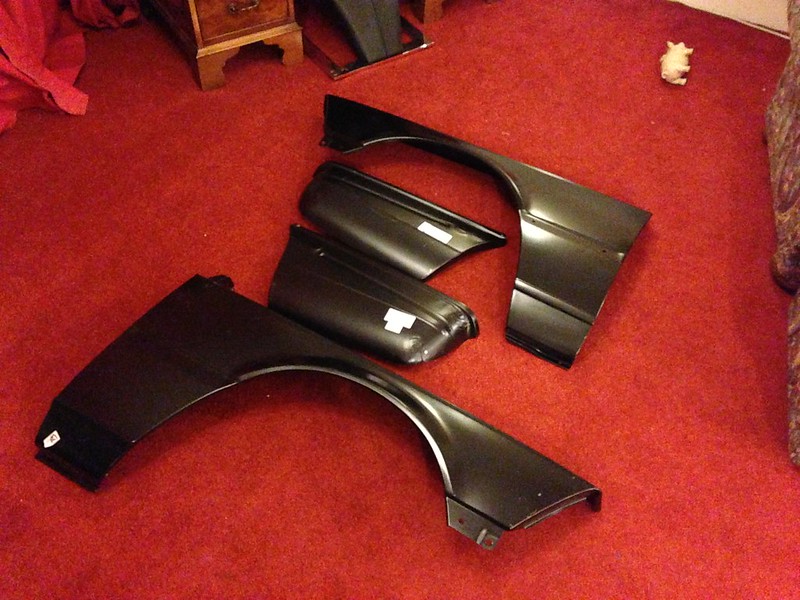
Some parts arrived this weekend
New front wings, and repair panels for the lower rear quarter.
(piss poor iPhone camera)
Yet again, this whole 'E21 thing' has come up with a pleasant surprise.
I ordered the parts from Wallothnesch, a German company who specialise in old BMW parts. Along with the wings came their brochure, which is potentially one of the handiest things I've had yet for this car:
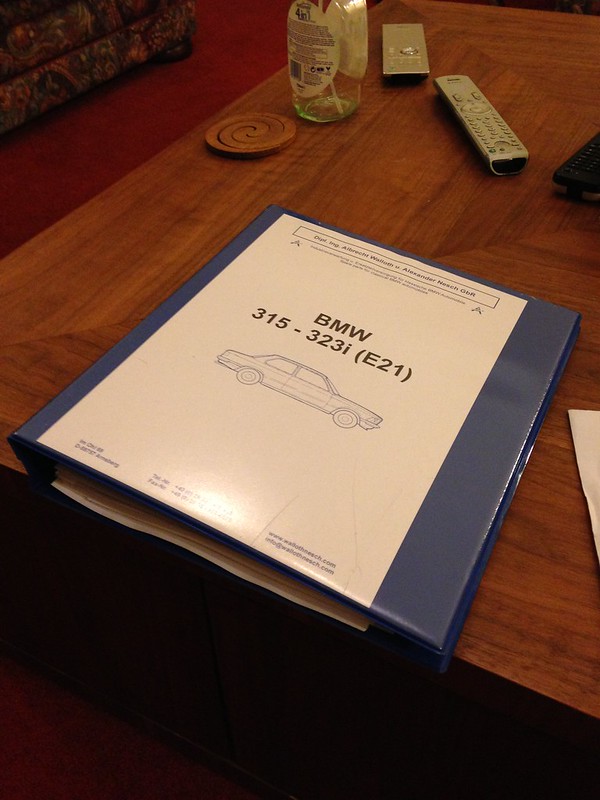
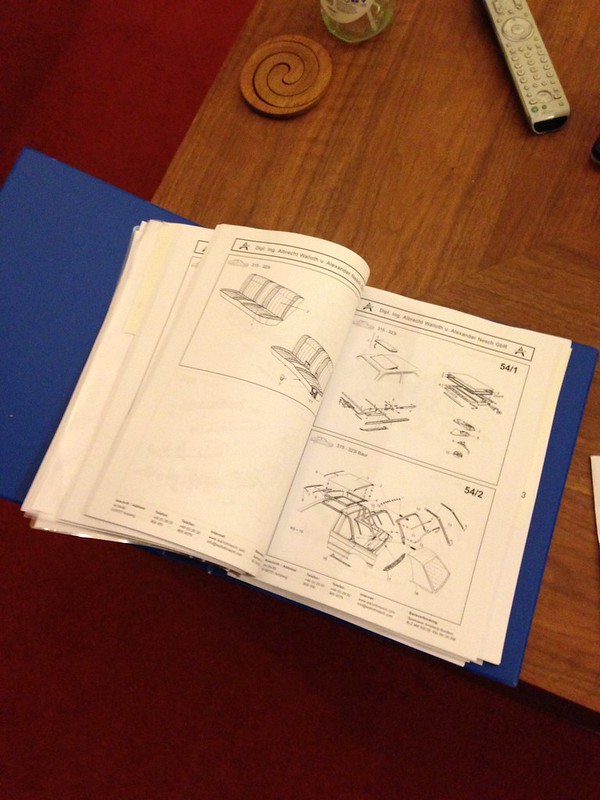
Parts diagrams for the entire car. Everything is listed, and at the back it's all priced up.
Tremendous
New front wings, and repair panels for the lower rear quarter.
(piss poor iPhone camera)
Yet again, this whole 'E21 thing' has come up with a pleasant surprise.
I ordered the parts from Wallothnesch, a German company who specialise in old BMW parts. Along with the wings came their brochure, which is potentially one of the handiest things I've had yet for this car:
Parts diagrams for the entire car. Everything is listed, and at the back it's all priced up.
Tremendous
Tonight saw the start of the final push to have the car ready for Saturday.
Windows removed, rubbers, seals and trims all removed. Sunroof and door hardware has also all be taken off the car.
Also, the all important areas are free of any corrosion.
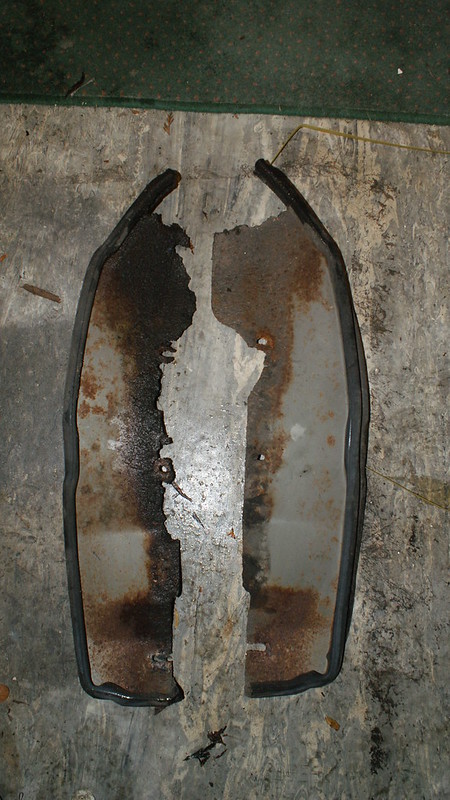
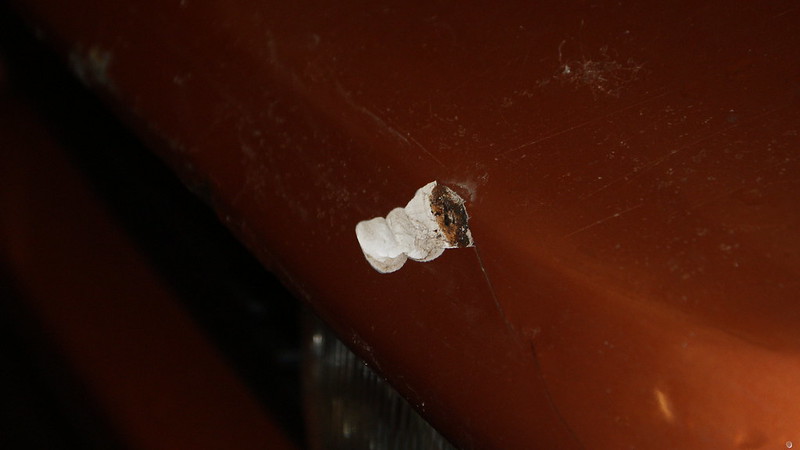
Lower windscreen corner:


The rear windows are also completely fine.
Next few evenings will be busy ones, but it's all very exciting now
Windows removed, rubbers, seals and trims all removed. Sunroof and door hardware has also all be taken off the car.
Also, the all important areas are free of any corrosion.
Lower windscreen corner:
The rear windows are also completely fine.
Next few evenings will be busy ones, but it's all very exciting now
- * Progress Update***
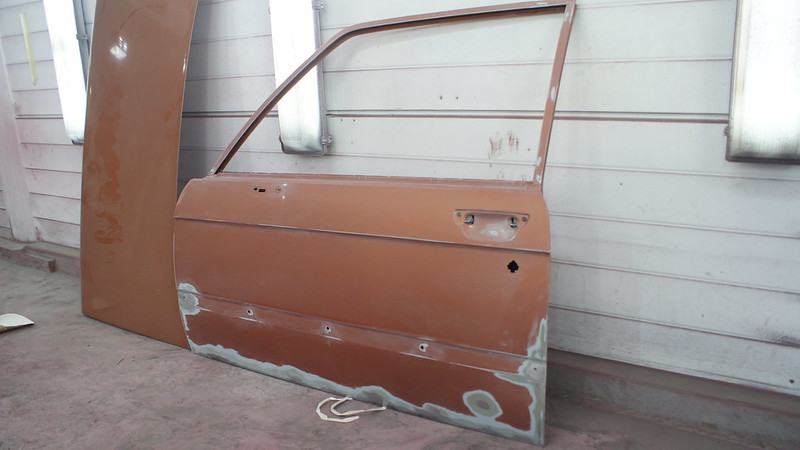
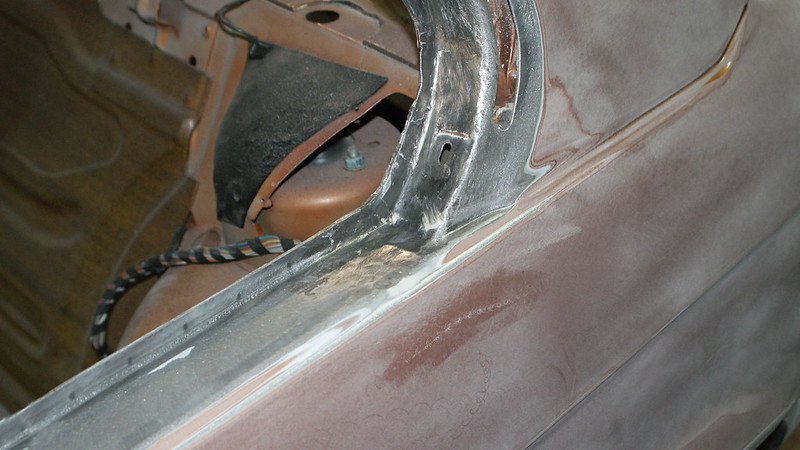
Doors:
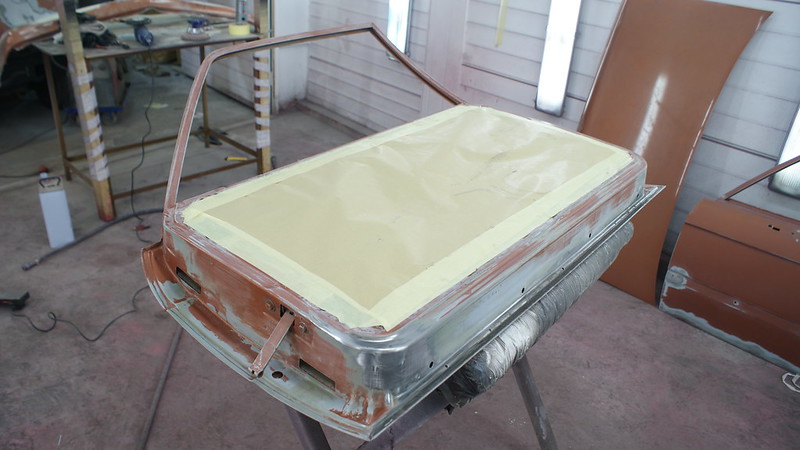
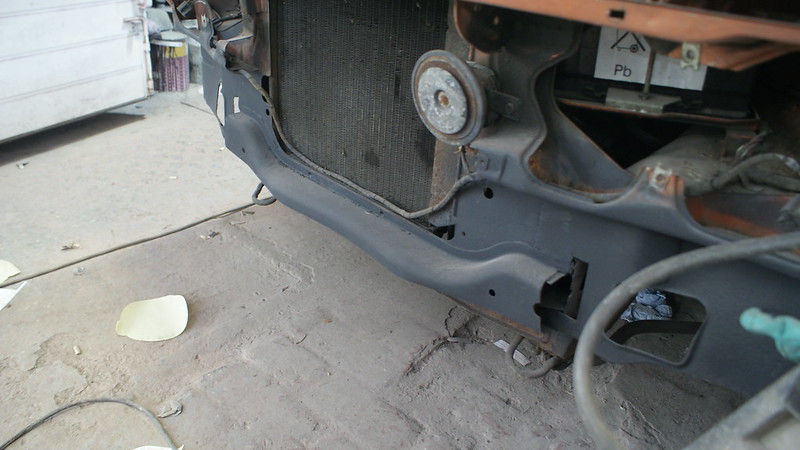
Lower valance smoothed off for a cleaner front end:
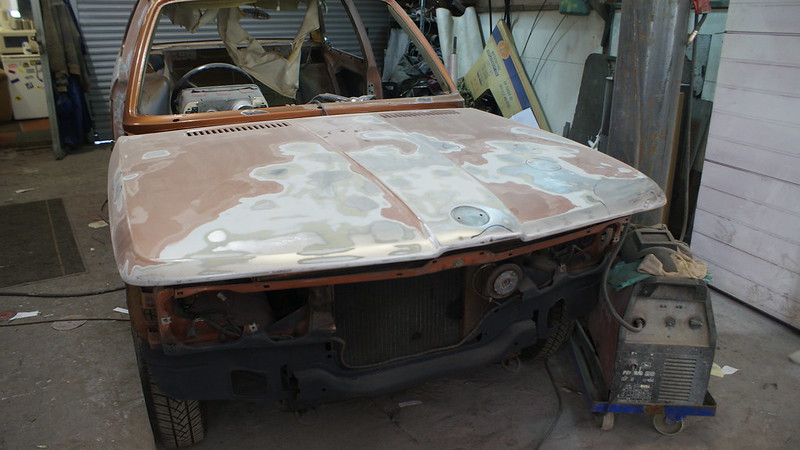
Bonnet, which is like the face of the moon really, Lee is working wonders on it though:
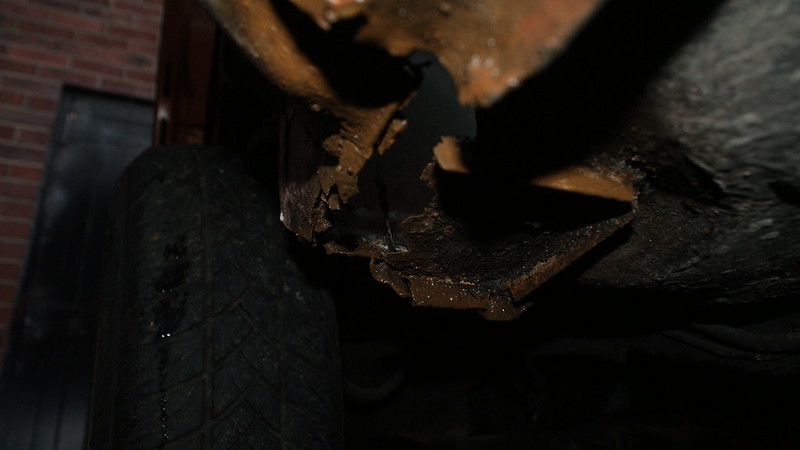
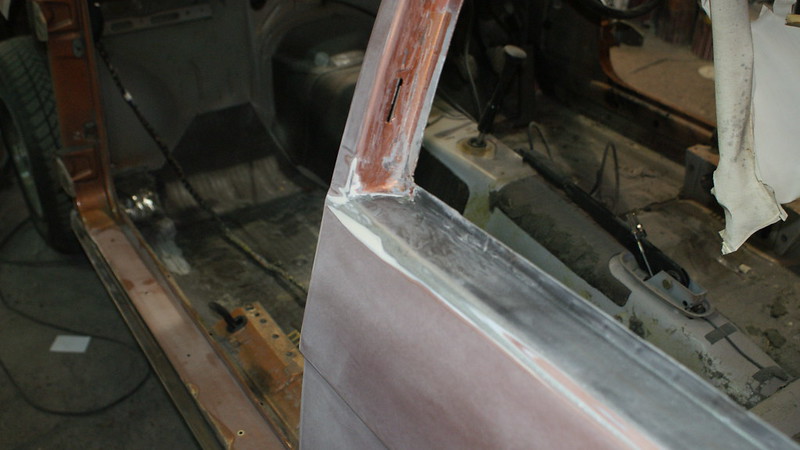
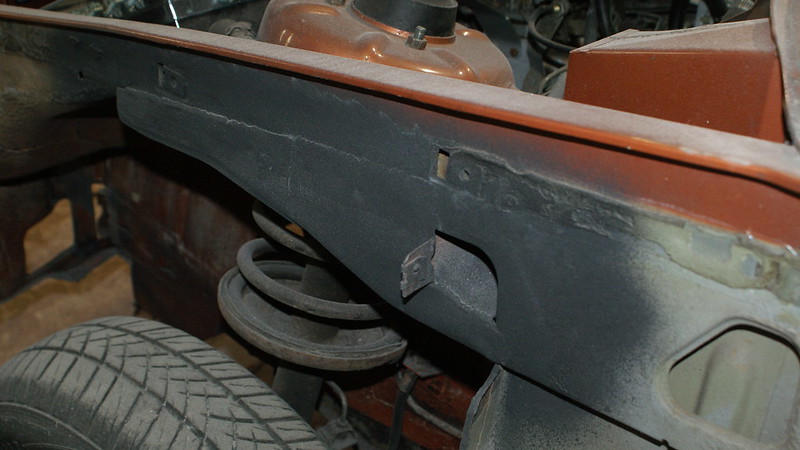
Repaired lower chassis rail:
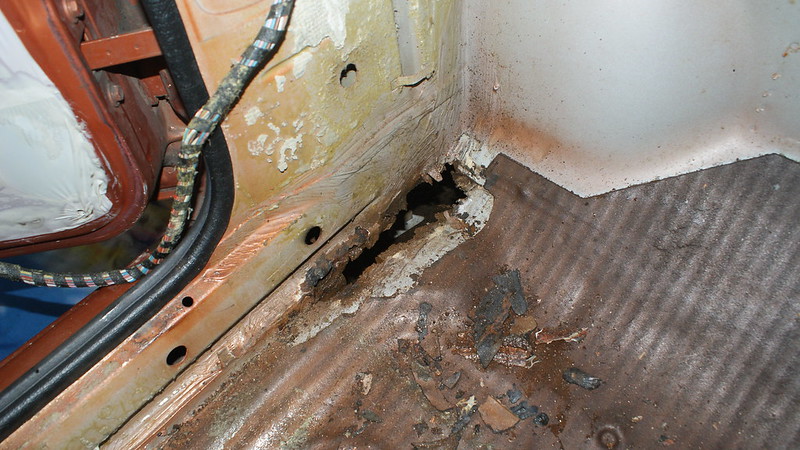
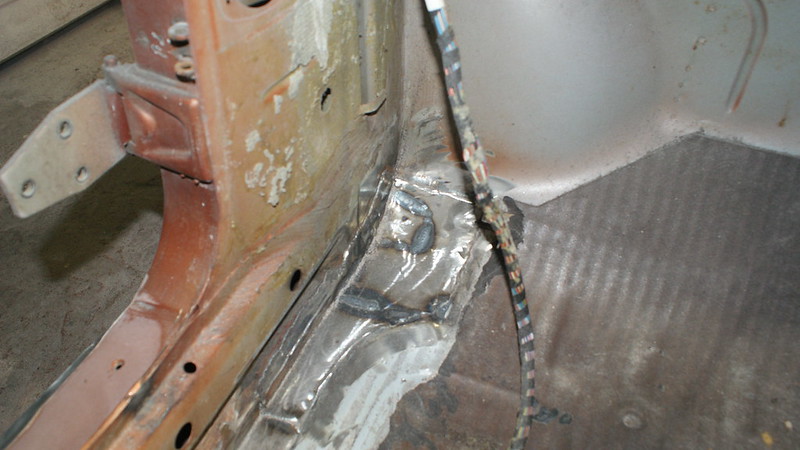
Remember the big hole in the passenger footwell? All gone:
Few bits and pieces around the car:
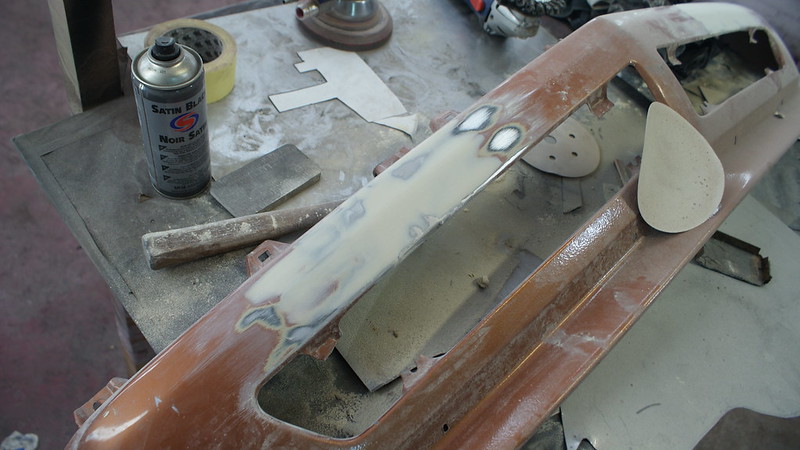
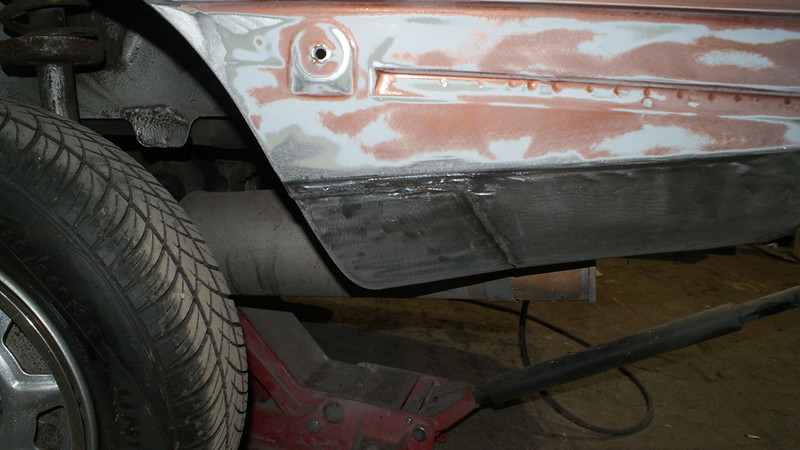
New lower rear quarter:
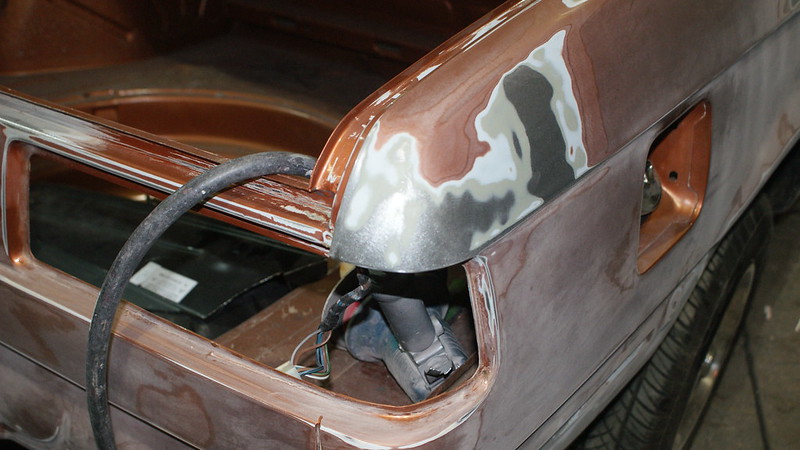
The hole behind the pedals, all welded and sealed up
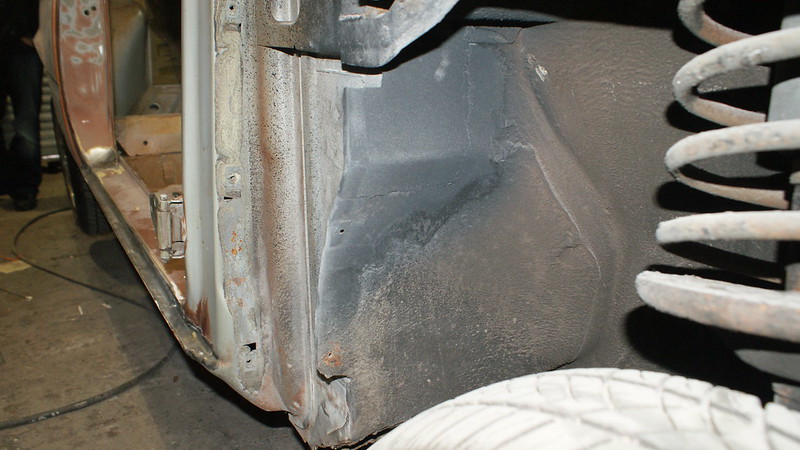
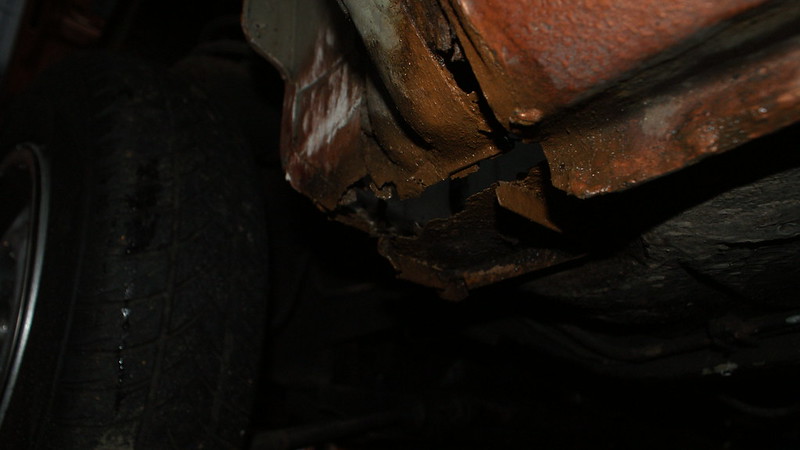
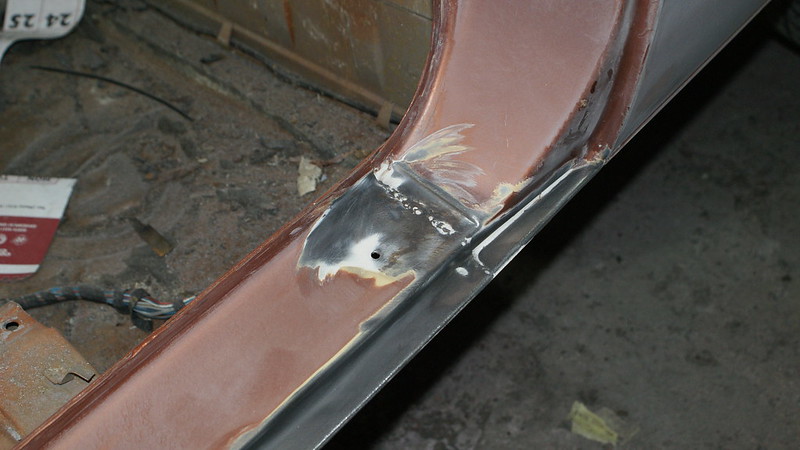
New arch to inner wing join:
And a couple of the car as a whole
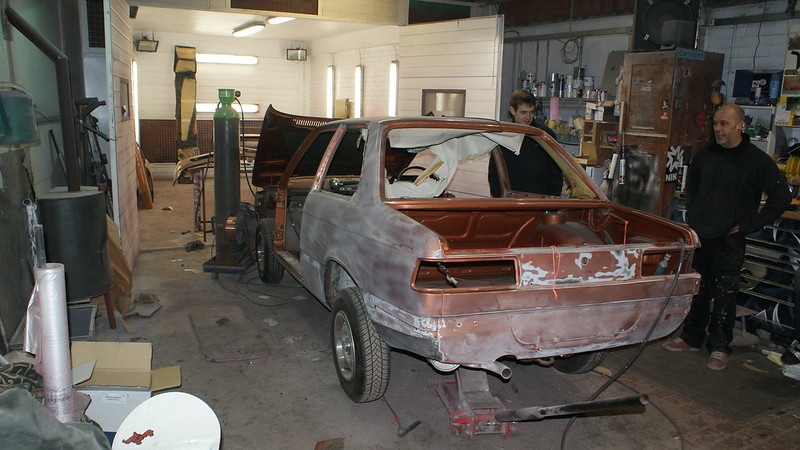
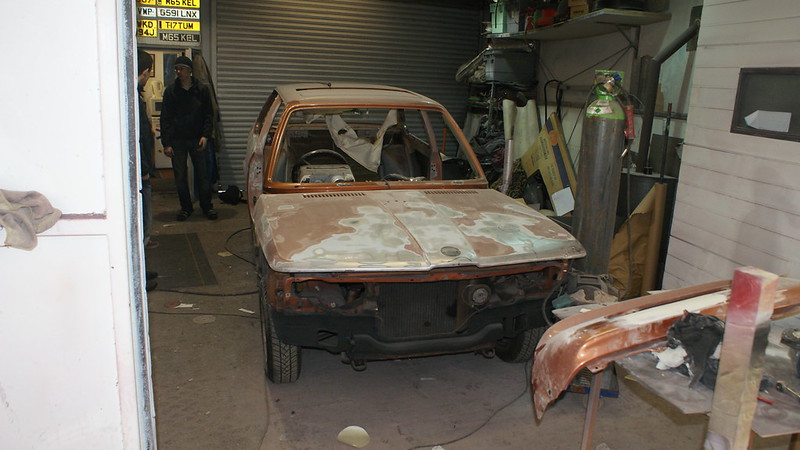
All very exciting!
I'll go back next weekend to see it again, by which point it should be primed and ready for paint
Gassing Station | Readers' Cars | Top of Page | What's New | My Stuff