Project plastic car (Scimitar GTE)
Discussion


I've had an a bit of a Scimitar craving for quite a long time, not sure why as most of them I came across were largely sat rotting on peoples driveways and around the back of run down blocks of garages, I guess I just found them strangely appealing...
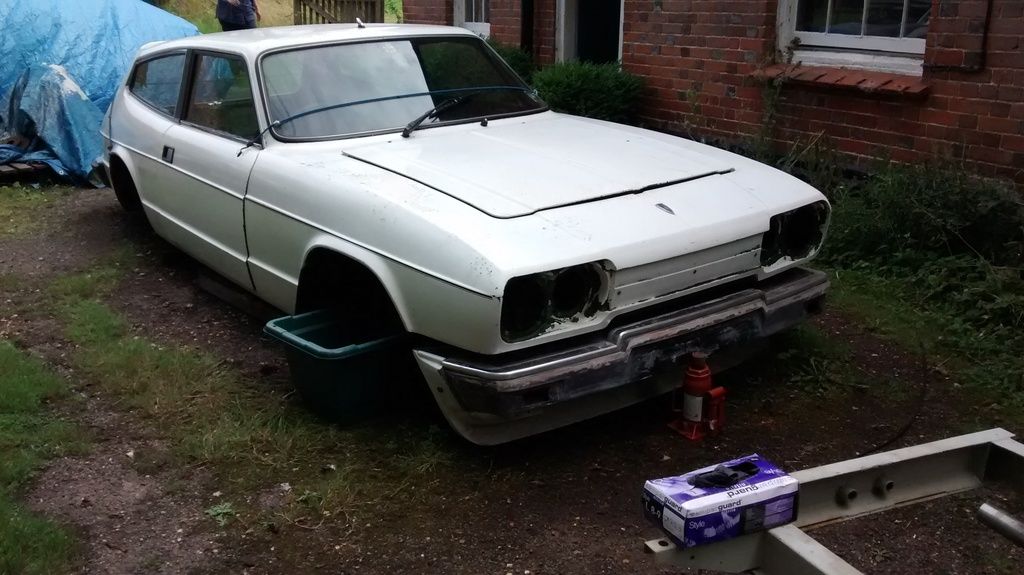
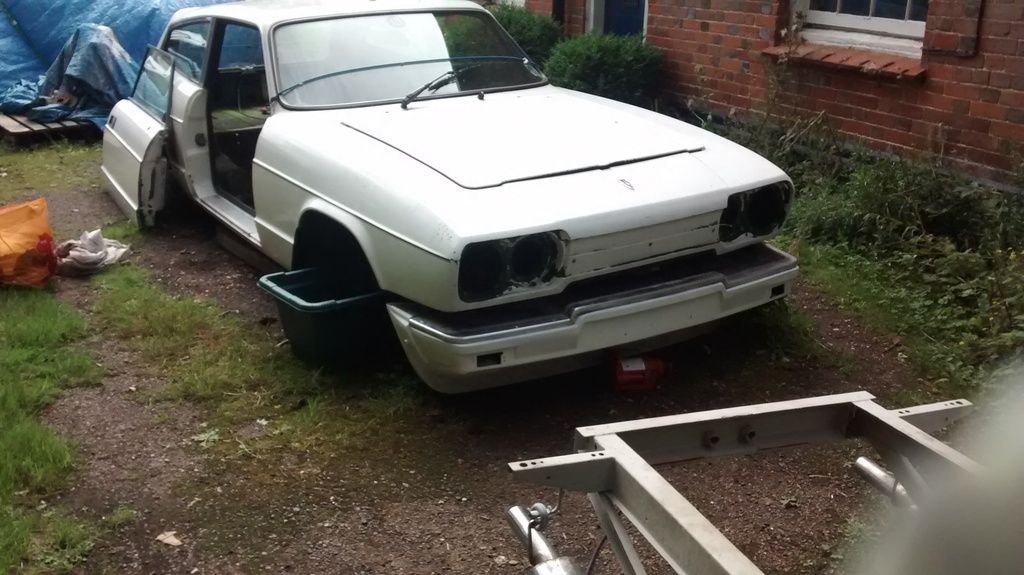
Anyway over the last couple of years I have been eyeing up possible project cars and the prospect of the Scimitar seemed like a good idea, after months of looking, I have finally found what appears to be a fairly solid project. It was 20 miles away in Reading, mostly white, hasn't run in ten years but apparently has a mildly breathed on engine and a sierra 5 speed box.
Collecting it turned out to be a complete saga. I arranged a pick up date and after discovering that towing it was going to be an issue I booked a mini transporter, two days before D day I received a message from the transporter people, the local franchise had run off with the pickup and their money, so I could either cancel or get a discount on their other vehicle, which was 60 miles away in Horsham....
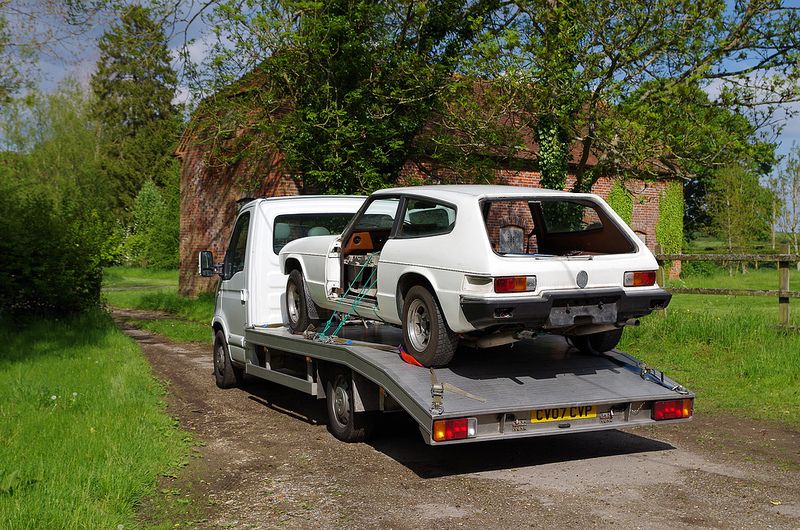
So Saturday morning rolled around I got up early (for me!) and headed for Horsham, picked up the transporter at about 9.30. Got back home at about 11.00. Then had to leave the transporter and pick up most of the contents of the car, doors, trim, seats (all the loose bits) before finally returning to do the exciting bit, pick up the Scimitar....
Off loading.....
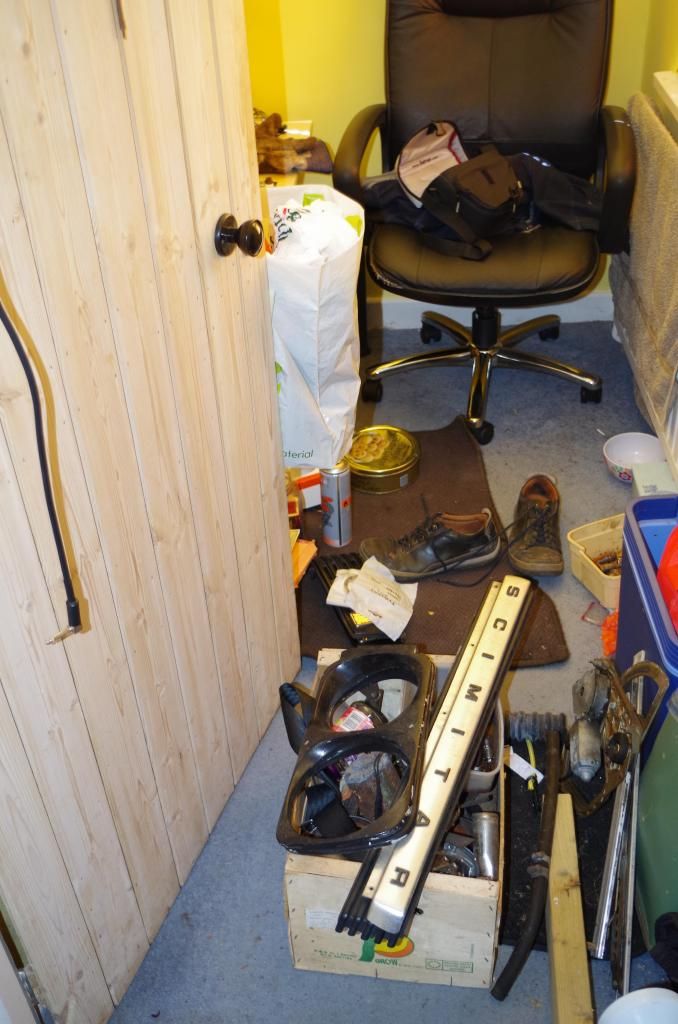
The House slowly filled with random Relaint parts...
After unloading the GTE, there was just the small matter of getting the transporter back to Horsham and retrieving my car, I eventually got back home around 10pm utterly shattered. I'm rather thank full that the my girlfriend is pretty understanding and actually likes the Scimitar.
Anyway more pics
Last on the road..

K30 010 by helen_l_rainbow, on Flickr
Seventies dash....

K30 008 (2) by helen_l_rainbow, on Flickr

K30 002 (2) by helen_l_rainbow, on Flickr

K30 008 by helen_l_rainbow, on Flickr
Now I'm just trying to figure out were to start.......
Anyway over the last couple of years I have been eyeing up possible project cars and the prospect of the Scimitar seemed like a good idea, after months of looking, I have finally found what appears to be a fairly solid project. It was 20 miles away in Reading, mostly white, hasn't run in ten years but apparently has a mildly breathed on engine and a sierra 5 speed box.
Collecting it turned out to be a complete saga. I arranged a pick up date and after discovering that towing it was going to be an issue I booked a mini transporter, two days before D day I received a message from the transporter people, the local franchise had run off with the pickup and their money, so I could either cancel or get a discount on their other vehicle, which was 60 miles away in Horsham....
So Saturday morning rolled around I got up early (for me!) and headed for Horsham, picked up the transporter at about 9.30. Got back home at about 11.00. Then had to leave the transporter and pick up most of the contents of the car, doors, trim, seats (all the loose bits) before finally returning to do the exciting bit, pick up the Scimitar....
Off loading.....

The House slowly filled with random Relaint parts...

After unloading the GTE, there was just the small matter of getting the transporter back to Horsham and retrieving my car, I eventually got back home around 10pm utterly shattered. I'm rather thank full that the my girlfriend is pretty understanding and actually likes the Scimitar.
Anyway more pics
Last on the road..
K30 010 by helen_l_rainbow, on Flickr
Seventies dash....
K30 008 (2) by helen_l_rainbow, on Flickr

K30 002 (2) by helen_l_rainbow, on Flickr
K30 008 by helen_l_rainbow, on Flickr
Now I'm just trying to figure out were to start.......
A bit of an update and some progress...
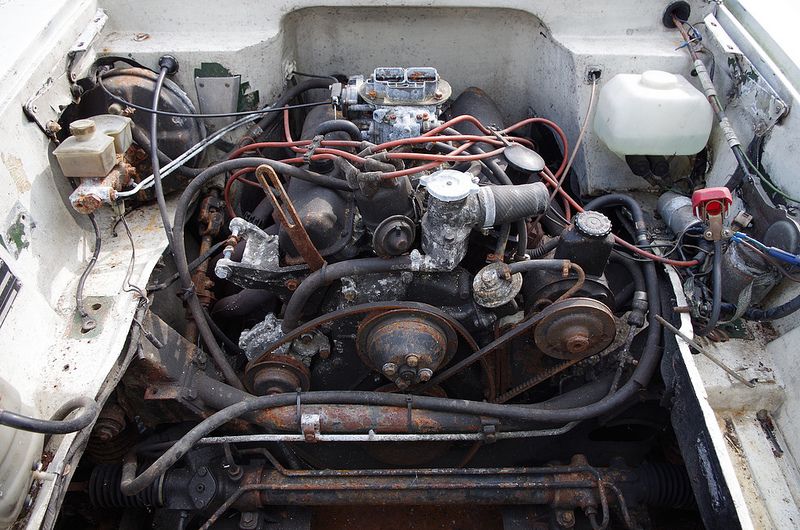
Today, I gave the old lump a service (oil, filter and spark plugs), removed what appeared to be a layer of compost from between the cylinder heads! Re fitted the webber and decided to try and start the engine.
After rocking the car in gear, just to make sure the engine wasn't seized I rigged up a battery. The main earth lead has gone missing so I got cunning with a set of jump leads! I tried the ignition and the dash came casually to life (well there was a click, the clock started and a couple of warning lights came on). A temporary gravity petrol feed for the carb was rigged. Things looked promising...
Anyway I tried the starter and it clicked, then nothing. I re checked my battery connections tried again and it turned over rather slowly, tried again and it picked the pace up but no were near fast enough to actually start....
I think either the starter is on it last legs or it has a poor earth, I will see if I can work this issue out tomorrow.
http://www.flickr.com/photos/14510005@N02/89897742...
Edited by interloper on Saturday 8th June 23:53
I have a proper earth lead arriving shortly, so I should be able to eliminate that possibilty...
In the mean time I have been looking at other electrical issues. Some of the wiring is interesting, I haven't seen this many scotch locks since I was in the electrical isle in Halfords circa 1997.....
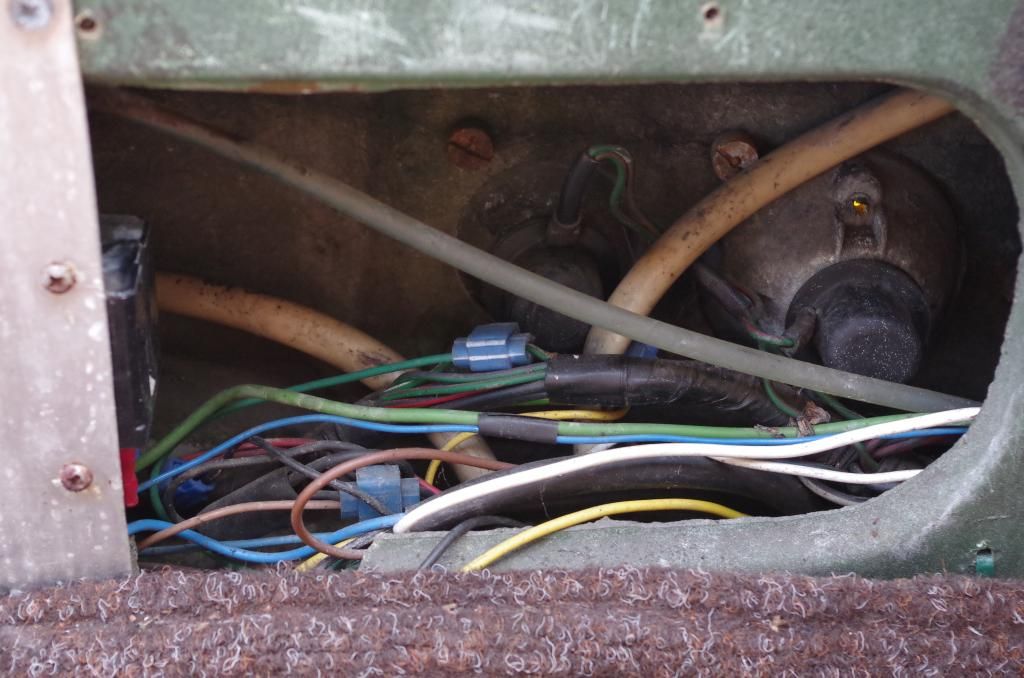
It turns out that this lash up was for the tow bar electrics, the tow bar had been removed but i found the dual sockets hidden awkwardly beneath the rear bumper.
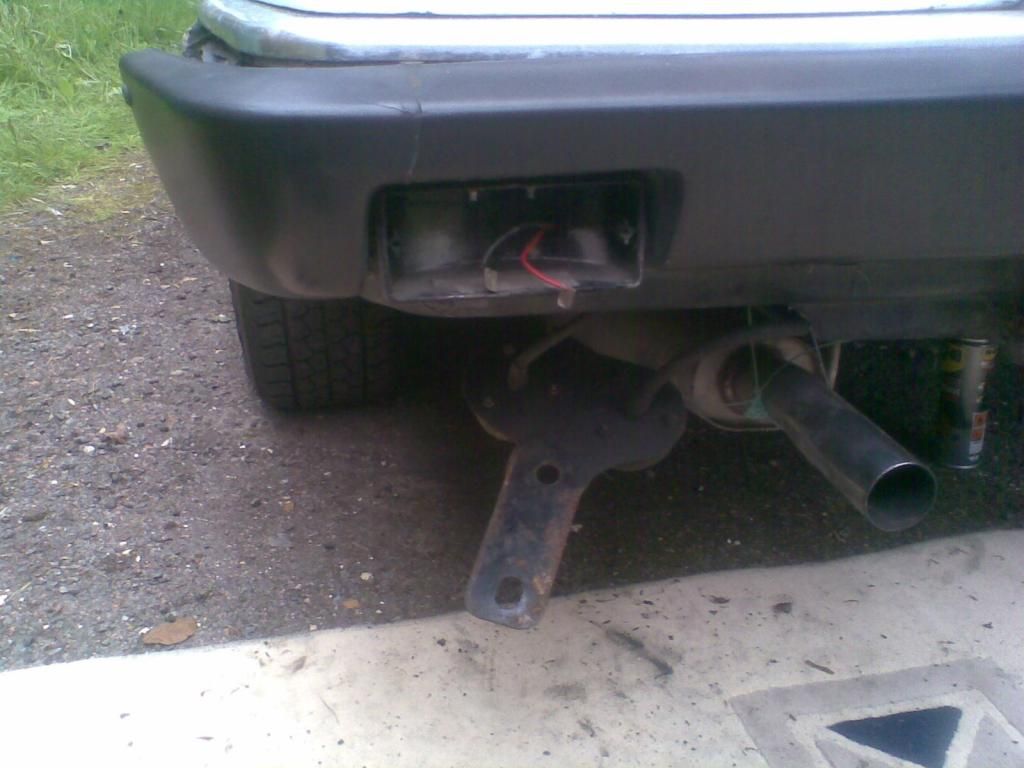
So an easy job, just a case of remove the scotch locks and check and repair the original wiring...

One other little thing I have noticed is that the previous, previous owner (the person I bought it off had merely stored it with vague intention of rebuilding it at some point) had made a very significant start on getting the body off.
It took me a while to figure this out! The clues were all there, as well as the doors and rear screen being loose, the seats taken up and the front bumper, rad, spare wheel carrier and frame being removed, virtually every body to chassis bolt has been removed too!
I now need to get back underneath the car to figure out if there is some hidden rot that requires this kind of drastic action, or whether I can put all the bolts back in!
Thanks Ironing man!
Now that the engine runs, I have started poking around at other areas, one of those is the electrics.
Last week I had, tail lights working, engine electrics (obviously!) The rear wiper, the radio, the brake lights (permanently due to a duff switch!), the interior lights, some of the dash lights and power to the front dipped and main. What I didn't have was indicators, hazards, heater fan, reverse lights and front wipers.
Now the front wipers are probably an internal fault as the unit heats up as soon as its connected. The indicators are a bit of a mystery as is the fan. All the fuses check out okay, I cant finds the flasher relay for the indicators? I found a row of three relays, one clearly does main beam, one clicks when you tug on an earth lead to the cigar lighter, don't think that's right?! And the other doesn't react to anything but swapping the units around with the main beam one, seems to show that they all work (which is very odd for Lucas parts).
To give myself best access, I decided to take the dash apart...
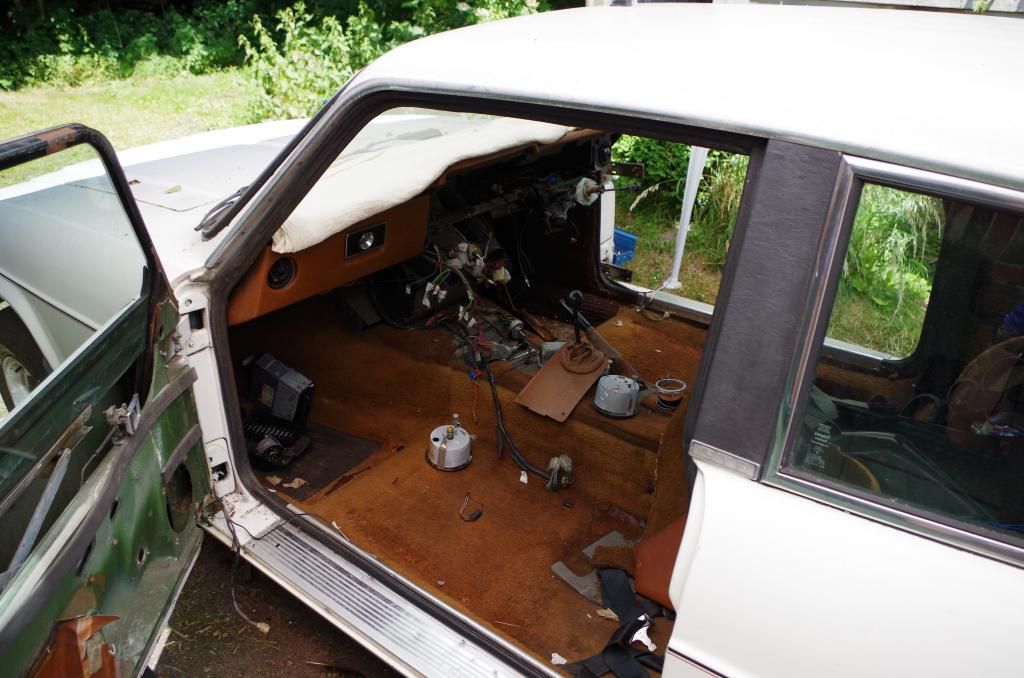
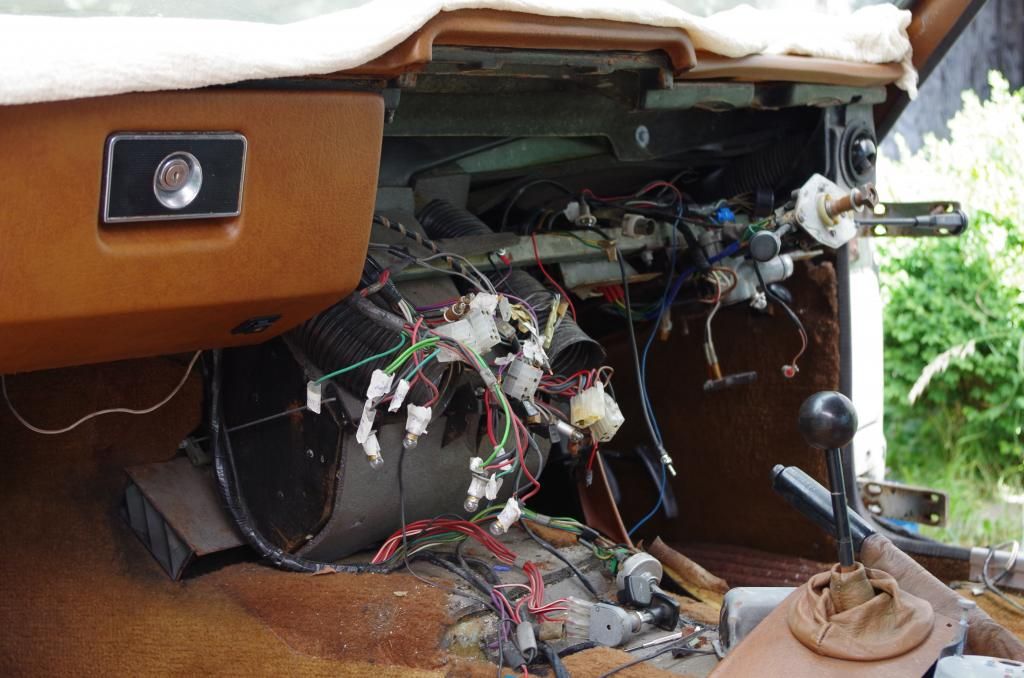
Then I realised you could get the dash top off easily, one thing led to another...
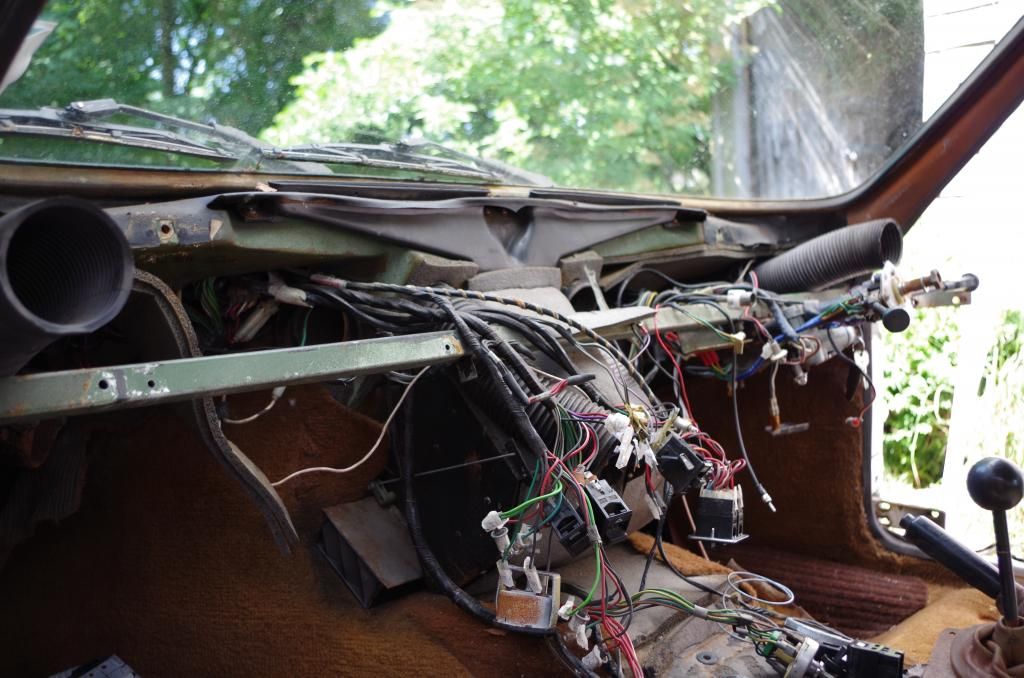
What have I done! Anyway. Loads of access but I have now found that I have lost all power to the rear lights? I suspect I have some wiring issues as most of the component parts seem to work, its just a case of finding were/if the loom is damaged or if its yet more bad earths. My poor old multi meter has never seen so much use.
Further update. I now know why the heater fans don't work, a little research revealed that the fans are normally located in the ends of the front wings, except they aren't, they are in boxes in my shed! A quick trial power feed reveals that both are a bit borked and short out internally. So that resolves that issue.......
Edited by interloper on Sunday 14th July 14:27
Long time no update! I decided that I would leave the electrics alone because part of the front loom is disconnected and I wont be putting that back together until I re fit the front bumper and headlights.
So I moved on to the chassis side of things, first up was the rear axle. The wheel studs on the drivers side are fairly knackered and one was loose. So I decided to try and remove the hub to replace them. The hubs on these axles are a fairly tight fit. Firstly I tried my little puller, it started to bend so I stopped. Then I borrowed a puller from work, this was a puller for a Mitsubishi Canter light truck, it too started to bend! And this point I consulted the Scimitar owners forum and I'm now waiting to borrow a certain tool (so job temporarily aborted).
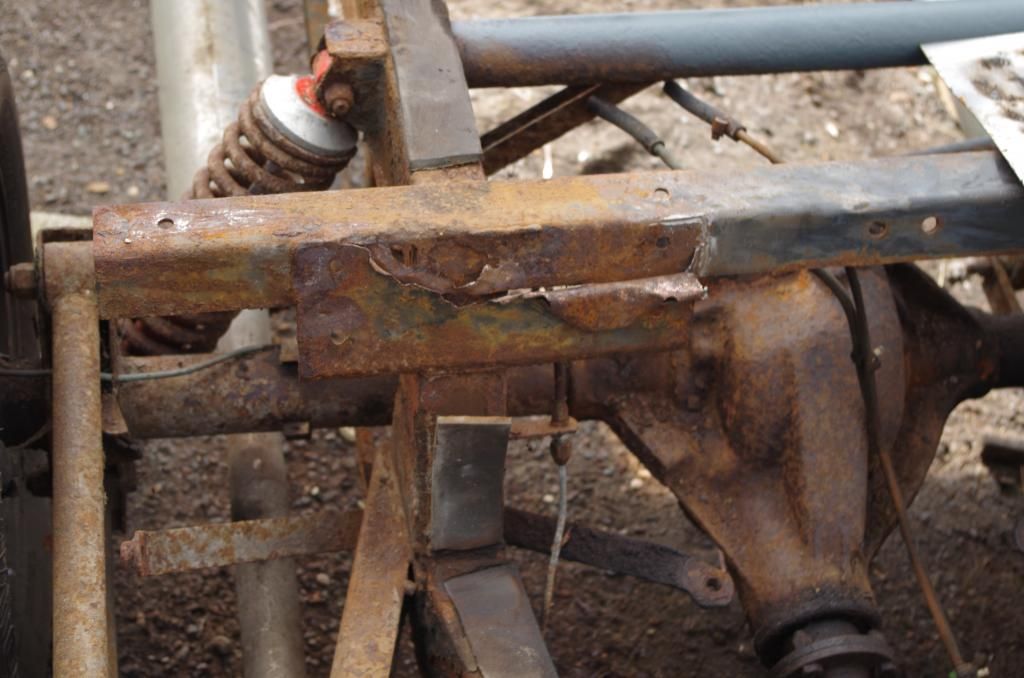
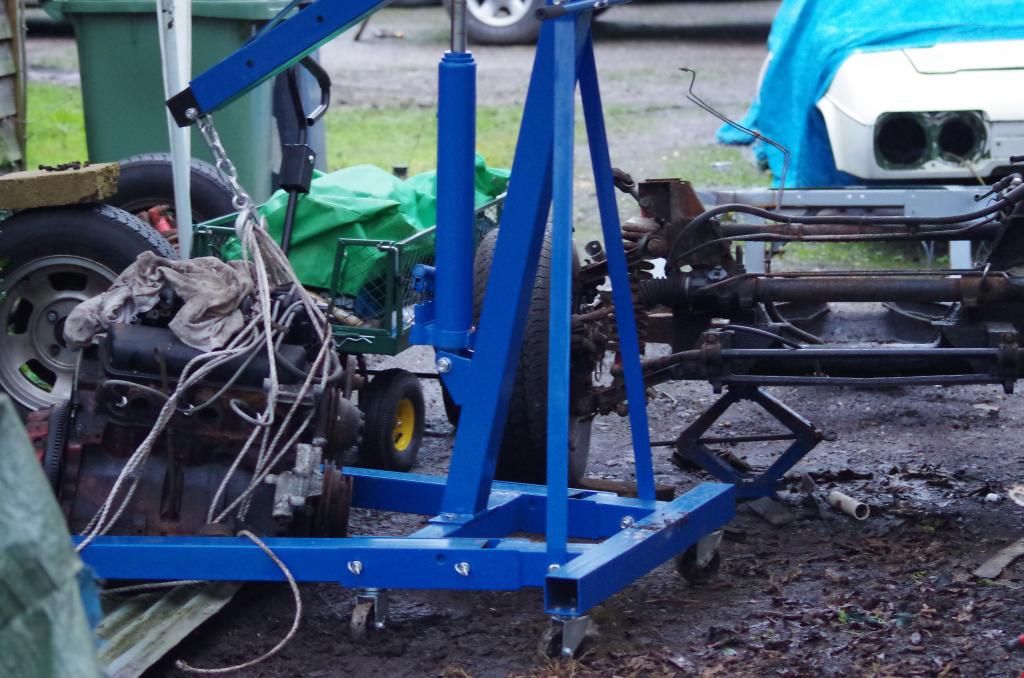
Feeling slightly down I started to look more at the chassis and seat belt mount points. The mounts are toast (actually toast would be more structurally sound!) so I cut them out, then I discovered the bolts that hold them to the chassis had become one with the chassis. After mush umming and arrrrring a big decision was made....
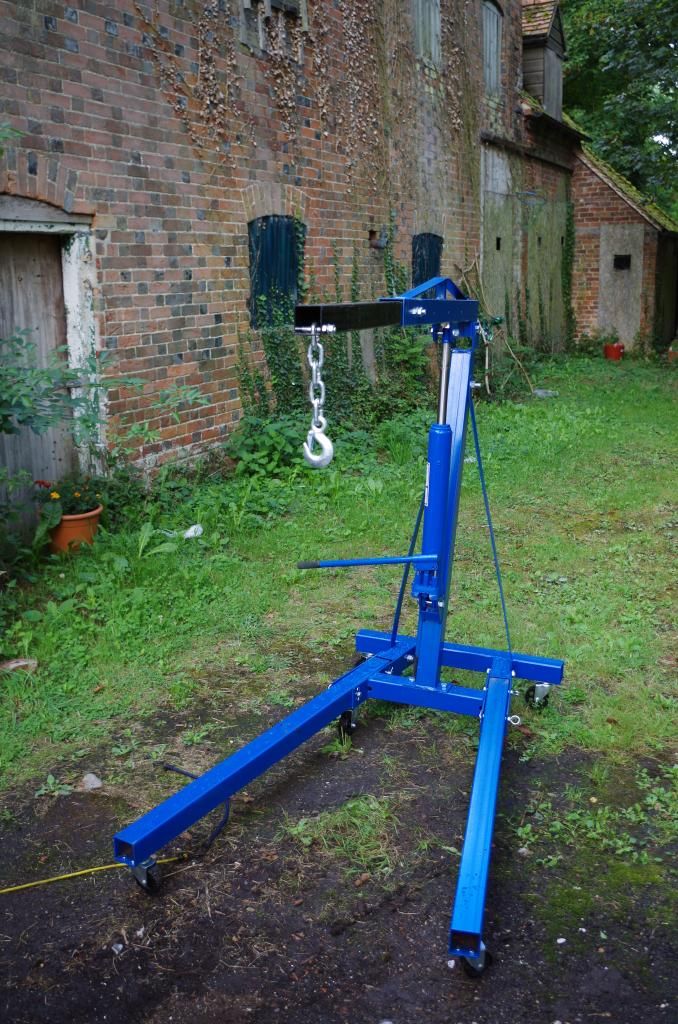
This arrived, 80kg of grown up Meccano!
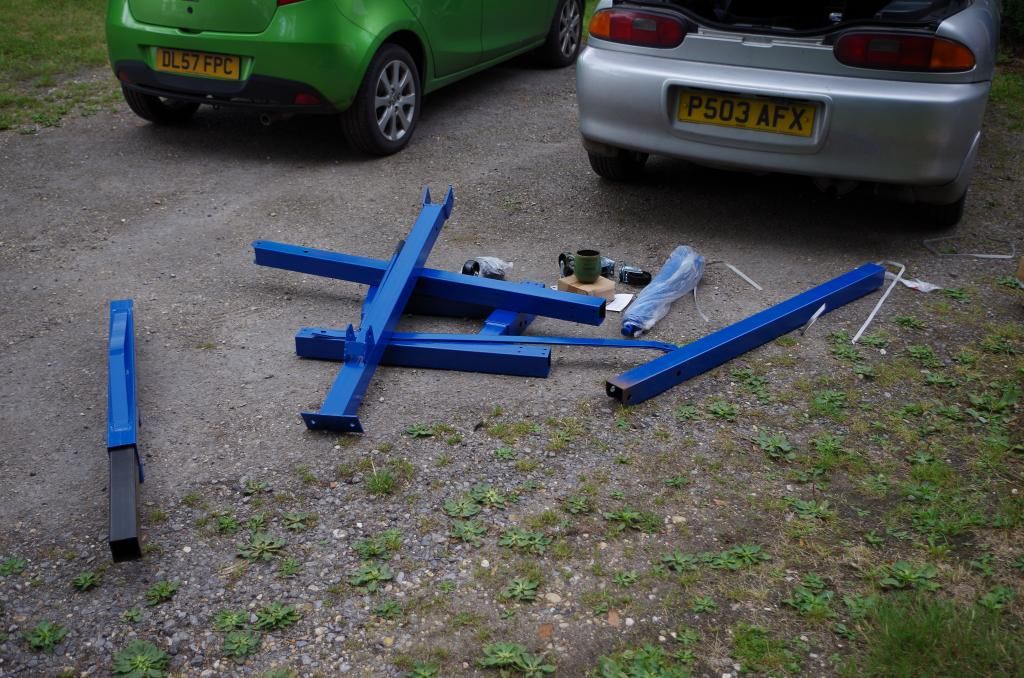
Which then became this.....
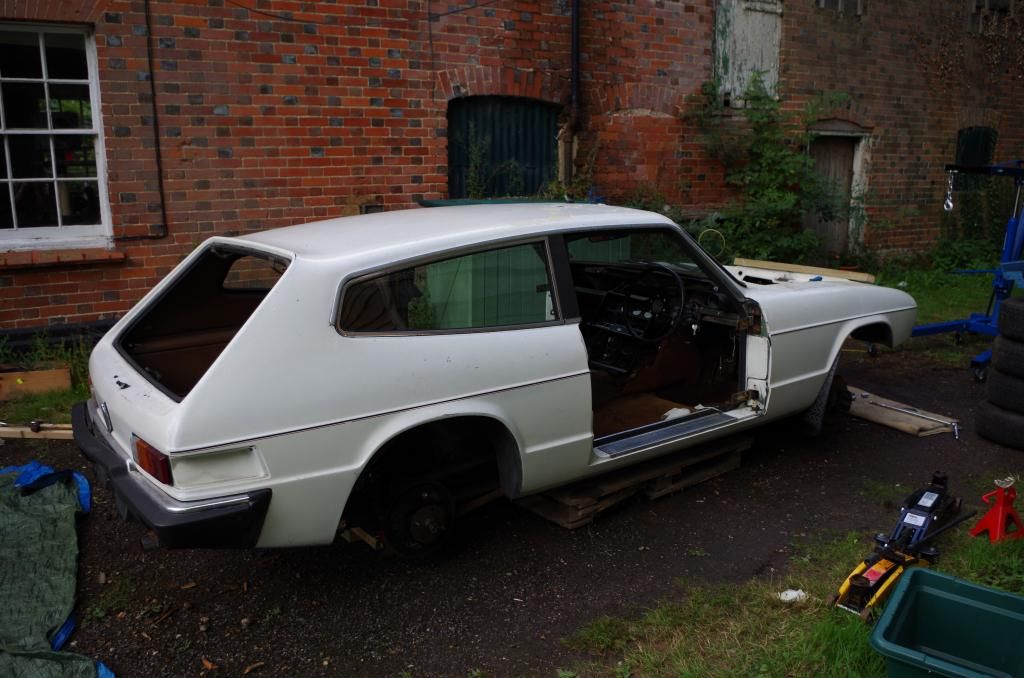
The car was prepared...
And the process began, sort of fission...
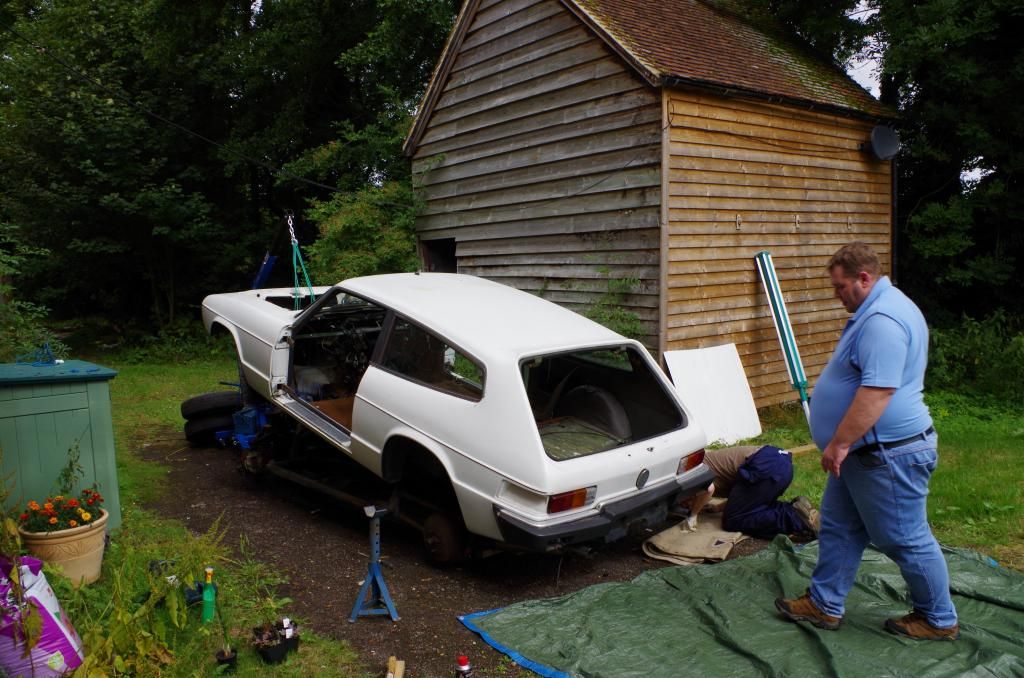
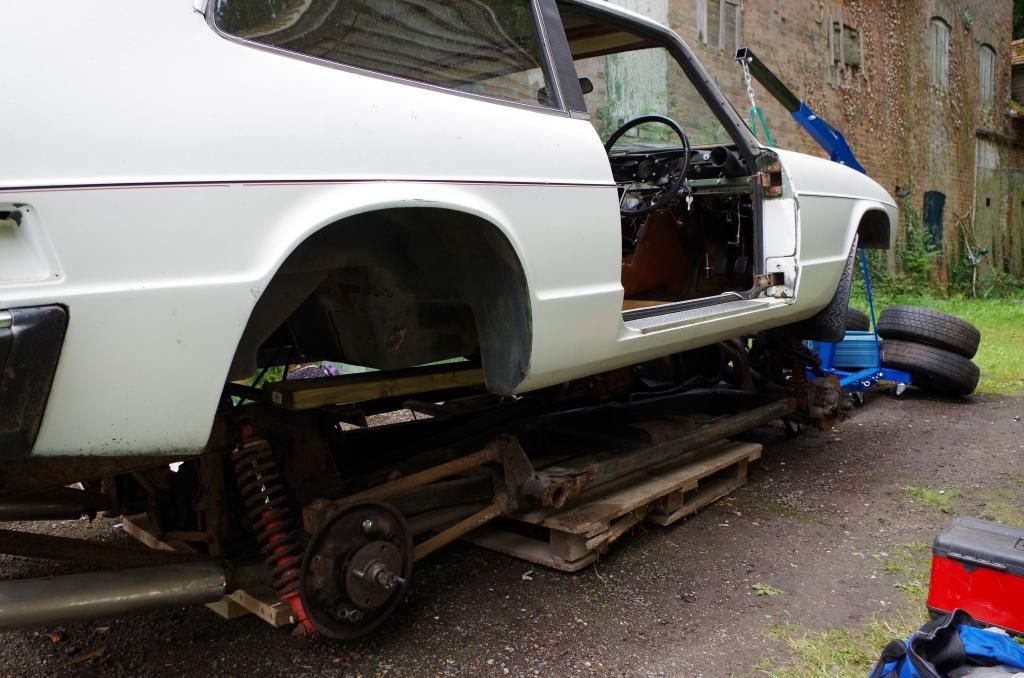
We have separation
The chassis really doesn't look too bad but will need a the odd patch here and there, some new brake and fuel lines will be going on then I will have to get it back together....
So I moved on to the chassis side of things, first up was the rear axle. The wheel studs on the drivers side are fairly knackered and one was loose. So I decided to try and remove the hub to replace them. The hubs on these axles are a fairly tight fit. Firstly I tried my little puller, it started to bend so I stopped. Then I borrowed a puller from work, this was a puller for a Mitsubishi Canter light truck, it too started to bend! And this point I consulted the Scimitar owners forum and I'm now waiting to borrow a certain tool (so job temporarily aborted).
Feeling slightly down I started to look more at the chassis and seat belt mount points. The mounts are toast (actually toast would be more structurally sound!) so I cut them out, then I discovered the bolts that hold them to the chassis had become one with the chassis. After mush umming and arrrrring a big decision was made....
This arrived, 80kg of grown up Meccano!

Which then became this.....

The car was prepared...

And the process began, sort of fission...


We have separation

The chassis really doesn't look too bad but will need a the odd patch here and there, some new brake and fuel lines will be going on then I will have to get it back together....

jamiebae said:
With the engine and box that easily accessible isn't it tempting to sling the old boat anchor in a skip and put the engine and box from something more modern in there? A 3.2 V6 from a rotten E Class Merc? 3.2 V6 from an Omega?
Not really.... Yes the old Essex is a bit of a lump but it makes a nice noise and has character, also it fits properly (no need for any fabrication etc). The standard brakes are un vented discs front and drums rear, so they would need upgrading too. There is also the issue of getting into certain events, if I wanted to enter a classic road rally having the wrong engine might be an issue.
Besides if I want to experience a slightly revier six I can just go for a blast in my old BMW.
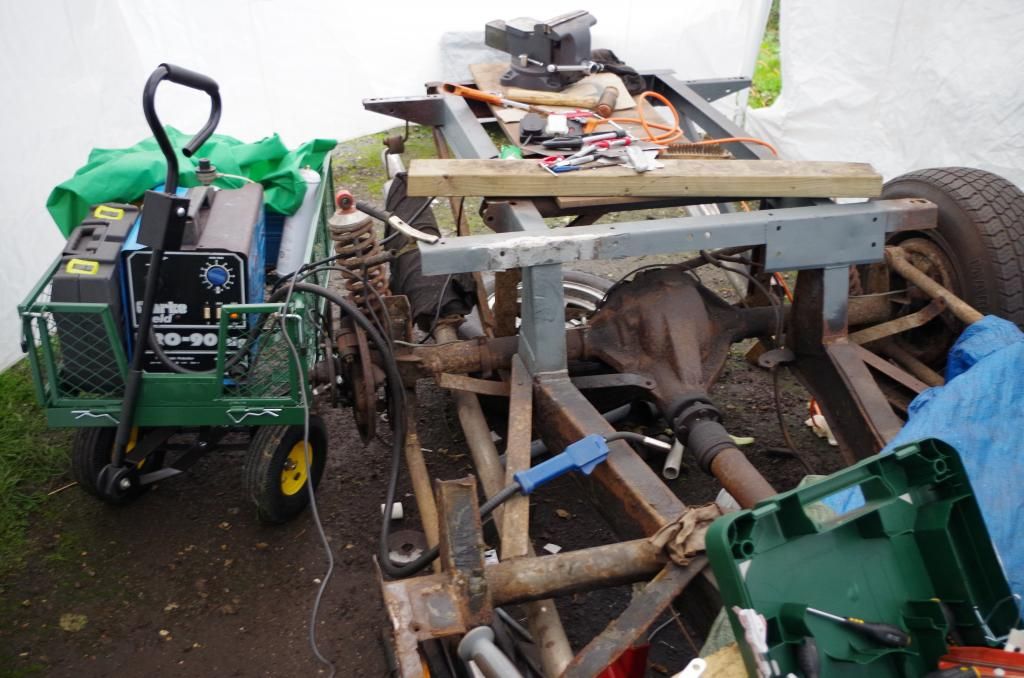
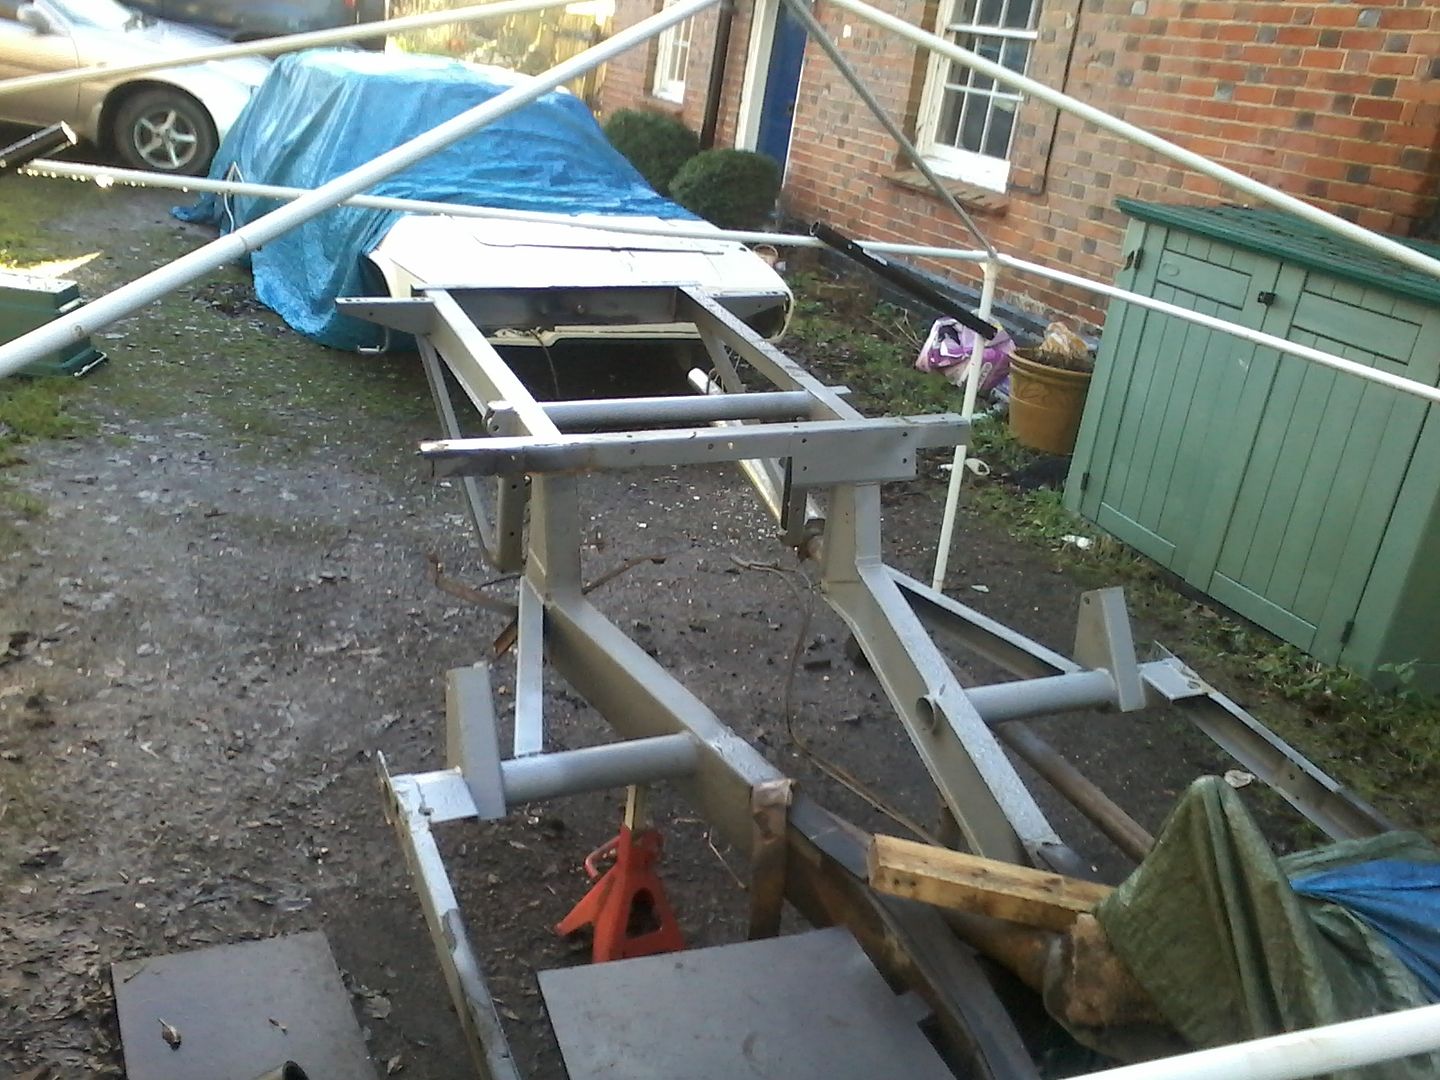
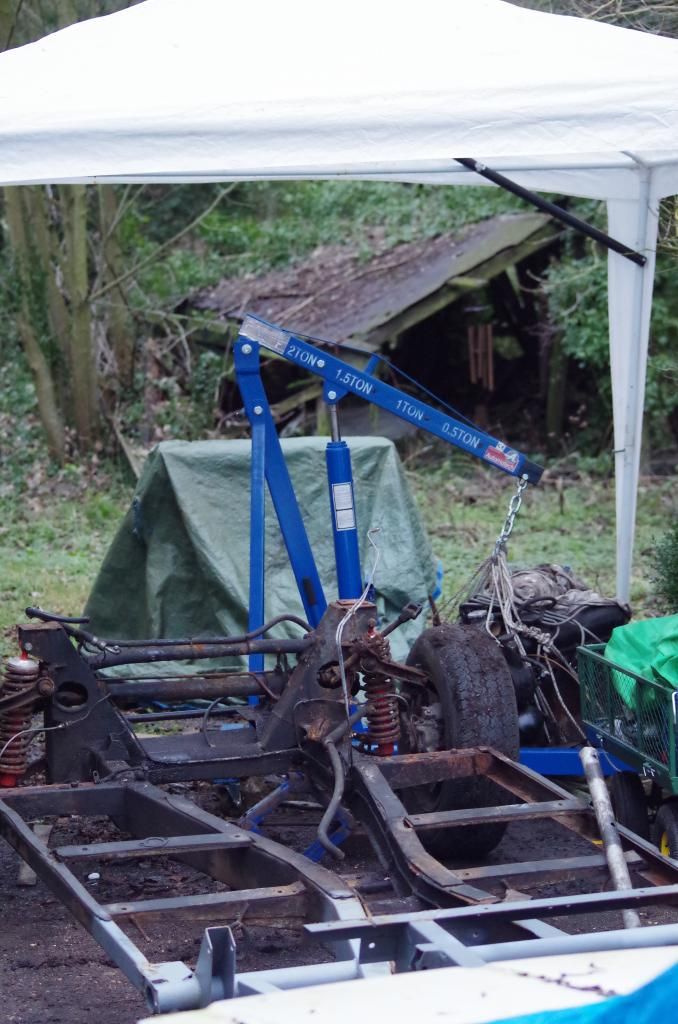
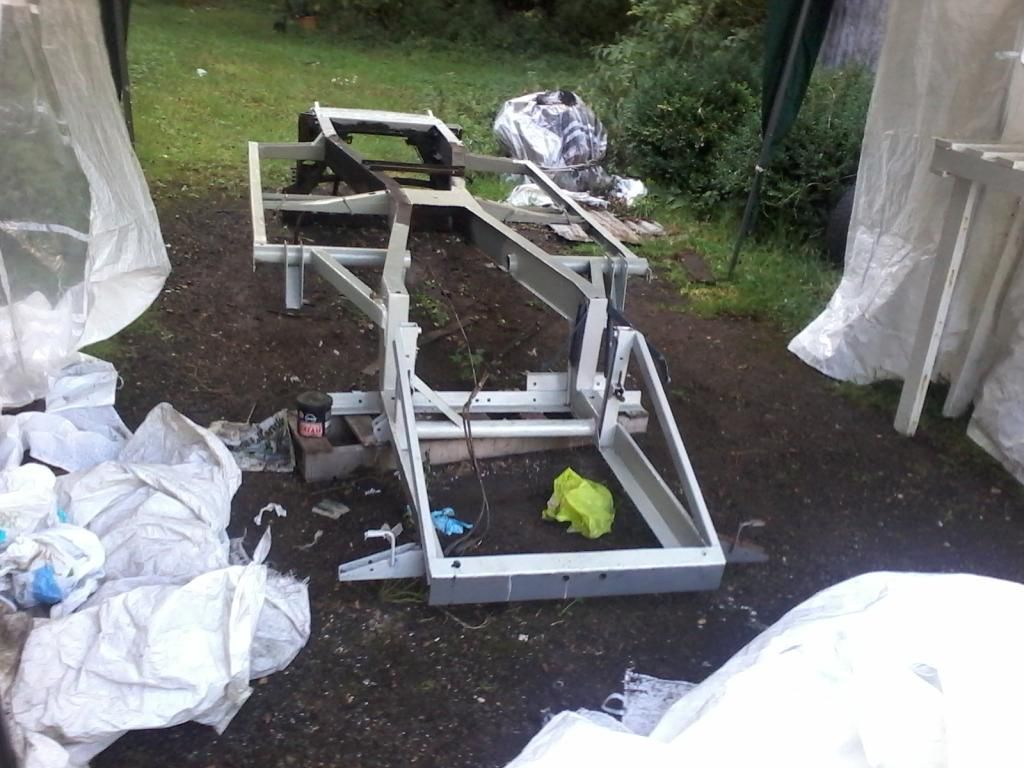
Time for another update, as you might have guessed things have slowed down a bit since getting the body off. Firstly I went on the hunt for a mig welder and managed to turn a decent old Clarke one on ebay for £70. Then there was the small matter of garage or lack of garage.
I had a gazebo lying around courtesy of the girl friend, its not quite long enough or sturdy enough so I picked up a second one and lashed it to the first then reinforced it. I now have a temporary garage!
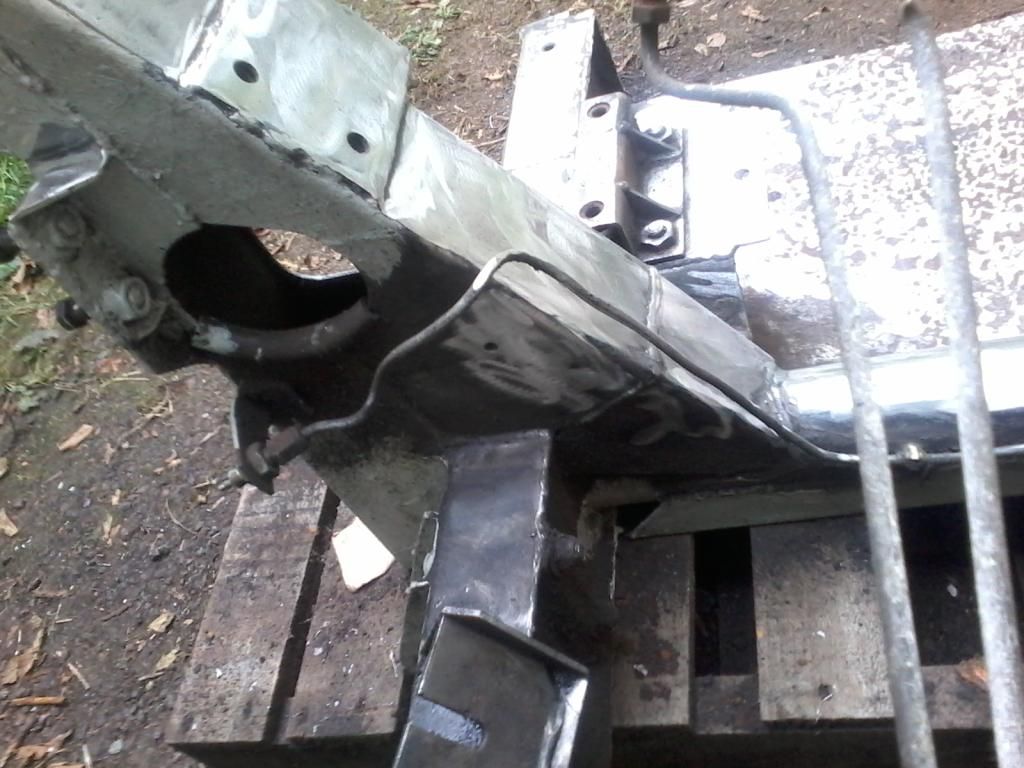
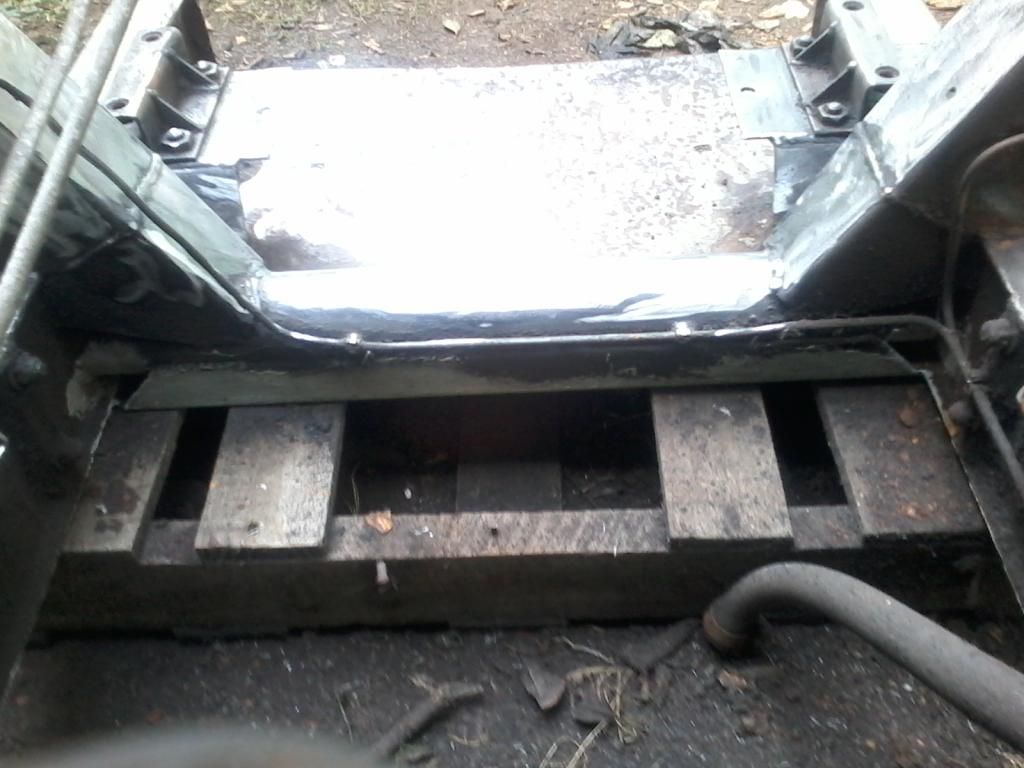
Then I injured my shoulder and lost another couple of weekends. Finally I got back to working on the chassis, I have been slowly grinding and cleaning up sections and have carried out my first proper welded repairs.
I have gone from this...
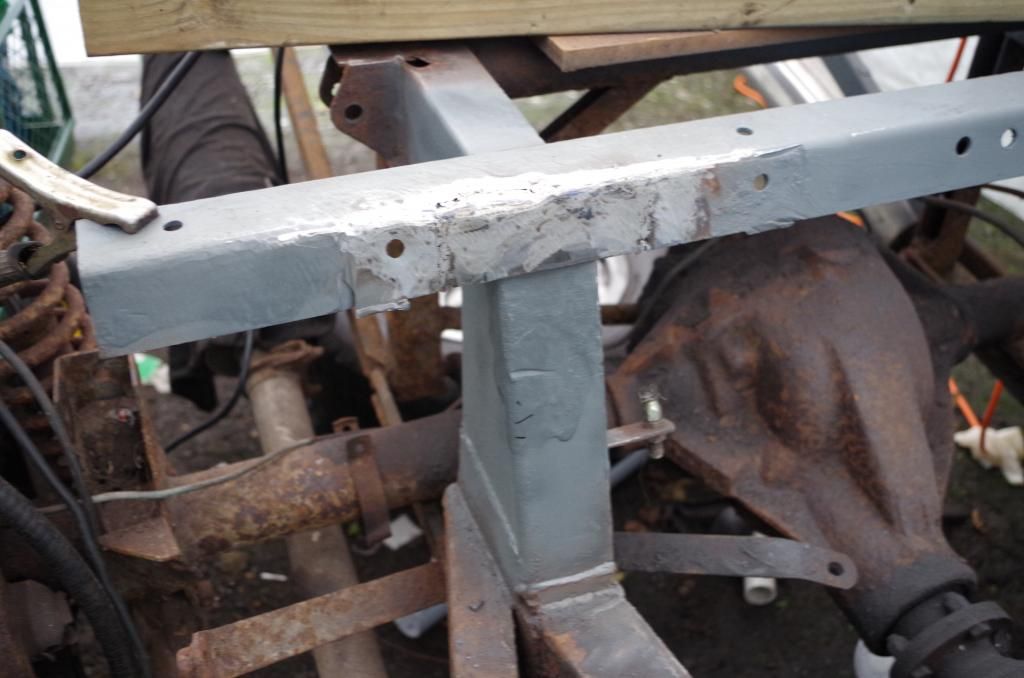
Got busy with the grinder...
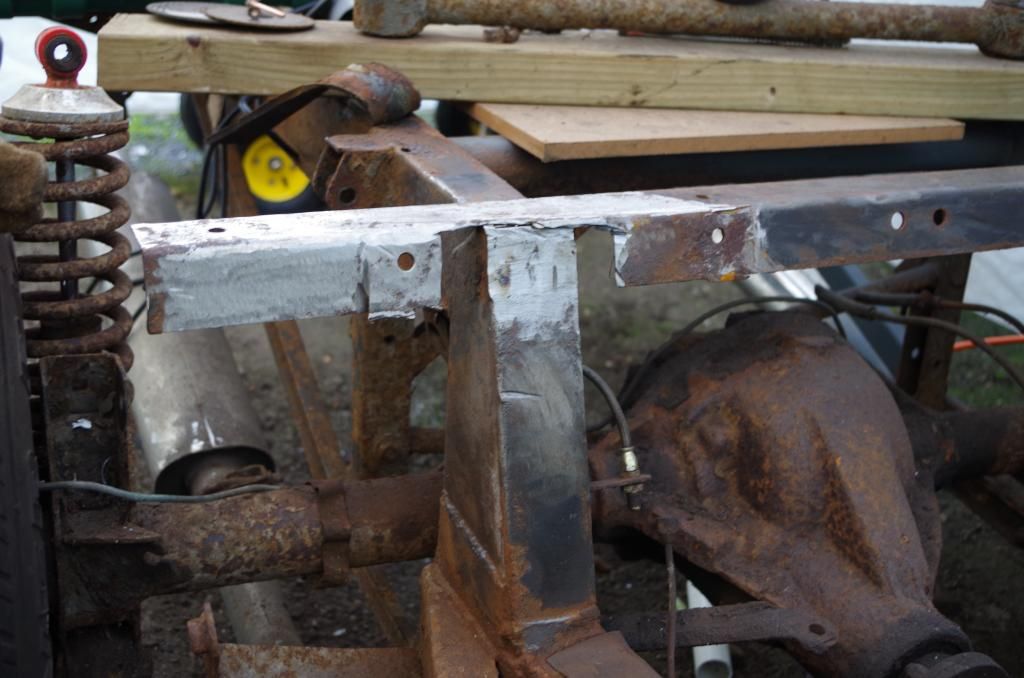
And started on the welding...
Who doesn't have a mig in a garden trolley?
I must admit when I bought the car back in May I thought it would have been back on the road by now, at this rate it will be on the road by about 2050, I really must try and speed up a bit!
I had a gazebo lying around courtesy of the girl friend, its not quite long enough or sturdy enough so I picked up a second one and lashed it to the first then reinforced it. I now have a temporary garage!
Then I injured my shoulder and lost another couple of weekends. Finally I got back to working on the chassis, I have been slowly grinding and cleaning up sections and have carried out my first proper welded repairs.
I have gone from this...

Got busy with the grinder...

And started on the welding...

Who doesn't have a mig in a garden trolley?

I must admit when I bought the car back in May I thought it would have been back on the road by now, at this rate it will be on the road by about 2050, I really must try and speed up a bit!
bobbybo said:
Hi, have enjoyed your posts
im thinking of buying a Scim gte 5A as a daily driver, I like the idea of lifting the body and sorting the chassis properly to get long term peace, do you have an idea of how long it takes to remove the car body? say how many 8 hour days for 2 guys..? would be very usefull to know
hows it going with the work, have you stopped for the cold season?
cheers
Rob
Good stuff 5As are a bit more desirable, lighter, prettier and not silly money. im thinking of buying a Scim gte 5A as a daily driver, I like the idea of lifting the body and sorting the chassis properly to get long term peace, do you have an idea of how long it takes to remove the car body? say how many 8 hour days for 2 guys..? would be very usefull to know
hows it going with the work, have you stopped for the cold season?
cheers
Rob
Getting the body off is a fair bit of work, over on the Scimitar forum (http://www.scimitarweb.co.uk/), all the body bolts are well documented and largely easy to find. Most will be rusty and seized and in most cases the time consuming bit is drilling/grinding them out. To speed this up try and get an electric die grinder (better still an air one if you are going to get a compressor) not a multitool (dremel/ryobi etc) as they really aren't man enough and I wrecked two of them in short succession!
The hardest bolts to do were the seat belt mount bolts as they are in a really awkward area, if they undo brilliant ( you have saved hours of faffing!) if not you will need to grind them out which is bloody awkward.
I probably took a couple of weekends and some evenings doing mine but if I'm honest I probably wasn't using the best tools for the job.
Also don't forget you will need to disconnect the electrics, the steering column and the brake lines!
I must admit I have slowed some what, largely because I'm working out side under shelters and have had other car issues to sort (its no good having your daily driver off the road!). I've also gained another car which needs a small amount of work before it can be MOT'ed and that needs doing as a priority because I don't want too many unusable cars sat around.
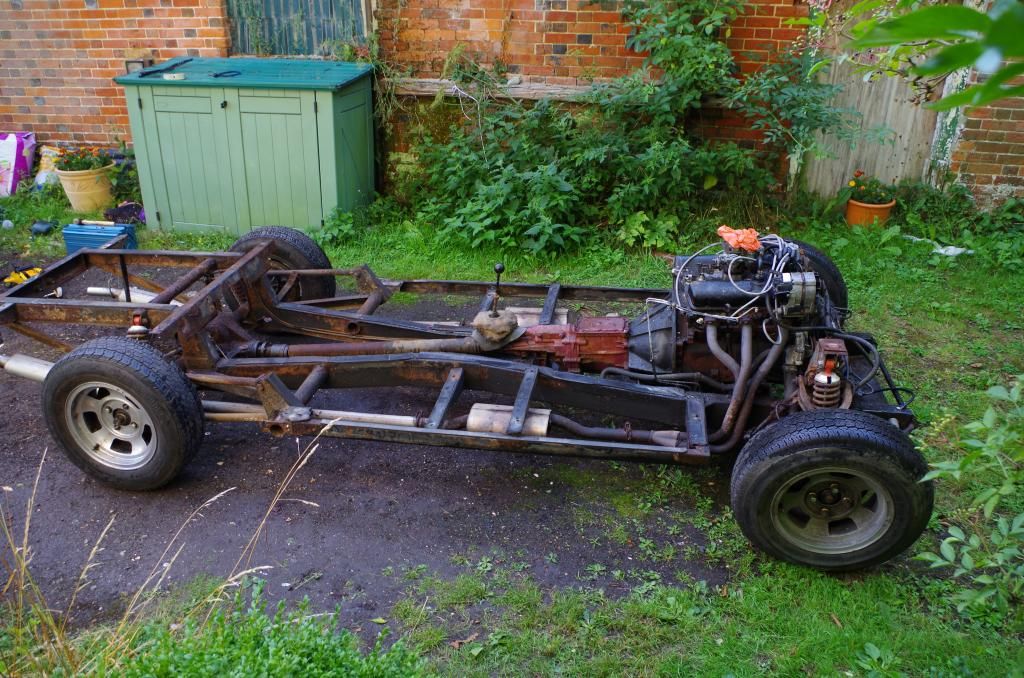
The other problem is once I had the body off I really wanted to do everything right, so I'm now slowly stripping the the chassis. The back axle is off the prop,gearbox, engine and front suspension are next.
Next month I will start on scrapping the rest of the old paint off, cleaning it up and re painting the whole frame before remounting the engine etc
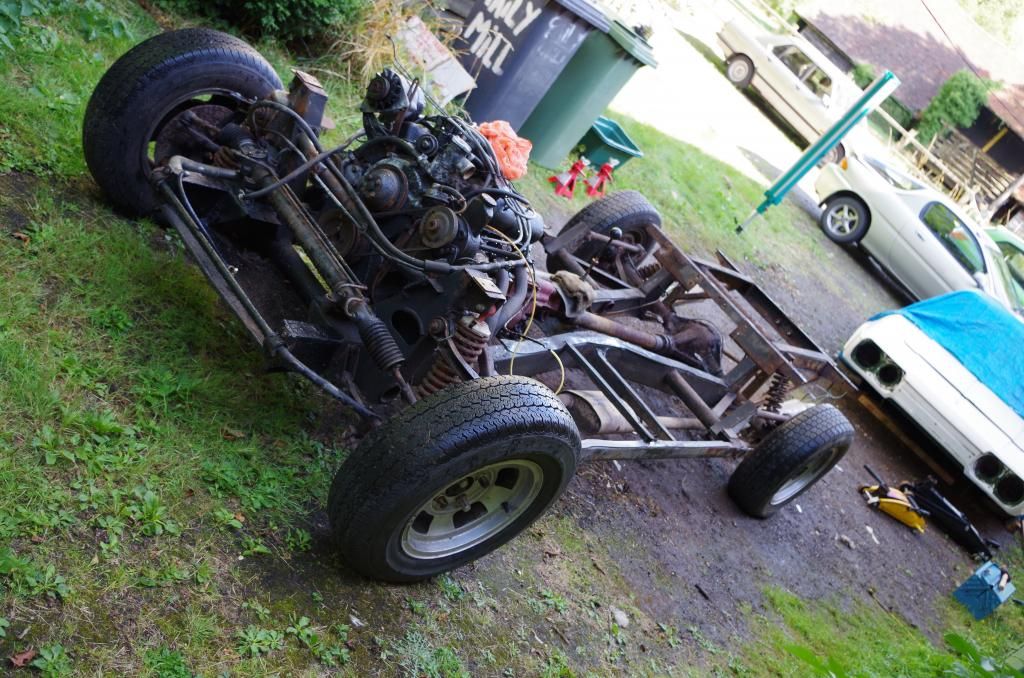
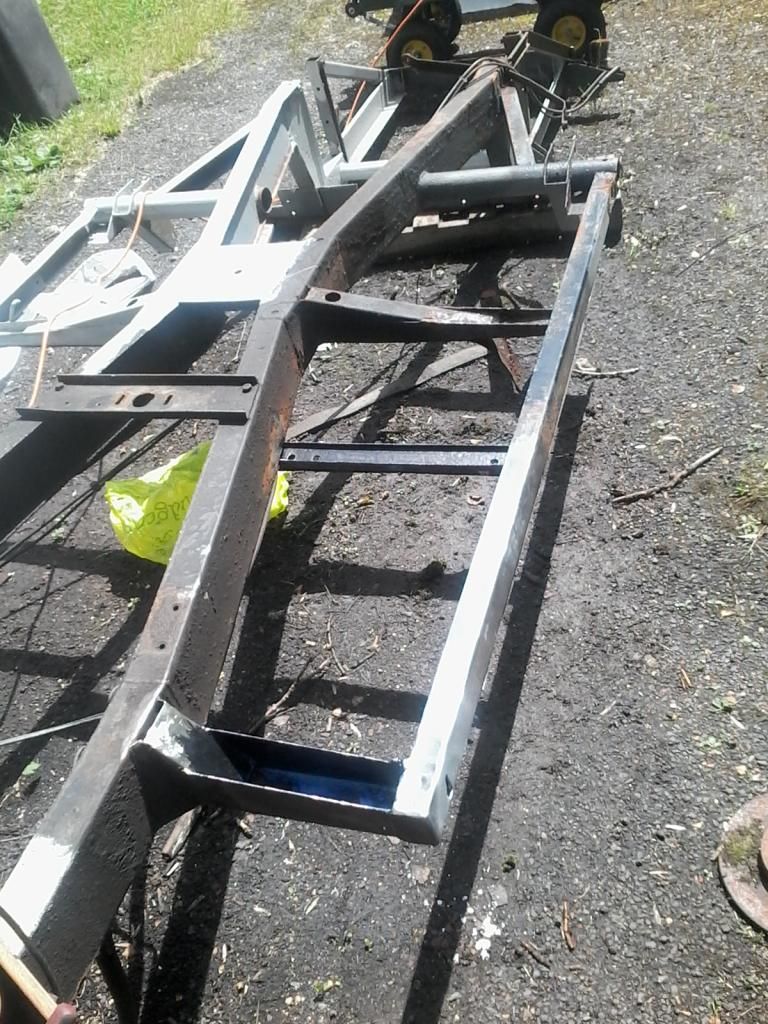
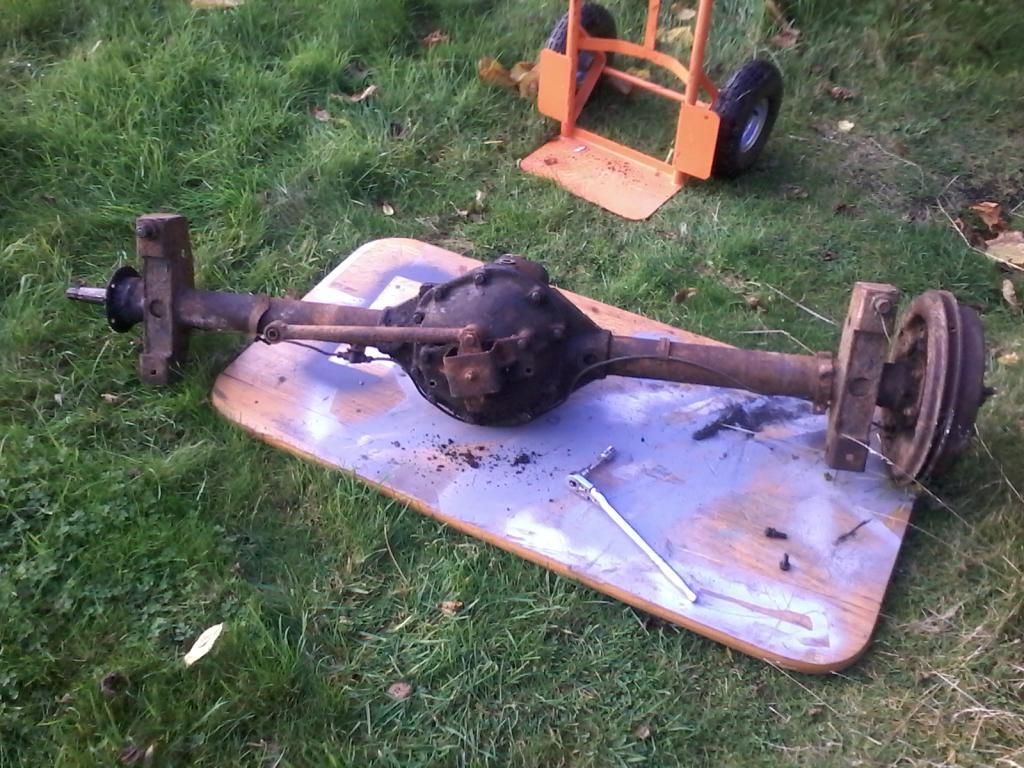
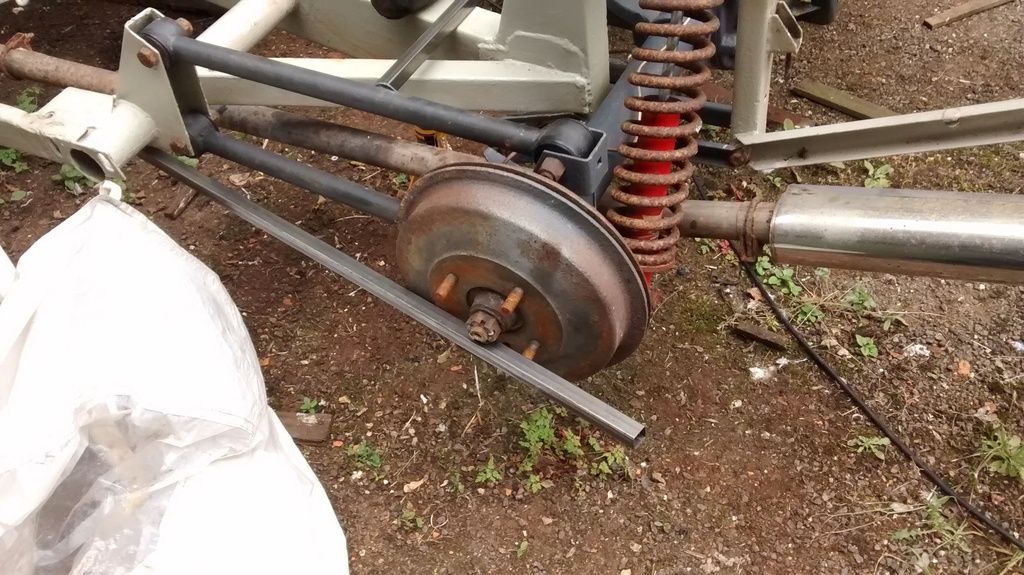
Small update, this is were I'm at currently. Back axle off, OS exhaust has parted company with the rather rotten manifold and it currently looks like this....
Any further progress is going to be governed by the weather, what we find needs doing on my better half's project off roader (an MOT failed Nissan Terrano2) and making sure my other cars get through their respective MOTs, one is due in the middle of February the other March.
It could be a busy start to the new year, I really hope the weather calms down a bit.
Finally an update!
Last weekend was dry but unfortunately its been mostly taken up with runs to the tip, we had a bit of a disaster, the water tank in the loft dropped (thanks to the whomever installed it, put it on chip board, which got wet and collapsed). But anyway I don't want to bore you lot with that, I did manage to do something on the car!
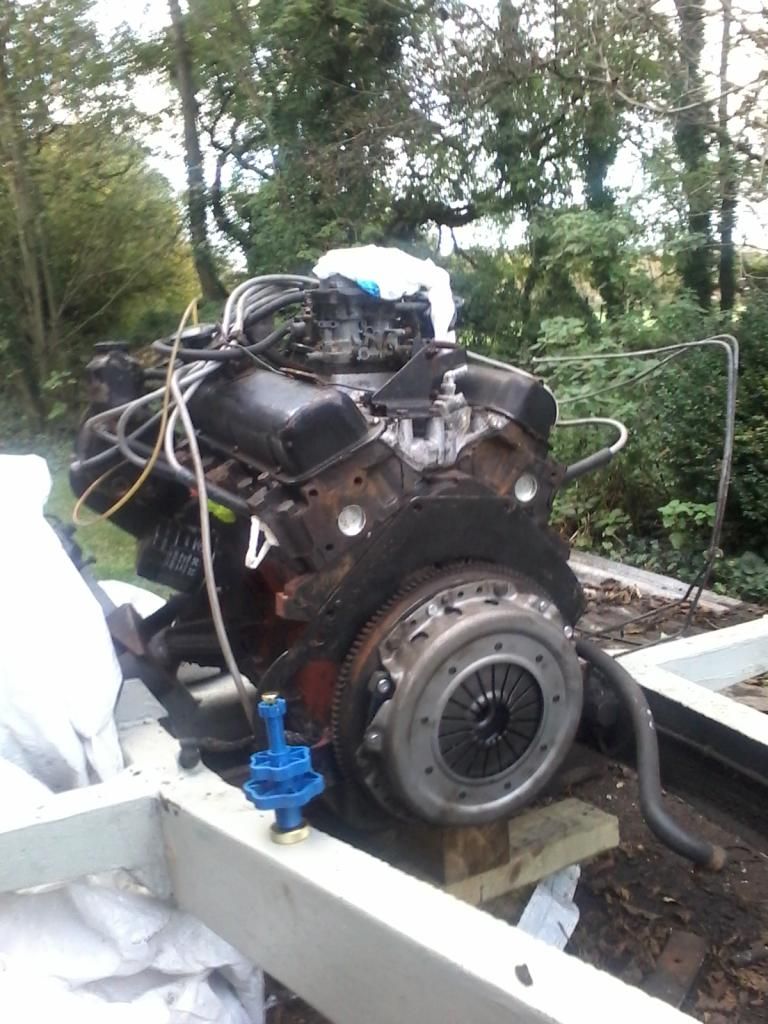
I'm stripping the major components off the chassis, (I've cleaned up one end, I may as well do all of it). This afternoon I got the gearbox and starter motor off....
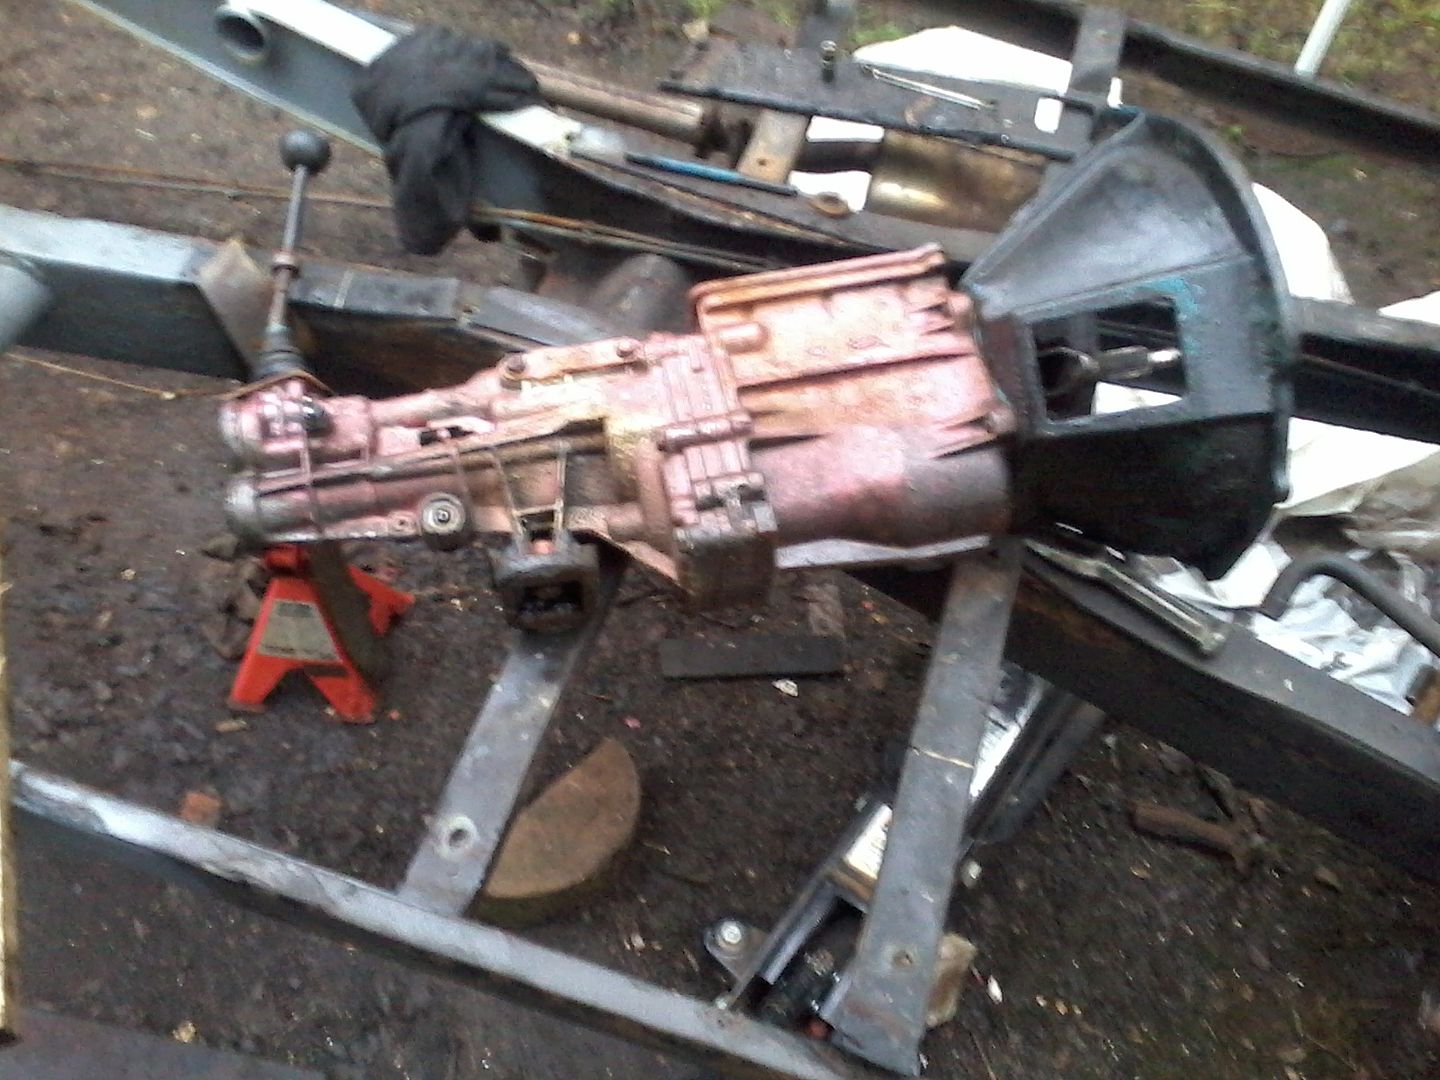
And made an odd discovery...
Excuse the shaky picture, I'm really not good with camera phones/phone cameras! So as well as having a pink gearbox and blue bell housing (it looks black but its very dirty) I have a red clutch, why would anyone paint a clutch, was this a fashionable thing to do at one time?
Anyway just the engine and front suspension to come off, fingers crossed for more good weather next weekend.
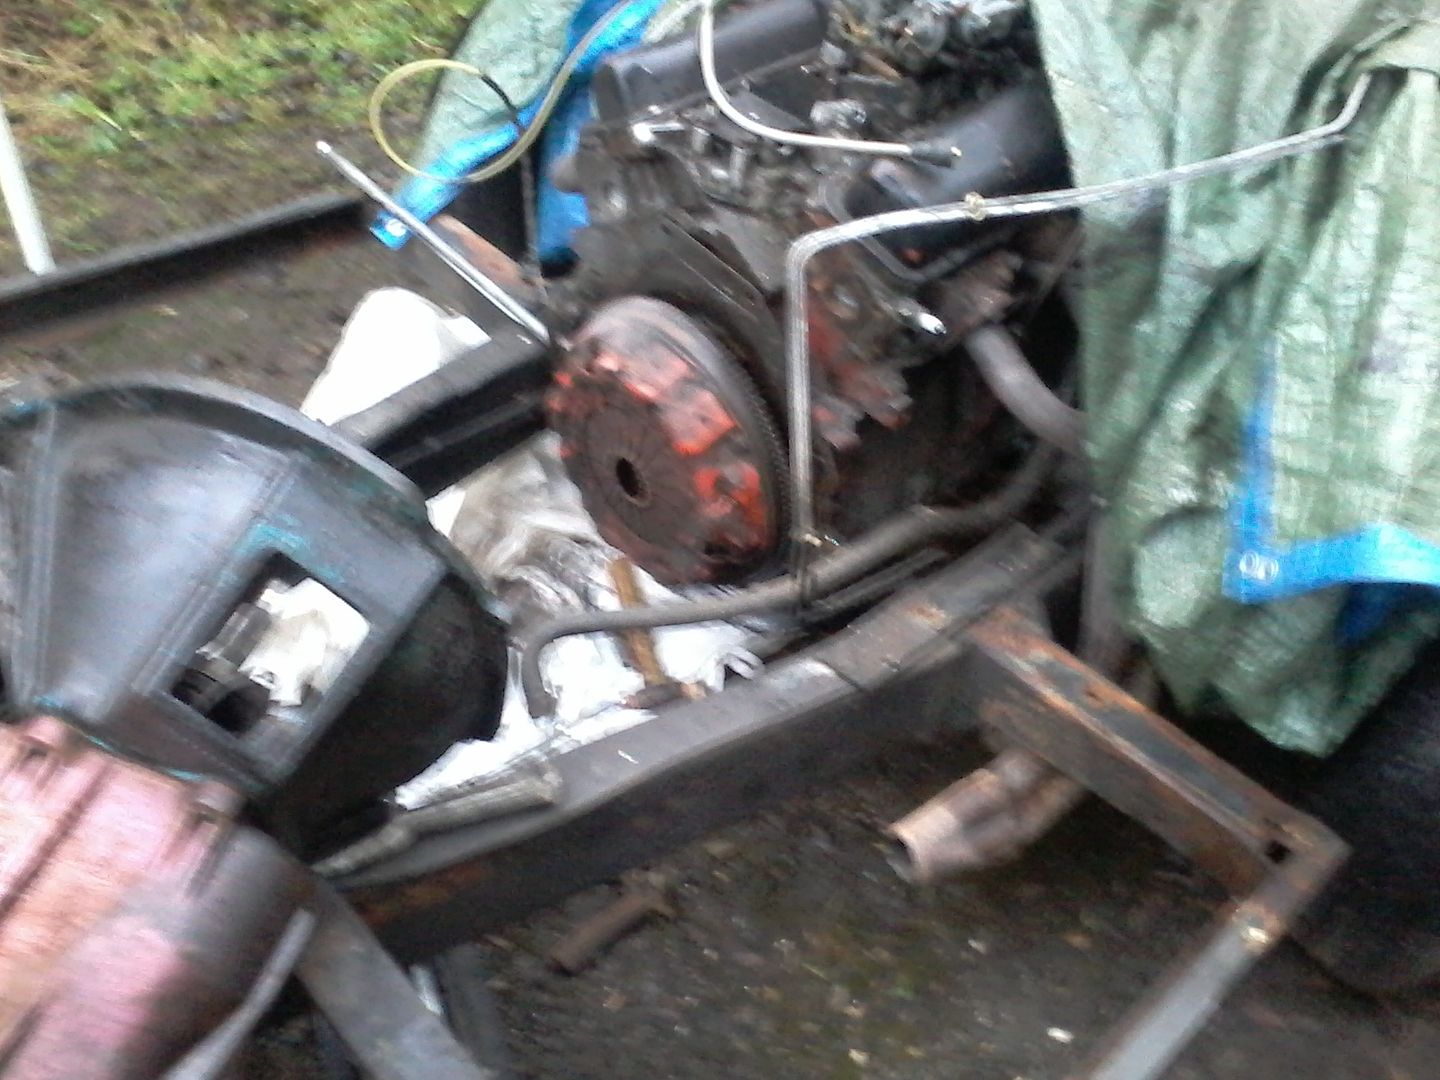
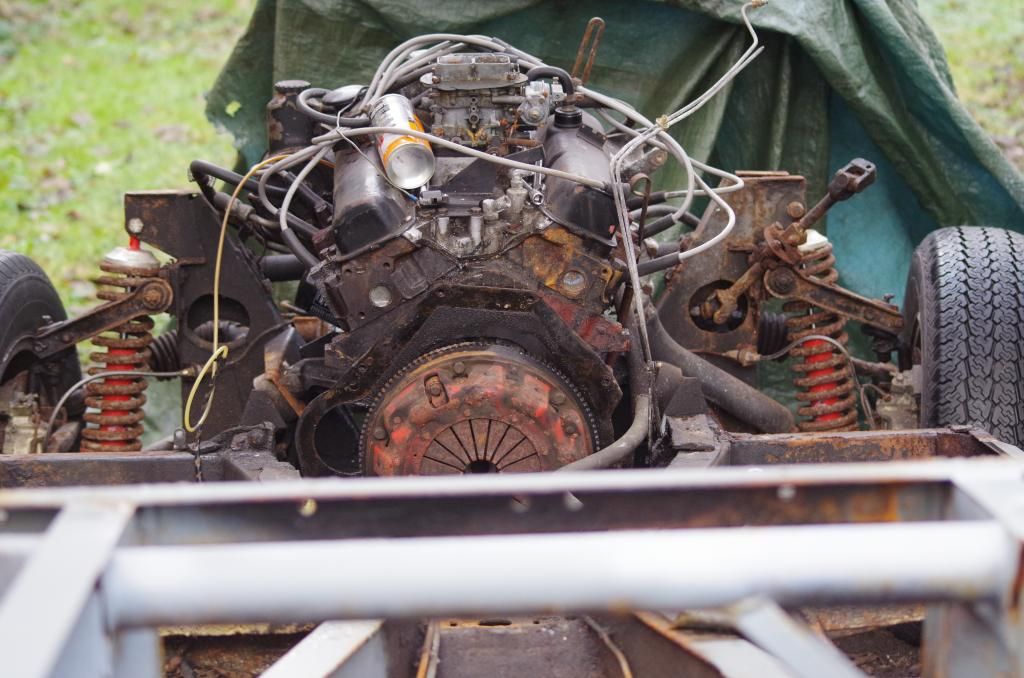
This weekends update....
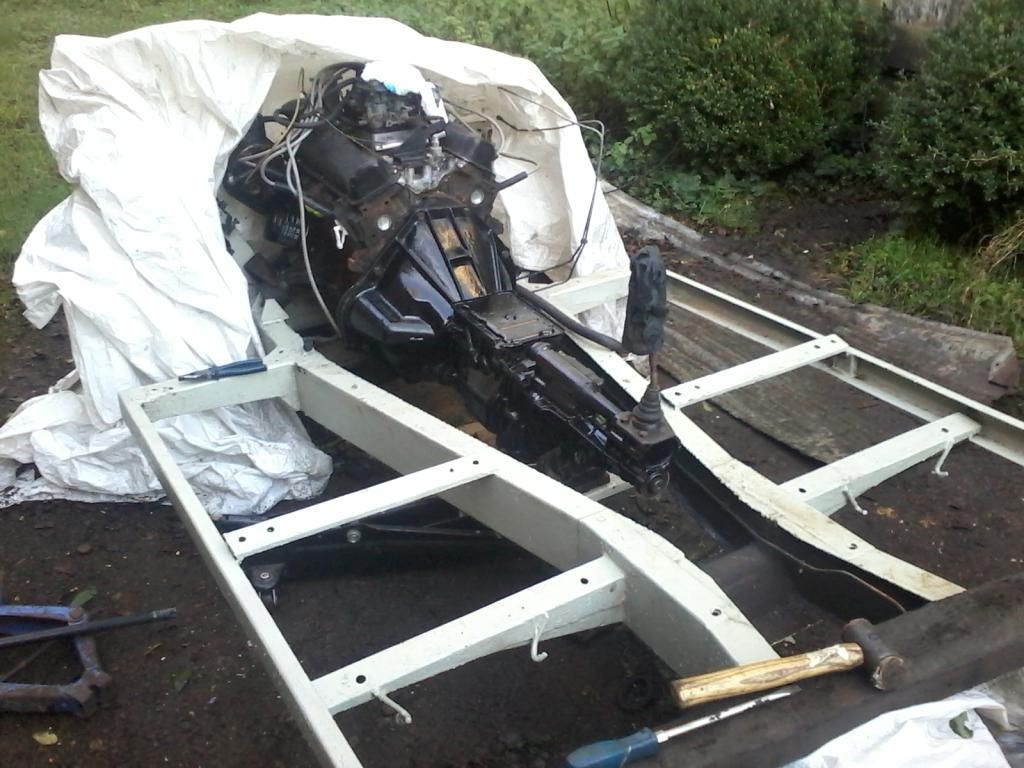
Slow and steady progress. Took the complete NS exhaust off and then tackled the remains (just the manifold) on the OS, got complacent and promptly snapped a bolt, bugger! At least its just one to sort. To be honest I was surprised how straightforward it was. After that I undid the remaining pipe work and hoisted the engine. Actually getting to that point was a bit of a pain, not because of the car but because the hoist is kept around the back of the house and the route to the scim is getting a tiny bit boggy, engine hoists are on big castors and don't like anything other than smooth surfaces!
I pinched the other half's DSLR, so some slightly better pictures for today's efforts.
I'm in two minds whether to remove the front suspension, I will see if I can flip the chassis over with it in place, tomorrow.
Last weekend was dry but unfortunately its been mostly taken up with runs to the tip, we had a bit of a disaster, the water tank in the loft dropped (thanks to the whomever installed it, put it on chip board, which got wet and collapsed). But anyway I don't want to bore you lot with that, I did manage to do something on the car!
I'm stripping the major components off the chassis, (I've cleaned up one end, I may as well do all of it). This afternoon I got the gearbox and starter motor off....

And made an odd discovery...

Excuse the shaky picture, I'm really not good with camera phones/phone cameras! So as well as having a pink gearbox and blue bell housing (it looks black but its very dirty) I have a red clutch, why would anyone paint a clutch, was this a fashionable thing to do at one time?
Anyway just the engine and front suspension to come off, fingers crossed for more good weather next weekend.
This weekends update....
Slow and steady progress. Took the complete NS exhaust off and then tackled the remains (just the manifold) on the OS, got complacent and promptly snapped a bolt, bugger! At least its just one to sort. To be honest I was surprised how straightforward it was. After that I undid the remaining pipe work and hoisted the engine. Actually getting to that point was a bit of a pain, not because of the car but because the hoist is kept around the back of the house and the route to the scim is getting a tiny bit boggy, engine hoists are on big castors and don't like anything other than smooth surfaces!
I pinched the other half's DSLR, so some slightly better pictures for today's efforts.


I'm in two minds whether to remove the front suspension, I will see if I can flip the chassis over with it in place, tomorrow.

Holy thread resurrection Batman! Realised I hadn't updated this in quite a while and there has been progress, slow progress!
So here's an abridged update...
The chassis got thoroughly stripped and cleaned..
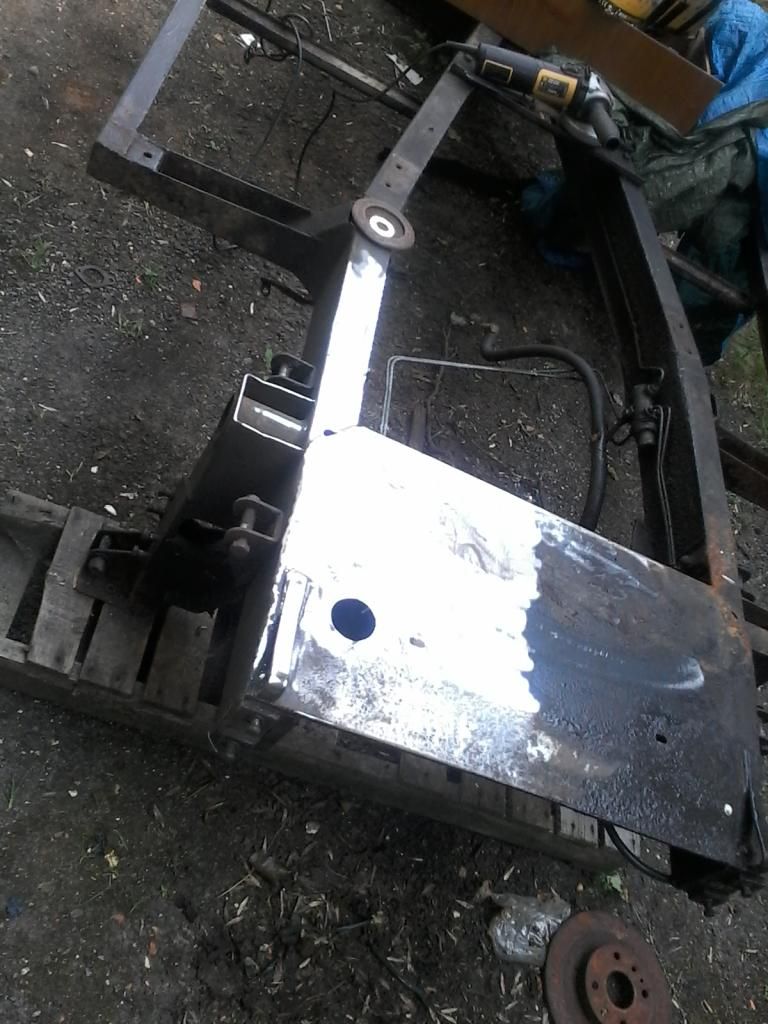
And more chassis action...
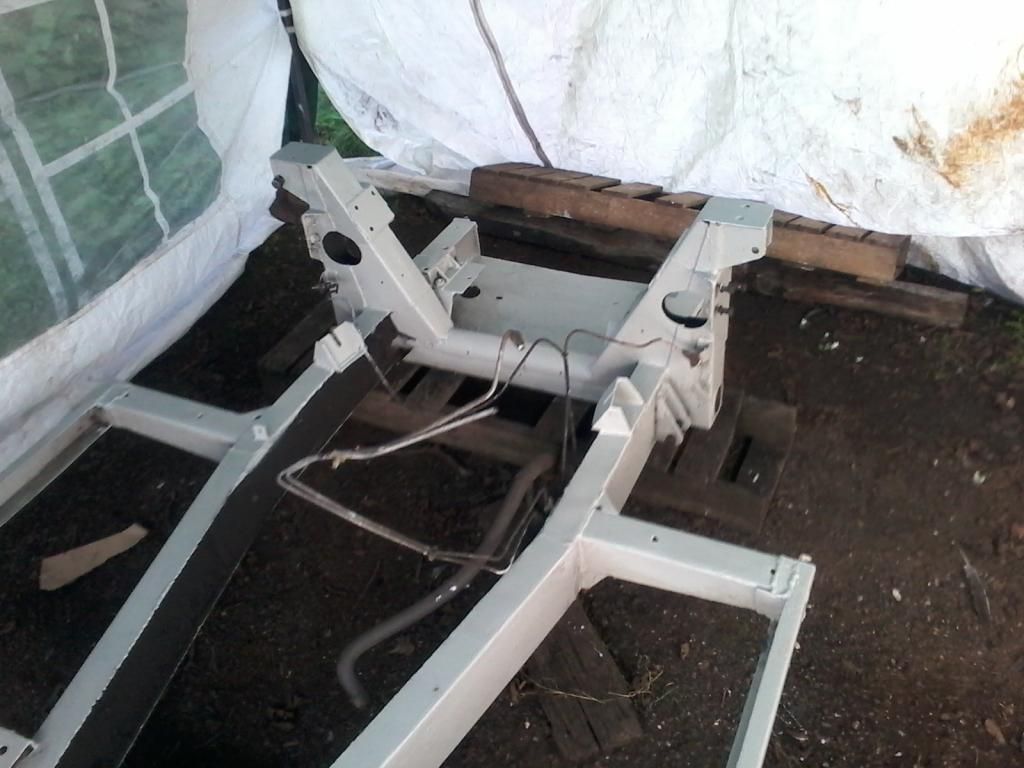
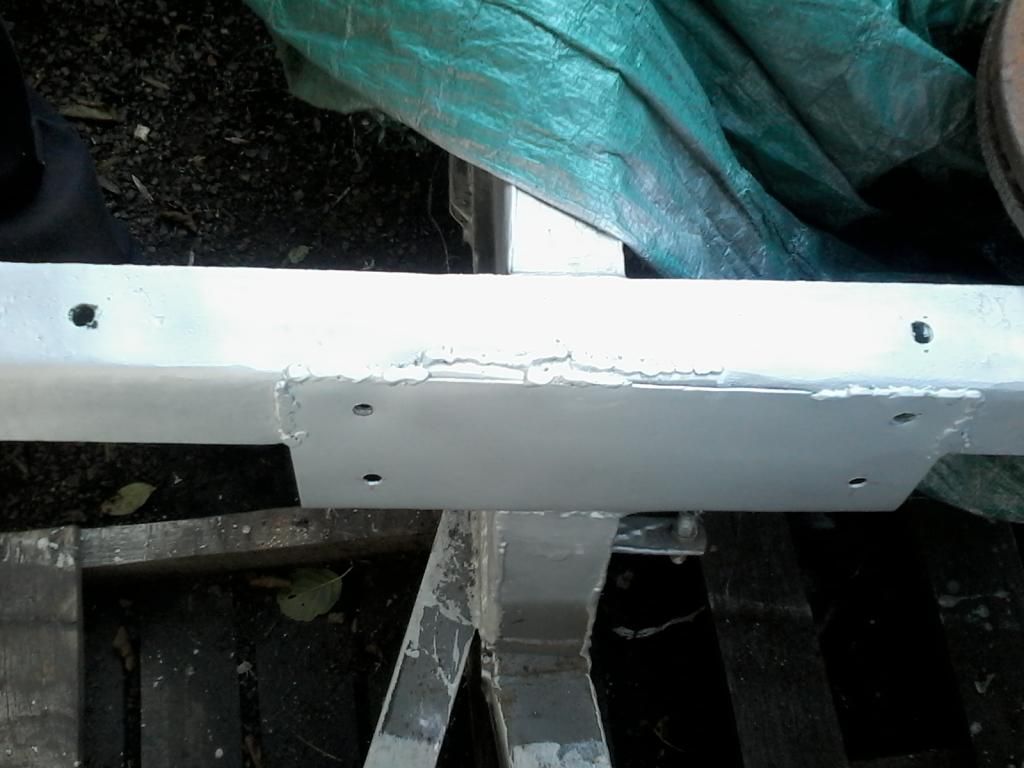
Welded in a new chassis plate...
Engine re fitted...

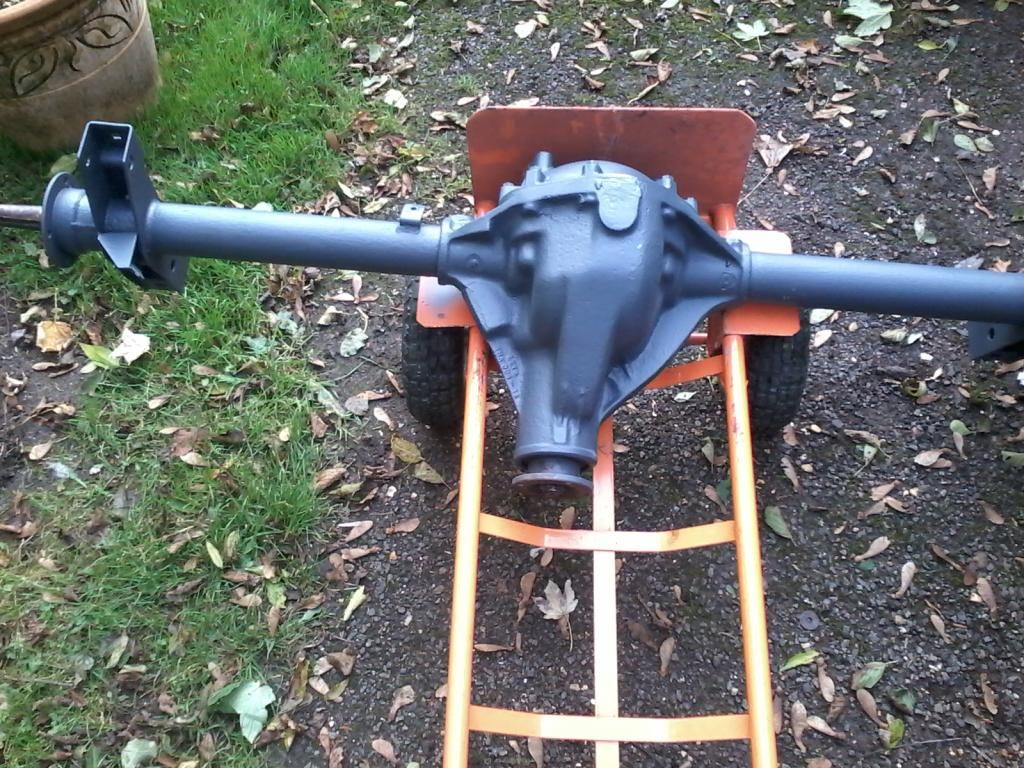
Removed hub with broken stud and then cleaned up axle and painted...

Behold nice and shiney, cleaned up, re bushed radius arms...
More to come...
So here's an abridged update...
The chassis got thoroughly stripped and cleaned..


And more chassis action...


Welded in a new chassis plate...

Engine re fitted...

Removed hub with broken stud and then cleaned up axle and painted...


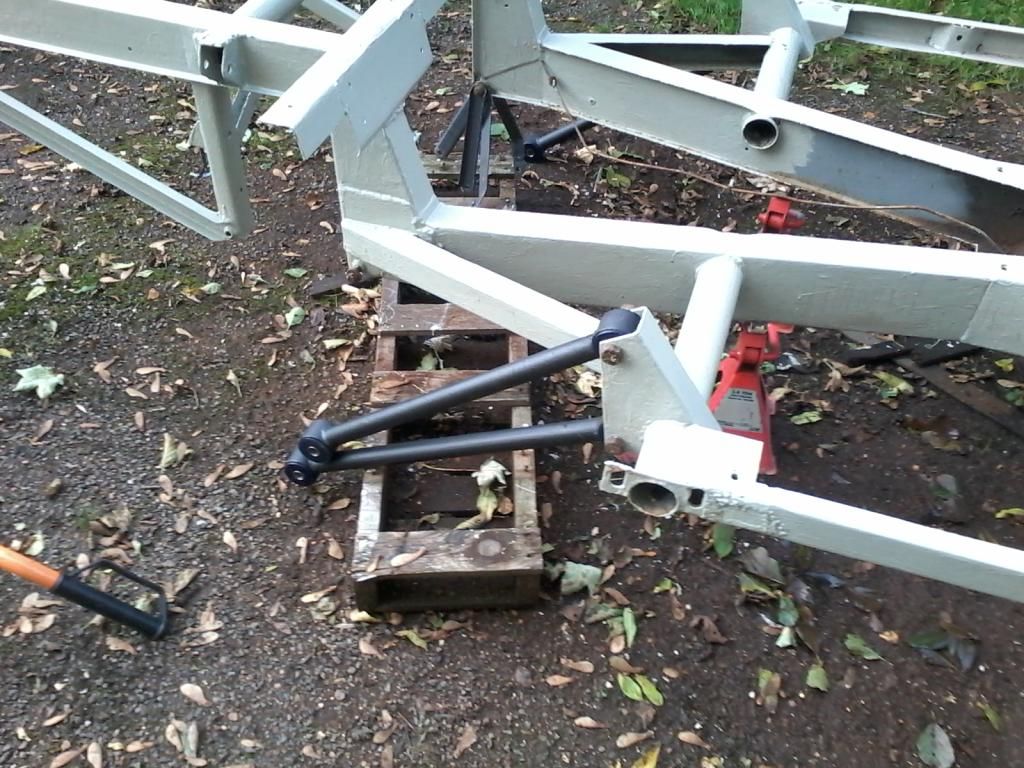
Behold nice and shiney, cleaned up, re bushed radius arms...

More to come...
And there is more...
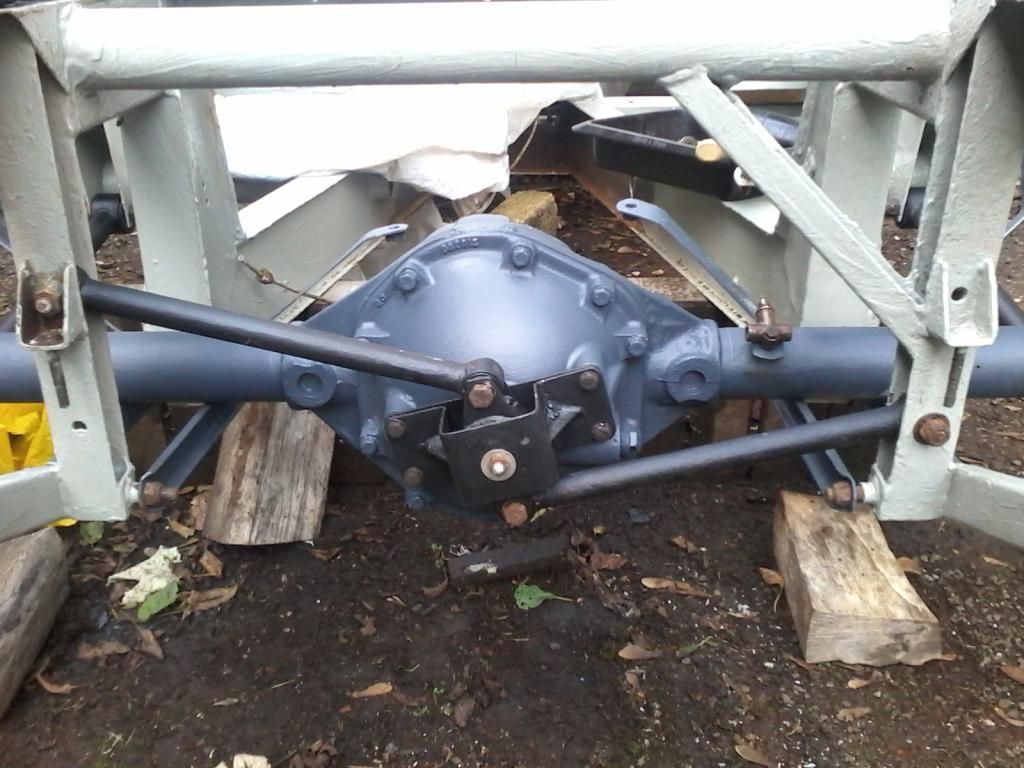
Re fitted the axle, the transverse arms and some of the brake parts.
Pulled the clutch off and dropped it into my local friendly factors, so he can source me a new one.
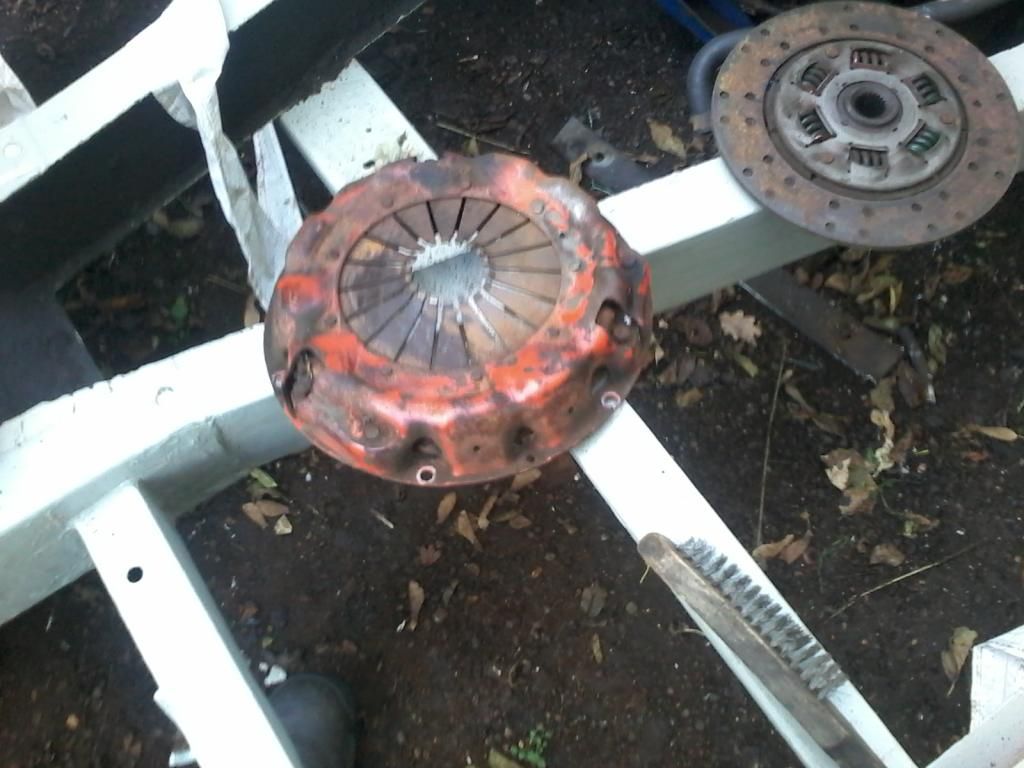
Then took the flywheel off to access the rear core plugs. After much thought and researching special tools. I decided to improvise.
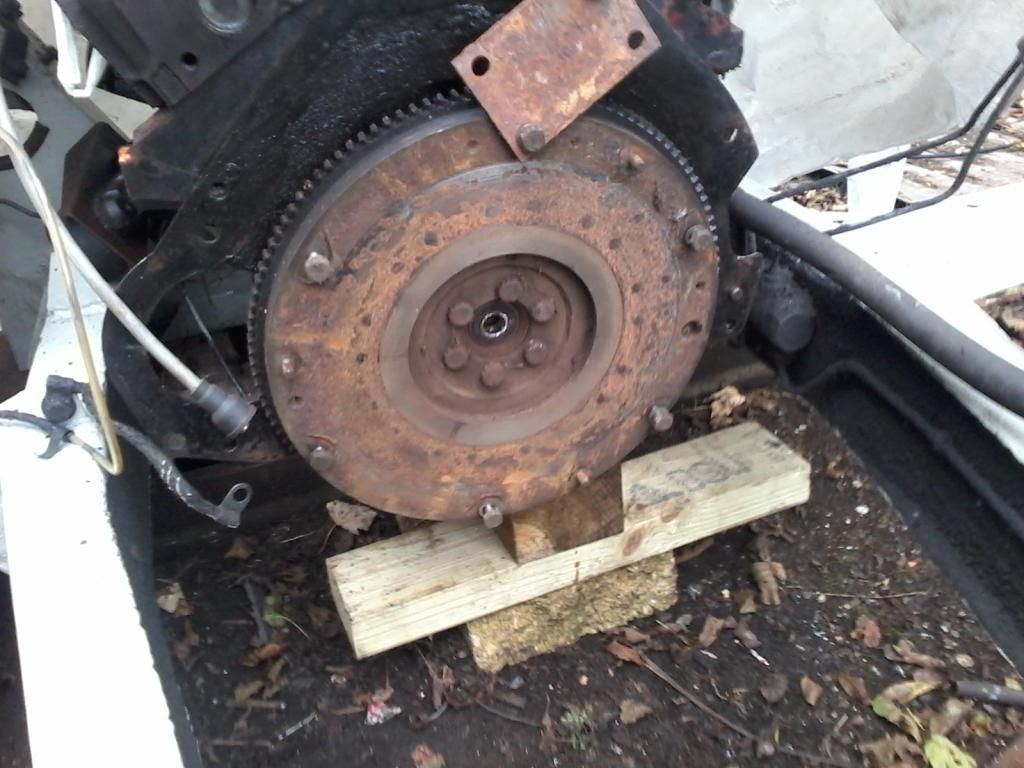
One rock steady flywheel and much safer than the dubious screw driver method I have witnessed!
Flywheel begone!
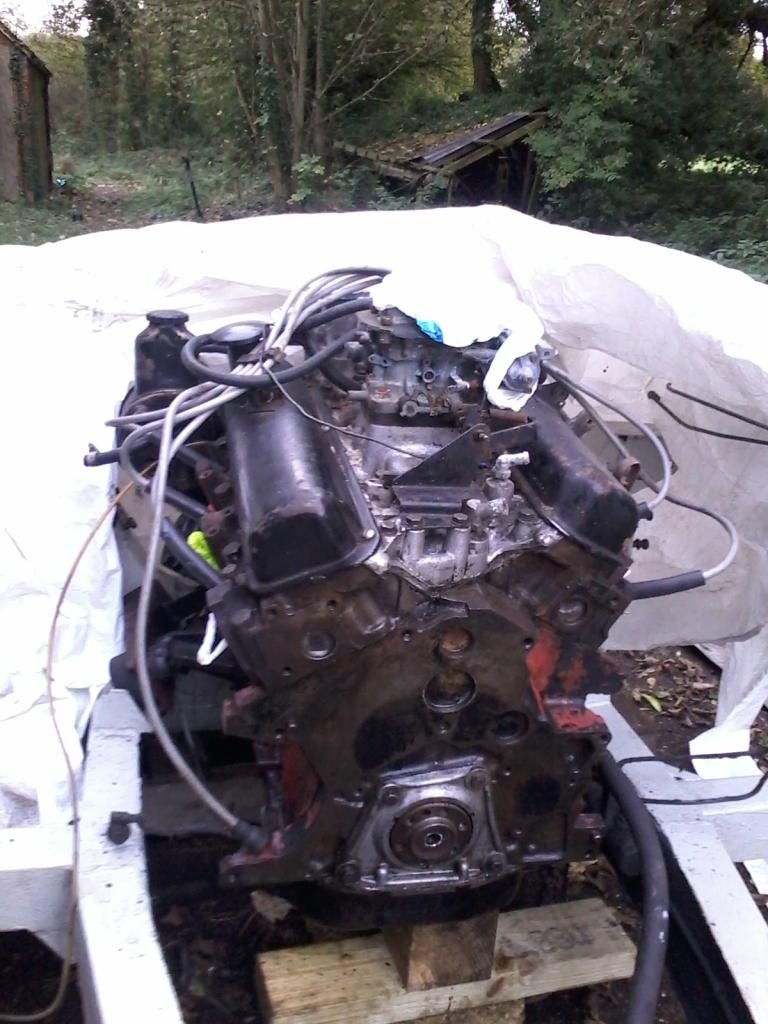
After that I persuaded the core plugs on the sides and rear out, washed the system through with the hose and hammered home some fresh ones. Also I replaced the water pump. FYI water pumps are currently around £100 on ebay but I picked up a complete unit from Burton Performance for £55, it certainly pays to shop around!
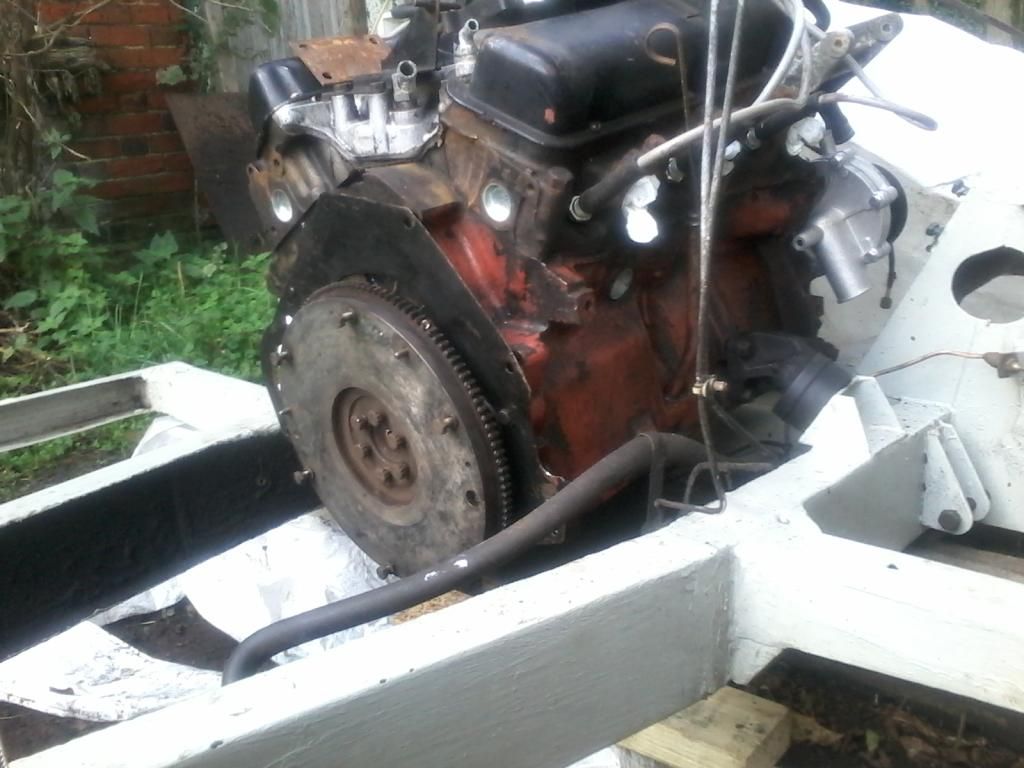
Flywheel cleaned up and re attached and new core plugs are now visible.
Fitted the new clutch.
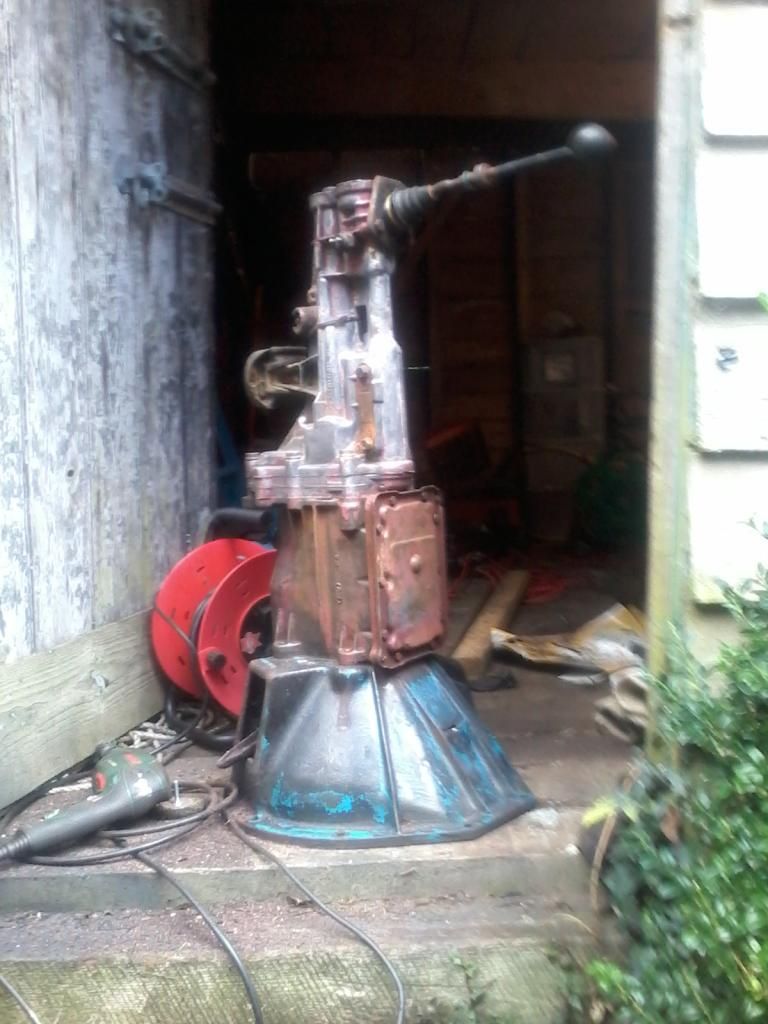
Cleaned up the pink and blue type 9 gearbox...
And like the rolling stones song, I wanted to paint it black, so I did.
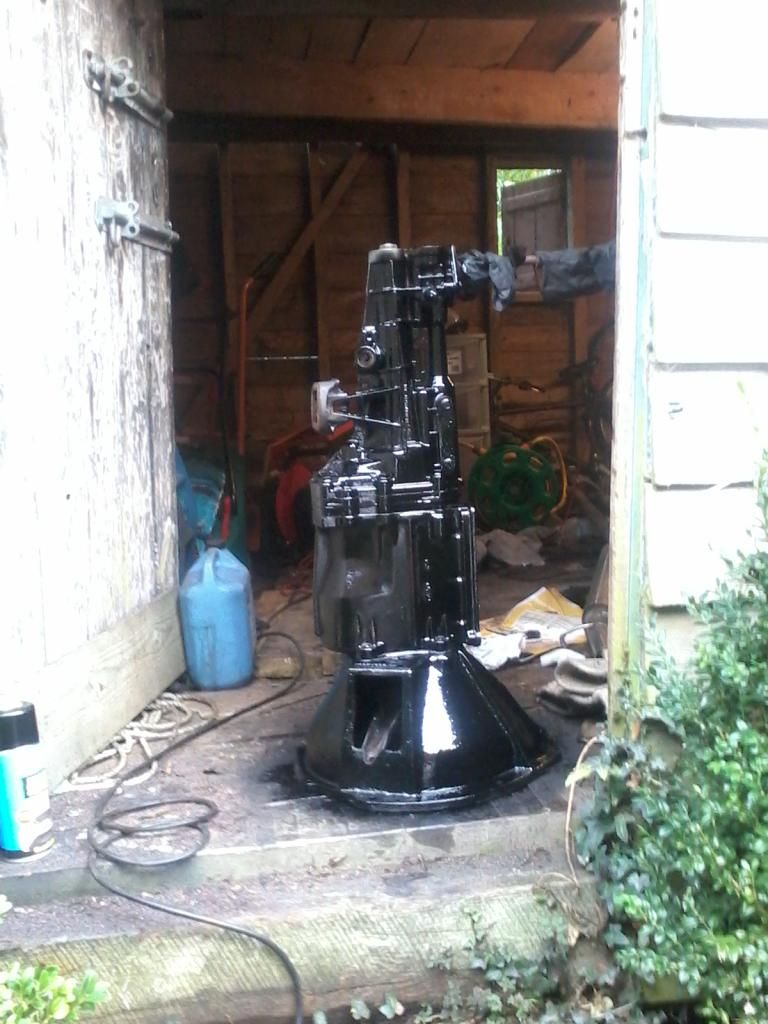
Gearbox back in place..
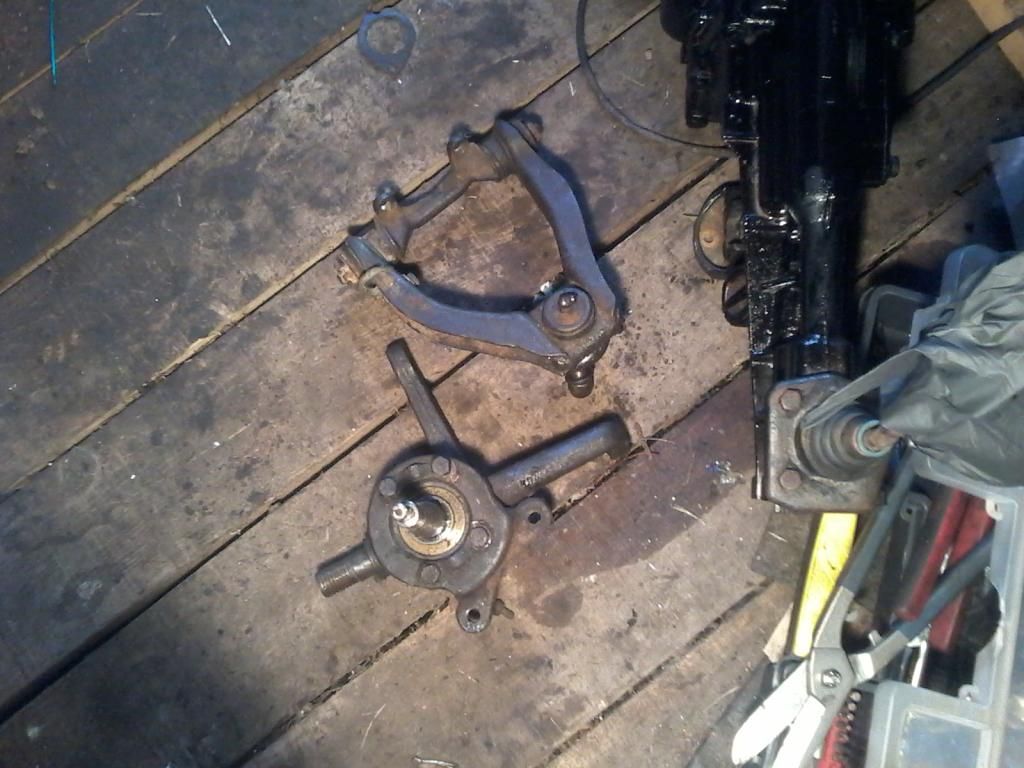
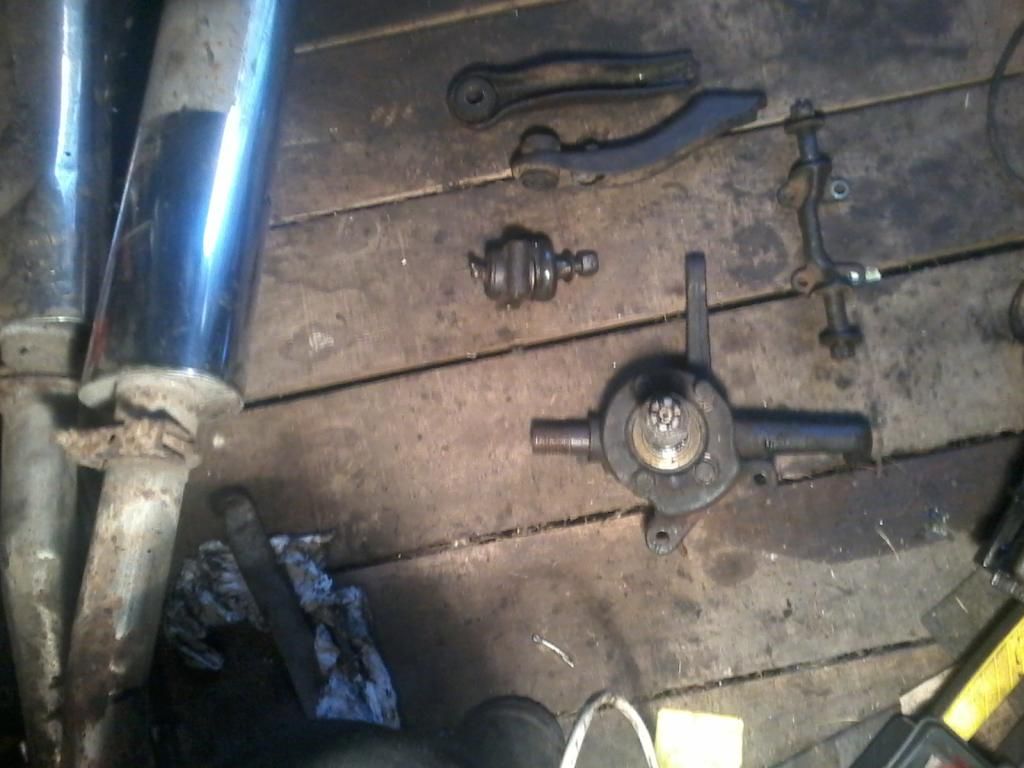
Then I moved onto the front suspension.
I decided to do one at a time, I figured that I can use the other as a guide to putting it back together. I started on the NS, I found the ball joint gaiter perished, the bushes aren't too bad but will be replaced anyway and I'm pretty sure the trunnion has too much play. I must admit I was a bit foxed by how you take the trunnion off? And was rather surprised that you just un screw the thing!
A few piccies...
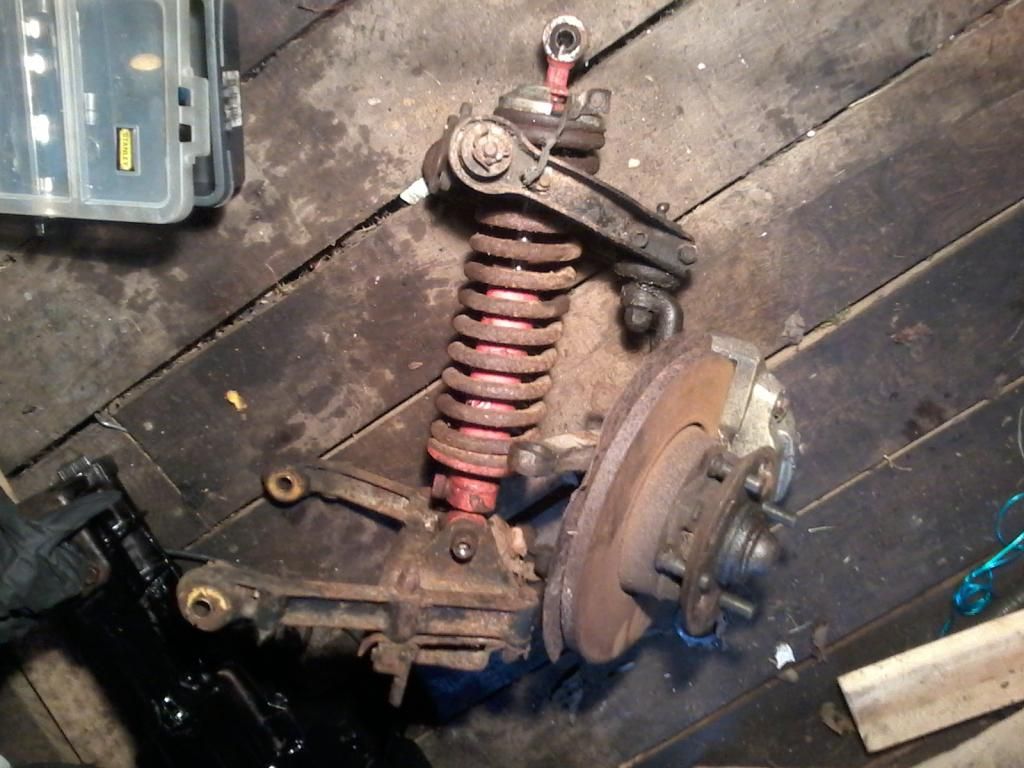
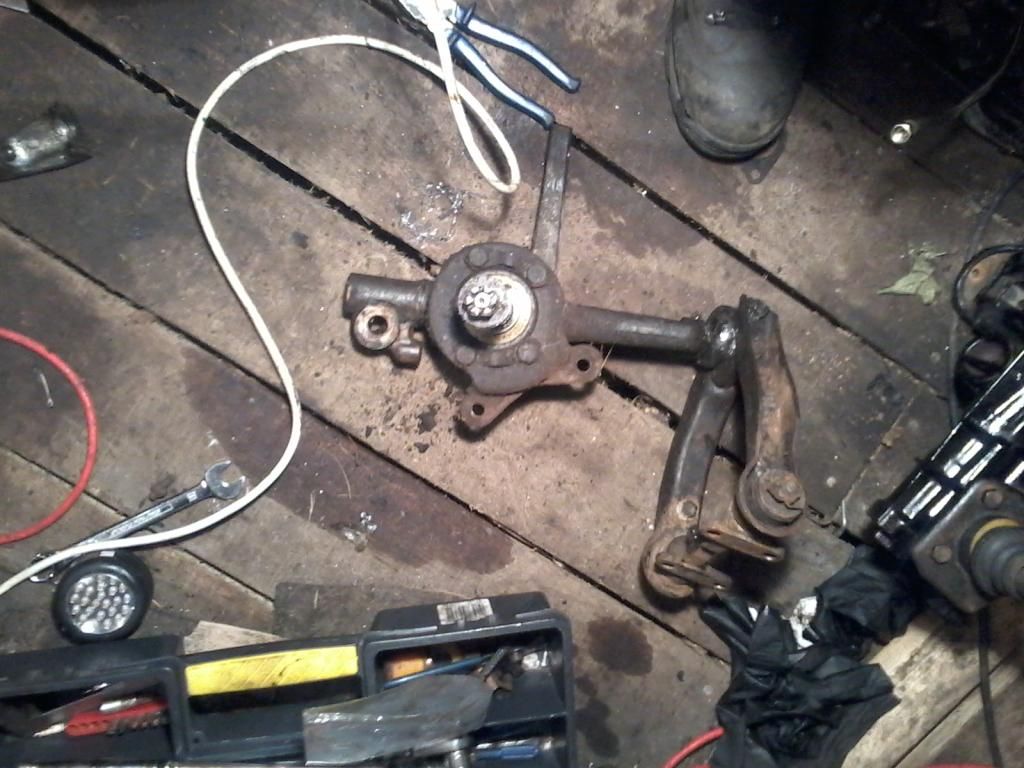
The ball joint was a git to separate. I eventually managed it by undoing the steering arm to give my splitter more space but I really think a better ball joint splitter would be a good investment.
Re fitted the axle, the transverse arms and some of the brake parts.

Pulled the clutch off and dropped it into my local friendly factors, so he can source me a new one.

Then took the flywheel off to access the rear core plugs. After much thought and researching special tools. I decided to improvise.

One rock steady flywheel and much safer than the dubious screw driver method I have witnessed!
Flywheel begone!

After that I persuaded the core plugs on the sides and rear out, washed the system through with the hose and hammered home some fresh ones. Also I replaced the water pump. FYI water pumps are currently around £100 on ebay but I picked up a complete unit from Burton Performance for £55, it certainly pays to shop around!
Flywheel cleaned up and re attached and new core plugs are now visible.

Fitted the new clutch.

Cleaned up the pink and blue type 9 gearbox...

And like the rolling stones song, I wanted to paint it black, so I did.

Gearbox back in place..

Then I moved onto the front suspension.
I decided to do one at a time, I figured that I can use the other as a guide to putting it back together. I started on the NS, I found the ball joint gaiter perished, the bushes aren't too bad but will be replaced anyway and I'm pretty sure the trunnion has too much play. I must admit I was a bit foxed by how you take the trunnion off? And was rather surprised that you just un screw the thing!
A few piccies...


The ball joint was a git to separate. I eventually managed it by undoing the steering arm to give my splitter more space but I really think a better ball joint splitter would be a good investment.


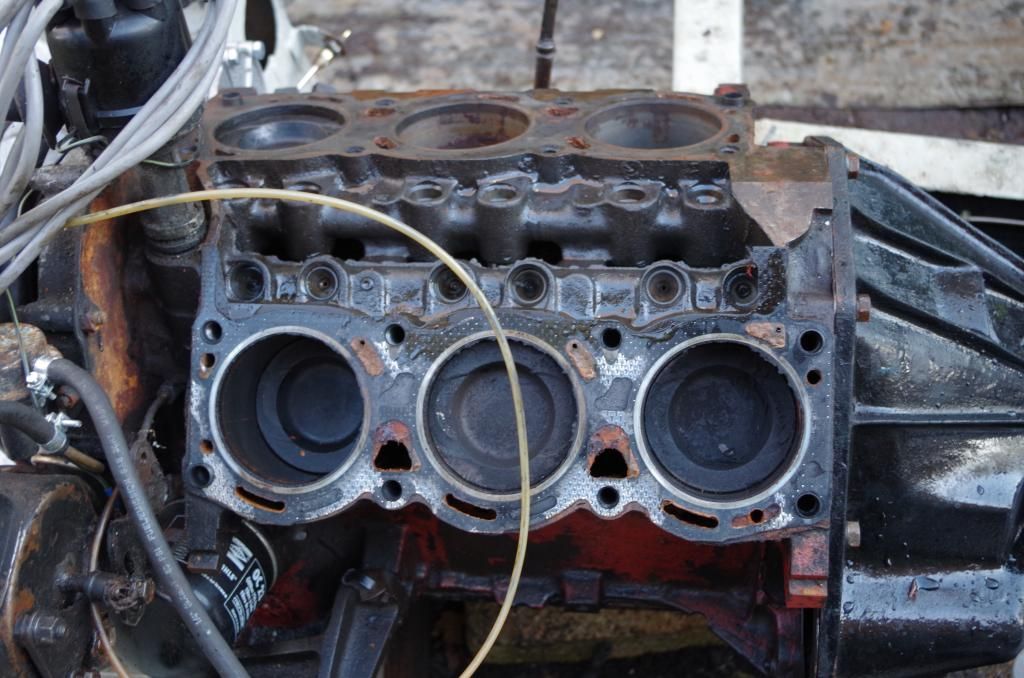
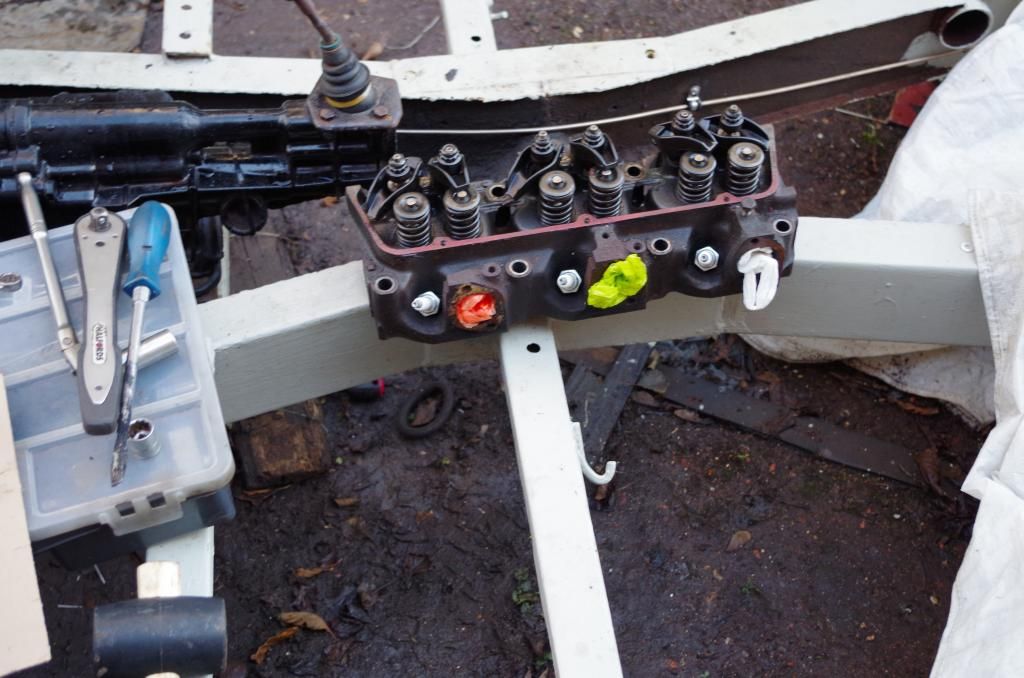
Another little job was to remove a broken exhaust bolt from the driver side cylinder head. I have seen people weld a bolt to the remains of the old bolt, then carefully wind out. I think you need more old thread sticking out, I just couldn't get the weld to stick. So have started on drilling the remains out, then I ran out of patience and drill bits!
I decided to take the head off and get the local thread doctor to remove the bolt. I knew I had snapped a couple of drill bits trying to get it out but what I hadn't realised is that I had left a bit of drill in the end of the bolt. So it took him an hour to drill the drill bit out before he could actual drill the remains of remains of the bolt out!
I must admit it was really satisfying cleaning up the heads and intake manifold, replacing all the gaskets, re fitting the heads then setting the tappets. For some reason engine work like this is really feel good!
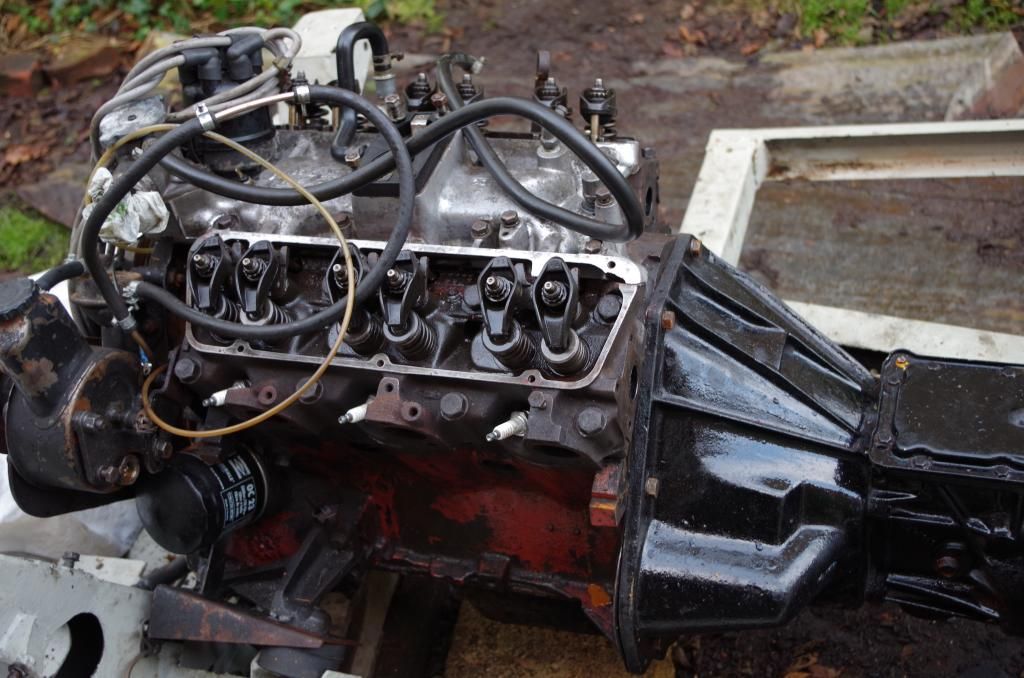
Then the best bit, trial fit the repaired manifold...

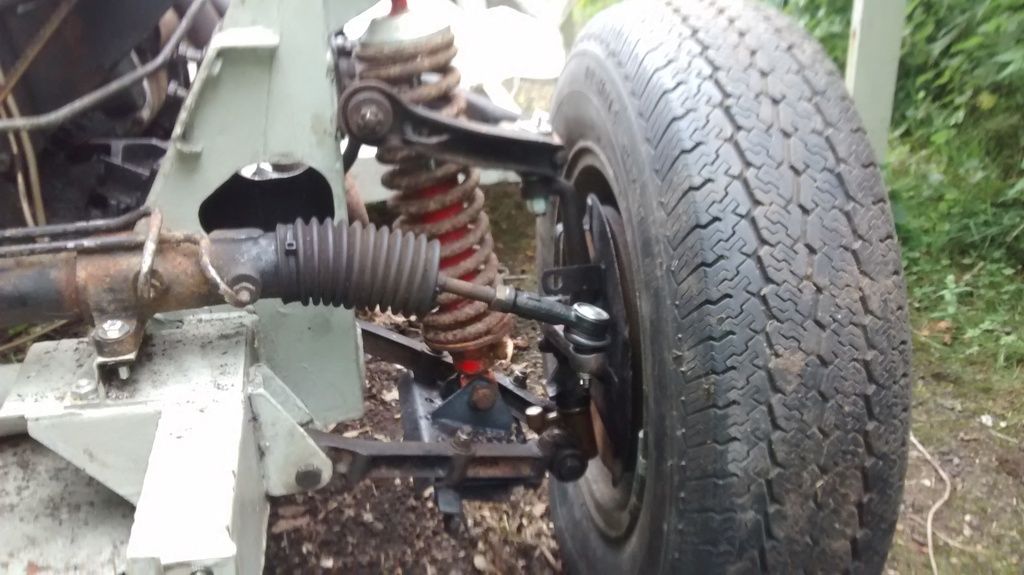
Next part of the job...Front suspension and rack back in, new bushes top and bottom, new ball joints and track rod ends.
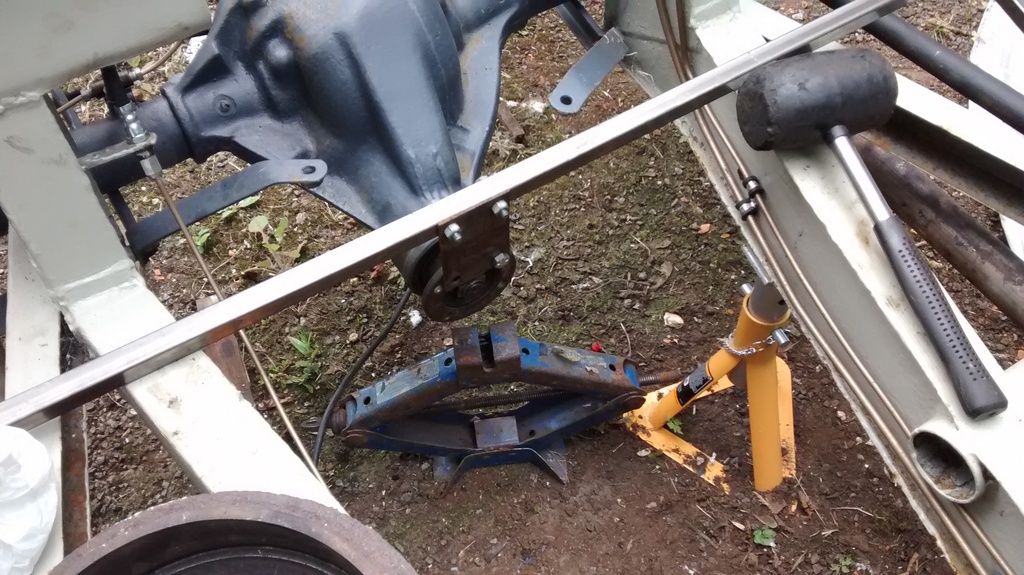
Then refitting the OSR hub and diff seal, to do this you need to stop things turning, so a bit of make shift iron mongery was called for.
Also spot the shiny new brake and fuel lines!
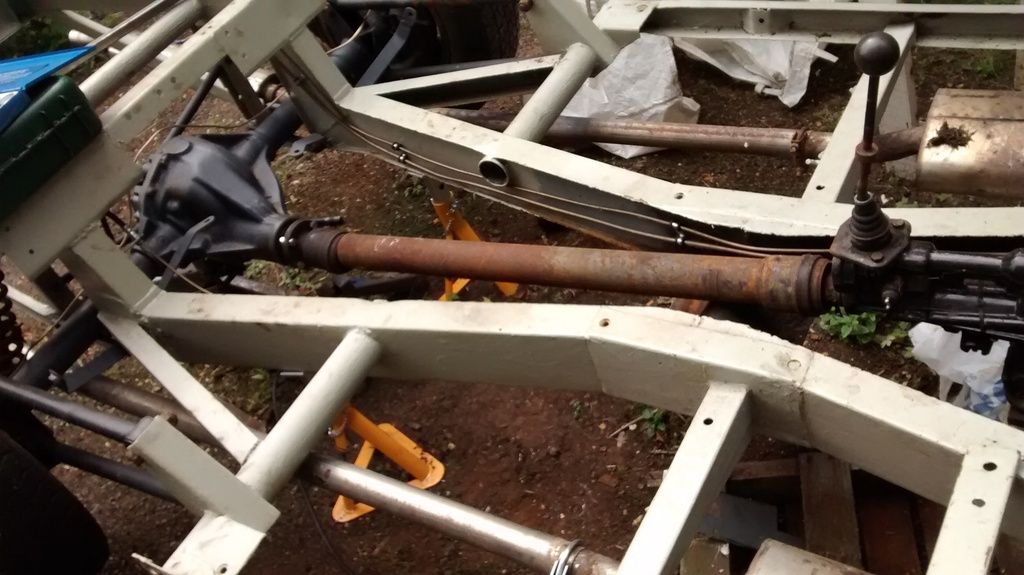
Prop in..
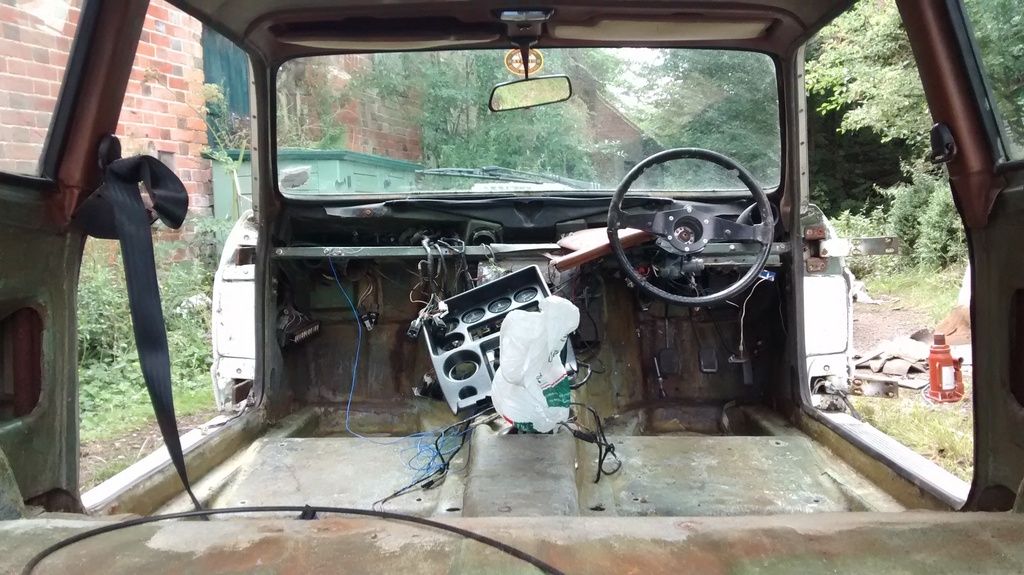
After that I started looking at the body and was slightly horrified by how bad the carpet and sound proofing had got (mould mainly), so promptly ripped them out and binned them.
In stripping the interior I found a couple of interesting things...
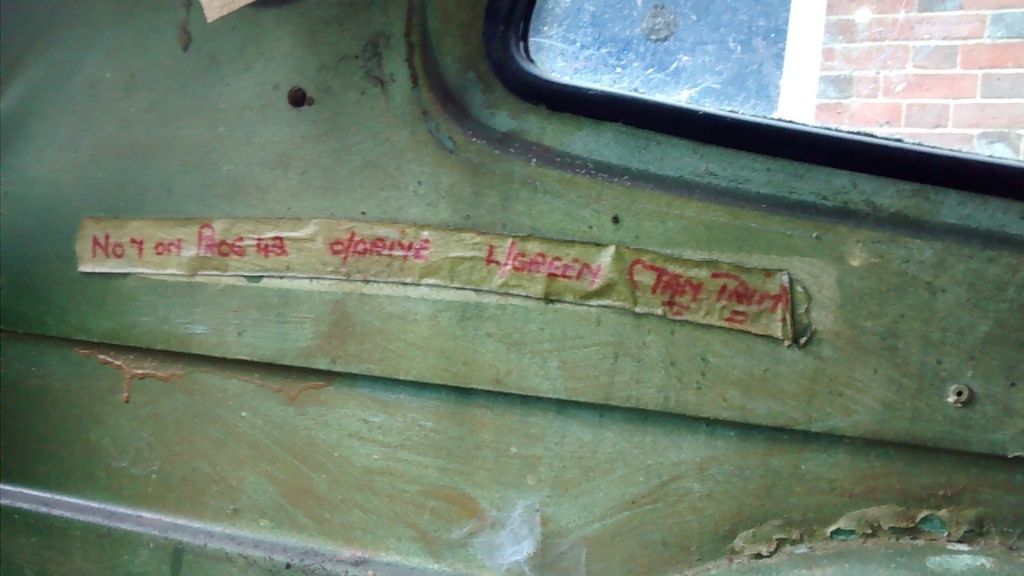
The original build spec! "No 7 Prog 43 O/drive L/Green C Tan trim" but also this....
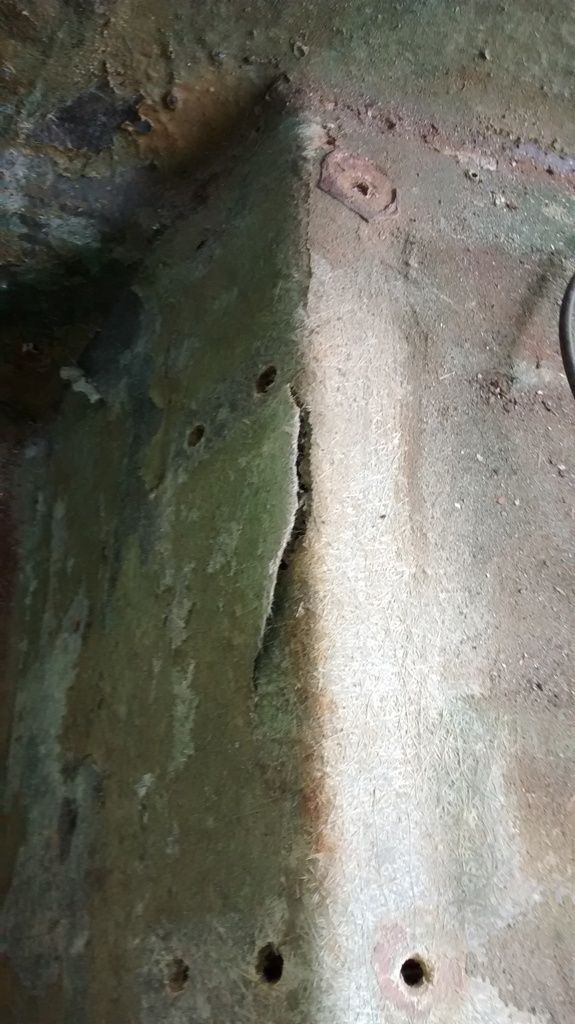
Looks like the rusty chassis plate had expanded enough to crack the fibre glass, so thats another small glass repair to add to the list.
Finally whilst tidying the shed/workshop I realised the front bumper was in a sorry state and I had never seen it attached, so did a quick trial fit.
Then curiosity got the better of me, what would the bumper look like colour coded? Well the rubber section had seperted already, so I cleaned it up and painted it.
Colour coded it is then!
I decided to take the head off and get the local thread doctor to remove the bolt. I knew I had snapped a couple of drill bits trying to get it out but what I hadn't realised is that I had left a bit of drill in the end of the bolt. So it took him an hour to drill the drill bit out before he could actual drill the remains of remains of the bolt out!
I must admit it was really satisfying cleaning up the heads and intake manifold, replacing all the gaskets, re fitting the heads then setting the tappets. For some reason engine work like this is really feel good!


Then the best bit, trial fit the repaired manifold...

Next part of the job...Front suspension and rack back in, new bushes top and bottom, new ball joints and track rod ends.

Then refitting the OSR hub and diff seal, to do this you need to stop things turning, so a bit of make shift iron mongery was called for.

Also spot the shiny new brake and fuel lines!

Prop in..

After that I started looking at the body and was slightly horrified by how bad the carpet and sound proofing had got (mould mainly), so promptly ripped them out and binned them.

In stripping the interior I found a couple of interesting things...

The original build spec! "No 7 Prog 43 O/drive L/Green C Tan trim" but also this....

Looks like the rusty chassis plate had expanded enough to crack the fibre glass, so thats another small glass repair to add to the list.
Finally whilst tidying the shed/workshop I realised the front bumper was in a sorry state and I had never seen it attached, so did a quick trial fit.

Then curiosity got the better of me, what would the bumper look like colour coded? Well the rubber section had seperted already, so I cleaned it up and painted it.

Colour coded it is then!
And now a properly recent update!
For the last week or so I have been hiding in my shed making up stands and props out of lengths of steel (my poor little Mig has been put through its paces!) in a bid to re fit the body. God knows what HSE would have made of it! anyway some pictures...
One stand complete, just see how things line up...

A slight skip forward in time, hoiking the body on to the make shift stands/trestle things.
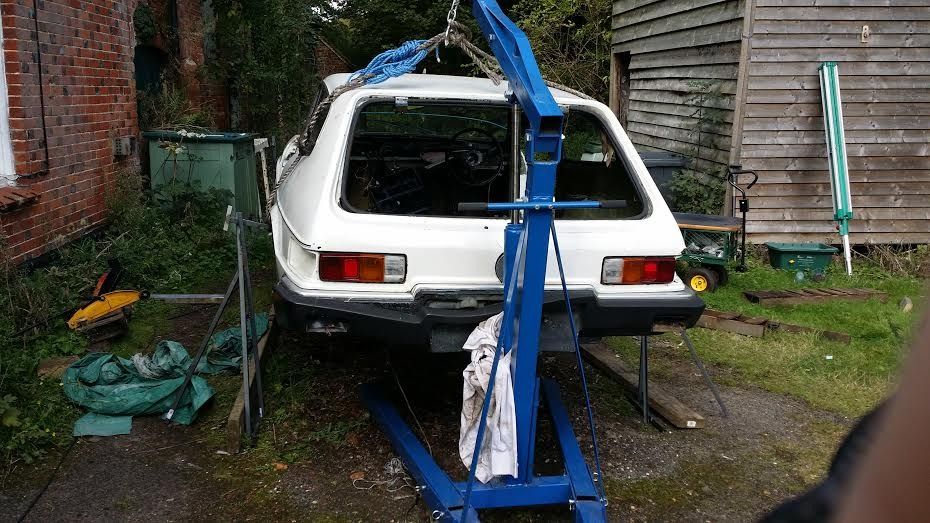
Floating in the air...
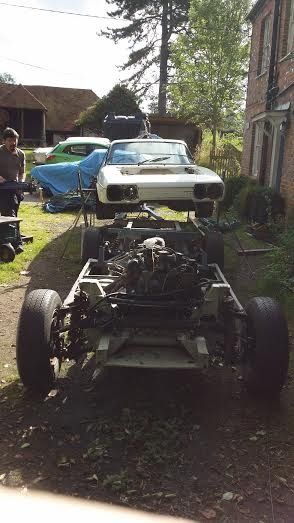
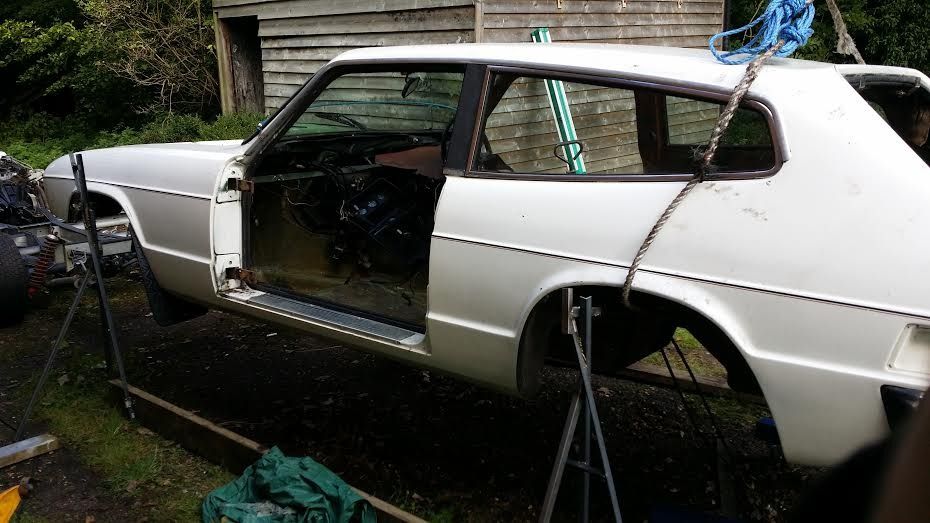
Squeezing underneath..This took several attempts to get the chassis lined up, not the easiest thing to steer..
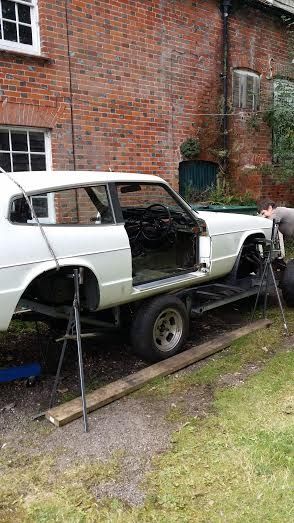
After much jiggery pokery, brute force, additional bits of trolley jacking, playing wears the gear lever? And also had to remove the carb, dizzy cap and thermostat housing for clearance! It was finally down.

Doors bolted on...

I wont be doing that again in a hurry, I have got tho thank my other half Helen for getting stuck in, pointing out were it would fail, sorting my ropes and knots and generally being the voice of sanity.
Still a fair way to go before MOT time but I can see light at the end of the tunnel and I dont think its a train heading in my direction!
Gassing Station | Readers' Cars | Top of Page | What's New | My Stuff