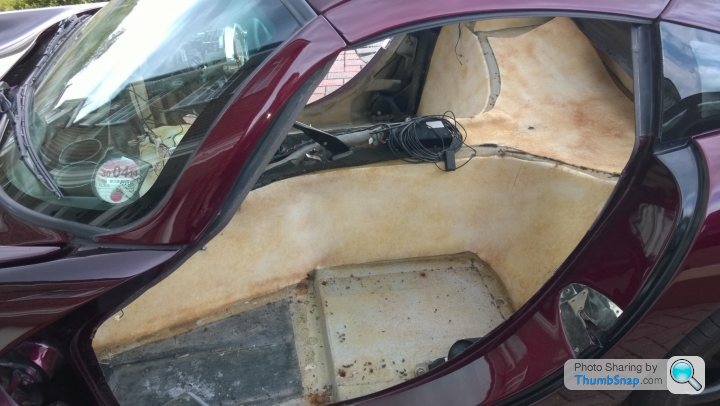
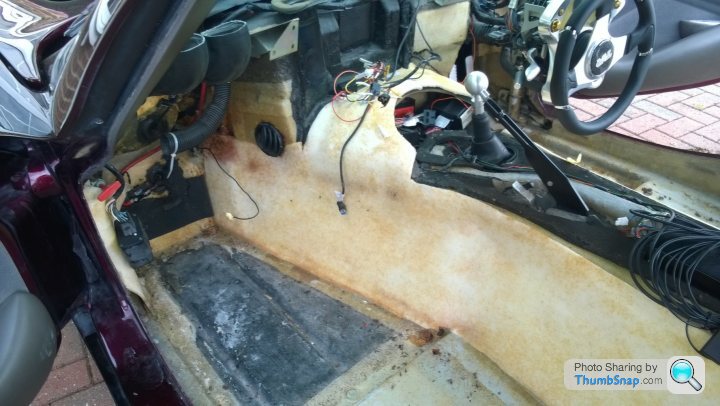
Taking the leather off the interior to redye, Please advise!
Discussion


just finished doing the leather black on the inside of the car - problem is with dying light I can't tell how it looks..hoping its ok in the morning!!
Looks fine to me!
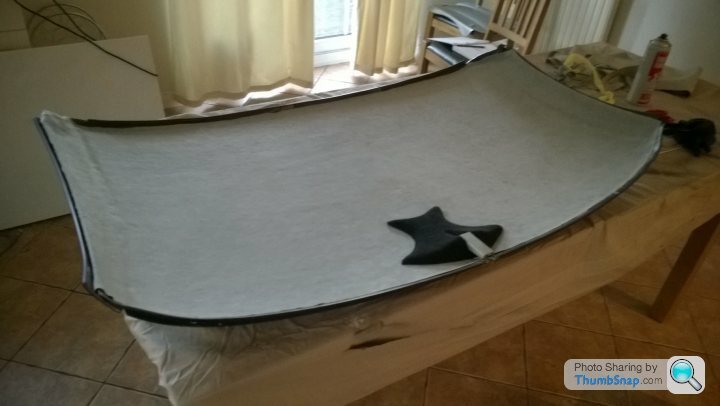
Planning to finish spraying the interior parts that were taken out of the car this evening and maybe fitting carpet then interior parts put back in the car over the weekend! (will then move on to door cards next week)
Looks fine to me!
Planning to finish spraying the interior parts that were taken out of the car this evening and maybe fitting carpet then interior parts put back in the car over the weekend! (will then move on to door cards next week)
Edited by Dischordant on Friday 16th May 06:18
lol apologies for my god awful camera work. Will see what I can do when I finish work - the alcantara is here now so having a play with that too - cut the piece for the outside of the head unit so will see how that goes as a tester.
Last pieces of interior were dyed via sponge at 5am this morning so planning to spray and laquer all the final pieces (not counting doors) tonight and maybe put in some of the carpet - ready for putting it back together Sat/Sun!
Is it possible to get to the battery compartment without taking off the wheel? I need to feed a wire through from the amp and connect it up - I'm not expecting it will be possible but may as well ask before I go to the hassle of taking it off!
MartH70 said:
Could you not take a second fuse off of the fuse in the footwell?? Also can i ask where you got the new steering wheel boss and what model it is please?
If we're talking power amps for in car audio the power supply is usually a pretty meaty cable (5mm plus diameter to handle the current draw) with in line fuse holder.1 x Steering wheel Boss Kit for NonAirbag Equipped Cars £49.99
1 x MOMO Millenium - 350mm STEERING WHEEL £169.99
From car audio security.com - although bear in mind the centre will instead be a piece of leather saying momo on it.
Current state: https://www.youtube.com/watch?v=BGMDtucXoPo&fe...
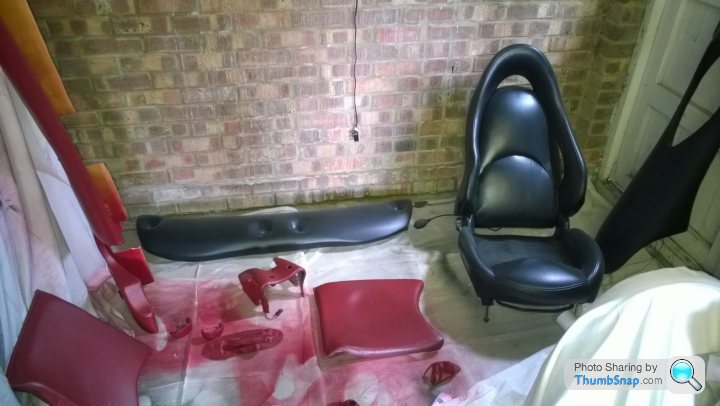
All black leather (seats upper dash) now sprayed and sealed. Only bottom dash and parts to finish in dark red.
1 x MOMO Millenium - 350mm STEERING WHEEL £169.99
From car audio security.com - although bear in mind the centre will instead be a piece of leather saying momo on it.
Current state: https://www.youtube.com/watch?v=BGMDtucXoPo&fe...
Edited by Dischordant on Friday 16th May 17:42
All black leather (seats upper dash) now sprayed and sealed. Only bottom dash and parts to finish in dark red.
Edited by Dischordant on Friday 16th May 21:43
Same process as normal - just a lot of taping off sections first to ensure you don't ruin anything on the car!
This involves:
Use a scourer with acetone to remove the lacquer etc currently protecting/on the leather - you dont have to do it very hard and you wipe it off with a cloth while still wet as this is the stuff you want to remove no point lett it dry back on! - you can tell when it's done it's job as the shine comes off the leather and you'll see all the little cracks etc.
Then use alcohol cleaner with a cloth to remove anything that the acetone doesn't - just wipe firmly over.
Then sand any areas that need smoothing over - you don't have to key the leather like some products though so this part is up to you.
Then use some dye on a sponge and give a covering - it won't look remotely like the final colour at this stage but I think it helps subsequent layers to bond with the leather so I just keep it super thin. I then did another coat with sponge.
The stuff dries itself in about 15mins or you can speed up with a hairdryer as all the products are water based.
Then you are ready to spray.
Hope this helps! =)
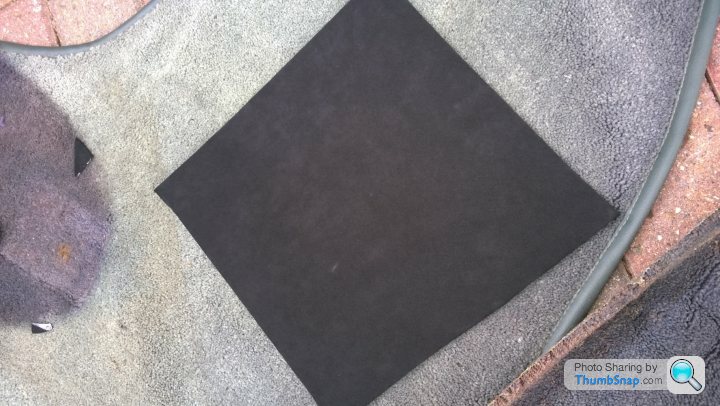
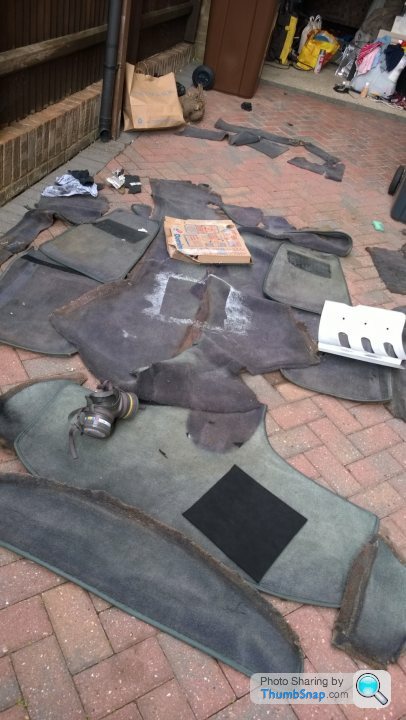
Made some progress - old carpets are now all out - finished minor corrections to dyed leather - placed new carpets in situ though will need trimming. Also started putting alcantara on some elements - stereo face - panel next to driver.
http://youtu.be/67_CmKeGFAU
http://youtu.be/-N86mYfQc74
http://youtu.be/Pfy_uIvaZ-A
http://youtu.be/ipyCtQaFx64
http://youtu.be/67_CmKeGFAU
http://youtu.be/-N86mYfQc74
http://youtu.be/Pfy_uIvaZ-A
http://youtu.be/ipyCtQaFx64
Edited by Dischordant on Saturday 17th May 20:48
Dischordant. looking good mate...
Do know the answer to the following:
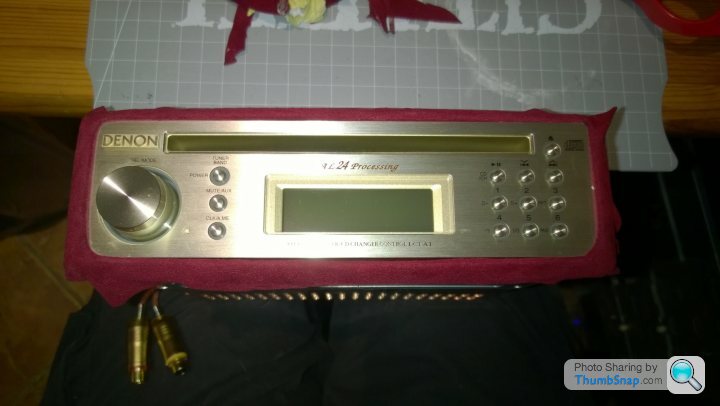
How do you get the stereo out as I want to fit a mp3 lead into the aux outlet on the the back?
I have a mk 1 Tuscan S (03) have the removal keys for the pioneer unit but I cannot for the life of me work out how/where to slip the keys in to remove it.
Do know the answer to the following:
How do you get the stereo out as I want to fit a mp3 lead into the aux outlet on the the back?
I have a mk 1 Tuscan S (03) have the removal keys for the pioneer unit but I cannot for the life of me work out how/where to slip the keys in to remove it.
Nearly all stereos you slip the removal tool down the sides and it'll slide out at least that's how I removed mine (except I didn't have the tool so I used flat head screwdrivers) - here is a video example I found - I used the first method shown.
http://www.youtube.com/watch?v=s3Y4lH-Vceg
http://www.youtube.com/watch?v=s3Y4lH-Vceg

Roof done and other side panel completed in Alcantara. Seat backs prepped - badges created for seat backs.
Centre section reassembled and tested - found one of the wires from the alarm had previously broken - potentially could have been causing the occasional beeping sound - have rewired to see if it fixes it.
Left to do:
Awaiting carpet scissors to arrive to make trimming carpet to size much easier.
Install new seals
Trim carpet to fit
Cut a piece of carpet to fit lower shelf
Velcro in all carpet
Remove door cards
Cut holes for woofer and tweeters.
Dye leather in door panels
Fit dynamat in doors
Install speakers
Wire up Amplifier
Wire up Speakers
Alcantara door panels
Wire in amplifier
Fix back in lower dash (worried I won't remember where the brackets go for this - might need some reminders/photos to help with this! - 28 bolts =)
Fix back in upper dash (2 fiddly screws)
Connect up head unit
Connect up mp3 jukebox player
Connect sub
Install door control head unit section
Fit seats
Add TVR logo to seats
Alcantara seat backs
Fit new seat back badges
Fish bit of plastic out of air system
Oh well - slowly getting there!

Edited by Dischordant on Sunday 18th May 21:12
Cheers! =) Yep I just stuck it straight over the top using Trim-Fix Adhesive - worked fine - there is nothing to really take apart - There is only the one panel I've covered in black alcantara which is held on by one bolt that easily unscrews - you leave the actual metal mechanism attached to the roof - and that's it!
glennamy said:
Cheers mate, I took a quick look at the youtube link and I didn't realise that the plastic surround just clips off and the slots are there...doh!
Runs away in shame & embarrassment...
Glad it helped =) I found it a pain the first time I tried to remove the stereo. I think it's like many things car related - once you know it's ok to put X amount of pressure on something, because that's what it takes to take it off, it's then simple!Runs away in shame & embarrassment...
Gassing Station | Tuscan | Top of Page | What's New | My Stuff