Rear Diff bushes, how I did it with pics
Discussion


Right, ill do my best here but I'm no pro photo taker and by the end i lost some enthusiasm for taking pics, but ill show you what i have and hope it helps people looking to do there own.
I left my Diff in, although have been told that its easier with it out, i didn't have anyone to help prop it.
TOOLS NEEDED
Good socket set both double and single depth
Hobby blow torch
1mtr extension bar
Good combination spanner set
6-12mm hex socket set (£20 for halfords pro set)
Big hammer
Torch
and usual screw drivers etc
Patience!
1 - Either get the car on a ramp that you are comfortable under or use a pit,
2 - Remove exhaust system from the cats back (2 x 14mm combination spanners) disconnect the speed sensor electrically and remove

3 - disconnect the drive shaft and rest it on the heat shield

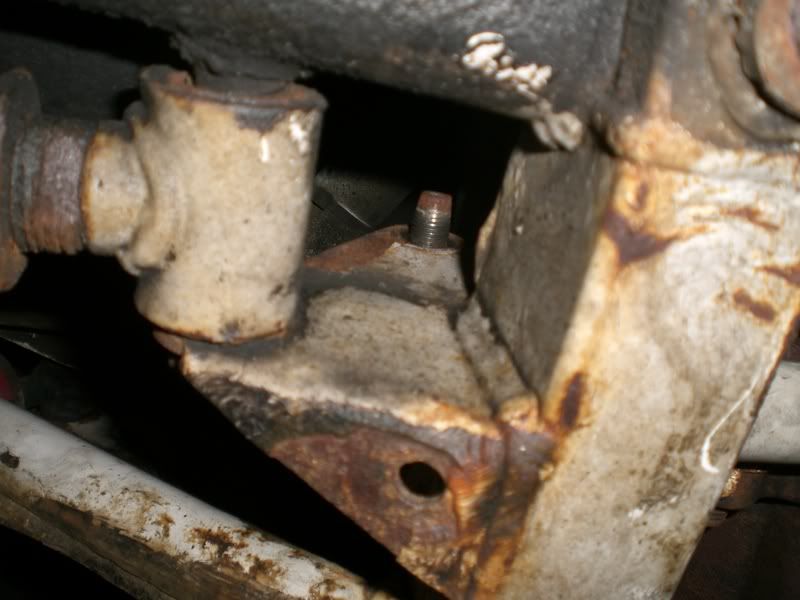
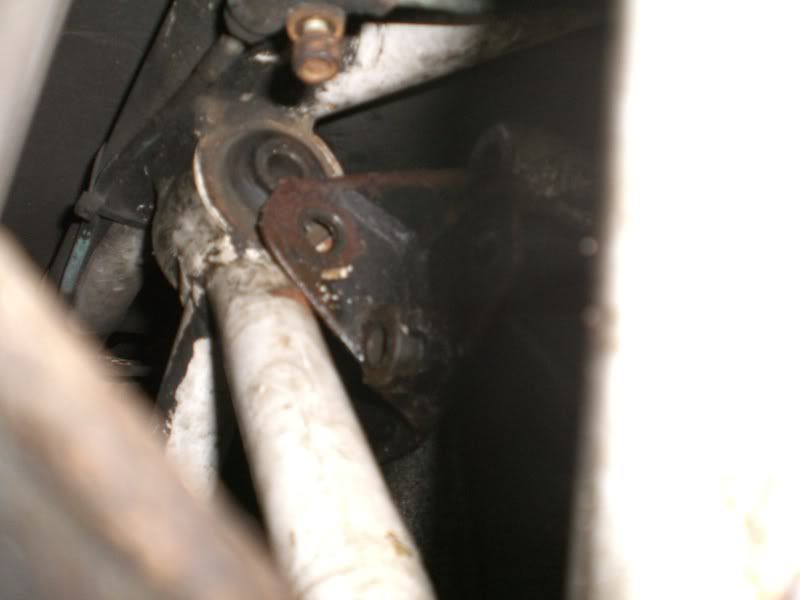
4 - remove all 4 locking bolts from the 2 front mounting plates

5 - remove the 2 nuts from the 2 bolts holding the lower bushes in place (i think they are 14mm)
6 - support the diff with something (i had a gearbox support)
7 - remove the 4 allen bolts holding the 2 lower bush mounting plates onto the diff (10mm allen socket)
8 - drift the 2 bush bolts out and remove both plates (be careful as the diff will move)
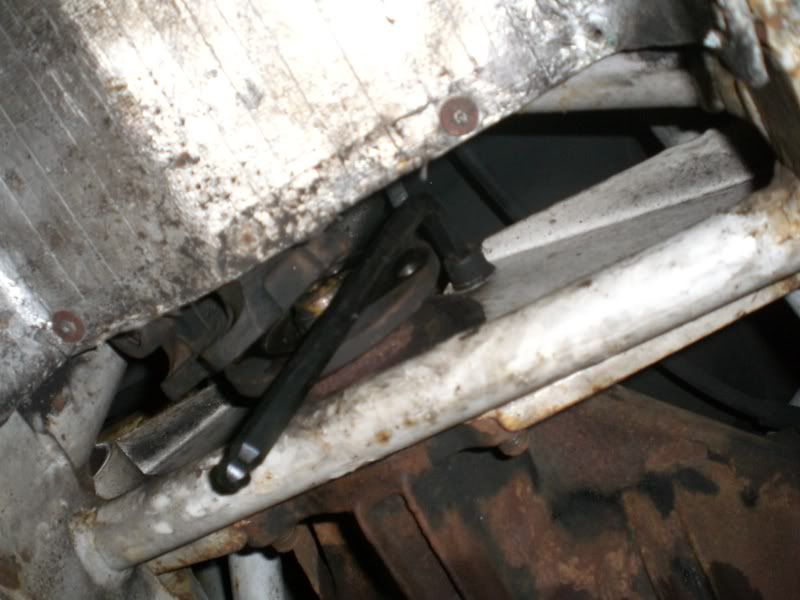
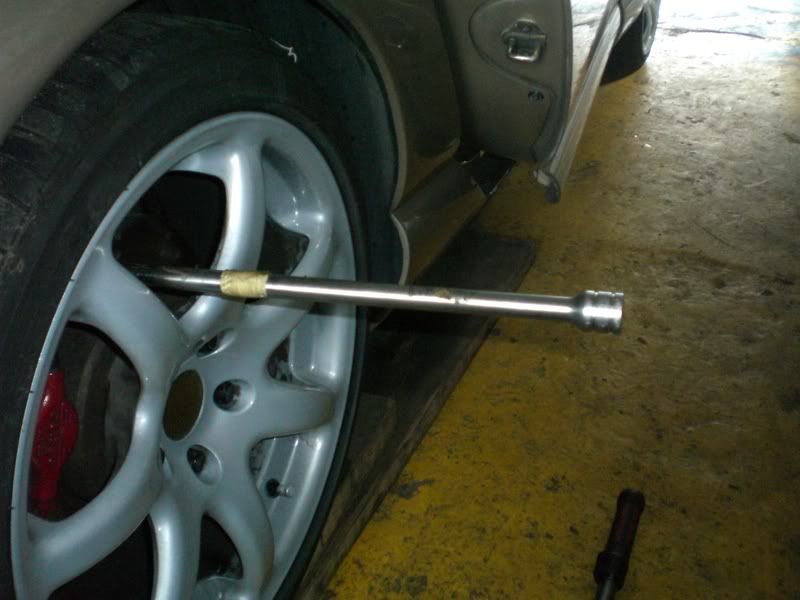
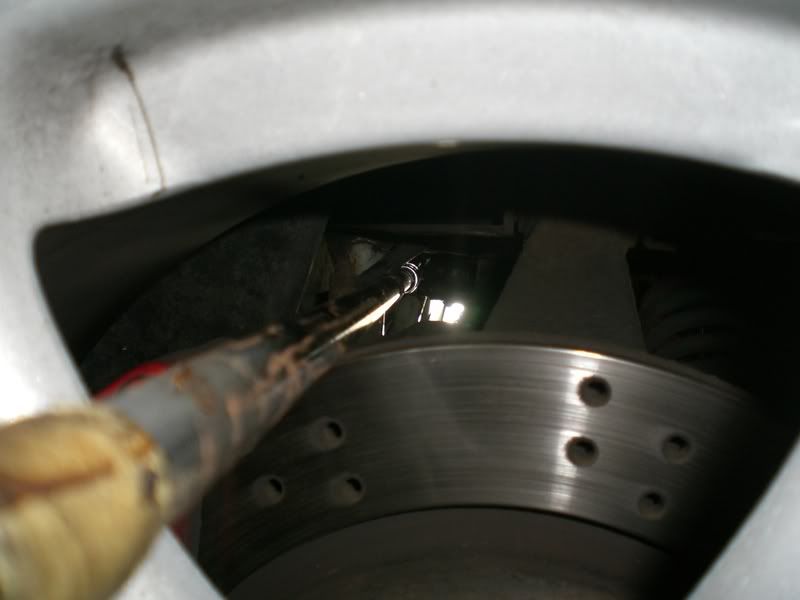
9 - now get a fooking huge extension bar and a elbow joint with a 14mm double depth socket and thead through the drivers side wheel onto the top bush nut and remove
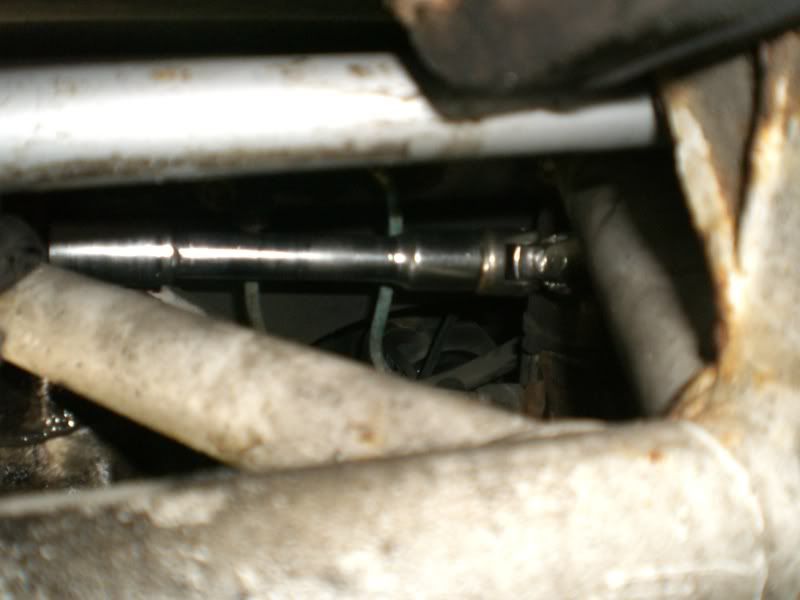
10 - now drift out the top bush bolt (the diff is now totally lose, but held in place by the drive shafts and what ever support you have used)
11 - Now remove the 4 allen bolts holding the mounting plate in place and wiggle the diff like a b d and the plate will drop out
12 - Have a cup of tea and some food and sound proof the garage and make sure there are no small children near as you will be swearing a lot!
from here this was my way of doing things, if others have a better please copy and edit for others benefit
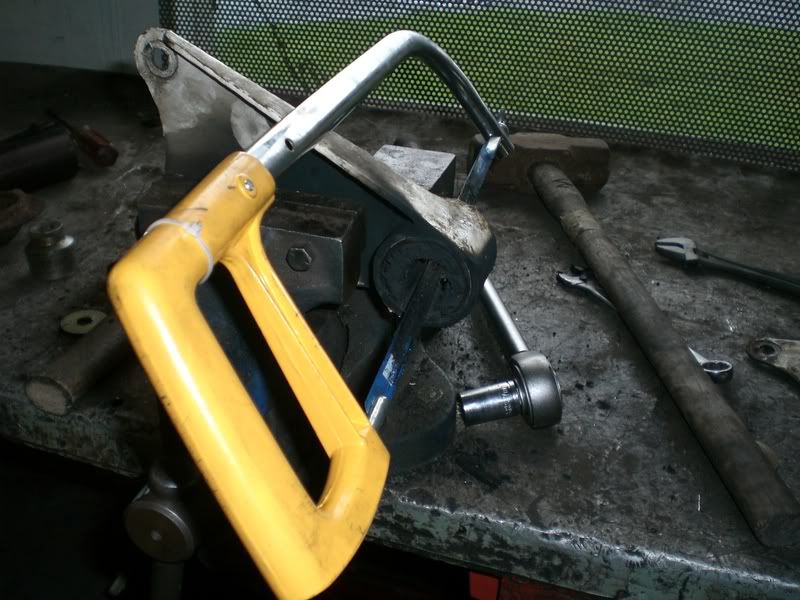
13 - use a hobby blow torch (£9 from halfords etc) and heat up the inner slieve of the 2 bushes on the lower mounting plates, you will set fire to it at some point so do it somewhere ventilated, once hot enough use a screw driver to push the sleeve out, now set fire to the bush and let it burn out and remove the hard stuff with a knife, then set fire to it again and repeat until its mostly all burnt out, now hacksaw through the outer slieve in 2 places about 10mm apart being very careful not to damage the mount, once cut remove the 10mm strip with hammer and an old screwdriver, the outer slieve should now come out easy (I tried a few other methods and trust me, this is the easiest)
14 - I used polly bushes, and would recomend that people do the same. use a 8mm threaded bar with a penny washer and a big socket either side to 'press' the bush into place.
15 - now for the fun bit I TAKE NO RESPONSIBILITY IF THINGS GO WRONG WHEN DOING THIS, be bloody careful
16 - very very very carefully heat the inner slieve of the top bush and remove as before (you are bellow the fuel tank) then heat and cut, heat and cut until you have got all the rubber removed as it will stop your hacksaw from cutting the metal and really annoy you.
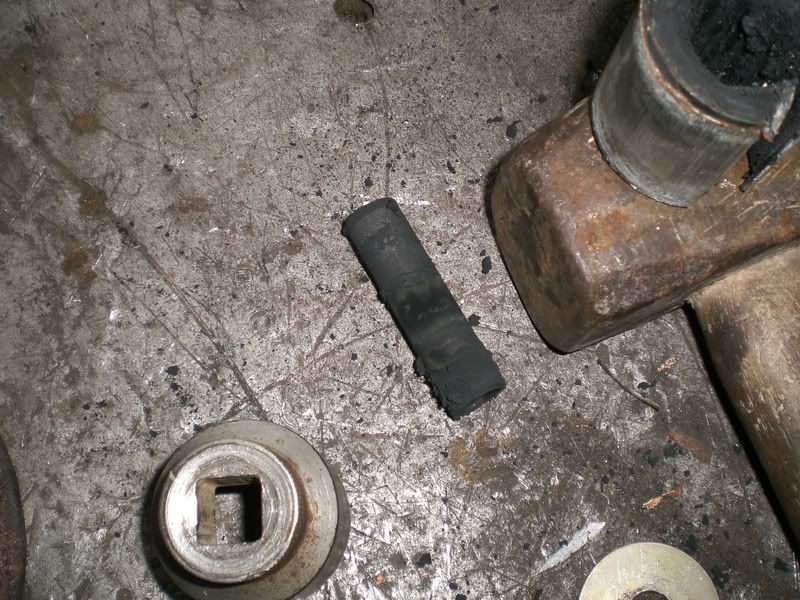
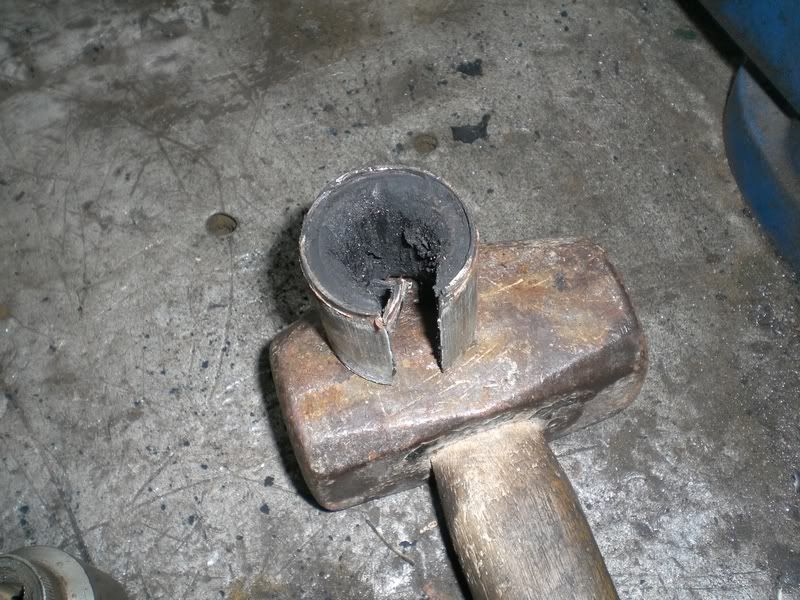
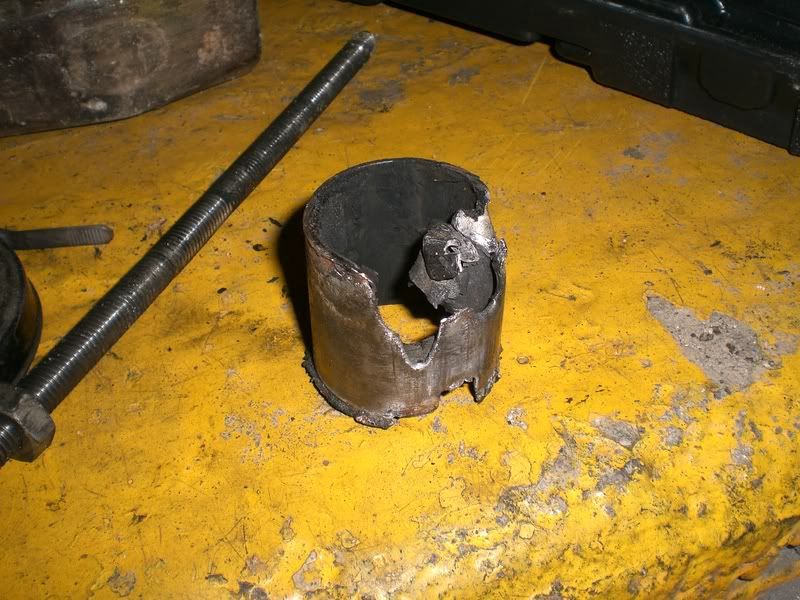
17 - Once most the rubber is out cut as much as you can into the outer sleeve and from either side with the huge extension bar and step downs with a 1/4inch socket and impact flathead screw driver bit, hit the extension with a big hammer from either side and try to remove the slieve, it will be bloody hard, i then used a 30mm socket as there were lips in the slieve that had been bent in from being cut and hit, i then used the 30mm on the end of the extension bar and used it to drift the outer sleive out.
Mine looked like this by the time i got it out
18 - now have another cup of tea, and pat yourself on the back, the hard work is done
19 - fit the new bush the same as above and re-assemble in the reverse order
Im still uploading some of the photo's to photobucket and will but them up tomorrow
Hope this helps!
I left my Diff in, although have been told that its easier with it out, i didn't have anyone to help prop it.
TOOLS NEEDED
Good socket set both double and single depth
Hobby blow torch
1mtr extension bar
Good combination spanner set
6-12mm hex socket set (£20 for halfords pro set)
Big hammer
Torch
and usual screw drivers etc
Patience!
1 - Either get the car on a ramp that you are comfortable under or use a pit,
2 - Remove exhaust system from the cats back (2 x 14mm combination spanners) disconnect the speed sensor electrically and remove
3 - disconnect the drive shaft and rest it on the heat shield
4 - remove all 4 locking bolts from the 2 front mounting plates
5 - remove the 2 nuts from the 2 bolts holding the lower bushes in place (i think they are 14mm)
6 - support the diff with something (i had a gearbox support)
7 - remove the 4 allen bolts holding the 2 lower bush mounting plates onto the diff (10mm allen socket)
8 - drift the 2 bush bolts out and remove both plates (be careful as the diff will move)
9 - now get a fooking huge extension bar and a elbow joint with a 14mm double depth socket and thead through the drivers side wheel onto the top bush nut and remove
10 - now drift out the top bush bolt (the diff is now totally lose, but held in place by the drive shafts and what ever support you have used)
11 - Now remove the 4 allen bolts holding the mounting plate in place and wiggle the diff like a b
d and the plate will drop out12 - Have a cup of tea and some food and sound proof the garage and make sure there are no small children near as you will be swearing a lot!
from here this was my way of doing things, if others have a better please copy and edit for others benefit
13 - use a hobby blow torch (£9 from halfords etc) and heat up the inner slieve of the 2 bushes on the lower mounting plates, you will set fire to it at some point so do it somewhere ventilated, once hot enough use a screw driver to push the sleeve out, now set fire to the bush and let it burn out and remove the hard stuff with a knife, then set fire to it again and repeat until its mostly all burnt out, now hacksaw through the outer slieve in 2 places about 10mm apart being very careful not to damage the mount, once cut remove the 10mm strip with hammer and an old screwdriver, the outer slieve should now come out easy (I tried a few other methods and trust me, this is the easiest)
14 - I used polly bushes, and would recomend that people do the same. use a 8mm threaded bar with a penny washer and a big socket either side to 'press' the bush into place.
15 - now for the fun bit I TAKE NO RESPONSIBILITY IF THINGS GO WRONG WHEN DOING THIS, be bloody careful
16 - very very very carefully heat the inner slieve of the top bush and remove as before (you are bellow the fuel tank) then heat and cut, heat and cut until you have got all the rubber removed as it will stop your hacksaw from cutting the metal and really annoy you.
17 - Once most the rubber is out cut as much as you can into the outer sleeve and from either side with the huge extension bar and step downs with a 1/4inch socket and impact flathead screw driver bit, hit the extension with a big hammer from either side and try to remove the slieve, it will be bloody hard, i then used a 30mm socket as there were lips in the slieve that had been bent in from being cut and hit, i then used the 30mm on the end of the extension bar and used it to drift the outer sleive out.
Mine looked like this by the time i got it out
18 - now have another cup of tea, and pat yourself on the back, the hard work is done
19 - fit the new bush the same as above and re-assemble in the reverse order
Im still uploading some of the photo's to photobucket and will but them up tomorrow
Hope this helps!
Edited by brakedust on Wednesday 15th October 01:39
Edited by brakedust on Wednesday 15th October 02:37
Edited by brakedust on Wednesday 15th October 03:16
Del 203 said:
For the top rear bush try a Void bush tool....
Sykes Pickavant 66082000
Bar code 5 012737 608201
Another number on the box is W216953
or a 14lb sledge hammer & a long iron bar
Yea I used the sledge hammer & iron bar! Wish I had known about these!Sykes Pickavant 66082000
Bar code 5 012737 608201
Another number on the box is W216953
or a 14lb sledge hammer & a long iron bar
Edited by Del 203 on Wednesday 15th October 10:12

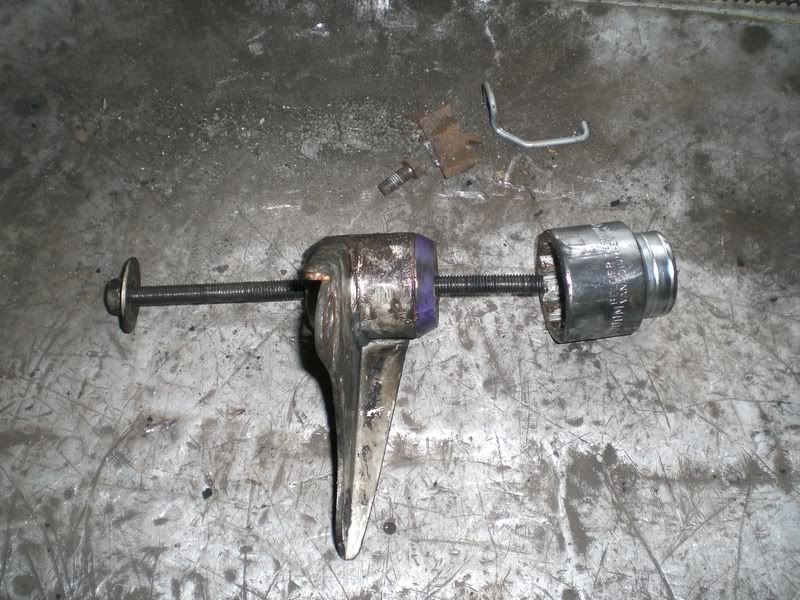
Glad it helped guys.... has anyone tried one of those bush pullers on the top diff bush yet? I tried a home made one of those and it was so tight that i rounded off the nut, then after another nut i stripped the threads on the bar (I used a threaded bar, a socket the same size as the bush outer sleave and a socket that was bigger and a great big fook off torque wrench)
Be interesting to see if this is strong enough
Be interesting to see if this is strong enough

I put some shielding on the tank and just used a hobby blow torch to burn out the rubber, then I used a hacksaw blade with tape on each end to saw through the outer case, I then used a impact flat head screw driver on the massive extension out the wheel and smashed it a few times with a huge mallet!
It gave up the fight in the end.
It gave up the fight in the end.
Gassing Station | Cerbera | Top of Page | What's New | My Stuff