Lund's MG Metro 1275 Engine Build
Discussion


robminiman said:
Mini_Lund said:
Can't get the flywheel off the other 1275 and I have just managed to strip the bolts of their thread - it wasn't my flywheel to ruin either  I'm starting to think am I really good at anything? I have also just spent another £130 at minispares, bought some cam followers, flywheel puller, and a full set of HILO's. I shouldn't have, but I did.
This engine build is really starting to get me down. Bad times!
think thats bad i owe my dad a lot of money and broke my mini then tryed to fix my scooter and failed then broke it even more im about ready to push them both into the middle of the yard and set them on fire anoyed is not the word I'm starting to think am I really good at anything? I have also just spent another £130 at minispares, bought some cam followers, flywheel puller, and a full set of HILO's. I shouldn't have, but I did. This engine build is really starting to get me down.
Bad times! I knew it would cost me alot finacially, I just don't like spending my money on what I already have. Hopefully it should all come together in the end. I stated that I'm on my own for this engine build and want to do it by myself, but I think Im going to ask my dad to get involved.
ETA: Sledge hammer didn't work neither. The thread on th flywheel is 'fubar' so keeps shredding the bolts. What drastic measures can I take to get the flywheel off? I only want the g/box!
Edited by Mini_Lund on Thursday 19th March 18:20
try pouring several boiling hot kettles full of water on the f/w with the f/w puller on then put a piece of bar threw the starter motor hole and give it a rite good clout then turn it overa bit hit it again turn it over again hit it again and cary on doing this till it comes off. if this dosnt work then try heating it up with oxgy acelatin bottles if you have them if not keep on hitting it

If the threads are stripped in the flywheel, you need to drill out the flywheel and tap it to 3.8" UNF. Then get some long 3/8" UNF high-tensile steel bolts and use those in the puller. Tighten it up, but not so tight as to strip the new threads. Then heat up the flywheel/crank with a blow torch. Tighten it a bit more and leave it overnight. Repeat this until it comes off. it will eventually - trust me!
If you grind it off with an angle grinder it will probably ruin the crank unless you are very lucky.
If you grind it off with an angle grinder it will probably ruin the crank unless you are very lucky.
Skyedriver said:
Just a a thought from someone with far too much money tied up in a mini somewhere...and with a flywheel that didn't want to come off...
You have removed the large 33mm (??) bolt, have you removed the washer behind it?
Sometimes you just forget these things...
Yes both bolt and washer have been removed; I'll buy some heavy duty bolts with more thread on them as the threads on the (now threadless) bolts are too short anway, there just not enough thread to ensure a fully fastened puller! I guess they just use cheap metal and a 20 year old, rusted-on flywheel will eat through them all! I'll be persistant. I will get this g/box off! I just hope its in good condition without broken teeth! You have removed the large 33mm (??) bolt, have you removed the washer behind it?
Sometimes you just forget these things...

mish000 said:
Hey there, new to the forum.
anyway i doing the same as u sort of just got a 1275 a+ metro engine putting it into a 1980 clubman 1275gt
do you know if you have to change much engine mounts to put it in?
yes, if it from metro then front mount am totally diffrent. Need to keep mini mount and dump metro one.anyway i doing the same as u sort of just got a 1275 a+ metro engine putting it into a 1980 clubman 1275gt
do you know if you have to change much engine mounts to put it in?
rear mount am diffrent 2 i fink.
Hi all, been a little bit busier today, not acheived alot, but its a step forward toward completion. I cleaned up and thoroughly oiled the primary gear assembley and refitted that, same again with the cam followers/tappets & loosley installed the cam back into place. I'm just awaiting a full gasket set, so haven't put the front plate and locker washer back on yet.
Flywheel cover is being welded and then re-tapped for a tenner.

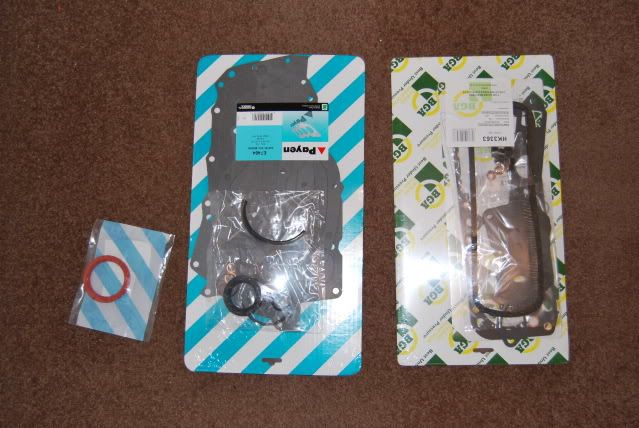
Full gasket set and oil seals:
Flywheel cover is being welded and then re-tapped for a tenner.
Full gasket set and oil seals:
Edited by Mini_Lund on Thursday 26th March 22:28
Edited by Mini_Lund on Friday 27th March 00:41
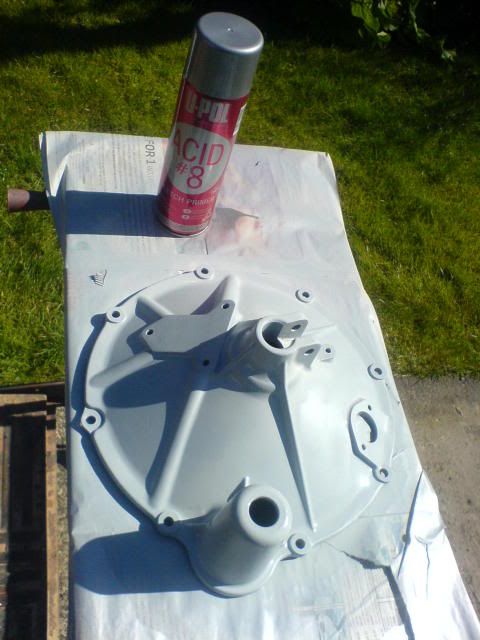
Hi all, with today being nice and sunny, decided to crack on and etch prime the aluminium housings.
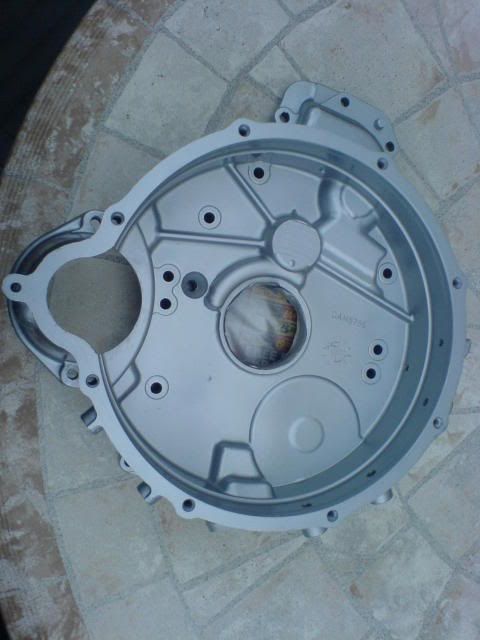
I have had the housing breather bit welded and re-tapped. I dressed the welds and fillered it to smarten it up abit. Here's the result, top coat of silver paint:

Impressed?
Sprayed front plate:


Pete, I also knocked out that dent in the timing cover. Is this all I need to do for the chain to fit?
Tom
I have had the housing breather bit welded and re-tapped. I dressed the welds and fillered it to smarten it up abit. Here's the result, top coat of silver paint:
Impressed?
Sprayed front plate:
Pete, I also knocked out that dent in the timing cover. Is this all I need to do for the chain to fit?
Tom
Edited by Mini_Lund on Sunday 29th March 19:38
Yes, just grind the flange off to cleat the sprocket and you'll be fine. I've got one to do myself this afternoon. As Rich says, don't forget to countersink the 2 holes in the engine plate and use 1/4" UNF x 1/2" long socket head screws, to ensure chain clearance.
I ecently hasd o strip an engine down and the holes had noty been countersunk by the original engine builder. It was quite a mess and the chain was damaged.
I ecently hasd o strip an engine down and the holes had noty been countersunk by the original engine builder. It was quite a mess and the chain was damaged.
FWDRacer said:
Why have you painted the end plate? If the paint ends up coming off (Think about the conditions it will experience, heat cycling + Hot oil) it'll end up in your oil system and probably go through your bearings 
I'm all for tidying stuff up etc
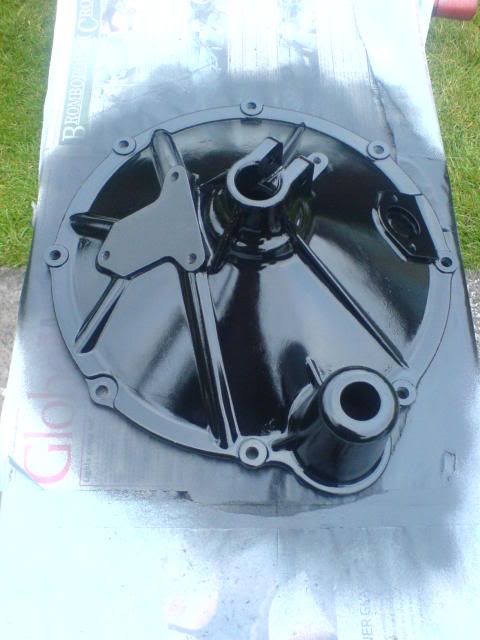
I have removed the inner ring, drilling out the spot welds (I had a little accident and managed to penetrate the timing cover!). However, I have welded the hole and put a skim of filler over the top to 'tidy it up abit'. I'm all for tidying stuff up etc

Sanded down the primer, and will clean it properly in due course.

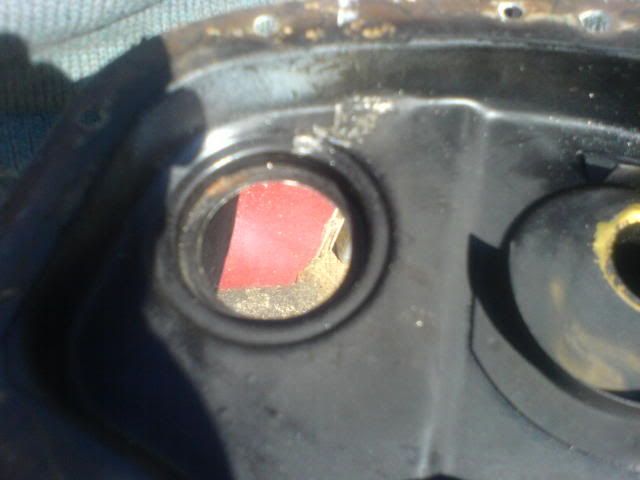
Also, what is the purpose of the squared bit of metal, bottom right of the oil seal?
Removed dent and inner ring;

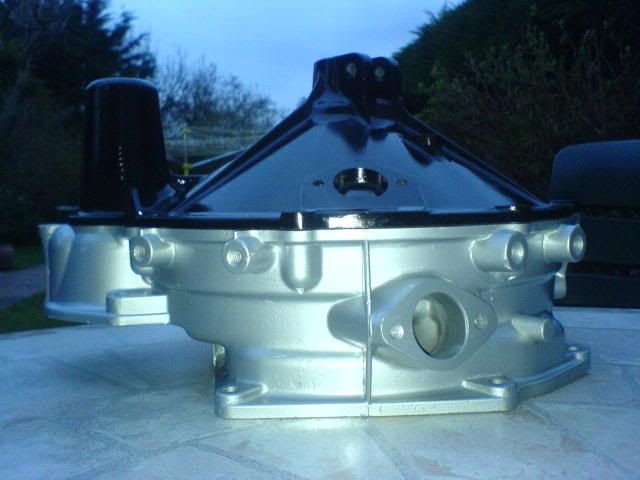
After etch priming the housing, I decided to use silver enamel, and a coating of lacquer; (now complete)
Gave the end cover an initial coat of enamel gloss black. Its due a second coat and I will also lacquer this:
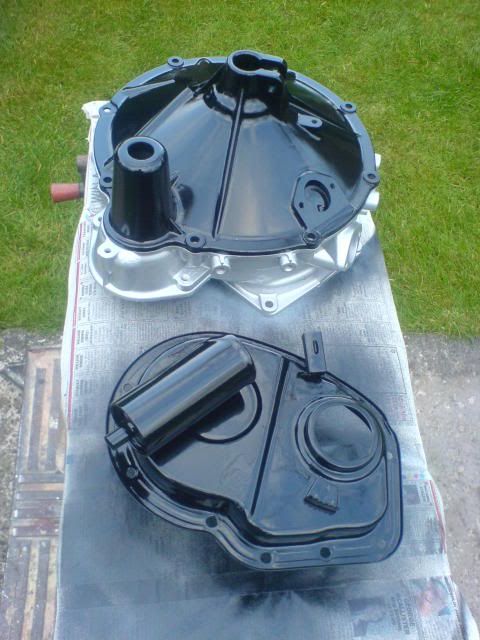
Together:
Slowly but surely getting there && Guys, If I had realised that fitting a duplex timing chain was this much effort, I really would'nt have bothered!
Edited by Mini_Lund on Tuesday 31st March 20:19
Mini_Lund said:
Also, what is the purpose of the squared bit of metal, bottom right of the oil seal?
on the very early metros there was a special tool that fitted into it to help set the timing. it was never used on the mini (and ive never seen anybody use it for anything, or seen the tool that fitted into it.....)i just chop it off, looks untidy.
also, if your using that cover in a mini, you really need to flatten the breather by cutting the outer edge off and welding a plate onto it. it is possible to use it as it is, but you have to space the fan so far from the pump so it doesnt hit it that fitting the rad becomes seriously hard work.
you can buy the later covers with the ready flattened side from minispares for not a lot of money (for far less than the hassle of sorting the round canister breather out on yours)
Edited by guru_1071 on Tuesday 31st March 20:39
guru_1071 said:
Mini_Lund said:
Also, what is the purpose of the squared bit of metal, bottom right of the oil seal?
on the very early metros there was a special tool that fitted into it to help set the timing. it was never used on the mini (and ive never seen anybody use it for anything, or seen the tool that fitted into it.....)i just chop it off, looks untidy.
also, if your using that cover in a mini, you really need to flatten the breather by cutting the outer edge off and welding a plate onto it. it is possible to use it as it is, but you have to space the fan so far from the pump so it doesnt hit it that fitting the rad becomes seriously hard work.
you can buy the later covers with the ready flattened side from minispares for not a lot of money (for far less than the hassle of sorting the round canister breather out on yours)
Edited by guru_1071 on Tuesday 31st March 20:39
Well I'm going to have to spacer the fan as I've finished spraying the timing cover now. 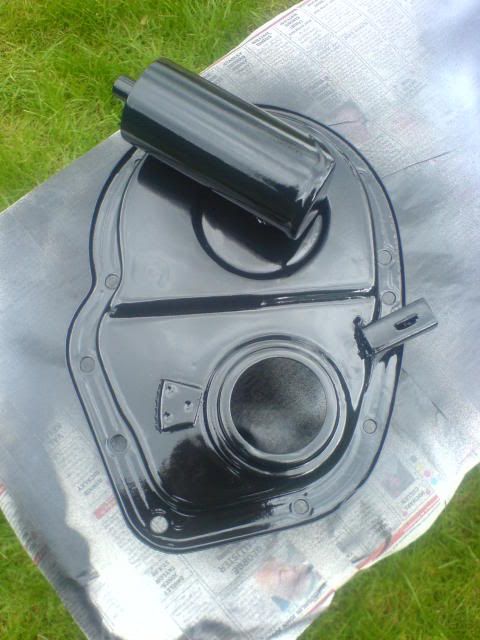
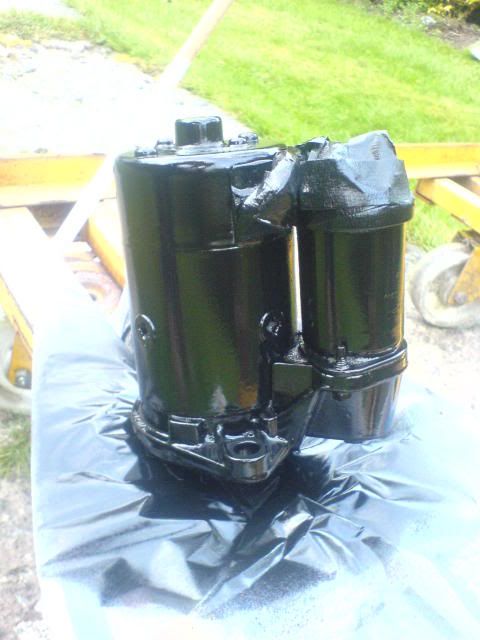
Sprayed Starter Motor;
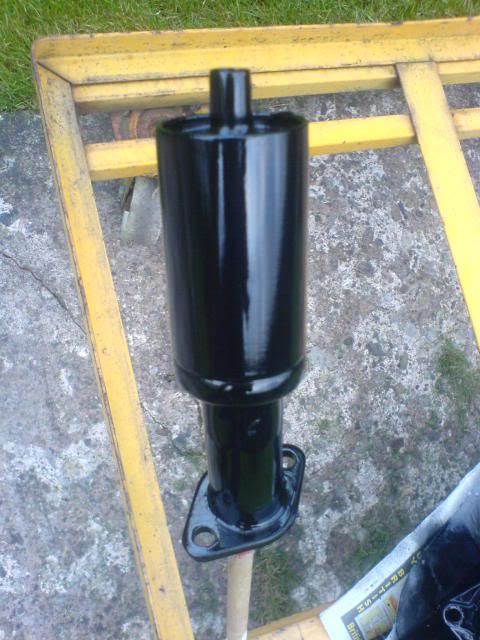
Breather;
guru_1071 said:
sorry about that.
i really wouldnt use it, as the 3/9 spacer you have to fit causes all sorts of proplems with the fan, it makes it nearly impossible to fit the rad!
Im debating what to do now, I might try it with the fan spacer and see how I get on. Too much pain and heartache has gone into that timing cover and it finally looks the mutts nutts!i really wouldnt use it, as the 3/9 spacer you have to fit causes all sorts of proplems with the fan, it makes it nearly impossible to fit the rad!
Have you a photo of what is to be done to the front plate? I've an idea of what is to be done, but can't picture it.
Thanks, Tom
Cooperman said:
I think he means 3/8" spacer!!!
FAN SPACER (3/16") actually 5/32 just under 4mm Edited by Cooperman on Monday 6th April 12:42
Description
Used with most of the stock fans, definitely required if you have a breather type timing cover.
£4.03 inc vat

http://minispares.com/Product.aspx?ty=pb&pid=3...
Does this mean I have to spacer the alternator or does it only spacer the fan out?
Gassing Station | Classic Minis | Top of Page | What's New | My Stuff