Lund's MG Metro 1275 Engine Build
Discussion


I have began to rebuild the carb now, after cleaning it best I could. Its not perfect but will certainly/hopefully do the job. It's all pieced together. I just haven't quite worked out how to reset the springs into place, but from looking at some of the before photo's I have an idea of how they should sit!
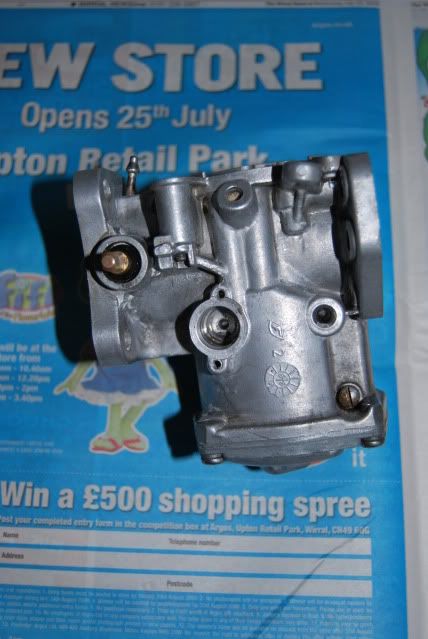
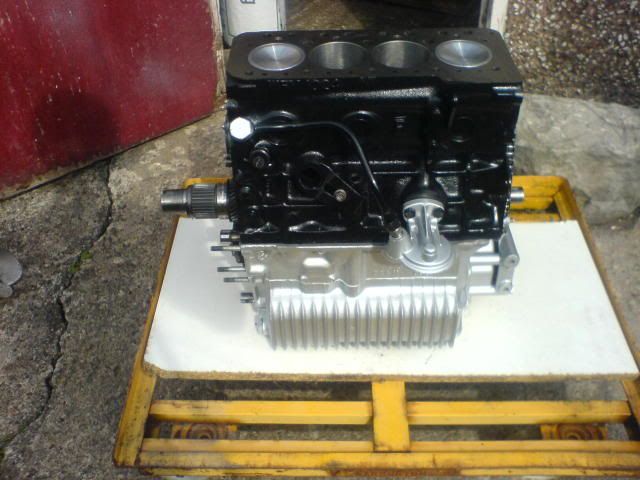
Bare Carb:
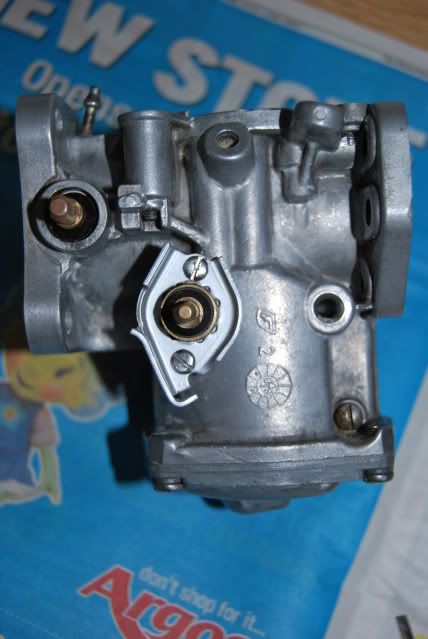
Part Assembled:
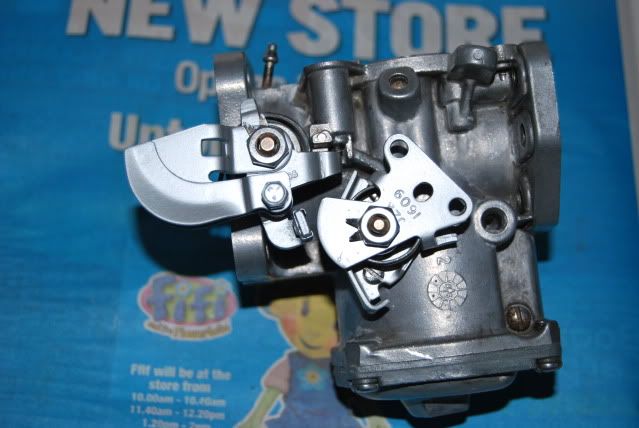
Assembled:
Thanks for looking.
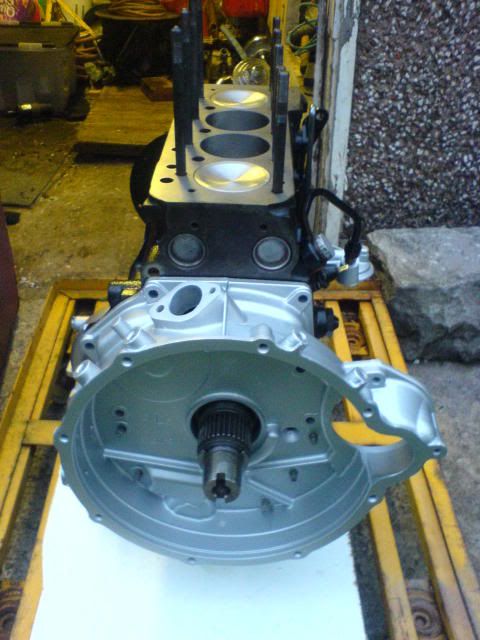
Bare Carb:
Part Assembled:
Assembled:
Thanks for looking.
mish000 said:
hi there at about the same point as you with my metro conversion. Was wondering how i get the metro clutch mechanism (verto) to work with the hydrolic system that my 1275gt used. do you just use the plunger and release leaver off the normal type? or do you have to modify the clutch system?
I was going to ask you the same question!Watch this space
Thank you for the information, I'll look into it when I get to that stage.
The MG engine didn't come with the flywheel cover on the side of the engine as it had previously been removed. I'm sure I need the 'locker washer strips'. However, as you can see from the pic, there are studs into the flywheel, thus needing bolts. However that wont work as well with the locktabs will it?
Should I remove the studs and insert bolts in their place or need'nt I bother & use bolts.
duncancallum said:
a+ units just have bolts and no lock tabs
you could if your worried just dap some thread lock on them. I have never known them to come loose, just make sure the threads are clean by running a tap though them 1st as the lower ones into the box will strip if your rough, also make sure you match the threads up right
unc into ally and unf into steel
As the metro engine came without the housing on the side, I have no idea what bolts to use and which ones go where. I have removed all of the studs from the side of the gearbox. Should I use bolts into the gearbox on the inside of the housing or nuts on the studs I have just removed?you could if your worried just dap some thread lock on them. I have never known them to come loose, just make sure the threads are clean by running a tap though them 1st as the lower ones into the box will strip if your rough, also make sure you match the threads up right
unc into ally and unf into steel
Any direction?
All very well, but that doesn't help me too much. I'm hoping to get this flywheel on sharpish, however I have also just fitted the petrol pump, all being well it should work fine 
Do I need 8 of these to fit the housing to the block?
CLUTCH HOUSING TO BLOCK BOLT 1.75"x5/16"unf - BH605141
Description
There are 3 of these bolts fitted -1/75"long UNF bolt ALTERNATIVE DAM7758. Also used for water pump.
Do I need 8 of these to fit the housing to the block?
CLUTCH HOUSING TO BLOCK BOLT 1.75"x5/16"unf - BH605141
Description
There are 3 of these bolts fitted -1/75"long UNF bolt ALTERNATIVE DAM7758. Also used for water pump.
Edited by Mini_Lund on Sunday 23 August 14:20
dogfather said:
Mini_Lund said:
Brief update guys, the gearbox has now been fully re-built.
how much was your rebuild mate and did you change any think inside, reason for my question is i have a cooper s diff and final drive gear which going to install to my box but was after a rough figure on how much they charge..thanks m8..looking good by the way..Extract from my build expenses
Gearbox Rebuild
Gearbox Refurb Labour 100.00
Central Oil Pickup 20.81
Differential Pin 21.09
Planet Gear Thrust Washer x2 4.20
Double Roller Mainshaft 37.00
Needle Roller 1st Motion/layshaft 4 sync 2.87
Roller Single Type for Holding 1st Motion Shaft 10.86
Baulk Rings Genuine Rover x4 63.00
Oil Pump Slot Drive 12.20
Fan Spacer '85 onwards 5.24
Planet Gears x2 16.54
TOTAL: £293.81
Edited by Mini_Lund on Sunday 23 August 20:48
duncancallum said:
Studs or bolts are fine. but make sure you use the right ones in the right holes as I said before.
if your using studs use a little thread lock and a spring washer or a nyloc on the stud it should be fine
as before
ally-unc
iron-unf
Hi there, thanks for you're input I have copper eased and fitted all of the studs back in place in the engine. I have the 3 bolts needed however one is slightly chewed up so I'm getting another. I have masses of Loctite leftover from the countersunk timing chain screws so should be ideal. I like the idea of the nyloc nuts. Either way I should be fine. Need a new clutch cover to eninge/gearbox gasket tho! One of the studs that align the cover managed to pinch the gasket and split it on the bottom corner. I'll have to get a new gasket. All being well it should be on soon. Then I can fit the flywheel and clutch. if your using studs use a little thread lock and a spring washer or a nyloc on the stud it should be fine
as before
ally-unc
iron-unf
duncancallum said:
make sure you get the same thickness gasket to keep the thrust float the same
Will do thanks. Engine:
Camshaft Gear Locktab 2A759
Locktab Crank Pulley Late TAM2020
Diff Output Shaft Oil Seal X2 ADU5738
Clutch Case gasket 22A2237B
Rotor Arm Distributer GRA2143
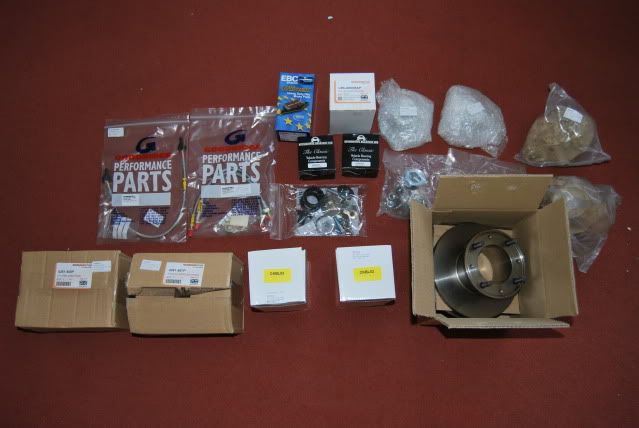
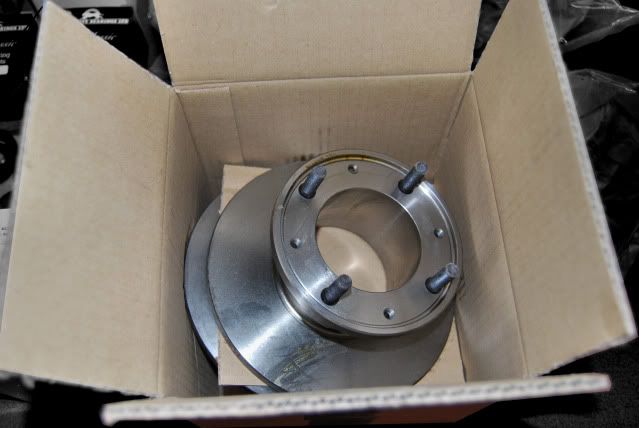
Brakes:
S Brakes C-AJJ4028
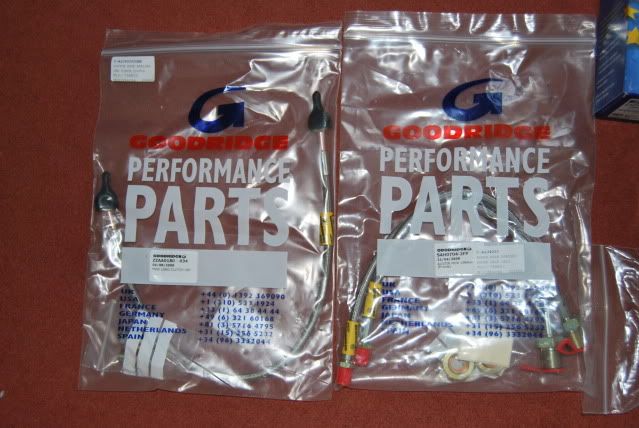
Braided Hoses Front C-AJJ4030
Clutch:
Verto Clutch GSY118
Clutch Hose Verto GVP1009
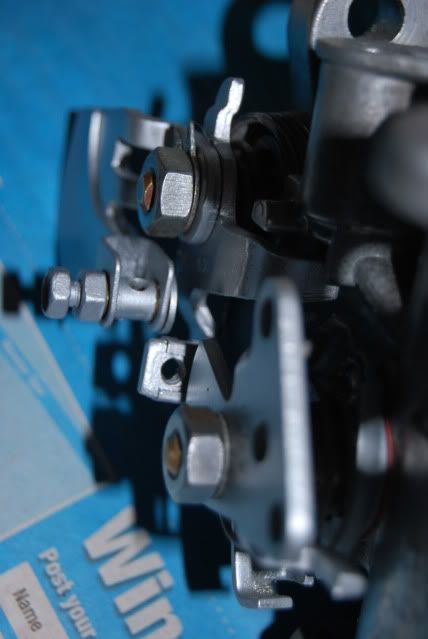
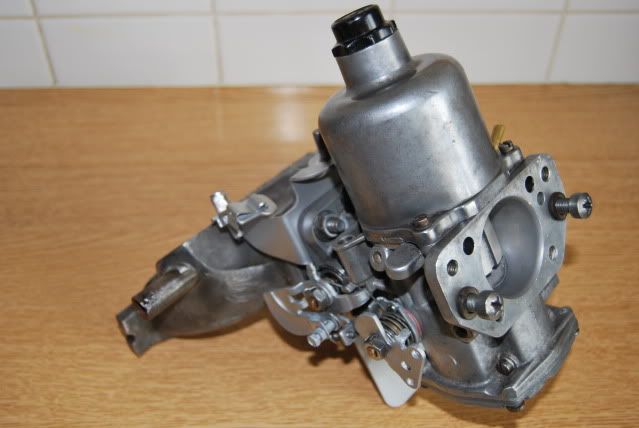
Rebuilt Hif44:
Edited by Mini_Lund on Monday 31st August 20:29
I'll be running the mini on the new S brake setup without a servo. However, I'll be removing the valve splitter for the brakes to harden the brake pedal. I'll also be using Goodrich braided brake lines for the fronts; do I require a different master cylinder or will my current one work with this setup?
GTRMikie said:
Mini_Lund said:
However, I'll be removing the valve splitter for the brakes to harden the brake pedal.
Do you mean the pressure limiting valve to the rear brakes? If you do then don't do it because you will be spinning down the road on the first heavy application of the brakes!Also Cooper S brakes work fine without a servo, assuming you have the single line braking system (well, they do on my van)
Best not too then you say? Indeed it is a single line braking system.I'm back on it! Afer a period of having no motivation for anything mini, this is my final push/jaunt to get it completed and another step further to the engine being in the mini before christmas! Should be fun in icy weather with Yoko Slicks! 
Oh and I must have forgotten to mention;
If there's one thing I hate doing, it's grinding the valve seats in!
Oh and I must have forgotten to mention;
If there's one thing I hate doing, it's grinding the valve seats in!
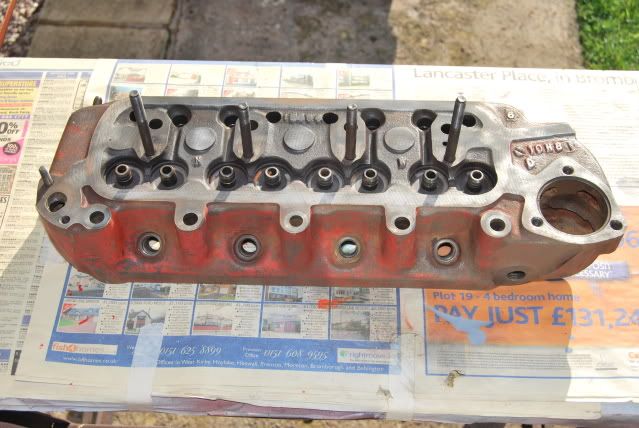
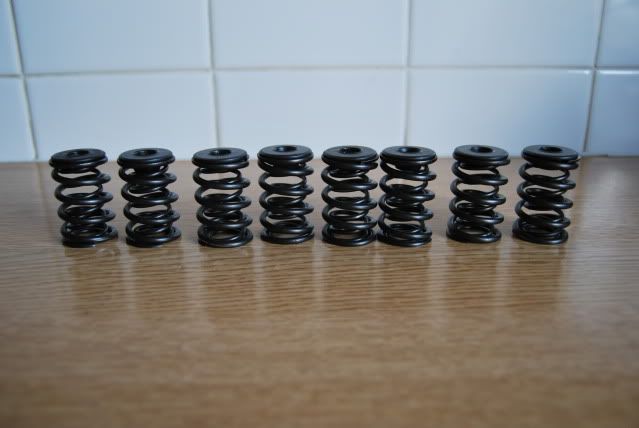
Yet another update guys, I had a look at one of the spare 1275 cylinderheads that were laying around in the garage. On closer inspection I notice that the cylinder head has double valve springs; Bonus! I promptly remove them and clean them up. I have no idea what load bearing they are (240lbs seems to be most common), is there any way to tell?
The cylinder head that I removed the springs from also had bronze valve guides as well as new valves by the looks of things, but was heavily coked up. The double spring head has made me curious as to what cam is in the spare 1275 engine it came from!
I intend on using the double valve springs for my MG metro cylinder head, is this advised over the standard single springs?
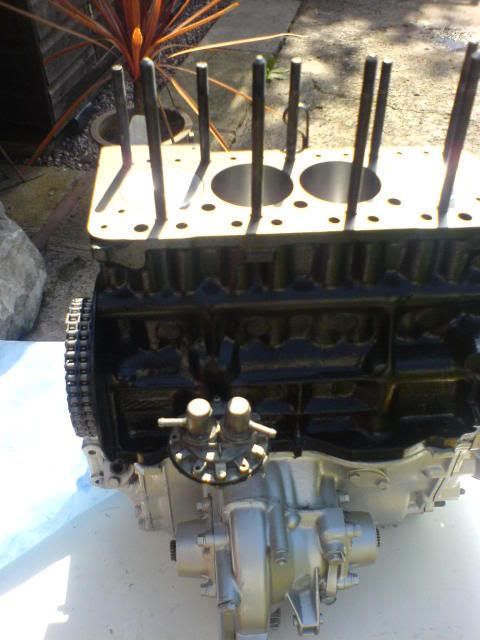
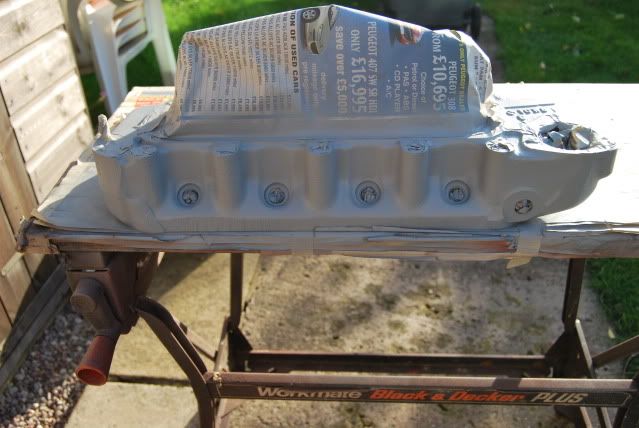
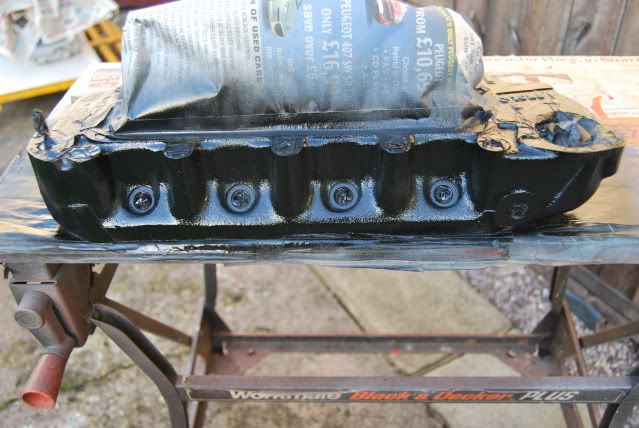
I primed and lightly coated the cylinder head today whilst the weather was decent, all is looking well. Cannot wait to piece it all together and fit it to the block.
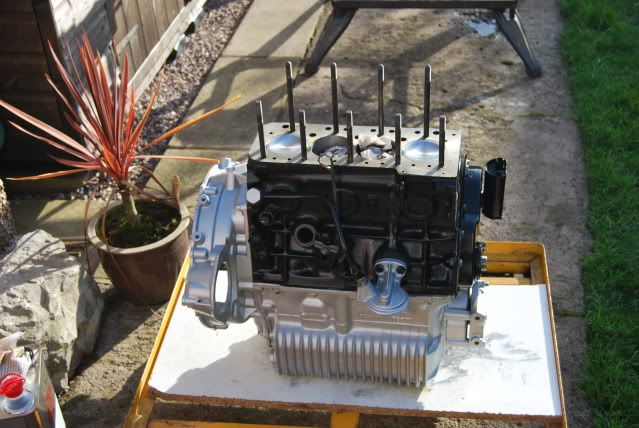
I have torqued up all the nuts and bolts as present. Next I'll focus my attention on the clutch and flywheel and then its basically done and ready to go in. I'm hoping to have the engine in before christmas.
Engine having had a few knocks and bumps whilst being in the garage:
The cylinder head that I removed the springs from also had bronze valve guides as well as new valves by the looks of things, but was heavily coked up. The double spring head has made me curious as to what cam is in the spare 1275 engine it came from!
I intend on using the double valve springs for my MG metro cylinder head, is this advised over the standard single springs?
I primed and lightly coated the cylinder head today whilst the weather was decent, all is looking well. Cannot wait to piece it all together and fit it to the block.
I have torqued up all the nuts and bolts as present. Next I'll focus my attention on the clutch and flywheel and then its basically done and ready to go in. I'm hoping to have the engine in before christmas.
Engine having had a few knocks and bumps whilst being in the garage:
phumy said:
Have you painted the valve springs , retainers and collets with black paint?, if you have you should take it off as it will flake off with heat and fill your oil system.
I haven't no. I gave them all a clean with soapy water to remove all the dirt & oil and dryed them off to take the photo. Cooperman said:
The single chain bears on both sides of the chain and puts the load in onto the chain links equally. If you put the tensioner onto the duplex chain it only bears on the centre of the chain where the links are virtually touching. So all the load goes into the centre of the tensioner over a very small area. This can cause tensioner failure on higher-revving engines.
I've seen one that's broken and one that was about to break this year alone.
The tensioner is probably OK for engines pulling up to about 5500 rpm regularly, but I would rather not take the risk at all.
Okay cheers Cooperman, thank you again for sharing your experience. Not long now before it's fully built up, need to get myself another flywheel housing oil seal and a few bits and bobs. Do you think the standard mechanical petrol pump is upto the job? I don't see why not.I've seen one that's broken and one that was about to break this year alone.
The tensioner is probably OK for engines pulling up to about 5500 rpm regularly, but I would rather not take the risk at all.
Tom
Gassing Station | Classic Minis | Top of Page | What's New | My Stuff