Project Peterborough
Discussion


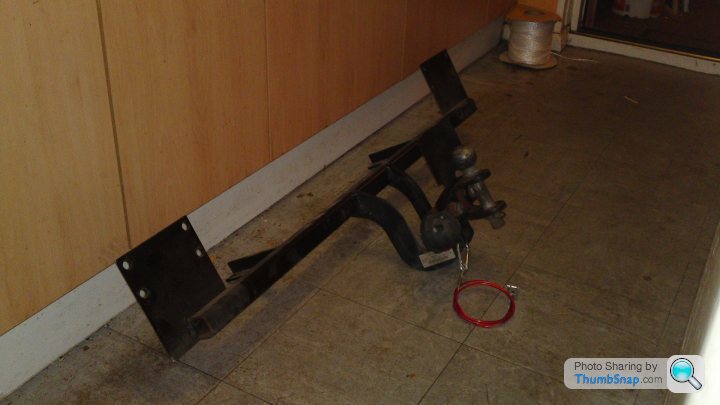
Okay after a bit of grinding...
...I used welding clamps to hold it in place and mark ready for drilling.
I was dreading this as I have no way of putting the ruddy great bar in my mates pillar drill and after my Diamond disc glowed red hot I went through three normal discs. I have no idea what kind of steel it was made of but it took a half hour just to cut the two corners out. I welded along the newly exposed seams. Normally with structural work I'd Arc it but because my welder was buried under a pile of stuff I had to M.I.G it. Poor welder hit duty cycle five times and blew the extension lead fuse.
The standard drill bits cut through like a fat brides maid cut through wedding cake then this happened...
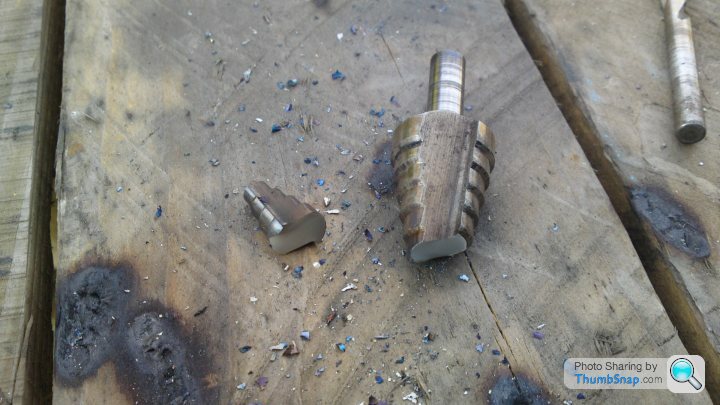
...to my step bit. Wow!
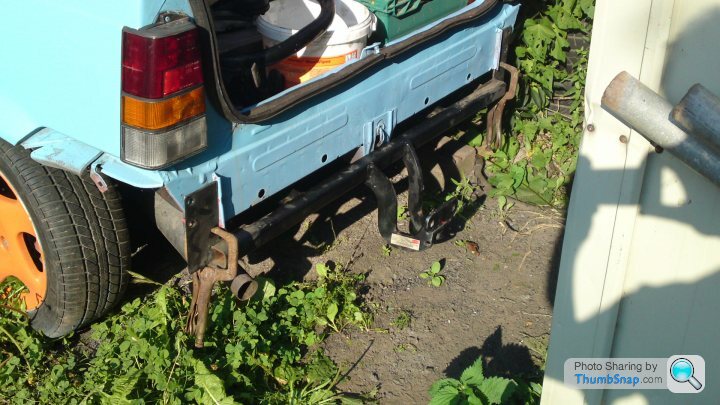
Anyway this is where progress ended...
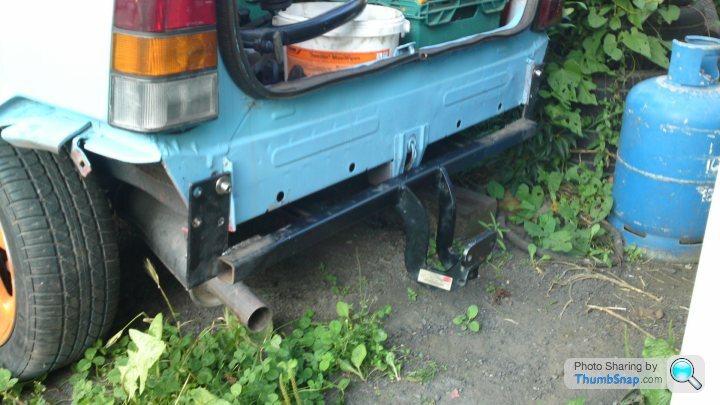
...ran out of time as I'm back to work in the morning and have to get prepared.
...I used welding clamps to hold it in place and mark ready for drilling.
I was dreading this as I have no way of putting the ruddy great bar in my mates pillar drill and after my Diamond disc glowed red hot I went through three normal discs. I have no idea what kind of steel it was made of but it took a half hour just to cut the two corners out. I welded along the newly exposed seams. Normally with structural work I'd Arc it but because my welder was buried under a pile of stuff I had to M.I.G it. Poor welder hit duty cycle five times and blew the extension lead fuse.
The standard drill bits cut through like a fat brides maid cut through wedding cake then this happened...
...to my step bit. Wow!
Anyway this is where progress ended...
...ran out of time as I'm back to work in the morning and have to get prepared.
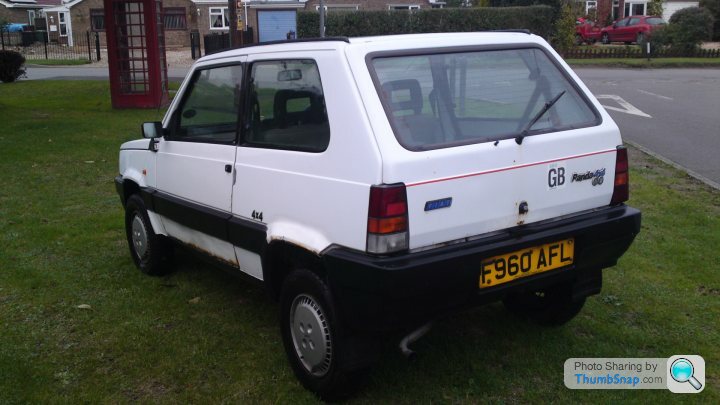
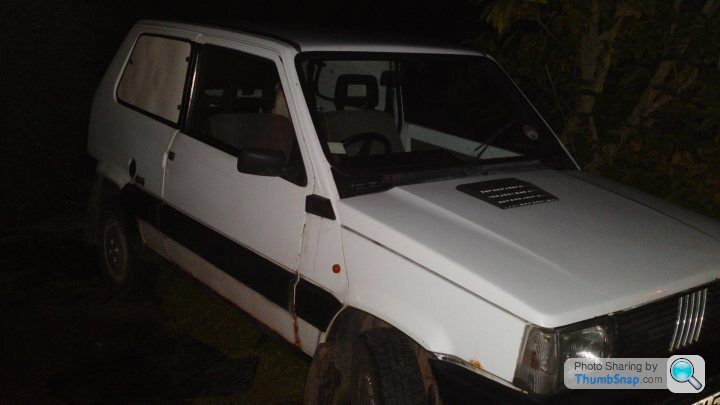
My Panda 4x4 arrived today! 

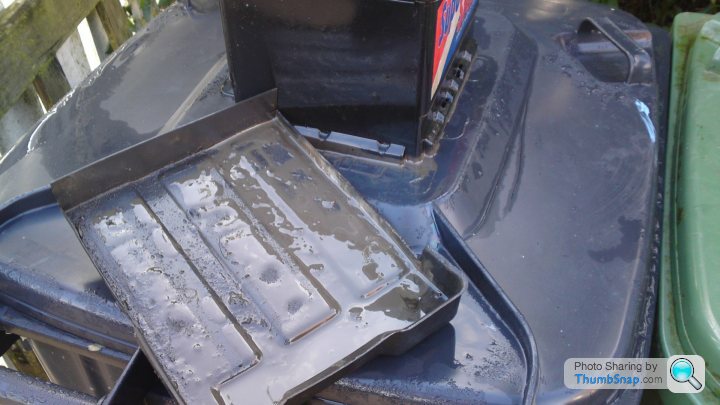
Stuff in the back that needed sorting out...

New slave cylinders, shoes and flexihose for the rear, new pads for the front. Brand new fuel tank (if I put more than £10 in the car it leaks), spare 4x4 cylinder head, spare 4x4 sump, spare front arms, a pair of bottom ball joints, a headlight, set of non-4x4 clocks, brand new back box and a couple of parcel shelves that are knackered.
First repair. The car has passed the last three M.O.T's without a driver door handle.
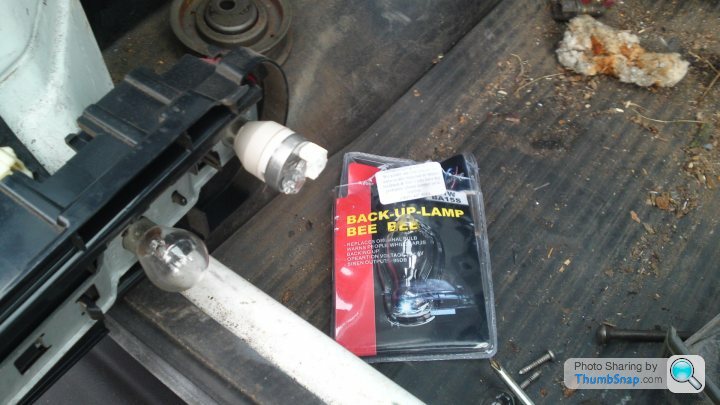
First modification. Reverse bleeper bulb.
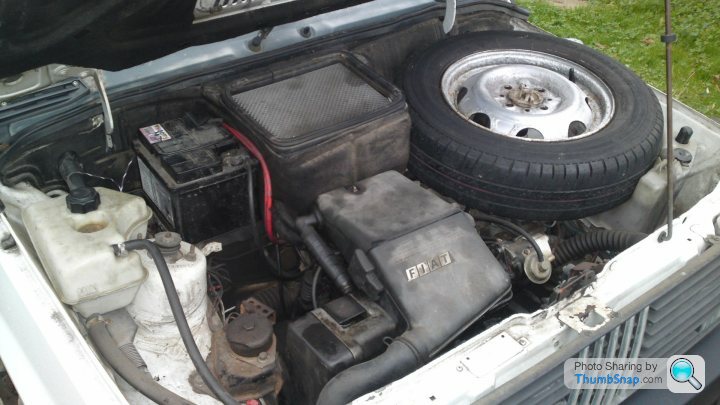
Apart from the classic Dizzy "O" ring oil leak the engine is in fine fettle considering...
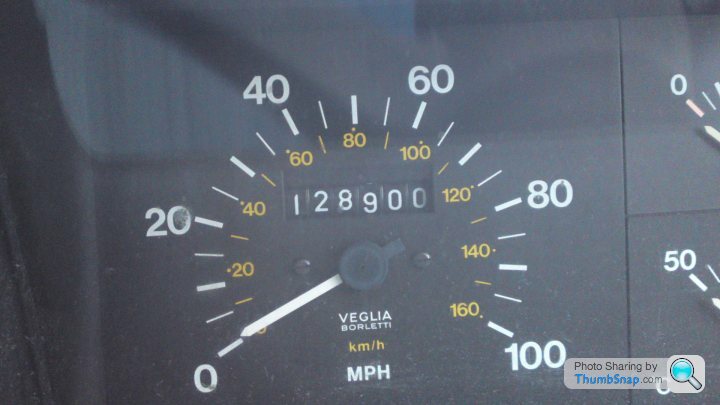
...the miles the old girl has been through.
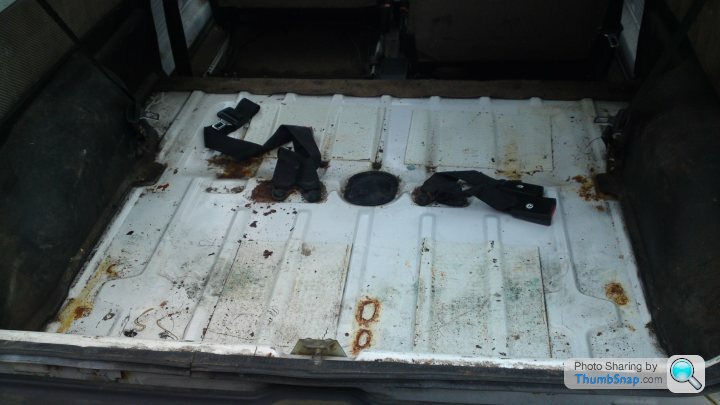
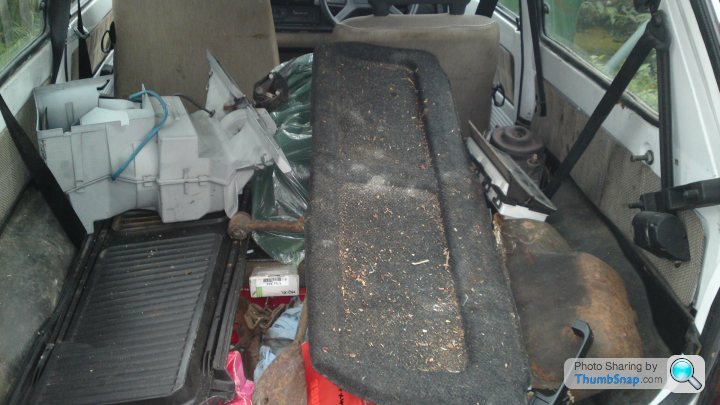
Stripped the back out to find the edges are bloody good but...
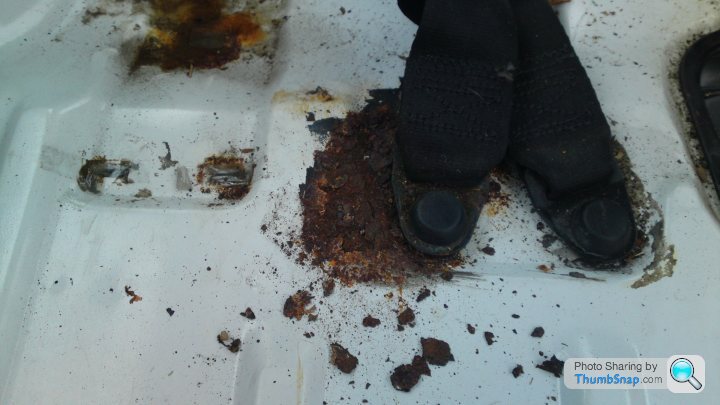
...there's an M.O.T fail (lucky the seat had been removed eh? No rear seat, no rear seat belt checks).
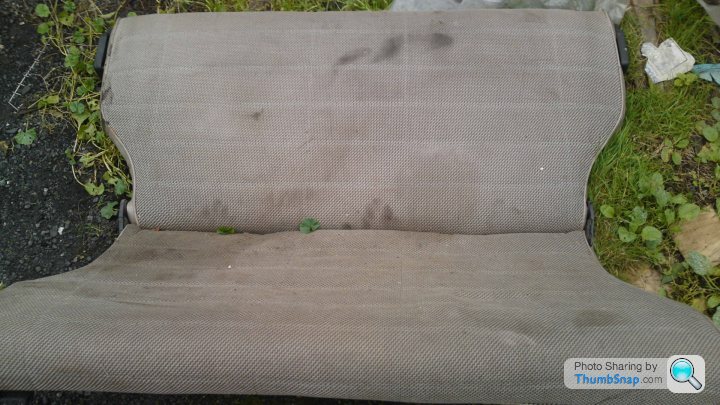
Just as grubby as the front seats. They are very comfortable though and demonstrate how much the little car has lived.
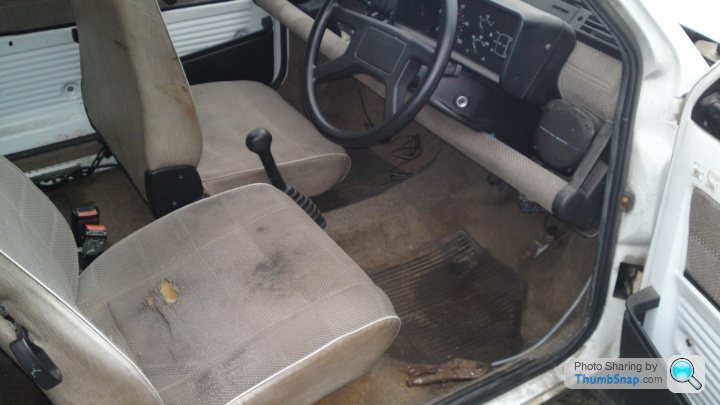
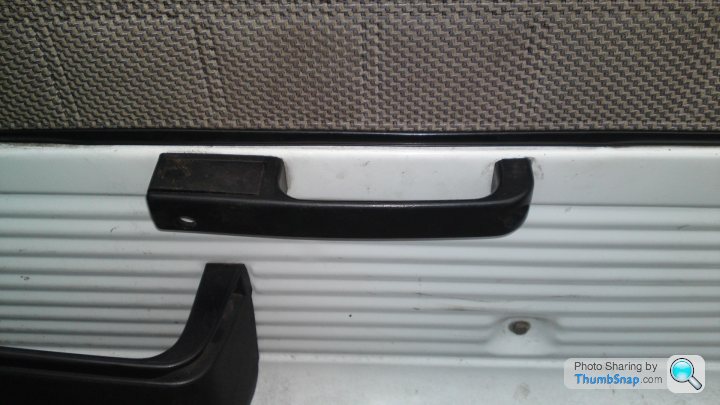
The Eagle eyed will have spotted the Holly Grail of Pandaing...
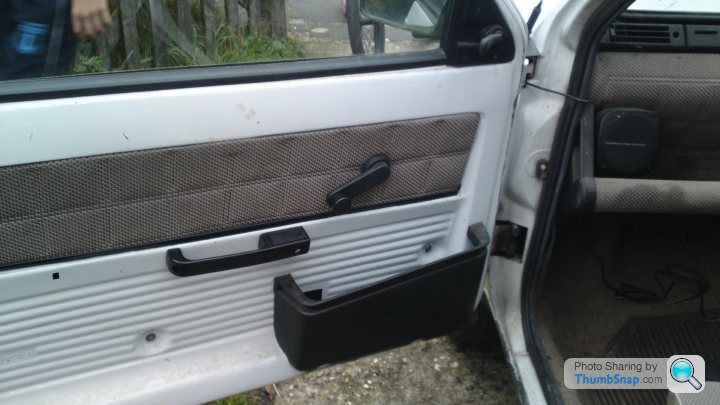
...A PASSENGER DOOR POD!!!!
I thought the internally adjustable mirrors were decedent.
Okay the usual shuttle panel rust hole...
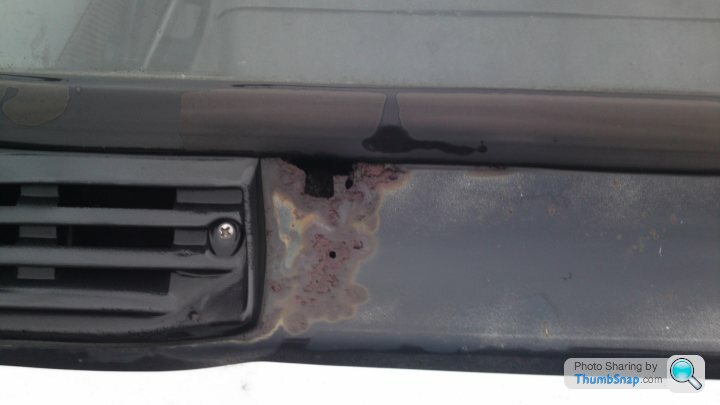
...but the main problem is the car has not been washed for about ten years and...

...the paint has the black spots of death growing in there.
A twice over with a wet sponge and...
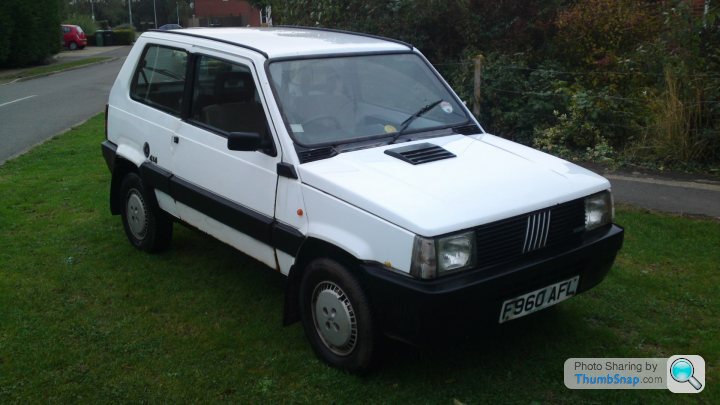
...the car (already called "The Ship") is almost presentable.
Now the fun can finally begin.
Stuff in the back that needed sorting out...
New slave cylinders, shoes and flexihose for the rear, new pads for the front. Brand new fuel tank (if I put more than £10 in the car it leaks), spare 4x4 cylinder head, spare 4x4 sump, spare front arms, a pair of bottom ball joints, a headlight, set of non-4x4 clocks, brand new back box and a couple of parcel shelves that are knackered.
First repair. The car has passed the last three M.O.T's without a driver door handle.
First modification. Reverse bleeper bulb.
Apart from the classic Dizzy "O" ring oil leak the engine is in fine fettle considering...
...the miles the old girl has been through.
Stripped the back out to find the edges are bloody good but...
...there's an M.O.T fail (lucky the seat had been removed eh? No rear seat, no rear seat belt checks).
Just as grubby as the front seats. They are very comfortable though and demonstrate how much the little car has lived.
The Eagle eyed will have spotted the Holly Grail of Pandaing...
...A PASSENGER DOOR POD!!!!
I thought the internally adjustable mirrors were decedent.
Okay the usual shuttle panel rust hole...
...but the main problem is the car has not been washed for about ten years and...
...the paint has the black spots of death growing in there.
A twice over with a wet sponge and...
...the car (already called "The Ship") is almost presentable.
Now the fun can finally begin.
Old car old bodges.
The exhaust back box. As well as being held on with black silicone...
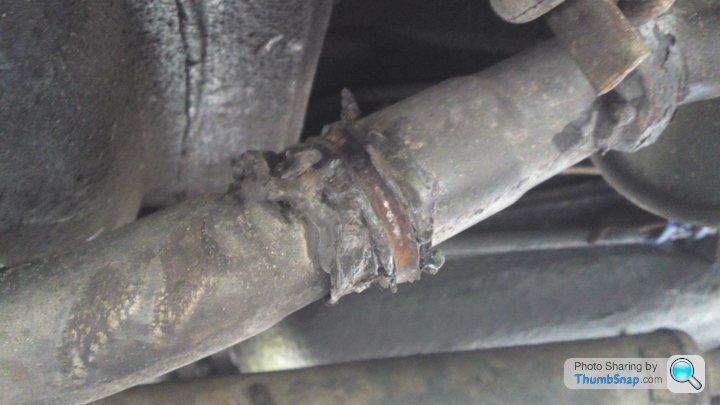
...it was welded by someone who fed liquid metal to a pigeon and got it poo along the subject and parent metal.
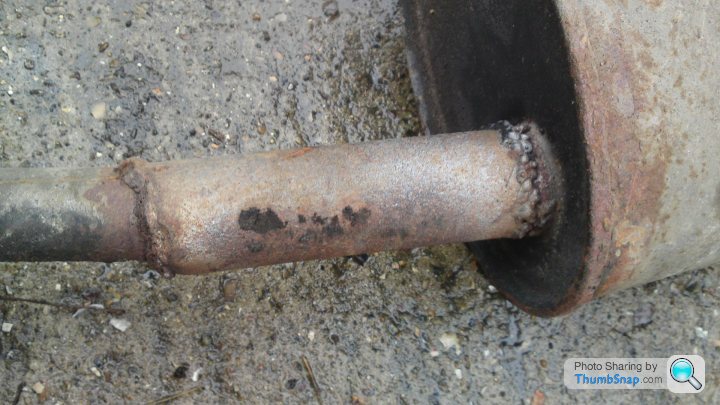
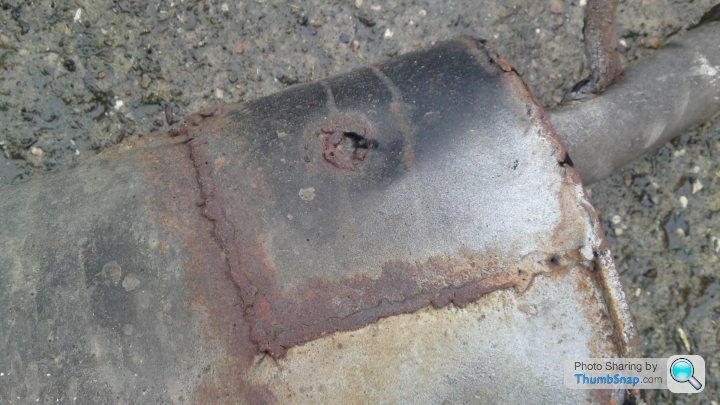
The new box took ten minutes to fit. I recon those bodges would have taken a lot longer. Talk about false economy.
Anyway the reason I had the car up on ramps was to replace the perished flexihose to the rear axle. This has also been bodged at some point and the replacement hose supplied is the wrong one.
I'll pop over to Wisbech engineering to get a stainless braided one custom made for the car when I jack it up.
The exhaust back box. As well as being held on with black silicone...
...it was welded by someone who fed liquid metal to a pigeon and got it poo along the subject and parent metal.
The new box took ten minutes to fit. I recon those bodges would have taken a lot longer. Talk about false economy.
Anyway the reason I had the car up on ramps was to replace the perished flexihose to the rear axle. This has also been bodged at some point and the replacement hose supplied is the wrong one.
I'll pop over to Wisbech engineering to get a stainless braided one custom made for the car when I jack it up.
The decadence continues. This car is spoiling me rotten.
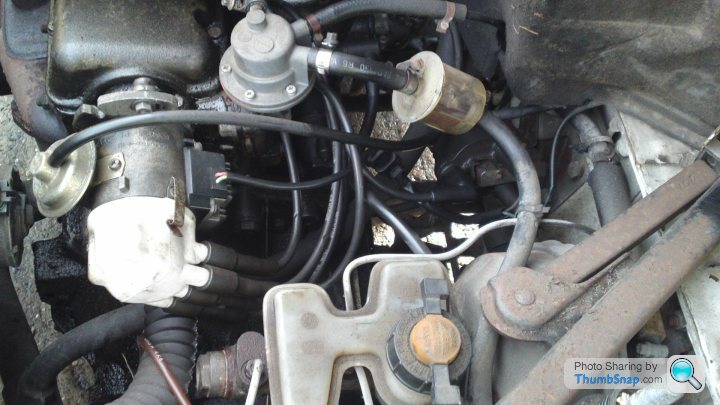
Brake servo and the black box distributor is much smoother running than the points and pins one. Even though the car is gears for about 55mph flat out and is dragging an axle behind it she's a perky little bus.
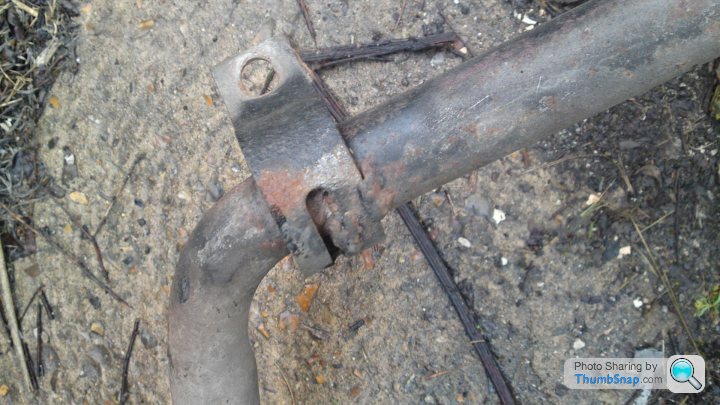
I mentioned jacking the car up earlier. The original plan was to make longer leaf spring hanger straps...
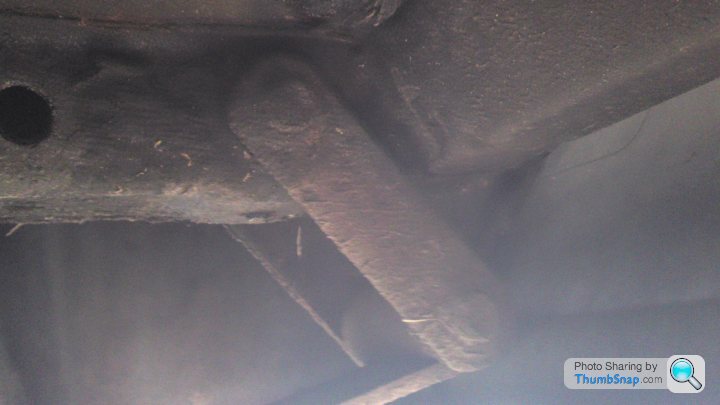
...but this would be counter productive and foul the tow bar brace if it were any longer. So 30mm blocks and longer "U" bolts it is then.
Brake servo and the black box distributor is much smoother running than the points and pins one. Even though the car is gears for about 55mph flat out and is dragging an axle behind it she's a perky little bus.
I mentioned jacking the car up earlier. The original plan was to make longer leaf spring hanger straps...
...but this would be counter productive and foul the tow bar brace if it were any longer. So 30mm blocks and longer "U" bolts it is then.

I've been thinking about colour again...
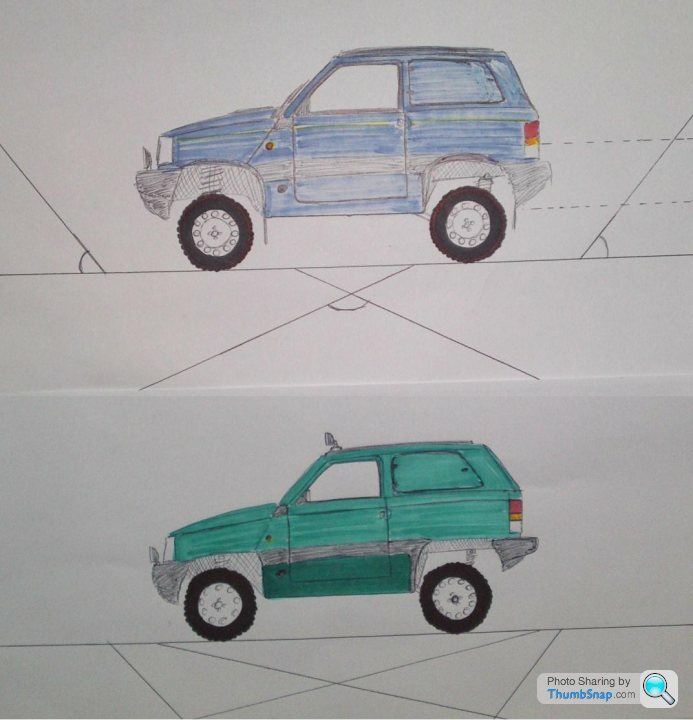
...Firecracker Blue and a two tone green.
http://www.ebay.co.uk/itm/1-lt-Firecracker-Blue-Me...
It would be a nightmare to maintain but my traditional project colours are...

...violet and yellow.
...Firecracker Blue and a two tone green.
http://www.ebay.co.uk/itm/1-lt-Firecracker-Blue-Me...
It would be a nightmare to maintain but my traditional project colours are...
...violet and yellow.
Turns out the silicone repair to the exhaust was the tip of this cars iceberg.
The drivers side rear arch is a combination of...
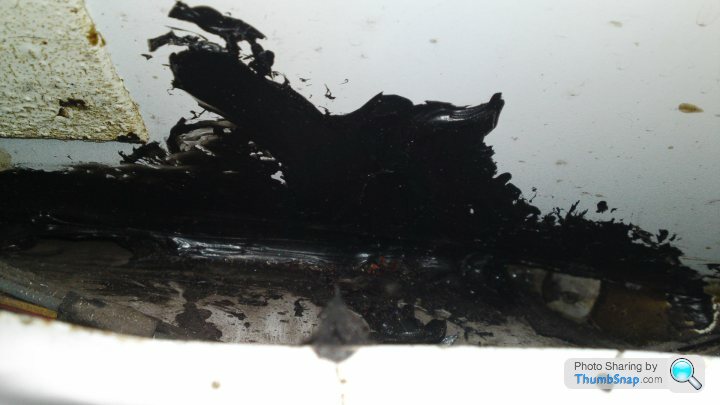
...black silicone and filler.
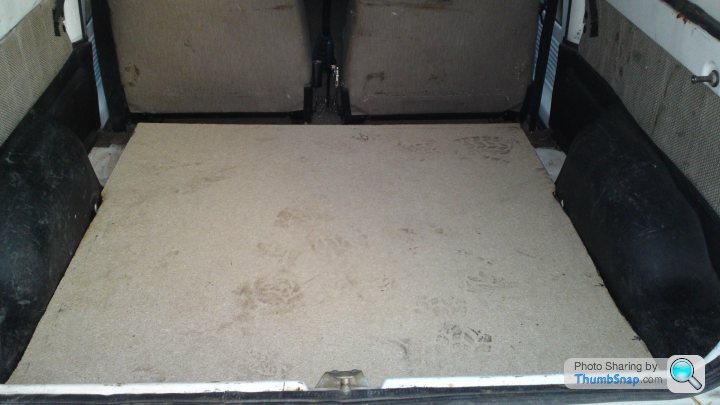
I got my nephew to help weld up a few holes in the rear load area floor and we made a deck for it out of a sheet of MDF.
I was going to tackle the fuel tank today but the driveway was too wet form valeting my brothers car.
The drivers side rear arch is a combination of...
...black silicone and filler.
I got my nephew to help weld up a few holes in the rear load area floor and we made a deck for it out of a sheet of MDF.
I was going to tackle the fuel tank today but the driveway was too wet form valeting my brothers car.
http://www.youtube.com/watch?v=RLXmsGEJ7Qo

Before...
...two hours after...
...I think I may have done more than water damage to the van as well. Coaxing her home on three and a half cylinders may have blown the head gasket.
An hour into the drivers side brake rebuild the thermostat started leaking and the expansion tank had a lot of pressure. Driving off the ramps she was still lumpy and not exactly confidence inspiring. FrankenFiat II is ready to fit but I was hoping to not have to just yet.
Okay here we go. As usual this is how I did it and not a comprehensive guide.
Replacing the slave cylinder and brake shoes from a Panda 4x4.
Take your Fiat Panda 4x4 and...
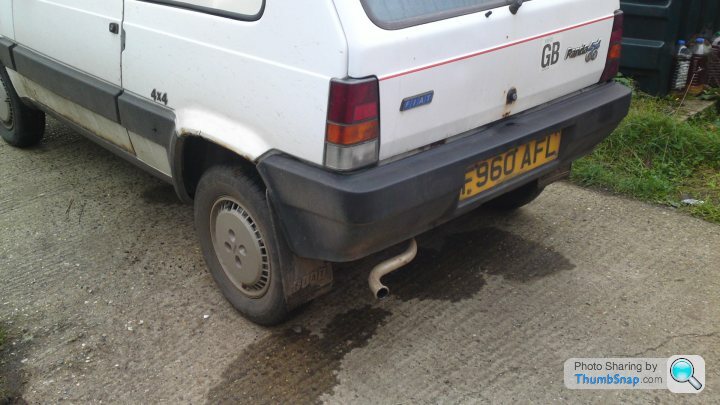
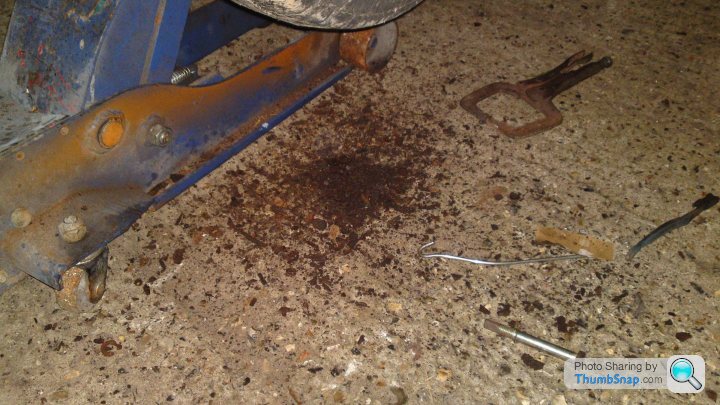
...elevate the rear of the car (in my case van) using ramps...
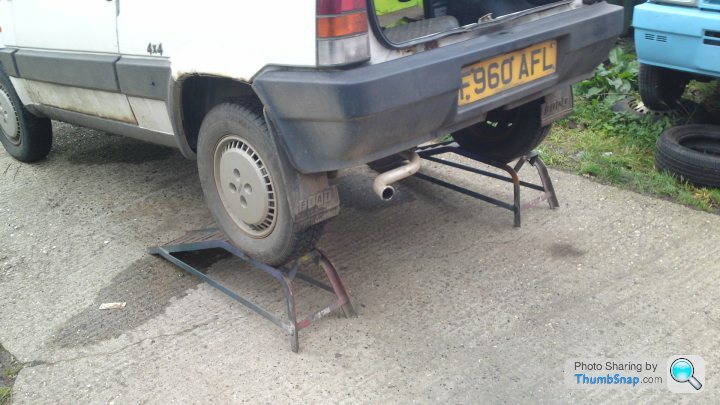
...support the axle with a trolley jack and remove the wheel bolts.
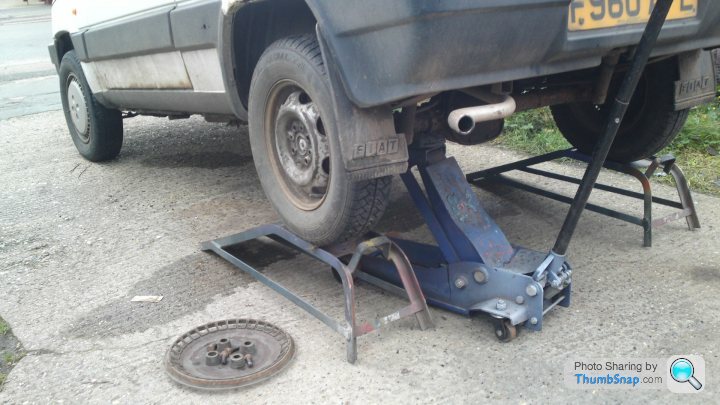
Once loosened, remove the wheel and move the ramp out of the way.

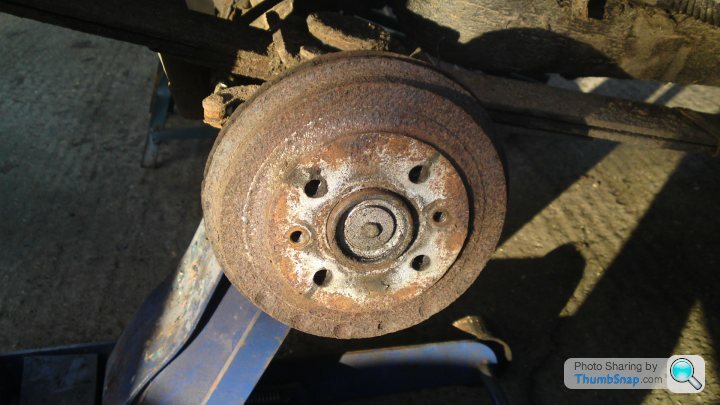
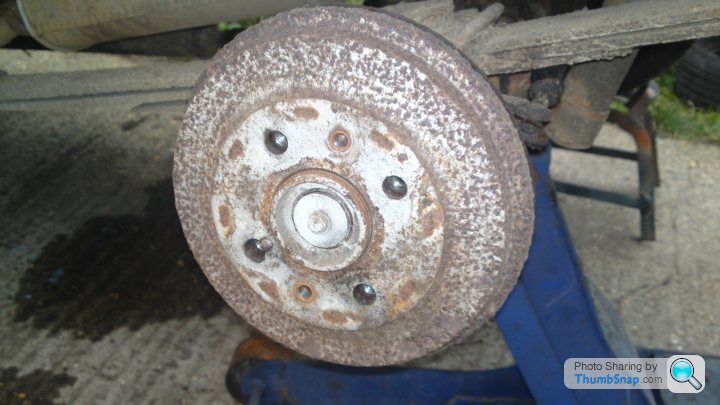
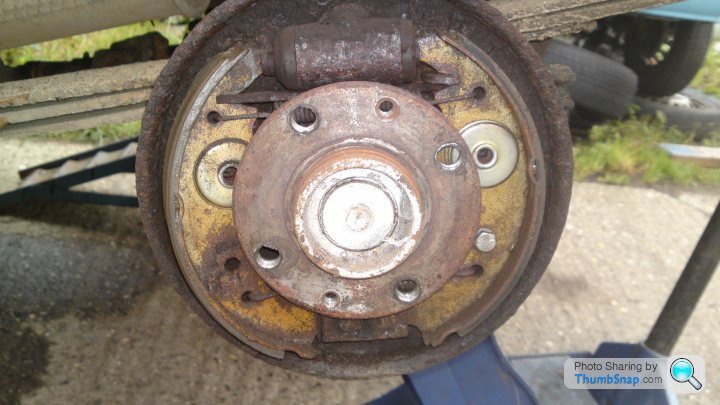
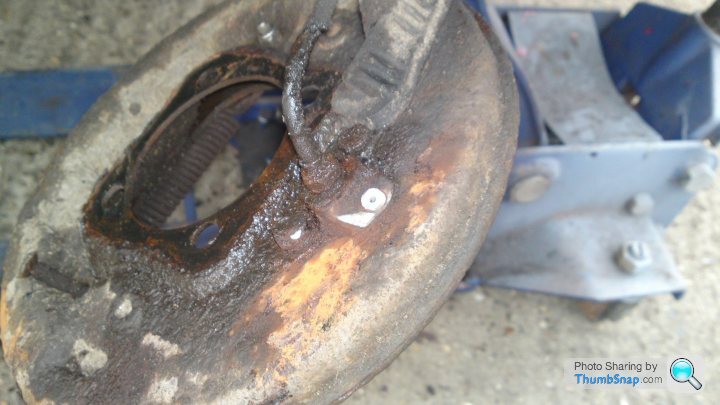
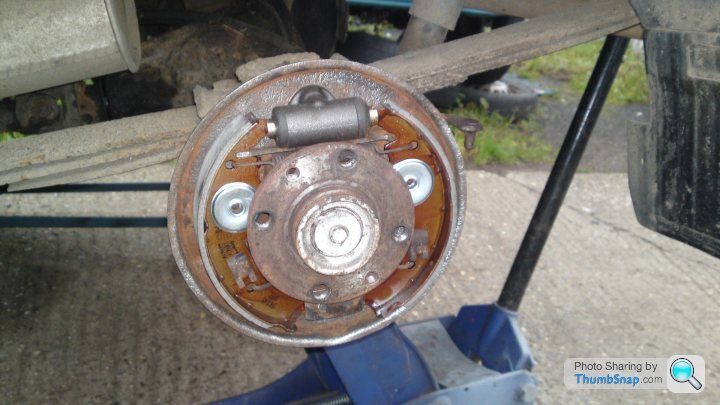
Inspect the brake drum for possible signs of damage, warping and surrounding areas for brake fluid and axle grease.

Removed the 12mm locating pin and bolt from the drum...
...and with a little persuasion remove the drum itself.
Next we remove the pin from the handbrake mechanism...

...the "R" clip can be rusty so be prepared to grind it off and drill the hole in the pin later.
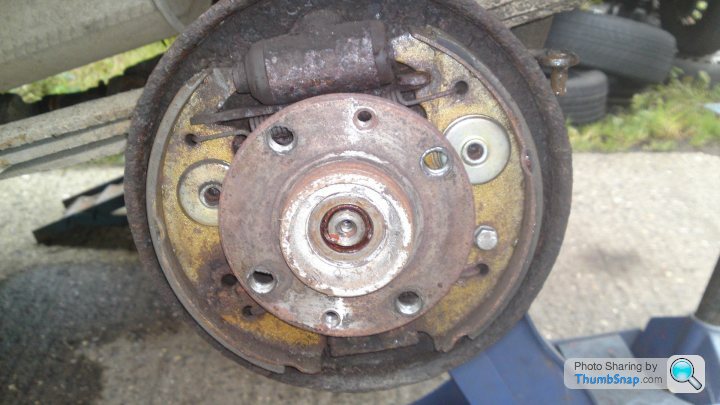
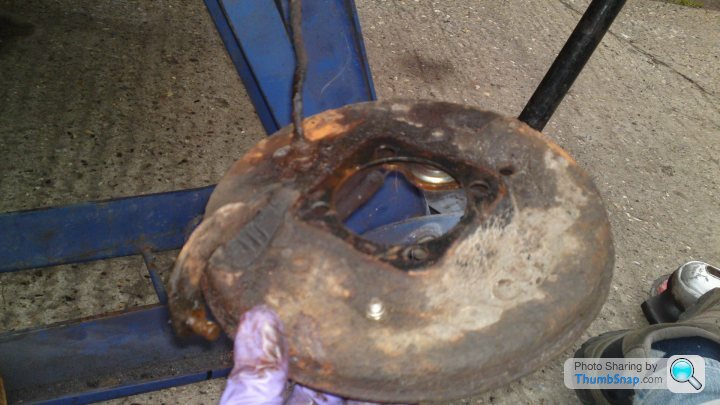
Next we remove the 10mm bolt and seal form the end of the half shaft. Undo the 17mm bolts at the back of the hub bearing...
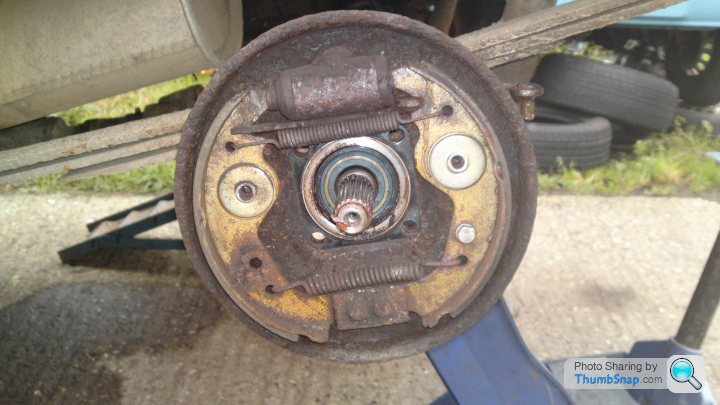
...and take the hub bearing out freeing the backing plate from the axle.
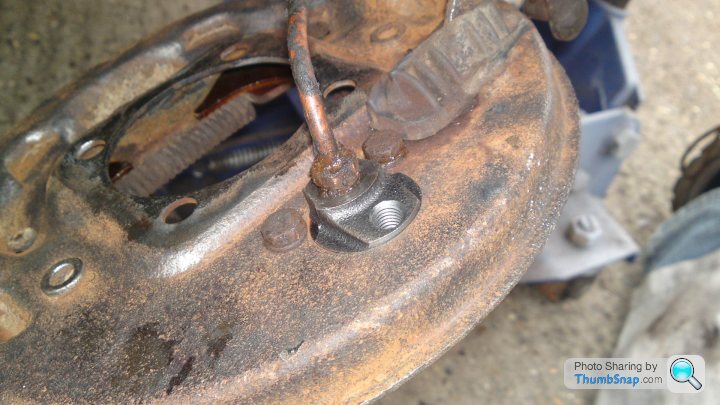
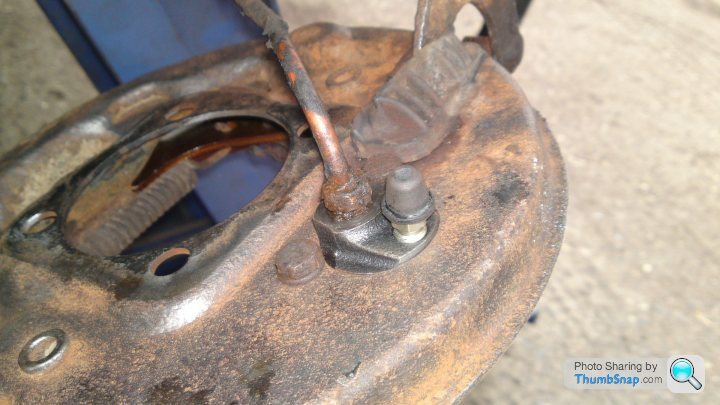
Next I tilted the backing plate forward...
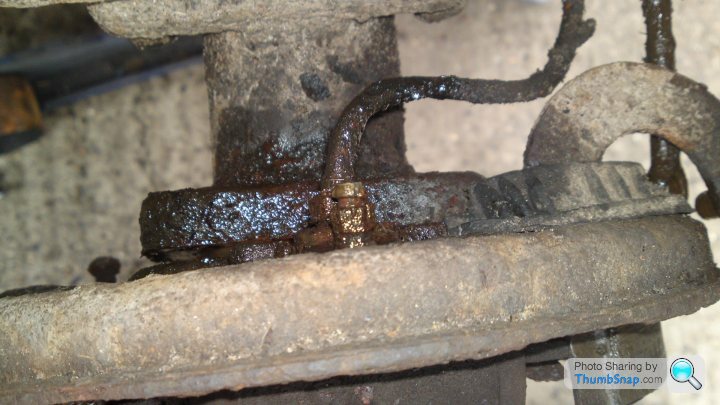
...because this slave cylinder is junk and I didn't want to leak brake fluid everywhere I used the grinder...
...to get the bleed nipple out of the way.
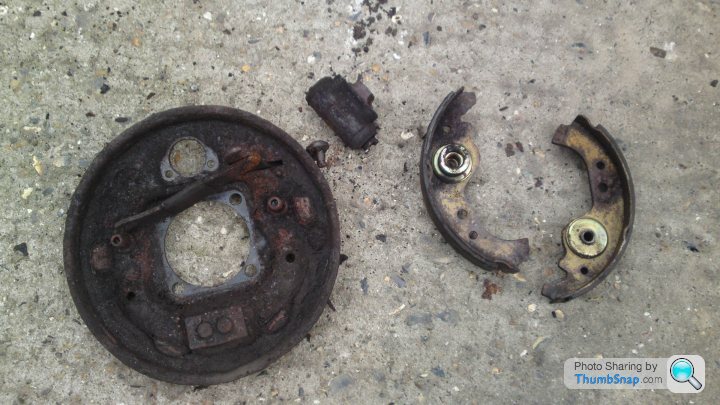
Next we get the brake line spanner and place it on the back of the slave cylinder...

...crank it loose and then turn the base plate to remove it from the car completely.
I do this because it's so much easier to strip and reassemble on a bench or sat on the floor with it in front of you.
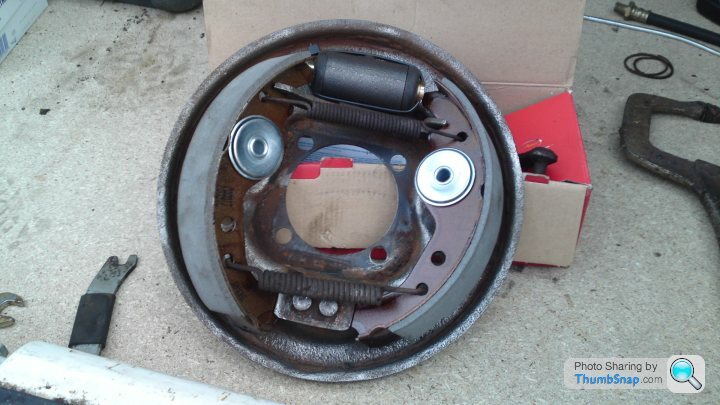
The eagle eyed will have spotted there was nothing holding the front shoe on and a 10mm bolt holding the rear shoe in place.
At least it isn't black silicone for a change. Probably just as well the slave cylinder was knackered. If I had brakes I'd probably be dead from the first time I slowed from 50+mph.
Okay soap box away...
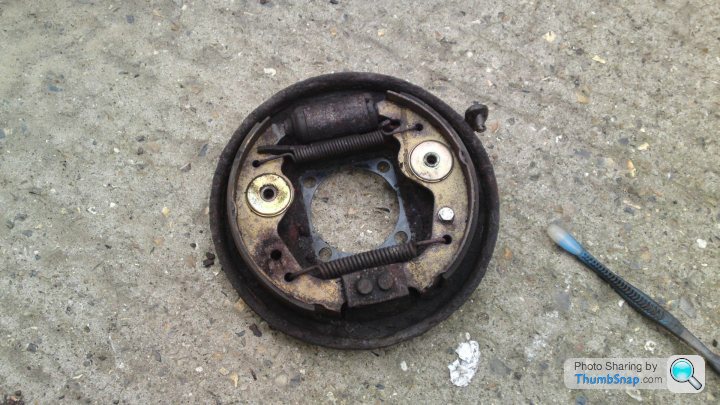
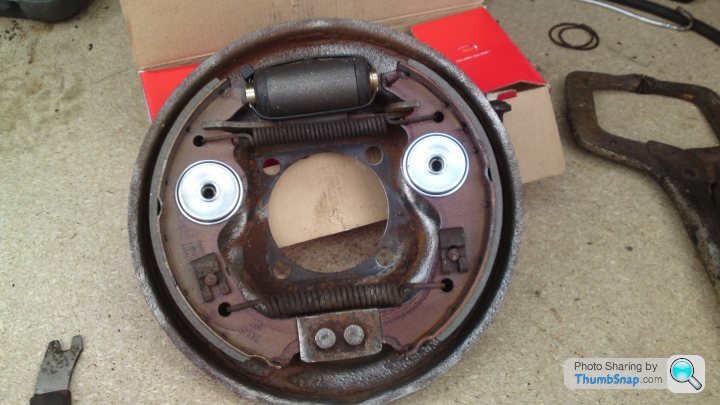
The whole brake assembly is now apart so I can...

...give it a quick going over with a wire brush and...
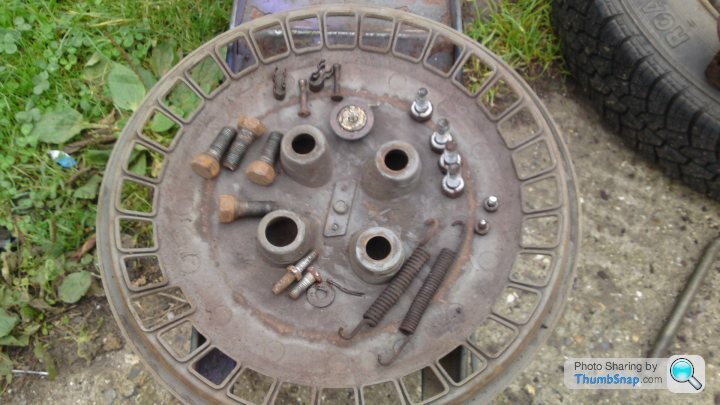
...make sure I have everything I need to put it all back together (good old shed. I had the shoe locating pins and spring clips from my old car, funny shoe and wheel cylinder kits don't come with new ones these days).
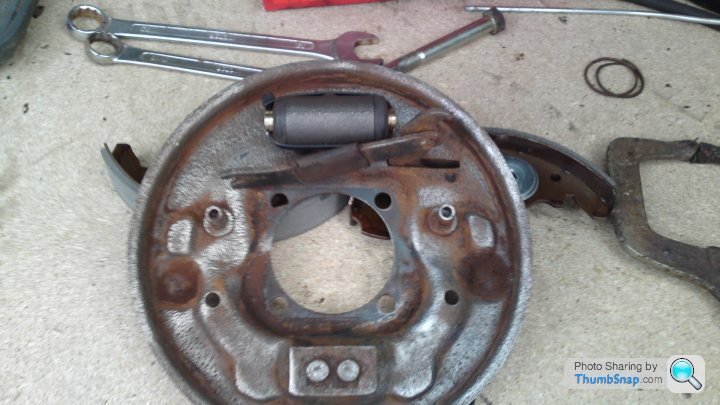
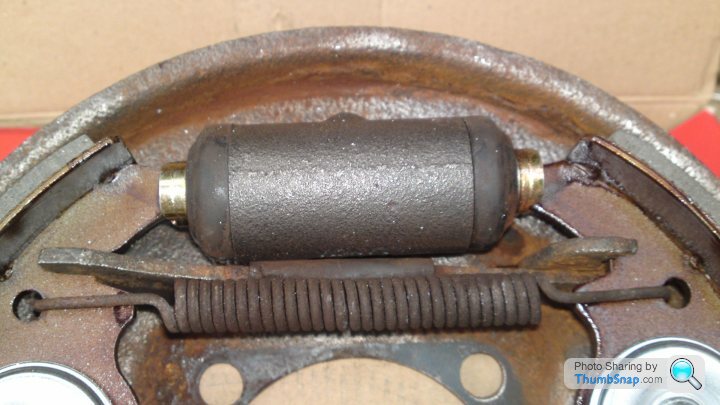
First of all I put the new slave cylinder in place. Held closed with a cable tie.
The rear shoe...
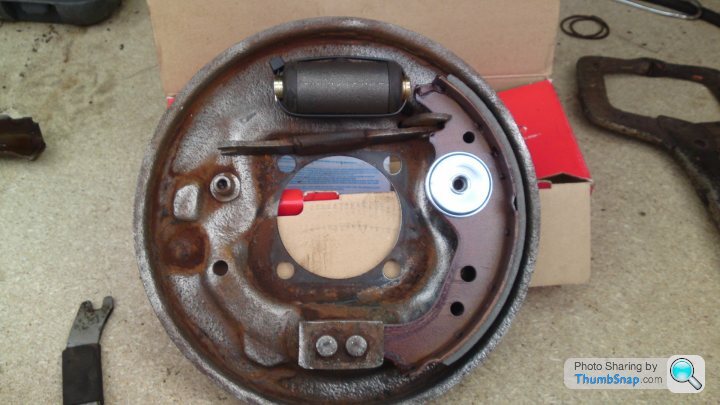
...springs...
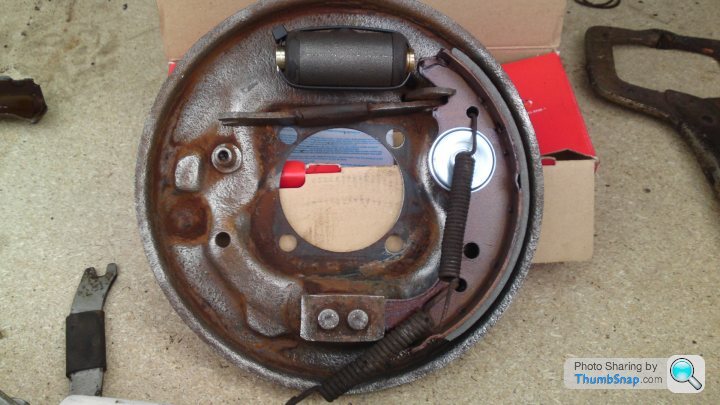
...thread the springs into the rear shoe...
...pull across and locate with the pins and clips.
This is so much easier than faffing about with spring pullers and ripping your knuckles apart trying to replace the shoes with the backing plate on the car.
Remove the cable tie and line the ends of the cylinder up to the shoes.
Okay I close the cylinder so it doesn't get in the way when I stretch the shoes across. I've seen people rip the rubber seals with the shoes if they are left open.
Replacing the backing plate is the reverse of removal (obviously) but instead of grinding the nipple out of the way I simply remove it...
...rotating the backing plate and torquing it against the brake line spanner.
Once tight replace the bleed nipple finger tight so you can bleed the bakes later.
Always put the dust cover back on the nipple before putting the assembly back together. There's all kinds of crap in your wheel arches and a dirty nipple won't bleed properly later.
Finally put the backing plate in place, push the hub bearing back and secure with the 17mm bolts, cap off the end of the half shaft with the 10mm bolt and washer...
...the drum will go on a bloody sight easier than it came off. Bleed the brakes as usual and wonder why your rear axle now makes noise.
Okay I've also been getting to the bottom of why the 4x4 sounded like crap, worked on three and half cylinders and cut out every time I lifted off the throttle.
Number one and two spark plug recesses still had water in them. The car still had water in it and the slow running jet was blocked with a bit of sand from yesterdays puddle. All stripped apart, cleaned and reassembled. Stick your diagnostic probe in that. :P
Replacing the slave cylinder and brake shoes from a Panda 4x4.
Take your Fiat Panda 4x4 and...
...elevate the rear of the car (in my case van) using ramps...
...support the axle with a trolley jack and remove the wheel bolts.
Once loosened, remove the wheel and move the ramp out of the way.
Inspect the brake drum for possible signs of damage, warping and surrounding areas for brake fluid and axle grease.
Removed the 12mm locating pin and bolt from the drum...
...and with a little persuasion remove the drum itself.
Next we remove the pin from the handbrake mechanism...
...the "R" clip can be rusty so be prepared to grind it off and drill the hole in the pin later.
Next we remove the 10mm bolt and seal form the end of the half shaft. Undo the 17mm bolts at the back of the hub bearing...
...and take the hub bearing out freeing the backing plate from the axle.
Next I tilted the backing plate forward...
...because this slave cylinder is junk and I didn't want to leak brake fluid everywhere I used the grinder...
...to get the bleed nipple out of the way.
Next we get the brake line spanner and place it on the back of the slave cylinder...
...crank it loose and then turn the base plate to remove it from the car completely.
I do this because it's so much easier to strip and reassemble on a bench or sat on the floor with it in front of you.
The eagle eyed will have spotted there was nothing holding the front shoe on and a 10mm bolt holding the rear shoe in place.
At least it isn't black silicone for a change. Probably just as well the slave cylinder was knackered. If I had brakes I'd probably be dead from the first time I slowed from 50+mph.
Okay soap box away...
The whole brake assembly is now apart so I can...
...give it a quick going over with a wire brush and...
...make sure I have everything I need to put it all back together (good old shed. I had the shoe locating pins and spring clips from my old car, funny shoe and wheel cylinder kits don't come with new ones these days).
First of all I put the new slave cylinder in place. Held closed with a cable tie.
The rear shoe...
...springs...
...thread the springs into the rear shoe...
...pull across and locate with the pins and clips.
This is so much easier than faffing about with spring pullers and ripping your knuckles apart trying to replace the shoes with the backing plate on the car.
Remove the cable tie and line the ends of the cylinder up to the shoes.
Okay I close the cylinder so it doesn't get in the way when I stretch the shoes across. I've seen people rip the rubber seals with the shoes if they are left open.
Replacing the backing plate is the reverse of removal (obviously) but instead of grinding the nipple out of the way I simply remove it...
...rotating the backing plate and torquing it against the brake line spanner.
Once tight replace the bleed nipple finger tight so you can bleed the bakes later.
Always put the dust cover back on the nipple before putting the assembly back together. There's all kinds of crap in your wheel arches and a dirty nipple won't bleed properly later.
Finally put the backing plate in place, push the hub bearing back and secure with the 17mm bolts, cap off the end of the half shaft with the 10mm bolt and washer...
...the drum will go on a bloody sight easier than it came off. Bleed the brakes as usual and wonder why your rear axle now makes noise.
Okay I've also been getting to the bottom of why the 4x4 sounded like crap, worked on three and half cylinders and cut out every time I lifted off the throttle.
Number one and two spark plug recesses still had water in them. The car still had water in it and the slow running jet was blocked with a bit of sand from yesterdays puddle. All stripped apart, cleaned and reassembled. Stick your diagnostic probe in that. :P
Edited by Liquid Knight on Thursday 31st October 22:08
Hmmmm, half way to work this morning and my heater stopped working. 
I'm losing water so I pull over at a petrol station to see from where. No puddles anywhere. It's a mystery.
Restart the car, she's clunky and the forecourt looks like an Ultravox video. Head gasket then.
12,000 miles in my Fantasia with only consumables; 123 miles in the 4x4 and it's dead.
Oh well I was going to put a perkier engine in there anyway now I have an excuse to move the timescale forward.

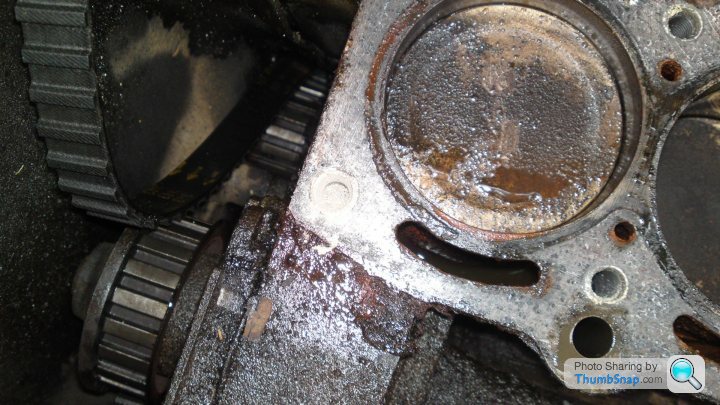
Time to begin the postmortem.
I know it's head gasket failure but...
...is it due to a neglectful previous owner...
...or abuse by me?
The number of bodges and cut corners I'm finding all over the car plus the fact I've only done a hundred and twenty miles in the car would suggest neglect but I did drive the car home with a misfire after the deep puddle incident. Could the delay in the spark have caused the head gasket to fail?
Well the preliminary results are in.
Cause of death is head gasket failure on number one cylinder but due to shameful neglect.
I'm glad I didn't kill the engine but the bodge that did so incredibly doltish it makes the pigeon poo welded exhaust held on with black silicone look like a Brunellian feat of engineering.
More later.
Cause of death is head gasket failure on number one cylinder but due to shameful neglect.
I'm glad I didn't kill the engine but the bodge that did so incredibly doltish it makes the pigeon poo welded exhaust held on with black silicone look like a Brunellian feat of engineering.
More later.
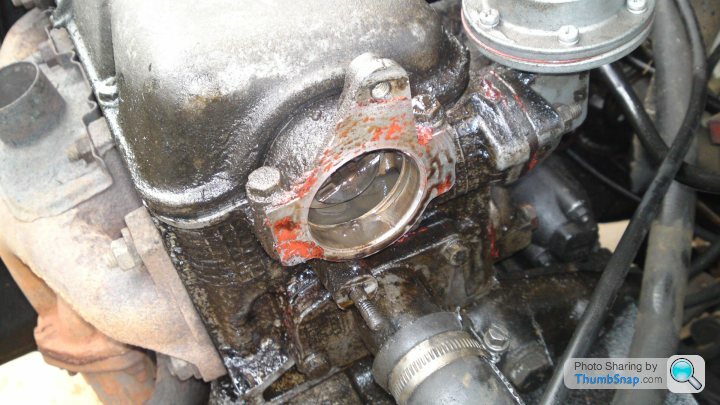
So the head gasket was the issue but I named neglect as the primary cause.
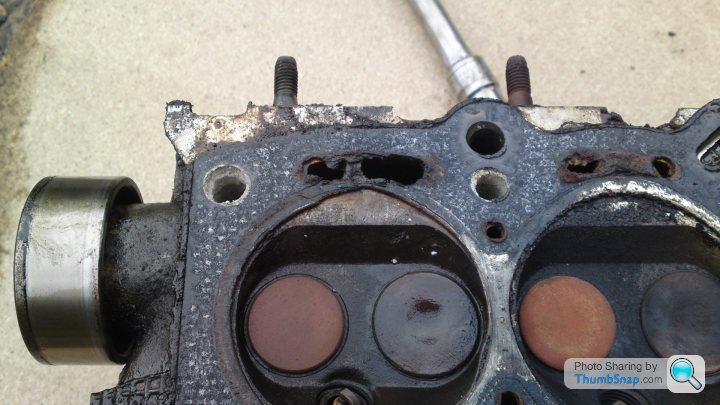
From the scratches left on the block face and head the gasket was changed possibly over a thousand miles ago, but when this task was carried out number eight stretch bolt must have sheered off either when removing the head or after the new gasket was in place. This bolt was drilled out and the damage to the treads repaired with car body filler.
I feared the black silicone would return and it did. It was used to hold the block and gearbox together as one of the mounting bolt holes had little to no thread. Still the other two engine mounting bolts and three starter motor bolts appeared to be fine.
Every single exhaust manifold nut was a quarter turn more than finger loose with only three proper washers, one wrong one and the other four had none at all.
The lower radiator hose was held on with welding wire...
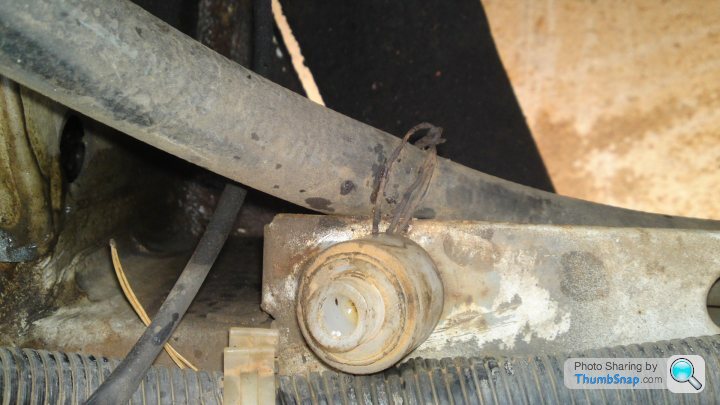
...lucky the gasket went when it did because it would have rusted away made contact with the exhaust manifold and burned itself to pieces.
Right I've had enough slating previous bodges. Time to try and put some of them right. But first...
Removing the head off a Panda 4x4
This is not a definitive guide but how I did it.
Okay remove the airbox...
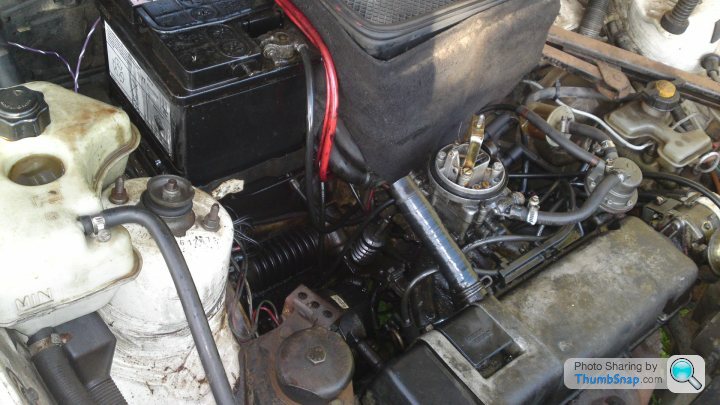
...disconnect (and in my case because it was covered in crap remove) the battery.
Next unscrew the front grille, unplug the fan and water level sensor, disconnect the radiator hoses, undo the nut and two bolts holding the fan in place and the two nuts holding the radiator top mounts in place. Carefully lift the radiator out and stick a hose pipe in one end to flush any crap out of the core.
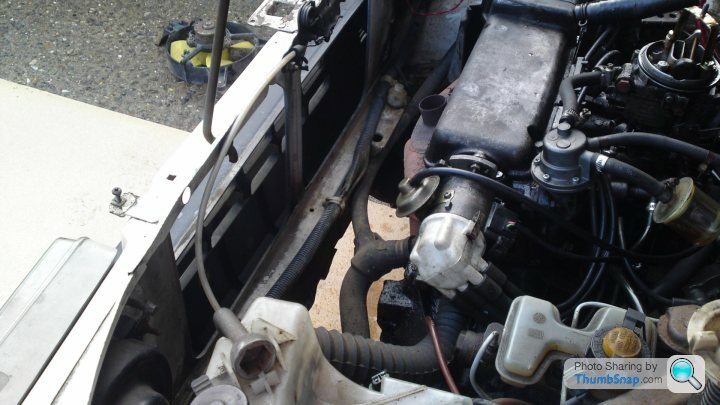
Remove fuel lines, fuel pump and the distributor so you can get to the top hose on remove that as well.
Disconnect the accelerator and choke cables before carefully undoing the long 10mm bolts that hold the carb' in place.
Next undo the four 10mm bolts that hold the cam' cover in place. Remove that and starting in the middle remove the 10mm bolts that hold the cam in place. Once loose pop the oil line out and carefully lift the cam' from the distributor end so the timing belt falls from the cam' wheel.
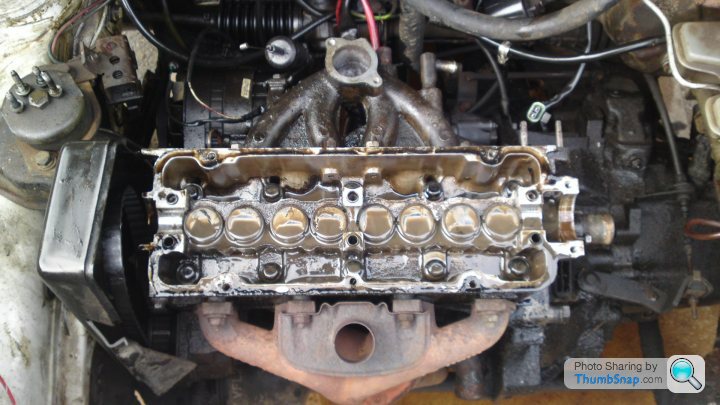
Starting from the top centre and working your way outwards undo all the head bolts and carefully lift the head from the block.
If I were replacing the gasket I would have made a few precautions like locking the engine in TDC (not that much of an issue with the FIRE engine as it's non-interference) and giving the had a good clean and ensuring the block surface is free from debris, bits of old gasket and ready to refit the head later. Due to the damage to the block I can't use it again so...
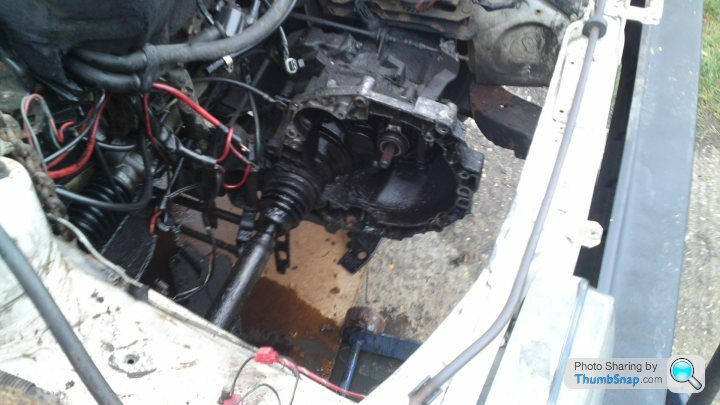
...it's out. I removed the nearly new clutch from the 4x4 999cc block to try and fit it to FrankenFiat II but...
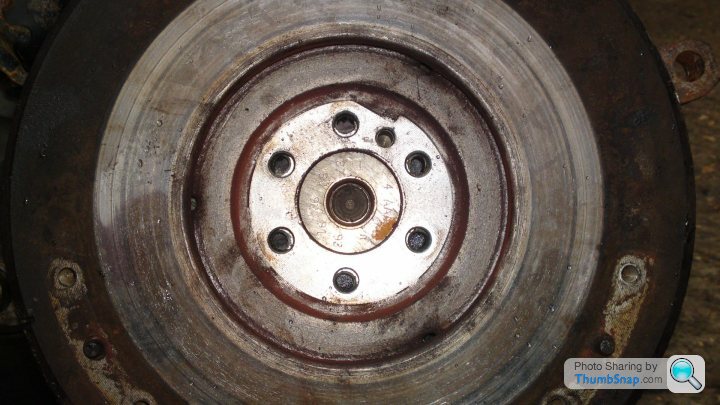
...the flywheel mounting holes were incompatible. So the FrankenFiat engine came with...
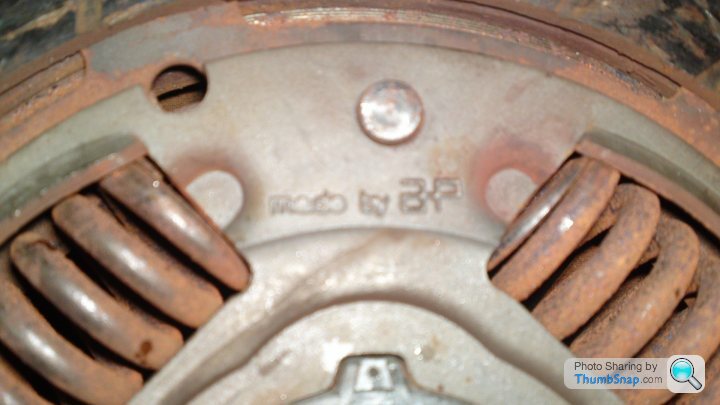
...an AP Racing clutch. I guess it will have to do.
Just as well I made the car a van. This load space has come in very handy indeed.
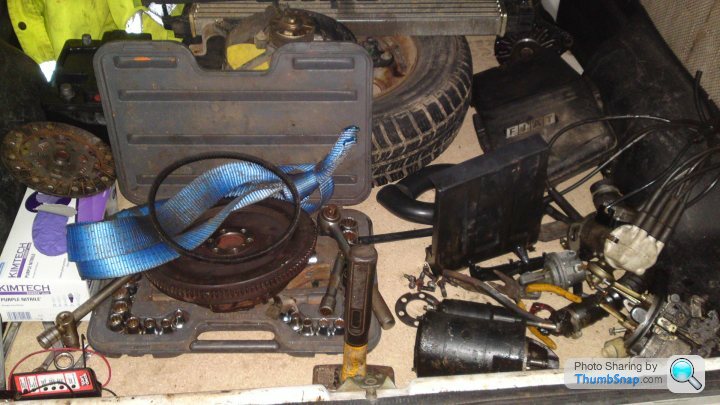
Two problems I'll need to address. There is no profile on the end of the 866 cam' to run a mechanical fuel pump. If I use an electric pump there's nowhere on the carb' for a return pipe.
From the scratches left on the block face and head the gasket was changed possibly over a thousand miles ago, but when this task was carried out number eight stretch bolt must have sheered off either when removing the head or after the new gasket was in place. This bolt was drilled out and the damage to the treads repaired with car body filler.
I feared the black silicone would return and it did. It was used to hold the block and gearbox together as one of the mounting bolt holes had little to no thread. Still the other two engine mounting bolts and three starter motor bolts appeared to be fine.
Every single exhaust manifold nut was a quarter turn more than finger loose with only three proper washers, one wrong one and the other four had none at all.
The lower radiator hose was held on with welding wire...
...lucky the gasket went when it did because it would have rusted away made contact with the exhaust manifold and burned itself to pieces.
Right I've had enough slating previous bodges. Time to try and put some of them right. But first...
Removing the head off a Panda 4x4
This is not a definitive guide but how I did it.
Okay remove the airbox...
...disconnect (and in my case because it was covered in crap remove) the battery.
Next unscrew the front grille, unplug the fan and water level sensor, disconnect the radiator hoses, undo the nut and two bolts holding the fan in place and the two nuts holding the radiator top mounts in place. Carefully lift the radiator out and stick a hose pipe in one end to flush any crap out of the core.
Remove fuel lines, fuel pump and the distributor so you can get to the top hose on remove that as well.
Disconnect the accelerator and choke cables before carefully undoing the long 10mm bolts that hold the carb' in place.
Next undo the four 10mm bolts that hold the cam' cover in place. Remove that and starting in the middle remove the 10mm bolts that hold the cam in place. Once loose pop the oil line out and carefully lift the cam' from the distributor end so the timing belt falls from the cam' wheel.
Starting from the top centre and working your way outwards undo all the head bolts and carefully lift the head from the block.
If I were replacing the gasket I would have made a few precautions like locking the engine in TDC (not that much of an issue with the FIRE engine as it's non-interference) and giving the had a good clean and ensuring the block surface is free from debris, bits of old gasket and ready to refit the head later. Due to the damage to the block I can't use it again so...
...it's out. I removed the nearly new clutch from the 4x4 999cc block to try and fit it to FrankenFiat II but...
...the flywheel mounting holes were incompatible. So the FrankenFiat engine came with...
...an AP Racing clutch. I guess it will have to do.
Just as well I made the car a van. This load space has come in very handy indeed.
Two problems I'll need to address. There is no profile on the end of the 866 cam' to run a mechanical fuel pump. If I use an electric pump there's nowhere on the carb' for a return pipe.

Gassing Station | Alfa Romeo, Fiat & Lancia | Top of Page | What's New | My Stuff