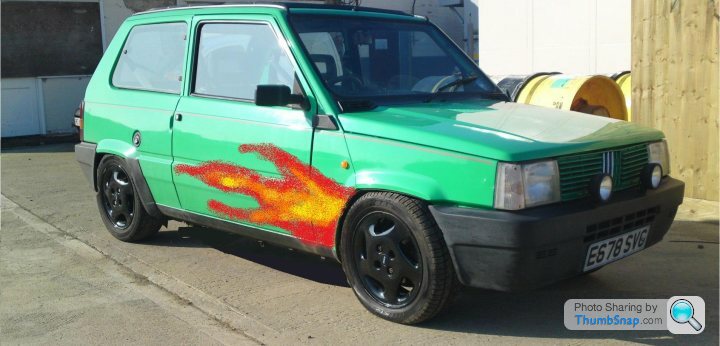
Sublime Pandamonium II
Discussion


Liquid Knight said:

None of the part I need that are listed on the site are actually available. D.I.Y sills it is then. Do I re-enforce the chassis with box section or roll cage tube? Decisions eh?

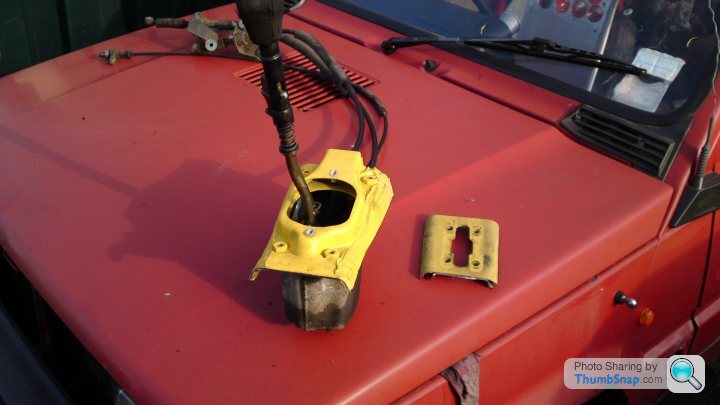
I welded base plates to the front hoop of the cage yesterday and took the head off the 16V engine. I was told it was a 1.4 (1368cc) engine when I bought it but when I checked the part numbers on the head, loom, ac pump and alternator they suggested it was a 1242cc engine. Now I have the head off I measured the bore and stroke to find it is a 1368cc block with a 1242 head.
After a little more investigation the water pump was held in with silicone and the even though the gasket between the head and the cam's was new and the bolts were also the old head gasket had been reused and there was radweld type stuff blocking one of the water channels.
So it looks like the 1368cc block had a 1242cc head fitted after the water pump failed. The water pump and head were bodged into place.
So do I continue with the 1108cc engine in the shed that has the distributor ready to go or do I fit the 1108cc head on to the 1368cc block with distributor and x/1-9 carb'?
The 1.5 carb' would need very little adjustment to suit the set up and if I clean the ports of the head before fitting it and fit the Punto 75 cam' it probably wouldn't need adjusting at all.
What do you guys think?
Okay I took three sleeping tablets last night and woke up this morning to find my laptop had this on the screen (and I've bid on a knackered SAAB Aero Estate, bloody eBay).
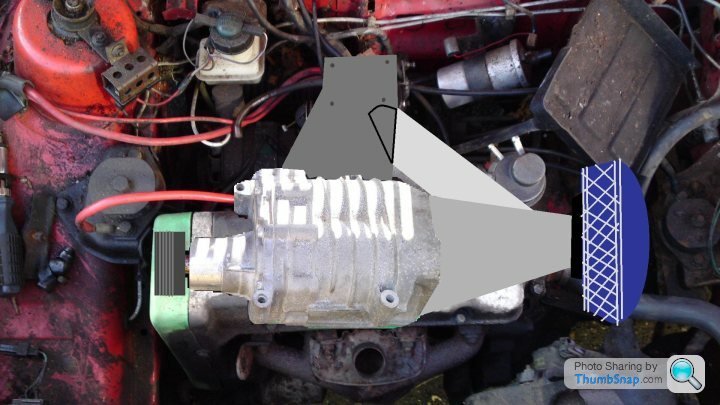
So with the actuated pulley from the air con' unit wired to a switch on the dash, and a cable from the old heater matrix to open and close the flap to go from N/A to charged. Looks fairly simple and may even work.
So with the actuated pulley from the air con' unit wired to a switch on the dash, and a cable from the old heater matrix to open and close the flap to go from N/A to charged. Looks fairly simple and may even work.
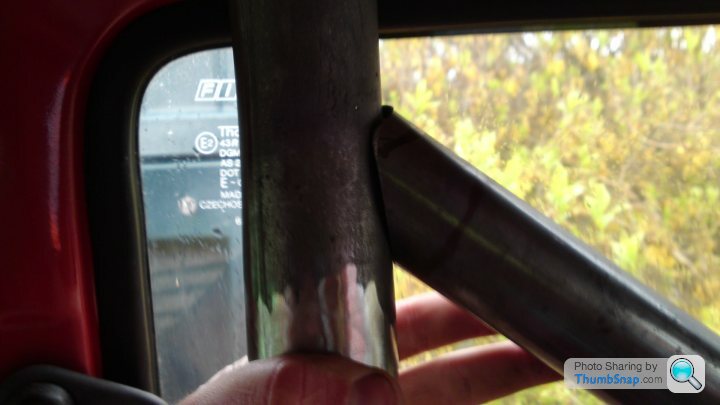
So today I've been working the angles for the roll cage.
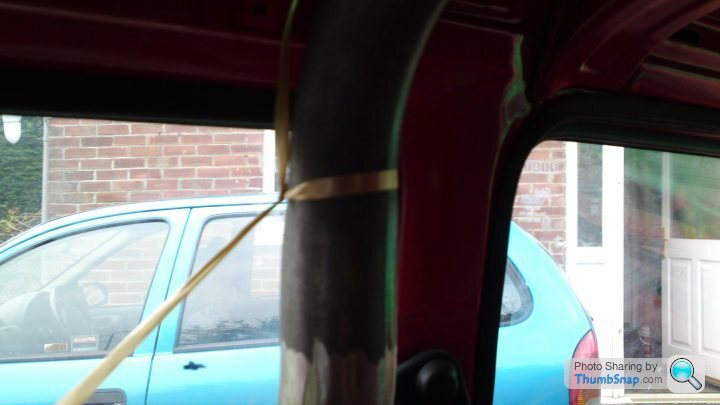
Started out by tying some ribbon (couldn't find any string) around the upright where I want the weld the diagonal bar to later...
...sticking the other end in place with tape.
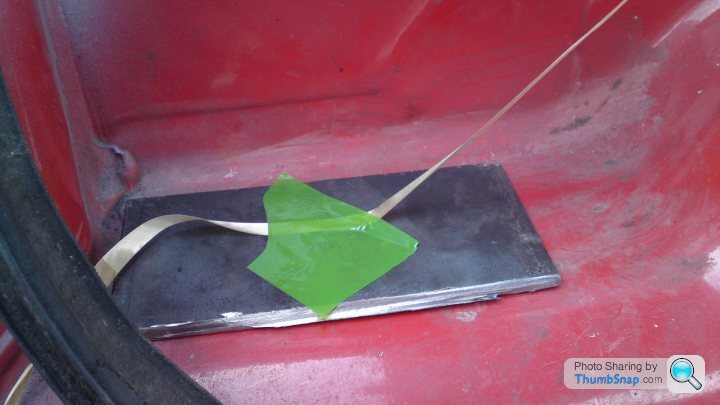
Then used the ribbon as a guide to draw a stencil.
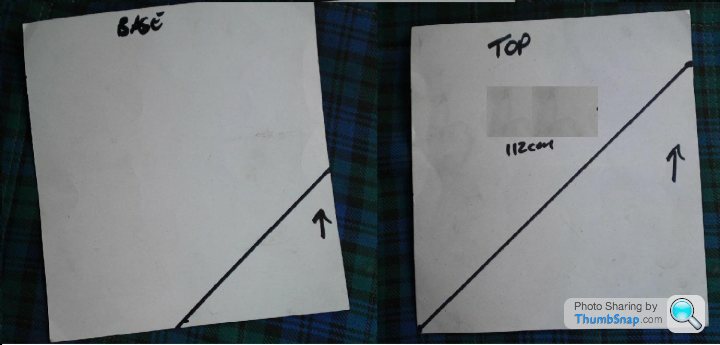
Popped over to my local forge the get the pipes cut and the correct angles.
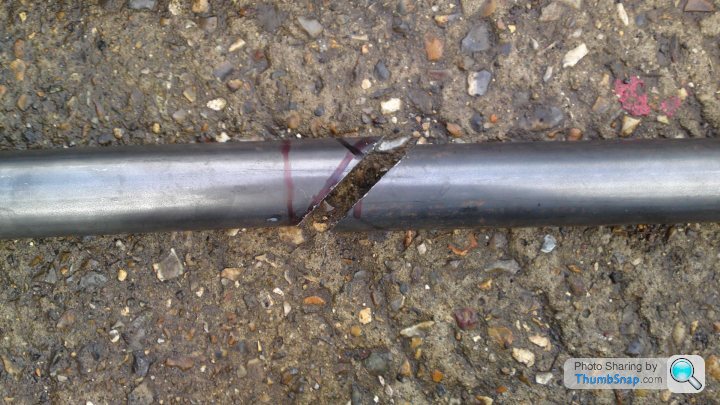
Used the off cut as a guide for to draw and grind out a flange...
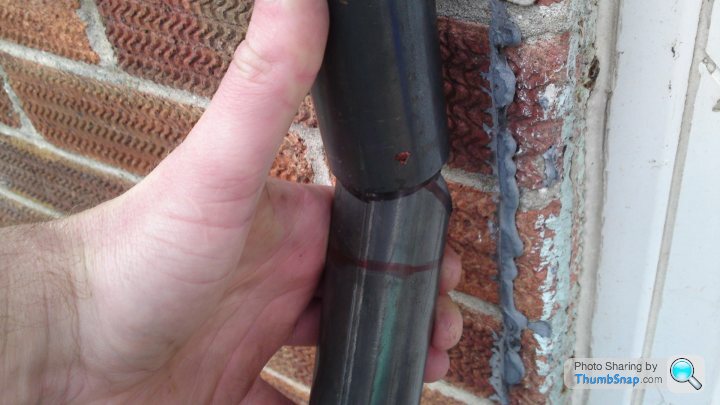
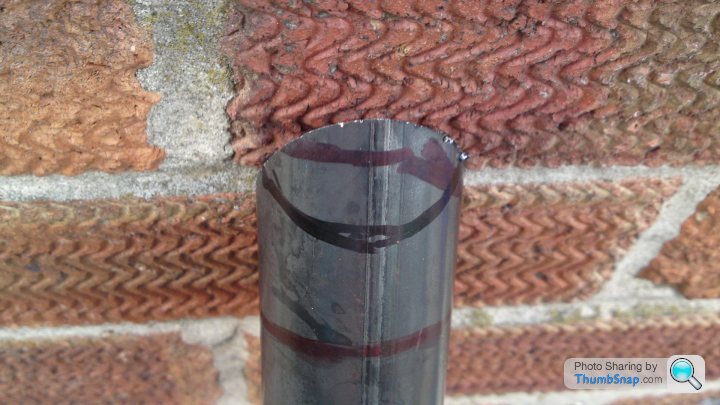
...ready to weld and paint.
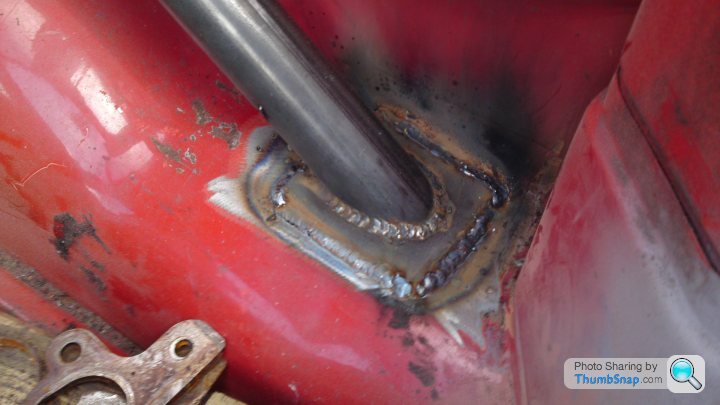
I'll finish the dirty welding inside first though.
Started out by tying some ribbon (couldn't find any string) around the upright where I want the weld the diagonal bar to later...
...sticking the other end in place with tape.
Then used the ribbon as a guide to draw a stencil.
Popped over to my local forge the get the pipes cut and the correct angles.
Used the off cut as a guide for to draw and grind out a flange...
...ready to weld and paint.
I'll finish the dirty welding inside first though.
Okay so I did the clean welding today. For two reasons, 1/ I'm doing the school run in a bit and didn't want to lose track of time under the car and 2/ The lengths of bar would probably have been nicked if I left them anywhere. Metal theft is at an all time high in this part of rural Norfolkistan.
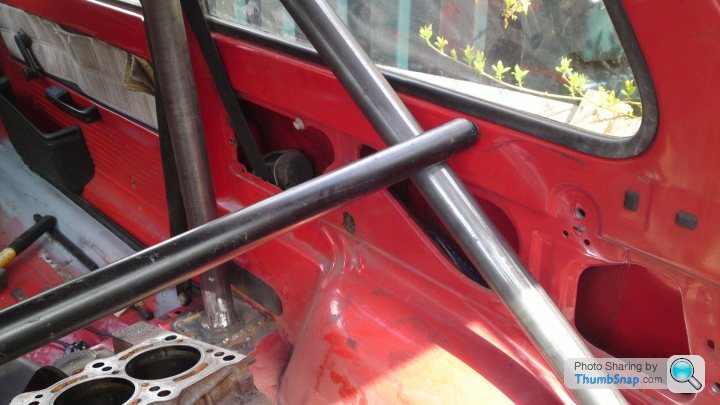
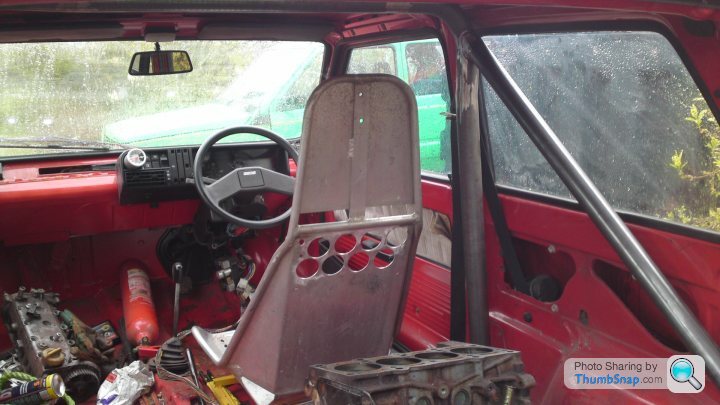
So I tacked the diagonals to the uprights only to discover I couldn't get the bloody cage back out of the car to finish it and re-install after some tidy bench welds. So the windows had to come out...
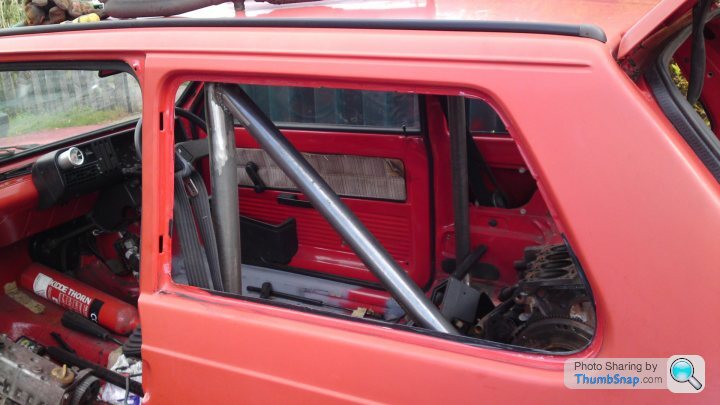
...and it got done. Considering the lack of space and rain showers pretty well.
I need to find out how strong the seat bars are so I can use one as a cross bar to mount the shoulder straps from my harness to.
I will get back to the dirty welding soon enough. My eBay free listing firesale has reaped in enough for a pair of 40's better suited to a draw through conversion just as an interesting alternative gets listed as well.
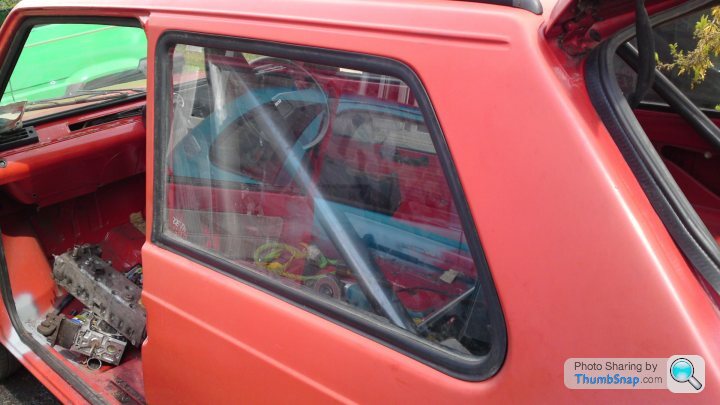
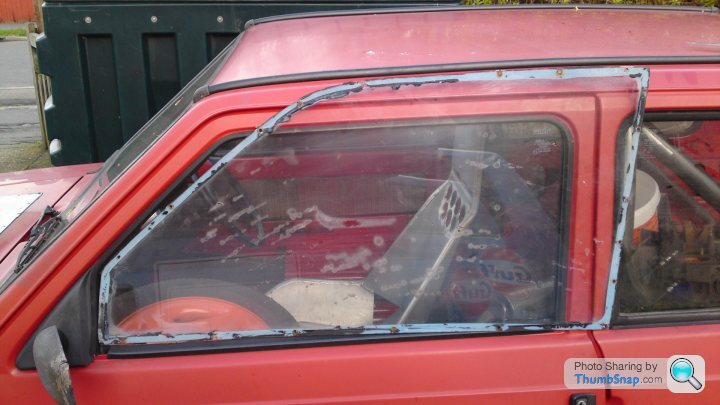
So here's a quick guide to removal and refitting sealed windows.
To remove the window from inside of the car pull the lip of the rubber seal up with one hand and gently tap the window at the same point with the other. Best to start at the lower rear corner as it is the weakest point of the seal.
Once you get about half way go outside the car and use one hand to support the window and the other pushing gently outwards from inside the tailgate.
As soon as the window had only the B pillar seal use both hands to wobble it out carefully.
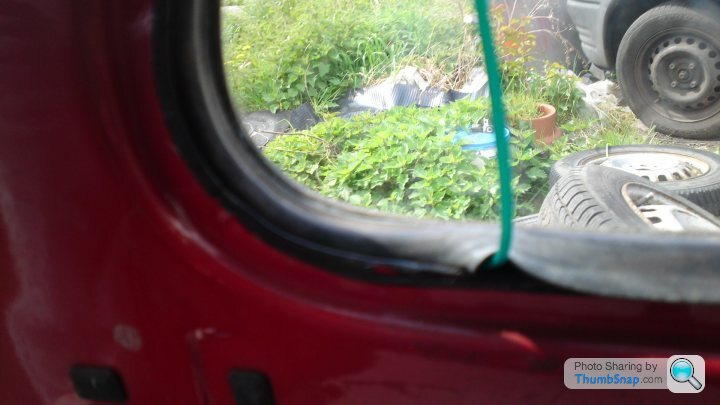
To refit you'll need a length of close line about five feet long.
Wrap the close line around the inner seal of the window...
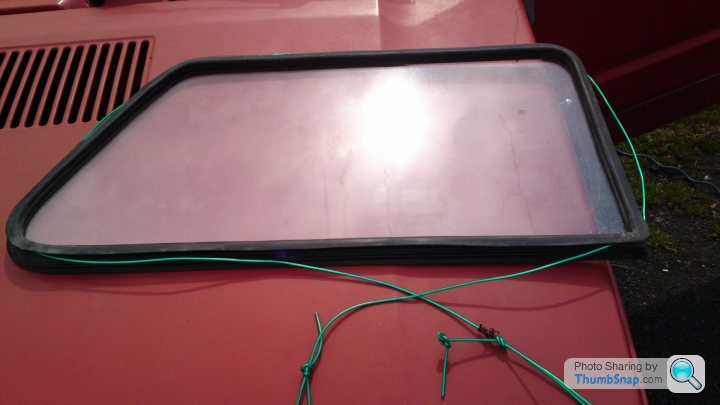
...making sure the line meets at the bottom of the window.
Place the glass into position ensuring the lower seal is over the lip of the window frame...
...and the line is inside the car.
Now pulling upwards and along the seal gentle pull the line out of the seal...
...making sure the seal goes over the lip and tapping the glass gently as you go round.
Once you get back to the bottom of the window remove the line and gently press the window from outside until it no longer has any movement. Clean the hand prints off and you're done.
So I tacked the diagonals to the uprights only to discover I couldn't get the bloody cage back out of the car to finish it and re-install after some tidy bench welds. So the windows had to come out...
...and it got done. Considering the lack of space and rain showers pretty well.
I need to find out how strong the seat bars are so I can use one as a cross bar to mount the shoulder straps from my harness to.
I will get back to the dirty welding soon enough. My eBay free listing firesale has reaped in enough for a pair of 40's better suited to a draw through conversion just as an interesting alternative gets listed as well.
So here's a quick guide to removal and refitting sealed windows.
To remove the window from inside of the car pull the lip of the rubber seal up with one hand and gently tap the window at the same point with the other. Best to start at the lower rear corner as it is the weakest point of the seal.
Once you get about half way go outside the car and use one hand to support the window and the other pushing gently outwards from inside the tailgate.
As soon as the window had only the B pillar seal use both hands to wobble it out carefully.
To refit you'll need a length of close line about five feet long.
Wrap the close line around the inner seal of the window...
...making sure the line meets at the bottom of the window.
Place the glass into position ensuring the lower seal is over the lip of the window frame...
...and the line is inside the car.
Now pulling upwards and along the seal gentle pull the line out of the seal...
...making sure the seal goes over the lip and tapping the glass gently as you go round.
Once you get back to the bottom of the window remove the line and gently press the window from outside until it no longer has any movement. Clean the hand prints off and you're done.
Not much in the way of progress to report today. I've taken the seat out of Guff I and placed it in Guff II to see how it looks...
...I was actually thinking of getting a different seat but it looks so right in there it has to stay.
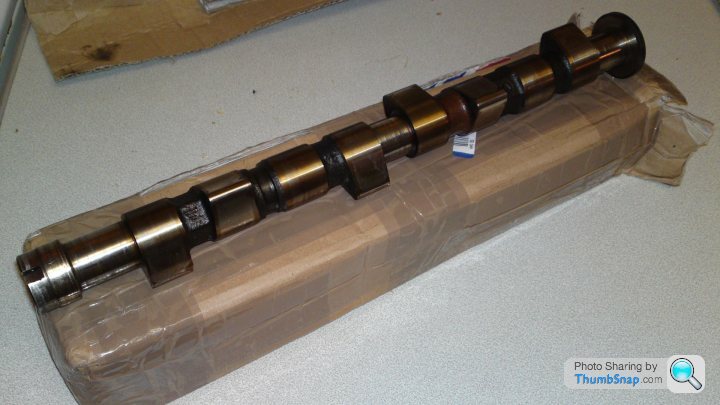
On the Fiat forum it has been suggested that the crank to cam' ratio may be different on the 1368 block. Basically because the 1368 block is a bored and stroked version of the FIRE engine the crank may turn at a slower rate and fitting the eight valve head wouldn't work. I was fairly sure this wasn't the case but checked to save a headache later.
1108cc block...
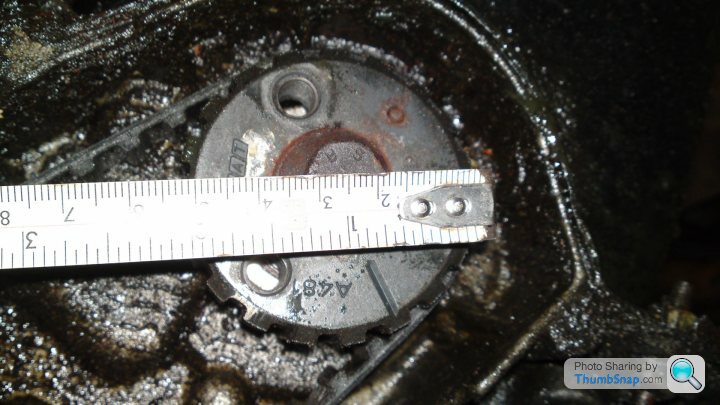
...A481 wheel approximately 55mm across.
1368cc block...
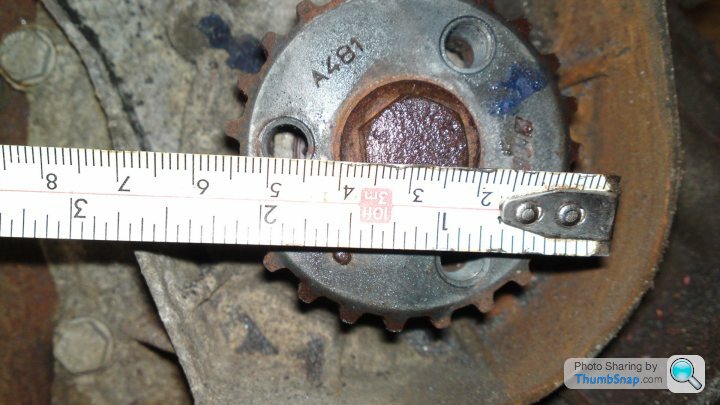
...the same A481 wheel 55mm in diameter. Phew.
I've been getting too horny with the Fantasia as I have found the second of the Fiat Coupe horns...
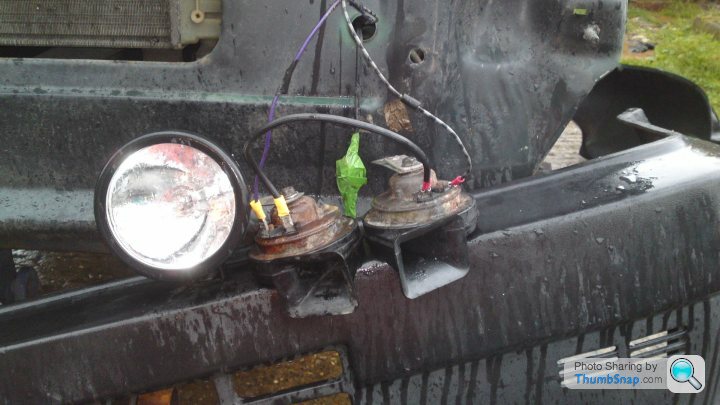
...I tried wiring them in parallel first and either horn would work but when both were wired neither would. The same thing in series. There aren't enough amps for the dual horns to work.
I fitted the lower tone of the two so it's more of a get out of the way "Honk!" the an excuse me "Meeep!".
...I was actually thinking of getting a different seat but it looks so right in there it has to stay.
On the Fiat forum it has been suggested that the crank to cam' ratio may be different on the 1368 block. Basically because the 1368 block is a bored and stroked version of the FIRE engine the crank may turn at a slower rate and fitting the eight valve head wouldn't work. I was fairly sure this wasn't the case but checked to save a headache later.
1108cc block...
...A481 wheel approximately 55mm across.
1368cc block...
...the same A481 wheel 55mm in diameter. Phew.
I've been getting too horny with the Fantasia as I have found the second of the Fiat Coupe horns...
...I tried wiring them in parallel first and either horn would work but when both were wired neither would. The same thing in series. There aren't enough amps for the dual horns to work.
I fitted the lower tone of the two so it's more of a get out of the way "Honk!" the an excuse me "Meeep!".
Chaz9950 said:
Awesome build!
Just a quick one on the horns - why not wire a relay in, instead of the horns, with a fused feed off the battery? That way, you can have as many amps as you require, and you'll not burn any switches out!
I did think of using the same live feed as the driving lamps but it was cacking it down and getting dark. Back at work today so I won't be able to get anything done until next Saturday. Just a quick one on the horns - why not wire a relay in, instead of the horns, with a fused feed off the battery? That way, you can have as many amps as you require, and you'll not burn any switches out!
The 100th post on this thread already? 
Well it's bad news. Much as I would love to build the worlds first supercharged Panda for practicalities sake I've decided to go for a turbo or N/A instead.
So here's the eBay listing...
http://www.ebay.co.uk/itm/261008640721?ssPageName=...
...10% off if you mention the forum before the checkout if you're the winning bidder.
Twenty one watchers and no bids as yet so I could be stuck with it.
I have a weekend off. As well as the usual Uncle, brother, son and boyfriend duties I have to...
1/ Strip Guff I to make space for...
2/ Project Repo' I'm having to repossess the Seicento because the guy's decided to move house.
3/ More welding.
4/ Fit the Punto GT Cinquecento Sporting hybrid brakes to Guff II.
5/ More welding.
6/ Fit the seat properly-ish.
7/ Harnesses.
8/ Find space for all the stuff I'm storing in Guff I and parts I've removed.
9/ Get some money for the shell (£60 a Ton round here).
10/ Fix dads Corsa exhaust and replace the manifold gasket on my sister Daewoo Matiz.
Conian said:
866 cam, is that cubic inches or bhp? 
Quarter mile time. There were a few things I wanted to harvest from Guff I before the what's left is collected for scrap.
I cut the plate out of the Cinquecento floor so I can weld it into the Panda and use the cable gear linkages so I can have the newer five speed box. While the four speed has nice close ratios ideal for the quarter mile it is in effect a three speed gearbox as you don't need first once the engine has warmed up. My Fantasia four speed maxes out at about 85mph so I'd like to make Guff II capable of over 100mph in so track days are more entertaining.
The Pollycarbonate Cinquecento windows will also fit the Panda after a bit of trimming down...
...and is it just me or does this not look too bad?
It doesn't look that hard to fit either. Shame the back bumper's nowhere near.
The Fantasia got a new steering wheel...

...and locking fuel cap...
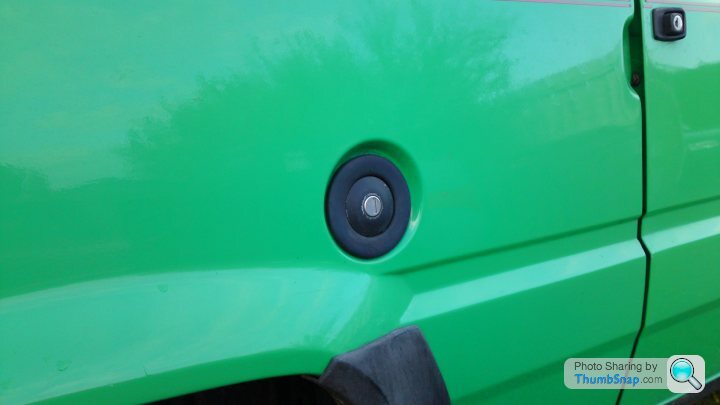
...thanks to Guff. Although I'm still pretty miffed about it the concept at least will live on.
Edited by Liquid Knight on Sunday 29th April 20:07
As the Repo'-cento took up most of my day yesterday, repairing and refitting the back bumper and taking the piss soaked passenger seat out so I could clean it with a pressure washer, upholstery shampoo, Vax and febreeze. I was offered a sub-box for an old stereo. Had to find some way of seeing if it worked so...
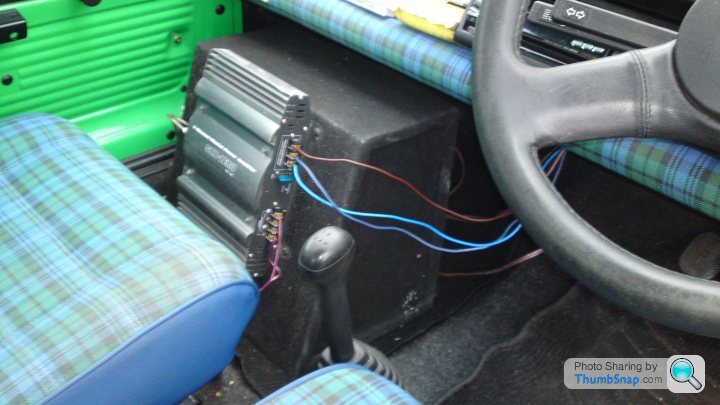
...old school mix tape on the way to work this morning.
...old school mix tape on the way to work this morning.

Gassing Station | Alfa Romeo, Fiat & Lancia | Top of Page | What's New | My Stuff