Remote clutch reservoir
Discussion


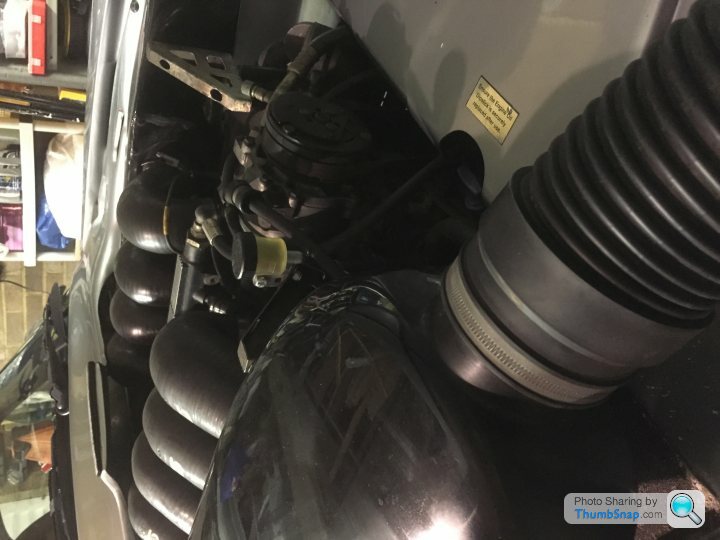
I've just fitted a remote clutch reservoir to the cerb, to save me from having to remove the F1 panel and black cover every time I need to check or top up the fluid (which is often at the moment).
Here's a pic of the finished article (can you spot it, it's near the A/C pump ;-)
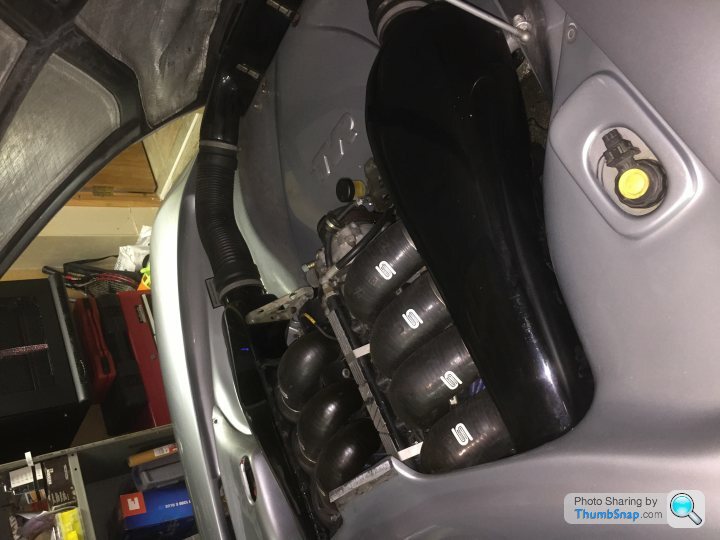
Sorry about the orientation of the picture, I blame the PH image upload.
What you will need:
Remove f1 panel and clutch cover
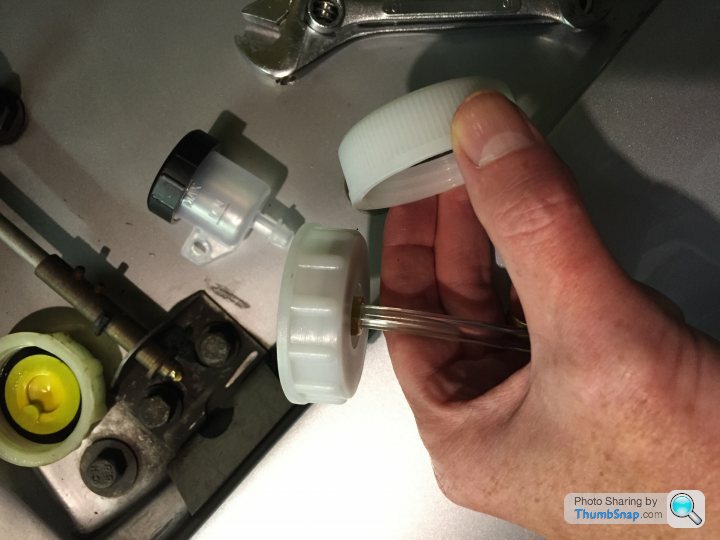
Open eezibleed and strip it down to its components. Remove clear tube from pressure vessel
Assemble cap and tube. Use the knurled cap (on the left in the pic below):
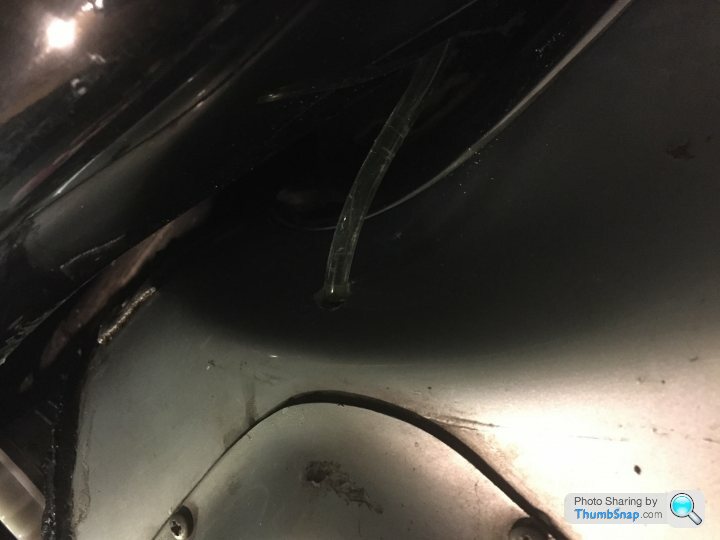
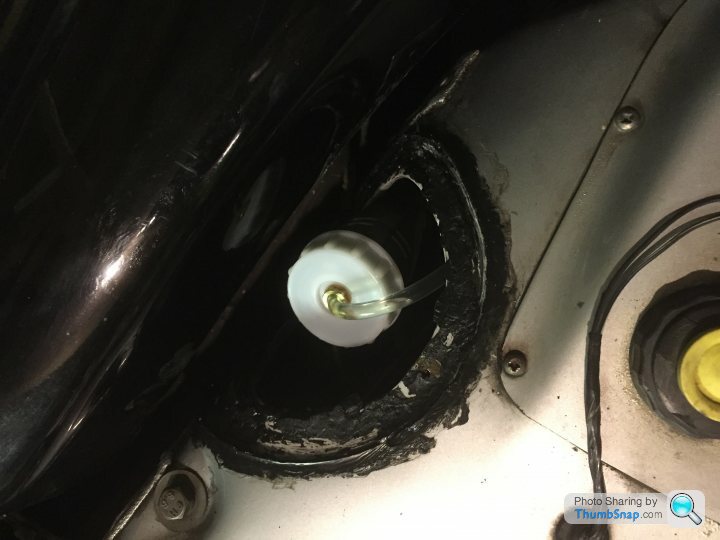
Using a 10mm bit, drill a hole in your inner wing (!) to lead the tube from the master cylinder
As shown below:
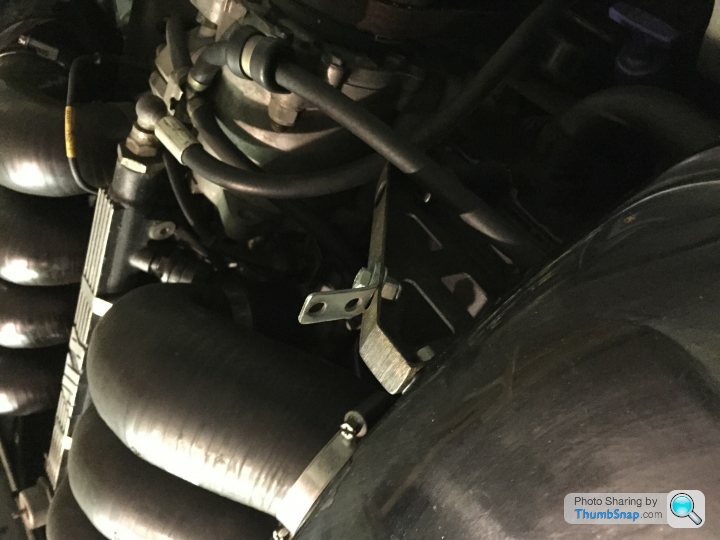
Take your small piece of metal, bend it to a 45 degree angle and drill holes in it to make a small bracket.
The bit of metal I found already had holes in it, shown here next to the demon tweeks reservoir:
Attach this to the air box bracket. I used the lower hole, the bonnet didn't close if I used the upper one.
Provided the top of the reservoir is higher than the master cylinder reservoir you should be ok .
.
Make sure the pipe is firmly attached to the cap and screw onto the master reservoir loosely.
Feed the tube through the hole you drilled (I used stiff wire bent over on itself, threaded into the hole from the engine bay side, and stuffed it into the end of the clear tube, and pulled it back through).
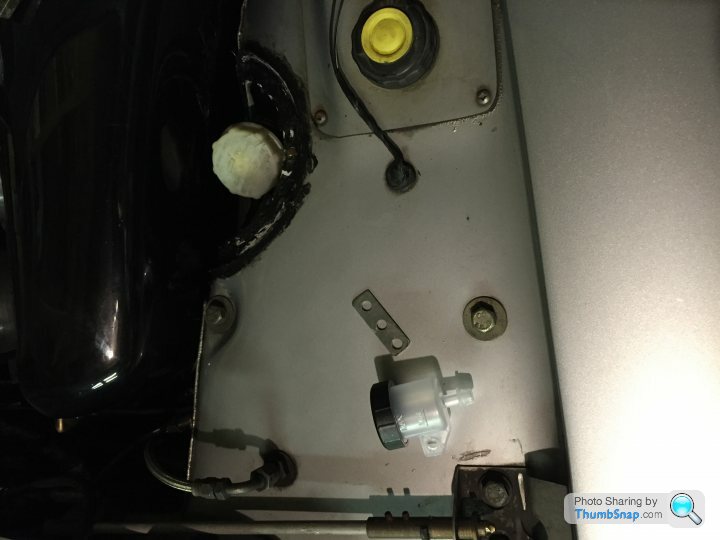
Attach your remote reservoir to the bracket, lead the tube under the airbox and connect it to the reservoir. There is a join in the tube with a step-up diameter bit of metal to mate the slightly wider tube to the narrower one. I bound some self amalgamating tape around this join in case it decided to separate. I also used same tape around the tube where it goes through the GRP hole.
Fill up the reservoir and the fluid should snake it's way down the tube because the cap is loose. When the fluid gets to the cap tighten it up and top up the remote reservoir.
The remote reservoir is really tiny, even smaller than I expected from the description, but at least it's vertical plus with the tubing I reckon the total fluid volume is about 3 times the amount you can get in the master reservoir.
Another pic...
Quite chuffed with the result. Will report whether it works!
Here's a pic of the finished article (can you spot it, it's near the A/C pump ;-)
Sorry about the orientation of the picture, I blame the PH image upload.
What you will need:
- a gunsons eezibleed (£15-£20)
- this reservoir from demon tweeks: http://www.demon-tweeks.co.uk/Product.do?method=vi... (~£10)
- a bit of metal to make a small bracket
Remove f1 panel and clutch cover
Open eezibleed and strip it down to its components. Remove clear tube from pressure vessel
Assemble cap and tube. Use the knurled cap (on the left in the pic below):
Using a 10mm bit, drill a hole in your inner wing (!) to lead the tube from the master cylinder
As shown below:
Take your small piece of metal, bend it to a 45 degree angle and drill holes in it to make a small bracket.
The bit of metal I found already had holes in it, shown here next to the demon tweeks reservoir:
Attach this to the air box bracket. I used the lower hole, the bonnet didn't close if I used the upper one.
Provided the top of the reservoir is higher than the master cylinder reservoir you should be ok
.Make sure the pipe is firmly attached to the cap and screw onto the master reservoir loosely.
Feed the tube through the hole you drilled (I used stiff wire bent over on itself, threaded into the hole from the engine bay side, and stuffed it into the end of the clear tube, and pulled it back through).
Attach your remote reservoir to the bracket, lead the tube under the airbox and connect it to the reservoir. There is a join in the tube with a step-up diameter bit of metal to mate the slightly wider tube to the narrower one. I bound some self amalgamating tape around this join in case it decided to separate. I also used same tape around the tube where it goes through the GRP hole.
Fill up the reservoir and the fluid should snake it's way down the tube because the cap is loose. When the fluid gets to the cap tighten it up and top up the remote reservoir.
The remote reservoir is really tiny, even smaller than I expected from the description, but at least it's vertical
plus with the tubing I reckon the total fluid volume is about 3 times the amount you can get in the master reservoir.Another pic...
Quite chuffed with the result. Will report whether it works!
Again. I have been thinking of doing something similar.
Glad you have done this as i was never sure if I could replace the existing clutch cap with the easybleed cap on a more long term basis.
Mine leaks but the level doesn't go down so I have to bleed it each time, rather than top up, which is a pain especially with the angle of the existing reservoir. I might use your idea but use the easybleed bottle instead which I've already adapted to work from a footpump rather than from tyre pressure. Then just plug the pump in and pump when needed.
Yea I don't know if it will work on a long term basis either but I keep the original cap in the boot.
Interesting that your fluid level doesn't drop but it needs bleeding, I wonder where the air is getting in?
But for me this mod is as much about a visual check of the fluid level as it is about refilling. I might try bleeding it and check that it works (nice to be able to see the level when you're pumping the clutch pedal).
but I keep the original cap in the boot.Interesting that your fluid level doesn't drop but it needs bleeding, I wonder where the air is getting in?
But for me this mod is as much about a visual check of the fluid level as it is about refilling. I might try bleeding it and check that it works (nice to be able to see the level when you're pumping the clutch pedal).
FarmyardPants said:
Yea I don't know if it will work on a long term basis either but I keep the original cap in the boot.
Interesting that your fluid level doesn't drop but it needs bleeding, I wonder where the air is getting in?
But for me this mod is as much about a visual check of the fluid level as it is about refilling. I might try bleeding it and check that it works (nice to be able to see the level when you're pumping the clutch pedal).
Yeah a lot less hassle having it where you have put it. but I keep the original cap in the boot.Interesting that your fluid level doesn't drop but it needs bleeding, I wonder where the air is getting in?
But for me this mod is as much about a visual check of the fluid level as it is about refilling. I might try bleeding it and check that it works (nice to be able to see the level when you're pumping the clutch pedal).
One of my slave seals is leaking. I already changed it a couple of times but this time I just can't be arsed. So a quick bleed is called for once every couple of months. I start to feel just a smidge of play at the top of my pedal travel when its cold and i know it's nearing that time.
I've got the whole process down to around 5 minutes
and I keep a bleed kit in my boot just in case i'm not at home lol 
Mr Cerbera said:
Thanks Paul. I like the idea of one with a switch for a warning light I have to say. The only thing that worries me about this is that the seal on top of the original reservoir will always be below the level of fluid. So if the seal loses it's seal then it's gonna result in a rather messy footwell 
I think I'd be tempted to add a bit of sealant round the thread as a backup.
I think I'd be tempted to add a bit of sealant round the thread as a backup.
Mad Mark said:
Huge difference in price tho!
Just out of interest Rog Would an easy bleed kit screw onto the Demon tweeks reservoir?
It certainly looks like it would with the Merlin ones But then they are Girling.
The merlin ones have 8mm outlets which is a bit bigger than the DT one, so it will be tight (I had to put the eesibleed tube in hot water for the DT one)Just out of interest Rog Would an easy bleed kit screw onto the Demon tweeks reservoir?
It certainly looks like it would with the Merlin ones But then they are Girling.
Mad Mark said:
I have to say. The only thing that worries me about this is that the seal on top of the original reservoir will always be below the level of fluid. So if the seal loses it's seal then it's gonna result in a rather messy footwell
I think I'd be tempted to add a bit of sealant round the thread as a backup.
It is a concern, but then again the eesibleed is supposed to be good for 15+ psi so is designed to not leak. So far so good on mine, anyway. I think I'd be tempted to add a bit of sealant round the thread as a backup.
Mad Mark said:
Huge difference in price tho!
Just out of interest Rog Would an easy bleed kit screw onto the Demon tweeks reservoir?
It certainly looks like it would with the Merlin ones But then they are Girling.
Sorry Mark I didn't read your post properly.Just out of interest Rog Would an easy bleed kit screw onto the Demon tweeks reservoir?
It certainly looks like it would with the Merlin ones But then they are Girling.
I just checked and the answer is no, none of the eesibleed caps fit the demon tweeks reservoir. The small caps supplied with the eesibleed are both too small and the other 2 are too big.
Thought it was about time for an update on this mod. Does it work? Sort of.
There are two main problems:
1. The eesibleed tubing is not suitable for long term storage of fluid, it goes opaque and stiff. I replaced it with PTFE tube (which is already quite opaque and stiff but is at least resistant to dot4).
2. Air would get into the main reservoir, either through the hole where the pipe goes through the cap or between the cap and the master. Usual symptom of this is that fluid added to the remote reservoir would just drain down and end up in the footwell. Or I'd go to the car to find no fluid in either reservoir. The bodge for this is self-amalgamating tape around the cap, and a better fitting for the tube into the top of the cap (something like this: https://www.ebay.co.uk/itm/114345541073?hash=item1... ) plus some silicone sealant around that to prevent air ingress.
With those fixes it has been working well for a year or so, but for anyone thinking of doing this I would suggest doing it properly a la Brummmie's thread: https://www.pistonheads.com/gassing/topic.asp?t=12...
There are two main problems:
1. The eesibleed tubing is not suitable for long term storage of fluid, it goes opaque and stiff. I replaced it with PTFE tube (which is already quite opaque and stiff
but is at least resistant to dot4).2. Air would get into the main reservoir, either through the hole where the pipe goes through the cap or between the cap and the master. Usual symptom of this is that fluid added to the remote reservoir would just drain down and end up in the footwell. Or I'd go to the car to find no fluid in either reservoir. The bodge for this is self-amalgamating tape around the cap, and a better fitting for the tube into the top of the cap (something like this: https://www.ebay.co.uk/itm/114345541073?hash=item1... ) plus some silicone sealant around that to prevent air ingress.
With those fixes it has been working well for a year or so, but for anyone thinking of doing this I would suggest doing it properly a la Brummmie's thread: https://www.pistonheads.com/gassing/topic.asp?t=12...
I followed someone on here who made a new plate and sealed it. Rather than havign the skills to make an aluminium plate like them, I used the original cover, all sealant removed and edged with rubber sealing, just held in with the two screws. Seems to work and I've had no water ingress yet.
Gassing Station | Cerbera | Top of Page | What's New | My Stuff