The photo enhancement and tutorial thread
Discussion


Hi,
Following on from the chat in the random photo thread I thought it best I start this.
http://www.pistonheads.com/gassing/topic.asp?h=0&a...
If anyone can think of a better title please ask the mods to rename it for me.
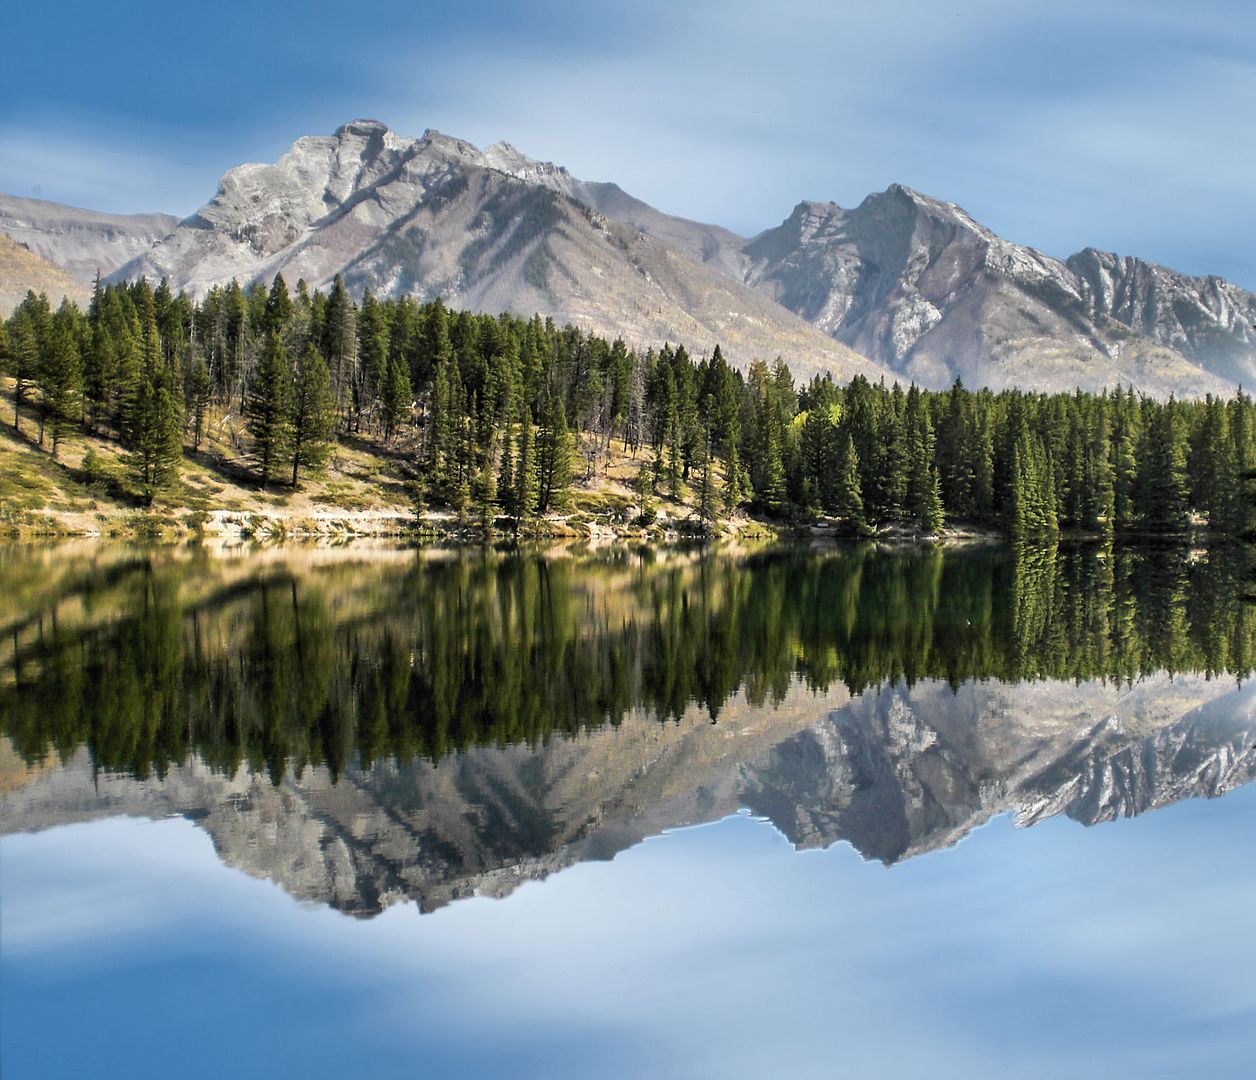
So here is the photo that started the conversation.
V1

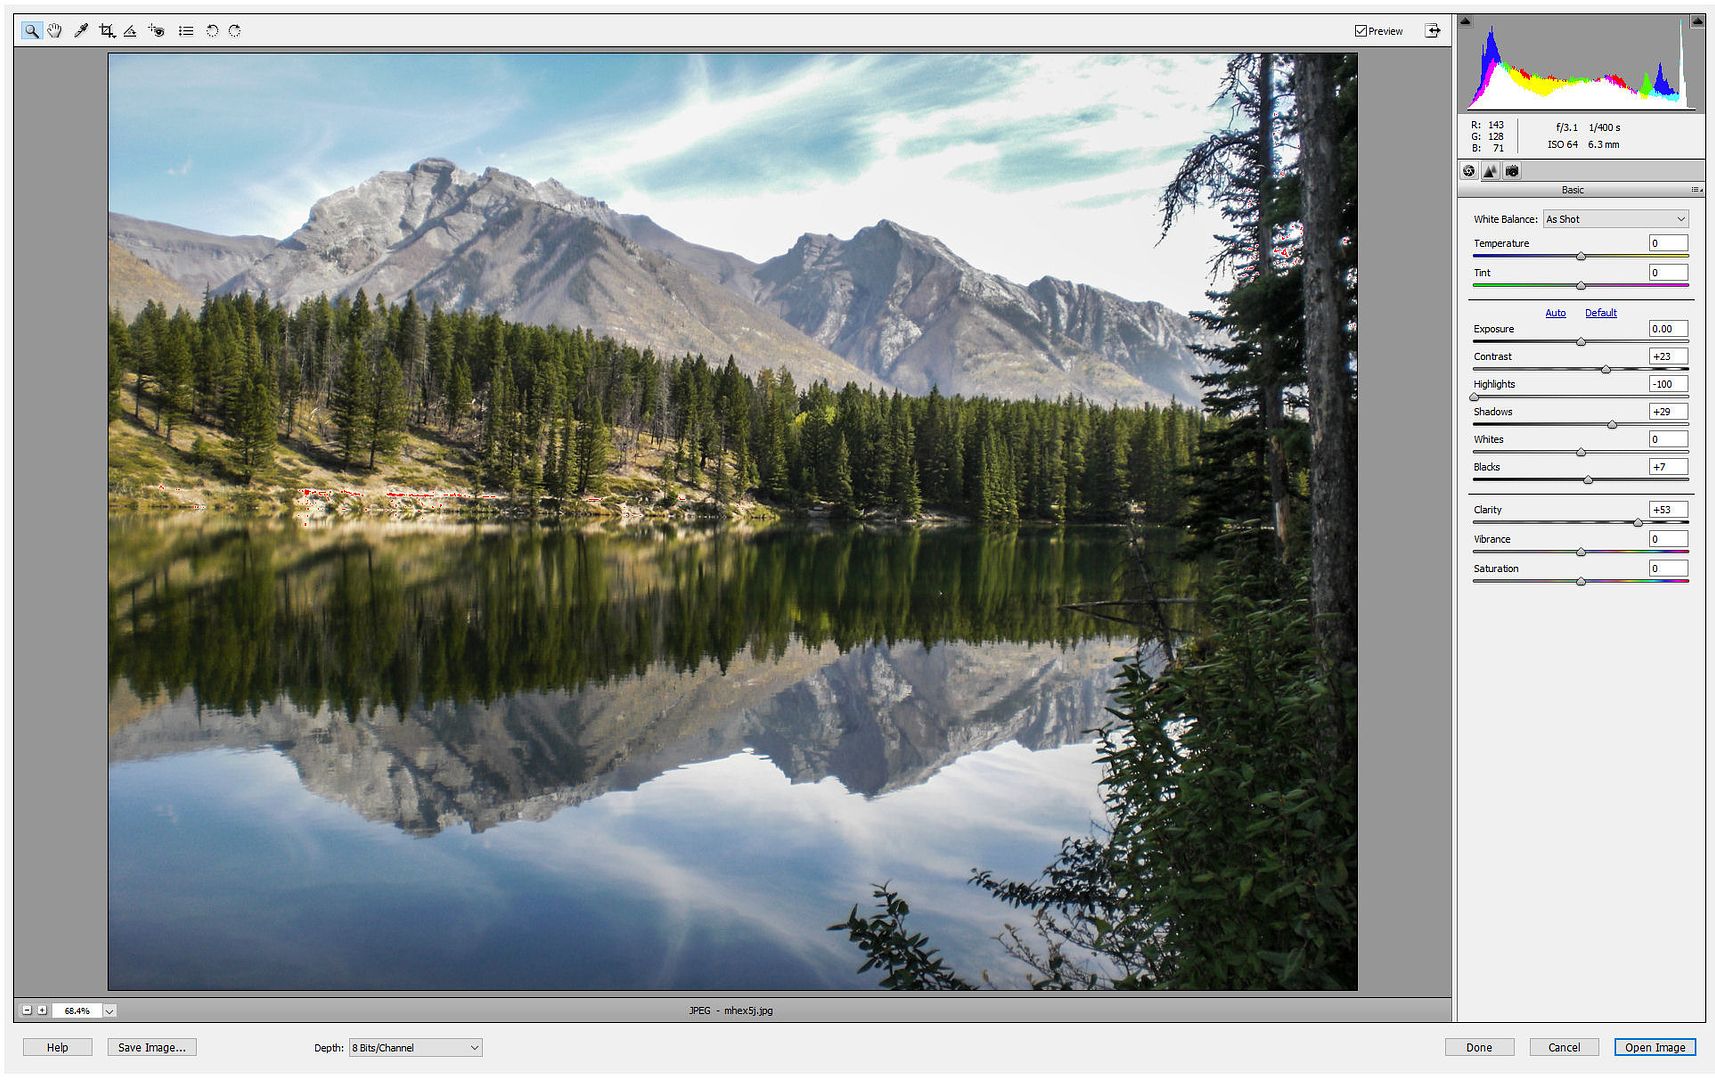
So I installed Paintshopro X as that is all I have and did an auto fix to start with, and here is the result.

So I understand what did it do wrong OR correctly so I can work on it.
Following on from the chat in the random photo thread I thought it best I start this.
http://www.pistonheads.com/gassing/topic.asp?h=0&a...
If anyone can think of a better title please ask the mods to rename it for me.
So here is the photo that started the conversation.
V1
So I installed Paintshopro X as that is all I have and did an auto fix to start with, and here is the result.
So I understand what did it do wrong OR correctly so I can work on it.
I think it's worse, and I think that's because an 'Auto' change affects all the image equally. You've got more midtone detail in the foliage bottom left, but the rest is now over-exposed.
Looking at the original photo I'd have selected the distant mountains and sky and raised the black level to give more contrast, then selected the foliage bottom left and used curves to brighten. The key is in what you select, how you select it and what you do to the selection.
(One option, if 'auto' works on part of the image, is to apply it, then use the history brush as required over the rest)
Simpo Two said:
I think it's worse, and I think that's because an 'Auto' change affects all the image equally. You've got more midtone detail in the foliage bottom left, but the rest is now over-exposed.
Looking at the original photo I'd have selected the distant mountains and sky and raised the black level to give more contrast, then selected the foliage bottom left and used curves to brighten. The key is in what you select, how you select it and what you do to the selection.
(One option, if 'auto' works on part of the image, is to apply it, then use the history brush as required over the rest)
Thank you, so I need to select different parts of the image to fix it and make it better. Thank you for your time to assist me in learning.Looking at the original photo I'd have selected the distant mountains and sky and raised the black level to give more contrast, then selected the foliage bottom left and used curves to brighten. The key is in what you select, how you select it and what you do to the selection.
(One option, if 'auto' works on part of the image, is to apply it, then use the history brush as required over the rest)
Allanv said:
Thank you, so I need to select different parts of the image to fix it and make it better. Thank you for your time to assist me in learning.
Happy to help - but I'd just add that my suggestions are based purely on my preferences, experience and software (Photoshop). What looks nice to one person may not please another, so the main thing is to find the way/s that you like best. Experiment - see what different things do. Edges of selection areas and brushes have adjustable soft edges and opacity. If it doesn't do what you want, undo and have another go 
NB Thanks DD but I'm not a PS pro, I just use it to bash things until people pay for them

I’ve had a play and it’s already been said, but you’ve blown the sky, so it’s unrecoverable. Add a ND grad or take multiple exposures next time and merge them.
There are some clever PS bods on PH but this is my take on it. I imported into Elements ACR and had a play…
Then into Paint Shop pro x2 and swapped the sky for one of mine. Plus a straighten and crop.
There are some clever PS bods on PH but this is my take on it. I imported into Elements ACR and had a play…
Then into Paint Shop pro x2 and swapped the sky for one of mine. Plus a straighten and crop.


 I've only ever added a sky to Two pics, and I felt dirty
  x 2
x 2 
I've been watching some interesting webinar seminars about Topaz software - through email invites after buying one of the collection. They use top pro photographers to demonstrate how they use some of the individual bits of their software collection to tweak photos. There was another good one tonight with Joel Woolf and they then put some on YouTube... https://www.youtube.com/user/topazlabs.
After the one tonight I bought the full set at a greatly discounted price and then had quick go with Clarity on your pic, then the ColorFX software from NikEffex. Obviously it must be difficult for the program to do its best on a low res screen grab of your image but interestingly it did restore some tone and colour in the sky, where the blown white bits were. The bad news was it didn't do it for the reflection of the sky in the water! so the water would need the colour etc. tweaked as well...
 Pic3 by David Hawkes, on Flickr
After the one tonight I bought the full set at a greatly discounted price and then had quick go with Clarity on your pic, then the ColorFX software from NikEffex. Obviously it must be difficult for the program to do its best on a low res screen grab of your image but interestingly it did restore some tone and colour in the sky, where the blown white bits were. The bad news was it didn't do it for the reflection of the sky in the water! so the water would need the colour etc. tweaked as well...
Pic3 by David Hawkes, on FlickrEdited by LastLight on Wednesday 14th October 00:35
I've been watching some interesting webinar seminars about Topaz software - through email invites after buying one of the collection. They use top pro photographers to demonstrate how they use some of the individual bits of their software collection to tweak photos. There was another good one tonight with Joel Woolf and they then put some on YouTube... https://www.youtube.com/user/topazlabs.
After the one tonight I bought the full set at a greatly discounted price and then had quick go with Clarity on your pic, then the ColorFX software from NikEffex. Obviously it must be difficult for the program to do its best on a low res screen grab of your image but interestingly it did restore some tone and colour in the sky, where the blown white bits were. The bad news was it didn't do it for the reflection of the sky in the water! so the water would need the colour etc. tweaked as well...
Pic3 by David Hawkes, on Flickr
After the one tonight I bought the full set at a greatly discounted price and then had quick go with Clarity on your pic, then the ColorFX software from NikEffex. Obviously it must be difficult for the program to do its best on a low res screen grab of your image but interestingly it did restore some tone and colour in the sky, where the blown white bits were. The bad news was it didn't do it for the reflection of the sky in the water! so the water would need the colour etc. tweaked as well...
Pic3 by David Hawkes, on FlickrEdited by LastLight on Wednesday 14th October 01:13
Best bet is to invest in Lightroom and later Photoshop if you are serious about learning photography and post procesing. You might not understand how to make the most of an image to start with, no one does, it's trial and error, listening to feedback and watching videos etc.
Just remember, it's better to get exposures correct in the camera at the time of shooting, post processing can make a good image pop but can't make a poor image good.
In this instance you have blown out the sky,it's over expsed. No software can recover the lost data n this case. Buy a Graduated filter (ND) or take multiple exposures and blend them to have a correctly exposed image.
Use the light meter in your camera to first photograph a correctly exposed sky, this will capture the cloud detail. Then without moving the camera, meter for the rest of the image. Now you can blend these two to have correct exposure across the whole image.
Enjoy the learning and don't get frustrated if you don't get things right the first time.
Edited by Craigwww on Wednesday 14th October 08:46
[quote=Craigwww
In this instance you have blown out the sky,it's over expsed. No software can recover the lost data n this case. Buy a Graduated filter (ND) or take multiple exposures and blend them to have a correctly exposed image.
Use the light meter in your camera to first photograph a correctly exposed sky, this will capture the cloud detail. Then without moving the camera, meter for the rest of the image. Now you can blend these two to have correct exposure across the whole image.
[/quote]
Would bracketing do this?
In this instance you have blown out the sky,it's over expsed. No software can recover the lost data n this case. Buy a Graduated filter (ND) or take multiple exposures and blend them to have a correctly exposed image.
Use the light meter in your camera to first photograph a correctly exposed sky, this will capture the cloud detail. Then without moving the camera, meter for the rest of the image. Now you can blend these two to have correct exposure across the whole image.
Edited by Craigwww on Wednesday 14th October 08:46
[/quote]
Would bracketing do this?
bernhund said:
Would bracketing do this?
It is bracketing. When faced with a high contrast scene like this, and if it's not moving, if you want good results it's always a good idea to take a set of bracketed exposures (tripod) so you have more options to play with in editing. Usually one to get the highlights and one to get the shadows will suffice, and blend together.Rather than meter for specific for each part of the image, I'd use +/- EV and use the histogram to see whereabouts I was.
I tend to find it easier working when the images are RAW files rather than JPG. With a RAW file it's usually a bit "safer" to under-expose slightly if you're not too sure on the proper exposure as you can still bring out detail, rather than when you over-expose and the deatail is lost forever.
Gassing Station | Photography & Video | Top of Page | What's New | My Stuff