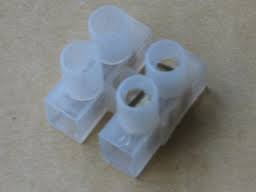
Quick yellow connector qu.
Discussion


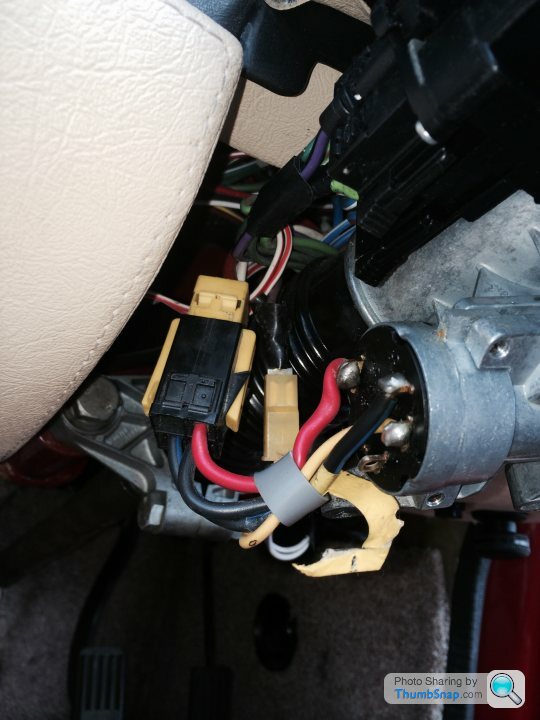

It's the one with the chunky cables going to it.
Not sure if that is the standard dreaded yellow one as mine never had the standard one when I got - that didn't stop the replacement causing the same problem.
IMHO don't replace it with an Andersen style connector - just as bad as original.
Not sure if that is the standard dreaded yellow one as mine never had the standard one when I got - that didn't stop the replacement causing the same problem.
IMHO don't replace it with an Andersen style connector - just as bad as original.

About to remove mine despite no sign of burning. I had planned to use heavy duty connectors but now plan to solder the connections together and use heat shrink+tape to insulate it. It only takes a couple of minutes to unsolder again if you want to remove the column on those rare occasions when you are changing the bulkhead bearing.

Oldred_V8S said:
solder the connections together and use heat shrink+tape to insulate it.
The connector is very close to the ignition switch, you may find there is enough slack to solder directly onto the switch avoiding the need for a join.For any one who is not "too handy" with a soldering iron, or doesn't have a nice big one, you could end up with a worse join than the yellow connector (imho).
Not usually a fan of these....
... but a nice big one with enough cable stripped back that both screws clamp both wires has worked for me for a year or two now

Edited by phillpot on Friday 11th April 14:10
phillpot said:
The connector is very close to the ignition switch, you may find there is enough slack to solder directly onto the switch avoiding the need for a join.
For any one who is not "too handy" with a soldering iron, or doesn't have a nice big one, you could end up with a worse join than the yellow connector (imho).
Like Mike said a nice big iron is important if you plan on soldering the connections. I have a chuffing big one and I am adept at using it, (easy Glenrobbo) having learnt the art of soldering back when all round here was fields.For any one who is not "too handy" with a soldering iron, or doesn't have a nice big one, you could end up with a worse join than the yellow connector (imho).
Edited by phillpot on Friday 11th April 14:10
Gassing Station | S Series | Top of Page | What's New | My Stuff