They Said it Couldn't be Done...
Discussion


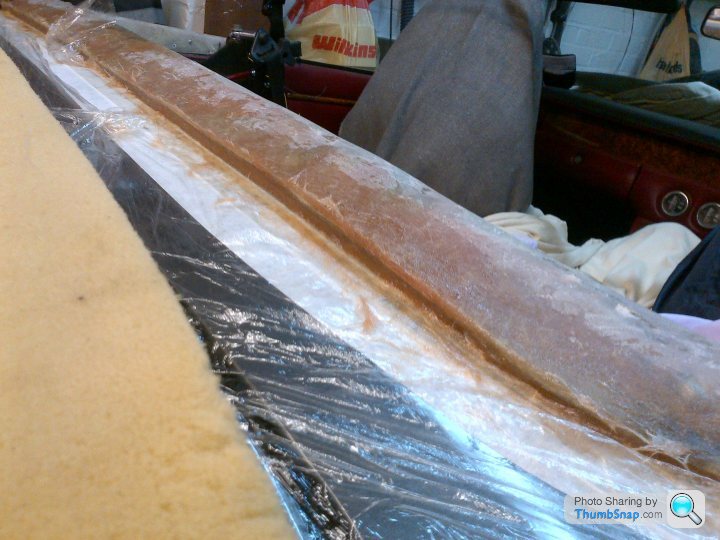
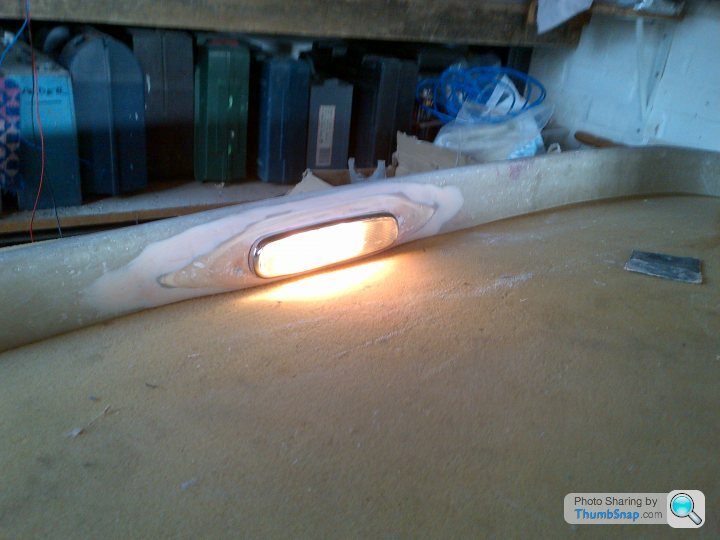
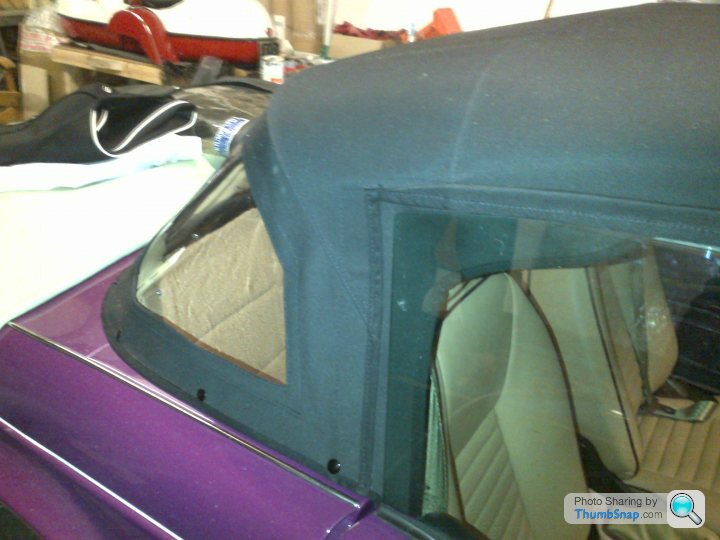
After a week of building up, sanding and trimming the hood rail is now starting to look like it should.

In the picture above you can see how the new rail will continue round to the 'B' post and make attaching the Velcro and a fixing stud a whole lot easier and neater. The trimmer who is going to do the job called in yesterday to check out the fit and wasn't happy with the gap between the rear lip and the tub so I've built that up as well now.
I've trial fitted the new interior light moulding but haven't done any blending yet.
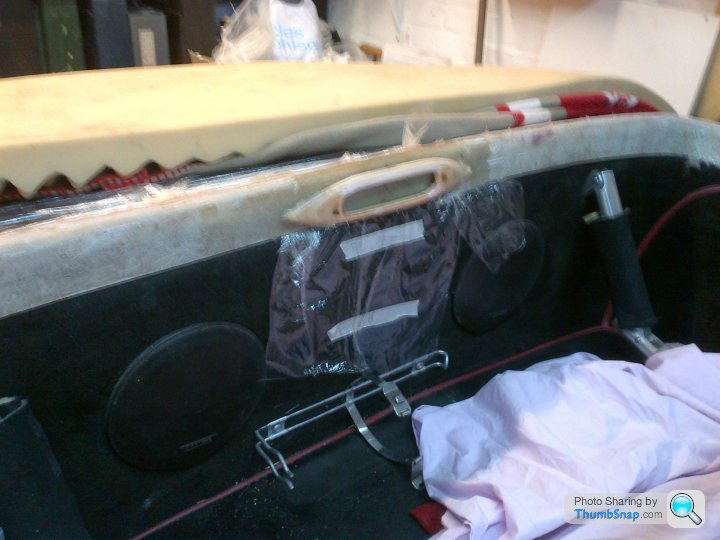
What do we think? I've a LED strip to try as another option.
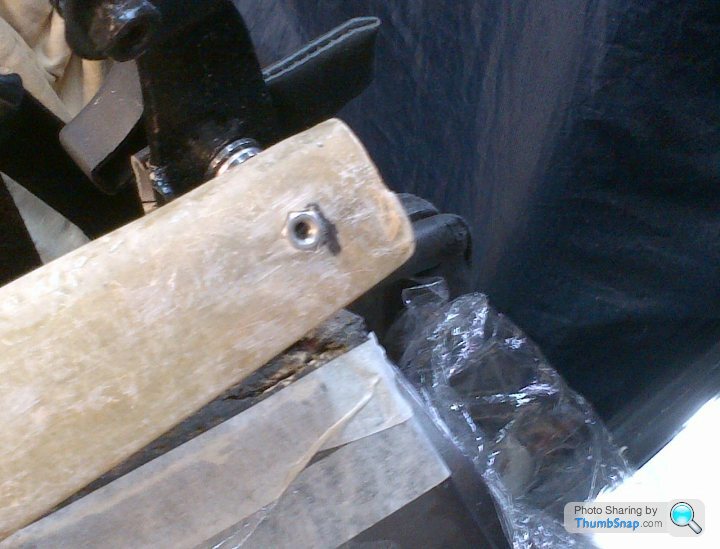
The trimmer also felt the distance between the end of the middle hoop and the door glass was a bit big and the hood fabric might sag at this point, so the final job for this weekend was to find a way of bridging the gap. This is where I got to before packing up for the night...

To be continued.....
In the picture above you can see how the new rail will continue round to the 'B' post and make attaching the Velcro and a fixing stud a whole lot easier and neater. The trimmer who is going to do the job called in yesterday to check out the fit and wasn't happy with the gap between the rear lip and the tub so I've built that up as well now.
I've trial fitted the new interior light moulding but haven't done any blending yet.
What do we think? I've a LED strip to try as another option.
The trimmer also felt the distance between the end of the middle hoop and the door glass was a bit big and the hood fabric might sag at this point, so the final job for this weekend was to find a way of bridging the gap. This is where I got to before packing up for the night...
To be continued.....
Deeman said:
Gotta say Joe - for someone who apparently hasn't fibre glassed before, let alone having the balls to rip up an immaculate V8s - this is looking "bang tidy" as they say down saff! Can't wait to see the finished article.
PeteThat's it, fill Joe with confidence with a post that is both encouraging and worrying at the same time.

My Eurotour mate Colin purchased a very expensive Chim and has proceeded to rip out the interior to replace the carpets. The vehicle looks like it has been in an accident; everyone that sees the car has proclaimed, what have you done to your car? Which I feel is starting to worry him somewhat.
Deeman said:
.....let alone having the balls to rip up an immaculate V8s ..
Pete - I don't want to worry you but that pram hood is only held on with three M6 bolts at the back and the two M8 pivot bolts. Taking the spark plugs out is harder than taking the roof off!Cheers for the compliments chaps
Edited by v8s4me on Monday 2nd February 22:13
So, what do we think then?

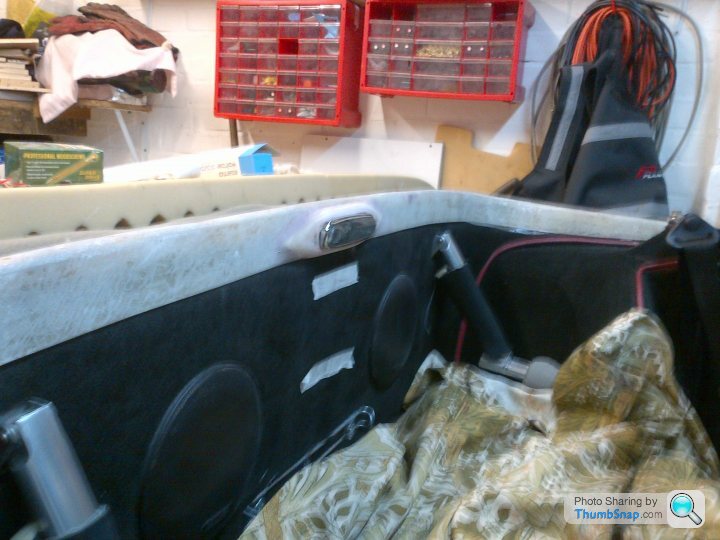
The LED strip is still an option, but I'm liking this. A little bit more smoothing tomorrow and the hood-rail is done
I'm thinking about using these to hold the 'B' post corners down (as well as Velcro). The trimmer has suggested recessing the securing nut in the back face of the hood-rail and bond it in flush with resin. Has anyone used these? Any other options to consider?
v8s4me said:
So, what do we think then?
The LED strip is still an option, but I'm liking this. A little bit more smoothing tomorrow and the hood-rail is done
I'm thinking about using these to hold the 'B' post corners down (as well as Velcro). The trimmer has suggested recessing the securing nut in the back face of the hood-rail and bond it in flush with resin. Has anyone used these? Any other options to consider?
Looking good Joe, nice work.The LED strip is still an option, but I'm liking this. A little bit more smoothing tomorrow and the hood-rail is done
I'm thinking about using these to hold the 'B' post corners down (as well as Velcro). The trimmer has suggested recessing the securing nut in the back face of the hood-rail and bond it in flush with resin. Has anyone used these? Any other options to consider?
Regarding fasteners, "Lift the dot" type are worth a look, they don't protrude as much as the Tenax when fitted.
My old TR 2 had a mixture of both types.
If you're thinking of making provision for a tonneau cover in the future, now is the time to be fitting and bonding the locating stud retaining nuts into your rear rail.
Good luck mate.
glenrobbo said:
......
If you're thinking of making provision for a tonneau cover in the future, now is the time to be fitting and bonding the locating stud retaining nuts into your rear rail...
Thanks Glen. Great minds...! I've got that on the list to talk to the trimmer about tomorrow. Actually getting a tonneau and/or a hood cover made will have to wait until next year though as the bank has been well broken If you're thinking of making provision for a tonneau cover in the future, now is the time to be fitting and bonding the locating stud retaining nuts into your rear rail...
 but getting the fasteners fitted at this stage makes good sense.
My only reservation is how the rear part of the hood will look with little studs or poppers sticking out of the smart black mohair.
I had thought of magnets in the seam of the hood cover located over the large penny washers I've glassed into the rail but they are too deep, even for quite a strong magnet. Are there any other ideas out there?
Edited by v8s4me on Tuesday 3rd February 22:19
v8s4me said:
My only reservation is how the rear part of the hood will look with little studs or poppers sticking out of the smart black mohair.
Not sure I would worry that much about nice tasteful fasteners on view. If anything TVR's are unusual, most 'classic' cars use fasteners round the hood.Edited by v8s4me on Tuesday 3rd February 22:19
I know what you mean about there being little holding the hood on, and one of the bolts on mine was almost rusted through! The Trim Technician now uses a different method, he fastens the hood to the rear rail but fastens the rail to the body using stainless set screws from the inside. i.e. the screws go horizontally through the tub and have nuts in the top edge of the boot. It does not rely on bolts glassed into the rear rail. Ok, the screws are now in view but, frankly, I would rather they were in a place I can get at them.
The original three holes in the tub are now glassed in. I found that one of them had been allowing water to leak into the boot.
I would rule out magnets, I doubt they would be positive enough and corrosion will be an issue.
Like Glen I have worked on cars with 'lift dot' and/or Tenax fasteners. Tenax used where the location is under a bit of stress, probably best for the hood corners. Lift dot probably OK for a tonneaux. One point with Tenax, I seem to remember they were pretty good for corrosion resistance.
greymrj said:
....The Trim Technician now uses a different method, .... It does not rely on bolts glassed into the rear rail....
This is what David Gerald recommended...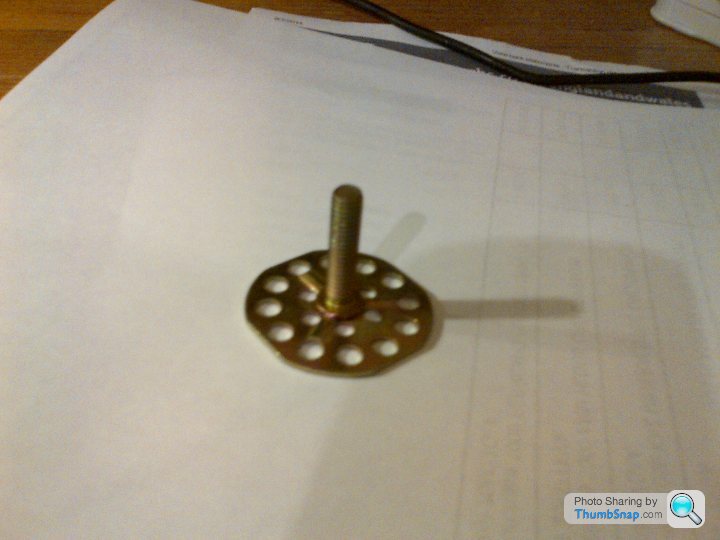
Very thin but wide top which is glass/resined into the GF moulding. Could easily be pegged as well. These aren't stainless but SS might be available from the manufactures. Look up "bigheads" based in Bournemouth.
greymrj said:
... he fastens the hood to the rear rail but fastens the rail to the body using stainless set screws from the inside. i.e. the screws go horizontally through the tub and have nuts in the top edge of the boot....
I'm not sure I follow this but I do know getting screws or bolts in from underneath will be just a tricky as getting nuts onto the downward pointing studs.greymrj said:
.... Tenax used where the location is under a bit of stress, probably best for the hood corners. ...
That makes sense. Thanks Today's little bits of progress....
The light works..
I've glassed in the little nut which secures the male part of the Tenax fastner...
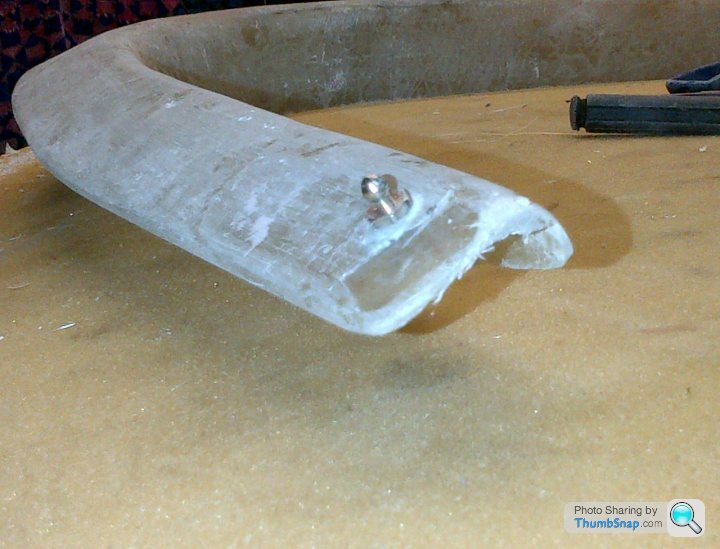
And solved the problem of how to extend the middle rail so that it will span the gap between the folding frame and the window and hold the hood fabric reasonably firmly against the glass...
Yes it is just a bit of garden hose. TVR would have been proud!
The light works..
I've glassed in the little nut which secures the male part of the Tenax fastner...
And solved the problem of how to extend the middle rail so that it will span the gap between the folding frame and the window and hold the hood fabric reasonably firmly against the glass...
Yes it is just a bit of garden hose. TVR would have been proud!
Edited by v8s4me on Thursday 5th February 00:33

Joe....much admiration for your dedication in overcoming various challenges to get what you need to achieve...I have no doubt that you will achieve your goal..a credit to S - owner ingenuity.
Two questions:
1. When done, will you do a article for us to publish and inspire all TVR owners?
2. I keep seeing your floral protective materials and now it's starting to brainwash me...ever thought using that pattern in the roof material?
Two questions:
1. When done, will you do a article for us to publish and inspire all TVR owners?
2. I keep seeing your floral protective materials and now it's starting to brainwash me...ever thought using that pattern in the roof material?
Edited by AutoAndy on Wednesday 4th February 21:41
AutoAndy said:
Two questions:
1. When done, will you do a article for us to publish and inspire all TVR owners?
2. I keep seeing your floral protective materials and now it's starting to brainwash me...ever thought using that pattern in the roof material?
Thanks Andy 1. When done, will you do a article for us to publish and inspire all TVR owners?
2. I keep seeing your floral protective materials and now it's starting to brainwash me...ever thought using that pattern in the roof material?


1. I'll think it over.
2. That is the roof material! It's designed to blend into the French/German/Swiss countryside
v8s4me said:
AutoAndy said:
Two questions:
1. When done, will you do a article for us to publish and inspire all TVR owners?
2. I keep seeing your floral protective materials and now it's starting to brainwash me...ever thought using that pattern in the roof material?
Thanks Andy 1. When done, will you do a article for us to publish and inspire all TVR owners?
2. I keep seeing your floral protective materials and now it's starting to brainwash me...ever thought using that pattern in the roof material?
1. I'll think it over.
2. That is the roof material! It's designed to blend into the French/German/Swiss countryside
2. That's the Ex's dresses all cut up for dust sheets.
Seriously Joe, I applaud you for your tenacity, craftmanship, and your willingness to try new skills and making them work so successfully!
And I love the way you've faired in that interior light, it looks fab.
Well done mate
PS. I hope it's not going to rain.
Thanks Glen
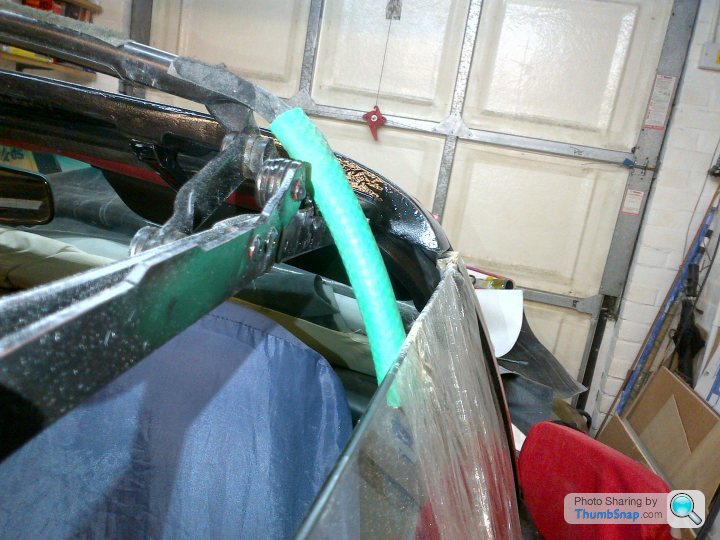
This TR6 was in the trimmer's shop today and we were talking about a similar arrangement for the back of the driver's door window on mine...
This wasn't his work and he says the seams and flaps on mine will be a lot neater but the basic principal of inner and outer flaps along the top edge (like a Surrey) and just an inner flap at the back is the design he is going to use as a 'starter for 10'.
I don't know if this little strip of hood fabric down the 'B' post is an original TR feature but it looks like a good idea worth copying...

I used to have a suit that colour once
This TR6 was in the trimmer's shop today and we were talking about a similar arrangement for the back of the driver's door window on mine...
This wasn't his work and he says the seams and flaps on mine will be a lot neater but the basic principal of inner and outer flaps along the top edge (like a Surrey) and just an inner flap at the back is the design he is going to use as a 'starter for 10'.
I don't know if this little strip of hood fabric down the 'B' post is an original TR feature but it looks like a good idea worth copying...
I used to have a suit that colour once

I used to have a cape with the lining in that colour, which was all the rage in 1828 when I was in my youth.
One could flamboyantly flourish the cape to disguise one's nuzzling of the inviting pale neck of a fair maiden.
Where was I?
Oh yes, that is very much a TVR colour.
Interesting to note the side window arrangement is very similar to the S, square top rear corner and all.
Would a TR6 hood come anywhere close to S dimensions?
Yes the extra little flap on the B post is an excellent idea, unless you're planning to drive at high speed in reverse to evade the aliens
Also what type of fasteners are those black ones on the TR?
Have you seen the time Joe?
I reckon it's time for our Ovomaltine
glenrobbo said:
...Would a TR6 hood come anywhere close to S dimensions?.......
My guess is the length will be about right but it might be too narrow. I'll check the dimensions if the TR6 is still there on my next visit.glenrobbo said:
........Also what type of fasteners are those black ones on the TR?....
Just ordinary Durable Dot pop studs. I could use these on the hood corners as an alternative to the Tenax by using a 2BA screw into the glassed in nut instead of the usual pop-rivet.There's pro & cons for each so glassing in the little nut gives me the option to choose when the hood is being made.
Gassing Station | S Series | Top of Page | What's New | My Stuff