They Said it Couldn't be Done...
Discussion


magpies said:
..Notice I said 'windows' not mirrors -
Apologies, you did indeed. I must have been reading the other thread about mirrors before this one.magpies said:
..I thought the MX5 windows would have the correct shape at the top / rear edge of the glass = more rounded.
Good idea, but would they fit the TVR door at the front? Also, the width across the top of the windscreen on the MX is less than on the 'S'. I'll post up a picture later if I get time.This morning has been spent grinding out the air pockets where I put the layers of matting on too thickly. I did mash everything into the corners but neverthess the matting still bubbled. A steep learing curve with this stuff. You know, with a enough material I reckon you could make a whole car from this GF stuff

Does anyone know where I can get this type of bearing? from in the UK? What's the correct name for these here in the UK? I need two with an 8mm hole in the middle.
Thanks again Phillpot. An odd question for you: have you by any chance go a little bit of stainless tube with an internal diameter of 19mm tucked away in a corner of your garage? I only need two 6.75mm spacers so I don't want to go out and buy a meter or more if I can help it. Many thanks. 
phillpot said:
.... Keep the resin indoors, will go thick if cold...
That's made a difference, it's much more runny now.phillpot said:
....use a "stippling" action. For small areas such as you're doing...
I wanted to use a small roller with the fine finishing material to try and get an even finish and roll out any air pockets. The roller worked well on the flat parts with the thick matting but the resin was too thick to flow properly so I suppose I'll have to do the next step in the kitchen.Thanks for the advice
phillpot said:
... a "proper roller"?
Obviuously not! I used a small foam roller; the type you use for gloss paint. Seemed to work OK though. Final little bit of moulding and shaping on the header rail to form the "ears" which curve back in to fill the space above the quarter-light frame.
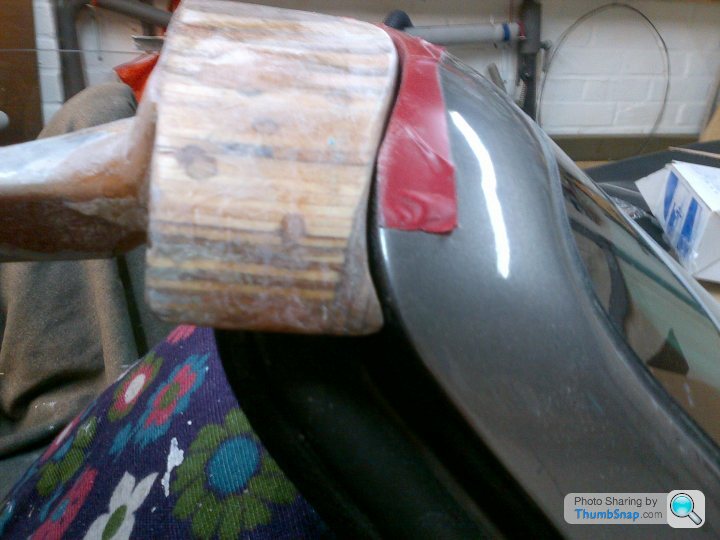

A final layer hopefully!) of tissue matting is now drying so tomorrow's jobs will be to sand it all off for (hopefully!!!!) the last time and paint it.
A final layer hopefully!) of tissue matting is now drying so tomorrow's jobs will be to sand it all off for (hopefully!!!!) the last time and paint it.
I’ve spoken to a couple of trimmers and making the hood is well within their capabilities. A new rear moulding is on order from David Gerald so now the big problems are solved (apart from finding the money to pay for it!) we move on to the smaller problems.
One of these is how to improve the Velcro join between the hood and the body just behind the ‘B’ post and get plenty of tension on the vertical seam of the hood so that it stays in contact with the rear edge of the window glass.
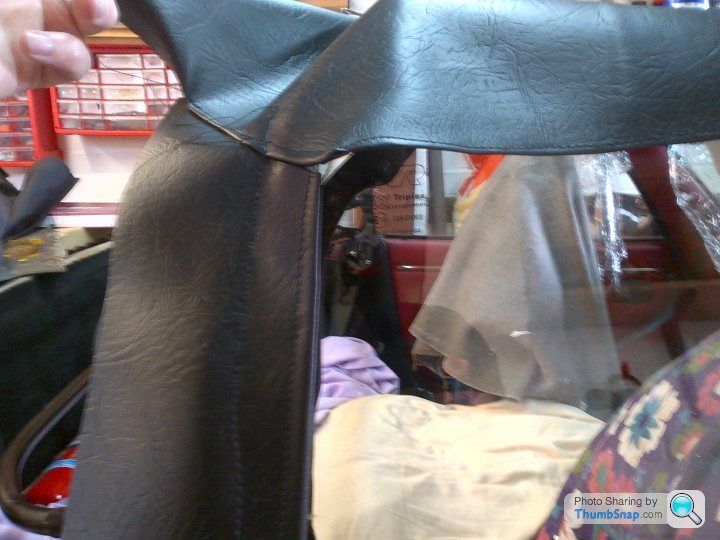
I've always been annoyed by the untidy way the Velcro just flaps over the join between the between outer body and the inside and the way the trim piece/hood seal ends about 200mm short of the ‘B’ post leaving the carpet looking scruffy.
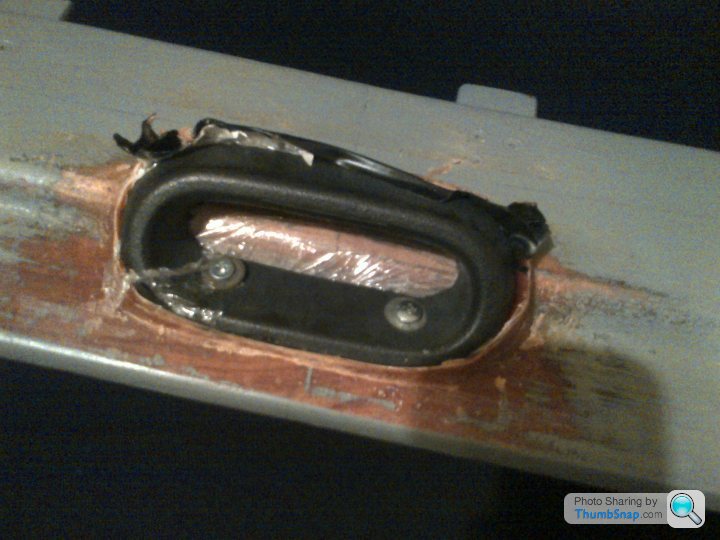
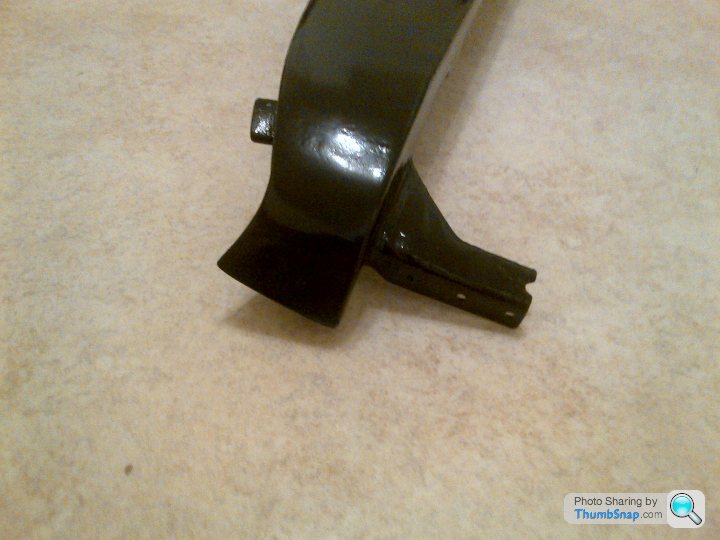
Here’s a possible solution. The metal thing in the picture has been cut and shaped to fill the gap between the end of the hood seal and the ‘B’ post; Velcro has been sewn to a piece of hood fabric (mohair here) and then that has been glued to the metal trim piece which will be screwed or pop-riveted to the tub.
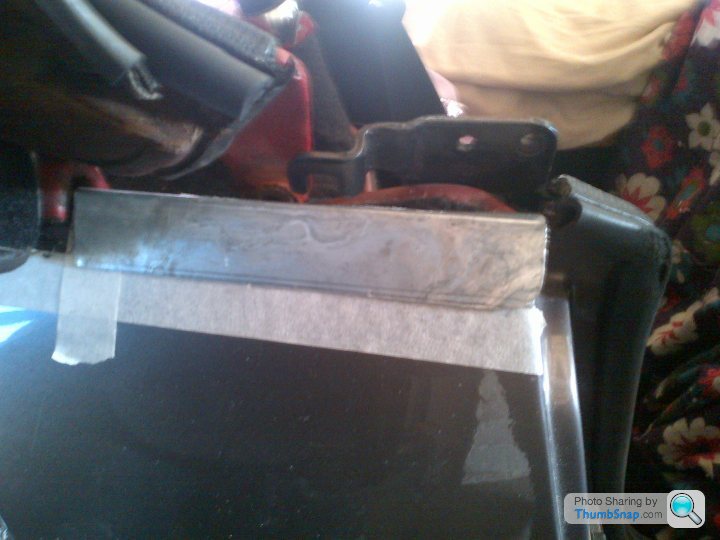

So this gives a nice firm fixing for the velcro which doesn't rely on glue. I will probably also have to fit a stud of some sort to this corner to make sure this seam stays taut. This gives a nice neat finish and a tidy cover for the edge of the carpet.

All ideas still in development at the moment so if you've got any better ones feel free to share
One of these is how to improve the Velcro join between the hood and the body just behind the ‘B’ post and get plenty of tension on the vertical seam of the hood so that it stays in contact with the rear edge of the window glass.
I've always been annoyed by the untidy way the Velcro just flaps over the join between the between outer body and the inside and the way the trim piece/hood seal ends about 200mm short of the ‘B’ post leaving the carpet looking scruffy.
Here’s a possible solution. The metal thing in the picture has been cut and shaped to fill the gap between the end of the hood seal and the ‘B’ post; Velcro has been sewn to a piece of hood fabric (mohair here) and then that has been glued to the metal trim piece which will be screwed or pop-riveted to the tub.
So this gives a nice firm fixing for the velcro which doesn't rely on glue. I will probably also have to fit a stud of some sort to this corner to make sure this seam stays taut. This gives a nice neat finish and a tidy cover for the edge of the carpet.
All ideas still in development at the moment so if you've got any better ones feel free to share
Edited by v8s4me on Thursday 15th January 21:27
Alan Whitaker said:
...before I can return to the soft top...
Are you sticking with the standard targa & hood set-up or going to try something different? Have you got some MX5 windows in the back of your garage? 
Alan Whitaker said:
...Have a few ideas for a hard top with Glass removable panels, like the 300z and Rover Tom Cat. Alan
Sounds interesting. Something like a Porshce Targa maybe?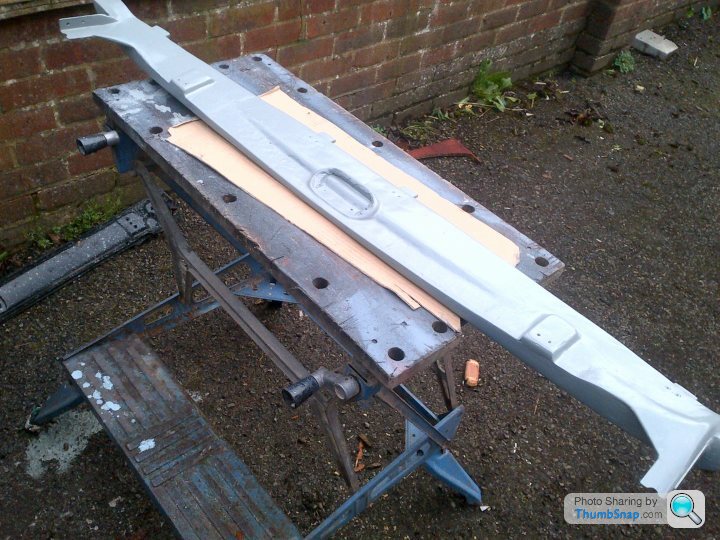
magpies said:
...I quite fancy something along these lines if I can find a local company...
That shouldn't be too difficult. Phillpot's sister could probably run that up. I'd be looking for a better solution to the join between the roll-bar and the cover though to keep the water out.Edited by v8s4me on Sunday 18th January 17:14
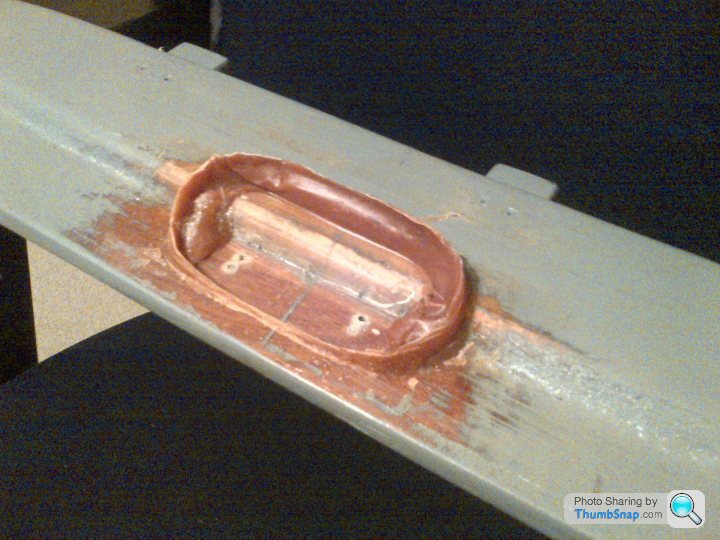
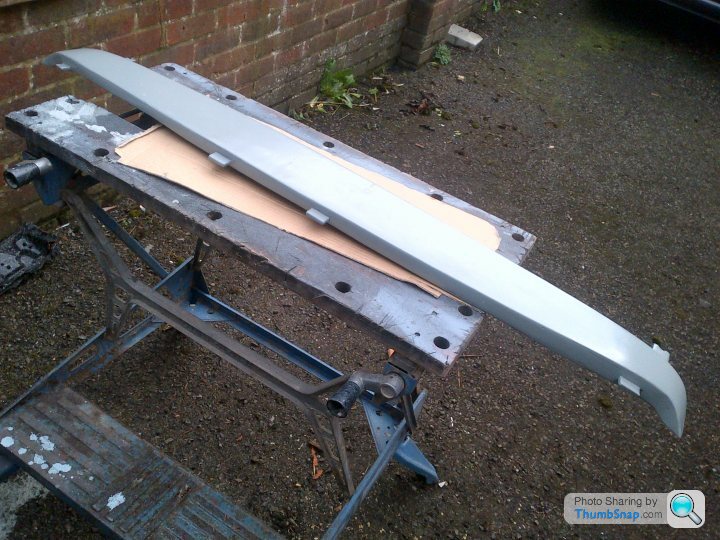
Finally! one header rail.....
....ready for fitting to the folding frame. I can then start a few more experiments with how the hood fabric might be fitted around the window. So bumpity bump.
....ready for fitting to the folding frame. I can then start a few more experiments with how the hood fabric might be fitted around the window. So bumpity bump.
phillpot said:
.............and a rear moulding ..
Many thanks Phillpot ..This came from David Gerald in case anyone needs one.
Once I've got this in place I can start working on positions of the side window seals and where to position the rear window so it won't get snagged or torn when folded.
I've booked the car in with a local trimmer for the 19th April so that's the deadline for sorting out all the little details, some of which I don't even know about yet, and won't until I start trial fitting some pieces of vinyl. The plan is to work with the trimmer between now and April on solving the fiddly details so when he gets it into the workshop he can crack on.
The two interior lights arrived this morning. Unfortunately the larger one with the on/off switch is too big so unless I can find a slimmer one the Audi sun-visor light will be going into the moulding Phillpot has picked up for me.
Thanks to Phillpot for his hospitality last night. Although being made to stay up to 2am polishing stainless steel components was a bit excessive
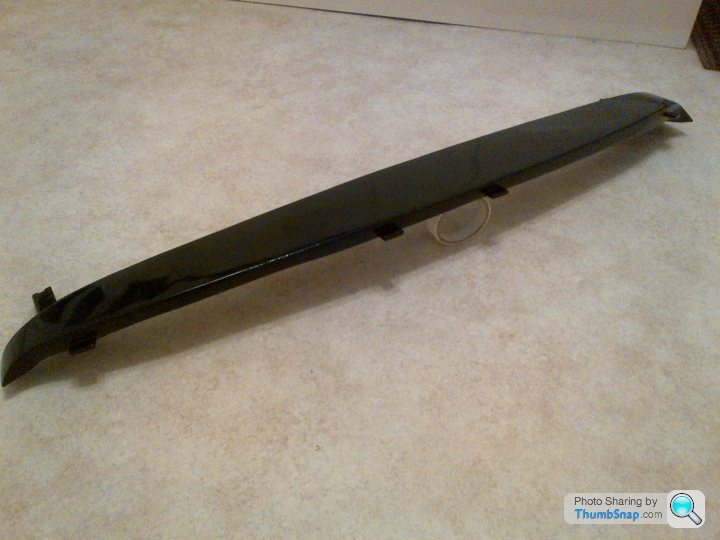
Unfortunately the hood rail is far from what I was expecting. The original part is on average 6mm thick all over where as the one I have here is significantly less than that so I don't think as it stands it will have the rigidity to hold the hood taut. As many of you will know, the hood rail is held to the body by three M6 bolts and washers which are recessed into the glass fibre so that the bolt heads don't foul the hood material. Obviously with the moulding being just the thickness it is that isn't going to work. I've left a meggage and hopefully we'll find a resolution tomorrow. Hopefully this resolution won't involve another 210 mile round trip
Unfortunately the hood rail is far from what I was expecting. The original part is on average 6mm thick all over where as the one I have here is significantly less than that so I don't think as it stands it will have the rigidity to hold the hood taut. As many of you will know, the hood rail is held to the body by three M6 bolts and washers which are recessed into the glass fibre so that the bolt heads don't foul the hood material. Obviously with the moulding being just the thickness it is that isn't going to work. I've left a meggage and hopefully we'll find a resolution tomorrow. Hopefully this resolution won't involve another 210 mile round trip
Gassing Station | S Series | Top of Page | What's New | My Stuff