What I've been doing in the garage today
Discussion


That puts that one to bed then, thanks Mike.
A collection of silicone hoses, bushes and shiny nuts and bolts, theres a new radiator somewhere too but it wouldn't fit in there
So what do we think about those outriggers? Obviously they're not going to get any better by themselves. Will a body lift be enough to get at everything? If welding is required do people do home visits?
LawrieS said:
Good evening all, thanks for your responses.
I'll be sending my brake pipes off to Stevsons so if anyone else wants to take a punt at theirs being the same as mine then now might be a good time to order, they seem to want a set to copy, however, I've seen previously that the kits are five pieces, but I count six, two each side up front and one each side at the rear?
braided?...Just thinking that now on mine. - Did you go for the modification mentioned of having a single hose per front assembly as mentioned? ...can someone remember if this has the issue of all metric fittings except at one end of the hose on the back?-- how much are they charging?I'll be sending my brake pipes off to Stevsons so if anyone else wants to take a punt at theirs being the same as mine then now might be a good time to order, they seem to want a set to copy, however, I've seen previously that the kits are five pieces, but I count six, two each side up front and one each side at the rear?
Hi Andy, I haven't sent anything off to them yet, thinking of going for the long ones up front though, anyone done this and have a recomended length?
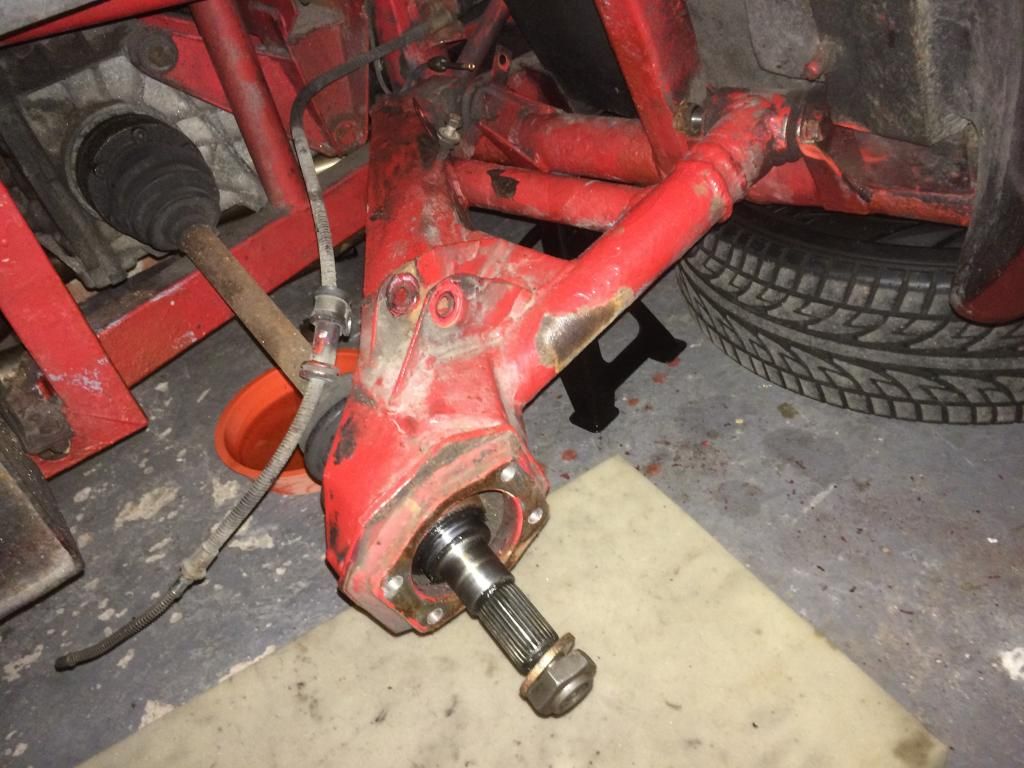
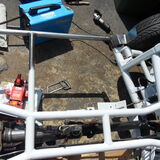
Tonight I have finished removing the front suspension, and managed to get the ARB out without any construction work.
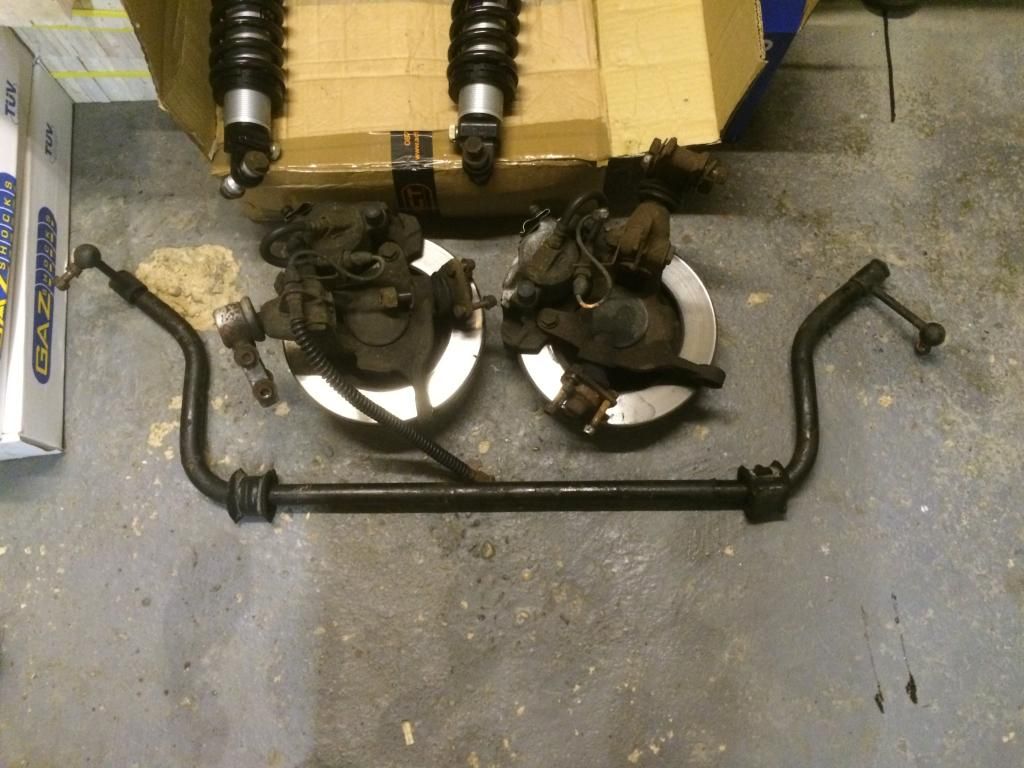
Wishbones ready for de-bushing tomorrow, looks like they have poly bushes in already but i've bought new ones now
Removed the cold air feed pipes, wheel arches and the lower steel coolant pipe. Think I may go for the stainless versions from ACT. Not bothered about replacing the air feed pipes, does anywhere sell grommets to fill the holes?
Had a quick read of TVRgits site today and think a body lift is the way forward for this.
Tonight I have finished removing the front suspension, and managed to get the ARB out without any construction work.
Wishbones ready for de-bushing tomorrow, looks like they have poly bushes in already but i've bought new ones now
Removed the cold air feed pipes, wheel arches and the lower steel coolant pipe. Think I may go for the stainless versions from ACT. Not bothered about replacing the air feed pipes, does anywhere sell grommets to fill the holes?
Had a quick read of TVRgits site today and think a body lift is the way forward for this.
phillpot said:
You'd have to be pretty damn sure the top car had no oil leaks!
Integral garage, could I take the floor out so the top car ends up in the spare bedroom
Mine came with drip trays as the pre war car on top has plenty of oil leaks. I also have an integral garage, but she who must be obeyed would not let me end up with the car in the spare room, strange woman. Integral garage, could I take the floor out so the top car ends up in the spare bedroom
Edited by phillpot on Thursday 20th November 23:06
Luckily the joists ran the right way, so I did cut a hole in the garage ceiling for my windscreen to poke through with the hood down, which gave me another few vital inches of clearence. Although the car underneath is only 40.5 inches high so 2 tvr's probably wouldn't fit in any case
Nick
Edited by Nick Brough on Saturday 22 November 06:16
phillpot said:
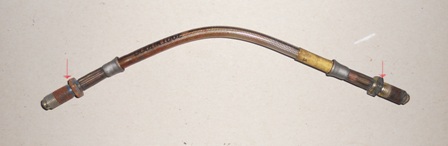
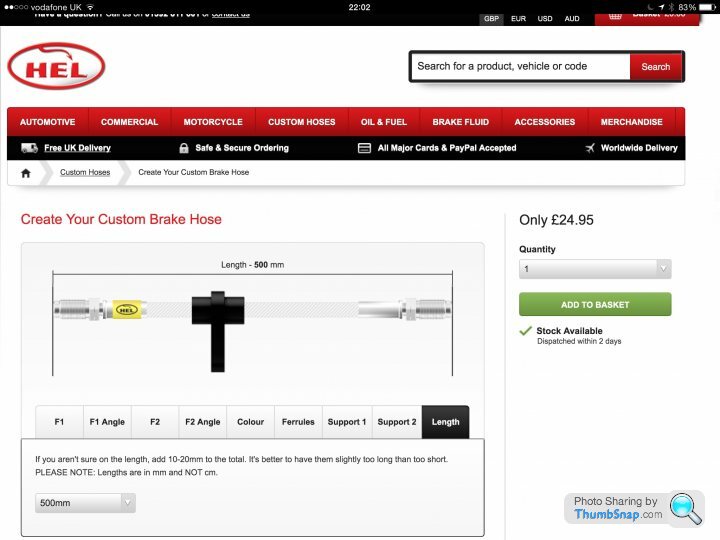
500mm from arrow to arrow (that's not the right one in the photo).
...that's what I estimated for my basic calcs and measurements ....one hose supplier can put a rubber grommet on for going thru a mount, and it seemed that this might work using the hole left when the copper pipe between the old two front hoses are...could be useful support/guide.....anyone doe this or just left your 500mm blow in the wind... 
Edited by AutoAndy on Saturday 22 November 19:57

phillpot said:
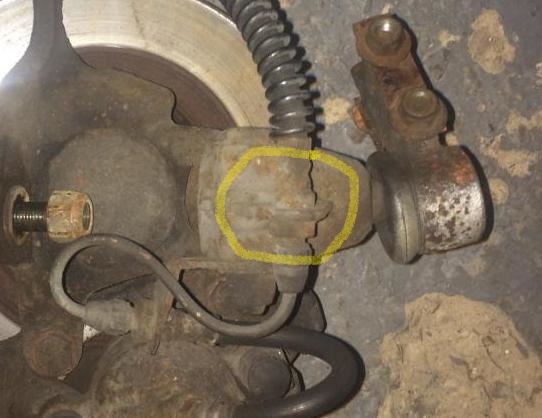
Yes, that works as a perfect guide but hole is not big enough to pass hose through. I cut mine, bent it "open" put pipe through then bent it closed again.
How much do Stevensons charge...these guys look good......bit like "build-a-bear", but the choice of Ferrell is a bit daunting...
Sorry to hi-jack the thread
Edited by AutoAndy on Saturday 22 November 22:14
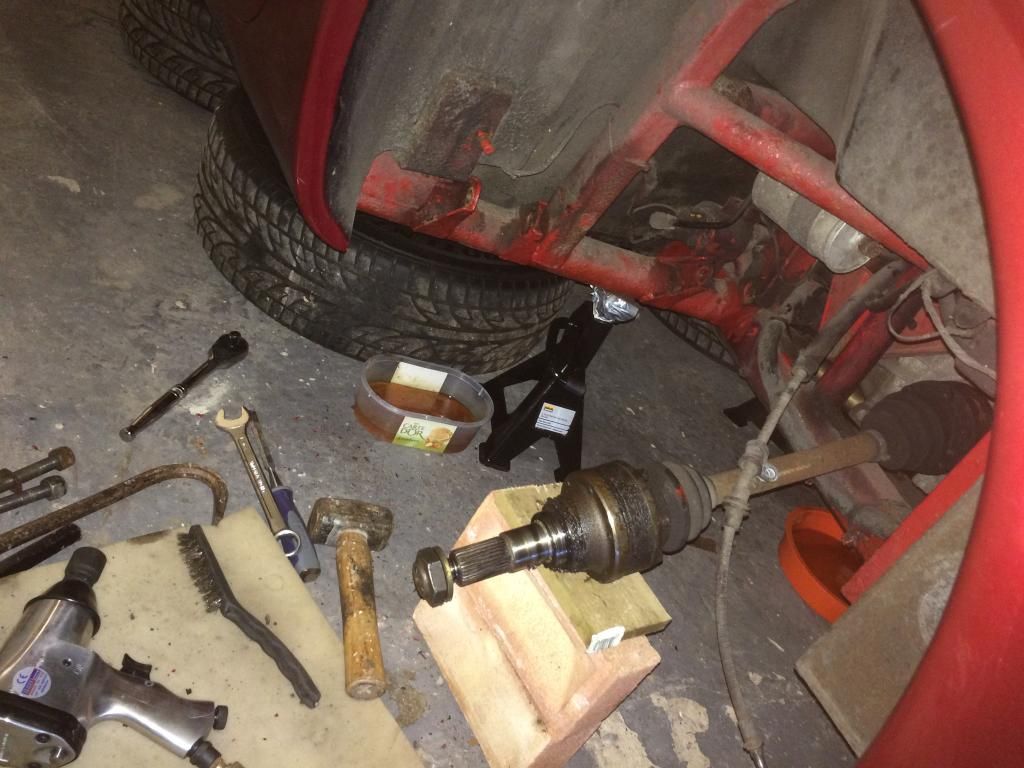
Today I have de-bushed the wishbones, they did have poly ones in already so came out easy enough though a couple seem to have been sitting at a slight angle so don't look too good. The uppers were fine and they're all free to a good home if anyone wants them?
Other than that nothing much to report, left the rear brakes draining, realise now that they should've been done at the same time as the fronts, the rear hoses will be removed and sent off to stevsons tomorrow. Thanks to whoever painted the chassis with the brake lines in place, they took a fair bit of oomph to get them off
The other newbie mistake I've discovered today was not opening the boot before disconnecting the battery...
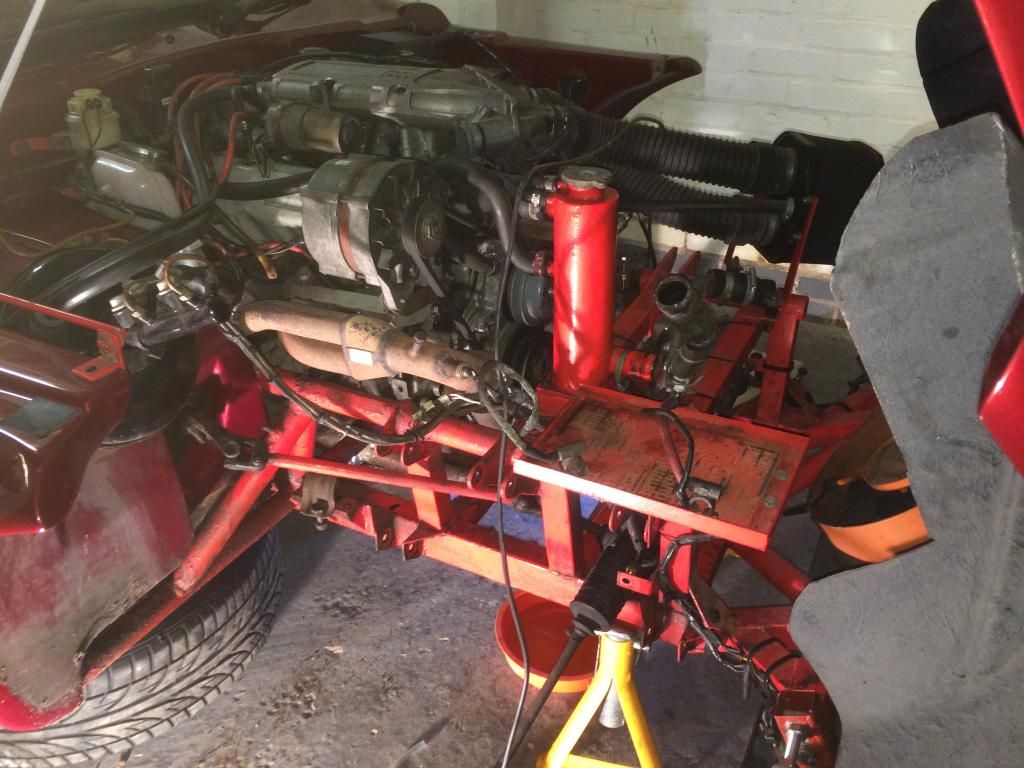
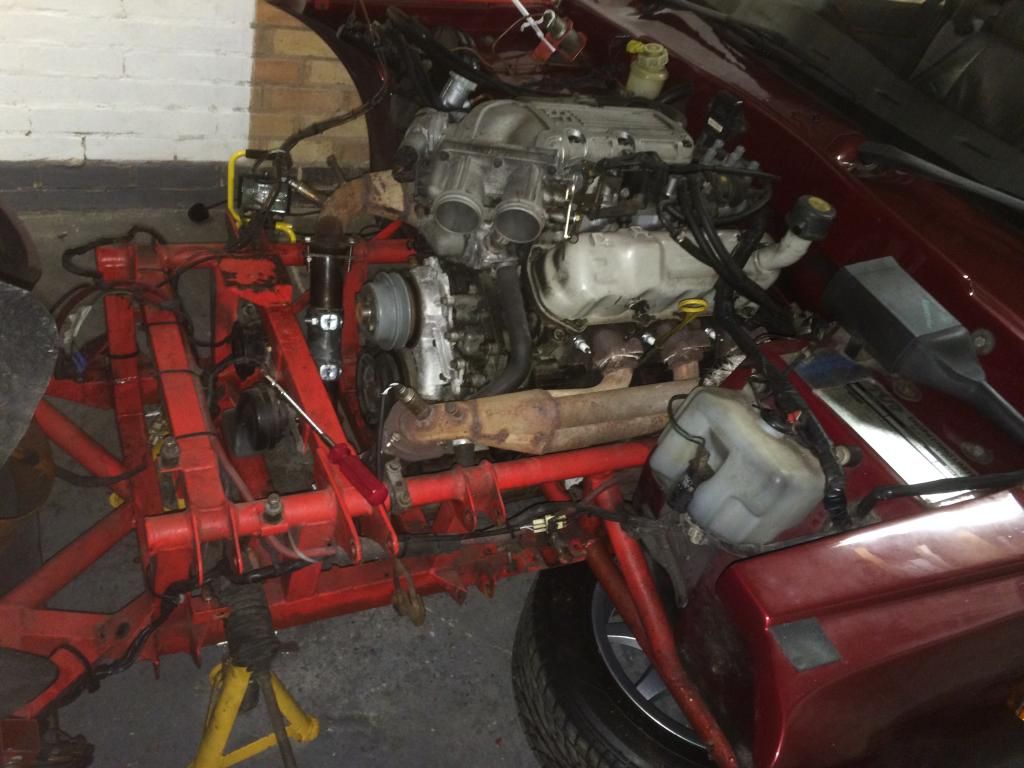
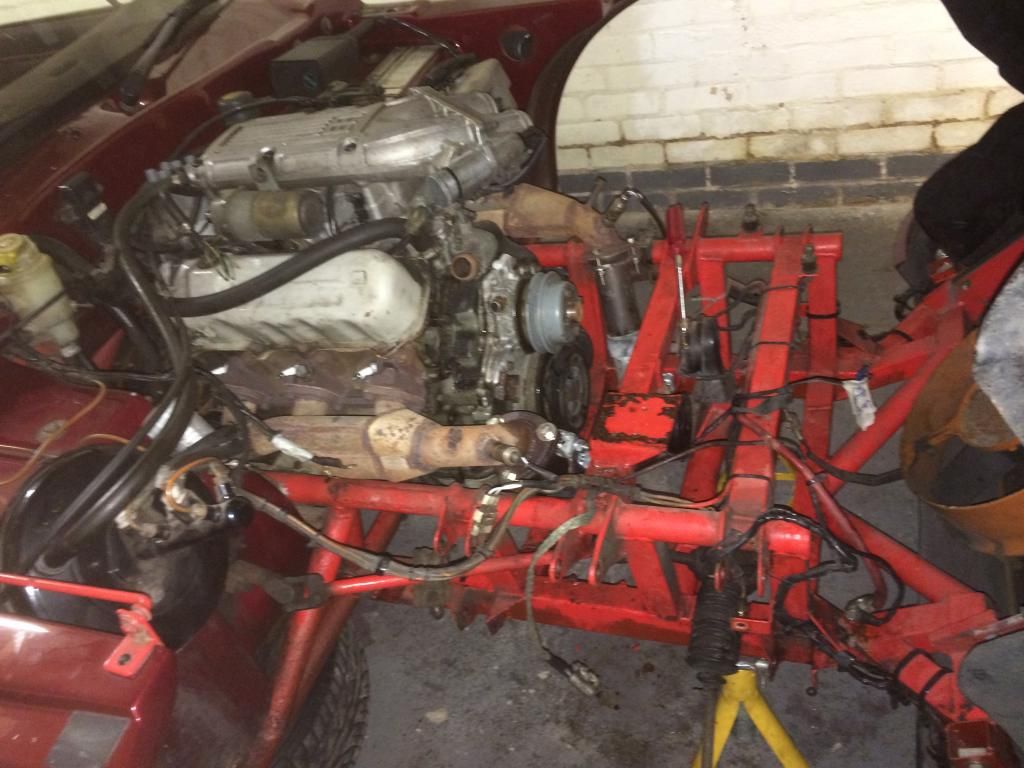
Started stripping the engine bay ready for tappet adjustment, removed the swirl pot and expansion tank in anticipation of a shiny replacement. I must say the engine is a dream to work on with the suspension out of the way and the bonnet right up!
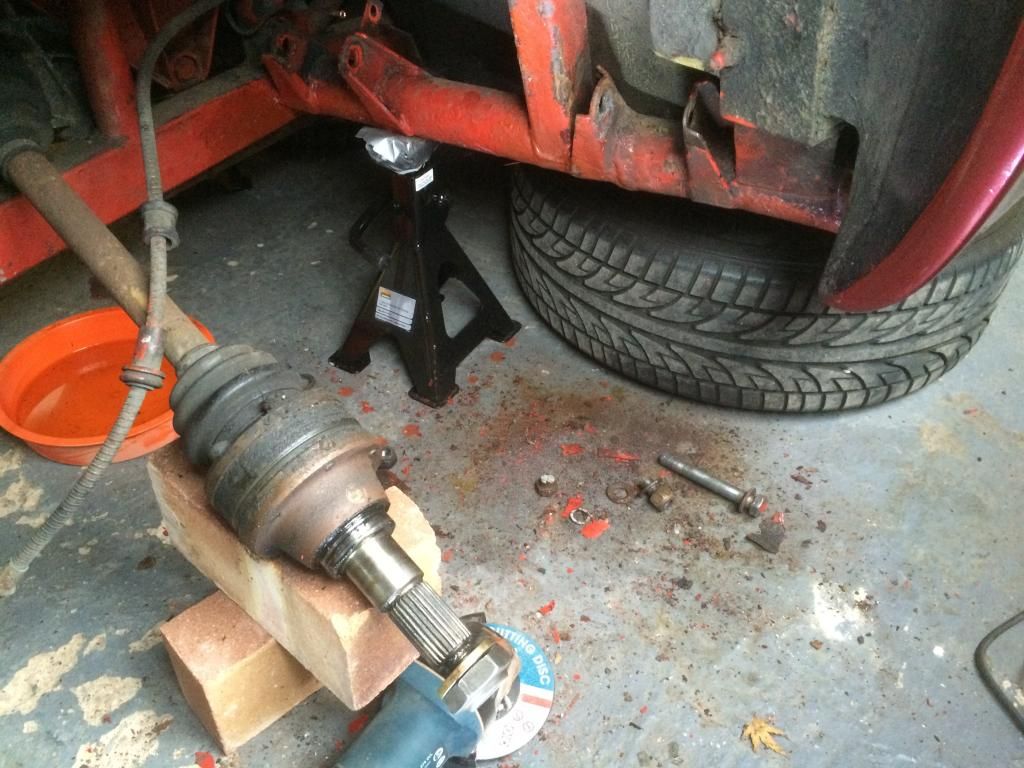
Hadn't quite done enough reading up on rear trailing arm removal so i'll be looking for the special hub socket tonight, my neighbour says he has a large breaker bar.
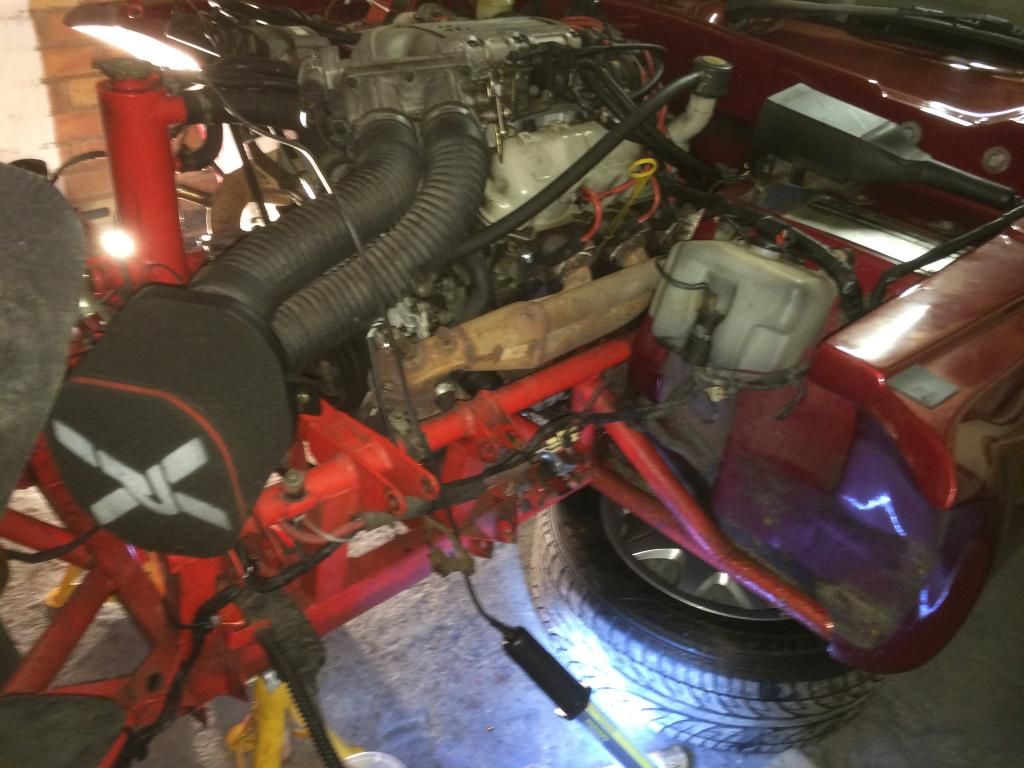
Not sure what my de-cat pipes are all about but I think I'll get those off this week and have some straight forward stainless pipes made up.
Other than that nothing much to report, left the rear brakes draining, realise now that they should've been done at the same time as the fronts, the rear hoses will be removed and sent off to stevsons tomorrow. Thanks to whoever painted the chassis with the brake lines in place, they took a fair bit of oomph to get them off
The other newbie mistake I've discovered today was not opening the boot before disconnecting the battery...
Started stripping the engine bay ready for tappet adjustment, removed the swirl pot and expansion tank in anticipation of a shiny replacement. I must say the engine is a dream to work on with the suspension out of the way and the bonnet right up!
Hadn't quite done enough reading up on rear trailing arm removal so i'll be looking for the special hub socket tonight, my neighbour says he has a large breaker bar.
Not sure what my de-cat pipes are all about but I think I'll get those off this week and have some straight forward stainless pipes made up.
Update...
Now the owner of a set of imperial spanners, harder to find in a local shop than you may think!
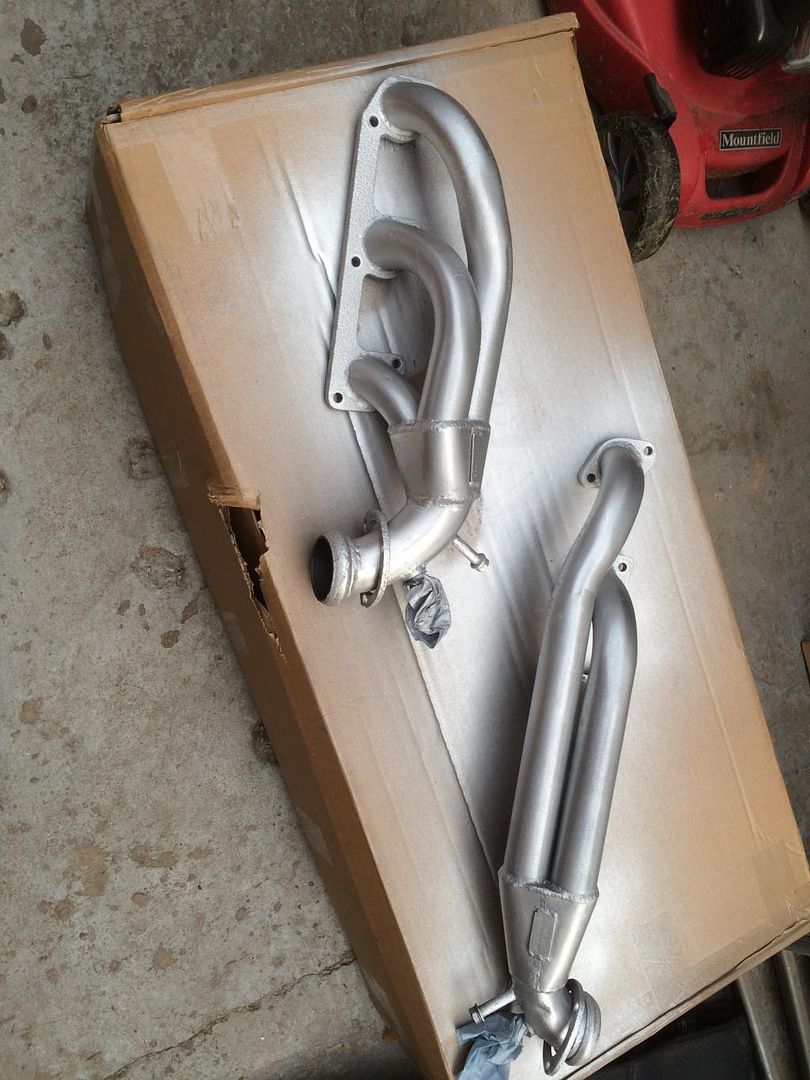
Manifolds off, one side had stainless bolts and came out really easily, other took a bit more persuasion. I thought that stainless were a no go for manifolds?
Hub nuts, surprisingly easy. Took some time to fathom out the drums.
Had enough of huffing and puffing for one day so gave up on the bolts which attach the trailing arms to the chassis, after I managed to find them under a few coats of paint, gave them a good wire brush and left them soaking in plusgas.
Now the owner of a set of imperial spanners, harder to find in a local shop than you may think!
Manifolds off, one side had stainless bolts and came out really easily, other took a bit more persuasion. I thought that stainless were a no go for manifolds?
Hub nuts, surprisingly easy. Took some time to fathom out the drums.
Had enough of huffing and puffing for one day so gave up on the bolts which attach the trailing arms to the chassis, after I managed to find them under a few coats of paint, gave them a good wire brush and left them soaking in plusgas.
LawrieS said:
Update...
Now the owner of a set of imperial spanners, harder to find in a local shop than you may think!
Shouldn't be much Imperial, wishbone pivot bolts are 1/2" = 3/4af spanner = 19mmNow the owner of a set of imperial spanners, harder to find in a local shop than you may think!
LawrieS said:
Had enough of huffing and puffing for one day so gave up on the bolts which attach the trailing arms to the chassis
Good luck with them, they may (or may not) just knock out 


Lawrie 1 - 1 TVR
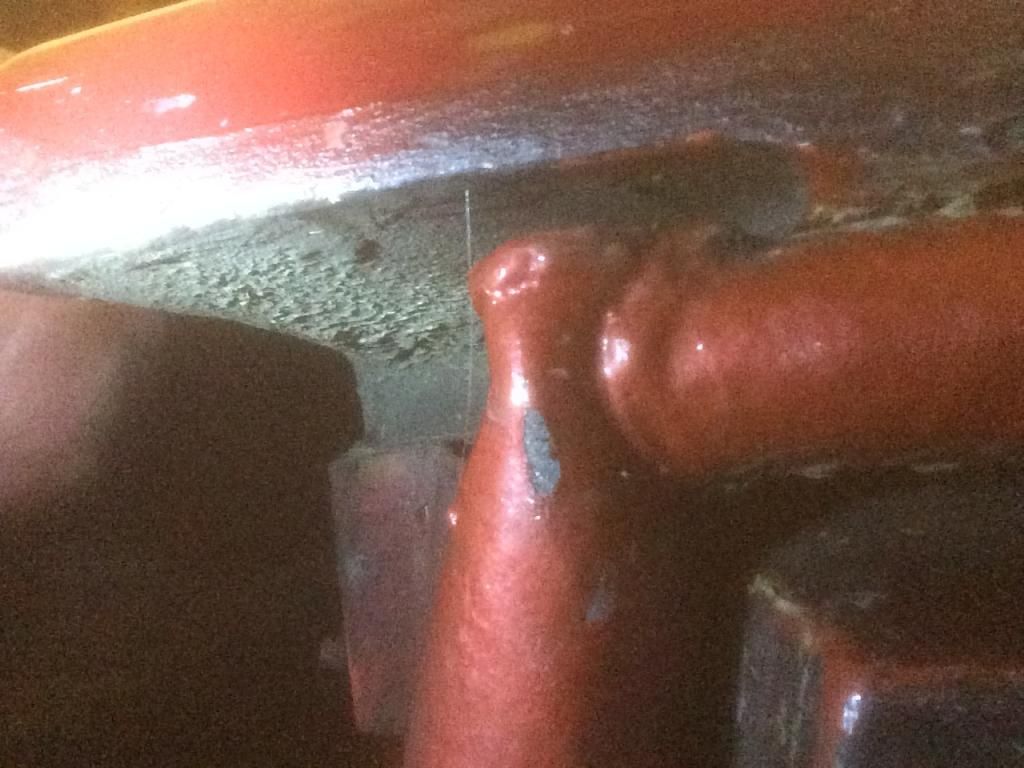
Nearside trailing arm off, which looked to be the worst.
Offside I managed to get the inner bolt free but gave up on the other post hernia. The nuts off but I just can't get the bolt to shift.

There was loads more clearance on the nearside allowing me to get a socket on but the body mounting plate/bracket is obstructing the nearside mounting, not sure why.

I'll have another go tomorrow but it may be easier with the body off.
Why on earth?

Nearside trailing arm off, which looked to be the worst.
Offside I managed to get the inner bolt free but gave up on the other post hernia. The nuts off but I just can't get the bolt to shift.
There was loads more clearance on the nearside allowing me to get a socket on but the body mounting plate/bracket is obstructing the nearside mounting, not sure why.
I'll have another go tomorrow but it may be easier with the body off.
Why on earth?
Lawrie,
Not sure if you/previous owner have done a mod the seatbelt reel mount but a little alarmed to see that you don't seem to have the chassis plate that it bolts through. When I did the body off attack of my S3, these just crumbled as soon as I unbolted the seat belt but yours are non-existent!
Great photos, keep up the work.
Mark.
 (or just c**p computer screen is a term I prefer), Just looked a little closer and they are there fully preserved which is good as they are a real sod to get the bends right to mate with the body on rebuild.
Thanks Mark, had me worried then
Shouting, swearing, religious ceremonies offering knuckle skin, fags, coffee, plusgas and beer and still no movement. Hacksaw tomorrow.
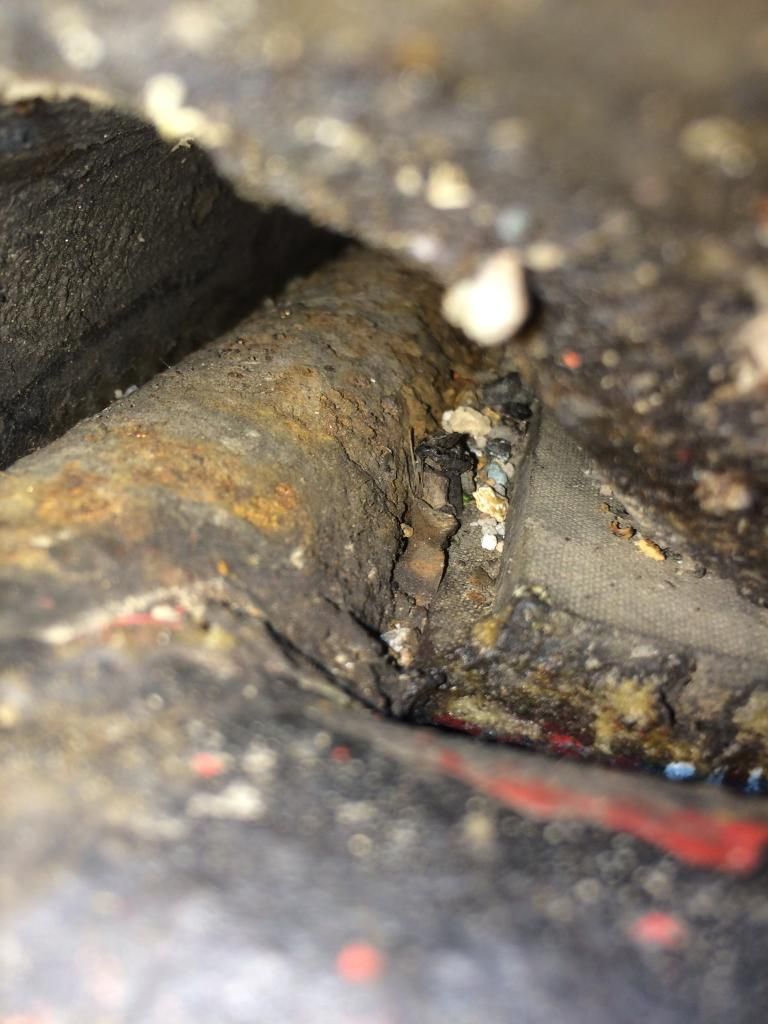
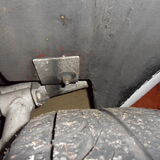
It's all not quite right though, this shot from the ground up shows the corner of outrigger has a bit of a dent. I'm guessing the seatbelt mount has been replaced after an 'incident' and helpfully obstructing access to the bolt. Even if I get it free I don't think I'll be able to get it out.
Obstuction
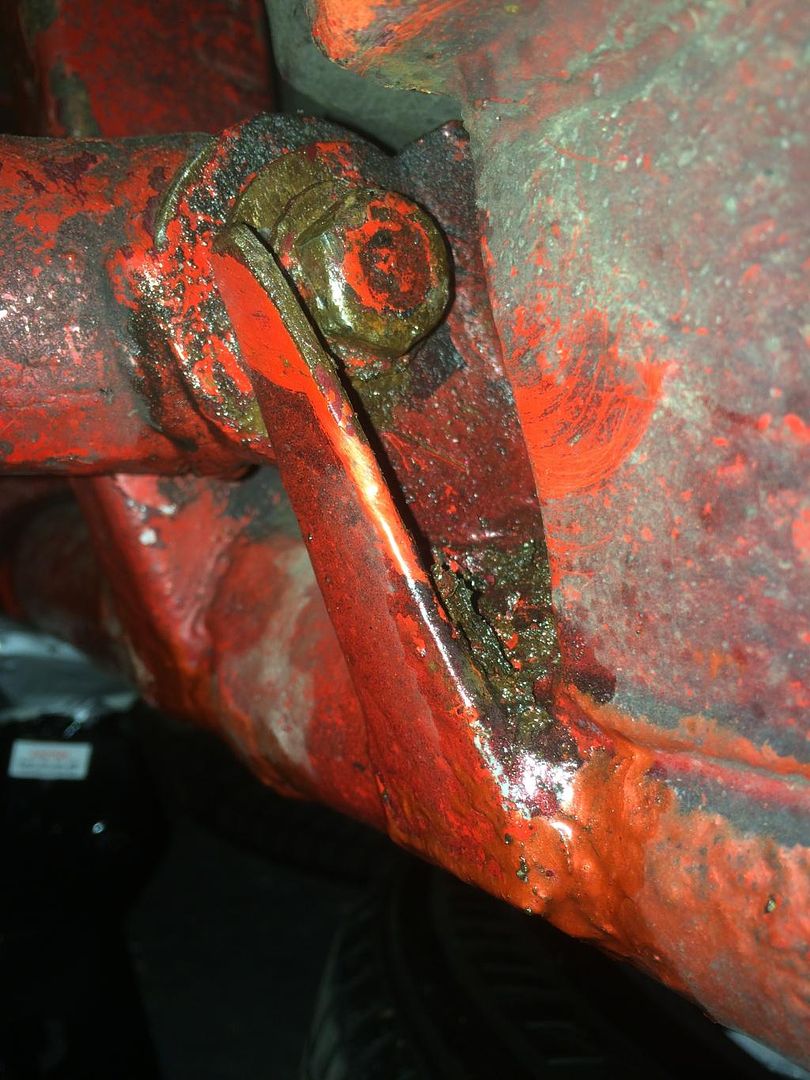
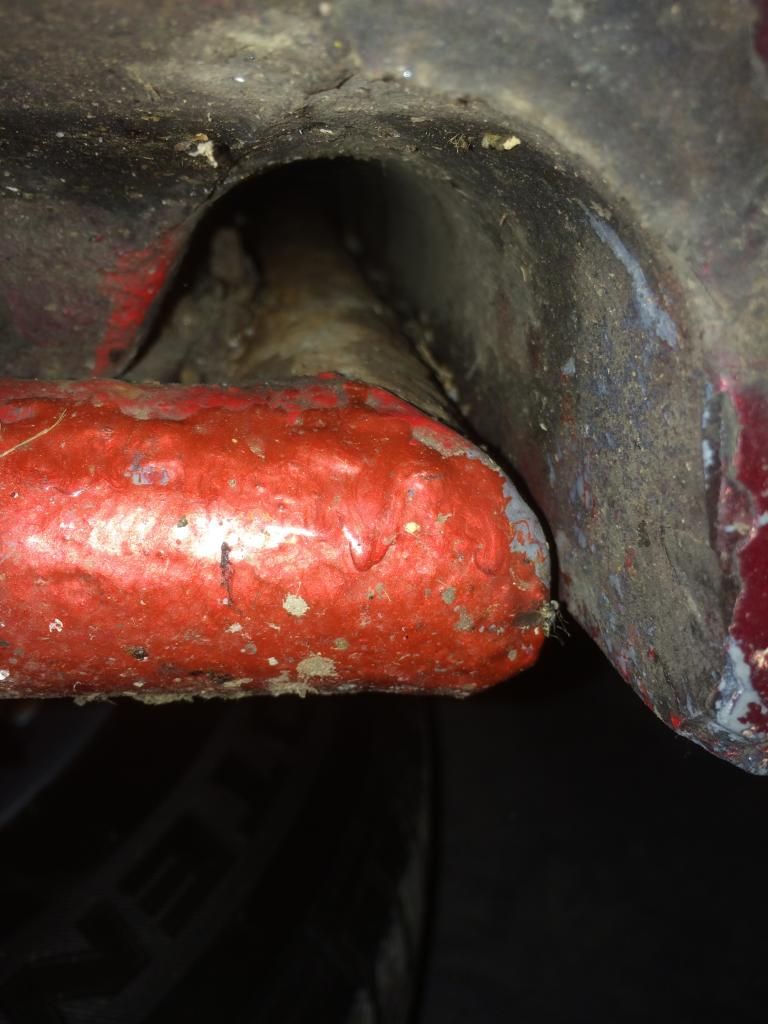
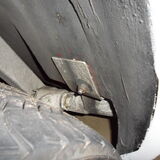
And from the wider angle, the bolt on seatbelt mounting looks to be in the wrong place to me?
I'll cut it out and re-asses the situation with the body off.
Shouting, swearing, religious ceremonies offering knuckle skin, fags, coffee, plusgas and beer and still no movement. Hacksaw tomorrow.
It's all not quite right though, this shot from the ground up shows the corner of outrigger has a bit of a dent. I'm guessing the seatbelt mount has been replaced after an 'incident' and helpfully obstructing access to the bolt. Even if I get it free I don't think I'll be able to get it out.
Obstuction
And from the wider angle, the bolt on seatbelt mounting looks to be in the wrong place to me?
I'll cut it out and re-asses the situation with the body off.
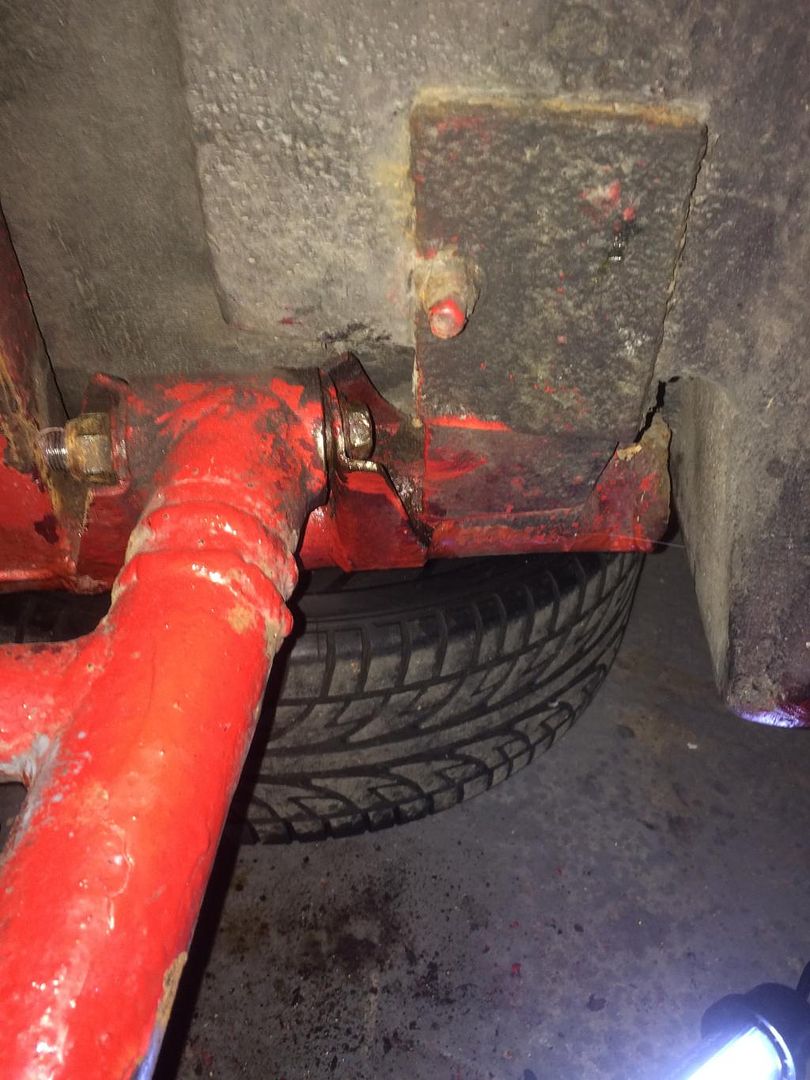
Finally got the trailing arm off
As expected, it's impossible to get a bolt in with the body mounting bracket where it is so that will have to be adjusted/replaced.
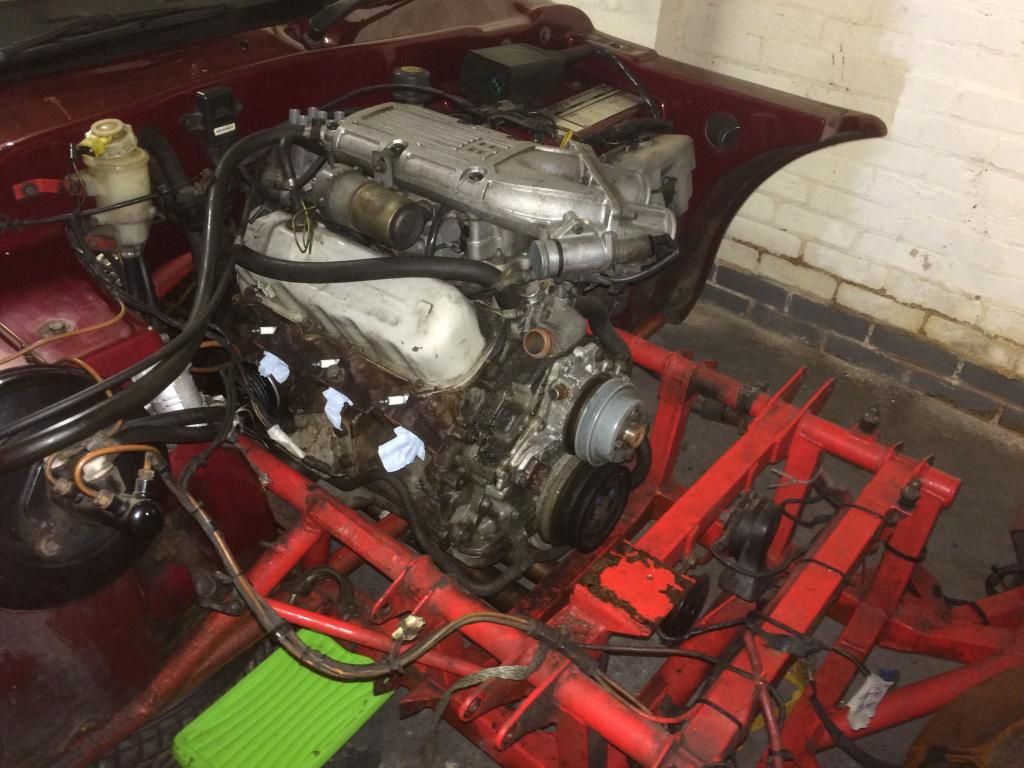
Fed up of spanners and sockets so decided to give the manifolds a lick of paint before packing up for the day.
Looking forward to a delivery of shiny bits tomorrow
As expected, it's impossible to get a bolt in with the body mounting bracket where it is so that will have to be adjusted/replaced.
Fed up of spanners and sockets so decided to give the manifolds a lick of paint before packing up for the day.
Looking forward to a delivery of shiny bits tomorrow
Gassing Station | S Series | Top of Page | What's New | My Stuff