What I've been doing in the garage today
Discussion


Thanks for the heads up on the boot strut bolt Glen, that hadn't been causing a problem but would have done the further up it got.
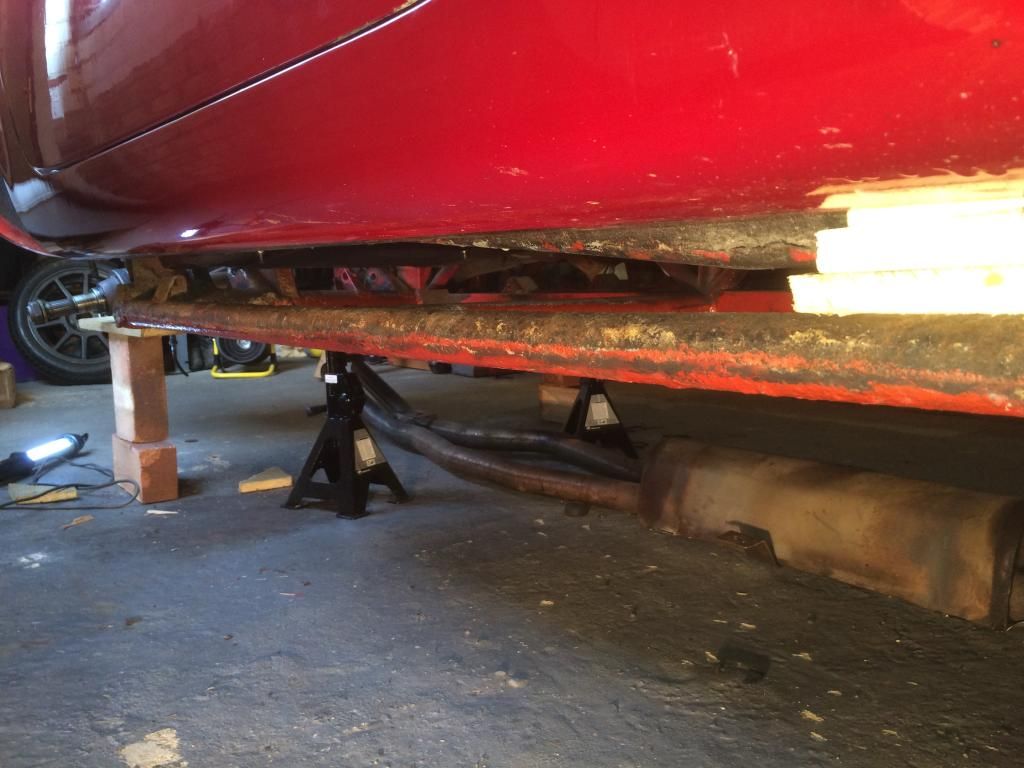
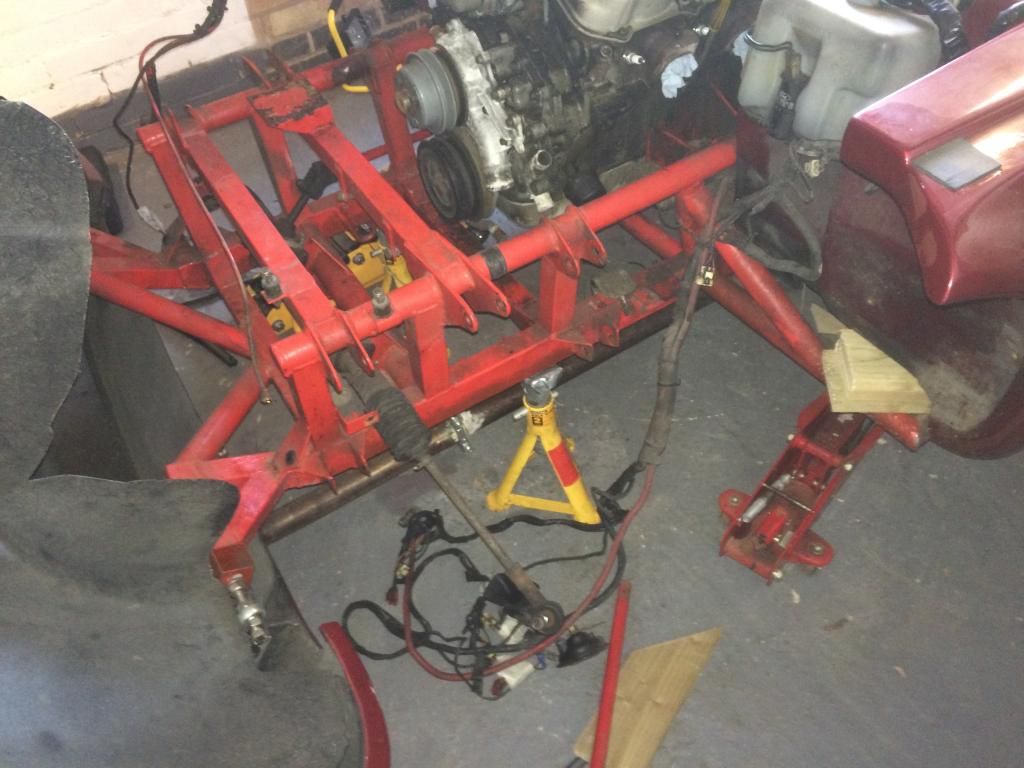
Lowered the front back down and went for it at the back, precision seems to be key, a couple off mm at a time on each side. Also think my garage floor isn't quite level causing the chassis to lift ever so slightly off the axle stands when the body weight was lifted off, at this point before I was stopping.
Hopefully this is enough room to get everything done, it may go higher still but I think I'll settle with this, one of the fuel hoses at the rear was getting a bit tight.
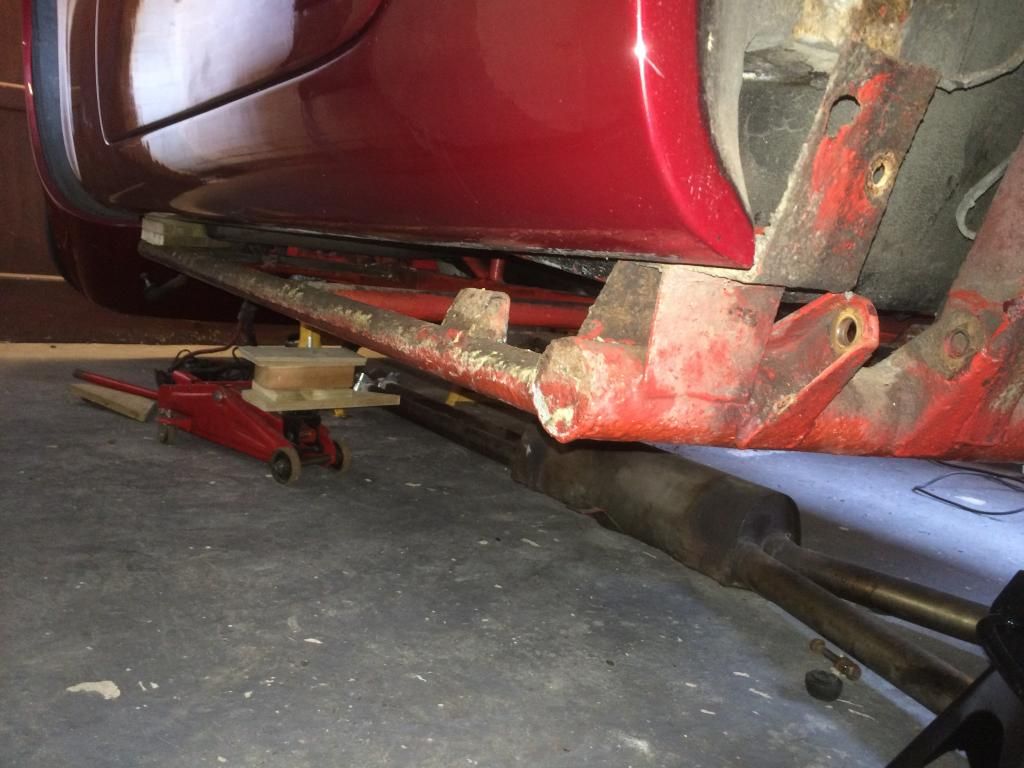
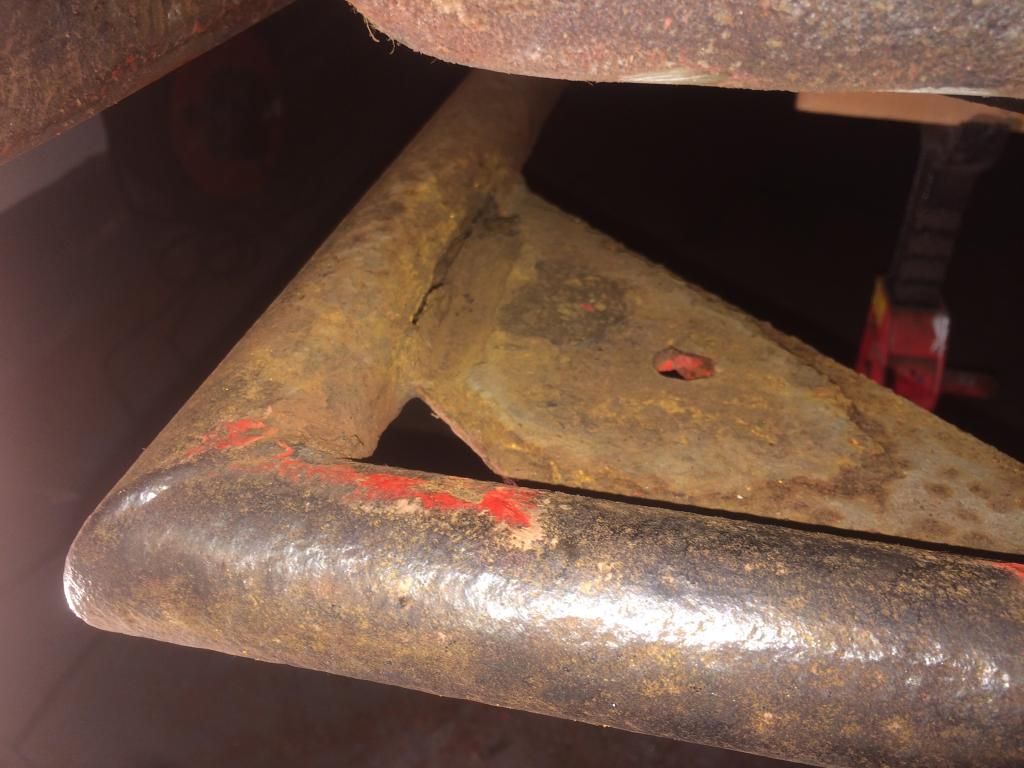
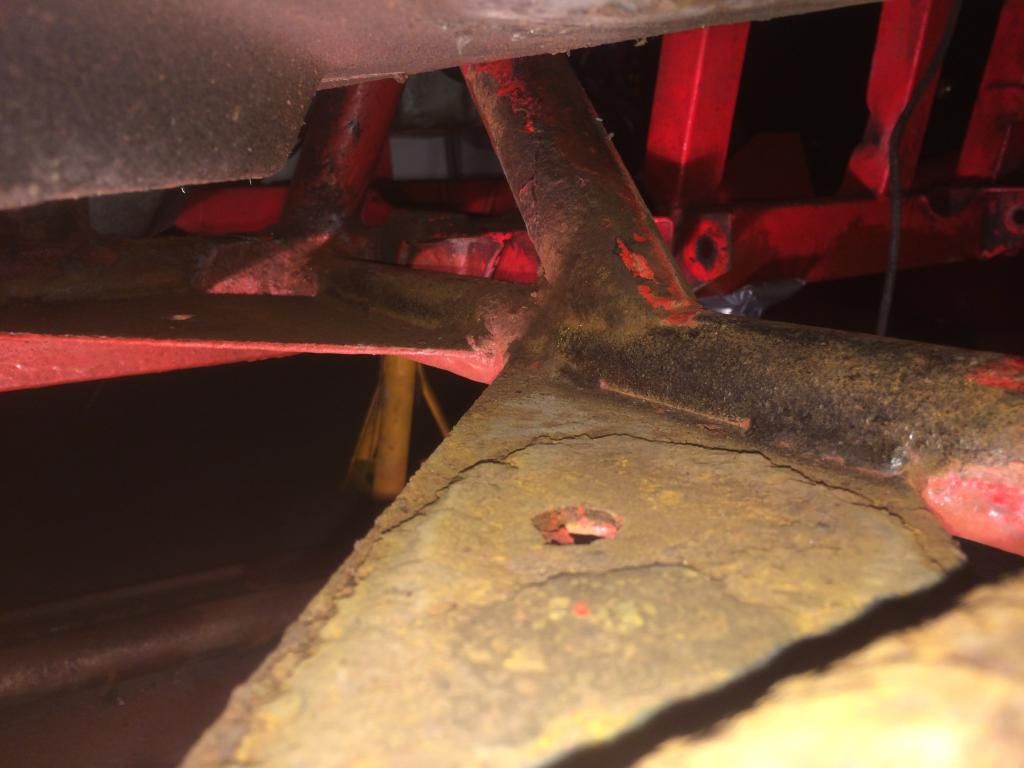
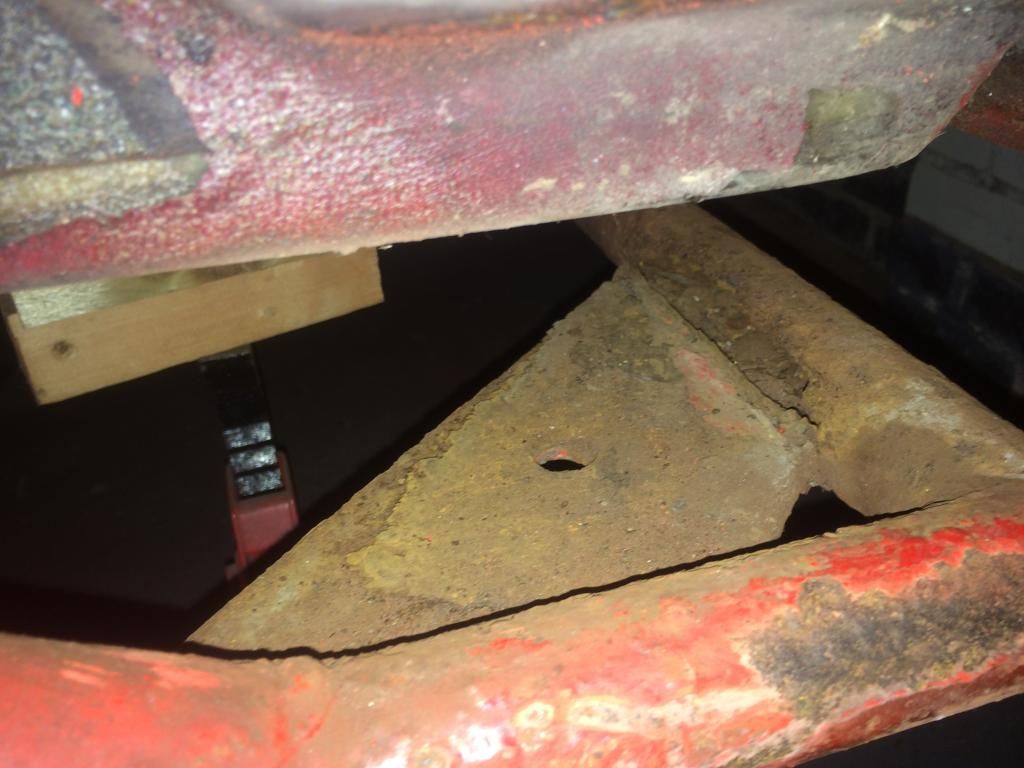
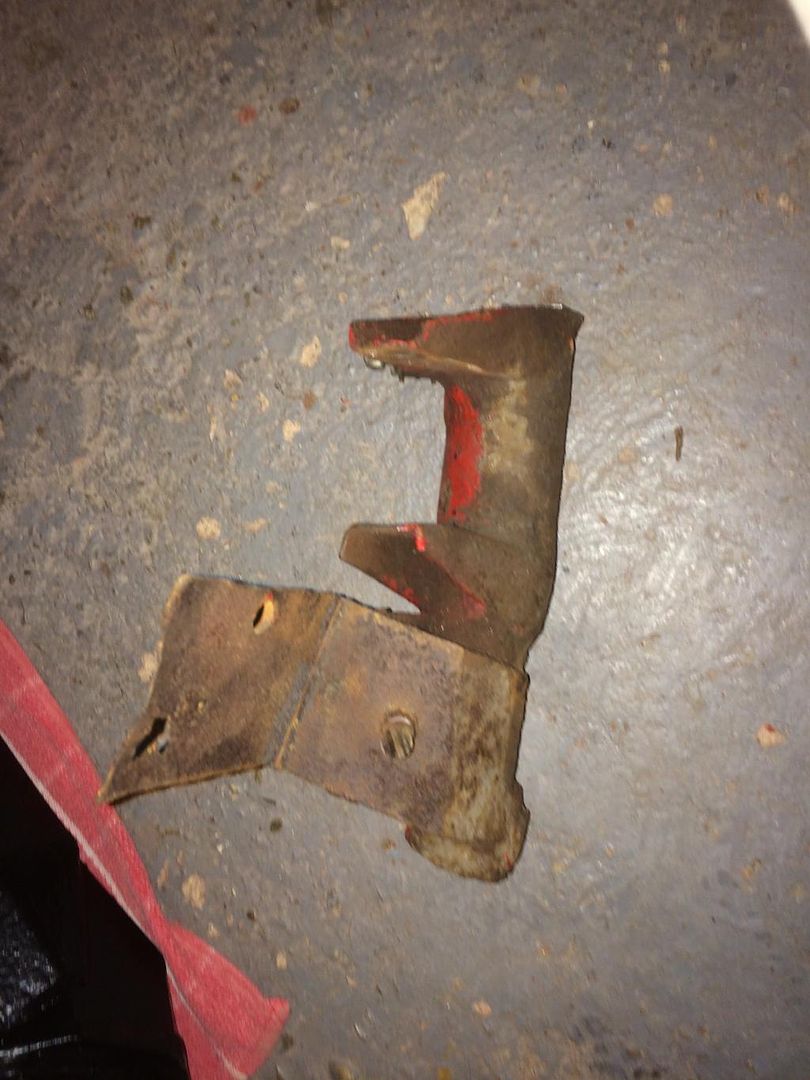
Damage can be seen here. Is it possible to buy the trailing arm hangers ready made?
Stripped the loom out of the engine bay and removed the fan/radiator bracket.
Feel like I've reached a milestone now I can start putting things right, big thanks again to everyone for all of the advice I couldn't have done it without you

LawrieS said:
Damage can be seen here. Is it possible to buy the trailing arm hangers ready made?
My worry would be getting the geo's right when it's been put straight/altered,
maybe if you can line through from the un damaged side or compare lengths, angles, heights of the outriggers, struts, hangers etc.
If you want any bits made up, welding etc let me know

greymrj said:
Hi LawrieS, sorry but I am not clear whether it is the brackets or the tube which is worrying you. It looks as if the 'damage' you refer to is holes in the brackets which have opened out? Or are the brackets badly rusted?
Looks like the horizontal stay that picks up the trailling arm hangers has been pieced up part way along.glenrobbo said:
 Well done Lawrie.
I reckon you deserve to reward yourself this evening!
But have a nice drink of milk first

How do the outriggers look on the inside top of each corner?
Edited by glenrobbo on Wednesday 31st December 15:07
Milk? As in cheese? With wine?
magpies said:
Well done.
Adrian will hopefully be along to confirm how to sort the trailing arm locating tube.
Adrian has my trailing arms at the moment, I suppose the amount of work required will become clear when I can offer the repaired one up to the chassis. Which reminds me I need to get a set of bushes sent off to him...Adrian will hopefully be along to confirm how to sort the trailing arm locating tube.
Alan461 said:
They should be easy enough to fabricate from scratch if you find them unavailable.
My worry would be getting the geo's right when it's been put straight/altered,
maybe if you can line through from the un damaged side or compare lengths, angles, heights of the outriggers, struts, hangers etc.
If you want any bits made up, welding etc let me know
My plan is to get my old trigonometry set out, compare the offside inner hanger to nearside and if it looks about right I should be able to work something out by fitting the repaired trailing arm to the inner hanger to get an idea of where the outer hanger should be, if that makes sense. If that fails to work I'll stand back, close one eye, scratch my head, move around a bit and hope for the best :roll eyes: Open to suggestions though.My worry would be getting the geo's right when it's been put straight/altered,
maybe if you can line through from the un damaged side or compare lengths, angles, heights of the outriggers, struts, hangers etc.
If you want any bits made up, welding etc let me know
Might take you up on that offer Alan, would you be comfortable doing the lot? I'll pay the going rate obviously.
greymrj said:
Hi LawrieS, sorry but I am not clear whether it is the brackets or the tube which is worrying you. It looks as if the 'damage' you refer to is holes in the brackets which have opened out? Or are the brackets badly rusted?
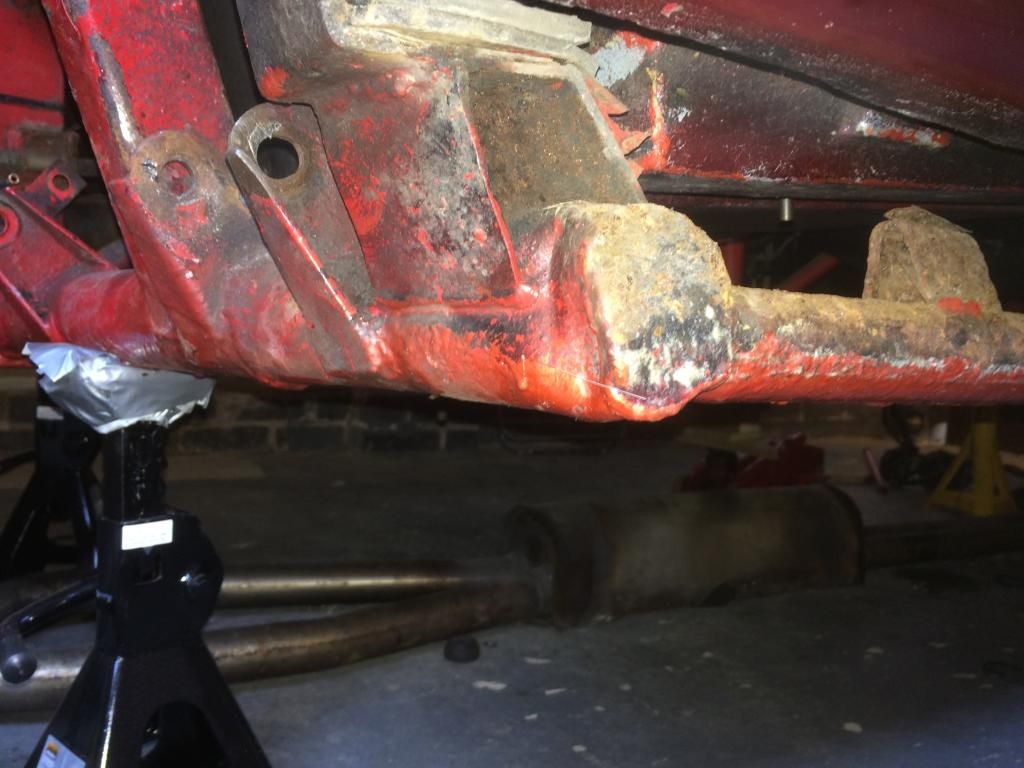
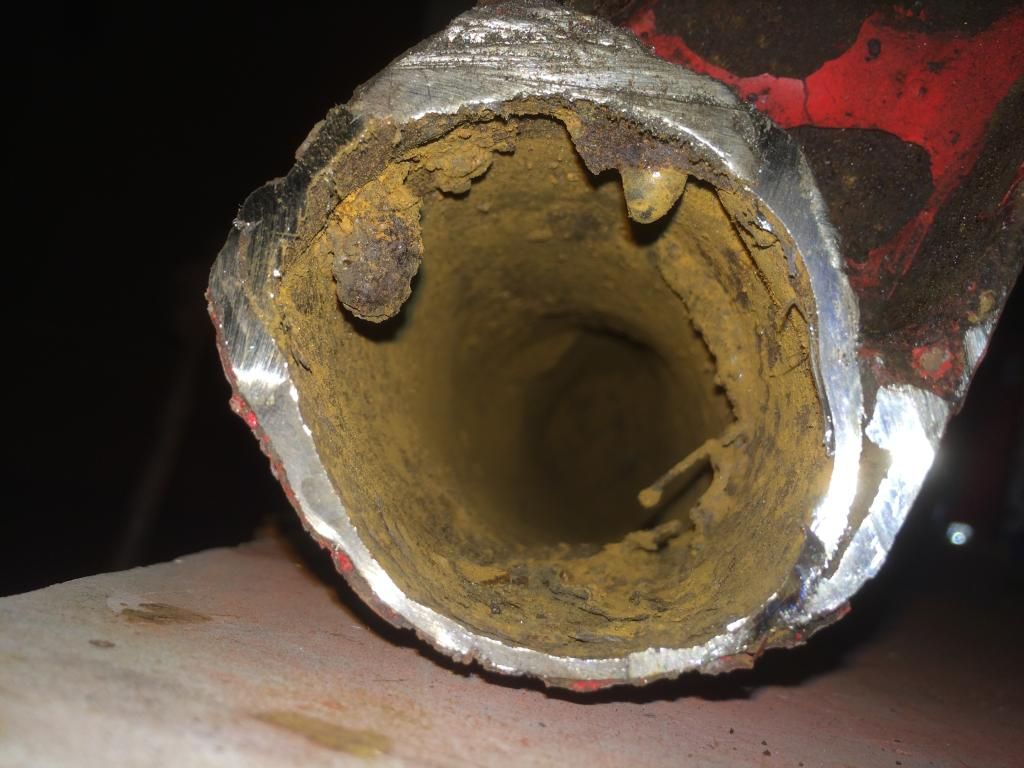
The horizontal tube has a great big dent in it and the outer trailing arm hanger isn't in the right place, can't get a bolt back in. Also both seat belt reel fixing plates have holes in.More obvious looking from the floor up;
Edited by LawrieS on Wednesday 31st December 17:05
TVR05 said:
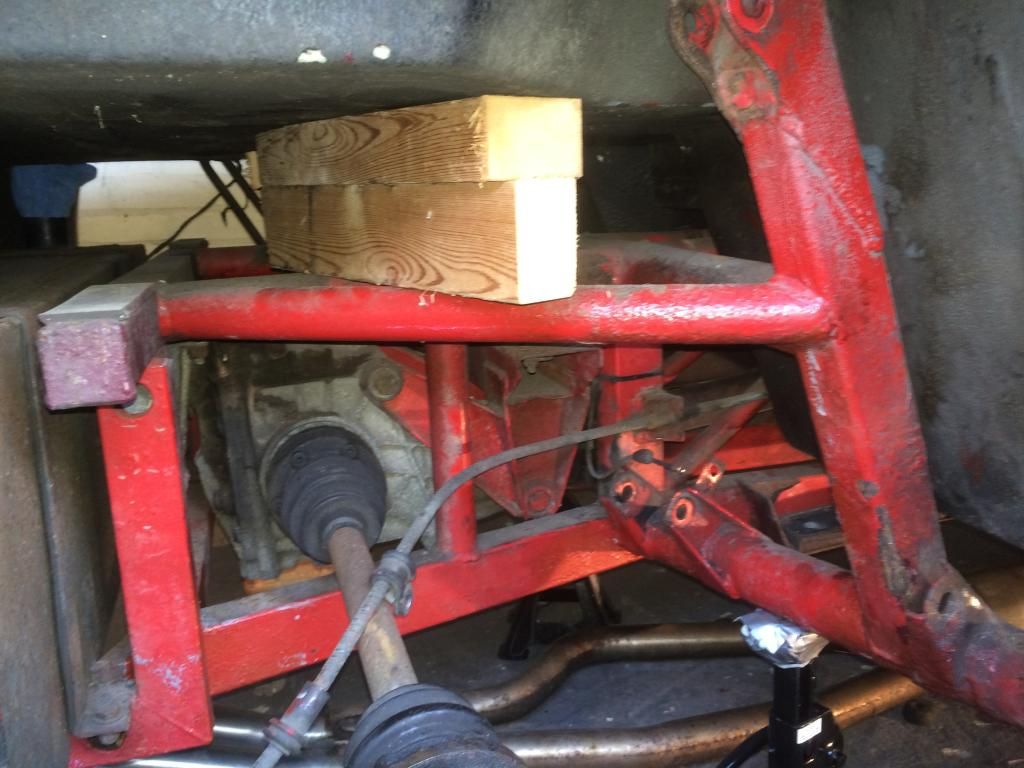
I believe there are 2 securing bolts for the body into the chassis near the gearbox, have these been removed?
Please keep us updated on how you progress, as interested in the body lift......
All the best and good luck
All bolts are out, this is about as high as it will go without disconnecting fuel hoses and more wiring.Please keep us updated on how you progress, as interested in the body lift......
All the best and good luck
chiefyo said:
Thanks for the link, I'll give RT Racing a call, looks like they have a jig and could possibly make up the whole corner for me, though they only mention Chims and Griffs.Nothing much done this week but buying a few bits 
Front near side outrigger ist kaput (well it was ok until Alan found a massive hole in it )
)
Figure that whilst the body is up and the damage needs correcting I may as well do as much metal replacement as possible. Adds another string to her bow and gives me less to worry about in the future.
Is it viable to cut off both outriggers and replace the lot (in my garage) or should I just focus on the areas of rot?
Plan to attack chassis tomorrow to reveal true tin worm damage.
Front near side outrigger ist kaput (well it was ok until Alan found a massive hole in it
)Figure that whilst the body is up and the damage needs correcting I may as well do as much metal replacement as possible. Adds another string to her bow and gives me less to worry about in the future.
Is it viable to cut off both outriggers and replace the lot (in my garage) or should I just focus on the areas of rot?
Plan to attack chassis tomorrow to reveal true tin worm damage.
LawrieS said:
Is it viable to cut off both outriggers and replace the lot (in my garage) or should I just focus on the areas of rot?
I'd say "yes", although that is further than iwent with mine.Outriggers are not particularly structural (although they are important for seat belt mounting) to so nothing should distort when you cut them off.
Plenty of measurements, drawings and photo's before cutting anything!
As a bit of lateral thinking I've wondered if it's feasible to junk the outriggers and just have a central spine like an Elan


Hi All
Not sure about removing the outriggers Phillpot, would think they give some sort of side impact strength to the body. The chassis looks to have had some sort of impact on that corner, is there any visible repairs to the body in that area, The trailing arm brackets need to be exact so when you refit the trailing arms you get correct wheel alignment. Looking at the mounting tube and the angle of the brackets I would wonder if the rear was inline and may have been pulling / driving to one side, are the tyres worn even?.
Alan
A PS
Just re read some back posts, noted the trailing arm had been extended, Is Adrian re making them to original spec ? if so you will need to pull the bracket tube back to where it should be?
Edited by Alan Whitaker on Sunday 11th January 08:13
Hi all, nothing much done but discovery of tin worm. Stripping the chassis is a tedious dirty job which in all honesty hasn't given me much enthusiasm to be in the garage.
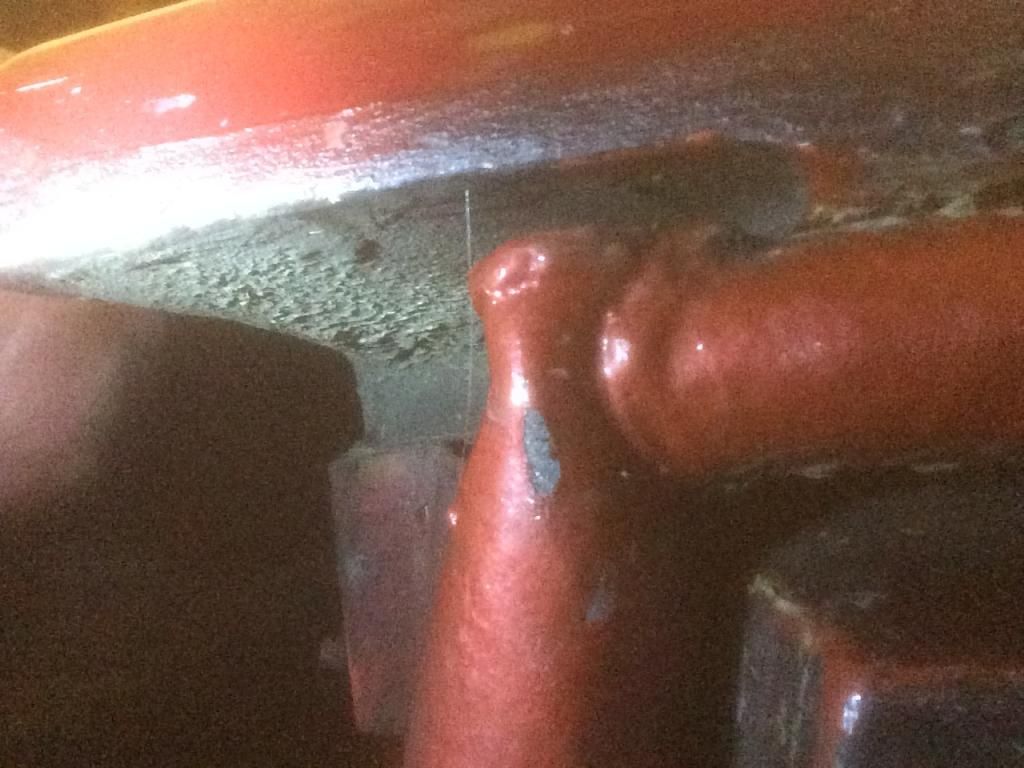
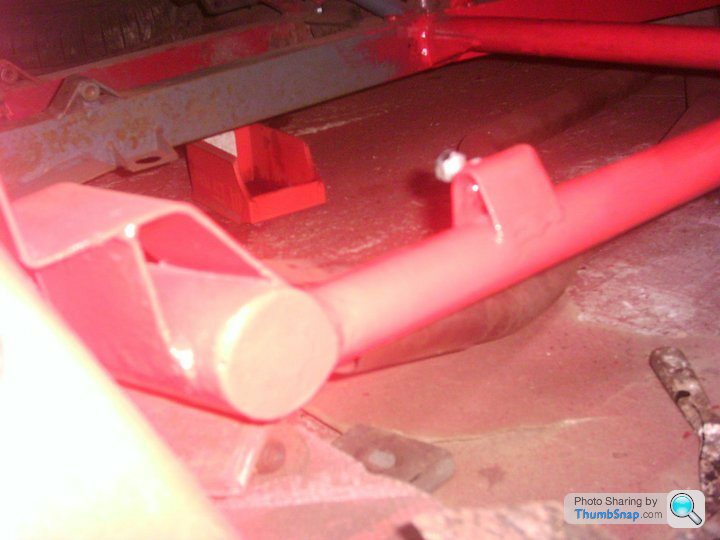
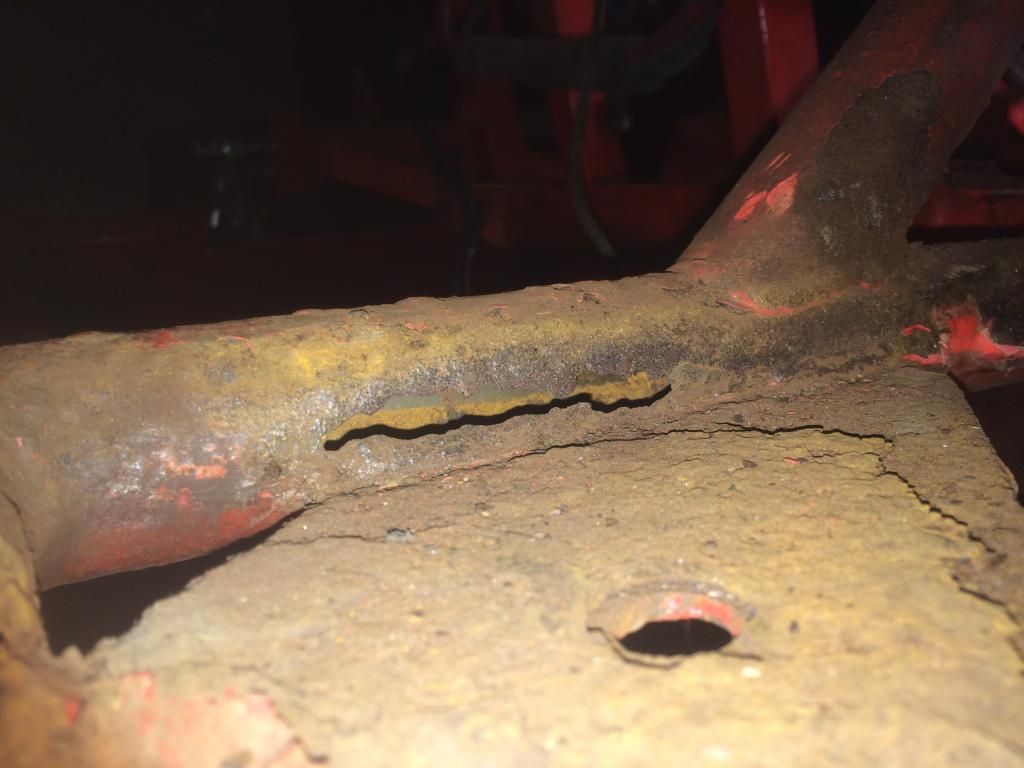
To add to the rear offside chassis damage, front corners of outriggers. Offside has this;
The front most tube seems ok, weld fully intact;
Nearside has rot on both sides of corner;
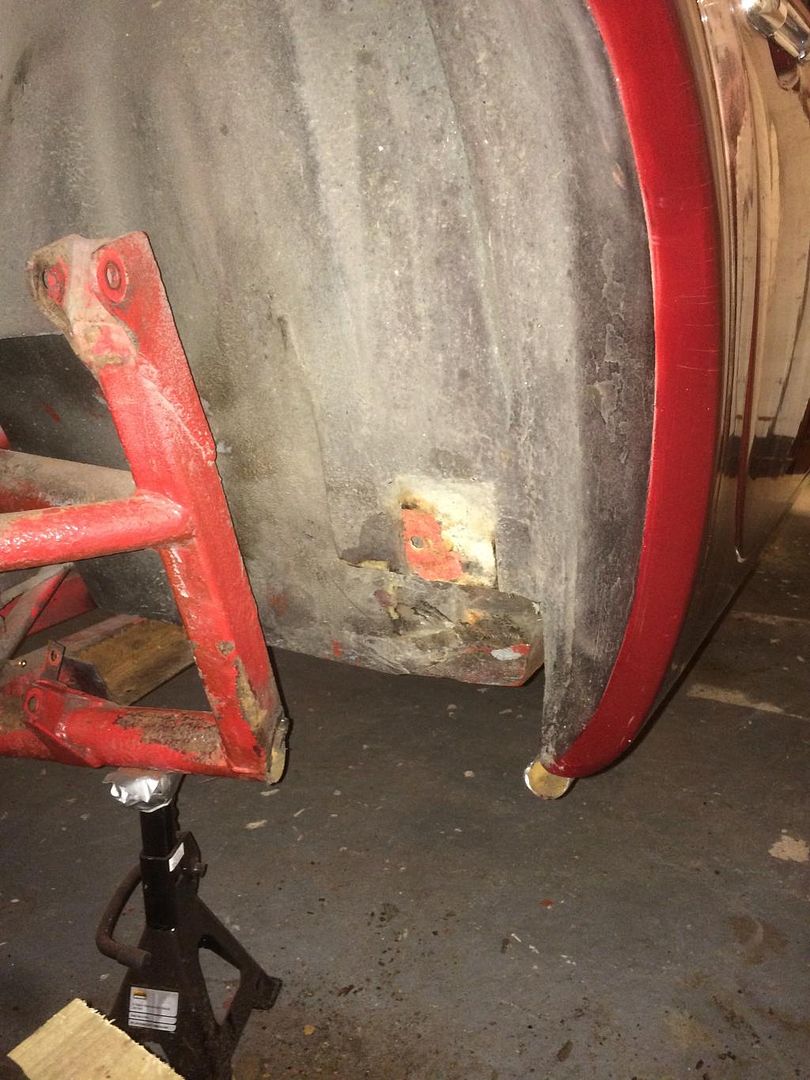
Rear seatbelt/tub mounts need doing and then theres the offside rear impact damage corner...
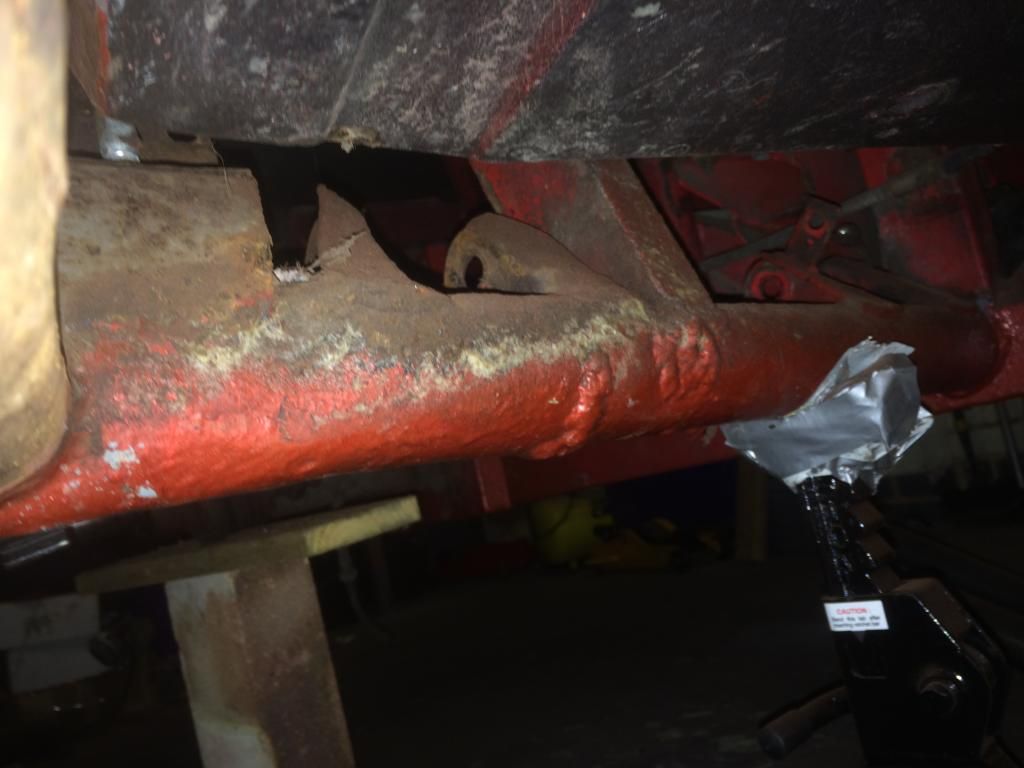
Horrendous from body side I think you'll agree!
I've checked all other hotspots, body mounting plates to inner chassis at front are all sound, as are the rear inners, slight surface rust only.
So I need your advice as to how to put this all right, particularly the impact damage.
Go back to the start of this thread and see the plan for a thorough winter service
Flick a couple of pages on and see a body lift idea to remediate outrigger surface rust :big laugh:
Honestly, had I known I'd have probably rented a bigger garage and had a replacement chassis, but it is what it is and I have what I have. I've been amazed by the help and support I've received so far and I'm very grateful.
My idea is to build some sort of wooden jig around the nearside rear area, then build a reverse and hope all is well
Any confirmation measurements that could be provided would really help, particularly from S3c owners.
I do have my repaired trailing arms in hand (great service from Adrian Venn btw, highly recommended) which will help.
Also, what wall thickness for tube?
Thanks
Lawrie
To add to the rear offside chassis damage, front corners of outriggers. Offside has this;
The front most tube seems ok, weld fully intact;
Nearside has rot on both sides of corner;
Rear seatbelt/tub mounts need doing and then theres the offside rear impact damage corner...
Horrendous from body side I think you'll agree!
I've checked all other hotspots, body mounting plates to inner chassis at front are all sound, as are the rear inners, slight surface rust only.
So I need your advice as to how to put this all right, particularly the impact damage.
Go back to the start of this thread and see the plan for a thorough winter service
Flick a couple of pages on and see a body lift idea to remediate outrigger surface rust :big laugh:
Honestly, had I known I'd have probably rented a bigger garage and had a replacement chassis, but it is what it is and I have what I have. I've been amazed by the help and support I've received so far and I'm very grateful.
My idea is to build some sort of wooden jig around the nearside rear area, then build a reverse and hope all is well
Any confirmation measurements that could be provided would really help, particularly from S3c owners.
I do have my repaired trailing arms in hand (great service from Adrian Venn btw, highly recommended) which will help.
Also, what wall thickness for tube?
Thanks
Lawrie
Fuel tanks off, a simple four bolt operation took the best part of five hours...
I did try Glens method for emptying the tank but it turned out to be rather time consuming and I ran out of rodents, ended up carrying it outside and sticking the fuel hose in another car.
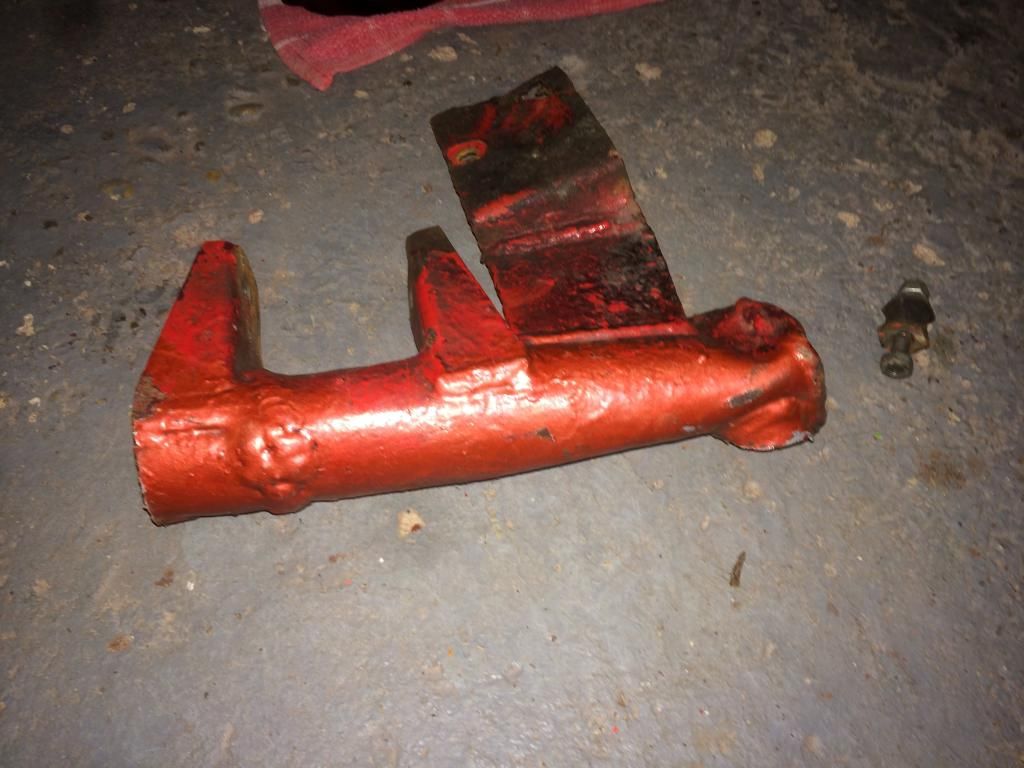
Alan popped round today and managed to remove some weight from the car, hideous piece of metal:
Now to really get stuck into cleaning/stripping/painting chassis and sourcing metal.

I did try Glens method for emptying the tank but it turned out to be rather time consuming and I ran out of rodents, ended up carrying it outside and sticking the fuel hose in another car.
Alan popped round today and managed to remove some weight from the car, hideous piece of metal:
Now to really get stuck into cleaning/stripping/painting chassis and sourcing metal.
Gassing Station | S Series | Top of Page | What's New | My Stuff